Home>Articles>How To Waterproof Basement Walls From The Inside
Articles
How To Waterproof Basement Walls From The Inside
Modified: August 28, 2024
Learn effective methods for waterproofing basement walls from the inside in this informative article. Discover tips and techniques to keep your basement dry and protected.
(Many of the links in this article redirect to a specific reviewed product. Your purchase of these products through affiliate links helps to generate commission for Storables.com, at no extra cost. Learn more)
Introduction
Welcome to our comprehensive guide on how to waterproof basement walls from the inside. If you’re a homeowner, you know that a dry basement is essential for the structural integrity of your home and the overall comfort of your living space. Basement walls are prone to water damage due to their below-ground location, making them vulnerable to moisture and dampness.
Water infiltration in basements can lead to a range of problems, including mold growth, structural damage, and a musty odor. By effectively waterproofing your basement walls from the inside, you can prevent these issues and create a dry and usable space.
In this article, we will discuss the importance of waterproofing basement walls, guide you through the assessment of your basement walls’ condition, provide steps on preparing your walls for waterproofing, explain different waterproofing methods, and offer valuable tips for successful basement wall waterproofing.
Whether you’re dealing with an existing wet basement or looking to proactively protect your home from potential water damage, this guide will equip you with the knowledge and tools needed to effectively waterproof your basement walls.
Before we dive into the specifics, it’s important to note that proper basement wall waterproofing involves understanding the source of water infiltration, addressing any underlying issues, and implementing the right techniques and materials. By taking a proactive approach to waterproofing, you’ll save yourself from costly repairs and maintain a healthy and dry living environment.
So, let’s get started and learn how to waterproof basement walls from the inside!
Key Takeaways:
- Properly waterproofing your basement walls from the inside is essential for preventing water damage, mold growth, and structural issues, ultimately protecting the longevity and value of your home.
- Assessing the condition of your basement walls, choosing the right waterproofing method, and following proper preparation and maintenance are crucial steps in creating a dry, healthy, and functional living space in your basement.
Understanding the Importance of Waterproofing Basement Walls
When it comes to maintaining a dry and healthy basement, waterproofing the walls is of utmost importance. Basement walls are in direct contact with the soil surrounding your home, making them highly susceptible to water seepage and moisture intrusion.
Here are some key reasons why waterproofing your basement walls is crucial:
- Preventing water damage: Water infiltration can cause significant damage to your basement walls, leading to cracks, deterioration, and even structural issues. Waterproofing acts as a protective barrier against water penetration, ensuring the longevity and strength of your basement walls.
- Preventing mold and mildew: Basements are notorious for being damp and humid, creating the perfect environment for mold and mildew to thrive. Waterproofing your basement walls helps create a dry environment, reducing the risk of mold growth. This is particularly important for those with allergies or respiratory issues, as mold spores can exacerbate these conditions.
- Preserving indoor air quality: When water infiltrates your basement walls, it can introduce musty odors and pollutants into your home’s air. By waterproofing your walls, you can prevent these unpleasant smells and improve the overall air quality within your living space.
- Protecting your belongings: Your basement may house valuable items such as furniture, electronics, and sentimental possessions. Waterproofing your basement walls provides an extra layer of protection against water damage, safeguarding your belongings and avoiding costly replacements.
- Increasing usable space: A dry and well-maintained basement can be a valuable addition to your home. By preventing water infiltration, you can create a livable space that can serve as an additional bedroom, home gym, office, or entertainment area.
Overall, waterproofing your basement walls is a proactive measure that not only prevents water damage but also enhances the safety, comfort, and value of your home. It is an investment that pays off in the long run by protecting your property and ensuring a healthy living environment for you and your family.
Assessing the Condition of Your Basement Walls
Before you embark on waterproofing your basement walls from the inside, it’s essential to assess their current condition. This assessment will help you determine the extent of any existing damage and identify potential areas of concern. Here are some key steps to follow when assessing the condition of your basement walls:
- Look for visible signs of damage: Inspect your basement walls for any visible cracks, discoloration, or efflorescence. Cracks can indicate structural issues or water penetration, while discoloration (such as white powdery residue) may be a sign of mineral deposits left behind by water seepage. These visible signs can provide valuable clues about the condition of your walls.
- Check for moisture and dampness: Run your hand along the basement walls to feel for any dampness or moisture. Moisture on the walls can be an indication of water seepage or high humidity levels. You can also use a moisture meter to measure the moisture content of the walls.
- Inspect for mold and mildew: Look out for any signs of mold or mildew growth on the walls. These can appear as fuzzy patches, black spots, or a musty odor. Mold and mildew growth can indicate a moisture problem that needs to be addressed before waterproofing.
- Check for water stains: Look for water stains on the walls, particularly near the floor or along the base of the walls. Water stains can indicate past or ongoing water infiltration and may require additional attention during the waterproofing process.
- Assess the condition of exterior drainage: The exterior drainage system plays a significant role in preventing water from accumulating around your foundation walls. Assess the condition of gutters, downspouts, and the grading around your home to ensure they are directing water away from the foundation effectively.
- Consider hiring a professional: If you’re uncertain about assessing the condition of your basement walls or unsure how to interpret the signs, it’s recommended to consult with a professional waterproofing contractor. They can provide a thorough inspection and expert advice tailored to your specific situation.
By carefully assessing the condition of your basement walls, you’ll gain a better understanding of any existing issues and determine the appropriate steps to take in the waterproofing process. This evaluation will help you address any underlying problems and ensure the success of your waterproofing efforts.
Preparing Your Basement Walls for Waterproofing
Proper preparation is key to achieve effective and long-lasting waterproofing for your basement walls. Before applying any waterproofing products or techniques, follow these steps to ensure your walls are ready:
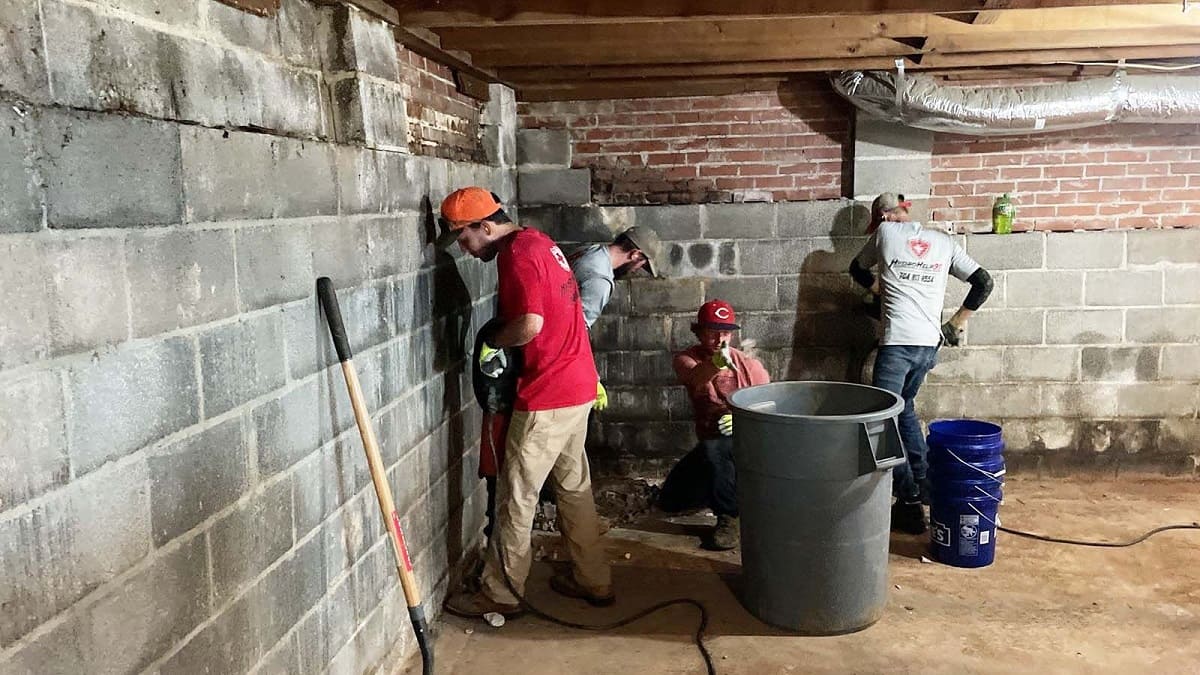
- Clean the walls: Start by thoroughly cleaning the basement walls to remove any dirt, dust, or debris. Use a stiff brush, water, and a mild detergent to scrub away any surface contaminants. Ensure that the walls are completely dry before proceeding to the next step.
- Repair any cracks: Inspect your basement walls for any cracks or gaps that may compromise the effectiveness of the waterproofing. Fill in any small cracks with an epoxy or polyurethane-based sealant. For larger cracks or structural issues, it’s best to consult with a professional for proper repairs.
- Remove any existing coatings: If your basement walls have previously been painted or coated, it’s important to remove these coatings before applying waterproofing products. Use a paint stripper or a scraper to strip off any existing paint or sealant layers.
- Address mold and mildew: If you notice any mold or mildew growth on your basement walls, it’s crucial to eradicate it before waterproofing. Scrub the affected areas with a mixture of water and bleach, wearing protective gloves and a mask. Allow the walls to dry completely before proceeding.
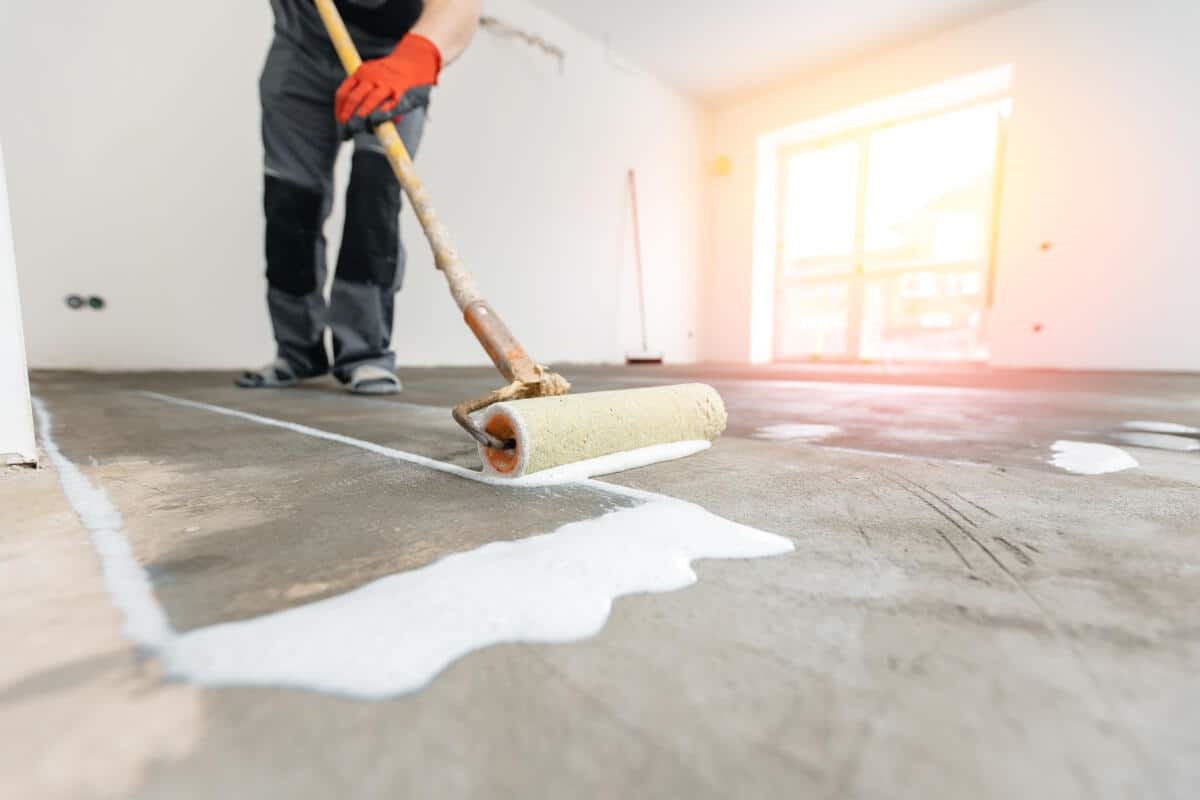
- Consider using a waterproofing primer: Applying a waterproofing primer to the walls can enhance the bonding effectiveness of the waterproofing products. This step is particularly beneficial if you have poured concrete walls or block walls with visible pores.
- Test for water absorption: Before proceeding with waterproofing, perform a simple water absorption test on the basement walls. Spray some water on different sections of the walls and observe how quickly it is absorbed. If the walls absorb water readily, you may need to apply a water repellent sealer before waterproofing.
- Ensure proper ventilation: Adequate ventilation is essential when working with waterproofing products. Open windows and use fans to promote air circulation, helping the walls to dry effectively after cleaning or repairs.
- Follow manufacturer’s instructions: Lastly, it’s crucial to carefully read and follow the instructions provided by the manufacturer of the waterproofing products you’re using. Each product may have specific application guidelines and curing times, so be sure to adhere to these instructions for optimal results.
By taking the time to properly prepare your basement walls, you’ll create a clean and suitable surface for the waterproofing materials to adhere to. This will maximize the effectiveness of the waterproofing and ensure a durable barrier against water infiltration in your basement.
Choosing the Right Waterproofing Method for Your Basement Walls
When it comes to waterproofing your basement walls from the inside, there are several methods to consider. The choice of method depends on various factors, including the condition of your walls, the source of water infiltration, your budget, and personal preferences. Here are some common waterproofing methods to help you make an informed decision:
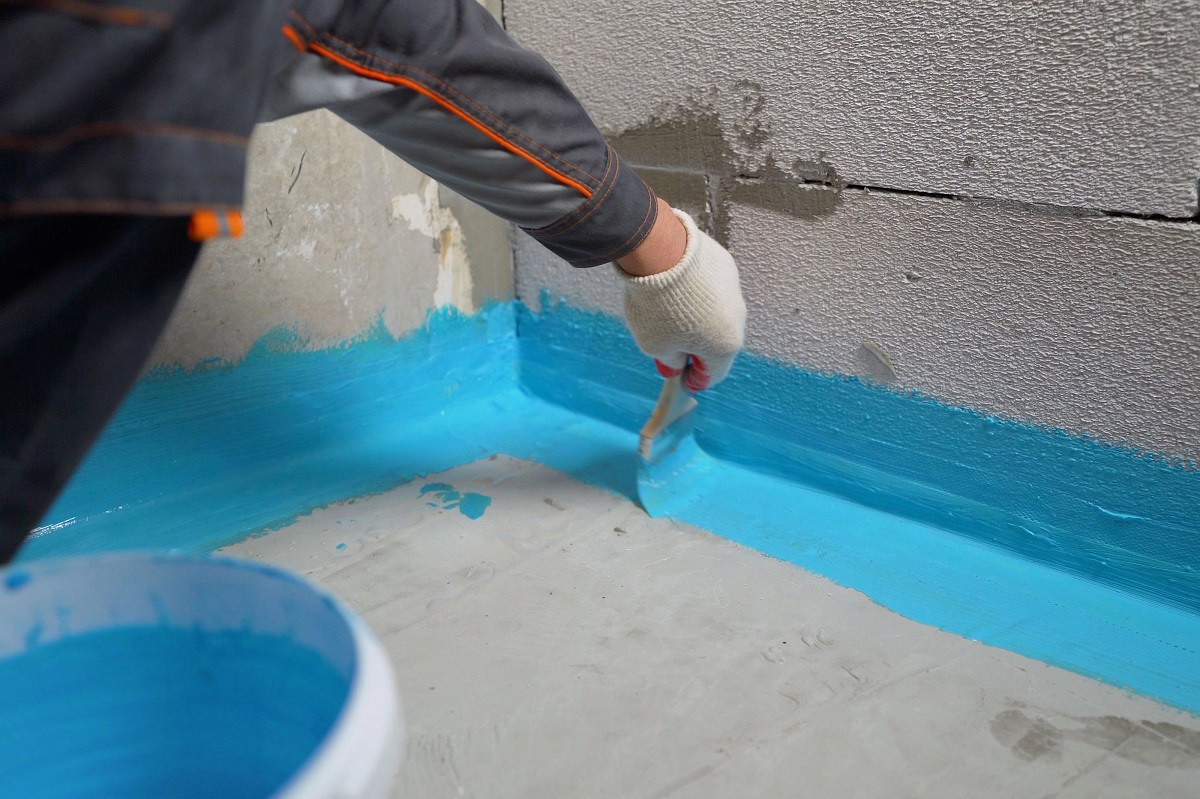
- Interior Waterproofing Membrane: One popular method is to apply an interior waterproofing membrane directly to the basement walls. This membrane is typically a thick, rubberized material that acts as a barrier against water. It is applied using adhesive or fasteners and creates a protective layer to prevent water from entering the basement. Interior waterproofing membranes are effective in resisting hydrostatic pressure.
- Injection Waterproofing: Injection waterproofing involves injecting a waterproofing material, such as epoxy or polyurethane, into cracks and gaps in the basement walls. This method helps to seal the walls and prevent water from seeping through. Injection waterproofing is suitable for addressing specific areas of concern and is often used in combination with other waterproofing methods.
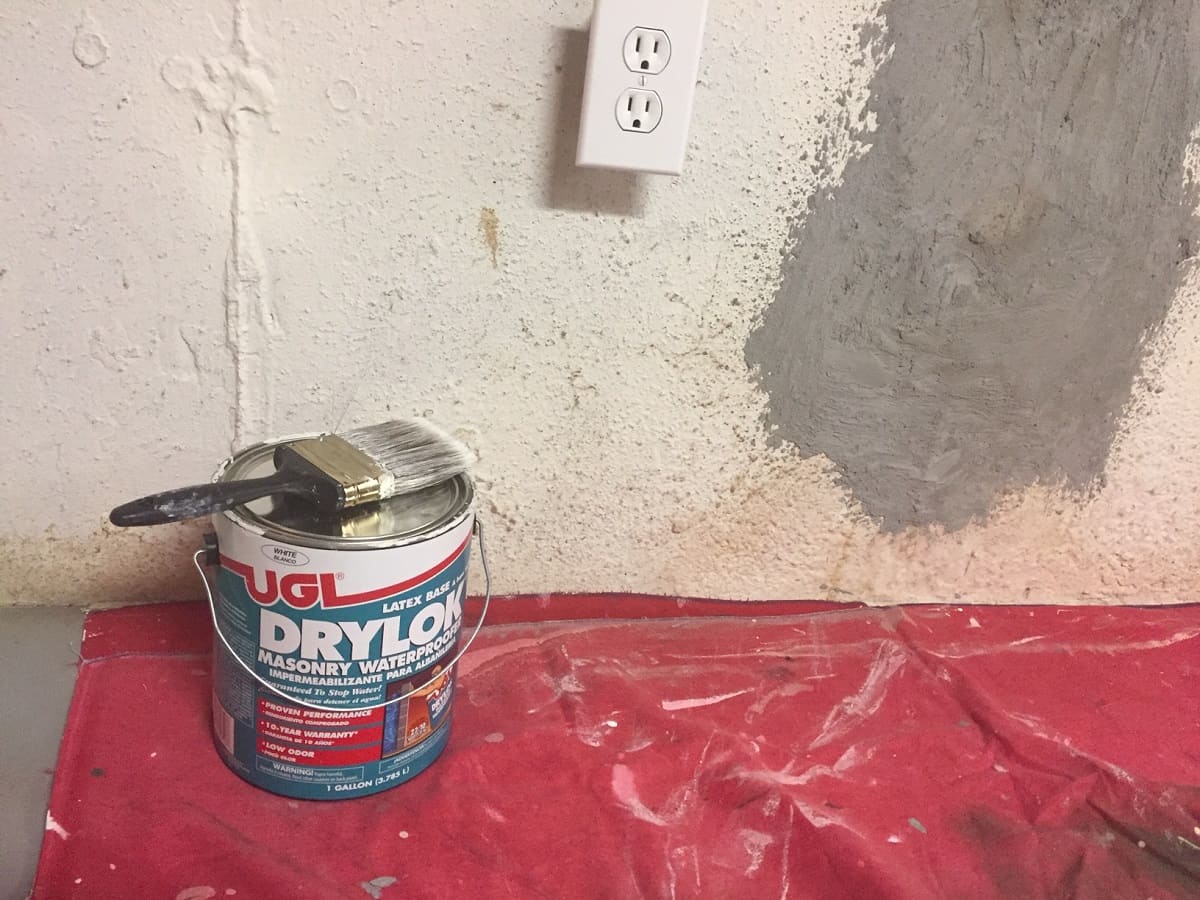
- Waterproofing Paint or Sealant: Waterproofing paint or sealant can be applied to the basement walls to provide a protective barrier against water. These products are typically latex-based and can be easily applied using a brush or roller. Waterproofing paints and sealants are an affordable option but may not be as effective for severe water infiltration issues.
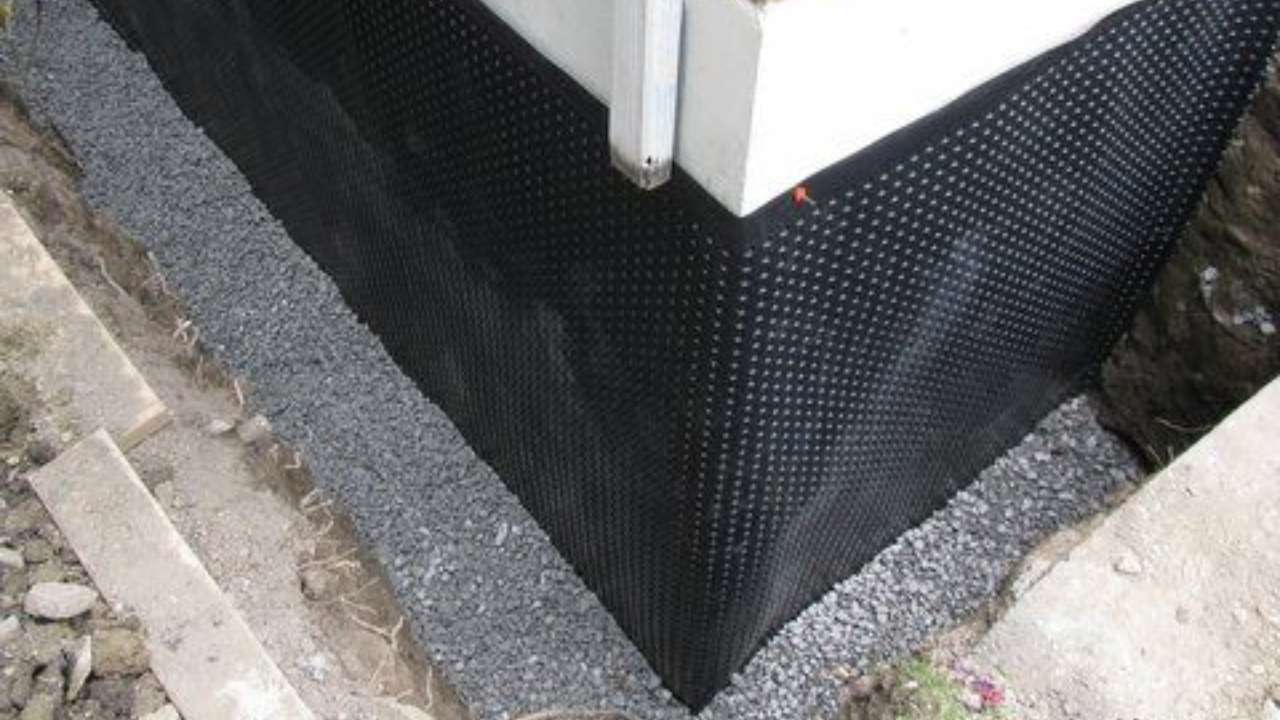
- Dimpled Drainage Membrane: Dimpled drainage membranes consist of a plastic sheet with dimples on one side and a filter fabric on the other. The plastic dimples create an air gap between the basement walls and the membrane, allowing for drainage and preventing water from reaching the walls. This method is often used in combination with other waterproofing techniques.
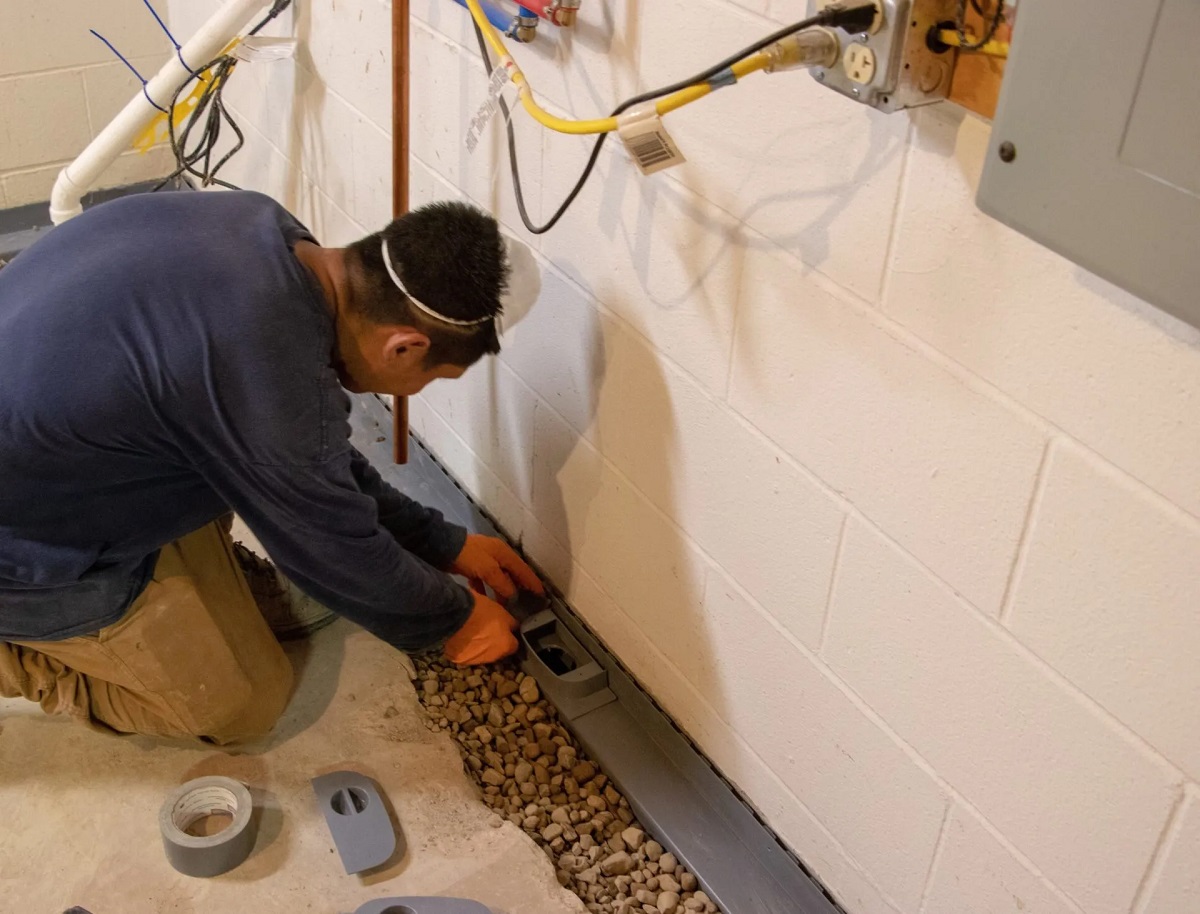
- Sump Pump Installation: Installing a sump pump in your basement can help to remove excess water and prevent flooding. A sump pump system consists of a basin, a pump, and a discharge pipe. The pump automatically kicks in when water levels rise, pumping the water out and away from your foundation. While not a direct waterproofing method for the walls, a sump pump can complement other waterproofing measures by managing water accumulation.
It’s important to consider the specific needs of your basement walls and consult with a professional waterproofing contractor if you’re unsure which method to choose. They can assess your situation and recommend the most suitable approach for your unique circumstances.
Keep in mind that no single waterproofing method is universally effective for all situations. Depending on the severity of water infiltration and the condition of your basement walls, a combination of methods may be necessary to achieve optimum results. Consider your budget, the extent of the problem, and the long-term durability when making your decision.
By selecting the right waterproofing method, you can effectively protect your basement walls from water damage and create a dry and healthy living space.
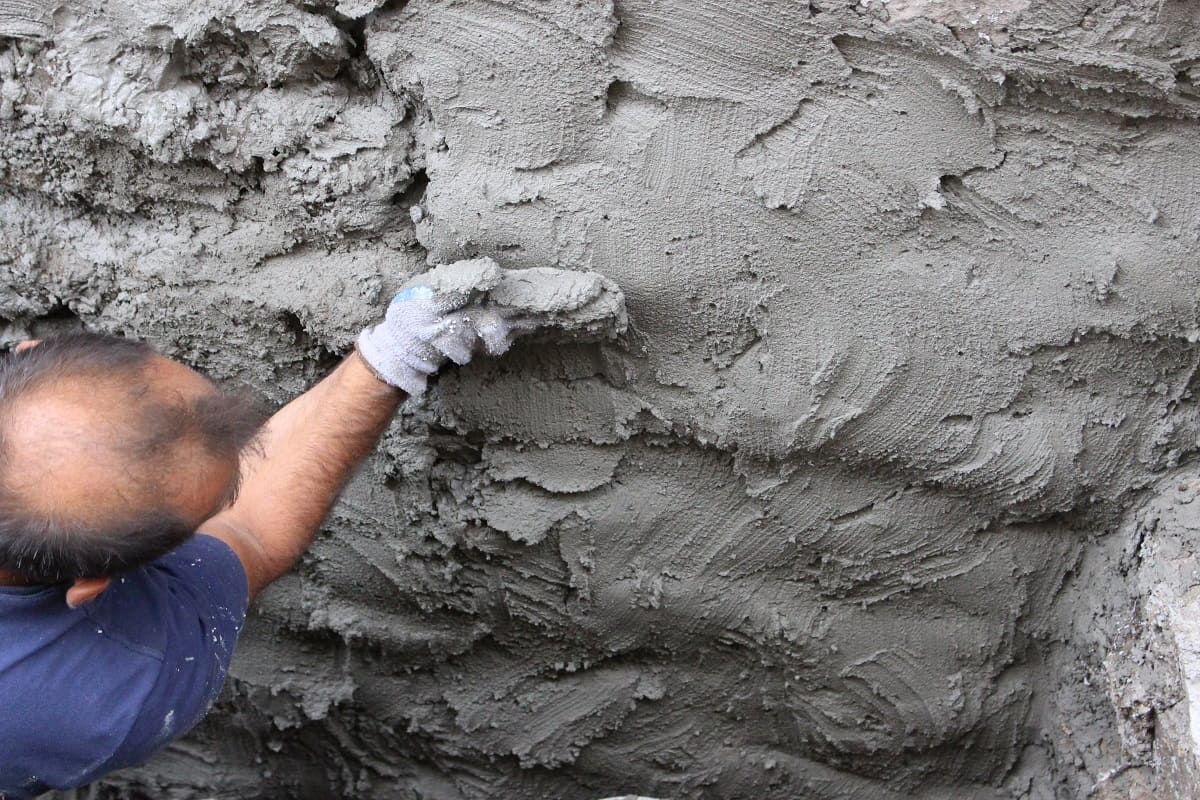
Apply a waterproofing sealant to the interior walls of the basement to prevent water infiltration. Make sure to properly prepare the surface and follow the manufacturer’s instructions for best results.
Read more: What Is Basement Waterproofing
Step-by-Step Guide to Waterproofing Basement Walls from the Inside
Waterproofing your basement walls from the inside is a process that requires careful planning and execution. Here is a step-by-step guide to help you navigate through the waterproofing process:
- Clean the walls: Start by cleaning the basement walls thoroughly to remove any dirt, dust, or debris. Use a stiff brush, water, and a mild detergent to scrub the walls. Allow them to dry completely before proceeding.
- Repair any cracks: Inspect the walls for any cracks or gaps and repair them using an appropriate sealant or epoxy. Ensure that the repairs are properly done and allow them to cure before moving on.
- Apply a waterproofing primer (optional): If desired, apply a waterproofing primer to the clean and repaired walls. Follow the manufacturer’s instructions for proper application and drying times.
- Choose your waterproofing method: Select the appropriate waterproofing method for your basement walls based on your needs and the recommendations of a professional, if necessary.
- Follow the product instructions: If using an interior waterproofing membrane, injection waterproofing, or waterproofing paint/sealant, carefully follow the instructions provided by the manufacturer. Ensure proper mixing, application, and drying times.
- Install a dimpled drainage membrane (if applicable): If using a dimpled drainage membrane, cut the membrane to fit the dimensions of your walls and attach it as directed. Make sure the dimples face the wall and the filter fabric faces inward.
- Install a sump pump (if applicable): If installing a sump pump, follow the manufacturer’s instructions for proper placement and installation. Connect the discharge pipe to ensure water is directed away from your foundation.
- Monitor for leaks and test effectiveness: After completing the waterproofing process, monitor the basement walls for any signs of leaks or moisture. Check the effectiveness of your waterproofing by spraying water on the walls and observing if it repels or absorbs.
- Maintain proper drainage and ventilation: To ensure the longevity of your waterproofing efforts, maintain proper exterior drainage systems, such as gutters and downspouts, to direct water away from your foundation. Additionally, ensure proper ventilation in your basement to prevent excess moisture buildup.
Remember, if you’re uncomfortable or unsure about any step in the process, it is recommended to seek the assistance of a professional waterproofing contractor. They have the expertise and experience to effectively waterproof your basement walls and address any specific issues you may have.
By following this step-by-step guide, you can successfully waterproof your basement walls from the inside and create a dry and protected space in your home.
Top Tips for Successful Basement Wall Waterproofing
When it comes to waterproofing your basement walls from the inside, there are some important tips to keep in mind to ensure a successful and effective outcome. Here are some top tips to consider:
- Identify and address the source of water: Before waterproofing, it’s crucial to identify the source of water infiltration in your basement. This could be due to poor exterior drainage, cracks in the foundation, or other issues. Addressing the root cause will help prevent future water problems.
- Invest in quality materials: Choose high-quality waterproofing products and materials that are designed specifically for the purpose. Investing in quality materials will ensure long-lasting protection and durability.
- Follow proper surface preparation: Thoroughly clean and repair your basement walls before applying any waterproofing products. Removing dirt, debris, and existing coatings will ensure proper adhesion and effectiveness.
- Consider multiple waterproofing methods: Depending on the condition of your basement walls and the severity of water infiltration, consider using a combination of waterproofing methods. This will provide added protection and increase the chances of success.
- Pay attention to details: Take the time to properly apply and seal all waterproofing products. Pay attention to corners, seams, and joints to ensure complete coverage and to prevent any potential areas of water penetration.
- Regularly inspect and maintain: After waterproofing, regularly inspect your basement walls for any signs of damage or water seepage. Additionally, perform routine maintenance on exterior drainage systems and ensure proper ventilation in your basement.
- Consider professional assistance: If you’re uncertain about the waterproofing process or dealing with complex water issues, it’s best to seek the help of a professional waterproofing contractor. They have the expertise and experience to ensure a successful waterproofing project.
- Address humidity and moisture: Alongside waterproofing, address humidity and moisture levels in your basement. Consider using a dehumidifier to maintain optimal moisture levels and prevent condensation and dampness.
- Maintain proper grading: Ensure that the soil around your home’s foundation is properly graded to prevent water from pooling near the walls. Proper grading helps to divert water away from the foundation and minimizes the chances of water infiltration.
- Stay proactive: Regularly check and maintain your basement waterproofing to catch any signs of water damage early. Being proactive will save you from costly repairs and help maintain a dry and healthy living environment.
By following these top tips, you’ll be well on your way to successful basement wall waterproofing. Remember, prevention is key, so addressing potential water issues before they become major problems is highly recommended. Take the necessary steps to protect your home, enhance its value, and create a comfortable living space.
Frequently Asked Questions (FAQs)
Here are some commonly asked questions about waterproofing basement walls from the inside:
- Q: Why do basement walls need to be waterproofed?
- Q: Can I waterproof my basement walls from the inside?
- Q: How do I know if my basement walls need waterproofing?
- Q: What is the best waterproofing method for basement walls?
- Q: Can I waterproof basement walls myself, or should I hire a professional?
- Q: How long does basement wall waterproofing last?
- Q: Can I paint over waterproofed basement walls?
- Q: Can I use waterproofing to fix existing mold problems?
A: Basement walls need to be waterproofed to prevent water damage, mold growth, and structural issues. Waterproofing creates a barrier that prevents water from infiltrating the walls and entering the basement space.
A: Yes, it is possible to waterproof basement walls from the inside. There are various methods and products available to effectively seal the walls and prevent water infiltration.
A: Signs that your basement walls may need waterproofing include visible cracks, water stains, mold growth, musty odors, and a damp or humid environment. It is important to assess the condition of your walls and address any issues promptly.
A: The best waterproofing method for basement walls depends on various factors, including the condition of the walls and the source of water infiltration. Interior waterproofing membranes, injection waterproofing, and dimpled drainage membranes are popular and effective methods, but it is recommended to consult with a professional to determine the most suitable option for your specific situation.
A: While some homeowners may choose to do it themselves, hiring a professional waterproofing contractor is highly recommended. They have the expertise, experience, and necessary equipment to properly assess the condition of your basement walls and implement the most effective waterproofing solutions.
A: The durability of basement wall waterproofing can vary depending on factors such as the quality of materials used and the maintenance of exterior drainage systems. With proper installation and regular maintenance, waterproofing can last for many years.
A: Yes, it is possible to paint over waterproofed basement walls. However, it is important to use a paint that is compatible with the waterproofing material and allow the waterproofing to cure completely before applying paint.
A: Waterproofing alone may not be sufficient to fix existing mold problems. It is crucial to address the mold issue separately, using appropriate remediation techniques. Consult with a mold removal specialist to ensure proper mold removal and prevention.
If you have any other questions or concerns about waterproofing basement walls, it is best to consult with a professional waterproofing contractor who can provide personalized advice and guidance based on your specific situation.
Conclusion
Waterproofing basement walls from the inside is a crucial step in protecting your home from water damage, mold growth, and structural issues. By implementing effective waterproofing techniques and addressing any underlying issues, you can create a dry and healthy living space in your basement.
In this comprehensive guide, we’ve explored the importance of waterproofing basement walls, the process of assessing their condition, preparing them for waterproofing, choosing the right waterproofing method, and provided a step-by-step guide to help you through the process. We’ve also shared valuable tips and answered common questions to empower you with the knowledge needed for successful basement wall waterproofing.
Remember, each basement is unique, and the best approach to waterproofing may vary. It is important to properly assess the condition of your walls and consult with a professional waterproofing contractor to determine the most suitable methods and materials for your specific situation.
By taking proactive measures to waterproof your basement walls and maintaining regular maintenance, you can prevent water infiltration, mold growth, and costly repairs in the future. A dry and protected basement will not only enhance the structural integrity of your home but also provide additional usable space for your family to enjoy.
Investing in basement wall waterproofing is an investment in the longevity and value of your home. So, take the necessary steps, choose the right waterproofing methods, and ensure diligent maintenance to keep your basement dry, healthy, and functional for years to come.
Frequently Asked Questions about How To Waterproof Basement Walls From The Inside
Was this page helpful?
At Storables.com, we guarantee accurate and reliable information. Our content, validated by Expert Board Contributors, is crafted following stringent Editorial Policies. We're committed to providing you with well-researched, expert-backed insights for all your informational needs.


0 thoughts on “How To Waterproof Basement Walls From The Inside”