Home>Articles>How To Waterproof A Basement Wall From The Outside
Articles
How To Waterproof A Basement Wall From The Outside
Modified: August 28, 2024
Learn effective methods and techniques for waterproofing your basement walls from the outside. Check out our informative articles to prevent water damage and maintain a dry and secure basement.
(Many of the links in this article redirect to a specific reviewed product. Your purchase of these products through affiliate links helps to generate commission for Storables.com, at no extra cost. Learn more)
Introduction
Welcome to our comprehensive guide on how to waterproof a basement wall from the outside. If you are a homeowner, you may be well aware of the potential dangers and damage that water infiltration can pose to your basement. From musty odors and mold growth to structural issues and decreased property value, a wet basement can quickly become a headache.
While there are several ways to address water issues in a basement, one effective method is to waterproof the walls from the outside. This approach creates a barrier that prevents water from seeping into the foundation, ensuring your basement remains dry and protected.
In this article, we will walk you through the step-by-step process of waterproofing a basement wall from the outside, providing you with the knowledge and guidance to tackle this project effectively. By following these instructions and taking the necessary precautions, you can safeguard your home and enjoy a dry, usable basement.
Before we dive into the practical steps, it’s important to understand why waterproofing your basement wall is crucial. Let’s explore some of the key reasons.
Key Takeaways:
- Properly waterproofing your basement wall from the outside is crucial for preventing water damage, mold growth, and structural issues, while also creating a usable living space and protecting your property value.
- Regular maintenance and vigilance are essential for ensuring the long-term effectiveness of your basement waterproofing efforts, allowing you to enjoy a dry, secure, and worry-free living space for years to come.
Understanding the Importance of Waterproofing
Waterproofing your basement wall is a vital step in maintaining the structural integrity of your home and preventing moisture-related issues. Let’s delve into the reasons why waterproofing is so important:
- Preventing Water Damage: The primary goal of basement waterproofing is to keep water out of your home. Waterproofing the walls from the outside creates a barrier that prevents water from entering the basement, protecting your belongings and preventing potential damage to the foundation and structure of your home.
- Mold and Mildew Prevention: A wet basement creates an ideal environment for mold and mildew growth. These fungi can pose serious health risks to you and your family, causing respiratory problems and allergic reactions. Properly waterproofing the basement helps to prevent moisture accumulation, minimizing the chances of mold and mildew development.
- Protecting Property Value: A wet or damp basement can significantly reduce the value of your home. Potential buyers often view water-related issues as major red flags, as they can indicate underlying structural problems. By waterproofing your basement, you not only protect your property value but also make it more attractive to potential buyers.
- Preventing Foundation Problems: Excessive moisture can exert pressure on the foundation walls, leading to cracks and structural issues. Over time, these problems can worsen and compromise the stability of your home. Waterproofing the basement walls from the outside helps to minimize the amount of water that comes in contact with the foundation, reducing the risk of damage.
- Creating a Usable Space: Waterproofing your basement opens up opportunities for transforming it into a usable living space. Whether you envision a home office, a playroom, or an entertainment area, a dry and waterproofed basement provides a suitable environment for your desired purpose.
Now that we understand the importance of waterproofing, let’s proceed with the step-by-step process of waterproofing a basement wall from the outside.
Step 1: Clearing and Preparing the Area
Before you can start the process of waterproofing your basement wall from the outside, it is essential to clear and prepare the area. Here are the necessary steps:
- Remove any obstructions: Begin by removing any items or debris near the exterior of the basement wall. This includes garden furniture, plants, rocks, or any other objects that may obstruct your work area.
- Locate and mark utilities: Use utility locating tools or contact your local utility companies to identify the location of underground utilities near the excavation area. Mark these utilities with flags or spray paint to avoid accidental damage during the excavation process.
- Protect nearby structures: If there are any structures, such as decks or porches, adjacent to the basement wall, it is crucial to protect them during the waterproofing process. Cover these structures with durable plastic sheets or plywood to prevent any damage or debris from falling onto them.
- Ensure proper drainage: Check the existing drainage system around your home to make sure it is functioning correctly. Clear any clogged gutters or downspouts and ensure that they are directing water away from the foundation. Adequate drainage is essential to prevent water from pooling around the basement walls.
- Secure necessary permits: Depending on local regulations, you may need to obtain permits before starting any excavation work or construction. Contact your local authorities to determine if any permits are required for your waterproofing project and obtain them, if necessary.
By taking the time to clear and prepare the area properly, you set the foundation for a smooth and efficient waterproofing process. Once you have completed these preparatory steps, you can move on to the next phase: excavating the soil.
Step 2: Excavating the Soil
Excavating the soil around the basement wall is a critical step in the process of waterproofing from the outside. This step allows access to the exterior surface of the wall, enabling you to apply the necessary waterproofing materials. Here’s how to properly excavate the soil:
- Start by determining the depth: Measure the depth of the basement wall and add extra depth to accommodate the necessary waterproofing materials. Typically, excavating the soil to a depth of at least 6-8 feet is recommended.
- Mark the excavation area: Use stakes and string to mark the boundaries of the excavation area. This will ensure precision and prevent unnecessary digging in surrounding areas.
- Use safety precautions: Prioritize safety during the excavation process. Wear protective gear such as gloves, safety goggles, and sturdy footwear. Ensure that any equipment used, such as shovels or excavators, are in good working condition.
- Start digging: Begin by removing the top layer of soil using a shovel or mechanical excavator. As you dig deeper, be cautious of any potential underground utilities and work around them. It is best to dig in layers, removing and clearing the soil as you progress.
- Slope the excavation: As you dig, create a slope away from the basement wall. This will facilitate proper drainage and prevent water from accumulating near the foundation. Aim for a slope of about 1 inch per foot away from the wall.
- Remove excess soil: Once the desired depth and slope are achieved, remove any excess soil from the excavation area. Keep in mind that the volume of soil removed may be significant, so plan for appropriate disposal or reuse of the soil.
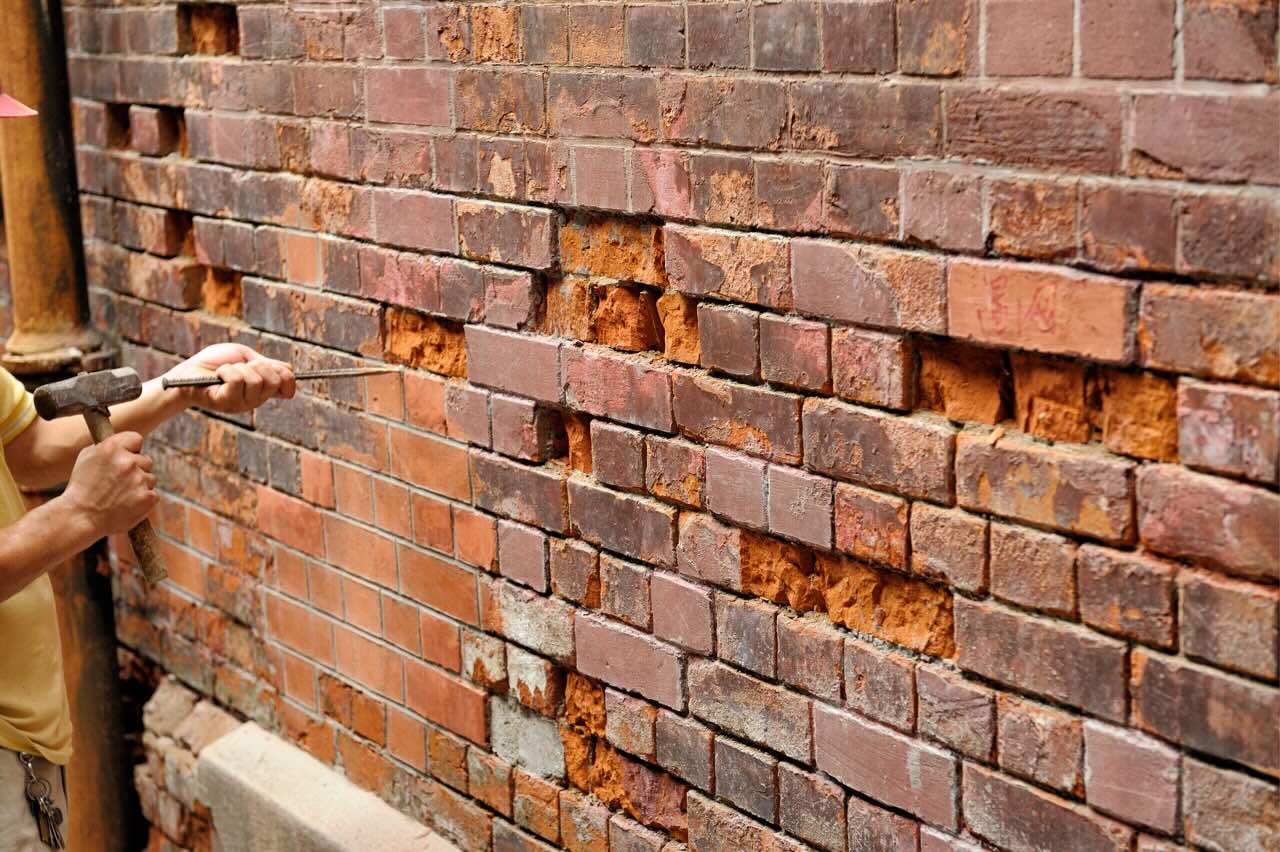
- Inspect the wall: Once the soil is removed, inspect the basement wall for any signs of damage, cracks, or deterioration. Address any issues you discover before proceeding with the waterproofing process.
By following these steps, you will successfully excavate the soil around the basement wall, providing you with access to the exterior surface for the subsequent waterproofing steps. In the next step, we will focus on cleaning the basement wall to ensure a proper and secure waterproofing application.
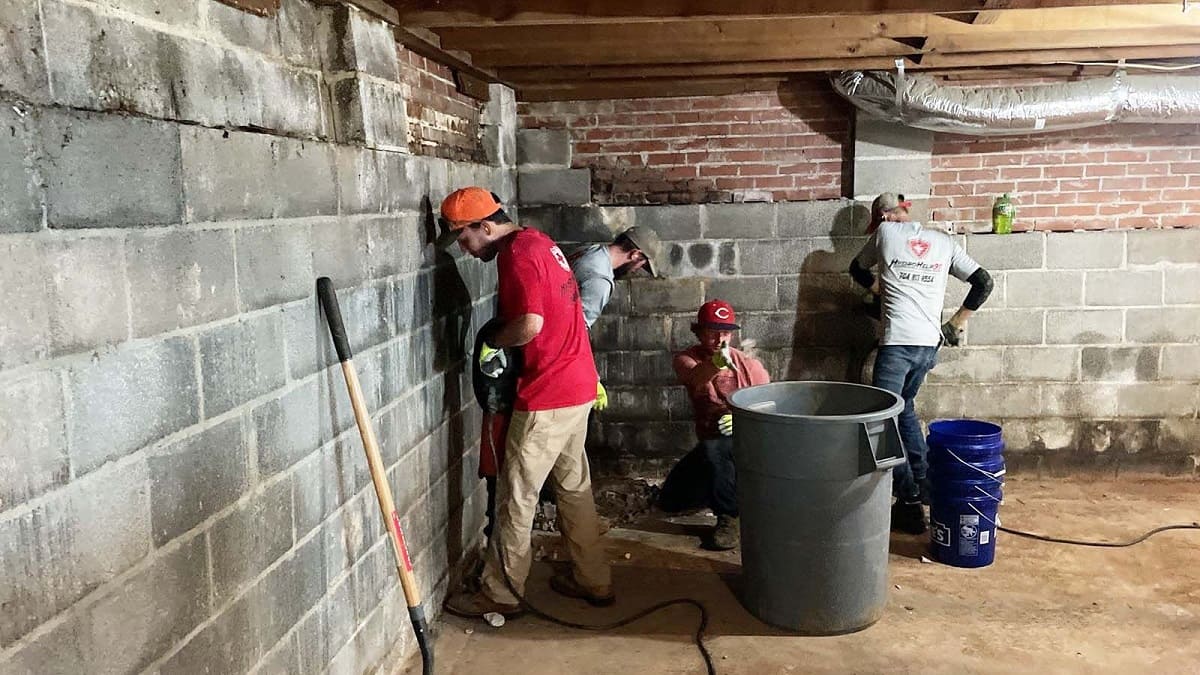
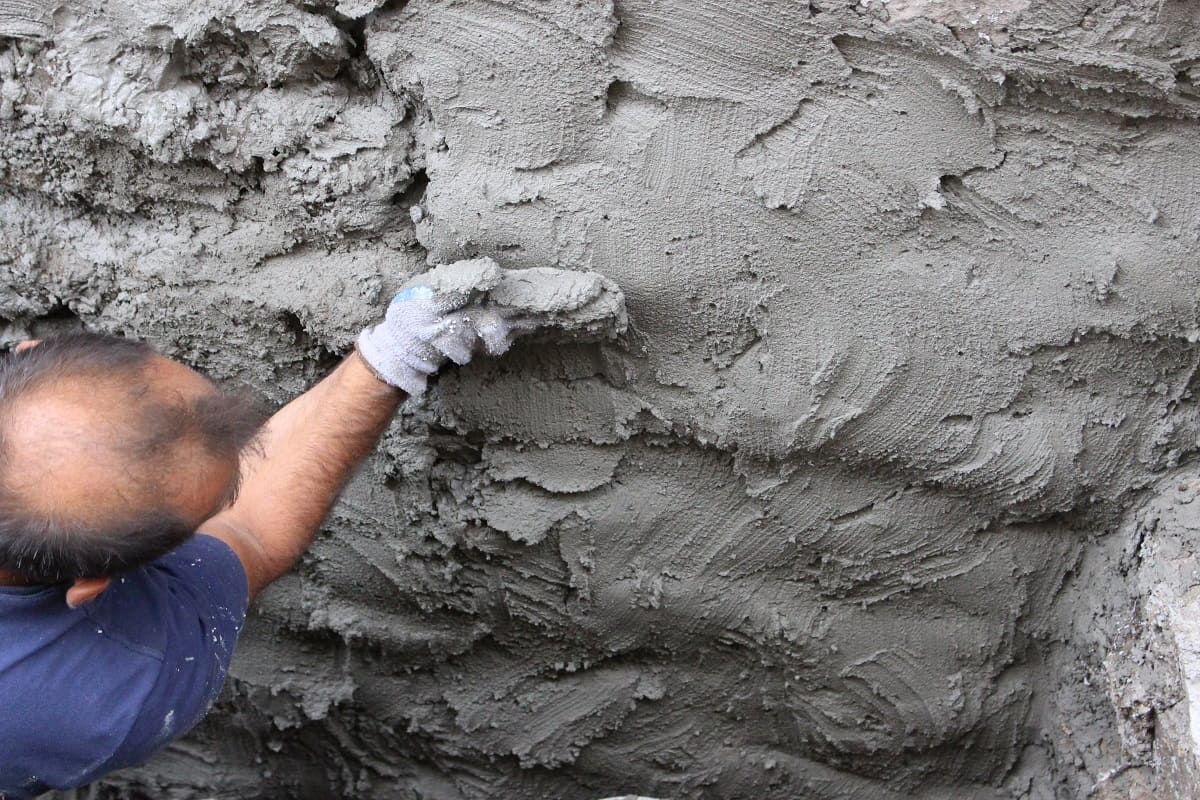
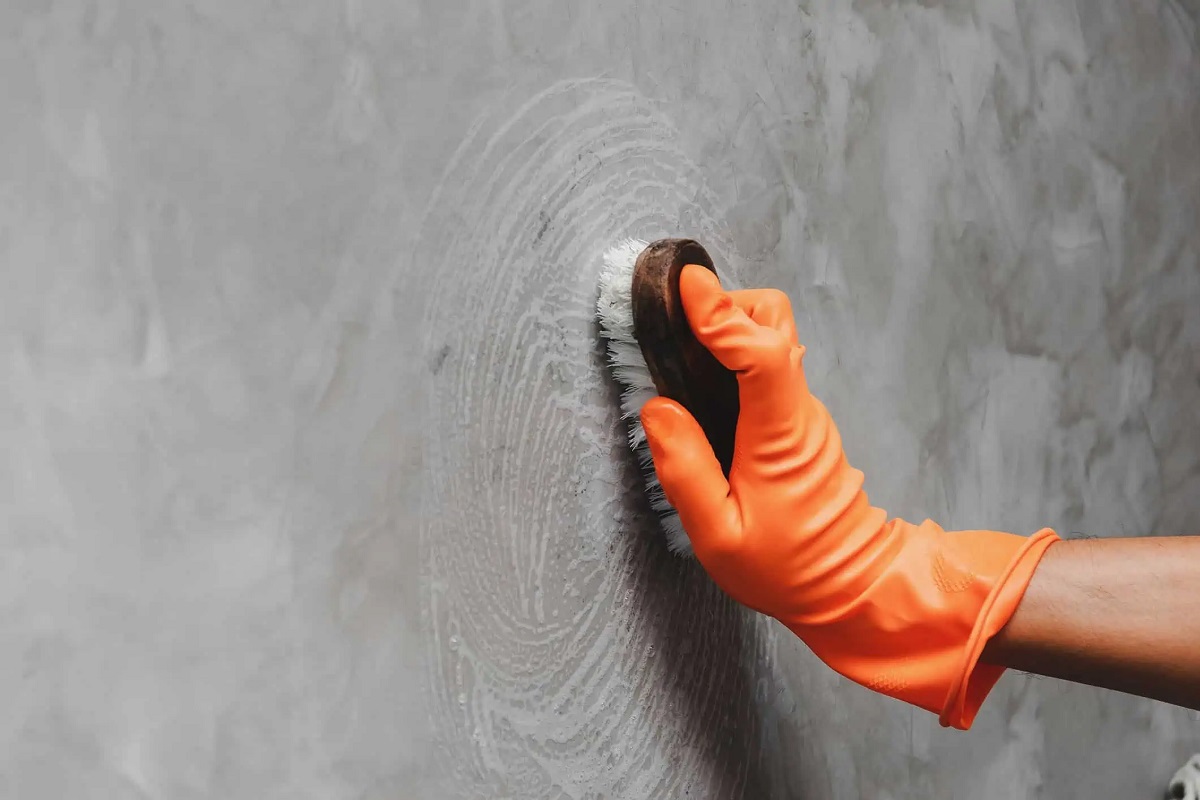
Step 3: Cleaning the Basement Wall
Before applying waterproofing materials to the basement wall, it is crucial to clean the surface thoroughly. This step ensures proper adhesion and maximizes the effectiveness of the waterproofing treatment. Here’s how to clean the basement wall:
- Remove loose debris: Start by removing any loose dirt, dust, or debris from the wall using a stiff brush or broom. This will provide a clean surface for the subsequent cleaning steps.
- Use a pressure washer: Next, use a pressure washer to thoroughly clean the basement wall. Adjust the pressure settings to a moderate level that will effectively remove dirt and grime without causing damage to the wall. Start from the top of the wall and work your way down, ensuring that you cover the entire surface area.
- Apply a cleaning solution: For stubborn stains or mold and mildew growth, it may be necessary to apply a cleaning solution. Use a mixture of water and mild detergent or a specialized mold and mildew cleaner. Follow the manufacturer’s instructions and apply the solution to the wall using a sprayer or a sponge. Allow the solution to sit for the recommended time to fully penetrate and dissolve any contaminants.
- Scrub the wall: After the cleaning solution has had time to work, use a scrub brush or sponge to scrub the entire wall surface. Pay close attention to areas with stains or mold/mildew growth. Apply gentle yet firm pressure to remove residue and ensure a thorough cleaning.
- Rinse the wall: Once you have scrubbed the wall, rinse it thoroughly with clean water using the pressure washer or a hose. Make sure all cleaning solution residue is removed, leaving the wall clean and ready for the next steps.
- Allow the wall to dry: Finally, allow the basement wall to dry completely. Depending on the weather conditions and the porosity of the wall material, this may take several hours or even a couple of days. Ensure that the wall is completely dry before moving on to the next step.
By following these cleaning steps, you will create a clean and prepared surface for the application of the waterproofing materials. In the next step, we will explore the process of applying a waterproofing membrane to the basement wall.
Read more: What Is Basement Waterproofing
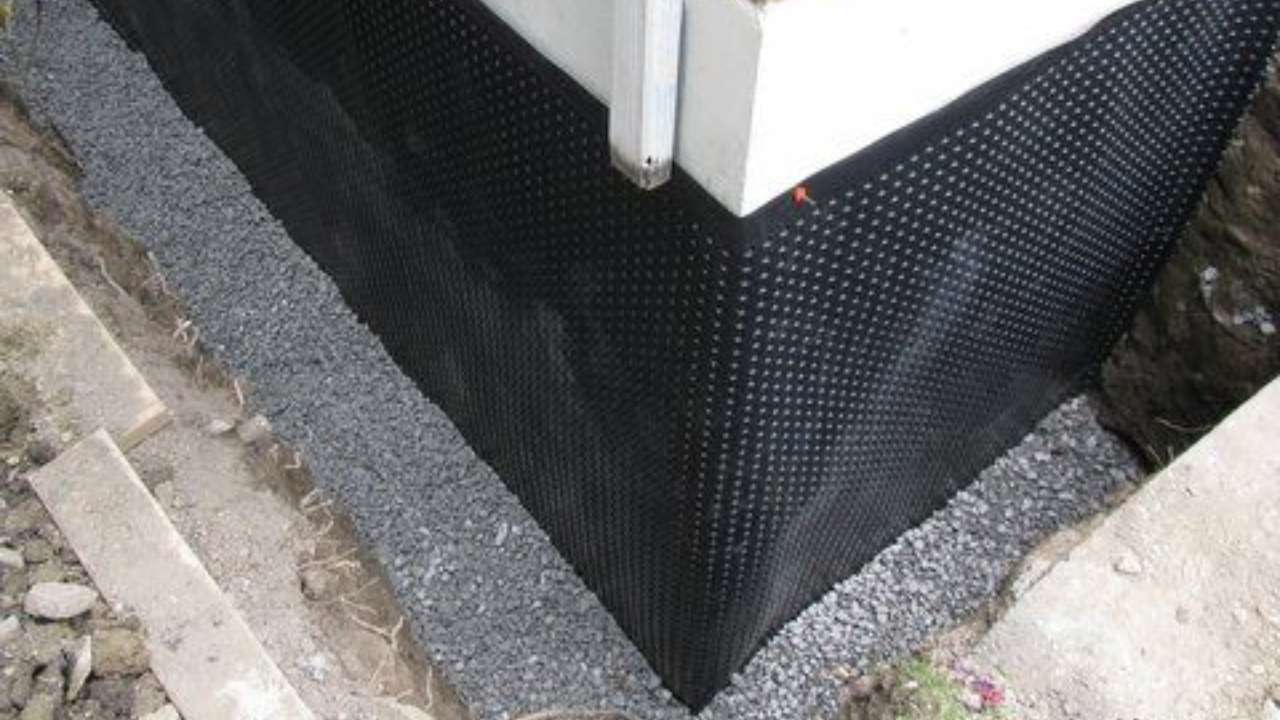
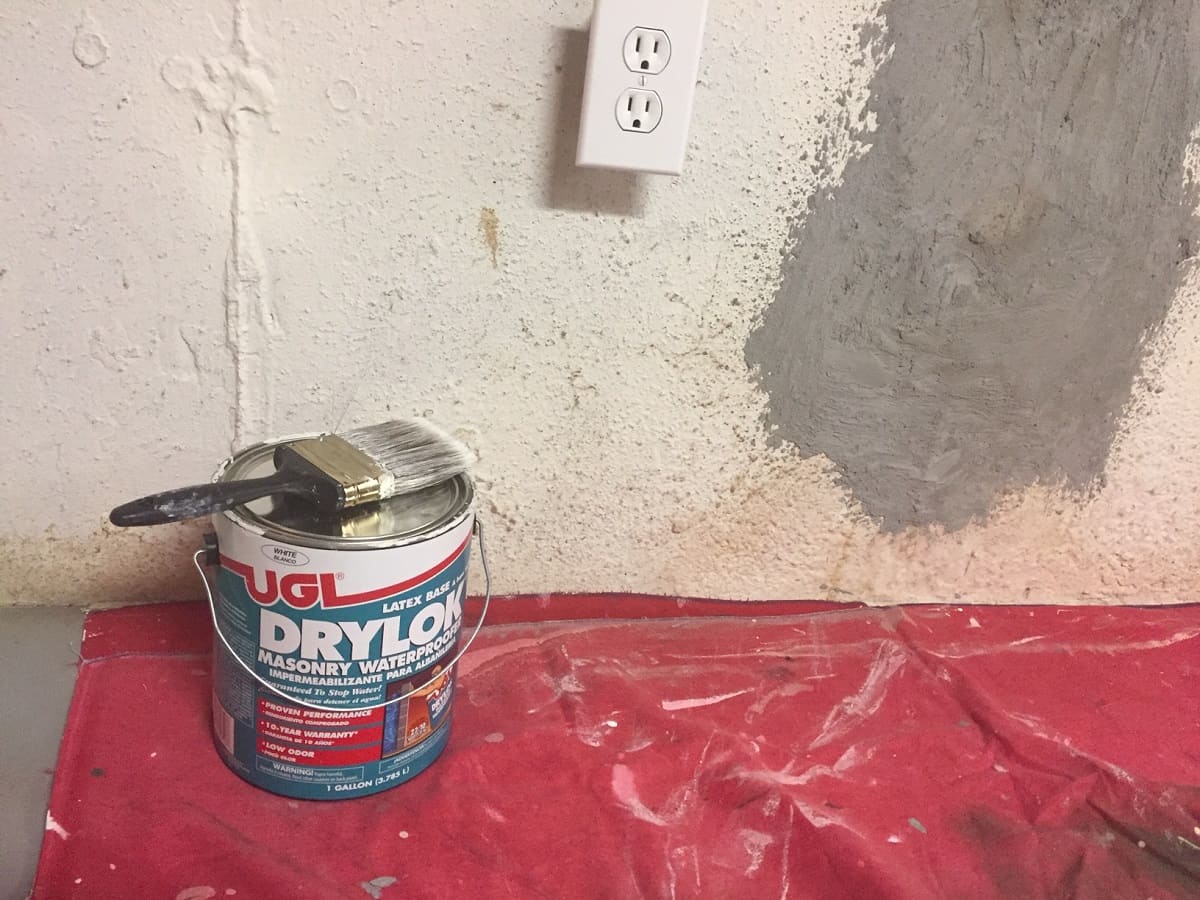
Step 4: Applying Waterproofing Membrane
Applying a waterproofing membrane is a crucial step in ensuring a waterproof seal for your basement wall from the outside. This protective layer acts as a barrier, preventing water from seeping into the foundation. Here’s a guide on how to apply a waterproofing membrane:
- Choose the right membrane: There are different types of waterproofing membranes available, including liquid-applied membranes and sheet membranes. Consider factors such as the material of your basement wall, the level of water pressure, and the climate in your area when selecting the appropriate membrane.
- Prepare the membrane: If you are using a liquid-applied membrane, follow the manufacturer’s instructions to prepare it properly. This may involve mixing components or diluting the membrane with water. For sheet membranes, ensure that they are cut to the correct size and have any required corner or seam reinforcements before proceeding.
- Apply the first coat: Start by applying the first coat of the waterproofing membrane to the cleaned and dry basement wall. Use a brush, roller, or sprayer, depending on the specific product’s application instructions. Ensure an even and consistent coverage, working from the bottom to the top of the wall.
- Allow for curing and drying: Follow the recommended curing and drying time for the first coat as specified by the product manufacturer. This typically involves allowing the membrane to cure for a certain period to form a strong, waterproof barrier.
- Apply additional coats: Depending on the specific waterproofing membrane and manufacturer’s instructions, you may need to apply additional coats. This ensures that the membrane provides sufficient protection against water infiltration. Follow the recommended number of coats and drying times for each application.
- Pay attention to details: During the application process, pay close attention to details such as corners, seams, and any penetration points, such as pipes or electrical conduits. Properly seal these areas with the waterproofing membrane to ensure a continuous barrier and prevent potential water entry points.
- Allow for final curing: Once all the recommended coats of the membrane have been applied, allow for the final curing and drying time as specified by the product manufacturer. This ensures that the membrane has fully bonded and provides optimal waterproofing protection.
By following these steps, you can effectively apply a waterproofing membrane to your basement wall, reinforcing its ability to resist water intrusion. In the next step, we will discuss the importance of installing a drainage system to further protect your basement.
Make sure to properly grade the soil around your home to ensure water flows away from the foundation. Install a waterproof membrane and drainage system to keep water away from the basement wall.
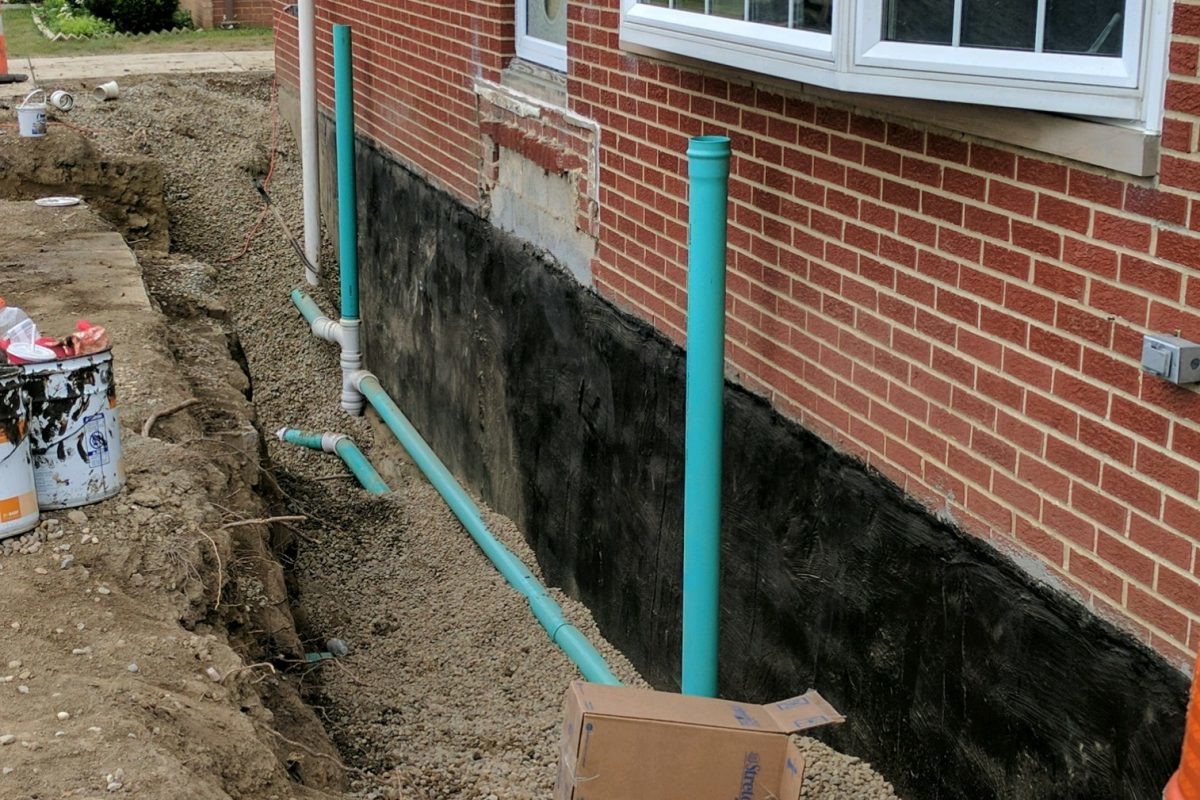
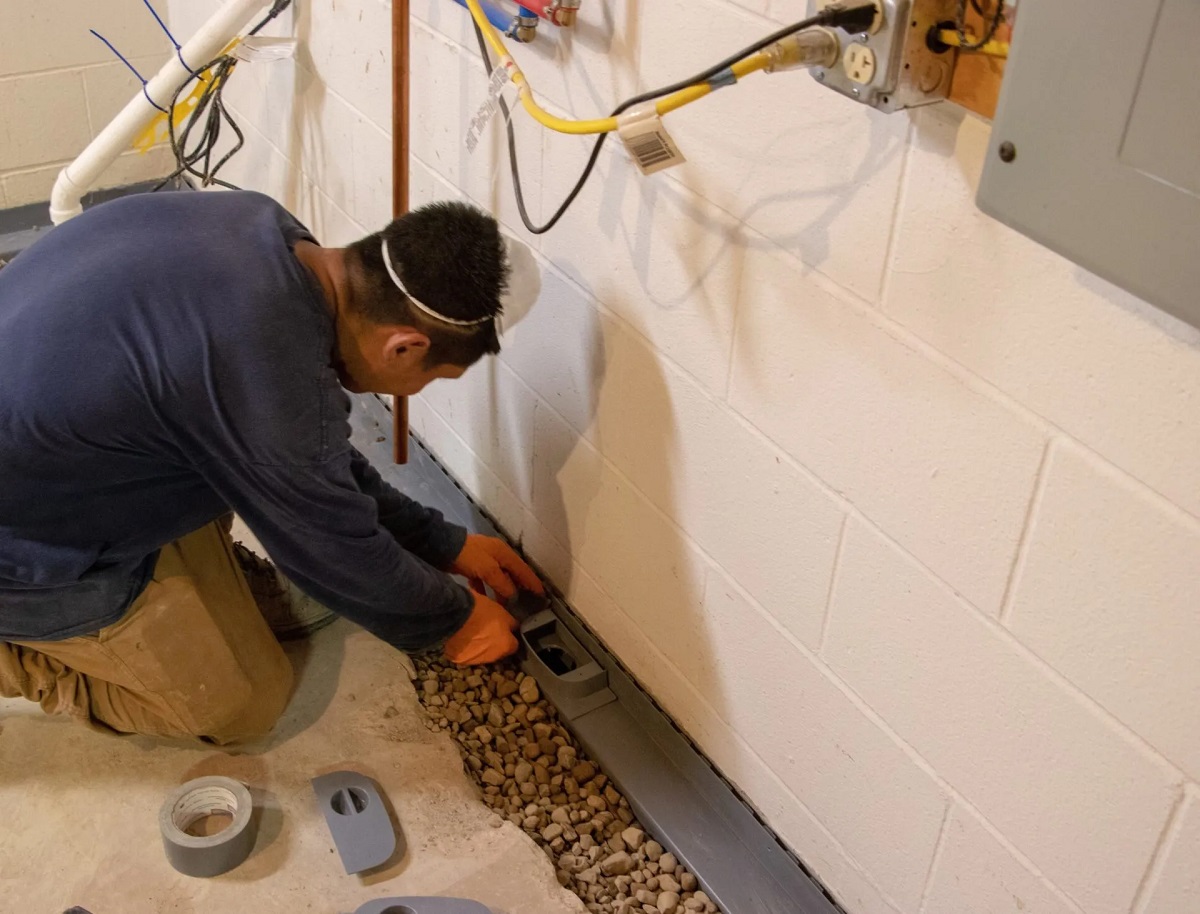
Step 5: Installing Drainage System
Installing a drainage system is a crucial component of the waterproofing process for your basement wall from the outside. A properly installed drainage system helps to redirect water away from the foundation, preventing water buildup and potential damage. Here’s a step-by-step guide on how to install a drainage system:
- Excavate a trench: Start by digging a trench along the perimeter of the basement wall, ensuring it slopes away from the foundation. The depth of the trench will depend on the specific drainage system you are installing, but it typically ranges from 12 to 18 inches.
- Install perforated drain pipe: Place a perforated drain pipe, such as a PVC pipe with small holes, at the bottom of the trench. Ensure the holes face downwards to allow water to enter the pipe. Connect multiple sections of pipe as needed to cover the entire perimeter of the basement wall.
- Cover the drain pipe: Once the drain pipe is in place, cover it with a layer of gravel or crushed stone. This helps to facilitate water flow and prevents soil from clogging the pipe. Ensure the gravel layer is level and evenly distributed.
- Install a filter fabric: To further prevent soil and debris from entering the drain pipe, wrap the pipe in a filter fabric. This fabric allows water to pass through while blocking unwanted particles. Secure the fabric with zip ties or adhesive as necessary.
- Backfill the trench: Carefully backfill the trench with soil, ensuring it is compacted evenly and tightly around the drainage system. Continue to slope the backfilled soil away from the foundation, creating a proper grade for water runoff.
- Create an outlet for the drainage system: Direct the end of the drain pipe to an appropriate outlet, such as a drainage ditch, storm sewer, or drywell. Ensure that the outlet is positioned to effectively carry the water away from the foundation and won’t cause any further water accumulation issues.
- Test the drainage system: Once the drainage system is installed, it is essential to test its effectiveness. Pour water into the trench and observe how it flows through the drain pipe and out of the outlet. Make any necessary adjustments or repairs if you notice any problems.
By following these steps, you can successfully install a drainage system around your basement wall, effectively managing water and preventing it from seeping into the foundation. In the next step, we will discuss backfilling the soil and compacting it for a stable and secure foundation.
Step 6: Backfilling and Compacting Soil
Backfilling and compacting the soil around the basement wall plays a crucial role in maintaining the stability and integrity of the foundation. This step ensures that the surrounding soil provides adequate support and prevents the wall from shifting or settling. Here’s how to properly backfill and compact the soil:
- Start backfilling: Begin by backfilling the soil into the trench, layer by layer, starting from the bottom and working your way up. Use a shovel or a mechanical compactor to evenly distribute the soil and ensure proper compaction.
- Compact the soil: After each layer of soil is added, use a mechanical compactor or a hand tamper to compact the soil firmly. This helps to eliminate air pockets and increase the density of the soil. Compact the soil in small sections, moving across the entire backfilled area.
- Continue layering and compacting: Repeat the process of adding a layer of soil and compacting it until the trench is entirely backfilled. Aim for a compaction level of at least 95% of the maximum density achievable for the specific soil type. Follow local regulations and guidelines for compaction requirements.
- Slope the soil: As you backfill and compact the soil, ensure that it slopes away from the basement wall. This creates proper drainage and prevents water from pooling near the foundation. Aim for a slope of at least 1 inch per foot away from the wall.
- Take precautions for utility lines: Be mindful of any utility lines that may be present in the backfill area. Avoid damaging or interfering with these lines during the backfilling process. If necessary, consult with utility companies or professionals to ensure proper precautions are taken.
- Inspect for settling: After the backfilling and compaction process is complete, monitor the soil around the basement wall for any signs of settling. If you notice significant settling or uneven areas, consider adding more soil and recompacting to achieve a stable and uniform surface.
- Leave room for topsoil and vegetation: Keep in mind that you will need to leave space near the surface of the backfilled soil for a layer of topsoil and vegetation. This will aid in proper drainage and help prevent erosion. Follow local landscaping guidelines for the appropriate depth and composition of the topsoil layer.
By following these steps, you can effectively backfill and compact the soil around the basement wall, providing stability and support to the foundation. In the next step, we will discuss redirecting rainwater to further protect your basement.
Step 7: Redirecting Rainwater
Redirecting rainwater away from your basement is an essential step in maintaining a dry and waterproofed environment. By properly managing rainwater runoff, you can prevent water from accumulating near the foundation, reducing the risk of water infiltration. Here’s how to effectively redirect rainwater:
- Assess current drainage: Start by evaluating the existing drainage system around your home. Check your gutters, downspouts, and other drainage features to ensure they are functioning correctly. Clear any clogs or blockages that may impede the flow of rainwater.
- Install downspout extensions: If your downspouts currently deposit water close to your foundation, consider installing downspout extensions. These extensions will redirect the water further away from the basement walls, preventing it from pooling near the foundation.
- Create a slope away from the foundation: Ensure that the soil surrounding your home is properly graded to slope away from the foundation. This slope should be gradual, aiming for at least a 1-inch drop per foot. This allows rainwater to naturally flow away from the foundation, reducing the risk of water seepage.
- Add swales or berms: If you have issues with water pooling near the foundation, consider incorporating swales or berms into your landscaping. A swale is a shallow ditch that directs water away from an area, while a berm is a raised ridge that diverts water to a desired location. These features can effectively redirect rainwater away from your basement.
- Install French drains: In cases where excessive water accumulation is a persistent issue, installing French drains may be beneficial. French drains are underground drainage systems that collect and divert water away from your foundation. Consult with a professional to determine the best placement and installation methods for your specific needs.
- Consider rain barrels: Rain barrels can be a sustainable and efficient way to collect rainwater from your gutters. By capturing the water in these barrels, you can later use it for watering your plants or other outdoor activities, reducing the amount of water that reaches your foundation.
- Maintain your drainage system: Regularly inspect and maintain your drainage system to ensure it remains functioning optimally. Clean your gutters and downspouts, remove any debris, and check for leaks or damage. Clear any obstructions in your drain system to guarantee the smooth flow of water away from your basement.
By implementing these strategies, you can effectively redirect rainwater away from your foundation, minimizing the risks of water damage and enhancing the effectiveness of your basement waterproofing efforts. In the final step, we will discuss some finishing touches and maintenance tips to ensure long-lasting protection for your basement.
Read more: How To Waterproof Basement Floor
Step 8: Finishing Touches and Maintenance Tips
After completing the primary steps of waterproofing your basement wall from the outside, it’s important to add the finishing touches and implement proper maintenance practices. These final steps will help ensure the long-term effectiveness of your waterproofing efforts. Here’s what you need to do:
- Replace landscaping materials: Once the soil is properly backfilled and graded, replace any landscaping materials, such as plants, grass, or decorative stones. This will restore the visual appeal of your outdoor area and contribute to proper water drainage.
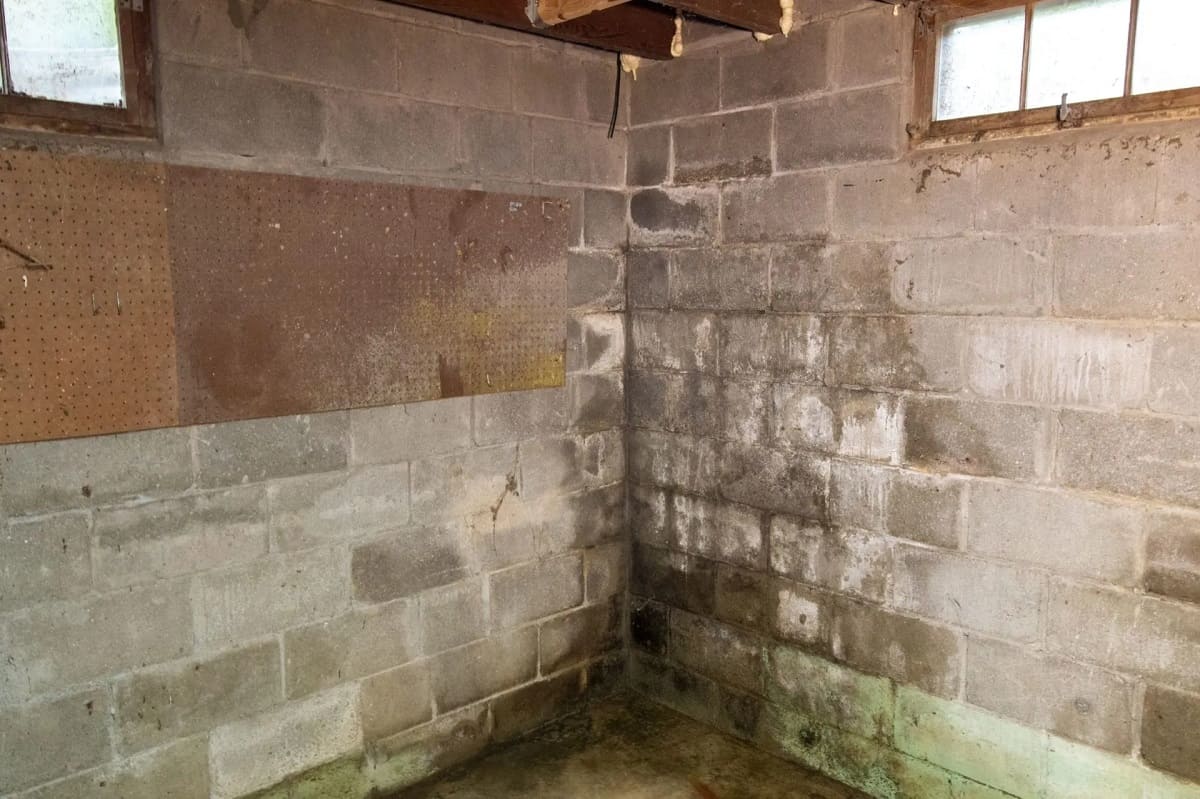
- Monitor for signs of water intrusion: Regularly inspect your basement for any signs of water intrusion, such as dampness, mold growth, or musty odors. Address any issues promptly to prevent further damage and protect the integrity of your basement.
- Check and clean gutters and downspouts: Regularly clean your gutters and downspouts to prevent clogs and ensure proper water flow. Remove leaves, debris, and other obstructions that may hinder the drainage system’s effectiveness.
- Perform routine maintenance on the drainage system: Inspect and maintain your drainage system on a regular basis. Check for any damage or leaks in the pipes, clean out debris from drain covers and collection basins, and address any issues promptly.
- Monitor and adjust grading: Keep an eye on the grading around your home and make adjustments as necessary. Over time, soil may settle or shift, potentially affecting the slope and drainage patterns. Maintain a proper slope away from the foundation to prevent water accumulation.
- Monitor and maintain exterior seals: Inspect any exterior seals around windows, doors, or other openings near the basement. Replace any damaged or deteriorated seals to ensure a secure and watertight barrier against the elements.
- Address any foundation cracks: If you notice any new or expanding cracks in the basement walls or foundation, address them promptly. Small cracks can potentially worsen over time, leading to water infiltration. Consult with a professional to determine the best method for repairing and sealing the cracks.
- Consider professional inspections: Periodically, consider hiring a professional to conduct a thorough inspection of your basement and the waterproofing system. They can identify any potential issues and provide expert guidance on necessary maintenance or repairs.
By following these finishing touches and maintenance tips, you can ensure the long-term effectiveness of your basement waterproofing efforts. Regular upkeep and vigilance will help protect your basement from water intrusion and maintain a dry and safe environment for years to come.
Now that you have completed all the steps in our guide, congratulations on successfully waterproofing your basement wall from the outside! By taking the time and effort to implement these measures, you have significantly reduced the risk of water damage and created a more secure and comfortable living space.
Conclusion
Congratulations! You have successfully completed the comprehensive process of waterproofing your basement wall from the outside. By following the step-by-step guide provided in this article, you have taken important measures to prevent water infiltration, protect your foundation, and create a dry and secure basement space.
Throughout this guide, we highlighted the importance of waterproofing and explained how each step contributes to the overall effectiveness of the process. From clearing and preparing the area to excavating the soil, cleaning the basement wall, applying a waterproofing membrane, installing a drainage system, backfilling and compacting the soil, redirecting rainwater, and implementing finishing touches, you have gained the necessary knowledge and skills to tackle this project.
Remember, proper maintenance is key to ensuring the longevity of your waterproofing efforts. Regularly monitor your basement for signs of water intrusion and address any issues promptly. Maintain your gutters, downspouts, and drainage system to ensure proper water flow. Keep an eye on the grading around your home and make adjustments as needed.
By taking these preventive measures and implementing regular maintenance practices, you can enjoy a dry and usable basement space, protect your property value, and maintain a healthy living environment for you and your family. In the event of heavy rainfall or potential water issues, you can rest assured knowing that your basement is well-protected.
As a homeowner, investing in basement waterproofing is a proactive step towards safeguarding your property and peace of mind. In addition to the practical benefits, waterproofing your basement can also enhance your home’s value and expand your usable living space.
Now that you have successfully completed this project, you can confidently enjoy your newly waterproofed basement. Sit back, relax, and relish in the comfort and security of your dry and protected living space.
Thank you for following this comprehensive guide. We hope it has been informative and valuable in your basement waterproofing journey. Here’s to a basement that remains dry and worry-free for years to come!
Now that you've got the scoop on keeping basement walls water-free, why not ensure the rest of your foundation is just as secure? If you're spotting cracks or uneven floors, don't wait for more signs of damage. Dive into our guide on understanding when professional foundation repair becomes necessary. Keep your home safe and sound from the ground up!
Frequently Asked Questions about How To Waterproof A Basement Wall From The Outside
Was this page helpful?
At Storables.com, we guarantee accurate and reliable information. Our content, validated by Expert Board Contributors, is crafted following stringent Editorial Policies. We're committed to providing you with well-researched, expert-backed insights for all your informational needs.

0 thoughts on “How To Waterproof A Basement Wall From The Outside”