Articles
How To Whip Cream With Hand Mixer
Modified: October 20, 2024
Learn the art of whipping cream with a hand mixer in this informative article. Discover tips and tricks for creating light and fluffy whipped cream at home.
(Many of the links in this article redirect to a specific reviewed product. Your purchase of these products through affiliate links helps to generate commission for Storables.com, at no extra cost. Learn more)
Introduction
Whipping cream to perfection can elevate any dessert or beverage, adding a luscious and creamy touch. While you might think that achieving the perfect whipped cream requires fancy equipment or professional skills, that’s not always the case. With just a handheld mixer, you can easily whip up a batch of delicious and fluffy cream in no time.
In this article, we will guide you step by step on how to whip cream with a hand mixer. Whether you’re a beginner in the kitchen or an experienced baker, these instructions will help you achieve the ideal consistency for your whipped cream.
Key Takeaways:
- Elevate your desserts and beverages with luscious whipped cream using just a hand mixer. Convenience, control, and versatility make it a practical and rewarding kitchen skill for any aspiring cook or baker.
- Achieve the perfect consistency of soft and stiff peaks by starting with cold cream, gradually increasing speed, and adding sweetener to taste. Master the art of whipping cream with a hand mixer for delightful culinary creations.
Read more: How To Whip Heavy Cream Without A Mixer
Why Use a Hand Mixer?
You might be wondering why a hand mixer is the preferred tool for whipping cream over other options. Hand mixers offer convenience, affordability, and ease of use. They are compact and portable, allowing you to whip cream anywhere in the kitchen. Compared to a stand mixer, hand mixers are quicker to set up, use, and clean, making them a practical choice for most home cooks.
Additionally, hand mixers are versatile and can be used for various tasks in the kitchen, such as mixing batter, kneading dough, or whipping egg whites. Investing in a good quality hand mixer is a smart choice for any aspiring cook or baker.
What You’ll Need
Before you start, gather the following materials:
- A handheld mixer
- A mixing bowl
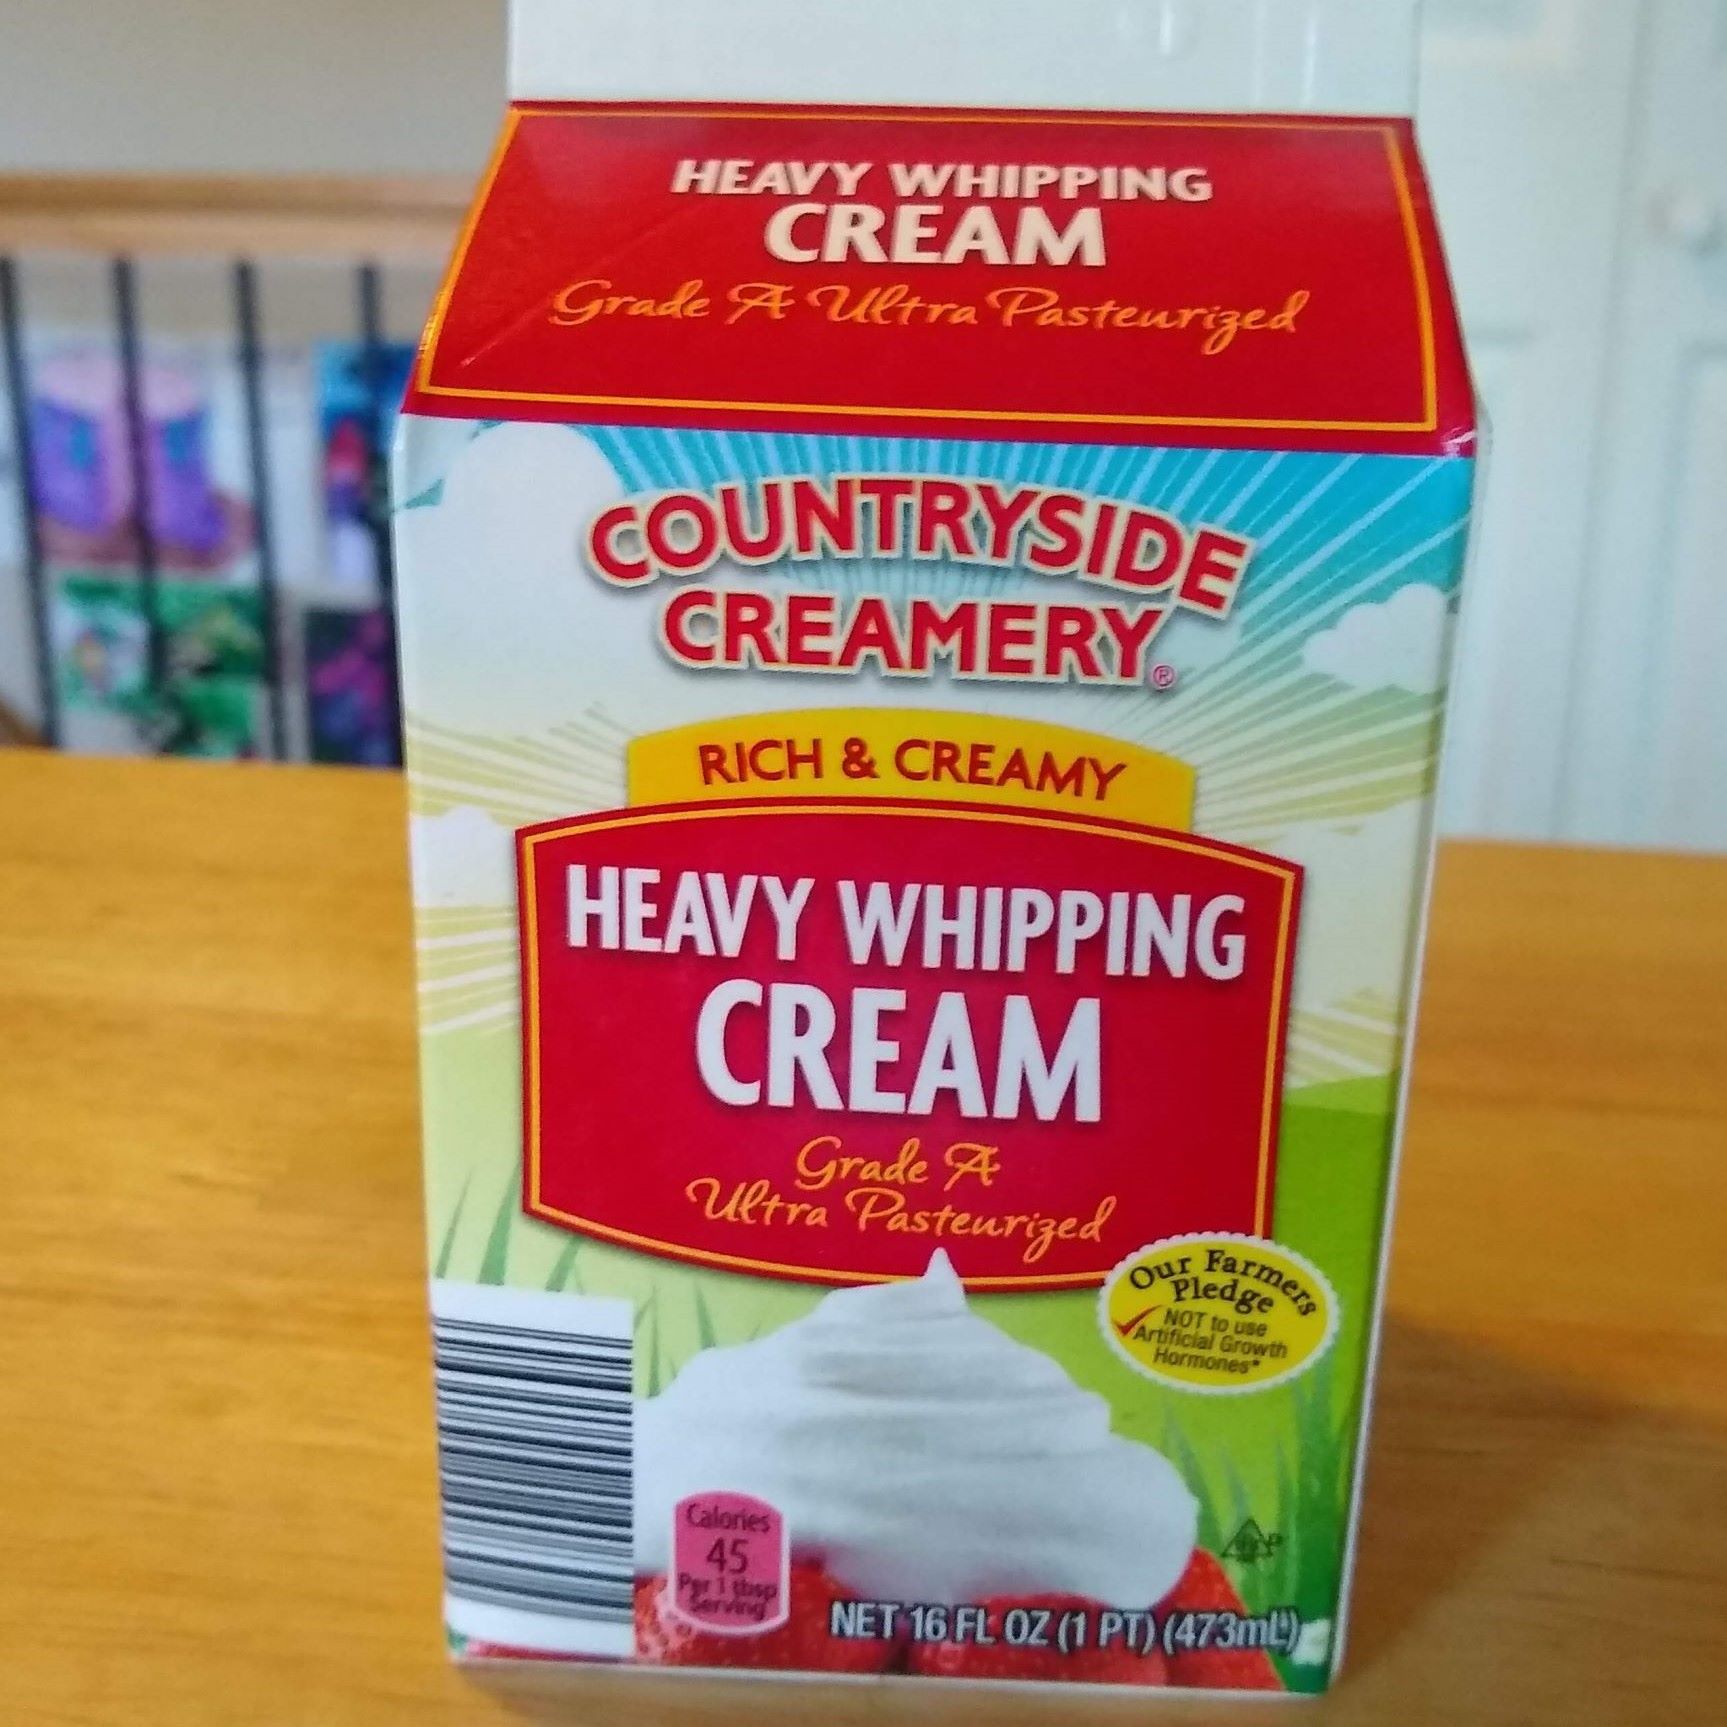
- Heavy cream (also known as whipping cream or double cream)
- Optional: Sweetener, such as sugar or vanilla extract
Make sure your mixing bowl and beaters are clean and dry before you begin. It’s also helpful to chill the bowl and beaters in the refrigerator for about 15 minutes before whipping the cream. This step helps maintain a colder temperature, allowing the cream to whip more easily.
Now that you have everything prepared, let’s move on to the step-by-step process of whipping cream with a hand mixer.
Key Takeaways:
- Elevate your desserts and beverages with luscious whipped cream using just a hand mixer. Convenience, control, and versatility make it a practical and rewarding kitchen skill for any aspiring cook or baker.
- Achieve the perfect consistency of soft and stiff peaks by starting with cold cream, gradually increasing speed, and adding sweetener to taste. Master the art of whipping cream with a hand mixer for delightful culinary creations.
Read more: How To Whip Heavy Cream Without A Mixer
Why Use a Hand Mixer?
When it comes to whipping cream, using a hand mixer offers several advantages. Here are a few reasons why a hand mixer is the ideal tool for this task:
- Convenience: Hand mixers are compact and portable, making them easy to use anywhere in the kitchen. They don’t take up much counter space and are lightweight, allowing you to maneuver them effortlessly while whipping the cream. Whether you’re whipping cream for a cake, pie, or topping for your favorite hot cocoa, a hand mixer provides the convenience you need.
- Affordability: Hand mixers are more budget-friendly compared to stand mixers. They offer a cost-effective solution for home cooks who want to achieve perfectly whipped cream without breaking the bank. Instead of investing in a larger and more expensive stand mixer, a hand mixer provides all the necessary functionality at a fraction of the cost.
- Control: Using a hand mixer gives you full control over the whipping process. You can easily adjust the speed and intensity to achieve the desired consistency. Unlike a stand mixer, where the bowl rotates while the beaters remain stationary, a hand mixer allows you to move the beaters around the bowl, ensuring that all the cream is evenly whipped.
- Ease of Use: Hand mixers are designed to be user-friendly, even for beginners. They typically have simple controls and attachments that are easy to assemble and disassemble. The lightweight design and ergonomic handle make it comfortable to hold and operate for extended periods. You don’t need any special training or experience to use a hand mixer effectively.
- Easier Cleanup: Cleaning a hand mixer is a breeze compared to a stand mixer. Since hand mixers are smaller and have detachable beaters, you can easily wash them in the sink or dishwasher. This saves you time and effort in the cleanup process, allowing you to enjoy your freshly whipped cream without worrying about a pile of dirty dishes.
- Multi-purpose: Hand mixers are not limited to whipping cream; they can be used for a variety of kitchen tasks. From mixing cake batter and kneading dough to beating eggs and blending sauces, a hand mixer is a versatile tool that serves many purposes. Investing in a hand mixer expands your culinary capabilities and makes your kitchen more efficient.
Overall, a hand mixer is a valuable kitchen tool that offers convenience, affordability, control, and versatility. Whether you’re a seasoned baker or a beginner cook, using a hand mixer to whip cream is a practical and effective choice that delivers excellent results every time.
What You’ll Need
Before you begin whipping cream with a hand mixer, make sure you have the following items on hand:
- Handheld Mixer: A hand mixer is an essential tool for whipping cream. Choose a reliable and sturdy handheld mixer that offers various speed settings to give you control over the whipping process.
- Mixing Bowl: Select a medium or large-sized mixing bowl that is deep enough to prevent splattering while whipping the cream. Stainless steel or glass bowls are recommended, as they retain cold temperatures better than plastic bowls.
- Heavy Cream: Also known as whipping cream or double cream, heavy cream is the main ingredient for whipped cream. Ensure that you have enough cream for the desired amount of whipped cream you need. It’s best to use cold cream taken straight from the refrigerator.
- Sweetener (Optional): If you prefer sweetened whipped cream, you can add a sweetener of your choice. Common options include granulated sugar, powdered sugar, or vanilla extract. Adjust the amount of sweetener to your taste preference.
It’s important to note that using cold cream and chilled mixing bowls and beaters helps achieve the best whipped cream results. Cold temperatures aid in achieving a higher volume and better stabilization of the cream as you whip it.
Once you have all the necessary equipment and ingredients ready, it’s time to move on to the step-by-step process of whipping cream with a hand mixer. Follow the instructions carefully to achieve the perfect whipped cream consistency for your desired dessert or beverage.
Read more: How To Make Whipped Cream In Stand Mixer
Step 1: Chill the Bowl and Beaters
Before you start whipping cream with your hand mixer, it’s essential to chill both the mixing bowl and the beaters. Chilling these items helps maintain a colder temperature throughout the whipping process, leading to better results. Here’s how to do it:
- Choose the Right Bowl: Select a medium to a large-sized mixing bowl that is suitable for the amount of cream you’re whipping. Stainless steel or glass bowls are ideal as they retain cold temperatures better than plastic bowls.
- Wash and Dry: Make sure the bowl is clean and dry before using it. Any residual moisture can affect the cream’s whipping process, so pat it dry with a clean kitchen towel if necessary.
- Place in the Refrigerator: Put the clean and dry mixing bowl in the refrigerator for about 15 minutes. This will ensure that the bowl is chilled and ready for whipping the cream.
- Chill the Beaters: While the bowl is chilling in the refrigerator, detach the beaters from your hand mixer and place them in the freezer or refrigerator as well. Chilled beaters will help maintain the cold temperature of the cream during the whipping process.
By chilling the bowl and beaters, you create an environment that helps the cream whip faster and hold its shape better. The cold temperature keeps the cream from breaking down and becoming watery as quickly. This step is especially crucial if you’re whipping cream in a warm kitchen or during hot weather.
Once the bowl and beaters are sufficiently chilled, you’re ready to move on to the next step: pouring the cream into the chilled bowl.
Step 2: Pour Cream into the Chilled Bowl
Now that you have chilled the mixing bowl and beaters, it’s time to pour the cream into the chilled bowl. This step ensures that the cream stays cold while you whip it, resulting in a smoother and more stable whipped cream. Follow these instructions:
- Measure the Cream: Determine the amount of whipped cream you need for your recipe or desired serving size. Measure the appropriate amount of heavy cream and pour it into the chilled mixing bowl.
- Start with Cold Cream: It’s crucial to use cold heavy cream straight from the refrigerator. Cold cream whips more easily and holds its shape better than cream that is at room temperature.
- Leave Some Space: To account for the increase in volume as you whip the cream, make sure not to fill the bowl to its maximum capacity. Leave some space at the top of the bowl to prevent overflow and make it easier to whip without splattering.
- Optional: Add Sweetener: If you prefer sweetened whipped cream, now is the time to add your desired sweetener. This could be granulated sugar, powdered sugar, or a sweetener alternative. Start with a small amount of sweetener and adjust to taste.
Pouring the cream into the chilled bowl sets the foundation for achieving light and fluffy whipped cream. By starting with cold cream and a cold bowl, you create the optimal environment for successful whipping. The chilled temperature helps maintain the stability of the cream, allowing it to hold its shape when whipped.
With the cream in the chilled bowl, you’re now ready to move on to the next step: using your hand mixer to start whipping the cream on low speed.
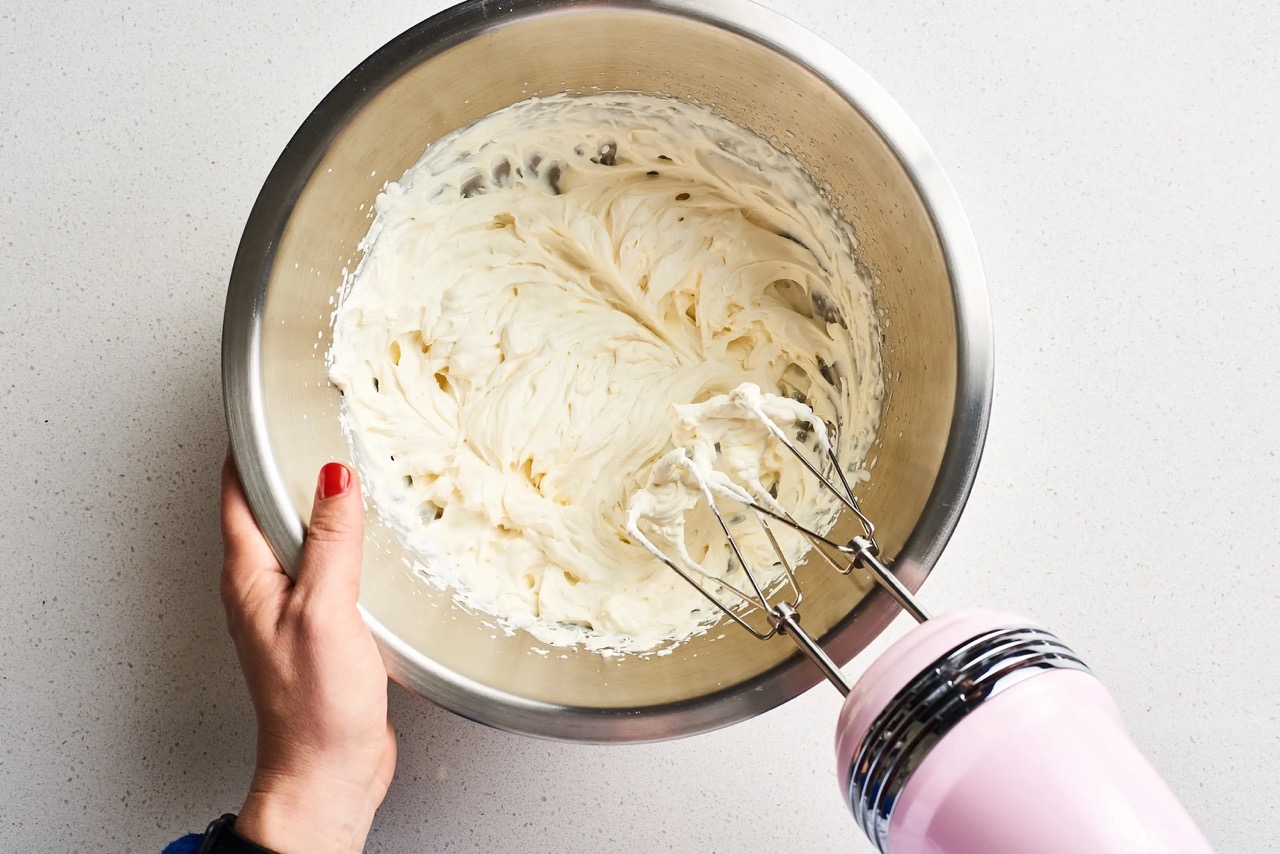
Step 3: Start on Low Speed
With the cream poured into the chilled bowl, it’s time to begin the process of whipping. Starting on low speed helps incorporate air into the cream gradually, ensuring a smooth and stable whipped cream. Follow these steps:
- Attach the Beaters: Attach the chilled beaters to your hand mixer. Make sure they are securely in place before turning on the mixer.
- Position the Hand Mixer: Hold the hand mixer with a firm grip and position it above the cream in the bowl. Make sure the beaters are submerged in the cream before turning on the mixer.
- Start on Low Speed: Turn on the hand mixer and start at the lowest speed setting. This helps prevent splattering and allows the cream to incorporate air gradually.
- Move the Mixer Slowly: With the mixer turned on, slowly move it in a circular motion around the bowl. Make sure to cover the entire surface of the cream to ensure even mixing.
Starting on low speed is important because it introduces air into the cream gradually. This process enables the cream to build structure and stabilizes the whipped cream as it forms. By beginning at a low speed, you minimize the chances of splattering and create a smooth foundation for the next steps of the whipping process.
As you continue to whip the cream, gradually increase the speed to achieve the desired consistency. The next step will guide you on how to progressively increase the speed to reach the perfect whipped cream consistency.
Chill the bowl and beaters before whipping cream to help it whip faster and hold its shape better.
Step 4: Gradually Increase Speed to Medium
Now that you’ve started whipping the cream on low speed, it’s time to gradually increase the speed to medium. Increasing the speed helps incorporate more air into the cream and forms soft peaks. Follow these steps:
- Monitor the Cream: As you continuously mix the cream on low speed, keep a close eye on its texture and consistency. Look for signs of thickening and the formation of small bubbles.
- Increase the Speed: After a minute or two of mixing on low speed, gradually increase the speed of the hand mixer to the medium setting. This can usually be done by pressing a speed button or sliding a control switch on the mixer. Make sure to increase the speed gradually, rather than making a sudden jump.
- Continue Mixing: With the mixer now set to medium speed, continue to move it in a circular motion around the bowl. Be sure to cover all areas of the cream to ensure even whipping. The increased speed will help incorporate more air into the cream, resulting in a lighter and fluffier texture.
- Observe Soft Peaks: As you whip the cream at medium speed, watch for soft peaks forming. Soft peaks are achieved when the cream holds its shape momentarily but still droops slightly when the beaters are lifted. This is an indication that you’re on the right track.
Gradually increasing the speed from low to medium allows for a controlled and gradual incorporation of air into the cream. This step helps create a stable whipped cream with a light and airy texture. Be patient and keep a close eye on the cream’s progress as you continue mixing at medium speed.
In the next step, we’ll discuss what to do once soft peaks have formed and how to determine the ideal consistency for your whipped cream.
Read more: How To Store Whipped Cream After Whipping
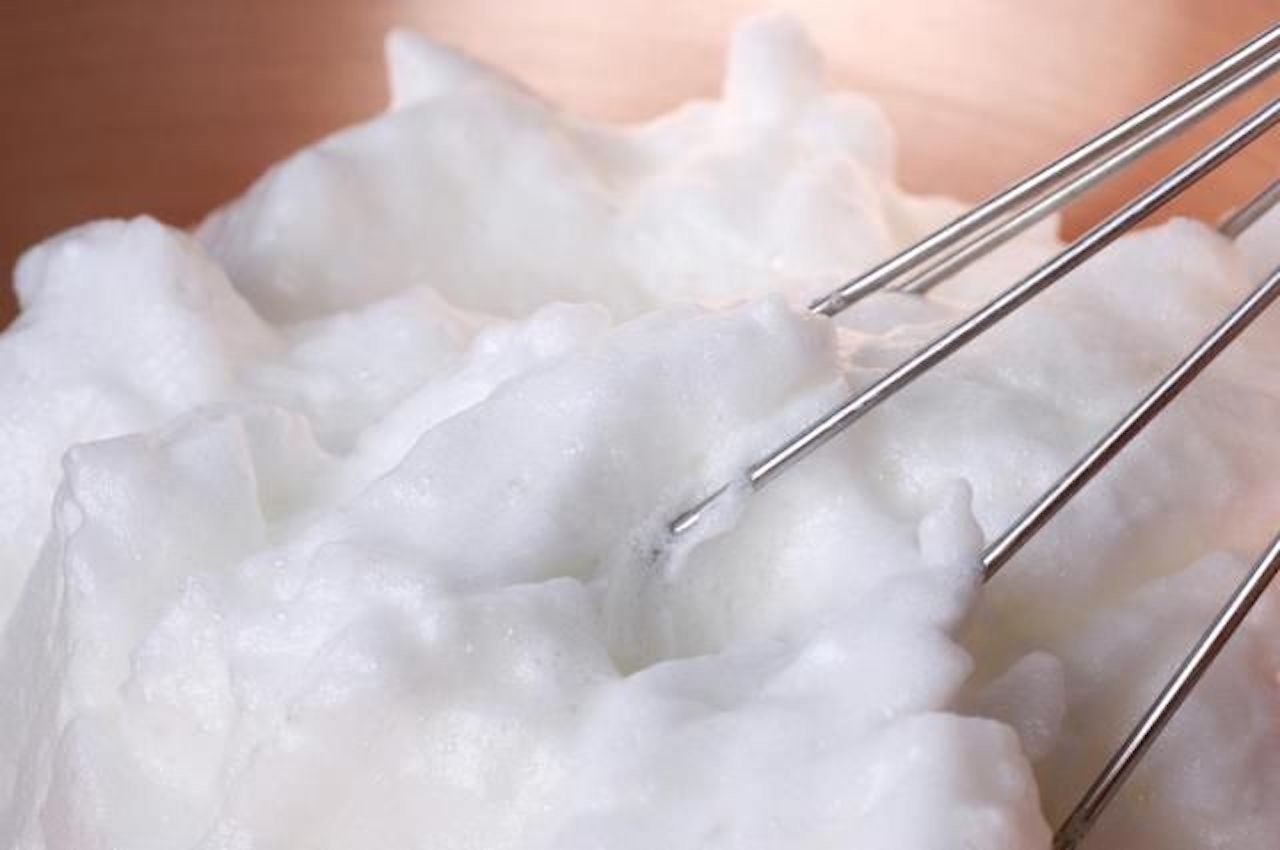
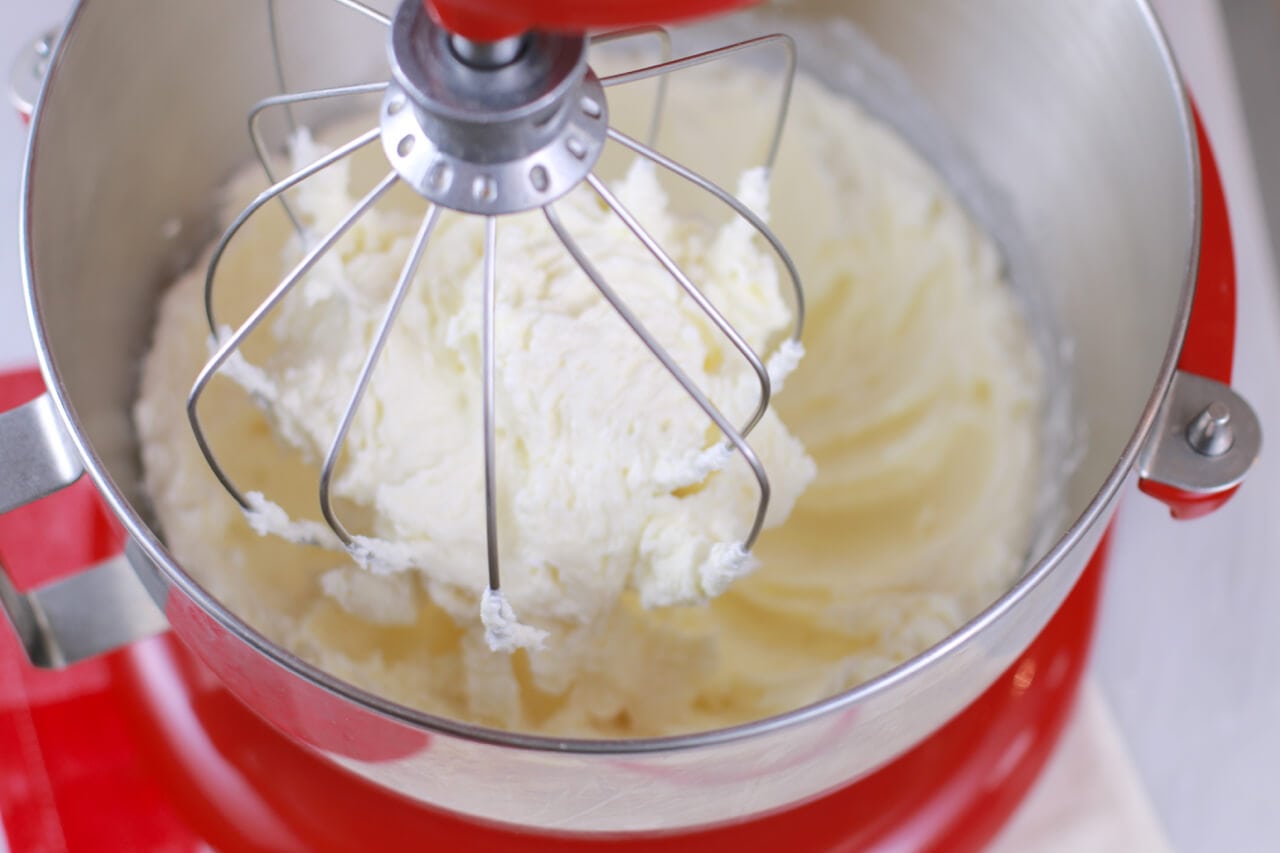
Step 5: Watch for Soft Peaks
As you continue whipping the cream at medium speed, it’s crucial to watch for the formation of soft peaks. Soft peaks are a key indicator that the cream is reaching the desired consistency. Follow these steps to identify soft peaks:
- Observe the Cream: Continuously monitor the texture of the cream as you whip it. Look for the following visual cues:
- Thickened Cream: The cream will gradually thicken as you whip it. You’ll notice a change in texture, becoming lighter and fluffier.
- Bubbles and Trails: Small bubbles will start to form on the surface of the cream, and you’ll see trails left by the beaters as you move them through the cream.
- Drooping Peaks: Lift the beaters out of the cream and examine the trails left behind. Soft peaks are achieved when the cream holds its shape briefly but then droops or falls back into the bowl.
- Test the Peaks: To check if soft peaks have formed, lift the beaters out of the cream. The cream should hold a soft peak shape momentarily before gently folding back into the bowl. Soft peaks should have a slightly curved tip rather than a sharp point.
- Continue Mixing if Needed: If the cream hasn’t reached the soft peak stage, continue whipping at medium speed for a short period. Be careful not to overwhip the cream, as it can quickly transition from soft peaks to stiff peaks.
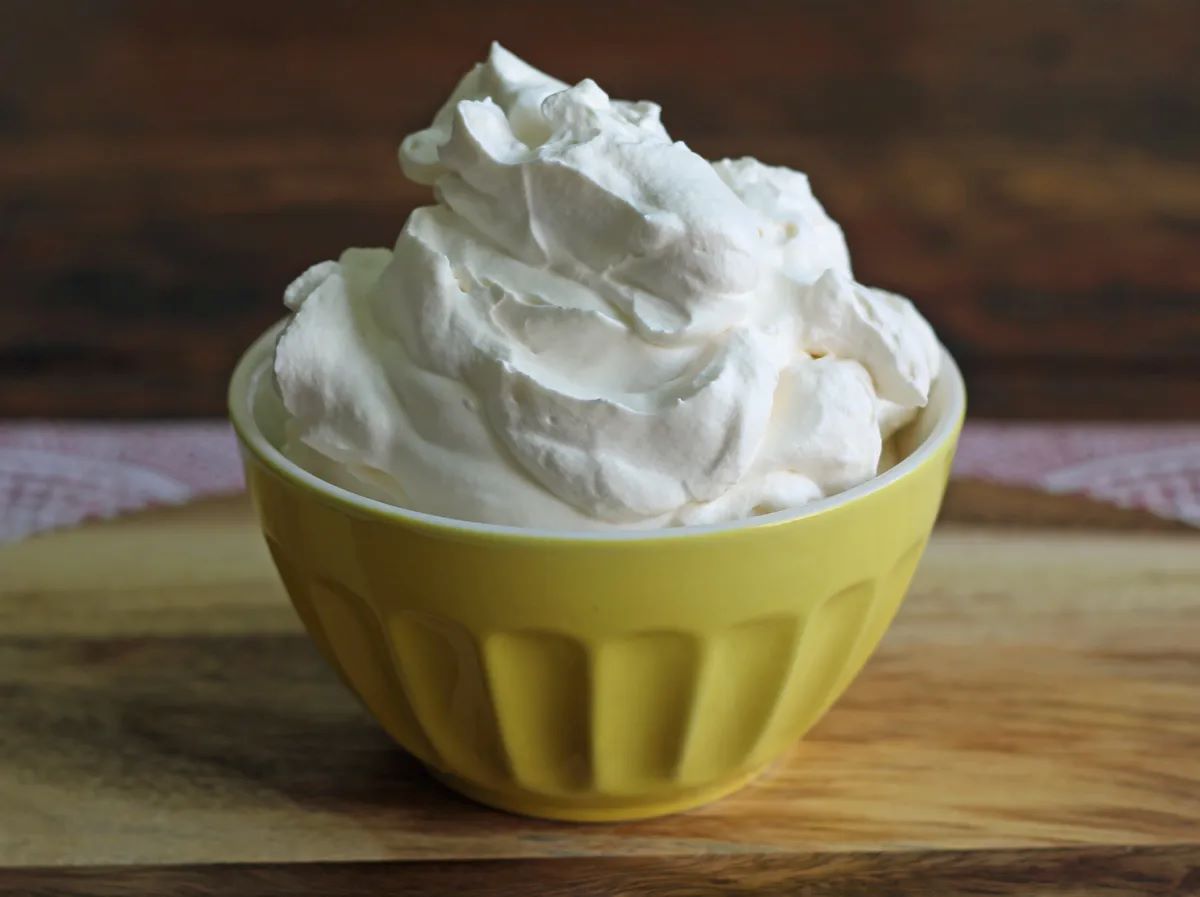
- Achieving Soft Peaks: Once soft peaks have formed, stop mixing. At this stage, the cream is light, fluffy, and has a smooth consistency that will beautifully enhance your desserts or beverages.
Watching for soft peaks is crucial as it indicates that the whipped cream is getting close to the right consistency. Soft peaks provide enough stability to hold their shape for a short time before gently settling back into the bowl. Remember to pay attention to the cream’s texture and appearance so that you can achieve the perfect soft peak stage for your whipped cream.
In the next step, we’ll cover the optional step of adding a sweetener to your whipped cream, giving it a touch of sweetness to complement your desserts.
Step 6: Add Sweetener (optional)
Once you have reached the soft peak stage with your whipped cream, you may choose to add a sweetener to enhance the flavor. Adding a sweetener is an optional step that allows you to customize the taste of your whipped cream to complement your desserts. Follow these steps to incorporate a sweetener:
- Select a Sweetener: Choose the type of sweetener you’d like to use. Common options include granulated sugar, powdered sugar, or a sweetener alternative like honey or maple syrup.
- Start with a Small Amount: Begin by adding a small amount of sweetener to your whipped cream. You can always add more later if needed. Adding too much sweetener at once can lead to an overly sweet whipped cream, so it’s best to start with a conservative amount.
- Beat on Low Speed: Turn the mixer back to low speed and gradually incorporate the sweetener into the whipped cream. This ensures an even distribution of the sweetener throughout the cream.
- Taste and Adjust: Once the sweetener is incorporated, taste the whipped cream to gauge the level of sweetness. If desired, add more sweetener in small increments until you achieve the desired level of sweetness.
Adding a sweetener to your whipped cream can elevate the flavor and make it more enjoyable to pair with your desserts or beverages. However, keep in mind that the choice to add a sweetener is entirely up to you. If you prefer a plain and unsweetened whipped cream, you can skip this step and proceed to the next one.
After incorporating the sweetener (or opting not to), it’s time to move on to the next step: continuing to beat the cream until stiff peaks form.
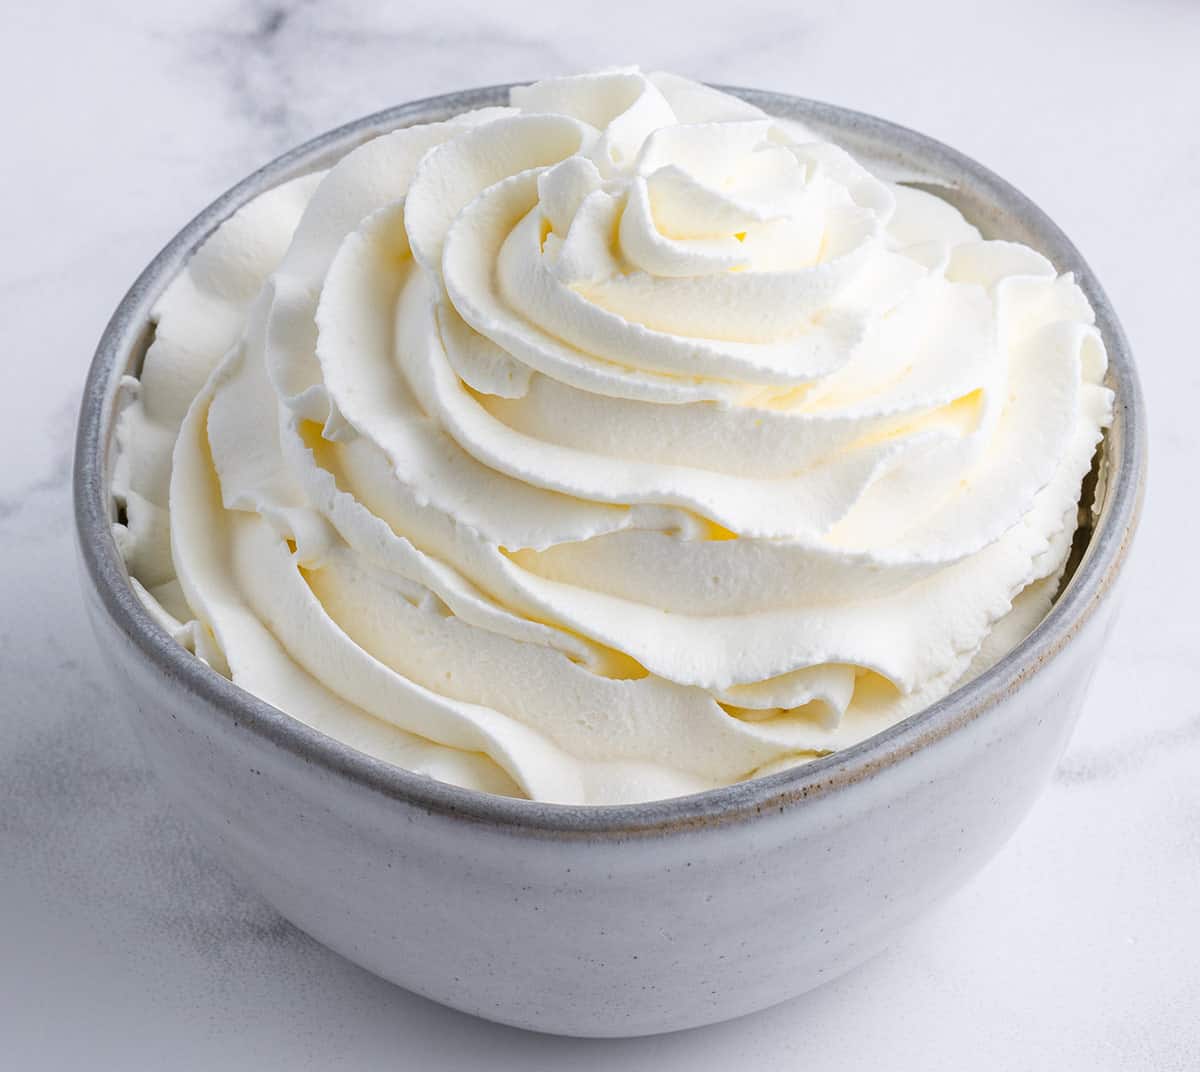
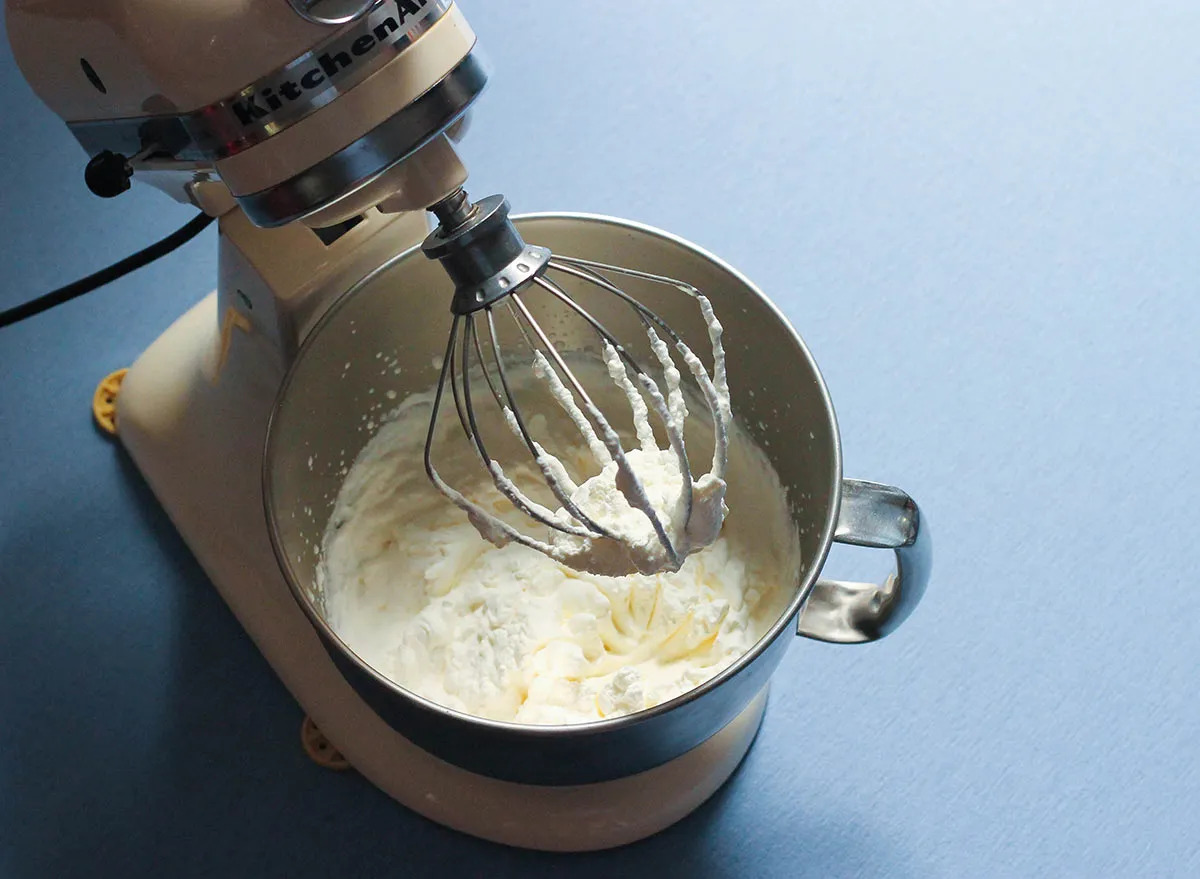
Step 7: Continue Beating Until Stiff Peaks Form
After adding a sweetener (or deciding to keep your whipped cream unsweetened), the next step is to continue beating the cream until it reaches the stage of stiff peaks. This is when the whipped cream is firm, holds its shape well, and is perfect for piping or spreading. Follow these steps to achieve stiff peaks:
- Increase the Speed: Increase the speed of the hand mixer to medium-high or high, depending on the speed settings available. This will help incorporate even more air and achieve the desired stiffness.
- Monitor the Whipping Cream: As the cream is being beaten, observe its transformation. Keep a close eye on the texture and consistency as it progresses.
- Watch for Changes: The cream will continue to thicken and increase in volume. You’ll notice the appearance of firmer peaks and a more stable structure as you keep whipping.
- Check for Stiff Peaks: Lift the beaters out of the cream and examine the peaks that form. If the peaks stand up firmly and hold their shape without drooping, you have achieved stiff peaks.
- Be Careful Not to Overbeat: It’s important to pay attention while reaching the stiff peak stage. Stop beating as soon as you see stiff peaks forming, as overbeating can quickly lead to the cream curdling or turning into butter.
Once your whipped cream has reached the stage of stiff peaks, it is ready to be used as a topping for desserts or incorporated into various recipes. The stiff peaks will hold their shape, allowing you to pipe or spread the whipped cream onto your desired creations.
In the next step, we’ll discuss how to determine the consistency of your whipped cream and ensure it meets your expectations.
Step 8: Stop and Check Consistency
As you near the end of the whipping process, it’s crucial to stop and check the consistency of your whipped cream. This step ensures that the cream has reached the desired texture and meets your expectations. Follow these steps to check the consistency:
- Turn Off the Mixer: After achieving stiff peaks, turn off the hand mixer and remove the beaters from the bowl.
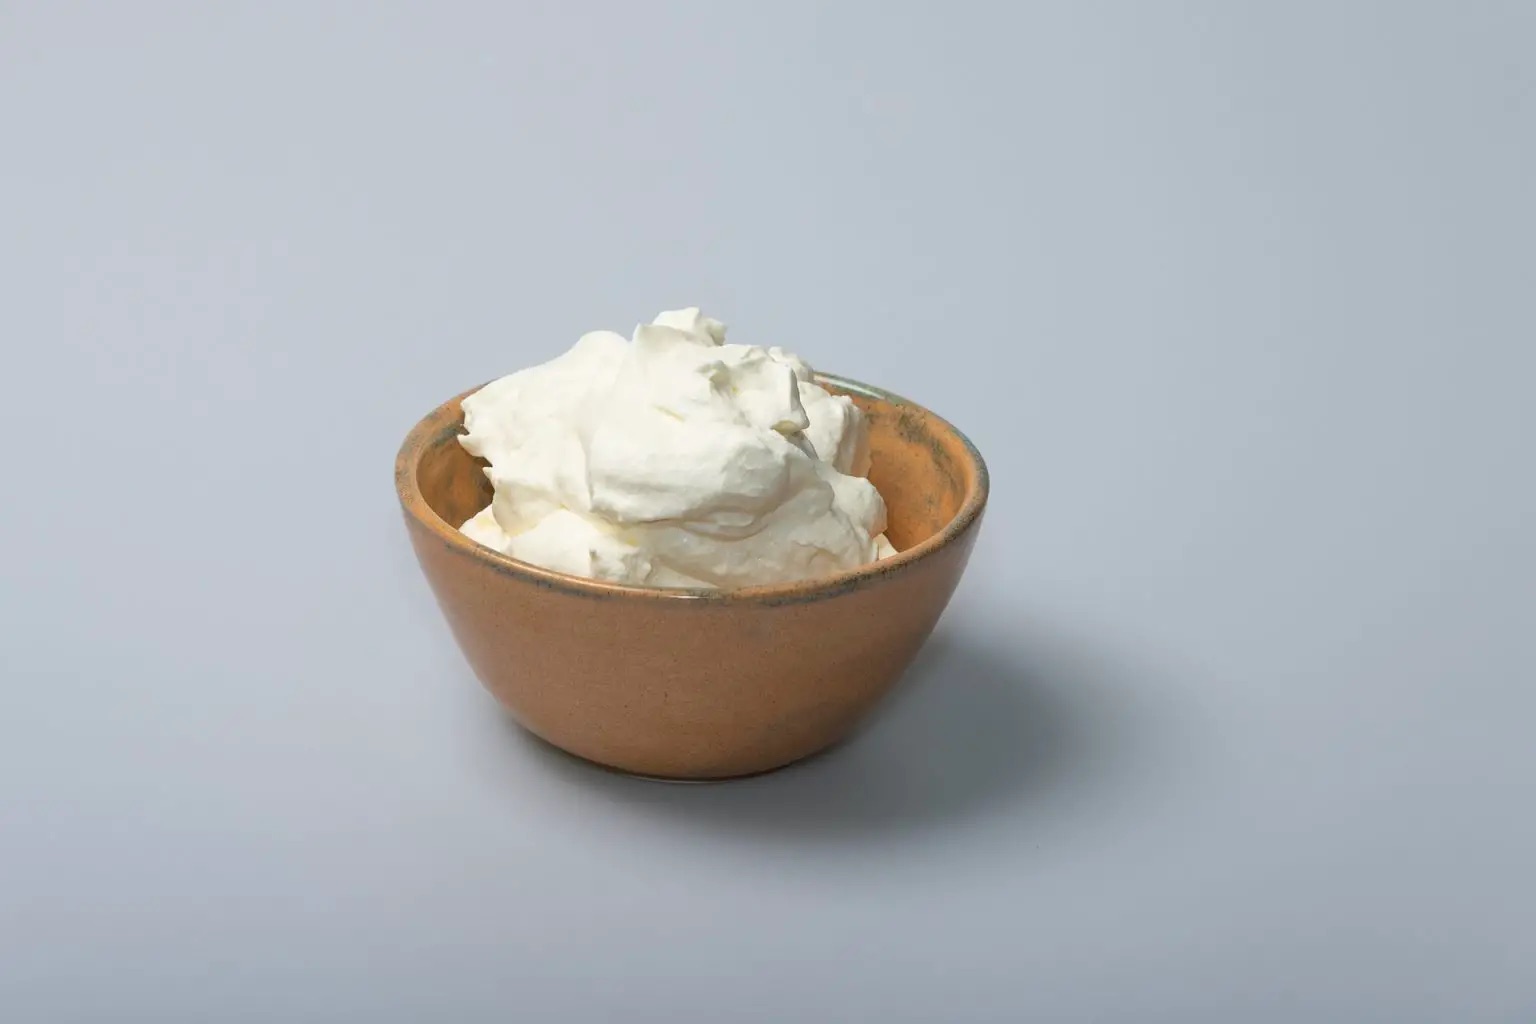
- Inspect the Whipped Cream: Take a close look at the whipped cream in the bowl. It should be smooth, fluffy, and have a light texture. The peaks should be firm and hold their shape without drooping.
- Perform a Spoon Test: Dip a spoon into the whipped cream and scoop out a small amount. Hold the spoon horizontally and observe the cream’s consistency. It should be light and airy, with a velvety texture that spreads easily.
- Taste Test: Take a small spoonful of the whipped cream and taste it. Adjust as needed by adding more sweetener if desired or folding in other flavorings like vanilla extract or cocoa powder.
By checking the consistency and performing a spoon test, you can ensure that your whipped cream has reached the stage of perfection. It should have a delightful texture and taste that complements your desserts or beverages. If needed, make any necessary adjustments to suit your preferred taste.
Now that you have checked the consistency and ensured your whipped cream meets your expectations, it’s time for the final step: serving or storing the prepared whipped cream.
Read more: How To Make Whipped Cream With A Blender
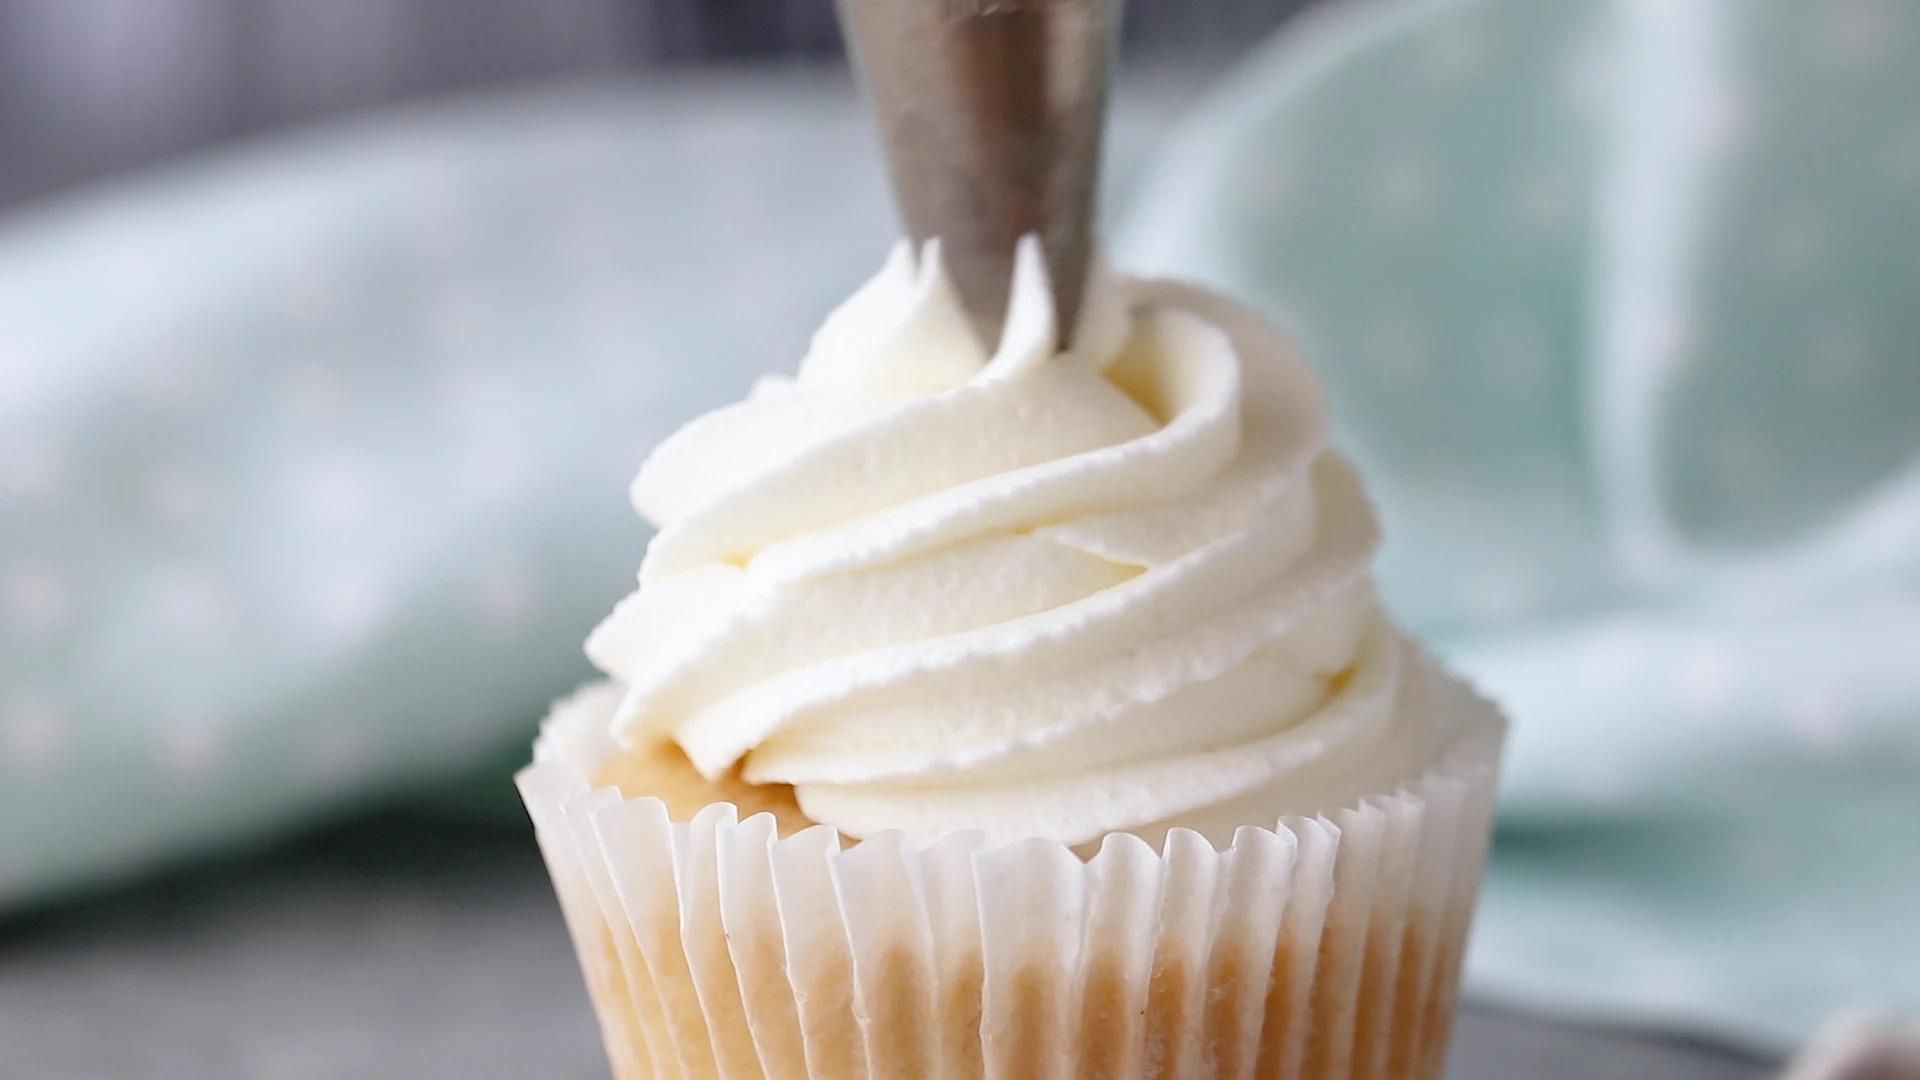
Step 9: Serve or Store Prepared Whipped Cream
After successfully whipping cream to the desired consistency, it’s time to decide whether you want to serve it immediately or store it for later use. Follow these steps to serve or store your prepared whipped cream:
- Serving: If you’re serving the whipped cream right away, gently transfer it from the mixing bowl to a serving container using a rubber spatula or spoon. Be careful not to deflate the cream while transferring it. Serve the whipped cream as a topping for desserts, hot beverages, or any other recipe that calls for a dollop of creamy delight.
- Storing: If you wish to store the whipped cream for future use, transfer it to an airtight container. Make sure the container is clean and dry before adding the whipped cream. Store the container in the refrigerator, where it will stay fresh for up to 3-4 days. Keep in mind that whipped cream, especially when sweetened, can lose some of its stability over time. Give it a gentle whisk before using if the texture has changed slightly.
When serving the whipped cream, consider adding some additional garnishments, such as grated chocolate, fresh berries, or a sprinkle of cinnamon, to enhance the presentation and flavor. Whipped cream can elevate a simple dessert or beverage into a delightful treat.
If you decide to store the whipped cream, it’s important to note that the colder temperature of the refrigerator will cause it to firm up slightly. Before using the stored whipped cream, allow it to sit at room temperature for a few minutes. Then, give it a gentle stir or whip to restore the desired consistency.
With your whipped cream served or safely stored, you can enjoy its creamy goodness whenever the desire strikes. Whether you’re using it to top pies, cakes, hot chocolate, or fruit salads, your homemade whipped cream will be a delightful addition to any culinary creation.
Congratulations! You’ve successfully learned how to whip cream with a hand mixer and are now equipped with the skills to create delicious and fluffy whipped cream at home.
Tips and Troubleshooting
Whipping cream with a hand mixer is a straightforward process, but here are a few tips and troubleshooting suggestions to help you achieve the best results:
- Use cold cream: Start with chilled heavy cream straight from the refrigerator. Cold cream whips more easily and holds its shape better.
- Chill the bowl and beaters: Place the mixing bowl and beaters in the refrigerator for about 15 minutes before whipping the cream. A colder environment helps the cream whip faster and more effectively.
- Start on low speed: Begin whipping the cream on low speed to prevent splattering and gradually incorporate air into the cream.
- Watch for soft peaks: Be attentive as the cream thickens and soft peaks form. Soft peaks should hold their shape momentarily before gently folding back into the bowl.
- Keep an eye on texture: Monitor the cream’s consistency as you increase the speed and continue whipping. Avoid overbeating, as it can cause the cream to curdle or turn into butter.
- Adjust sweetness: If desired, add a sweetener such as granulated or powdered sugar during the whipping process. Start with a small amount and adjust to taste.
- Store properly: If storing whipped cream, transfer it to an airtight container and refrigerate for up to 3-4 days. Give it a gentle stir or whip before using if the texture has changed slightly.
If you encounter any issues while whipping cream, here are some troubleshooting suggestions:
- Underwhipped cream: If the cream appears too runny or hasn’t reached the desired consistency, continue beating at a medium-high speed in short intervals. Be careful not to overbeat and turn it into butter.
- Overwhipped cream: If the cream becomes grainy or lumpy, and starts to separate, you may have overwhipped it. Unfortunately, there is no easy fix for overwhipped cream. You can try adding more cream and gently folding it in to salvage the texture, but it may not regain its original consistency.
- Unsweetened cream: If you forgot to add a sweetener and the whipped cream is already at the stiff peak stage, you can gently fold in the sweetener of your choice. Be careful not to deflate the whipped cream too much during this process.
- Temperature: Be mindful of the room and ingredient temperatures. Cream whips best in a cool environment, so avoid whipping cream on a hot day or in a warm kitchen.
Remember, practice makes perfect, and you may need to adjust the technique based on your specific hand mixer and cream brand. With a bit of practice and these helpful tips in mind, you’ll soon become a master at whipping cream with a hand mixer!
Enjoy your homemade whipped cream and the delectable creations you’ll be able to enhance with it!
Conclusion
Whipping cream with a hand mixer is a simple yet rewarding culinary skill that allows you to create luscious and fluffy whipped cream from the comfort of your own kitchen. With the right tools and techniques, you can transform a plain container of cream into a delightful topping that elevates the flavors and presentation of your desserts, hot beverages, and more.
In this article, we covered the step-by-step process of whipping cream with a hand mixer, from chilling the bowl and beaters to achieving the perfect consistency of soft and stiff peaks. We also explored the option of adding a sweetener to customize the flavor to your liking. With each step, we provided tips and troubleshooting suggestions to help you navigate any challenges you may encounter along the way.
Remember to use cold cream and chill the mixing bowl and beaters before whipping. Start on low speed and gradually increase to medium for optimal air incorporation. Watch for soft peaks forming and continue whipping until stiff peaks are achieved, being mindful not to overbeat. Adjust the sweetness to your preference and, finally, decide whether to serve the whipped cream immediately or store it for later use.
With practice and attention to detail, you’ll soon become proficient in whipping cream with a hand mixer. Experiment with different flavor variations, such as adding extracts, spices, or liqueurs, to create unique whipped cream creations that tantalize your taste buds.
Now that you have the knowledge and skills, it’s time to get creative in the kitchen. Whip up some homemade whipped cream and enjoy the creamy and dreamy creations you can make. Whether you’re topping a slice of pie, decorating a cake, or adding the finishing touch to your favorite hot cocoa, homemade whipped cream will surely delight your senses and impress your guests.
Frequently Asked Questions about How To Whip Cream With Hand Mixer
Was this page helpful?
At Storables.com, we guarantee accurate and reliable information. Our content, validated by Expert Board Contributors, is crafted following stringent Editorial Policies. We're committed to providing you with well-researched, expert-backed insights for all your informational needs.
0 thoughts on “How To Whip Cream With Hand Mixer”