Home>Articles>The Basic Electrical Wiring Skills Every Homeowner Should Master
Articles
The Basic Electrical Wiring Skills Every Homeowner Should Master
Modified: October 31, 2024
Discover essential electrical wiring skills every homeowner should know with our informative articles. Master the basics of wiring to ensure safety and efficiency in your home.
(Many of the links in this article redirect to a specific reviewed product. Your purchase of these products through affiliate links helps to generate commission for Storables.com, at no extra cost. Learn more)
Introduction
Welcome to the world of electrical wiring! Whether you are a new homeowner or a DIY enthusiast, having a basic understanding of electrical wiring is essential. Being able to handle simple electrical tasks can save you money, provide a sense of accomplishment, and keep your home running smoothly. In this article, we will explore the fundamental skills and knowledge every homeowner should master when it comes to electrical wiring.
Electrical wiring is the system that connects the various electrical devices and fixtures in your home, allowing them to receive power and function properly. It involves installing and connecting wires, switches, outlets, and other electrical components to create a safe and functional electrical system.
Before we dive into the details of electrical wiring, it’s important to note that working with electricity can be dangerous if you are not properly trained or take the necessary precautions. If you are unsure or uncomfortable with any electrical task, it’s always best to consult a licensed electrician.
In this article, we will cover the basic concepts of electrical wiring, the tools and equipment you will need, safety precautions, and step-by-step guides on how to install outlets, switches, ceiling fans, and light fixtures. We will also touch on common electrical problems and how to troubleshoot them.
By the end of this article, you will have a solid foundation in electrical wiring skills, empowering you to take on small electrical projects with confidence and enhance your understanding of your home’s electrical system.
So let’s get started and explore the fascinating world of electrical wiring!
Key Takeaways:
- Understanding the basics of electrical wiring, from current flow to circuit types, empowers homeowners to tackle small projects and troubleshoot common issues with confidence and safety.
- Equipped with the knowledge of tools, safety precautions, and practical installation guides, homeowners can enhance their homes’ electrical systems while saving money and gaining a sense of accomplishment.
Read more: Top 10 Tools Every Homeowner Should Own
Understanding Electrical Wiring Basics
Before you start working with electrical wiring, it’s important to have a good understanding of the basic principles that govern how electricity flows through your home. Here are a few key concepts you should know:
- Electrical Current: Current is the flow of electric charge. It is measured in amperes (A) and is represented by the symbol “I”. In a home electrical system, the current flows in a closed circuit, from the power source (usually the electrical panel) through the wires to the various devices and fixtures, and then back to the power source.
- Voltage: Voltage is the force that pushes the electric current through the circuit. It is measured in volts (V) and is represented by the symbol “V”. The voltage in a home electrical system is typically 120 volts or 240 volts, depending on the type of circuit.
- Resistance: Resistance is the opposition to the flow of electric current. It is measured in ohms (Ω) and is represented by the symbol “R”. Different materials have different levels of resistance. Wires, switches, and other electrical components are designed to have minimal resistance to ensure efficient current flow.
- Series and Parallel Circuits: Electrical circuits can be connected in two main ways: series and parallel. In a series circuit, the components are connected one after the other, forming a single path for the current. In a parallel circuit, the components are connected side by side, providing multiple paths for the current to flow. Most household circuits are parallel circuits.
- Grounding: Grounding is an important safety measure in electrical wiring. It involves connecting metal parts of the electrical system, such as outlets and switches, to the earth using a grounding wire. This helps protect against electric shock by providing a path for the electric current to safely discharge into the ground if there is a fault.
- Circuit Breakers and Fuses: Circuit breakers and fuses are devices designed to protect the electrical system from overloads and short circuits. They detect excessive current flow and interrupt the circuit to prevent damage or fire. Circuit breakers can be reset, while fuses need to be replaced once they blow.
Having a solid understanding of these basic principles will allow you to work more effectively and safely with electrical wiring. It’s also helpful when troubleshooting electrical problems or planning new electrical installations in your home.
Now that we have covered the fundamentals, let’s move on to the tools and equipment you will need for basic electrical wiring tasks.
Tools and Equipment Needed for Basic Electrical Wiring
When it comes to basic electrical wiring, having the right tools and equipment is essential for a successful and safe project. Here are some of the essential tools you will need:
- Screwdrivers: A set of screwdrivers is a must-have for electrical work. Make sure you have both flathead and Phillips-head screwdrivers in various sizes to handle different types of screws.
- Pliers: Pliers are versatile tools that come in handy for gripping, bending, and cutting wires. Needle-nose pliers are especially useful for reaching into tight spaces.
- Wire Strippers: Wire strippers are specifically designed to strip off the insulation from electrical wires without damaging the wire itself. Make sure to choose wire strippers that are suitable for the size of wire you will be working with.
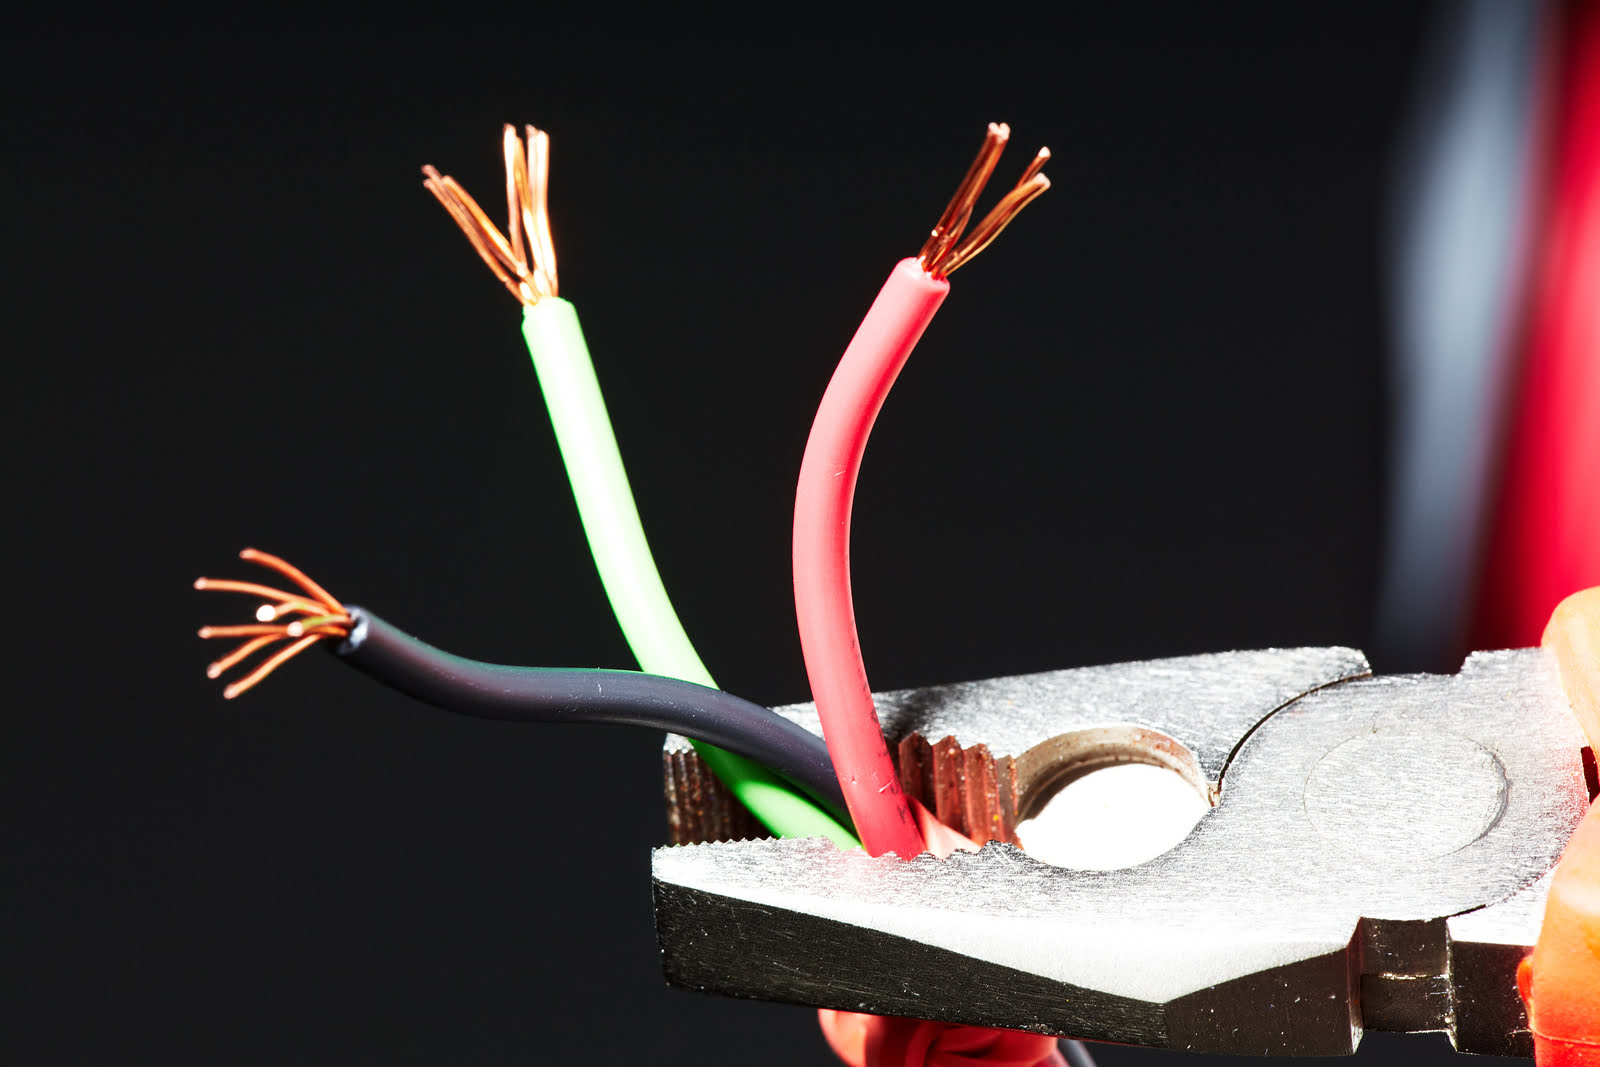
- Wire Cutters: Wire cutters, also known as side cutters or diagonal pliers, are used to cut through electrical wires and cables. They have a cutting edge that allows for clean and precise cuts.
- Circuit Tester: A circuit tester is a small handheld device used to check if electrical circuits are live or dead. It helps ensure that power is safely turned off before working on electrical wiring.
- Tape Measure: A tape measure is essential for measuring and marking distances accurately. It is useful when planning the placement of electrical outlets, switches, and fixtures.
- Electrical Tape: Electrical tape is a type of insulation tape that is used to protect and secure electrical connections. It is important to use electrical tape that is specified for electrical use to ensure proper insulation and safety.
- Circuit Breaker Finder: A circuit breaker finder is a handy tool that helps you identify the corresponding circuit breaker for a specific outlet or fixture. It saves time and eliminates the guesswork when it comes to turning off power to a specific area.
- Voltage Tester: A voltage tester is used to check the presence of voltage in electrical outlets, switches, and wires. It is a crucial tool for ensuring that power is properly disconnected before working on electrical wiring.
- Electrical Box: Electrical boxes are essential for housing electrical outlets, switches, and other electrical fixtures. They provide a safe and secure enclosure for wiring connections.
These are some of the basic tools and equipment you will need for most electrical wiring projects. It’s important to invest in good-quality tools that are durable and reliable, as they will make your work easier and safer. Additionally, always remember to wear appropriate safety gear, such as gloves and safety glasses, when working with electrical wiring.
Now that you have the necessary tools, let’s move on to the next section, where we will discuss the safety precautions you should take when working with electrical wiring.
Safety Precautions for Electrical Wiring
When working with electrical wiring, safety should always be your top priority. Electricity can be dangerous if not handled properly, so it’s important to take the necessary precautions to protect yourself and others. Here are some essential safety tips to keep in mind:
- Turn off the power: Before you start any electrical work, always turn off the power to the circuit you will be working on. This can be done by switching off the circuit breaker or removing the fuse that controls the circuit. Use a circuit tester to verify that the power is indeed off.
- Use proper insulation: Whenever you are working with live wires, ensure that they are properly insulated to prevent the risk of electric shock. Use electrical tape to secure and insulate wire connections.
- Avoid overloading circuits: Overloading a circuit can lead to overheating and potential fire hazards. Be mindful of the electrical load on each circuit and avoid plugging too many devices into a single outlet or circuit.
- Keep water away: Water and electricity do not mix. Avoid working on electrical wiring projects in wet or damp conditions, and keep your tools and hands dry at all times.
- Wear safety gear: Protect yourself by wearing appropriate safety gear, such as gloves and safety glasses, when handling electrical wiring. This will help prevent injuries and minimize the risk of electrical shock.
- Avoid working alone: Whenever possible, have someone nearby when working on electrical wiring. They can assist you if an accident occurs and can provide valuable guidance.
- Inspect wires and cables: Before you start any electrical work, inspect the wires and cables for any signs of damage or wear. If you encounter frayed or damaged wires, replace them immediately to prevent potential hazards.
- Turn off the power during installation: When installing outlets, switches, or fixtures, make sure the power is turned off. Double-check with a voltage tester to ensure that there is no residual voltage in the wires.
- Know the location of utilities: Before drilling, cutting, or driving nails into walls or ceilings, be aware of the location of electrical wiring, plumbing pipes, and other utilities to prevent accidental damage.
- Consult a professional: If you are unsure or uncomfortable with any electrical task, do not hesitate to consult a licensed electrician. Electrical work that requires extensive knowledge and expertise should be left to the professionals to ensure safety and compliance with electrical codes.
Remember, safety should always be your priority when working with electrical wiring. By taking the necessary precautions and following proper electrical safety procedures, you can minimize the risks and ensure a safe working environment.
In the next section, we will delve into identifying electrical circuits in the home, an important skill for any homeowner.
Identifying Electrical Circuits in the Home
Understanding the layout and organization of electrical circuits in your home is essential for troubleshooting electrical problems, planning new installations, and ensuring that the electrical load is properly distributed. Here are some tips to help you identify the electrical circuits in your home:
- Check the electrical panel: The electrical panel, also known as the breaker box, is where all the electrical circuits in your home are controlled and protected. Each circuit is connected to a circuit breaker or fuse. Take a look at the labeling on the panel to identify which breaker controls each circuit.
- Inspect outlets and switches: Outlets and switches are typically connected to specific circuits in your home. By inspecting the outlets and switches, you can often determine which circuit they are connected to. Turn off the power to a specific circuit and see which outlets, switches, or fixtures are affected to identify the circuit.
- Follow the wiring: By tracing the electrical wiring from outlets, switches, and fixtures, you can get a sense of how the circuits are interconnected. Look for junction boxes or electrical boxes where wires are spliced or connected, as these are often indicators of circuit separation.
- Use a circuit breaker finder: A circuit breaker finder is a handy tool that can help you locate the corresponding circuit breaker for a specific outlet or fixture. Simply plug the transmitter into the outlet or fixture and use the receiver to scan the circuit breakers in the panel. The receiver will indicate which breaker controls the circuit.
- Create a circuit map: To keep track of the electrical circuits in your home, consider creating a circuit map. This can be a simple diagram that shows each circuit and the corresponding outlets, switches, and fixtures. Label each circuit on the electrical panel and mark the relevant locations on the diagram.
- Consult the electrical plan: If you have access to the electrical plan or blueprint of your home, it can provide valuable information about the layout and organization of electrical circuits. This can be particularly useful when troubleshooting issues or planning new electrical installations.
By identifying and understanding the electrical circuits in your home, you will be able to troubleshoot electrical problems more efficiently and make informed decisions when adding new electrical devices or fixtures. Remember to always exercise caution when working with electrical circuits and to turn off the power before making any adjustments or repairs.
Now that we have covered the basics of identifying electrical circuits, let’s move on to discussing the different types of electrical wiring systems commonly used in homes.
Types of Electrical Wiring Systems
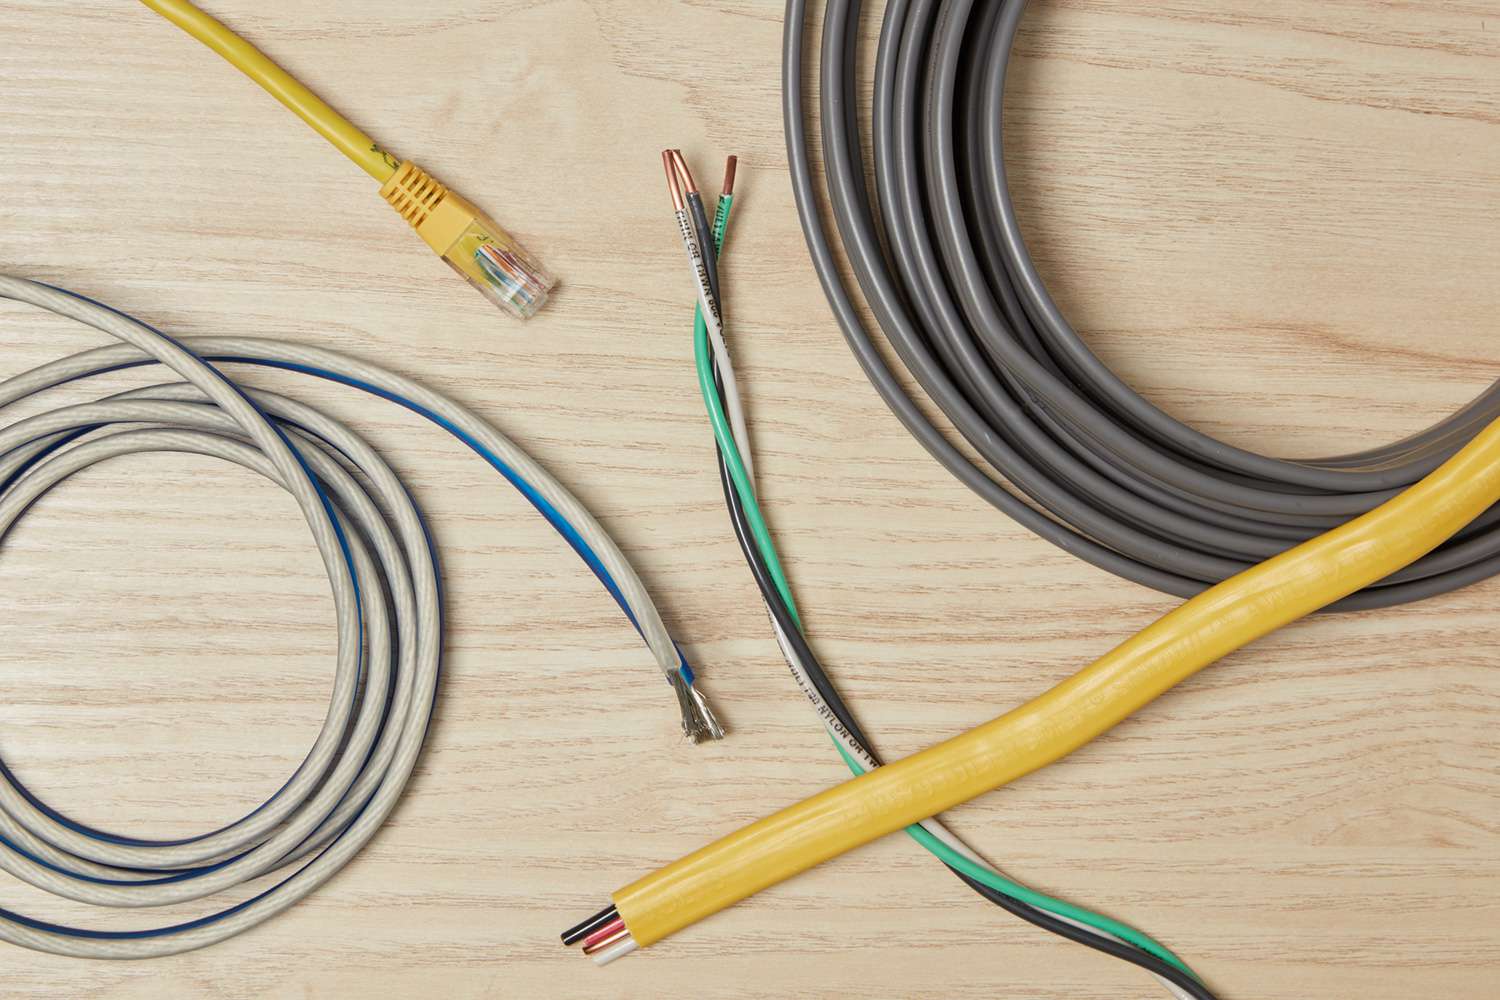
There are several different types of electrical wiring systems that are commonly used in homes. Each type has its own characteristics and is suitable for different applications. Here are some of the most common types of electrical wiring systems:
- Knob and Tube Wiring: Knob and tube wiring is an older type of electrical wiring that was commonly used in homes built before the 1930s. It consists of ceramic knobs that hold the wires in place and ceramic tubes that protect wires as they pass through framing members. Knob and tube wiring is no longer used in new installations due to safety concerns and building code requirements.
- Aluminum Wiring: Aluminum wiring was used in homes during the 1960s and 1970s as a cheaper alternative to copper wiring. However, it is no longer used due to the potential for fire hazards caused by aluminum’s tendency to expand and contract with temperature changes. If your home has aluminum wiring, it is recommended to have it inspected by a qualified electrician.
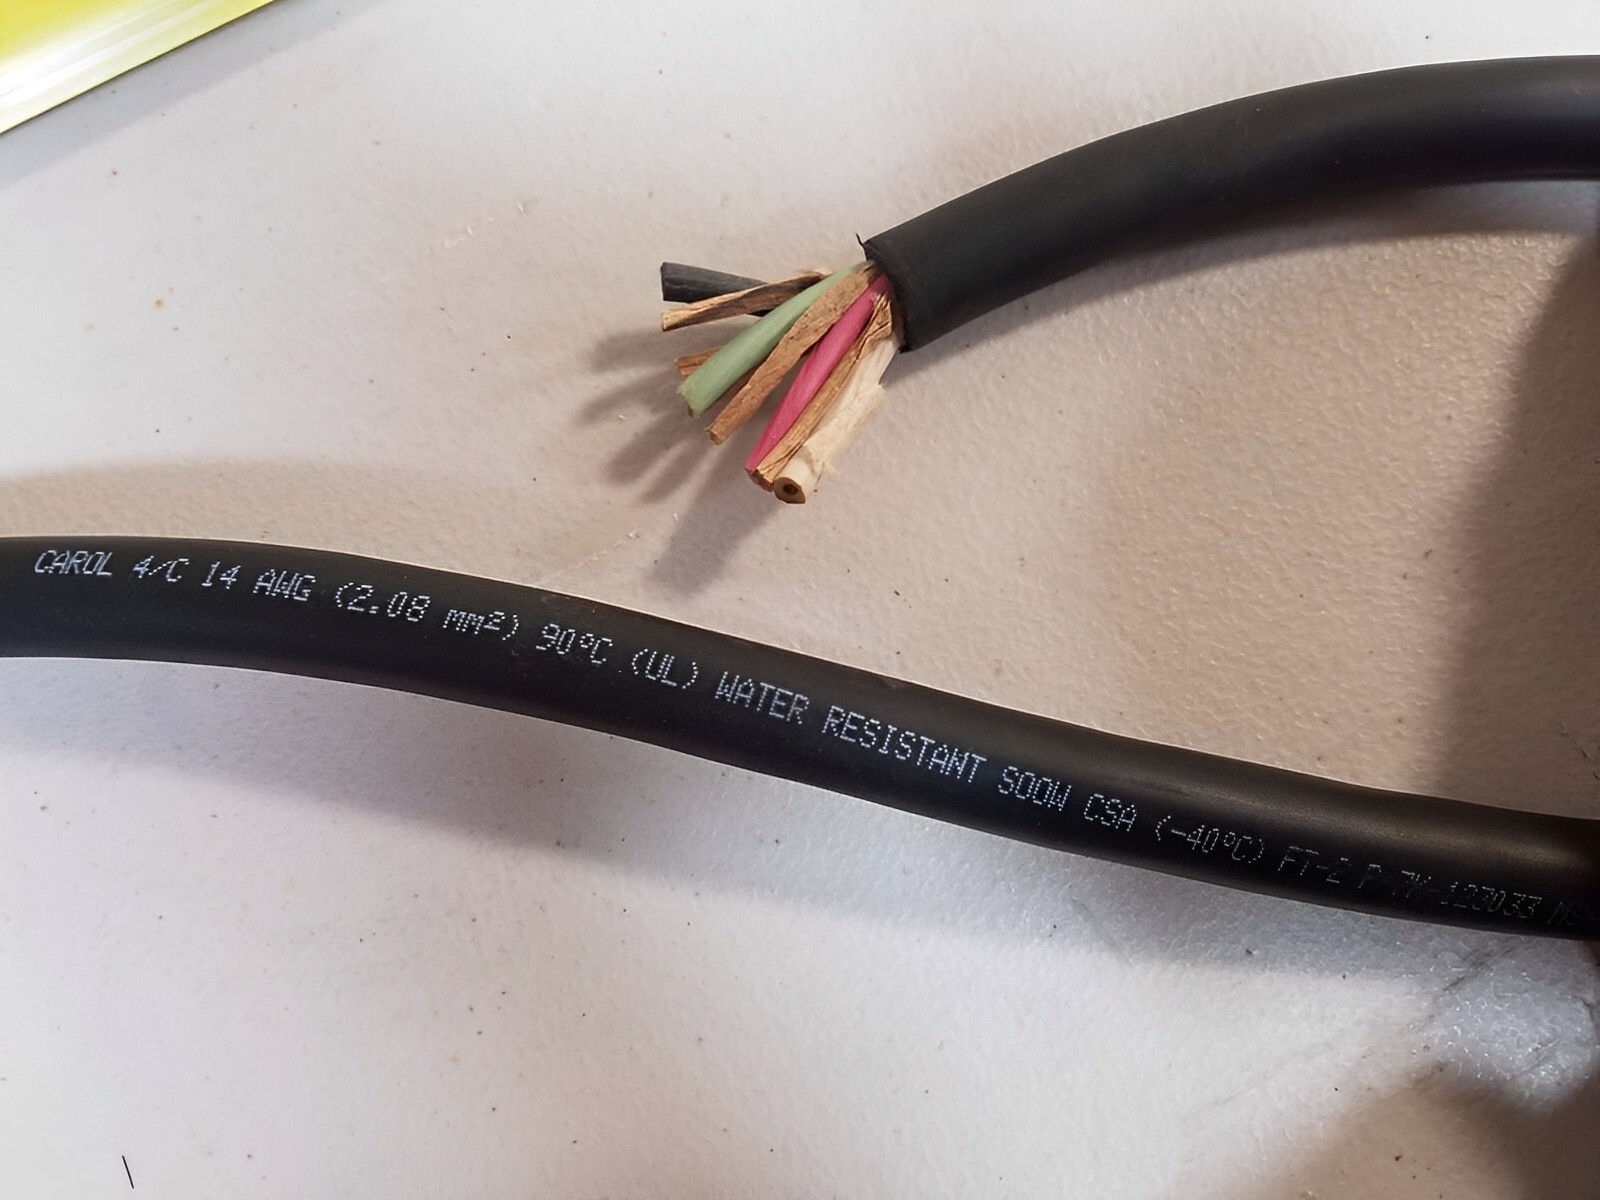
- Copper Wiring: Copper wiring is the most common type of electrical wiring used in modern homes. It is known for its excellent conductivity, durability, and resistance to corrosion. Copper wiring comes in different gauges (sizes) to accommodate different electrical loads. It is widely used for both residential and commercial installations.
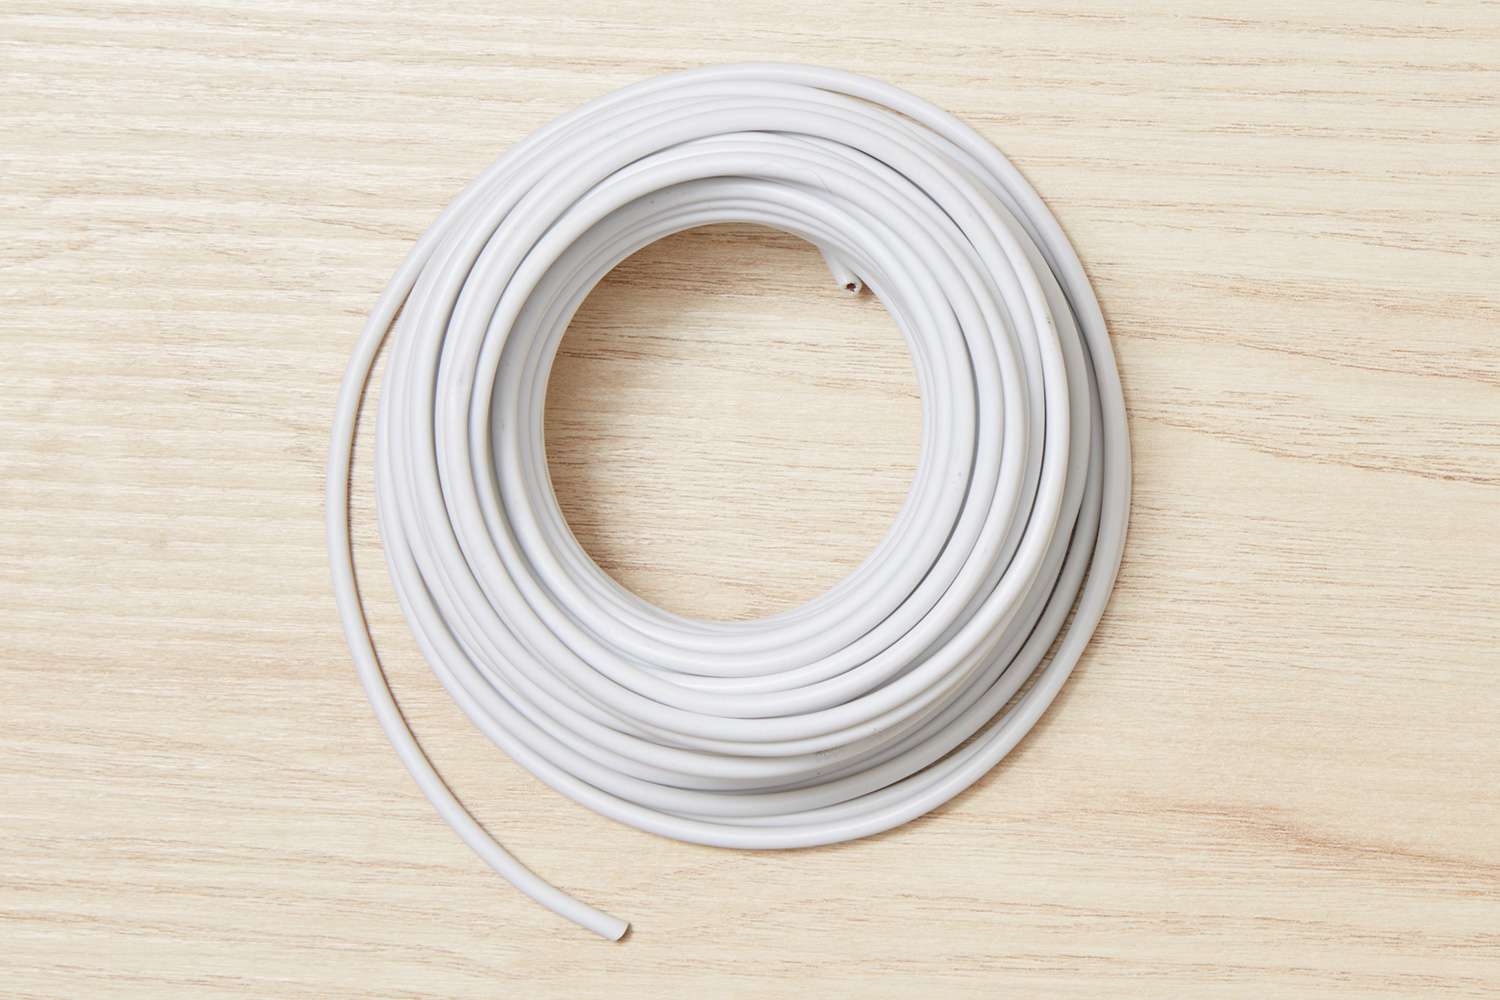
- Romex Wiring: Romex is a brand of electrical wiring that is widely used in residential applications in the United States. It consists of two or more insulated wires (usually black and white) and a bare copper ground wire, all enclosed in a plastic sheath. Romex wiring is commonly used for general power circuits, lighting circuits, and outlets.
- Armored Cable (AC) Wiring: Armored cable, also known as AC wiring or BX wiring, is a type of electrical wiring that has a protective metal armor surrounding the insulated wires. This armor provides additional mechanical protection and allows the cable to be directly buried in walls or ceilings without the need for conduit. AC wiring is commonly used in older homes and in commercial installations.
- Non-Metallic Sheathed Cable (NM) Wiring: Non-metallic sheathed cable, also known as NM or Romex, is a type of electrical wiring that has non-metallic insulation and a grounding wire. It is used for residential wiring applications, such as running wires from the electrical panel to outlets, switches, and fixtures. NM wiring should be installed in protected areas and not exposed to moisture or excessive heat.
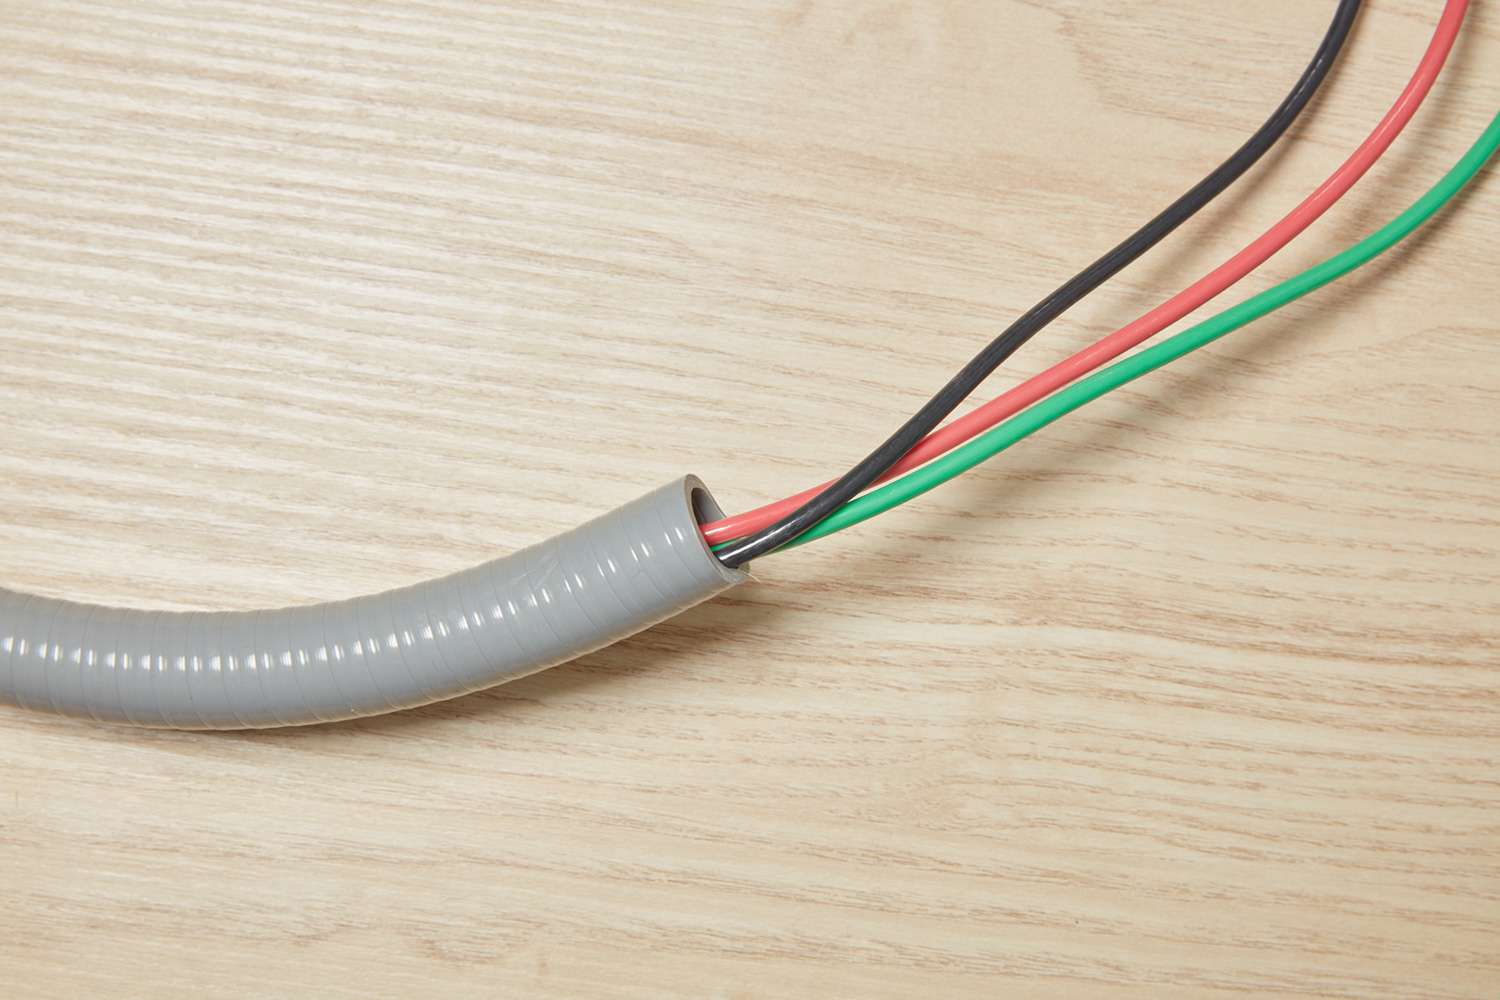
- Conduit Wiring: Conduit wiring involves running electrical wires through metal or plastic conduits, which act as protective channels. Conduit wiring provides superior protection against physical damage, moisture, and fire hazards. It is commonly used in commercial and industrial applications where wiring needs to be exposed or in areas with hazardous conditions.
It’s important to note that building codes and regulations may vary depending on your location. It is always recommended to consult a licensed electrician or check with local authorities to ensure that your electrical wiring system meets the required safety standards.
Understanding the different types of electrical wiring systems will help you make informed decisions when it comes to repairs, renovations, or new installations in your home.
Now that we have covered the types of electrical wiring systems, let’s move on to the practical aspect of electrical wiring. In the next sections, we will provide step-by-step guides on how to install electrical outlets, replace a light switch, install a ceiling fan, and install a light fixture.
Always turn off the power before working on any electrical wiring in your home. Use a voltage tester to double-check that the power is off before starting any work.
How to Install Electrical Outlets
Installing electrical outlets, also known as receptacles, is a common electrical wiring task that homeowners often encounter. Here is a step-by-step guide on how to install electrical outlets:
- Turn off the power: Before you begin any electrical work, always turn off the power to the circuit you will be working on. Locate the circuit breaker in the electrical panel that controls the circuit and switch it off. Use a circuit tester to verify that the power is indeed off before proceeding.
- Prepare the installation area: Choose the location where you want to install the electrical outlet. Ensure that the area is clear of any obstructions and is accessible. Use a voltage tester to confirm that there is no electrical current in the wires before proceeding.
- Trace the wiring: If you are replacing an existing electrical outlet, trace the existing wiring to determine which wires are hot (black), neutral (white), and ground (bare or green). If you are installing a new outlet, run the electrical wiring from the electrical panel to the installation location using appropriate wiring methods. Consult local codes and regulations for specific requirements.
- Prepare the wires: Strip about 3/4 inch of insulation from the end of each wire using wire strippers. Twist the strands of each wire to ensure a clean and tight connection.
- Connect the wires: Connect the black (hot) wire to the brass or gold-colored screw terminal on the side of the outlet. Connect the white (neutral) wire to the silver-colored screw terminal. Connect the bare or green (ground) wire to the green screw terminal or ground wire on the outlet.
- Secure the outlet: Carefully push the connected wires back into the electrical box, ensuring that they are not being pinched or strained. Align the outlet’s mounting holes with the screws provided on the electrical box and secure the outlet in place using a screwdriver.
- Install the cover plate: Attach the cover plate over the outlet, aligning the screw holes with the mounting screws on the outlet. Use a screwdriver to securely tighten the screws and ensure that the cover plate is flush with the wall.
- Test the outlet: Once the outlet is installed, turn the power back on at the circuit breaker. Use a circuit tester to verify that the outlet is properly wired and functioning correctly. Plug in a known working device to ensure that power is being supplied to the outlet.
It’s important to follow all electrical codes and regulations when installing electrical outlets. If you are unsure about any step in the process or have concerns about electrical wiring, it’s always best to consult a licensed electrician for assistance.
Remember, electrical work should be done with safety as the top priority. Always turn off the power, use appropriate tools and equipment, and exercise caution throughout the installation process. By following these steps, you can confidently install electrical outlets in your home and ensure reliable power for your devices and appliances.
In the next section, we will discuss how to replace a light switch, another common electrical wiring task that homeowners may encounter.
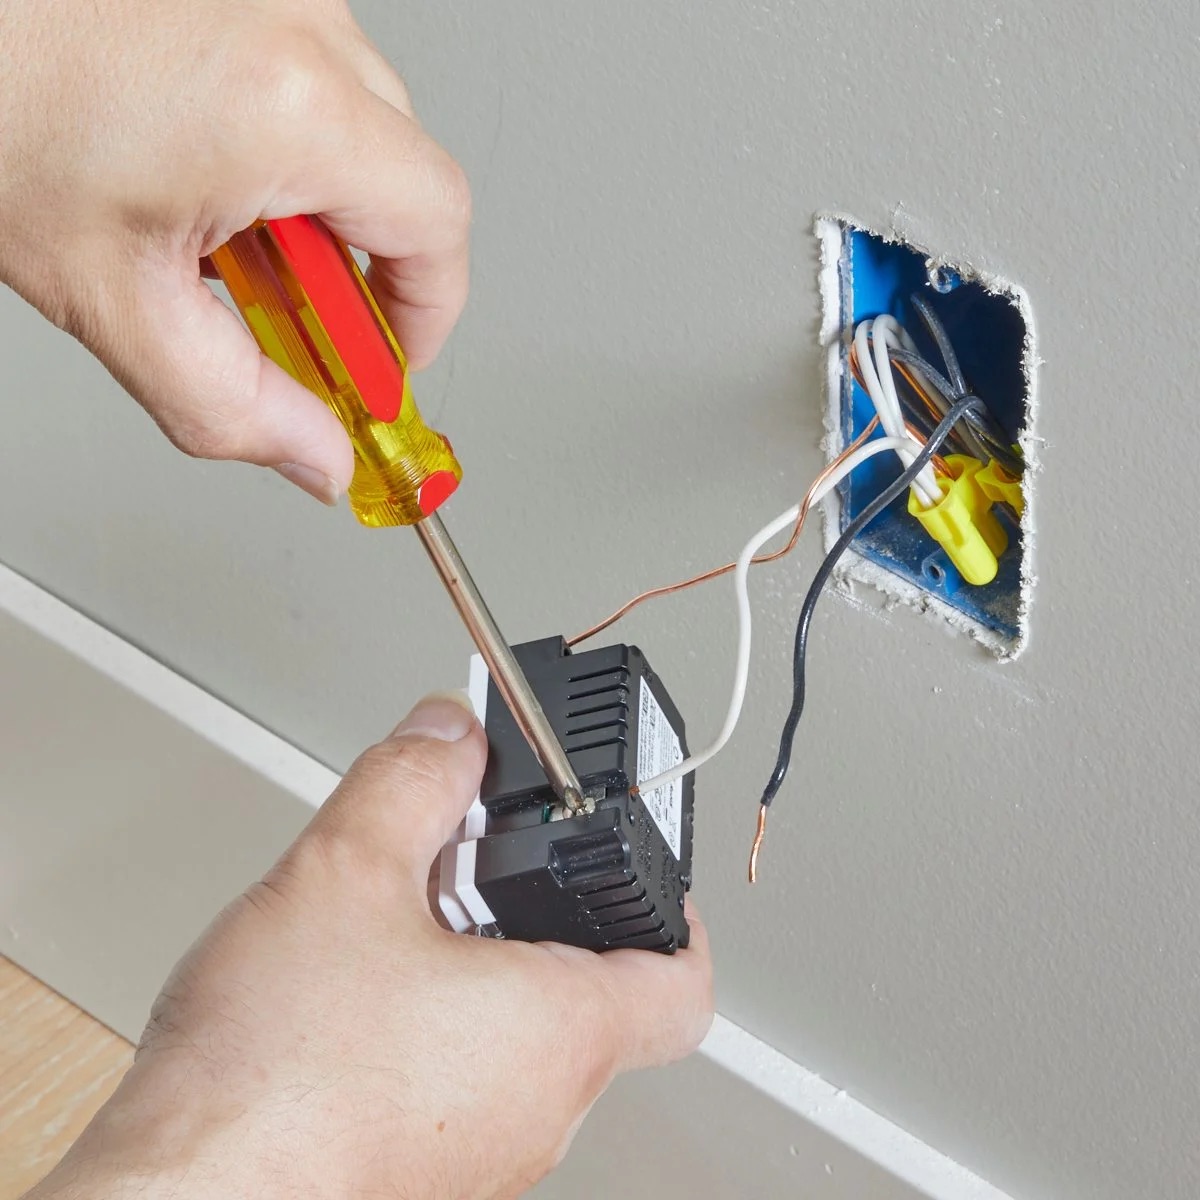
How to Replace a Light Switch
Replacing a light switch is a common electrical wiring task that allows you to update the look of your switches or repair a faulty switch. Here’s a step-by-step guide on how to replace a light switch:
- Turn off the power: Start by turning off the power to the circuit you will be working on. Locate the circuit breaker in the electrical panel that controls the circuit and switch it off. Double-check with a voltage tester to ensure that there is no power reaching the switch.
- Remove the old switch: Unscrew the cover plate on the switch with a screwdriver. Next, remove the screws that secure the switch to the electrical box. Carefully pull the switch out, exposing the wires connected to it. Take note of how the wires are connected before disconnecting them.
- Identify the wires: Identify the wires connected to the old switch. The hot wire (typically black) carries the electrical current, the neutral wire (typically white) completes the electrical circuit, and the ground wire (usually bare or green) provides safety protection. If the wires are not clearly labeled, use a voltage tester to identify the hot wire, or consult an electrician for assistance.
- Connect the new switch: To connect the new switch, start by connecting the hot wire to the brass-colored screw terminal on the switch. Connect the neutral wire to the silver-colored screw terminal. If there is a ground wire, connect it to the green screw terminal or the grounding wire on the switch. Tighten the screw terminals securely to ensure proper connections.
- Secure the switch: Carefully push the wires back into the electrical box, ensuring they are not being pinched. Align the screw holes on the switch with the screw holes on the electrical box and secure the switch in place with screws. Make sure the switch is flush against the wall or switch plate.
- Attach the switch plate: Place the switch plate over the switch and align the screw holes. Secure the switch plate in place with screws, tightening them until the plate is securely attached.
- Restore the power: Once the new switch is installed, restore power to the circuit by turning the circuit breaker back on. Test the new light switch by flipping it on and off to ensure that it is working properly.
Always exercise caution when working with electricity. If you are uncomfortable or unsure about any step in the process, it’s best to consult a licensed electrician for assistance. They can ensure the job is done safely and in compliance with electrical codes and regulations.
By following these steps, you can confidently replace a light switch in your home, putting the power at your fingertips and enhancing the functionality and aesthetics of your lighting system.
Next, we will discuss how to install a ceiling fan, which requires a few additional steps due to its unique electrical and mechanical components.
How to Install a Ceiling FanInstalling a ceiling fan is a great way to improve air circulation and add a stylish element to any room. While it may seem like a complex task, with the right tools and instructions, you can easily install a ceiling fan. Here’s a step-by-step guide:
- Gather the necessary tools and materials: Before you begin, make sure you have all the tools and materials you’ll need, including a ladder, screwdriver, wire connectors, electrical tape, and the ceiling fan kit.
- Turn off the power: As always, start by turning off the power to the circuit where you’ll be installing the ceiling fan. Locate the circuit breaker in the electrical panel and switch it off. Double-check with a voltage tester to confirm that there is no power reaching the wires.
- Prepare the installation area: Clear the area and ensure you have enough space to work. Remove any old fixtures or lighting components from the ceiling, if necessary.
- Mount the fan bracket: Follow the manufacturer’s instructions to attach the fan bracket to the ceiling, using the provided screws and mounting hardware. Ensure that the bracket is securely fastened and can support the weight of the fan.
- Wire the fan: Carefully remove the fan canopy and expose the electrical wiring. Match the wire colors from the fan to the corresponding wires in the ceiling: black to black (hot), white to white (neutral), and green or bare to the grounding wire or screw. Secure the connections with wire connectors and wrap them with electrical tape for added safety.
- Hang the fan: Lift the fan and align the mounting bracket with the fan bracket on the ceiling. Connect the wires from the fan to the corresponding wires in the ceiling, making sure they are securely fastened. Gently tuck the wires into the electrical box and slide the canopy up to cover the wiring and attach it to the mounting bracket.
- Assemble and attach the fan blades: Follow the manufacturer’s instructions to attach the fan blades to the motor housing. Make sure the blades are evenly spaced and securely tightened.
- Install the light kit (if applicable): If your ceiling fan includes a light kit, follow the instructions to assemble and attach it to the fan. Connect the wiring for the light kit, ensuring that it is properly secured and insulated.
- Secure all components: Double-check that all screws and connections are tight and secure. Give the fan a gentle push to confirm that it is stable and properly mounted.
- Restore the power: Once everything is in place and secure, turn the power back on at the circuit breaker and test the ceiling fan to ensure it is functioning correctly. Use the fan’s controller or pull chains to adjust the speed and direction of the fan, as desired.
Remember, if you are uncertain about any aspect of the installation process or if you encounter any difficulties, it’s always best to consult a licensed electrician to ensure a safe and proper installation.
By following these steps, you can enjoy the comfort and convenience of a ceiling fan in your home while adding a touch of style to your living space.
Next, we will discuss how to install a light fixture, another common electrical wiring task that can enhance the ambiance and lighting in any room.
How to Install a Light Fixture
Installing a light fixture is a straightforward process that can brighten up any room and enhance the overall ambiance. Here’s a step-by-step guide on how to install a light fixture:
- Turn off the power: Begin by turning off the power to the circuit you will be working on. Locate the circuit breaker in the electrical panel and switch it off. Use a voltage tester to ensure that there is no power reaching the wires.
- Prepare the installation area: Clear the area where you will be installing the light fixture. Remove any existing fixtures, if necessary. It’s also a good idea to place a drop cloth or cardboard underneath to catch any debris or screws that may fall during the installation.
- Identify the wires: Identify the wires in the electrical box. Typically, there will be a black (hot) wire, a white (neutral) wire, and a bare or green (ground) wire. If the wires are not clearly labeled, use a voltage tester to determine which wire is hot.
- Connect the wires: Start by connecting the wires from the electrical box to the corresponding wires on the light fixture. Twist the same-colored wires together and secure them with wire connectors. Make sure the connections are tight and secure.
- Mount the light fixture: Attach the light fixture to the electrical box using the screws provided. Ensure that the fixture is securely fastened and level. If necessary, use a screwdriver or pliers to tighten any adjustment screws or brackets.
- Install the lightbulbs: Insert the appropriate lightbulbs into the light fixture. Follow the manufacturer’s instructions for the maximum wattage and type of lightbulbs recommended for the fixture.
- Attach the light fixture cover: If your light fixture has a cover or a shade, carefully attach it according to the manufacturer’s instructions. Make sure it is securely fastened, ensuring the lightbulbs are fully covered and protected.
- Restore the power: Once the light fixture is securely installed and all connections are complete, restore power to the circuit by turning the circuit breaker back on. Test the light fixture by flipping the switch to ensure that it is functioning properly.
As always, exercise caution when working with electricity. If you are unsure about any step in the process or have concerns about your electrical wiring, it’s best to consult a licensed electrician for assistance.
By following these steps, you can successfully install a light fixture and illuminate your space with beautiful and functional lighting.
Now that we have covered the installation of light fixtures, we will move on to troubleshooting common electrical problems, helping you to identify and resolve issues that may arise in your electrical system.
Troubleshooting Common Electrical Problems
Electrical problems can be frustrating and potentially dangerous. However, with a little troubleshooting know-how, you can often identify and resolve common electrical issues. Here are some common electrical problems and steps to troubleshoot them:
- Power outage: If power is completely lost in your home, first check if your neighbors are also experiencing an outage. If they are, the issue may be with the electrical grid in your area. In this case, contact your power utility provider. If it’s only your home affected, check the main circuit breaker in the electrical panel and reset it if necessary. If the circuit breaker continues to trip, there may be an underlying electrical issue, and it’s recommended to consult a licensed electrician.
- Intermittent power loss: If you experience random power losses that come and go, it could indicate a loose connection in the electrical wiring. Check all connections, including outlets, switches, and circuit breaker connections, to ensure they are securely fastened. If the issue persists, it’s best to consult an electrician to investigate and rectify the problem.
- Overloaded circuit: If a circuit breaker frequently trips or you experience dimming lights when using certain appliances or devices, it could indicate an overloaded circuit. Reduce the load by unplugging unnecessary devices or redistributing the electrical load to different circuits. If you consistently have overloaded circuits, consider adding additional circuits or consulting an electrician to ensure your electrical system can handle the demand.
- Electrical shocks: If you receive a small electrical shock when touching an appliance or switch, it could indicate a grounding issue. Ensure that all outlets and switches are properly grounded. If the problem persists, it’s important to consult an electrician, as it could pose a safety hazard.
- Malfunctioning outlets or switches: If an outlet or switch stops working or becomes loose, first check if the circuit breaker has tripped. If not, turn off the power to the affected circuit and inspect the outlet or switch for any loose connections or damaged components. If you’re unsure or uncomfortable, it’s best to consult an electrician for proper diagnosis and repair.
- Flickering lights: Flickering lights can be caused by various factors, such as loose bulbs, loose connections, voltage fluctuations, or a faulty light switch. Start by checking and tightening the bulbs. If the problem persists, inspect the connections and switch. If needed, consult an electrician to identify and address the underlying cause.
Remember, working with electricity can be dangerous, so always prioritize your safety. If you’re unsure about any electrical troubleshooting procedure or if the issue seems complex, it’s best to consult a licensed electrician. They have the knowledge and experience to diagnose and fix electrical problems safely and effectively.
By troubleshooting common electrical problems, you can often resolve minor issues on your own or know when to seek professional assistance, ensuring the safety and functionality of your electrical system.
Now that we have covered troubleshooting common electrical problems, let’s conclude our comprehensive guide to basic electrical wiring skills every homeowner should master.
Conclusion
Congratulations! You’ve now gained a comprehensive understanding of basic electrical wiring skills that every homeowner should master. By learning these essential skills, you can confidently tackle small electrical projects, troubleshoot common issues, and enhance the functionality and safety of your home’s electrical system.
We began by exploring the fundamental principles of electrical wiring, including electrical current, voltage, resistance, and different types of electrical circuits. Understanding these concepts provides a solid foundation for working with electricity.
We then delved into the tools and equipment needed for basic electrical wiring tasks. Having the right tools not only makes the job easier but also ensures your safety throughout the process.
Safety precautions are crucial when working with electricity, and we discussed the importance of turning off the power, using proper insulation, avoiding overloading circuits, and wearing appropriate safety gear.
Identifying electrical circuits in your home allows you to troubleshoot issues more effectively, and we provided tips on how to do so, including checking the electrical panel, inspecting outlets and switches, and following the wiring.
Furthermore, we explored different types of electrical wiring systems, such as knob and tube wiring, aluminum wiring, copper wiring, and various cable types. Having knowledge of these systems helps you make informed decisions when it comes to repairs and renovations.
We then provided step-by-step guides on installing electrical outlets, replacing a light switch, installing a ceiling fan, and installing a light fixture. These practical guides empower you to take on these common tasks with confidence.
Finally, we discussed troubleshooting common electrical problems, such as power outages, intermittent power loss, overloaded circuits, electrical shocks, malfunctioning outlets or switches, and flickering lights. Knowing how to troubleshoot these issues enables you to identify and resolve them efficiently.
Remember, while this guide provides valuable information, it is always important to prioritize safety and consult a licensed electrician if you are uncertain or uncomfortable with any electrical task.
By mastering these basic electrical wiring skills, you have the ability to handle simple electrical tasks, save money on professional repairs, and maintain a safe and functional electrical system in your home. So go forth with confidence and enjoy the rewards of your newfound knowledge!
Frequently Asked Questions about The Basic Electrical Wiring Skills Every Homeowner Should Master
Was this page helpful?
At Storables.com, we guarantee accurate and reliable information. Our content, validated by Expert Board Contributors, is crafted following stringent Editorial Policies. We're committed to providing you with well-researched, expert-backed insights for all your informational needs.


0 thoughts on “The Basic Electrical Wiring Skills Every Homeowner Should Master”