Home>Articles>Why Is My Garage Door Not Responding To Remote?
Articles
Why Is My Garage Door Not Responding To Remote?
Modified: August 28, 2024
Find articles on why your garage door is not responding to the remote and learn how to troubleshoot it. Take control of your garage door with these helpful tips.
(Many of the links in this article redirect to a specific reviewed product. Your purchase of these products through affiliate links helps to generate commission for Storables.com, at no extra cost. Learn more)
Introduction
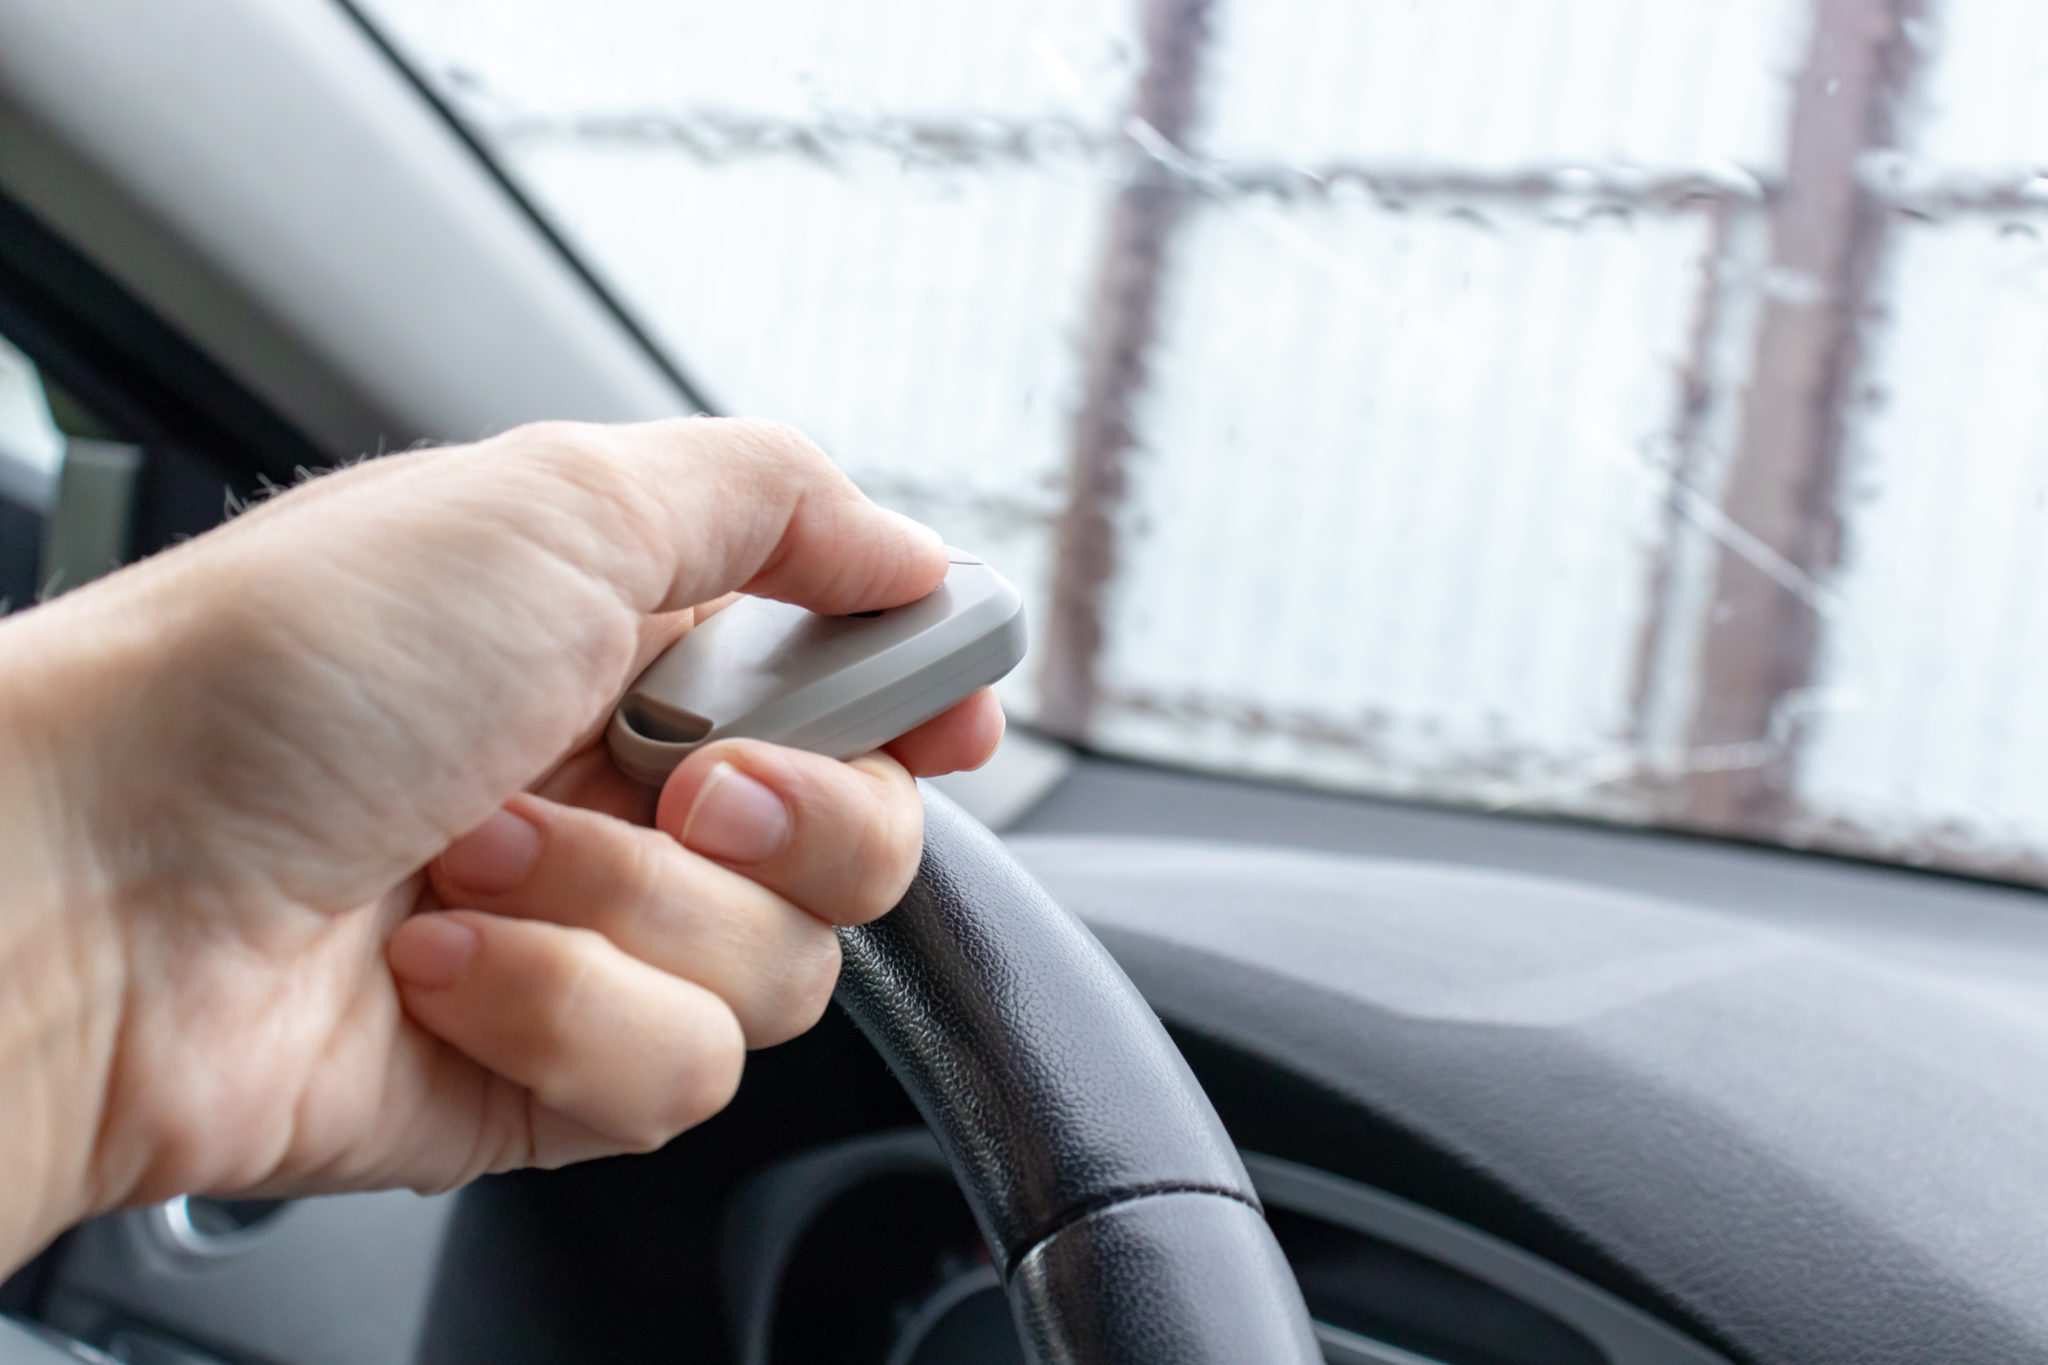
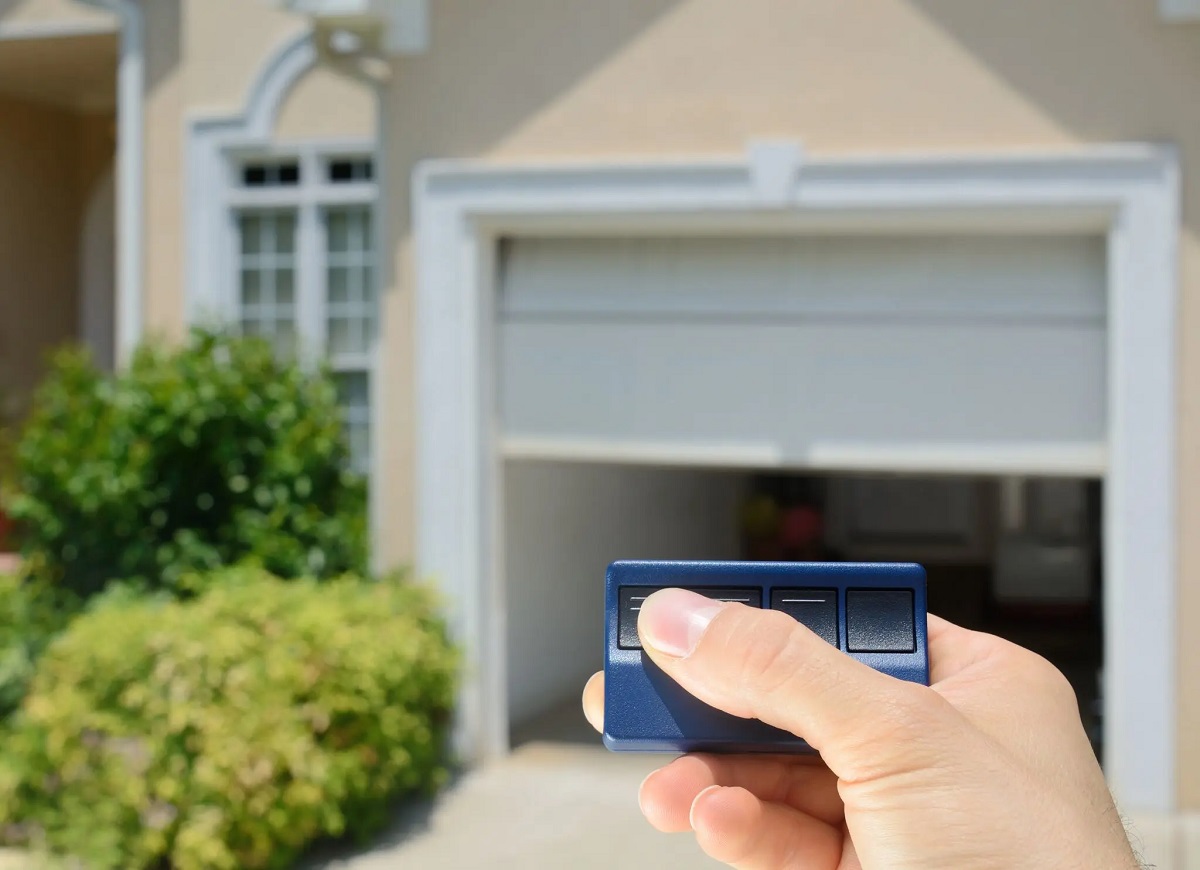
A garage door remote provides convenience and security, allowing you to easily open and close your garage door without leaving your vehicle. However, it can be frustrating when your garage door fails to respond to the remote, leaving you stranded outside or unable to secure your garage.
There can be several reasons why your garage door remote is not working as expected. In this article, we will explore the common issues that may cause your garage door remote to fail and provide you with practical solutions to fix the problem.
Whether you have a brand new garage door system or a well-used one, these troubleshooting methods will help you regain control over your garage door and get it functioning properly again.
So let’s dive into the most common reasons why your garage door is not responding to the remote control and discover how to resolve these issues.
Key Takeaways:
- Ensure your garage door remote is always responsive by checking and replacing the batteries regularly, minimizing interference from other devices, and reprogramming the opener for seamless operation.
- Troubleshoot and address common issues such as faulty receiver, wiring problems, and range limitations to restore the functionality of your garage door remote and enjoy hassle-free access to your garage.
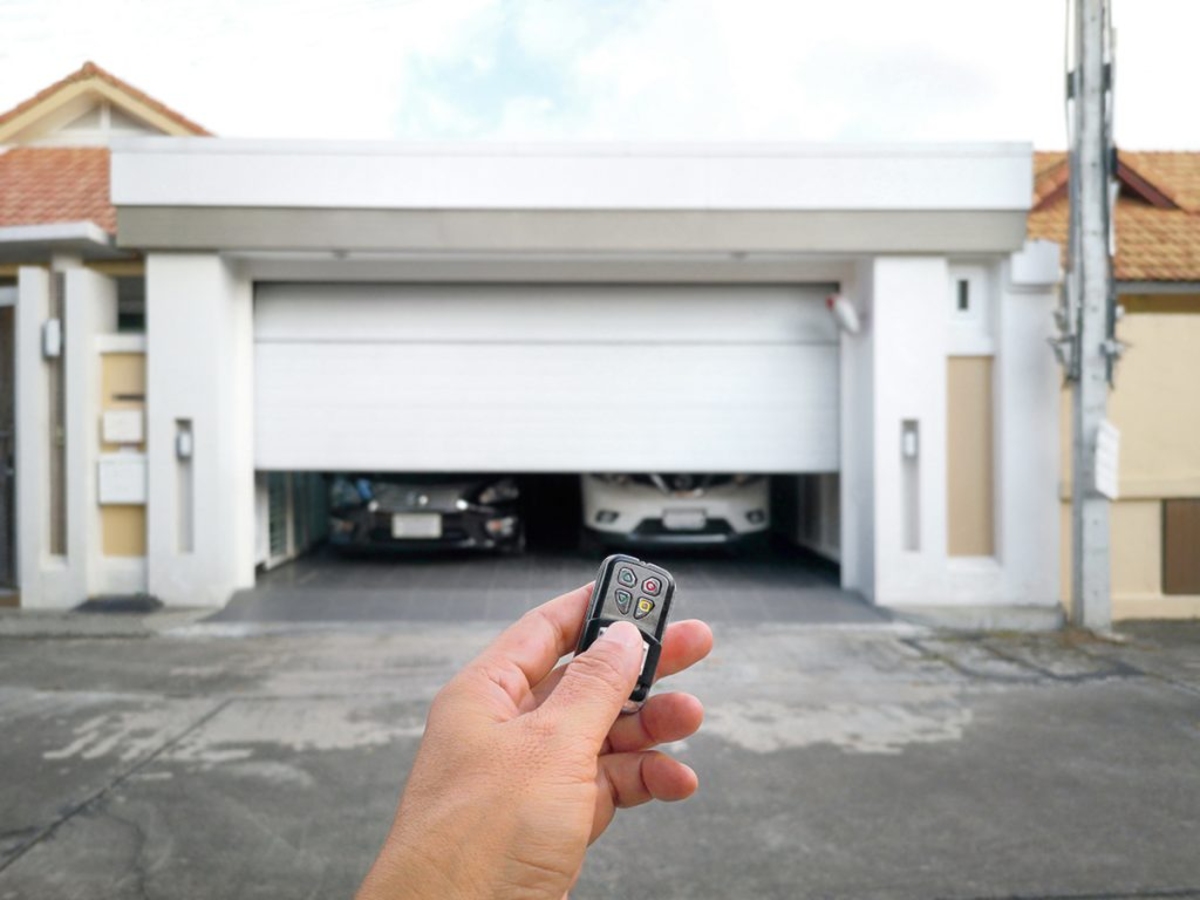
Common Reasons for Garage Door Remote Failure
When your garage door remote stops working, it can be frustrating and inconvenient. Fortunately, many of the common reasons for remote failure can be easily addressed. Here are some potential causes to consider:
- Issues with Remote Batteries: One of the most common reasons for a garage door remote not responding is simply dead or weak batteries. Over time, the batteries in your remote may lose their power and need to be replaced. Check the battery compartment and replace the batteries with fresh ones to see if this resolves the issue.
- Interference from Other Devices: Sometimes, your remote’s signals can be disrupted by other wireless devices operating on similar frequencies, such as baby monitors or cordless phones. If you recently added a new electronic device to your home, try moving it away from the garage or turning it off temporarily to see if it resolves the problem.
- Programming Issues: If your garage door opener and remote were working fine before but suddenly stopped, it could be a programming issue. Over time, the programming of the remote control or the opener itself may get out of sync. Refer to your garage door opener manual for instructions on how to reprogram the remote and reconnect it to the opener’s receiver.
- Faulty Garage Door Opener Receiver: In some cases, the issue may lie with the garage door opener receiver. The receiver acts as a bridge between the remote control and the garage door opener. If the receiver is faulty or malfunctioning, it may not be able to receive the signals from the remote control. Consult a professional technician to diagnose and replace the faulty receiver if necessary.
- Wiring Problems: Another potential cause of garage door remote failure is a wiring problem. Over time, the wires connecting the opener and the receiver may become damaged, frayed, or disconnected. Carefully inspect the wiring and look for any signs of damage. If you spot any issues, it’s best to contact a professional electrician or garage door technician to repair or replace the wiring.
- Range Limitations: The range of your garage door remote control can vary depending on the specific model and manufacturer. If you find that the remote only works when you are very close to the garage, it could be a range limitation issue. Consider upgrading to a remote with a longer range or installing a signal repeater to extend the remote’s reach.
These are some of the common reasons why your garage door remote may not be responding. By addressing these issues, you can increase the chances of resolving the problem without the need for professional assistance. However, if you have tried these troubleshooting methods and the issue persists, it may be time to consult a garage door professional for further diagnosis and repair.
Issues with Remote Batteries
One of the most common reasons for a garage door remote not responding is issues with the batteries. Over time, the batteries in your remote may lose their power and become weak, leading to malfunctioning or non-responsive remote control. Here’s what you need to know about remote battery issues and how to address them:
1. Check the battery compartment: Start by checking the battery compartment of your remote to ensure that the batteries are properly inserted and making good contact with the terminals. Sometimes, a loose connection or incorrect placement of the batteries can result in a loss of power and prevent the remote from working.
2. Replace the batteries: If your batteries are low on power or completely dead, replace them with new ones. It’s important to use the correct type and size of batteries specified by your remote control manufacturer. Typically, garage door remotes use AAA or AA batteries.
3. Test the remote after battery replacement: Once you have replaced the batteries, test the remote to see if it is now functioning properly. Stand within range of your garage door opener and press the buttons on the remote to open and close the garage door. If the remote still doesn’t work, proceed to the next steps.
4. Clean the battery contacts: Over time, dirt and corrosion can build up on the battery contacts inside the remote. This can interfere with the electrical connection and cause the remote to malfunction. Use a clean cloth or a small brush to gently clean the battery contacts. Ensure they are free from any dirt or debris before inserting new batteries.
5. Try a different set of batteries: Sometimes, even brand new batteries can be defective or have a low charge. If you have recently replaced the batteries with new ones and the remote is still not working, try another set of fresh batteries to rule out the possibility of a faulty batch.
6. Consider rechargeable batteries: If you find that your remote goes through batteries quite frequently, it may be worth considering using rechargeable batteries. Not only can this save you money in the long run, but it also reduces the environmental impact of disposable batteries.
By addressing battery-related issues, you can often resolve problems with your garage door remote control. However, if you have tried replacing the batteries and the remote is still not responding, there may be other underlying issues that require further investigation and troubleshooting.
Interference from Other Devices
Another common reason why your garage door remote may not be responding is interference from other devices in your home. Wireless devices operating on similar frequencies can disrupt the signals between the remote control and the garage door opener, resulting in unreliable or non-responsive operation. Here’s what you need to know about interference and how to address it:
1. Identify potential sources of interference: Take note of any recently added wireless devices in your home, such as baby monitors, cordless phones, Wi-Fi routers, or other electronic gadgets. These devices can operate on the same frequency band as your garage door opener, potentially causing interference.
2. Move or turn off interfering devices: If you suspect that a specific device is causing interference, try moving it further away from the garage or turning it off temporarily. This can help determine if the device is indeed causing the problem. Alternatively, you can try repositioning your garage door opener or remote to minimize the distance and potential obstruction between them.
3. Change the frequency settings: Some garage door openers offer the ability to change the frequency settings to avoid interference. Check the opener’s manual or consult a professional to see if this is possible. However, keep in mind that changing the frequency may require reprogramming the remote control as well.
4. Upgrade to a remote with enhanced security features: Some newer garage door remotes utilize rolling code technology, which changes the access code every time the remote is used. This technology not only enhances security but also reduces the likelihood of interference from other devices. Consider upgrading to a rolling code remote if interference is a recurring issue for you.
5. Use a signal repeater or range extender: If you have a large garage or your remote has limited range, using a signal repeater or range extender can help boost the signal strength and extend the range. These devices can be installed near the garage door opener to enhance the remote’s effectiveness.
By addressing potential interference from other devices, you can improve the reliability and responsiveness of your garage door remote. However, if interference continues to be an issue, it may be worth consulting a professional technician for further assistance and advice on mitigating the interference.
Programming Issues
Programming issues can often cause your garage door remote to stop responding. Over time, the programming between the remote control and the garage door opener may become out of sync or get reset, resulting in a loss of functionality. Here’s what you need to know about programming issues and how to resolve them:
1. Refer to the manufacturer’s instructions: Consult the user manual or programming instructions provided by the manufacturer of your garage door opener. The specific steps for programming the remote control can vary depending on the model and brand. Follow the instructions carefully to ensure correct programming.
2. Reset the remote control: If you suspect a programming issue, try resetting the remote control and reprogramming it from scratch. This can be done by locating the “learn” or “program” button on the garage door opener. Press and hold this button until the indicator light starts flashing, then follow the steps to program the remote control.
3. Check the remote control battery: Ensure that the batteries in your remote control are fresh and properly inserted. Weak or dead batteries can affect the programming process. If necessary, replace the batteries and attempt the programming steps again.
4. Clear out old programming codes: In some cases, there may be old programming codes stored in the garage door opener’s memory, causing conflicts with the remote control. Follow the manufacturer’s instructions to clear out any old codes before reprogramming the remote control.
5. Follow the proper sequence: When programming the remote control, it is important to follow the correct sequence of steps. Be patient and allow ample time for each step to be completed before moving on to the next. Rushing through the process may result in unsuccessful programming.
6. Test the remote control after programming: Once you have successfully programmed the remote control, test it to ensure it is working correctly. Stand within range of the garage door opener and press the buttons on the remote to open and close the garage door. If the remote is still not responding, proceed to the next troubleshooting steps.
If you are unsure of the programming process or have tried the above steps without success, it may be helpful to consult the manufacturer’s customer support or contact a professional garage door technician for further assistance. They can provide guidance specific to your garage door opener model and help resolve any programming issues.
Read more: Why Is My Garage Door Opener Beeping
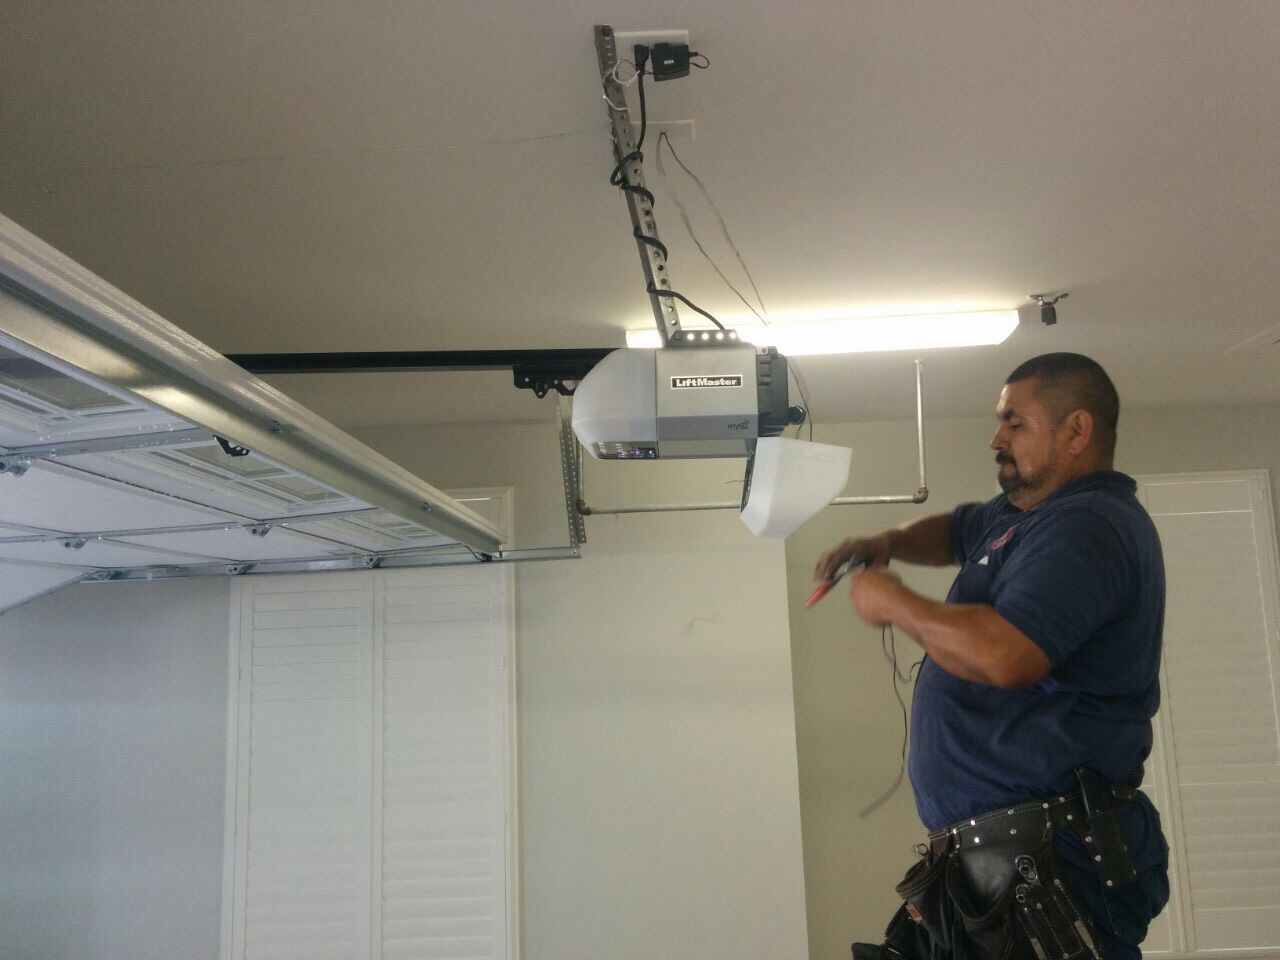
Faulty Garage Door Opener Receiver
A faulty garage door opener receiver can be another reason why your garage door remote is not responding. The receiver serves as a communication hub between the remote control and the garage door opener, relaying the signals and commands. If the receiver is malfunctioning or defective, it can prevent the remote control from operating properly. Here’s what you need to know about a faulty garage door opener receiver and how to address it:
1. Check for power and connectivity: Start by ensuring that the garage door opener receiver is receiving power and has a proper connection. Make sure it is plugged in securely and that there are no loose wires or damaged connectors.
2. Reset the receiver: Some garage door openers have a reset button or switch on the receiver itself. Try resetting the receiver by pressing the reset button or flipping the switch. Refer to the manufacturer’s instructions for the exact location and procedure.
3. Test the receiver with another remote: To determine if the problem lies with the receiver, try using a different remote control to operate the garage door opener. If the other remote works fine, it indicates that the original remote may be at fault. However, if neither remote works, the issue is likely with the receiver.
4. Replace the receiver: If you have identified that the garage door opener receiver is faulty, it will need to be replaced. Contact the manufacturer or a professional garage door technician to obtain a compatible replacement receiver. Follow the installation instructions carefully to ensure proper connection and programming.
5. Consult a professional technician: If you’re not comfortable replacing the receiver yourself or if the problem persists even after replacing it, it is advisable to consult a professional garage door technician. They have the expertise and knowledge to diagnose and address complex issues related to the garage door opener receiver.
Remember, dealing with electrical components can be dangerous, so exercise caution and, if necessary, seek professional assistance if you are unsure about handling the receiver replacement process.
By addressing a faulty garage door opener receiver, you can restore the functionality of your garage door remote and regain control over your garage door. Whether it’s a malfunctioning power connection or a defective receiver, taking the necessary steps to resolve the issue will ensure smooth and reliable operation of your garage door system.
Wiring Problems
Wiring problems can cause issues with your garage door remote control. Over time, the wires connecting the garage door opener and the receiver can become damaged, frayed, or even disconnected, resulting in a loss of communication and non-responsive remote control. Here’s what you need to know about wiring problems and how to address them:
1. Inspect the wiring: Start by visually inspecting the wiring between the garage door opener and the receiver. Look for any signs of damage, such as frayed or exposed wires, loose connections, or disconnected wires. Ensure that all wires are properly secured and in good condition.
2. Repair or replace damaged wiring: If you notice any damaged wires, it’s essential to repair or replace them. Use electrical tape or wire connectors to repair small damages. For more severe damage, it may be necessary to replace the affected section of wiring. If you are not confident in handling electrical repairs, it’s best to consult a professional electrician or garage door technician.
3. Verify proper wire connections: Make sure that all wire connections between the garage door opener and the receiver are secure and tight. Loose or poorly connected wires can disrupt the flow of electrical signals and cause the remote control to malfunction. Double-check that the wires are correctly connected based on the manufacturer’s wiring diagram or instructions.
4. Test the remote control: Once you have inspected and addressed any potential wiring issues, test the remote control to see if it is working correctly. Stand within range of the garage door opener and press the buttons on the remote to open and close the garage door. If the remote is still not responding or experiencing intermittent issues, further troubleshooting may be required.
5. Contact a professional electrician or garage door technician: If you have tried inspecting and repairing the wiring but the problem persists, it is recommended to seek assistance from a professional electrician or garage door technician. They have the expertise and specialized equipment to diagnose and resolve complex wiring problems.
Wiring problems can be challenging to diagnose and fix, especially for individuals without experience in electrical repairs. It’s always better to err on the side of caution and seek professional assistance if you are unsure about addressing wiring issues.
By ensuring that the wiring between the garage door opener and the receiver is in good condition and properly connected, you can eliminate potential wiring-related problems and restore the functionality of your garage door remote control.
Range Limitations
Range limitations can be a common reason why your garage door remote control is not responding. The range of your remote control can vary depending on various factors, such as the specific model and manufacturer. Limited range can make it difficult to operate the garage door from a distance, resulting in a non-responsive remote control. Here’s what you need to know about range limitations and how to address them:
1. Determine the range of your remote control: Consult the user manual or check the manufacturer’s specifications to determine the effective range of your remote control. Keep in mind that obstacles like walls, doors, and other structures can reduce the range.
2. Ensure you are within range: Make sure you are standing within the recommended range when operating the remote control. If you are too far away, the signals may not reach the receiver effectively, resulting in a non-responsive remote control.
3. Replace batteries: Weak or low batteries in the remote control can also impact its range. Replace the batteries with fresh ones and test the remote control to see if it improves the range. Ensure that you are using the correct type and size of batteries recommended by the manufacturer.
4. Check the antenna: Some garage door openers have an adjustable antenna to improve signal reception. Make sure the antenna is fully extended and positioned correctly for optimal performance. Adjusting the antenna’s angle may help improve the range.
5. Install a signal repeater: If the range limitation persists, consider installing a signal repeater or range extender. These devices can amplify the signals from the remote control, allowing for an extended range. Consult with a professional or check with the manufacturer for compatibility and installation instructions.
6. Upgrade to a remote with longer range: If you frequently encounter range limitations, you may consider upgrading to a remote control with a longer range. Some manufacturers offer remote controls that are specifically designed to provide a greater operating range. Research different options and choose one that suits your needs and garage setup.
By addressing range limitations, you can ensure that your garage door remote control operates reliably and effectively. Whether it involves replacing batteries, adjusting the antenna, or exploring signal repeaters or upgraded remotes, improving the range can enhance your overall garage door experience.
Check the batteries in the remote and replace them if necessary. Also, make sure the antenna on the garage door opener is properly aligned and not blocked by any obstructions.
Fixing Garage Door Remote Issues
Experiencing issues with your garage door remote can be frustrating, but fortunately, many common problems can be resolved without the need for professional assistance. Here are some practical steps you can take to fix your garage door remote issues:
1. Check and replace remote batteries: Start by checking the batteries in your remote control. Dead or weak batteries are a common culprit for non-responsive remotes. Replace the batteries with fresh ones and test the remote to see if it starts working again.
2. Ensure no interference from other devices: Other wireless devices operating on similar frequencies can interfere with the signals of your remote control. Move any potential sources of interference away from the garage or turn them off temporarily to see if it improves the remote’s functionality.
3. Reprogram the garage door opener: Over time, the programming of the remote control and the opener may get out of sync. Consult your garage door opener’s manual for instructions on how to reprogram the remote control and reconnect it to the opener’s receiver. Follow the steps carefully to ensure successful reprogramming.
4. Troubleshoot the garage door opener receiver: If reprogramming doesn’t resolve the issue, the problem may lie with the garage door opener receiver. Check the power and connectivity of the receiver, and if necessary, reset it according to the manufacturer’s instructions. If the receiver is faulty, it may require replacing.
5. Inspect and repair wiring: Examine the wiring between the garage door opener and the receiver for any damage or loose connections. Repair or replace any damaged wires and ensure all connections are secure. If you are unsure about handling electrical repairs, seek assistance from a professional.
6. Extend the range of the remote signal: If you find that the range of your remote control is limited, try replacing the batteries, adjusting the antenna, or installing a signal repeater or range extender to improve the signal’s strength and extend the range.
By following these steps and troubleshooting methods, you can often resolve common issues with your garage door remote. However, if the problem persists or if you are uncomfortable performing these troubleshooting steps yourself, it is recommended to seek assistance from a professional garage door technician. They have the expertise and tools to diagnose and fix more complex remote control issues.
Remember to always prioritize safety and consult manufacturer’s instructions or seek professional guidance when necessary to ensure proper and effective resolution of garage door remote issues.
Read more: Why Is My Garage Door Opening By Itself
Check and Replace Remote Batteries
One of the most common reasons why a garage door remote fails to work is due to issues with the batteries. Over time, the batteries in your remote control can lose their power, causing the remote to become weak or non-responsive. Here’s what you need to know about checking and replacing the batteries in your remote control:
1. Access the battery compartment: Locate the battery compartment on your garage door remote control. Depending on the model, you may need to slide open a panel, remove a cover, or twist a cap to access the batteries.
2. Inspect the battery contacts: Take a moment to examine the metal contacts inside the battery compartment. Ensure that they are clean and free from any corrosion or debris. If you see any buildup, you can use a clean cloth or a cotton swab slightly dipped in rubbing alcohol to gently clean the contacts.
3. Remove the old batteries: Carefully remove the old batteries from the remote control. Make note of their orientation or take a picture to ensure correct placement of the new batteries.
4. Choose the correct replacement batteries: Refer to the manufacturer’s instructions or check the old batteries’ markings to determine the correct type and size for replacement. Garage door remotes typically use AAA or AA batteries.
5. Insert the new batteries: Insert the fresh batteries into the battery compartment, paying attention to their proper orientation. Ensure that the positive (+) and negative (-) ends align correctly with the markings or symbols inside the compartment.
6. Test the remote control: After replacing the batteries, test the remote control by pressing the buttons. Stand within range of your garage door opener and observe if the remote successfully opens or closes the garage door. If it works, you have successfully resolved the issue. However, if the remote is still not responding, there may be other factors contributing to the problem which need to be addressed.
7. Battery maintenance and replacement schedule: To avoid future remote control issues, it’s a good idea to establish a regular battery maintenance and replacement schedule. Replace the batteries periodically, even if they still seem to be working, as they may lose their power gradually. Consider setting a reminder or mark your calendar for routine battery replacements every six months to a year.
By regularly checking and replacing the batteries in your garage door remote control, you can ensure optimal performance and minimize the chances of experiencing issues with remote control functionality. Remember to choose high-quality batteries from reputable brands to maximize their lifespan and effectiveness.
Ensure No Interference from Other Devices
Interference from other devices can disrupt the signals between your garage door remote control and the opener, leading to non-responsive or unreliable operation. To ensure that there is no interference affecting your remote control, follow these steps:
1. Identify potential sources of interference: Take note of any recently added wireless devices in your home that may be operating on similar frequencies as your garage door opener. Common sources of interference include Wi-Fi routers, cordless phones, baby monitors, and even some electronic gadgets. Keep in mind that the specific frequency range can differ among different models and manufacturers.
2. Move or turn off interfering devices: If you suspect that a specific device is causing interference, try moving it further away from your garage or temporarily turning it off. This will help you determine if the device is indeed causing the problem. Even a slight relocation or powering down of these devices can make a significant difference in reducing interference.
3. Change wireless channels: If you are using a wireless router or any other wireless devices that allow you to switch channels, consider changing the channel to a less congested one. This can minimize the chances of overlapping frequencies between your garage door opener and other devices, reducing the likelihood of interference.
4. Upgrade to devices with better frequency management: If interference continues to be a persistent issue, consider upgrading to newer garage door opener models or remotes that incorporate advanced frequency management techniques. These technologies, such as rolling code or hopping code systems, are designed to mitigate interference and enhance the security and reliability of the remote control signals.
5. Test the remote control: After ensuring there are no nearby sources of interference, test the remote control to see if it is now functioning properly. Stand within range of your garage door opener and press the buttons to operate the door. If the remote control works without any issues, then interference was likely the cause of the problem.
6. Consult a professional if interference persists: If you have taken all the necessary steps to eliminate interference but the problem persists, it may be beneficial to consult a professional garage door technician. They can assess your specific situation and provide additional guidance on identifying and resolving interference-related problems.
By identifying and addressing potential interference sources, you can enhance the performance and reliability of your garage door remote control. Taking proactive steps to minimize interference will ensure a smoother and more consistent operation, providing you with the convenience and peace of mind you expect from your garage door system.
Reprogramming the Garage Door Opener
If your garage door remote control is not responding, one potential solution is to reprogram the garage door opener. Over time, the programming between the remote control and the opener may become out of sync or get reset, leading to a loss of functionality. Follow these steps to reprogram your garage door opener:
1. Refer to the manufacturer’s instructions: Locate the user manual or programming instructions provided by the manufacturer of your garage door opener. These instructions will guide you through the specific steps for reprogramming your particular model. It’s important to have the correct instructions for your specific garage door opener, as the process can vary between different brands and models.
2. Access the programming mode: Depending on your garage door opener, you may need to perform a specific sequence of button presses or access a programming mode. Refer to the instructions to determine how to access the programming mode on your particular opener. This typically involves pressing a series of buttons on the opener unit itself or using a remote control to activate the programming mode.
3. Clear existing programming codes: Once you are in the programming mode, you will need to clear any existing programming codes from the garage door opener. This ensures a fresh start for the reprogramming process. Follow the provided instructions to clear the existing codes, which may involve pressing a specific button or following a specific sequence of actions.
4. Program the remote control: With the previous programming codes cleared, it’s now time to program the remote control. For most garage door openers, this involves pressing a button on the opener unit and then pressing the desired button on the remote control to link them together. Follow the instructions carefully to ensure that the programming is successful.
5. Test the remote control: Once the programming is complete, it’s time to test the remote control to see if it is now functioning properly. Stand within range of the garage door opener and press the buttons on the remote control to open and close the garage door. If the remote control operates the door as expected, then the reprogramming process was successful.
6. Additional remote controls: If you have multiple remote controls, you may need to reprogram all of them to ensure they are synchronized with the garage door opener. Follow the same steps for each remote control, ensuring that they are properly linked to the opener.
If you encounter any difficulties during the reprogramming process or if the remote control still does not respond after reprogramming, consult the manufacturer’s customer support or contact a professional garage door technician for further assistance. They can provide specific guidance or perform more advanced troubleshooting to address any issues.
By reprogramming your garage door opener, you can often restore the functionality of your remote control and enjoy seamless operation of your garage door once again.
Troubleshooting the Garage Door Opener Receiver
If your garage door remote control is not responding, the problem may lie with the garage door opener receiver. The receiver acts as the communication hub between the remote control and the garage door opener motor. Here are some troubleshooting steps to help you identify and address potential issues with the receiver:
1. Check power and connections: Start by ensuring that the garage door opener receiver is receiving power. Check that it is securely plugged into a functioning power outlet. Inspect the power cord and connections for any damage or loose connections. If the receiver is not receiving power, try plugging it into a different outlet or replacing the power cord.
2. Reset the receiver: Some garage door openers have a reset button or switch on the receiver itself. Try resetting the receiver by pressing the reset button or flipping the switch, as indicated in the manufacturer’s instructions. Resetting the receiver can often resolve minor issues and restore its functionality.
3. Test with a different remote control: If you have another remote control for your garage door opener, try using it to operate the door. This will help determine whether the issue lies with the remote control or with the receiver. If the other remote control works fine, it indicates that the original remote control may be at fault. However, if neither remote control works, the problem is likely with the receiver or the opener itself.
4. Reprogram the receiver: If the receiver does not respond to any remote controls, try reprogramming it. Refer to the manufacturer’s instructions to understand how to enter the programming mode for your specific garage door opener. Once you are in the programming mode, follow the steps to reprogram the receiver. This process typically involves pressing a button on the opener and then pressing a corresponding button on the remote control to establish a connection.
5. Check for antenna issues: Some garage door openers have an antenna that receives the signals from the remote control. Ensure that the antenna is straight and not damaged. Adjust the position of the antenna to maximize signal reception. Straightening or repositioning the antenna can often improve the receiver’s performance and responsiveness.
6. Consult a professional technician: If you have tried the above troubleshooting steps and the receiver is still not responding, it may be time to consult a professional garage door technician. They have the expertise and specialized tools to diagnose and repair receiver issues. They can assess the receiver’s circuitry, wiring, or other internal components to identify any faults or malfunctioning parts that require repair or replacement.
Remember to prioritize safety throughout the troubleshooting process. If you are uncertain or uncomfortable with handling electrical components, it is best to seek assistance from a professional technician to avoid any potential hazards.
By troubleshooting the garage door opener receiver, you can identify and address issues that may be preventing your remote control from functioning correctly. A properly functioning receiver ensures reliable communication between the remote control and the garage door opener, providing you with smooth and convenient access to your garage.
Read more: Why Is My Canon Printer Not Responding
Inspect and Repair Wiring
Wiring problems can be a common cause of issues with your garage door remote control. Over time, the wires connecting the garage door opener and the receiver can become damaged, frayed or disconnected leading to communication failures and non-responsive remote control. Follow these steps to inspect and repair the wiring:
1. Disconnect power: Before working on any electrical components, ensure that the power to the garage door opener is turned off. This can be done by disconnecting the power cord from the electrical outlet or by flipping the appropriate switch in the breaker box.
2. Visually inspect the wiring: Carefully examine the wiring between the garage door opener and the receiver. Look for any visible signs of damage, such as frayed, exposed, or chewed wires. Pay close attention to areas where the wiring may pass through tight spaces or near moving parts, where it is more prone to wear and tear.
3. Repair or replace damaged wires: If you find any damaged wires, it is important to repair or replace them to restore proper functionality. For minor damage, you can use electrical tape to carefully cover the affected area. For more extensive damage, it may be necessary to replace the damaged section of wiring. It is recommended to use wires with similar specifications to the original ones.
4. Secure loose connections: Check for any loose or disconnected wire connections between the garage door opener and the receiver. Ensure that all wire connections are securely fastened using appropriate connectors or terminals. Tighten any screws or clamps that hold the wires in place to prevent them from coming loose in the future.
5. Test the remote control: After inspecting and repairing the wiring, test the remote control to see if it is working properly. Stand within range of the garage door opener and press the buttons on the remote control to open and close the garage door. If the remote control is functioning as expected, it indicates that the wiring repairs were successful.
6. Seek professional assistance if needed: If you are unsure about handling wiring repairs or if the issue persists even after repairing the wiring, it is recommended to consult a professional electrician or garage door technician. They have the expertise and knowledge to diagnose and repair complex wiring issues in a safe and efficient manner.
Remember to prioritize safety throughout the inspection and repair process. Always disconnect the power before working on any electrical components, and consider seeking professional assistance if you are uncertain or uncomfortable with handling wiring repairs.
By inspecting and repairing any damaged wiring, you can ensure reliable communication between the garage door opener and the remote control, allowing for seamless operation of your garage door system.
Extending the Range of the Remote Signal
If you’re experiencing range limitations with your garage door remote control, there are several steps you can take to extend its range and improve its effectiveness. Here are some methods to consider:
1. Check the batteries: Ensure that the batteries in your remote control are fresh and fully charged. Weak batteries can reduce the range of the remote. Replace the batteries regularly to maintain optimal performance.
2. Reposition the antenna: Many garage door openers have an adjustable antenna that can improve signal reception. Ensure that the antenna is extended fully and positioned vertically for optimal performance. Experiment with different angles to find the position that provides the best range.
3. Clear obstructions: Objects in the path between the remote and the garage door opener can obstruct the signal. Clear any obstacles, such as clutter or debris, that may be blocking the signal path. Ensure that there are no large metallic objects or walls that can interfere with the signal.
4. Replace the remote: If your current remote control has a limited range, consider upgrading to a remote with a stronger signal or longer range. Some manufacturers offer remote controls specifically designed for extended range. Check with the manufacturer or consult a professional to find a compatible remote for your garage door opener.
5. Install a signal repeater: A signal repeater or range extender can amplify the signal of your remote control, allowing it to reach a greater distance. These devices are typically installed in the garage or near the garage door opener. Consult the manufacturer or a professional technician for recommendations on signal repeaters that are compatible with your garage door opener model.
6. Avoid wireless interference: Other wireless devices operating on the same frequency as your garage door opener can interfere with the signal. Ensure that your remote control and garage door opener are operating on a unique frequency that is not being used by other devices in your home. Consult the manufacturer’s guide or a professional technician for information on adjusting the frequency settings.
7. Upgrade your garage door opener: If you’re still experiencing range limitations after trying the above methods, it may be time to consider upgrading your garage door opener. Newer models often come with improved technology and extended range capabilities. Consult a professional to find the best garage door opener model that suits your needs and offers a better range for your remote control.
By following these steps, you can extend the range of your garage door remote control and ensure reliable operation from a greater distance. Remember to consult the manufacturer’s instructions or seek professional guidance when needed to safely implement these range-extending methods.
Conclusion
A non-responsive or malfunctioning garage door remote control can be a frustrating experience. However, with a little troubleshooting and some practical steps, you can often resolve the issues and regain control over your garage door. Throughout this article, we have explored common reasons for garage door remote failure and provided solutions to fix them.
Inspecting and addressing potential issues such as remote batteries, interference from other devices, programming problems, faulty garage door opener receivers, wiring problems, and range limitations can help restore the functionality of your garage door remote control.
By checking and replacing remote batteries, ensuring no interference from other devices, reprogramming the garage door opener, troubleshooting the receiver, inspecting and repairing the wiring, and extending the range of the remote signal, you can overcome many common problems and enjoy the convenience and security of a properly working garage door system.
It is important to prioritize safety throughout the troubleshooting process. Whenever working with electrical components or if you are uncertain about any repairs, consult a professional garage door technician or electrician for assistance.
Remember that regular maintenance and periodic checks can prevent future issues with your garage door remote. Keep an eye on battery life, clear any obstructions, and address any interference sources promptly to optimize the performance and longevity of your remote control.
By taking these steps and following the troubleshooting methods outlined in this article, you can improve the reliability, range, and responsiveness of your garage door remote control, ensuring smooth and hassle-free operation for years to come.
So, don’t let a non-responsive garage door remote control get in the way of your convenience and security. Take action and troubleshoot the issues today!
Frequently Asked Questions about Why Is My Garage Door Not Responding To Remote?
Was this page helpful?
At Storables.com, we guarantee accurate and reliable information. Our content, validated by Expert Board Contributors, is crafted following stringent Editorial Policies. We're committed to providing you with well-researched, expert-backed insights for all your informational needs.


0 thoughts on “Why Is My Garage Door Not Responding To Remote?”