Home>Articles>How To Disconnect A Back Up Camera Electrical Cord From A 2015 Silverado
Articles
How To Disconnect A Back Up Camera Electrical Cord From A 2015 Silverado
Modified: August 28, 2024
Looking for articles on how to disconnect the electrical cord of a backup camera in a 2015 Silverado? Find step-by-step instructions and expert guidance here!
(Many of the links in this article redirect to a specific reviewed product. Your purchase of these products through affiliate links helps to generate commission for Storables.com, at no extra cost. Learn more)
Introduction
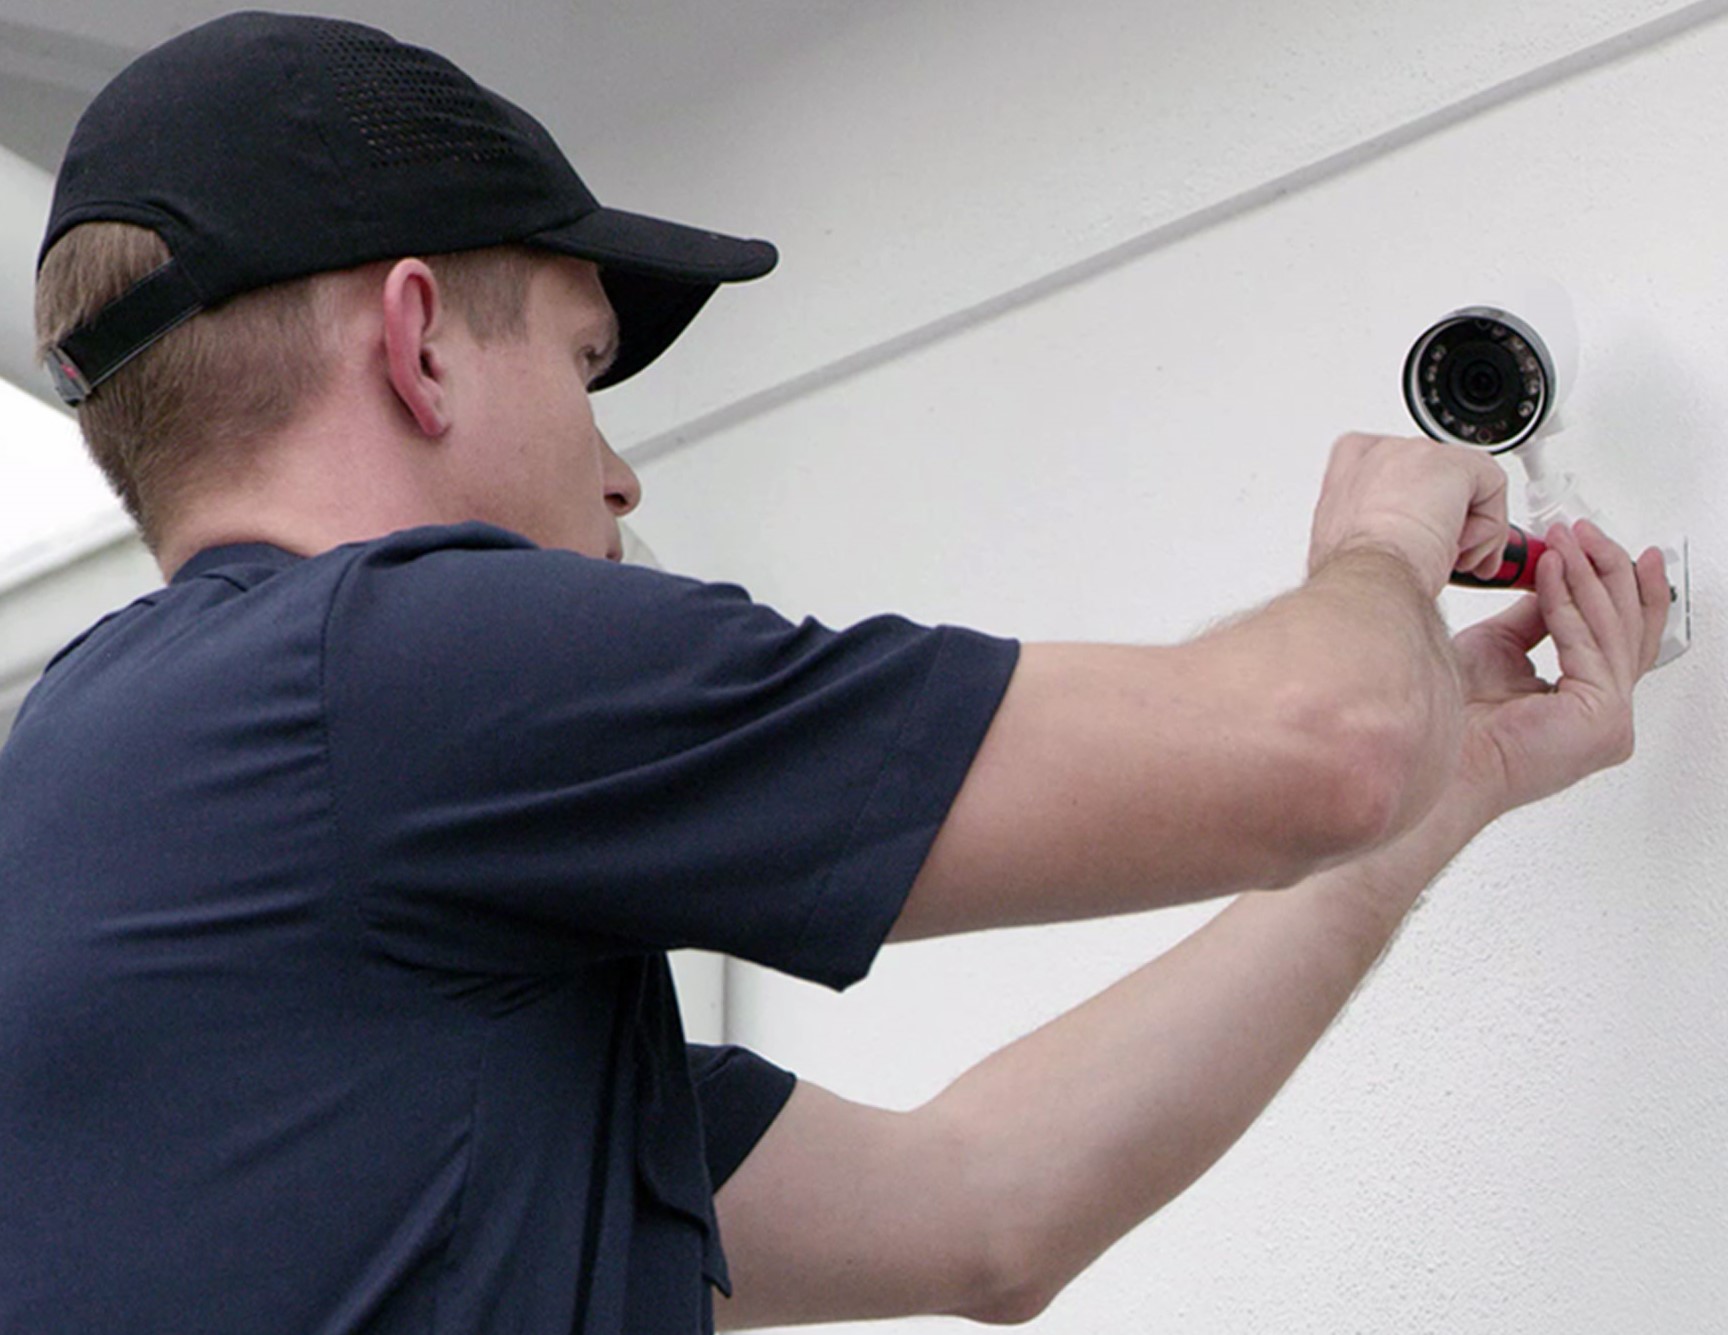
Having a back-up camera in your vehicle can greatly improve safety and make parking and reversing easier. However, there may be instances where you need to disconnect the electrical cord of your back-up camera, such as when replacing it or performing maintenance. In this article, we will guide you through the steps to disconnect a back-up camera electrical cord in a 2015 Silverado.
Before we begin, it’s important to note that working with electrical components requires caution. Make sure to follow these instructions carefully and, if you are unsure or uncomfortable, it’s always best to consult a professional.
Please be aware that this guide is specific to the 2015 Silverado model, and the steps may vary for other vehicles. Always consult your vehicle’s owner’s manual for specific instructions or refer to manufacturer guidelines.
Now, let’s get started with the process of disconnecting the back-up camera electrical cord.
Key Takeaways:
- Safely disconnecting a back-up camera electrical cord in a 2015 Silverado involves locating the cord, disconnecting the power source, and detaching the video connector, ensuring optimal safety and functionality.
- Thoroughly inspecting the electrical cord for damage and wear is crucial, and optional steps for reinstalling the back-up camera provide added convenience and safety for vehicle owners.
Read more: How To Disconnect A Hot Tub From Electricity
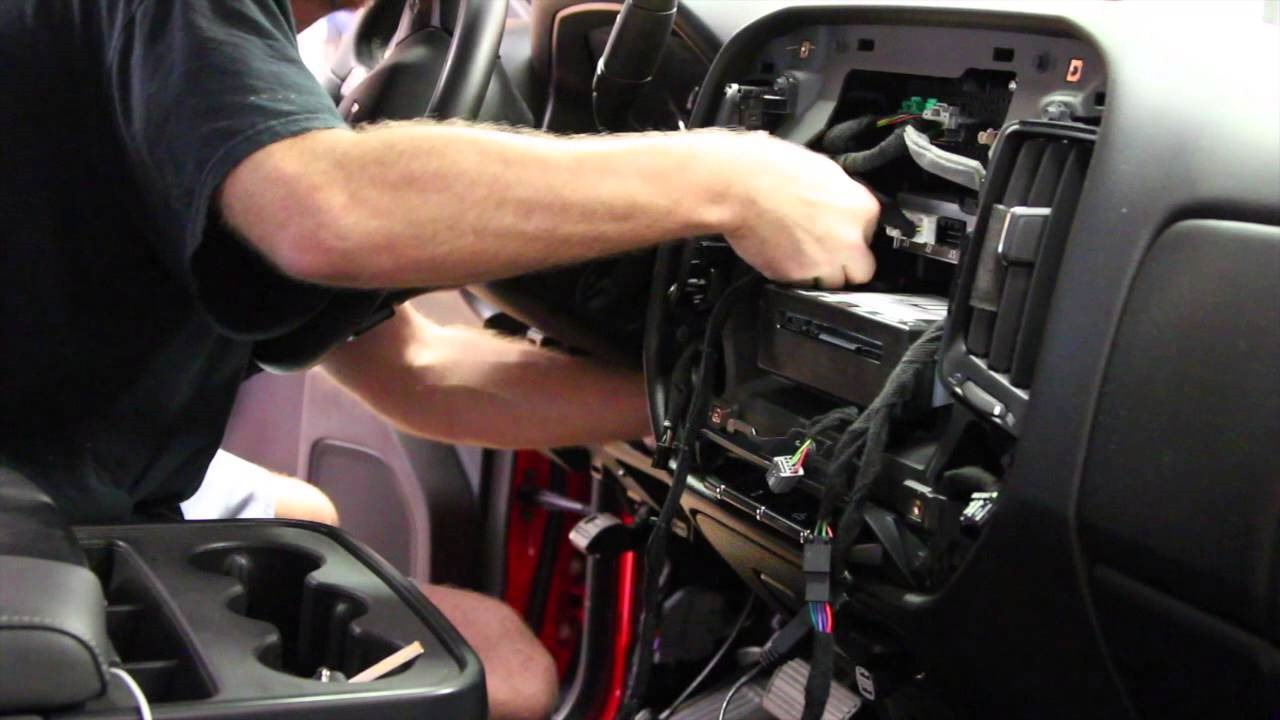
Step 1: Locate the back-up camera electrical cord
The first step in disconnecting the back-up camera electrical cord is to locate it. In most vehicles, the back-up camera is typically located near the rear license plate or on the rear bumper. Take a moment to visually inspect the back of your vehicle to find the camera.
Once you’ve located the back-up camera, follow the electrical cord from the camera itself to trace its path. The cord may be bundled with other wires or run along the vehicle’s frame.
In the 2015 Silverado, you can typically find the back-up camera electrical cord running from the camera housing up along the tailgate and into the interior of the vehicle.
Take note of any clips or fasteners that may be securing the electrical cord to the vehicle’s body. These will need to be removed in later steps to disconnect the cord.
It’s important to be gentle while handling the cord to avoid causing any damage or disconnecting it prematurely. If you’re having trouble locating the cord or are unsure, consult your vehicle’s owner’s manual or refer to manufacturer guidelines for specific instructions.
Once you’ve located the back-up camera electrical cord, you’re ready to move on to the next step.
Step 2: Disconnect the power source
Now that you have located the back-up camera electrical cord, the next step is to disconnect the power source. Disconnecting the power source ensures that there is no electrical current flowing to the camera, making it safe to proceed with further disconnection steps.
In the 2015 Silverado, the power source for the back-up camera is typically connected to the vehicle’s fuse box or directly to the wiring harness.
Start by locating the fuse box in your Silverado. The fuse box is usually found under the dashboard on the driver’s side or in the engine compartment. Consult your vehicle’s owner’s manual if you’re unsure about the exact location.
Once you’ve located the fuse box, open it and carefully inspect the fuse diagram or chart to identify the fuse corresponding to the back-up camera. The diagram will provide you with the fuse’s number or description, making it easier to locate.
With the correct fuse identified, use a pair of needle-nose pliers to gently pull out the fuse, effectively disconnecting the power supply to the back-up camera. Alternatively, you may find a dedicated connector or plug specifically for the back-up camera’s power source. If this is the case, simply unplug the connector.
Disconnecting the power source ensures that there is no risk of electrocution or accidental power to the camera while you proceed with further disconnection steps.
By following these steps, you have successfully disconnected the power source for the back-up camera in your 2015 Silverado.
Step 3: Disconnect the video connector
After disconnecting the power source, the next step is to disconnect the video connector of the back-up camera. The video connector is responsible for transmitting the camera’s video signal to the display screen in your vehicle.
In the 2015 Silverado, the video connector is typically located near the back-up camera housing or along the path of the electrical cord.
To disconnect the video connector, carefully examine the connector itself. It may be a plug or a set of wires with a specific connector at the end. Depending on the design, you may need to press on a release tab or gently pull on the connector to detach it from the corresponding port.
It’s essential to handle the connector with care and avoid pulling on the wires directly. Applying excessive force or mishandling the connector may cause damage to the wires or the connector itself.
Take note of any clips or fasteners that may be securing the video connector to the vehicle’s body or other components. These will need to be removed or undone to allow for a smooth disconnection.
Once you have successfully disconnected the video connector, inspect it for any signs of damage or wear. Check for loose wires, frayed insulation, or corrosion. If you notice any issues, it may be necessary to replace the connector to ensure proper functioning of the back-up camera.
By following these steps, you have effectively disconnected the video connector of the back-up camera in your 2015 Silverado.
Step 4: Remove any mounting brackets or fasteners
With the power source and video connector disconnected, the next step is to remove any mounting brackets or fasteners that are securing the back-up camera in place. These brackets or fasteners are typically used to hold the camera housing in position.
In the 2015 Silverado, the back-up camera may be attached to the rear bumper, the tailgate, or other areas near the camera housing.
Inspect the back of your vehicle to identify any mounting brackets or fasteners that are securing the back-up camera. These may be screws, bolts, or clips.
Using the appropriate tools, such as a screwdriver or wrench, carefully remove the mounting brackets or fasteners one by one. Make sure to keep them in a safe place to prevent misplacement.
Take note of the specific positions and orientations of the brackets and fasteners as you remove them. This will make the reinstallation process easier, should you choose to reinstall the back-up camera later on.
Be mindful of any wiring or cables that may be attached to the camera housing. These will need to be disconnected before completely removing the camera. Refer to Step 5 for instructions on detaching the electrical cord.
Once you have removed all the necessary mounting brackets or fasteners, the back-up camera housing should be free to move. Carefully hold the camera housing with one hand while disconnecting any remaining attachments in the following steps.
By following these steps, you have successfully removed the mounting brackets or fasteners that are securing the back-up camera in your 2015 Silverado.
Before disconnecting the electrical cord of the back-up camera on a 2015 Silverado, make sure to disconnect the vehicle’s battery to avoid any electrical mishaps.
Read more: How To Hook Electrical Cord Up To A Ballast
Step 5: Detach the electrical cord from the vehicle’s body
After removing the mounting brackets or fasteners, the next step is to detach the electrical cord from the vehicle’s body. This step involves disconnecting the cord from any clips, retainers, or anchors that are keeping it secured to the vehicle.
In the 2015 Silverado, the electrical cord of the back-up camera typically runs along the tailgate and into the interior of the vehicle. Take a close look at the cord to identify any clips or retainers that are holding it in place.
Using a suitable tool, such as a flathead screwdriver or trim panel removal tool, gently pry or release the clips or retainers that are securing the cord. Take care not to damage the cord or surrounding components while doing so.
As you detach the electrical cord, it may be necessary to move the cord slightly to access all the clips or retainers. Be patient and ensure that you disconnect the cord evenly without putting unnecessary strain on any particular section.
If the cord is held in place by anchors or securement points, carefully unscrew or unclip them to release the cord. Depending on the specific design, you may need to use a suitable tool or your fingers to accomplish this.
Once all the clips, retainers, and anchors are detached, the back-up camera’s electrical cord should be free from the vehicle’s body.
Take a moment to inspect the cord for any signs of damage or wear. Look for any exposed wires, frayed insulation, or cuts. If you notice any issues, it’s advisable to address them before reinstalling or replacing the back-up camera.
By following these steps, you have successfully detached the electrical cord from the vehicle’s body in your 2015 Silverado.
Step 6: Inspect for any damage or wear
After detaching the electrical cord from the vehicle’s body, it is important to inspect the cord for any signs of damage or wear. This step ensures that the back-up camera is in good condition and will function properly when reinstalled or replaced.
Take a close look at the entire length of the electrical cord. Check for any exposed wires, frayed insulation, cuts, or other visible damage. If you notice any issues, it is recommended to address them before proceeding with reinstalling the back-up camera.
If the electrical cord appears to be in good condition, it is still worth examining the connections and plugs. Ensure that there is no corrosion, loose connections, or bent pins. These can affect the quality of the electrical connection and potentially impact the performance of the back-up camera.
A thorough inspection at this stage will give you peace of mind knowing that you are reinstalling or replacing a back-up camera that is in optimal condition. It is always better to address any potential issues upfront to avoid any future complications or malfunctions.
If you do notice any damage or wear that requires repair or replacement, consult a professional or refer to the manufacturer’s guidelines for further assistance. They will be able to provide you with the appropriate steps and resources to rectify the issue.
By carefully inspecting the electrical cord for any damage or wear, you can ensure that the back-up camera is in the best possible condition when it is time to reinstall or replace it.
Step 7: Optional: Reinstalling the back-up camera
After disconnecting and inspecting the back-up camera electrical cord, you may choose to reinstall the back-up camera. This step is optional and depends on your specific needs, such as replacing a faulty camera or restoring functionality after maintenance or repair.
If you have determined that the back-up camera is in good condition and ready to be reinstalled, follow these steps:
- Begin by carefully routing the electrical cord back into its original position along the vehicle’s body.
- Attach any necessary clips, retainers, or anchors to secure the cord. Make sure they are properly fastened but not overly tight.
- Reconnect the video connector to its corresponding port. Ensure that it is aligned correctly and fully inserted.
- If required, reattach the mounting brackets or fasteners that hold the back-up camera housing in place. Use the notes you took during the removal process to guide you.
- Connect the power source back to the back-up camera. This may involve replacing the fuse or plugging in the connector, depending on the specific setup.
- Once everything is in place, test the back-up camera to ensure that it is functioning correctly. Engage the vehicle’s reverse gear and check the display screen for a clear and accurate image.
Remember to refer to your vehicle’s owner’s manual or manufacturer guidelines for specific instructions regarding the reinstallation process. These resources will provide you with any model-specific information or tips to ensure proper installation.
If you are unsure or uncomfortable with the reinstallation process, it is recommended that you consult a professional. They have the expertise and knowledge to ensure a safe and proper installation of the back-up camera.
By following these optional steps, you can reinstall the back-up camera in your 2015 Silverado and restore its functionality for added convenience and safety.
Conclusion
Disconnecting a back-up camera’s electrical cord may be necessary for various reasons, such as maintenance, replacement, or repair. By following the steps outlined in this guide, you can safely and effectively disconnect the back-up camera’s electrical cord in your 2015 Silverado.
Remember, it is crucial to exercise caution and follow the instructions carefully when working with electrical components. If you feel unsure or uncomfortable at any point during the process, it is always advisable to consult a professional to avoid any potential risks or damage.
From locating the back-up camera and disconnecting the power source to detaching the video connector and removing any mounting brackets or fasteners, each step plays a vital role in the disconnection process. Additionally, inspecting the cord for any damage or wear ensures that the back-up camera is in optimal condition.
If you choose to reinstall the back-up camera, make sure to follow the optional steps provided in this guide. Routing the electrical cord correctly, securing it in place, reconnecting the video connector, and testing the camera’s functionality are key in achieving a successful reinstallation.
Always refer to your vehicle’s owner’s manual or manufacturer guidelines for specific instructions tailored to your vehicle model. These resources offer valuable insights and additional details to ensure a smooth disconnection and potential reinstallation of the back-up camera.
Remember, maintaining and inspecting your back-up camera system regularly can help ensure its proper functionality and enhance your overall driving safety. If you encounter any issues or notice any abnormal behavior with your back-up camera, consult a professional for assistance.
By following the steps and guidelines provided in this article, you have gained valuable knowledge on how to disconnect a back-up camera electrical cord in the 2015 Silverado. Whether you are replacing the camera, performing maintenance, or exploring repair options, you are now equipped with the necessary information to confidently and safely navigate the disconnection process.
Frequently Asked Questions about How To Disconnect A Back Up Camera Electrical Cord From A 2015 Silverado
Was this page helpful?
At Storables.com, we guarantee accurate and reliable information. Our content, validated by Expert Board Contributors, is crafted following stringent Editorial Policies. We're committed to providing you with well-researched, expert-backed insights for all your informational needs.


0 thoughts on “How To Disconnect A Back Up Camera Electrical Cord From A 2015 Silverado”