
Articles
Why Is My HVAC Not Cooling
Modified: October 18, 2024
Discover articles on why your HVAC system may not be cooling and learn how to troubleshoot common issues affecting your cooling system.
(Many of the links in this article redirect to a specific reviewed product. Your purchase of these products through affiliate links helps to generate commission for Storables.com, at no extra cost. Learn more)
Introduction
Having a properly functioning HVAC (Heating, Ventilation, and Air Conditioning) system is essential for maintaining a comfortable indoor environment. Whether it’s the scorching summer heat or the bitter cold of winter, your HVAC system plays a crucial role in keeping your home cool or warm. However, there may be instances when you notice that your HVAC is not cooling your space as it should be.
Several factors can contribute to an HVAC system not cooling correctly. It is important to identify and address these issues promptly to ensure the optimal performance of your cooling system. In this article, we will delve into the common reasons why your HVAC may not be cooling effectively and provide troubleshooting tips to help you fix the problem.
Key Takeaways:
- Regularly replacing the air filter and addressing refrigerant leaks can significantly improve HVAC cooling efficiency, ensuring optimal airflow and preventing system strain.
- Consulting professionals for correct system sizing and addressing electrical issues are crucial steps in maintaining efficient HVAC cooling performance and ensuring a comfortable living environment.
Read more: Why Is My HVAC Making Noise
Common Reasons for HVAC Not Cooling
When your HVAC system fails to cool your home as expected, it can be frustrating and uncomfortable. Understanding the common culprits behind this problem can help you diagnose and resolve the issue more effectively. Here are some of the most common reasons why your HVAC may not be cooling:
- Dirty Air Filter: A clogged or dirty air filter can restrict airflow, preventing cool air from circulating effectively. Regularly changing or cleaning your air filter is crucial to ensure proper airflow and cooling efficiency.
- Refrigerant Leak: Refrigerant is essential for the cooling process in your HVAC system. If there is a refrigerant leak, it can lead to a decrease in cooling capacity. A qualified HVAC technician can locate and repair the leak and recharge the system with the necessary refrigerant.
- Faulty Thermostat: A malfunctioning thermostat can incorrectly sense the temperature in your home, leading to inconsistent cooling. Calibration or replacement of the thermostat may be required to ensure accurate temperature control.
- Blocked Air Vents: Obstructed or closed air vents can impede the airflow and prevent cold air from reaching certain areas in your home. Ensure that all vents are open and unobstructed for optimal cooling.
- Faulty Compressor: The compressor is responsible for circulating refrigerant and facilitating the cooling process. If the compressor is faulty or not functioning properly, it can result in inadequate cooling. Repair or replacement of the compressor may be necessary to restore proper cooling.
- Electrical Issues: Electrical problems such as tripped breakers, damaged wiring, or malfunctioning components can impact the performance of your HVAC system. Professional assistance is recommended to diagnose and resolve any electrical issues.
- Improper Insulation: Inadequate insulation in your home can lead to heat transfer, making it difficult for your HVAC system to cool your space effectively. Adding or improving insulation can help maintain a comfortable temperature.
- Oversized or Undersized HVAC Unit: A system that is either oversized or undersized for your space can result in inefficient cooling. A professional assessment can determine the correct sizing requirements for your home and help you select an appropriately sized HVAC unit.
Understanding these common reasons for your HVAC not cooling can help you troubleshoot the problem and take appropriate measures to rectify the issue. In the following sections, we will explore various troubleshooting techniques to address these cooling problems effectively.
Dirty Air Filter
A dirty air filter is one of the most common reasons why an HVAC system fails to cool effectively. The air filter’s primary function is to capture dust, debris, and other particles, preventing them from circulating through your home. Over time, the air filter accumulates dirt and becomes clogged, restricting the airflow.
When the airflow is restricted, the HVAC system has to work harder to push air through the clogged filter. This extra effort can strain the system, leading to reduced cooling performance. Additionally, a dirty air filter can cause poor indoor air quality and increased energy consumption.
To address the issue of a dirty air filter, follow these steps:
- Start by locating your HVAC system’s air filter. In most cases, the filter is situated near the air handler or the return air grill.
- Turn off your HVAC system to ensure your safety and prevent any dust or debris from circulating while you work on the filter.
- Gently remove the air filter from its housing. Take note of its size and type, as you will need this information to purchase a replacement filter.
- Inspect the removed air filter for dirt, dust, and debris. If it appears gray or visibly clogged, it requires cleaning or replacement.
- If your air filter is reusable, gently clean it using a vacuum cleaner or by rinsing it with water. Allow it to dry completely before reinstalling.
- If your air filter is disposable, dispose of it properly and replace it with a new filter of the same size and type. Ensure that the new filter is inserted in the correct direction, with the arrow indicating the airflow direction.
- Once the new or cleaned air filter is in place, securely close the air filter housing.
- Turn on your HVAC system and monitor its cooling performance. You should notice improved airflow and cooling efficiency with a clean air filter.
It is recommended to check and change your air filter regularly, typically every 1-3 months or as advised by the manufacturer. Regular maintenance of your air filter will help ensure proper airflow, improve indoor air quality, and enhance the cooling performance of your HVAC system.
Refrigerant Leak
A refrigerant leak is another common issue that can cause your HVAC system to fail in providing adequate cooling. Refrigerant is a substance that circulates within the coils and absorbs heat from the indoor air, cooling it down before releasing it back into your home. If there is a leak in the refrigerant lines, it can lead to a decrease in cooling capacity and inefficient operation of your HVAC system.
Signs of a refrigerant leak include reduced cooling performance, ice formation on the evaporator coil, and hissing noises coming from the refrigerant lines. If you suspect a refrigerant leak, it is important to address the issue promptly to prevent further damage to your system.
Here’s how you can troubleshoot and fix a refrigerant leak:
- Observe any visible signs of refrigerant leakage, such as oil stains or residue near the refrigerant lines or connections.
- If you suspect a refrigerant leak, it is recommended to contact a licensed HVAC technician as handling refrigerant requires expertise and specialized equipment.
- The HVAC technician will perform a thorough inspection of the refrigerant lines and system to identify the location and extent of the leak.
- Once the leak is located, the technician will repair or replace the damaged part or component, such as the refrigerant lines, coils, or connections.
- After the repair is complete, the HVAC technician will recharge the system with the appropriate amount of refrigerant to ensure optimal cooling efficiency.
- Regular maintenance and inspections by a professional can help identify refrigerant leaks early on and prevent them from causing significant damage to your HVAC system.
It is important to note that handling refrigerant and repairing refrigerant leaks should be left to trained professionals. Attempting to fix a refrigerant leak yourself can be dangerous and may lead to further damage to your system. Therefore, it is always best to consult with a licensed HVAC technician for proper diagnosis and repair of refrigerant leaks.
Faulty Thermostat
A faulty thermostat can be a significant factor contributing to an HVAC system not cooling properly. The thermostat is responsible for sensing the temperature in your home and signaling the HVAC system to turn on or off and adjust the cooling settings accordingly. If the thermostat is not functioning correctly, it may inaccurately sense the temperature, leading to inconsistent cooling performance.
Here are some steps to troubleshoot and fix a faulty thermostat:
- Check the power source: Ensure that the thermostat has power. If it is battery-operated, replace the batteries with fresh ones. If it is hardwired, check that the circuit breaker for the thermostat is not tripped.
- Calibrate the thermostat: Often, a misaligned thermostat calibration can lead to incorrect temperature readings. Consult the manufacturer’s instructions to calibrate the thermostat, or contact a professional HVAC technician to help with the calibration process.
- Check the location of the thermostat: The placement of the thermostat can affect its accuracy. Make sure it is located away from direct sunlight, heat sources, or drafts that could influence the temperature readings. Additionally, ensure that there are no objects obstructing the thermostat’s temperature sensor.
- Inspect and clean the thermostat: Dust and debris can accumulate on the thermostat and affect its performance. Gently clean the thermostat using a soft cloth or a brush to remove any dirt or debris that may be interfering with its operation.
- Upgrade to a smart thermostat: Consider upgrading to a programmable or smart thermostat. These devices offer advanced features such as remote access, scheduling, and temperature sensors, providing more accurate control over your HVAC system’s cooling settings.
- If troubleshooting steps do not resolve the issue, it may be necessary to replace the faulty thermostat. Consult a professional HVAC technician to select and install a new thermostat that is compatible with your system.
By troubleshooting and addressing faulty thermostat issues, you can ensure accurate temperature control and improve the cooling efficiency of your HVAC system. If you are uncertain about dealing with thermostat troubleshooting or replacement, it is recommended to seek professional assistance to avoid any potential complications or damage to your system.
Read more: Why Is My HVAC Not Heating
Blocked Air Vents
Blocked air vents can significantly affect the cooling performance of your HVAC system. Air vents, also known as supply vents, are responsible for distributing the cooled air from your HVAC system into your home. If these vents are obstructed or blocked, it can restrict the proper airflow, leading to inadequate cooling in certain areas of your home.
Here’s how you can troubleshoot and fix blocked air vents:
- Inspect your home’s air vents: Check each air vent in your home to ensure they are not blocked by furniture, rugs, curtains, or any other objects. Move these obstructions away from the air vents to allow for unrestricted airflow.
- Open any closed vents: If you have closed off any air vents in the past, ensure that they are open to allow for proper airflow throughout your home.
- Clean the air vents: Dust and debris can accumulate on the air vents, hindering the airflow. Use a vacuum cleaner with a brush attachment or a damp cloth to gently clean the air vents and remove any dirt or dust buildup.
- Check for blocked return air vents: Return air vents are responsible for pulling the warm air from your home back into the HVAC system to be cooled. Ensure that these vents are not blocked and are free from any obstructions.
- Inspect and clean ductwork: If you suspect that your air ducts are obstructed, it is recommended to contact a professional HVAC technician to inspect and clean the ductwork. Accumulated dirt, debris, or blockages in the ductwork can significantly affect airflow and cooling efficiency.
- Maintain proper ventilation: Ensure that your home has proper ventilation in areas such as the attic or crawl spaces. Proper ventilation helps with the circulation of air and promotes better cooling efficiency.
By addressing any blocked air vents, you can enhance the airflow and improve the cooling performance of your HVAC system. Regularly checking and maintaining the cleanliness of your air vents will help prevent future blockages and ensure optimal cooling throughout your home.
Faulty Compressor
The compressor is a vital component of your HVAC system responsible for circulating refrigerant and facilitating the cooling process. A faulty compressor can lead to inadequate cooling performance and even system failure. Several factors can contribute to a faulty compressor, including wear and tear, electrical issues, or mechanical failures.
If you suspect a faulty compressor, it is recommended to contact a professional HVAC technician as compressor repairs require specialized knowledge and equipment. Here are some troubleshooting steps and possible solutions for a faulty compressor:
- Check for power supply issues: Ensure that the HVAC system is receiving adequate power by checking the circuit breaker or fuse box. If the compressor is not receiving adequate power, it may fail to operate correctly. If you notice any issues with the power supply, contact an electrician to address the electrical problem.
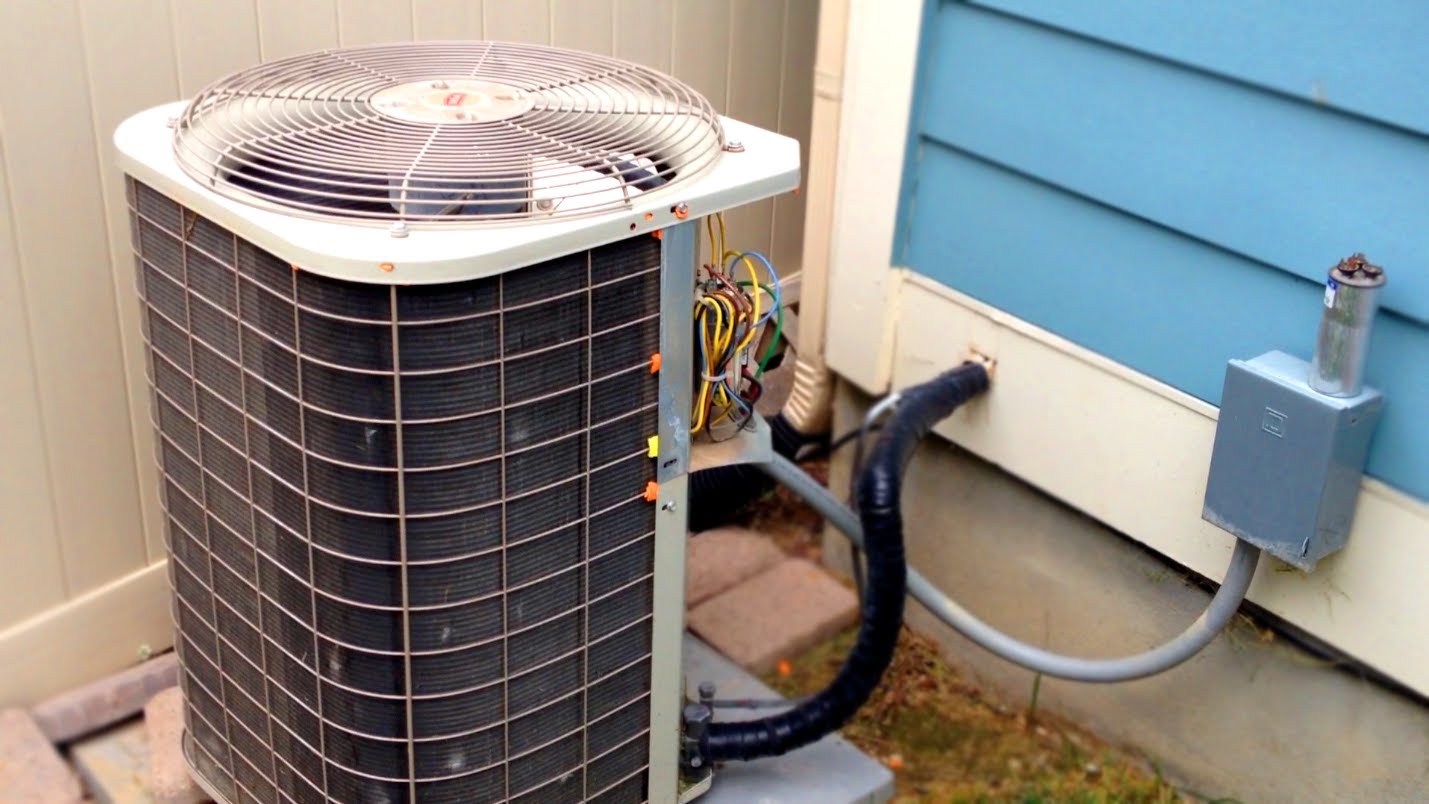
- Inspect and clean the outdoor unit: If the compressor is housed in the outdoor unit of your HVAC system, ensure that the unit is free from debris, dirt, and vegetation. Clean the coils and fins using a soft brush or hose to increase airflow and prevent overheating.
- Maintain recommended refrigerant levels: Low refrigerant levels can cause the compressor to work harder and may result in damage over time. If you suspect low refrigerant levels, contact an HVAC technician to inspect and recharge the system with the appropriate amount of refrigerant.
- Repair or replace faulty components: If the compressor is faulty due to a specific component, such as a faulty capacitor or worn-out fan motor, the technician may recommend repairing or replacing the affected part to restore proper operation.
- Consider compressor replacement: In some cases, if the compressor is severely damaged or beyond repair, it may be necessary to replace the entire compressor. This option is typically considered for older systems or instances where the cost of repair outweighs the cost of replacement.
- Regular maintenance: Regular maintenance by a trained HVAC technician can help identify and prevent potential compressor issues. Regular inspections and tune-ups can catch any problems early on and ensure the longevity and efficient operation of your compressor and HVAC system.
Dealing with a faulty compressor can be complex and potentially dangerous. It is always best to consult with a professional HVAC technician who can accurately diagnose the issue and provide appropriate solutions. Prompt action and regular maintenance are essential to prevent further damage and ensure optimal cooling performance.
Electrical Issues
Electrical issues can contribute to an HVAC system not cooling effectively. Problems with the electrical components of your HVAC system can disrupt the normal operation and performance of the system. These issues can range from tripped breakers to faulty wiring or malfunctioning components.
If you suspect electrical issues with your HVAC system, it is important to address them promptly to avoid further damage or safety hazards. Here are some troubleshooting steps and considerations for dealing with electrical issues:
- Check the circuit breaker: Start by checking the circuit breaker or fuse box that supplies power to your HVAC system. If the breaker has tripped, reset it and see if this resolves the issue. If the breaker continues to trip, it may indicate an underlying electrical problem. Contact an electrician for further investigation and repair.
- Inspect wiring and connections: Examine the wiring and connections within your HVAC system for any signs of damage, loose connections, or frayed wires. Faulty wiring can disrupt the electrical flow and impact the cooling performance of the system. If you notice any issues, contact an HVAC technician or electrician to repair or replace the faulty wiring.
- Check capacitors and contactors: Capacitors and contactors are components that control the electrical flow within your HVAC system. If these components become faulty or worn out, they can lead to electrical issues and affect cooling performance. A qualified technician can inspect and replace these components if needed.
- Address malfunctioning components: If specific electrical components, such as the fan motor or control board, are malfunctioning, they may need to be repaired or replaced. These components play a crucial role in the cooling process, and their malfunction can result in poor cooling performance.
- Consult a professional: Dealing with electrical issues can be complex and potentially dangerous. It is best to consult with a trained HVAC technician or electrician who can accurately diagnose and resolve electrical problems. They have the knowledge, experience, and tools to address electrical issues safely and effectively.
Regular maintenance and inspections by a professional HVAC technician can help identify and mitigate electrical issues before they escalate. Addressing electrical problems promptly can ensure the safe and efficient operation of your HVAC system, leading to optimal cooling performance in your home.
Improper Insulation
Improper insulation can have a significant impact on the cooling efficiency of your HVAC system. Inadequate insulation allows heat to transfer into your home, increasing the workload on your cooling system and reducing its ability to effectively cool your space. This can result in higher energy bills and decreased comfort.
If you suspect that improper insulation is affecting the cooling performance of your HVAC system, consider the following steps:
- Inspect your home’s insulation: Check the insulation in your attic, walls, and floors to ensure it meets the recommended levels. Insulation is typically measured in R-values, which represent the material’s ability to resist heat transfer.
- Identify areas of concern: Look for areas where insulation may be lacking, damaged, or improperly installed. Common problem areas include attics, crawl spaces, and areas around doors and windows.
- Add or upgrade insulation: If your home has inadequate insulation, consider adding more insulation or upgrading to a higher R-value. The amount of insulation needed varies depending on location and climate. Consult an insulation professional to determine the appropriate insulation levels for your region.
- Seal air leaks: In addition to insulation, air leaks can contribute to heat transfer. Seal any gaps or cracks around windows, doors, and other openings using caulk, weatherstripping, or foam sealant.
- Consider radiant barriers: Radiant barriers are reflective materials that can be installed in attics or on roofs to minimize heat transfer. They reflect radiant heat away from your home, helping to keep it cooler.
- Consult with a professional: If you are unsure about the insulation status of your home or need assistance with insulation upgrades, consult with an insulation professional. They can assess your existing insulation and provide recommendations specific to your home’s needs.
Proper insulation plays a crucial role in maintaining a comfortable indoor temperature and reducing the workload on your HVAC system. By addressing and improving insulation, you can enhance the cooling efficiency of your home and optimize the performance of your HVAC system.
Read more: Why Is My HVAC Leaking
Oversized or Undersized HVAC Unit
The size of your HVAC unit has a significant impact on its cooling efficiency. An oversized or undersized HVAC unit can lead to problems such as inadequate cooling, poor humidity control, and increased energy consumption.
If your HVAC unit is too big for your space, it will cool the area quickly and shut off before adequately removing moisture from the air. This can result in a clammy or uncomfortable environment. On the other hand, an undersized unit may struggle to cool your space efficiently, leading to constant running and increased energy consumption.
If you suspect that your HVAC unit is improperly sized, consider the following steps:
- Consult a professional: Engage the services of a reputable HVAC contractor to assess your space and determine if your HVAC unit is appropriately sized. They will consider factors such as square footage, insulation, window placement, and climate to make a correct sizing calculation.
- Upgrade or downsize the unit: If your current HVAC unit is too large or too small for your space, consult with the HVAC contractor to determine the appropriate size for your home. If necessary, consider upgrading or downsizing to a properly sized unit that will provide optimal cooling performance.
- Consider energy-efficient options: When replacing your HVAC unit, look for energy-efficient models with higher SEER (Seasonal Energy Efficiency Ratio) ratings. These models are designed to provide excellent cooling efficiency while consuming less energy, resulting in cost savings over time.
- Ensure proper regular maintenance: Regardless of the size of your HVAC unit, regular maintenance is crucial for optimal performance. Schedule annual maintenance with a qualified HVAC technician to clean, inspect, and tune up your system.
- Control temperature with a programmable thermostat: To maximize cooling efficiency, install and utilize a programmable thermostat. This allows you to set different temperature levels for different times of the day, optimizing energy usage based on your household’s needs.
Proper sizing of your HVAC unit ensures efficient cooling, reduces energy consumption, and improves overall comfort. Consulting with a professional and following their recommendations will help you achieve the ideal HVAC unit size for your home.
Check your air filters regularly, as dirty filters can restrict airflow and reduce the efficiency of your HVAC system. Replace or clean them as needed to ensure proper cooling.
How to Troubleshoot and Fix HVAC Not Cooling Issues
Experiencing an HVAC system that is not cooling your space can be frustrating, especially during hot summer months. Fortunately, there are several troubleshooting steps you can take to identify and resolve the issue. Here’s a guide on how to troubleshoot and fix HVAC not cooling issues:
- 1. Replace the Air Filter: Start by checking and replacing a dirty or clogged air filter. A dirty air filter restricts airflow, reducing cooling efficiency. Replace the filter if it is dirty to promote proper airflow and improve cooling performance.
- 2. Check for Refrigerant Leak: Inspect the refrigerant lines for any signs of leakage, such as oil stains or hissing noises. If you suspect a refrigerant leak, contact a professional HVAC technician to locate and repair the leak, and recharge the system with the necessary refrigerant.
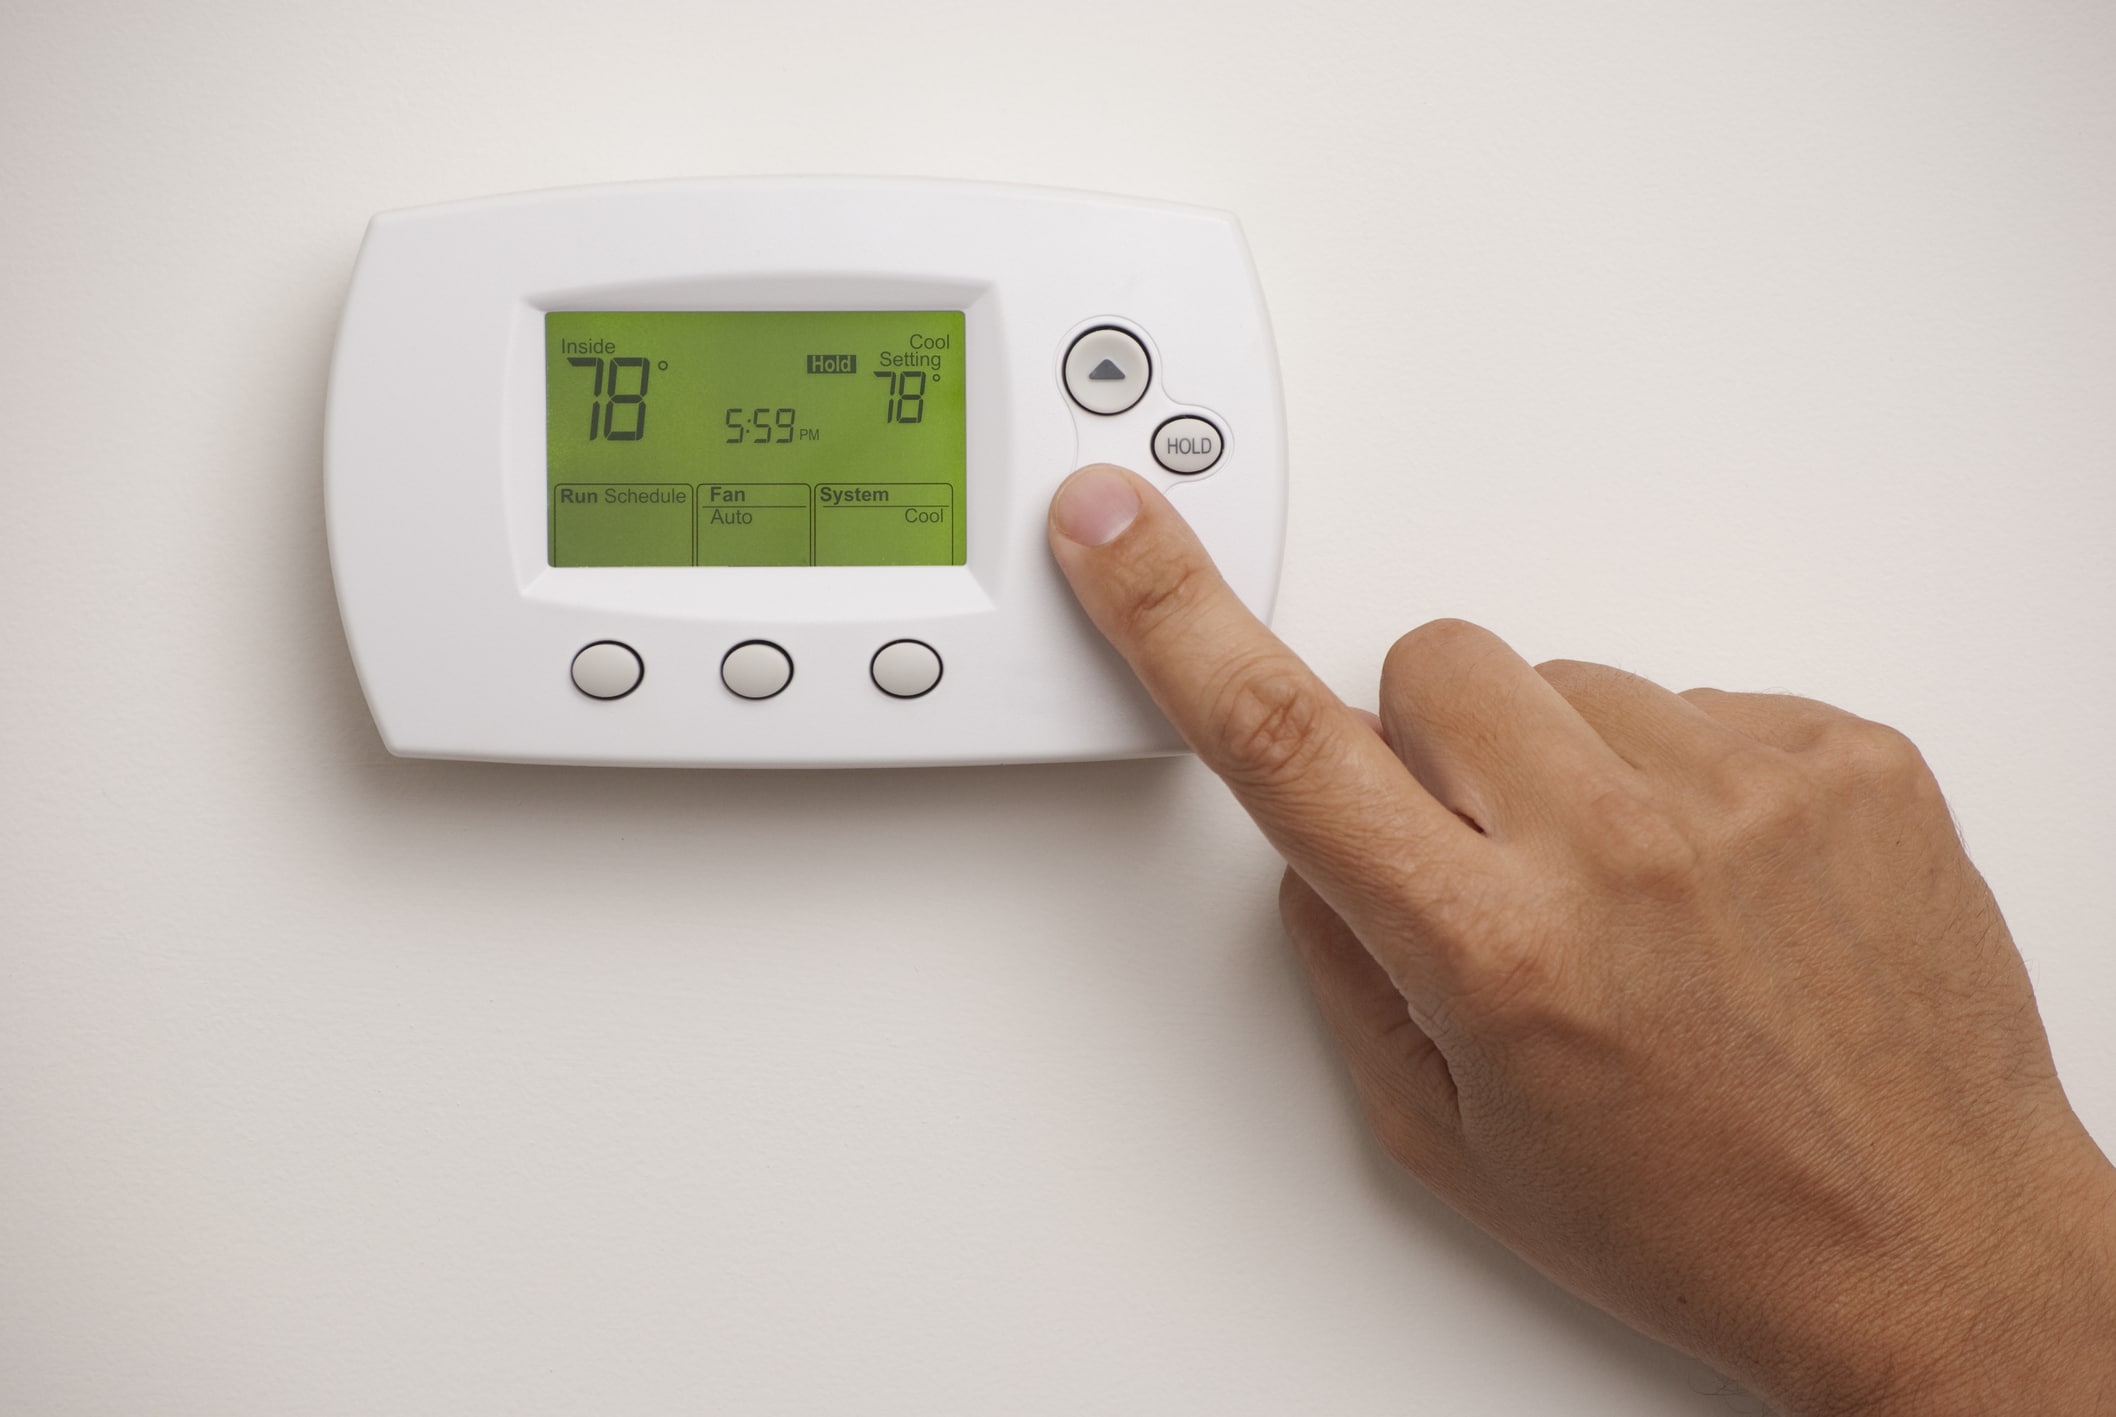
- 3. Calibrate or Replace the Thermostat: Check the thermostat settings and ensure they are accurately set for cooling. If the thermostat is malfunctioning or outdated, consider calibrating or replacing it to ensure accurate temperature control.
- 4. Clear Blocked Air Vents: Make sure all air vents in your home are open and unobstructed. Adjust furniture and ensure there are no objects blocking the airflow from the vents. This allows for proper air circulation and enhances cooling efficiency.
- 5. Repair or Replace Faulty Compressor: If the compressor is faulty, it may need repair or replacement. Contact an HVAC professional to diagnose and address any compressor issues.
- 6. Address Electrical Problems: Electrical issues can disrupt the cooling performance of your HVAC system. Check the circuit breaker and inspect wiring for any faults. Contact an electrician or HVAC technician to handle any electrical repairs.
- 7. Improve Insulation: Inadequate insulation can result in heat transfer, making it difficult for your HVAC system to cool your home efficiently. Add or upgrade insulation in your attic, walls, and floors to improve cooling efficiency.
- 8. Consult a Professional for Correct Sizing: If you suspect that your HVAC unit is too big or too small for your space, consult with an HVAC professional. They can assess your home and recommend the appropriate size for optimal cooling performance.
It is important to note that while you can perform some troubleshooting steps on your own, certain tasks, such as refrigerant handling or electrical repairs, require the expertise of a trained professional. Always contact a qualified HVAC technician or electrician to handle complex repairs to avoid any potential hazards or further damage to your system.
By following these troubleshooting steps, you can identify and address common issues that prevent your HVAC system from cooling effectively, ensuring a comfortable indoor environment during hot summer days.
Replace the Air Filter
One of the first and simplest steps to troubleshoot an HVAC system not cooling properly is to check and replace the air filter. The air filter plays a crucial role in maintaining good indoor air quality by trapping dust, dirt, pollen, and other particles. However, over time, the filter can become dirty and clogged, causing a restriction in airflow and reducing the cooling efficiency of your HVAC system.
Here’s a step-by-step guide on how to replace the air filter:
- Locate the air filter: The air filter is typically located near the air handler, which can be found in the air return duct or the indoor unit of your HVAC system.
- Turn off your HVAC system: Before removing or replacing the air filter, it is essential to turn off the HVAC system to prevent any potential damage or injury.
- Remove the existing air filter: Carefully remove the air filter from its housing. Take note of the size (e.g., dimensions like 16x20x1) and type of filter (e.g., fiberglass, pleated, electrostatic) to ensure you purchase the correct replacement.
- Inspect the air filter: Examine the removed air filter for dirt accumulation. If it appears dirty or clogged, it is time for a replacement. A good rule of thumb is to replace the air filter every 1-3 months, depending on the manufacturer’s recommendation and the air quality in your home.
- Purchase a replacement filter: Visit your local hardware store or order a replacement filter online, ensuring that you select the correct size and type for your HVAC system.
- Install the new air filter: Align the new air filter with the arrows or markings on the filter housing to ensure proper airflow direction. Slide the filter back into the housing, making sure it fits snugly.
- Turn on your HVAC system: After replacing the air filter, you can turn on your HVAC system and monitor its performance. You should notice improved airflow and cooling efficiency with a clean air filter.
Regularly replacing the air filter is important to maintain the optimal performance of your HVAC system. A clean air filter not only allows for better airflow and cooling but also helps improve indoor air quality by capturing and trapping airborne contaminants. By following this simple step of replacing the air filter, you can enhance the efficiency and longevity of your HVAC system while ensuring a comfortable and healthy living environment.
Check for Refrigerant Leak
If your HVAC system is not cooling as it should, a refrigerant leak could be the culprit. Refrigerant is the substance responsible for absorbing heat from the indoor air and cooling it down. When there’s a leak in the refrigerant lines, the system may not have enough refrigerant to effectively cool the air, resulting in reduced cooling performance.
Here’s a step-by-step guide on how to check for a refrigerant leak and take appropriate measures:
- Look for signs of leakage: Inspect your HVAC system, paying close attention to the refrigerant lines and connections for any signs of leakage. Signs of a refrigerant leak may include oil stains, residue, or hissing sounds near the refrigerant lines.
- Turn off the system: Before proceeding with any further steps, turn off your HVAC system to prevent any potential hazards or further leaks.
- Call a professional: Refrigerant handling and leak detection require the expertise and tools of a trained HVAC technician. Reach out to a licensed professional who can accurately diagnose the issue and perform the necessary repairs.
- Professional leak detection: The HVAC technician will utilize specialized tools, such as an electronic leak detector or ultraviolet dye, to locate the refrigerant leak. They will inspect the refrigerant lines, connections, coils, and other components for evidence of a leak.
- Addressing the leak: Once the leak is identified, the technician will repair or replace the faulty part causing the leakage. Depending on the extent of the leak, it may involve soldering the refrigerant line, tightening connections, or replacing damaged components.
- Recharge the system: After the leak is fixed, the HVAC technician will recharge the system with the appropriate amount of refrigerant. This ensures that the HVAC system has the necessary refrigerant levels to cool the air effectively.
- Regular maintenance: To prevent future refrigerant leaks, it’s vital to schedule regular maintenance for your HVAC system. Routine inspections and tune-ups can catch any potential issues early on and address them before they become major problems.
It’s crucial to address refrigerant leaks promptly, as low refrigerant levels can strain the system and lead to further damage. Additionally, refrigerant leaks can have negative environmental impacts, as some refrigerants contribute to ozone depletion or have a high global warming potential (GWP). Seek professional assistance to handle refrigerant leaks to ensure the safety, efficiency, and environmental sustainability of your HVAC system.
Read more: Why Is My HVAC Fan So Loud
Calibrate or Replace the Thermostat
A faulty thermostat can cause your HVAC system to have difficulty cooling your space effectively. The thermostat is responsible for sensing the temperature in your home and signaling the HVAC system to turn on or off and regulate the cooling settings. If the thermostat is not functioning correctly, it can result in inconsistent cooling or inaccurate temperature readings.
Here are steps to troubleshoot and fix a faulty thermostat:
- Check the thermostat settings: Ensure that the thermostat is set to the appropriate cooling mode and temperature. Make sure it is not set to “fan only” or “off” mode, which can prevent the system from cooling.
- Calibrate the thermostat: If you suspect that the thermostat temperature readings are inaccurate, it may require calibration. Consult the manufacturer’s instructions to calibrate the thermostat or contact a professional HVAC technician to assist with the calibration process.
- Replace the batteries: If your thermostat is battery-operated, replace the batteries with fresh ones. Weak batteries can affect the thermostat’s functionality.
- Clean and dust the thermostat: Dust and debris can accumulate on the thermostat, affecting its performance. Gently clean the thermostat using a soft cloth or brush to remove any dirt or buildup that may be interfering with its operation.
- Consider upgrading to a programmable thermostat: If your thermostat is outdated or malfunctioning, consider upgrading to a programmable or smart thermostat. These advanced thermostats offer features such as remote access, scheduling, and temperature sensors, which can enhance temperature control and energy efficiency.
- Consult with a professional: If you’ve tried troubleshooting steps and the thermostat still isn’t functioning correctly, it may be time to replace it. Contact an HVAC professional to assess and replace the faulty thermostat with a new, compatible model.
A properly calibrated or replaced thermostat can ensure accurate temperature control and improve the cooling performance of your HVAC system. It allows you to set and maintain your desired temperature, optimizing comfort and energy usage. If you’re unsure about thermostat troubleshooting or replacement, it’s best to seek the expertise of an HVAC professional to ensure proper installation and functioning of your thermostat.
Clear Blocked Air Vents
Blocked air vents can restrict the airflow and prevent your HVAC system from cooling your space effectively. Air vents, also known as supply vents, are responsible for distributing the cooled air from your HVAC system throughout your home. If these vents are blocked or obstructed, it can hinder the proper airflow, resulting in inadequate cooling in certain areas of your home.
Here’s a step-by-step guide on how to clear blocked air vents to improve the cooling performance of your HVAC system:
- Locate all the air vents in your home: Take note of where the supply vents are located in each room or area of your home.
- Inspect the air vents: Check each air vent to see if it is blocked or obstructed by furniture, curtains, rugs, or any other objects that may be hindering the airflow. Pay extra attention to vents that are partially closed or covered.
- Clear away any obstructions: Move any furniture, curtains, rugs, or other objects that are blocking the air vents. Ensure that the vents are completely unobstructed to allow for optimal airflow.
- Open any closed vents: Check if any air vents have been intentionally closed or partially closed. Fully open these vents to allow for maximum airflow throughout your home.
- Clean the air vents: Dust and debris can accumulate on the air vents over time, restricting the airflow. Use a vacuum cleaner with a brush attachment or a cloth to gently clean the vents and remove any dirt or dust buildup.
- Consider professional duct cleaning: If you suspect there is significant dust or debris buildup within your ductwork, consider contacting a professional duct cleaning service. They can thoroughly clean and remove any blockages, allowing for improved airflow.
By clearing blocked air vents, you can ensure proper airflow and distribution of cooled air throughout your home. This allows your HVAC system to cool the space more effectively and evenly. Regularly checking and maintaining the cleanliness of your air vents will help prevent future blockages and ensure optimal cooling performance.
Repair or Replace Faulty Compressor
The compressor is a critical component of your HVAC system that plays a crucial role in the cooling process. It circulates refrigerant, which absorbs heat from the indoor air and releases it outside. If the compressor is faulty or not functioning properly, it can negatively impact the cooling performance of your HVAC system.
Here’s a step-by-step guide on how to troubleshoot and address a faulty compressor:
- Observe signs of a faulty compressor: Look out for indicators of a faulty compressor, such as unusual noises (e.g., grinding, rattling, or hissing sounds), poor cooling performance, or frequent system cycling.
- Turn off the HVAC system: Before attempting any repairs or replacements, turn off the HVAC system to ensure your safety and avoid any potential damage.
- Consult a professional: Compressor repairs and replacements require specialized knowledge and equipment. It’s best to contact a licensed HVAC technician to accurately diagnose the issue and determine the appropriate course of action.
- Professional inspection and diagnosis: The HVAC technician will conduct a thorough inspection of the compressor, electrical connections, and associated components. They may use diagnostic tools to assess the compressor’s functionality and identify the root cause of the problem.
- Repairing the faulty compressor: If the compressor can be repaired, the technician will perform the necessary fixes. This may involve replacing faulty parts, such as capacitors or contactors, or repairing any damaged wiring or connections.
- Replacing the faulty compressor: In some cases, the compressor may be irreparable or replacing it is more cost-effective than extensive repairs. The HVAC technician will assist in selecting a compatible replacement compressor and ensure proper installation.
- System performance and testing: After repairing or replacing the compressor, the HVAC technician will test the system’s cooling performance to ensure it’s functioning as expected. This includes checking temperature differentials, refrigerant levels, and overall system efficiency.
- Maintenance and regular inspections: To prevent future compressor issues, it’s essential to schedule regular maintenance with a professional HVAC technician. Routine inspections can catch any potential problems early on and ensure the proper functioning of the compressor and the entire HVAC system.
Dealing with a faulty compressor requires the expertise of a qualified HVAC technician. Attempting to repair or replace the compressor without proper knowledge and tools can be dangerous and may further damage the system. Contacting a professional ensures safe repairs or replacements that restore the cooling performance of your HVAC system.
Address Electrical Problems
Electrical problems can significantly impact the cooling performance of your HVAC system. Issues with the electrical components can disrupt the normal operation and efficiency of the system, leading to reduced cooling capabilities and potential system failures. Dealing with electrical problems requires caution and expertise, and it is recommended to seek professional assistance from an HVAC technician or electrician.
Here are steps to help address electrical problems with your HVAC system:
- Check the power supply: Ensure that your HVAC system is receiving proper electrical power. Check the circuit breaker or fuse box to verify that the breaker is not tripped and that the appropriate switches are in the “on” position.
- Inspect wiring and connections: Examine the wiring and connections within your HVAC system for any signs of damage, loose connections, or frayed wires. Faulty wiring can cause electrical problems and impact the cooling performance. If you notice any issues, it is best to contact an HVAC technician or electrician to repair or replace the faulty wiring.
- Professional diagnosis: If you suspect electrical issues but aren’t sure of the cause, it is advisable to seek professional help. An HVAC technician or electrician will have the expertise and equipment to accurately diagnose and troubleshoot the electrical problems in your system.
- Repair or replace faulty components: Electrical problems can occur due to malfunctioning components such as relays, capacitors, or transformers. A trained professional can inspect these components, identify any faulty ones, and repair or replace them as necessary.
- Address electrical safety concerns: Electrical problems can potentially pose safety hazards. The HVAC technician or electrician can ensure that all electrical connections and wirings are properly secured and meet the necessary safety standards.
- Preventive measures: Regular maintenance by a professional can help identify and prevent electrical problems before they arise. Schedule annual inspections and tune-ups to ensure that all electrical components in your HVAC system are in proper working condition.
It is crucial to prioritize safety when it comes to addressing electrical problems. Handling electrical components without proper knowledge and training can be dangerous and may lead to further damage or personal injury. Hiring a trained HVAC technician or electrician will ensure that electrical problems are handled properly and safely, ensuring the efficient cooling performance of your HVAC system.
Read more: Why Is My Standing Fan Squeaking
Improve Insulation
Inadequate insulation can significantly impact the cooling efficiency of your HVAC system. Insulation helps to create a barrier that prevents the transfer of heat between the inside and outside of your home. When your home is not properly insulated, it allows hot air from the outside to seep in and cool air from within to escape, making it difficult for your HVAC system to maintain a comfortable indoor temperature.
To improve the insulation in your home, consider the following steps:
- Inspect your home’s insulation: Begin by assessing the condition of your current insulation. Check the insulation levels in your walls, attic, and floors to determine if it meets the recommended standards for your climate.
- Identify areas for improvement: Look for areas where insulation may be lacking or damaged. Pay close attention to spaces around windows and doors, as well as any gaps or cracks in the walls or attic that may allow for heat transfer.
- Add or upgrade insulation: Depending on your findings, you may need to add insulation or upgrade to a higher R-value (the measure of insulation’s ability to resist heat transfer). Consider using insulation materials like fiberglass batts, blown-in cellulose, or spray foam insulation based on the specific needs of each area.
- Insulate the attic: Proper attic insulation is crucial since heat tends to rise and escape through the roof. Ensure that the attic floor and walls are well-insulated to prevent heat from entering your living space.
- Seal air leaks: In addition to insulation, sealing air leaks is essential to prevent unwanted heat transfer. Use caulk or weatherstripping to seal gaps around windows, doors, and other openings to reduce the infiltration of hot air.
- Consider radiant barriers: Radiant barriers can be installed in the attic or on the roof to reflect radiant heat away from your home, helping to keep it cooler. Consult with a professional to determine if a radiant barrier is suitable for your climate and home.
- Consult with insulation professionals: If you’re unsure about the type or amount of insulation needed, it’s best to consult with insulation professionals. They can assess your home, recommend the appropriate insulation solutions, and ensure proper installation.
Improving insulation in your home will not only enhance the cooling efficiency of your HVAC system, but it will also help lower energy consumption, reduce utility costs, and create a more comfortable living environment. By taking the necessary steps to address insulation issues, you can create a thermal barrier against heat transfer and optimize the performance of your HVAC system.
Consult a Professional for Correct Sizing
Having an HVAC system that is properly sized for your home is essential for optimal cooling performance. An HVAC system that is either oversized or undersized can lead to inefficient operation, increased energy consumption, and poor temperature control. Consulting with a professional HVAC contractor is crucial to ensure that your system is correctly sized to meet the cooling needs of your specific space.
Here’s why it’s important to consult a professional for correct sizing:
- Accurate assessment: HVAC professionals have the expertise to accurately assess the cooling requirements of your home. They take into consideration factors such as the square footage, layout, insulation levels, number of occupants, and climate to determine the appropriate HVAC system size.
- Preventing inefficiencies: An oversized HVAC system may cool the air too quickly, resulting in frequent cycling on and off. This not only increases energy consumption but also fails to dehumidify the air adequately. Conversely, an undersized system will struggle to cool the space, leading to poor comfort and increased running time.
- Proper load calculations: HVAC contractors perform load calculations to determine the heating and cooling load requirements of your home. This considers factors such as solar heat gain, insulation effectiveness, and air leakage. With accurate load calculations, they can recommend the right HVAC system size to meet the specific needs of your home.
- Choosing the right equipment: Consulting with a professional ensures that you select the appropriate HVAC equipment for your home. They will consider energy efficiency ratings (such as SEER – Seasonal Energy Efficiency Ratio), system compatibility, and other important factors to help you choose a system that provides optimal cooling performance.
- Ensuring proper installation: Professional HVAC contractors have the knowledge and experience to install your HVAC system correctly. Improper installation can lead to reduced efficiency, shortened system lifespan, and potentially voided warranties. By consulting a professional, you can ensure that your HVAC system is installed according to industry standards.
- Maximizing energy efficiency and cost savings: A properly sized HVAC system operates more efficiently, leading to energy savings and lower utility bills. Consulting with a professional allows you to invest in a system that provides the best balance between performance and cost-effectiveness.
Choosing the correct size for your HVAC system is crucial for efficient cooling and long-term comfort. A professional HVAC contractor can properly assess your home’s cooling requirements and guide you in selecting and installing the appropriately sized system. Their expertise ensures that your HVAC system is optimized for peak performance and energy efficiency.
Conclusion
A properly functioning HVAC system is essential for maintaining a comfortable indoor environment, especially during hot summer months. When your HVAC is not cooling effectively, it can be frustrating and impact your overall comfort and well-being. However, by understanding the common reasons behind HVAC cooling issues and following troubleshooting steps, you can rectify the problems and restore optimal cooling performance.
In this article, we’ve explored various factors that can contribute to an HVAC system not cooling as it should. We discussed the importance of replacing the air filter regularly to maintain proper airflow and prevent clogging. We also highlighted the significance of checking for refrigerant leaks, addressing faulty thermostats, clearing blocked air vents, repairing or replacing faulty compressors, addressing electrical problems, improving insulation, and consulting professionals for correct system sizing.
Remember, proper maintenance and regular inspections will help prevent and address cooling issues. It’s important to schedule routine maintenance with qualified HVAC technicians to keep your system in excellent working condition. By troubleshooting and addressing HVAC cooling issues promptly, you can ensure efficient cooling, reduce energy consumption, and create a comfortable living environment.
Always prioritize safety and consult with professionals when dealing with complex issues like refrigerant leaks, electrical problems, or system replacement. A trained HVAC technician or electrician has the expertise and necessary tools to handle these tasks safely and effectively.
In conclusion, by understanding the common causes of HVAC cooling problems and taking appropriate measures, you can ensure an efficiently functioning HVAC system that keeps you cool and comfortable, even during the hottest days of the year.
Frequently Asked Questions about Why Is My HVAC Not Cooling
Was this page helpful?
At Storables.com, we guarantee accurate and reliable information. Our content, validated by Expert Board Contributors, is crafted following stringent Editorial Policies. We're committed to providing you with well-researched, expert-backed insights for all your informational needs.
0 thoughts on “Why Is My HVAC Not Cooling”