Articles
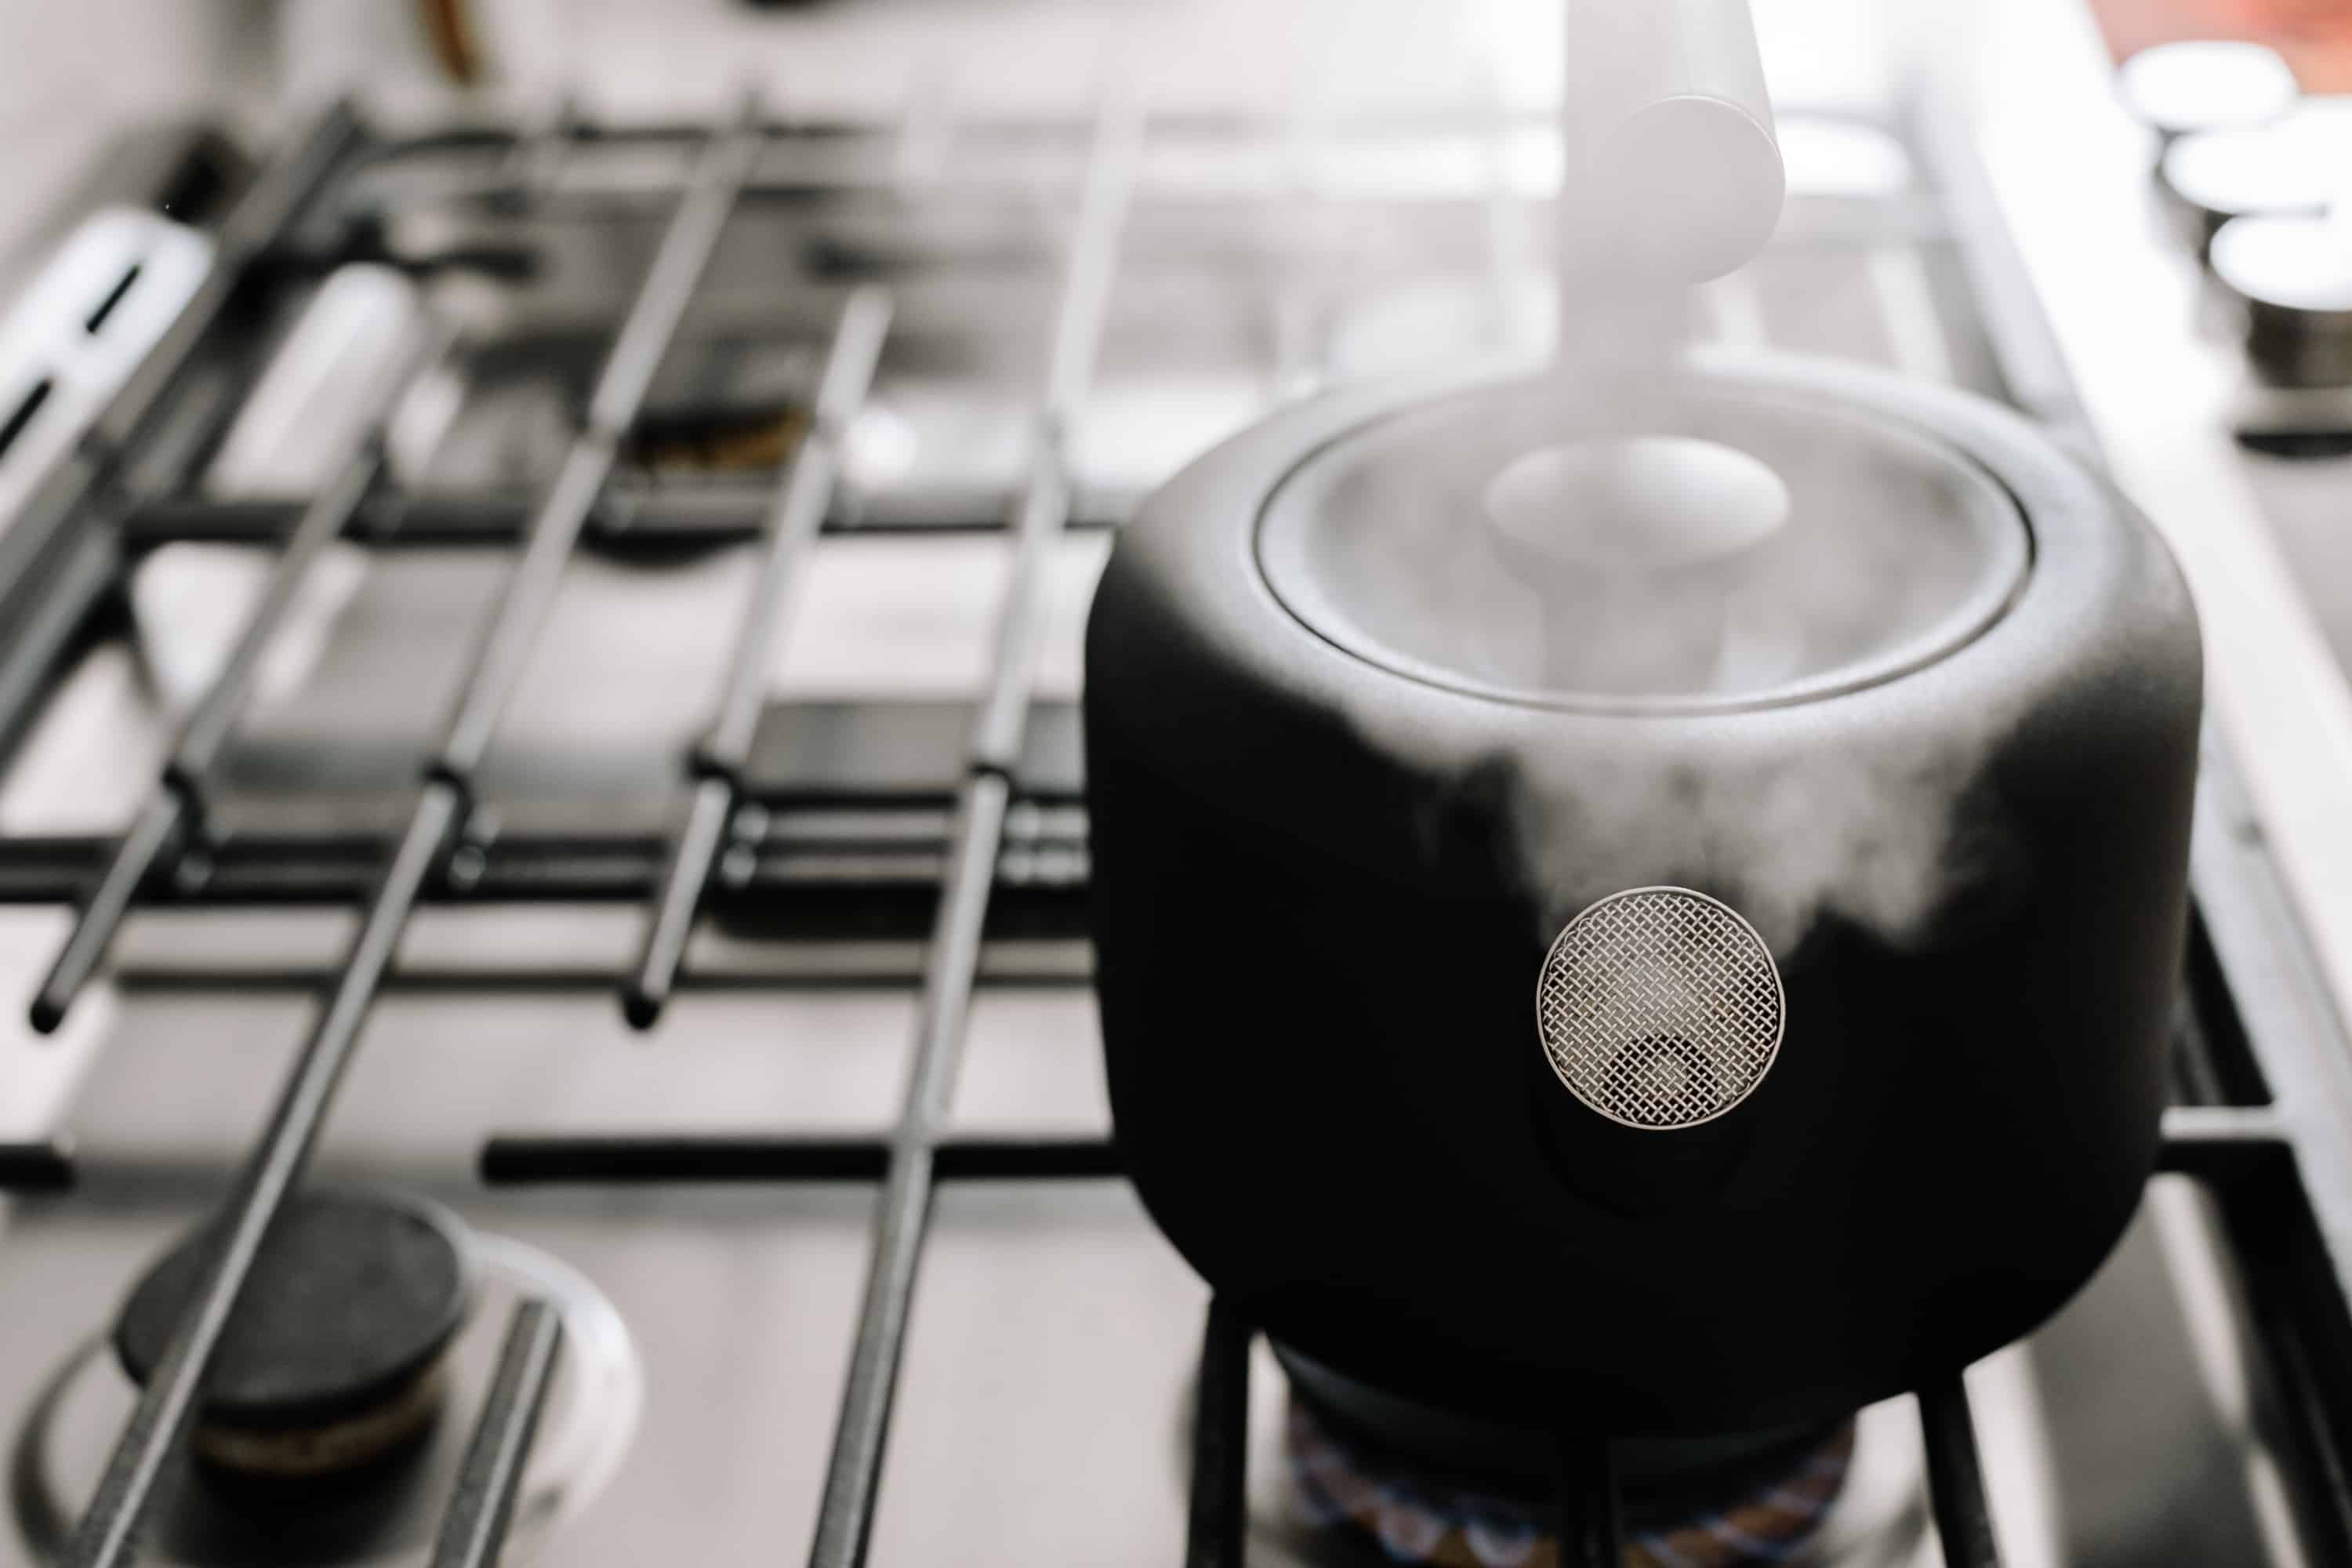
Why Is My Water Heater Whistling
Modified: October 22, 2024
Discover articles on why your water heater is whistling and learn how to fix this common plumbing issue.
(Many of the links in this article redirect to a specific reviewed product. Your purchase of these products through affiliate links helps to generate commission for Storables.com, at no extra cost. Learn more)
Introduction
Having a water heater in your home is a convenient and essential appliance that ensures your daily hot water needs are met. However, it can be concerning if you start hearing a whistling sound coming from your water heater. Not only is it annoying, but it may also signify an underlying issue that needs to be addressed.
In this article, we will explore the common causes of water heater whistling and discuss how you can deal with this problem effectively. By understanding the potential reasons behind this whistling noise, you can take appropriate measures to resolve the issue and restore your water heater’s proper functioning.
Before we dive into the causes, it’s important to note that any work done on your water heater should be performed by a professional, unless you have experience and knowledge in this area. Safety should always be your top priority when dealing with appliances that involve electricity, gas, or water.
Now, let’s explore the common culprits behind that annoying whistling sound coming from your water heater.
Key Takeaways:
- Regularly flushing your water heater can prevent sediment buildup and maintain its efficiency, eliminating the annoying whistling noise and ensuring a reliable hot water supply.
- Addressing high water pressure and ensuring proper ventilation are crucial steps in eliminating water heater whistling, promoting safety, and maintaining optimal performance.
Read more: Why My Water Heater Is Not Working
Common Causes of Water Heater Whistling
When your water heater starts whistling, it is usually an indication that something is not functioning correctly. Here are some common causes of water heater whistling:
- Sediment Buildup in the Tank: Over time, sediment can accumulate at the bottom of the water heater tank. This sediment can cause restricted water flow and lead to boiling or rumbling noises. When these noises occur, they can sometimes result in a whistling sound as steam tries to escape through the sediment.
- High Water Pressure: Excessive water pressure can also cause your water heater to whistle. When the pressure inside the tank becomes too high, it can force water to flow through small openings, creating a whistling sound. This can happen if the pressure regulator is faulty or if the water pressure from the main supply is too high.
- Faulty Pressure Relief Valve: The pressure relief valve is a crucial component of a water heater that releases excess pressure to prevent a potential explosion. If the valve becomes faulty or fails to operate correctly, it can cause a whistling noise as the pressure inside the tank builds up and tries to escape through the valve.
- Loose or Damaged Heating Element: If the heating element in your water heater becomes loose or damaged, it can create vibrating or whistling noises. This can occur due to wear and tear over time or improper installation. The whistling sound is often a result of the heating element vibrating against the tank or other parts of the water heater.
- Proper Ventilation: In some cases, inadequate ventilation can cause a whistling sound. When the exhaust gases are not able to escape properly, they can create a pressure imbalance, resulting in a whistling noise. This can occur if the vent pipes are clogged, damaged, or improperly installed.
Identifying the specific cause of the whistling noise can help you determine the appropriate steps to address the issue. In the next sections, we will discuss how to deal with water heater whistling based on the underlying causes.
Sediment Buildup in the Tank
One of the common causes of water heater whistling is sediment buildup in the tank. Over time, minerals and debris in the water can settle at the bottom of the tank, creating a layer of sediment. This buildup can cause several issues, including a whistling sound.
When sediment accumulates, it acts as an insulator, trapping heat at the bottom of the tank. As a result, the water in direct contact with the heating element becomes extremely hot and can cause the water to boil. The boiling water creates bubbles that rise to the surface and pop, causing a rumbling noise. In some cases, the boiling water may create enough pressure to force steam through the sediment, causing a whistling sound.
To address sediment buildup in your water heater and eliminate the whistling noise, you can follow these steps:
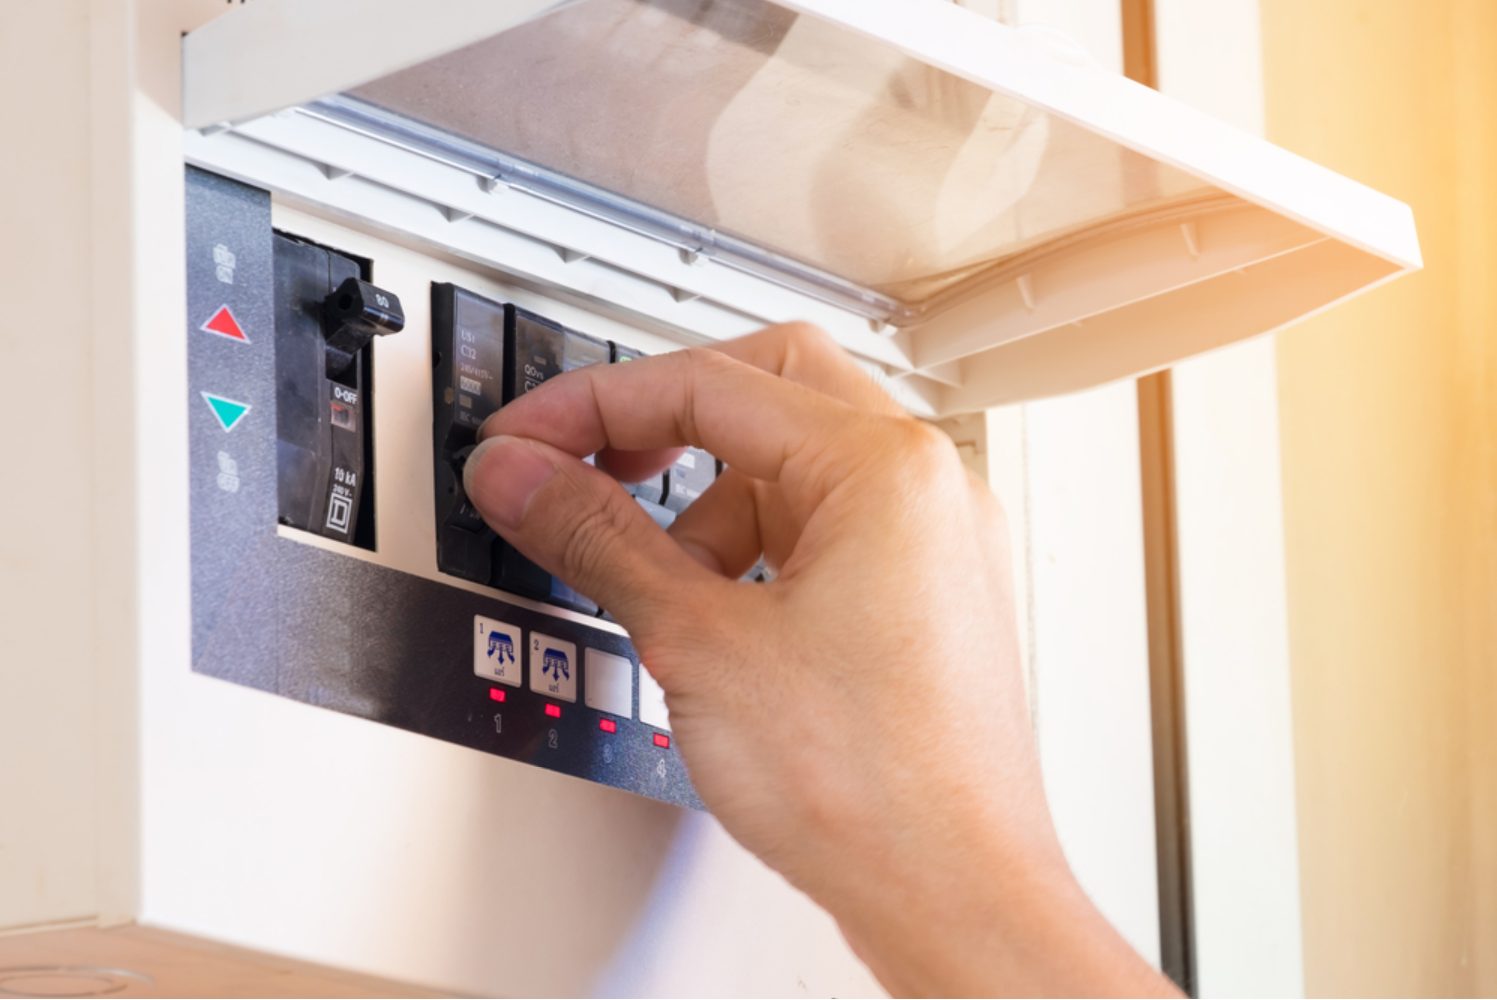
- Turn off the Power: Before performing any maintenance on your water heater, it’s important to turn off the power supply. This can usually be done by switching off the circuit breaker dedicated to the water heater.
- Drain the Tank: Connect a hose to the drain valve located at the bottom of the tank and open it to drain the water. Be careful as the water may be hot. Allow the tank to empty completely.
- Flush the Tank: Once the tank is drained, close the drain valve and fill the tank partially with cold water. Open the supply valve to allow water to flow into the tank while simultaneously opening the drain valve. This will create a flushing action that helps dislodge and remove sediment from the tank. Repeat this process several times until the water coming out of the drain valve runs clear.
- Refill the Tank: After flushing, close the drain valve and fully refill the tank. Once the tank is full, you can turn on the power supply and allow the water heater to heat the water to the desired temperature.
Regularly flushing your water heater can help prevent sediment buildup and maintain its efficiency. It is recommended to perform this maintenance task at least once a year, or more frequently if your water supply has a high mineral content.
In the next sections, we will discuss other potential causes of water heater whistling and how to address them.
High Water Pressure
Another common cause of water heater whistling is high water pressure. Water pressure refers to the force at which water flows through your plumbing system. If the water pressure is too high, it can cause various issues, including a whistling sound coming from your water heater.
When the water pressure exceeds the recommended level, it can create turbulence and force water through small openings, such as valves or pipes, at a high velocity. This rapid flow of water can cause a whistling sound as it passes through these narrow passages.
To address high water pressure and eliminate the whistling noise, you can undertake the following steps:
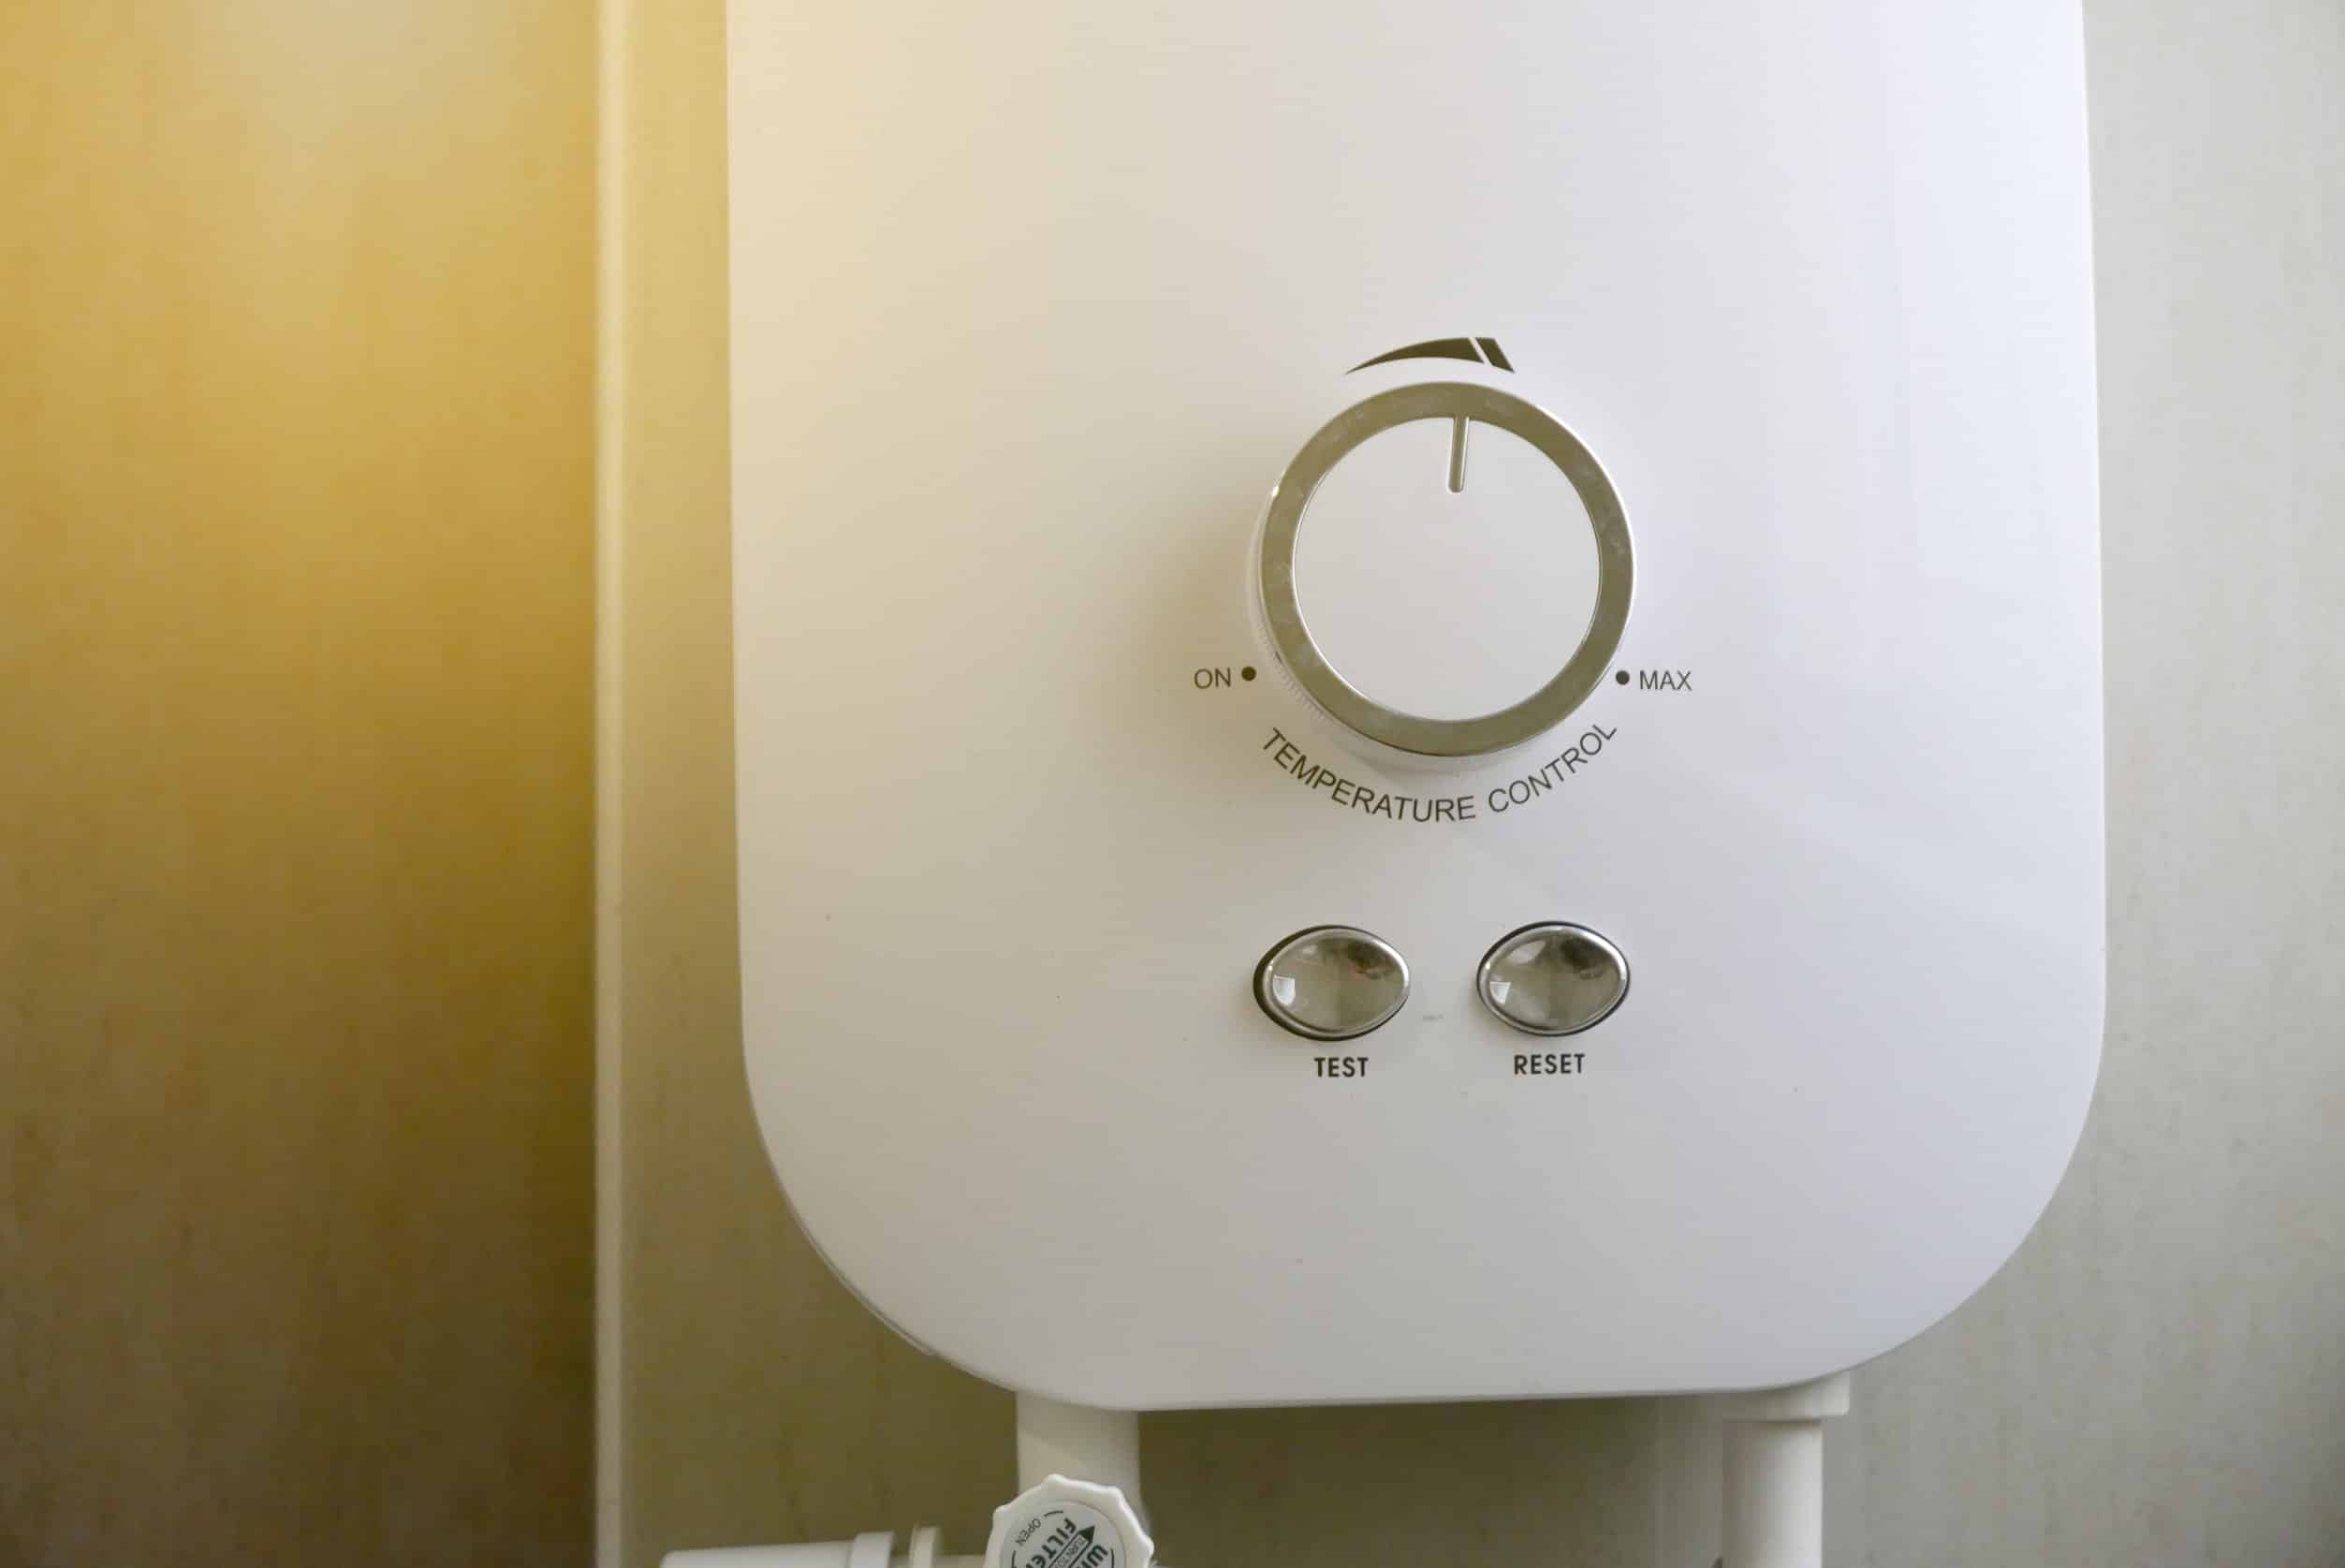
- Check the Water Pressure: Use a water pressure gauge to measure the water pressure in your home. The ideal water pressure should be around 40-60 psi (pounds per square inch).
- Adjust the Pressure Regulator: Locate the pressure regulator, which is usually located near the main water supply line or the water meter. Use a wrench to adjust the regulator to lower the water pressure to the recommended level. Consult the manufacturer’s instructions or seek professional assistance if you are unsure about making adjustments to the pressure regulator.
- Install a Pressure Reducing Valve: If your home does not have a pressure regulator or if adjusting the existing regulator does not resolve the issue, you can consider installing a pressure reducing valve. This device helps regulate the water pressure and prevent it from exceeding the recommended level.
- Consult a Professional: If you are not confident in adjusting or installing a pressure regulator or reducing valve, it is best to consult a professional plumber. They can accurately assess the water pressure in your home and make the necessary adjustments or installations to ensure the pressure is within the appropriate range.
By addressing high water pressure, you can not only eliminate the whistling noise from your water heater but also prevent potential damage to your plumbing system and other appliances.
In the next sections, we will explore other potential causes of water heater whistling and discuss how to deal with them effectively.
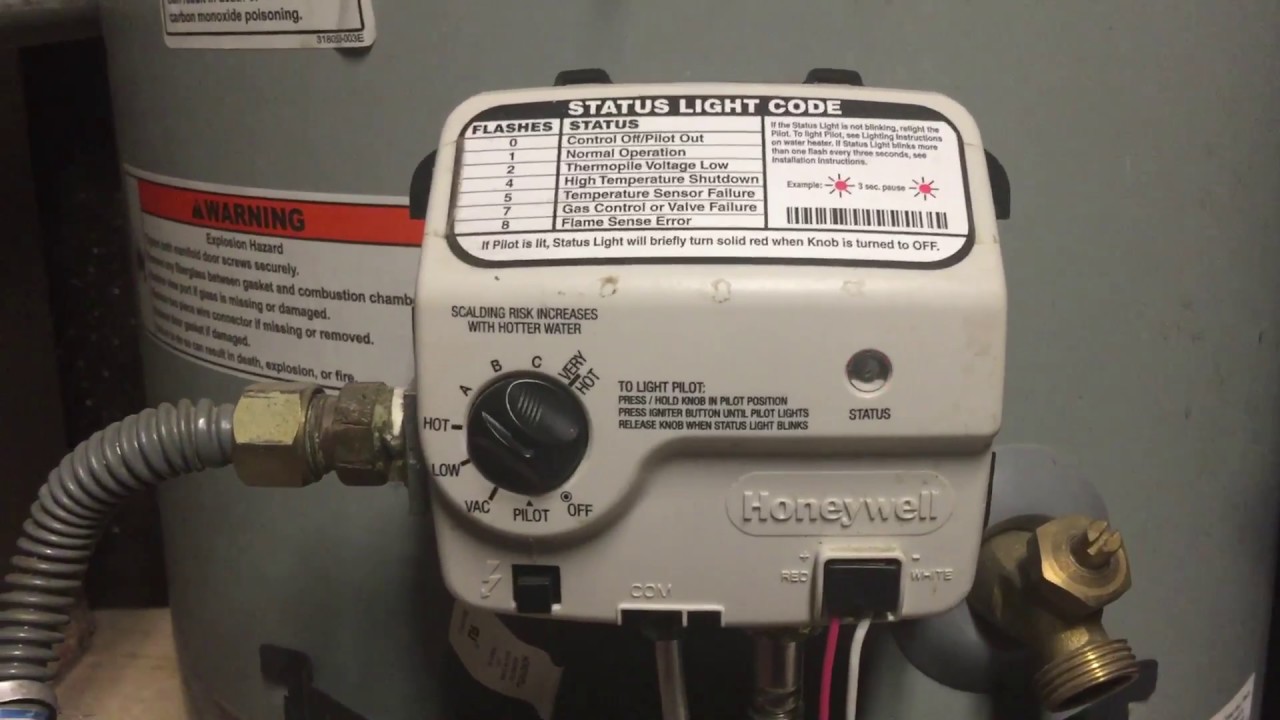
Faulty Pressure Relief Valve
The pressure relief valve is an essential safety feature of a water heater. Its primary function is to release excess pressure from the tank to prevent a potential explosion. If the pressure inside the tank becomes too high, the relief valve opens to release the pressure, ensuring the safe operation of the water heater.
However, if the pressure relief valve is faulty or not functioning correctly, it can cause a whistling noise as the pressure builds up inside the tank and tries to escape through the valve. This whistling sound is an indication that the relief valve needs attention and may require repair or replacement.
To deal with a faulty pressure relief valve and eliminate the whistling noise, follow these steps:
- Turn Off the Power: Before working on the pressure relief valve, ensure that the power supply to the water heater is turned off. This will help prevent any accidents or injuries.
- Locate the Pressure Relief Valve: The pressure relief valve is typically located on the side or the top of the water heater. It is a small valve with a lever or a probe extending from it.
- Test the Valve: To check if the valve is functioning correctly, lift the lever or push the probe gently. You should hear a rush of water as the valve opens and releases some pressure. If there is no water flow or if the valve does not release pressure, it indicates a faulty relief valve.
- Replace the Valve: If the pressure relief valve is faulty, it is crucial to replace it. You can find a suitable replacement valve from a hardware store or consult a professional plumber to help you with the replacement. Follow the manufacturer’s instructions for proper installation.
- Test the New Valve: Once the new relief valve is installed, test it by lifting the lever or pushing the probe to ensure it operates correctly and releases pressure. This will help ensure the safety of your water heater.
Regularly inspecting and maintaining the pressure relief valve is important for the safe operation of your water heater. If you are unsure about handling the valve replacement, it is recommended to seek assistance from a professional plumber to avoid any potential risks.
In the next sections, we will discuss other potential causes of water heater whistling and provide guidance on how to address them.
Read more: Why Is My Water Heater Leaking From The Top
Loose or Damaged Heating Element
The heating element in your water heater is responsible for heating the water in the tank. It consists of a coil that heats up when electricity passes through it. However, if the heating element becomes loose or damaged, it can create vibrations or cause a whistling sound.
Over time, the heating element can become loose due to thermal expansion and contraction or improper installation. When it is not securely in place, it may vibrate against the tank or other components, resulting in a whistling noise. Additionally, a damaged heating element, such as a cracked or broken coil, can also cause the water heater to whistle.
If you suspect that a loose or damaged heating element is causing the whistling noise in your water heater, follow these steps to address the issue:
- Turn off the Power: Before working on the water heater, make sure to turn off the power supply to avoid any electric shock hazards. This can typically be done by switching off the circuit breaker dedicated to the water heater.
- Inspect the Heating Element: Remove the access panel or cover of the water heater to gain access to the heating element. Check if the element is loose or shows any signs of damage, such as cracks or breaks in the coil.
- Tighten the Element: If the heating element is loose, use a wrench or a suitable tool to tighten it securely. Be careful not to overtighten, as it can cause damage to the element or tank. Ensure that the element is snugly in place without excessive play or movement.
- Replace the Element: If the heating element is damaged or shows signs of extensive wear, it may need to be replaced. Consult the manufacturer’s instructions or seek professional assistance to ensure the correct replacement procedure.
- Restore Power and Test: Once the heating element is either tightened or replaced, restore the power supply to the water heater. Allow the water heater to heat the water and monitor for any whistling noise. If the whistling noise persists, further inspection or professional assistance may be required.
Proper installation and maintenance of the heating element are key to ensuring the efficient operation of your water heater. Regularly inspecting the element for any signs of damage or looseness can help prevent the whistling noise and extend the lifespan of your water heater.
In the next sections, we will explore other potential causes of water heater whistling and discuss how to address them effectively.
Proper Ventilation
Proper ventilation is crucial for the safe and efficient operation of your water heater. The ventilation system allows for the exhaust gases produced during the combustion process to escape outside. If the venting system is inadequate or obstructed, it can create a pressure imbalance and result in a whistling sound coming from the water heater.
When the exhaust gases are not able to escape properly, they can create back pressure within the water heater, leading to the whistling noise. This can occur if the vent pipes are clogged, damaged, or improperly installed. Additionally, too many bends or sharp angles in the venting system can also disrupt the airflow and cause the whistling sound.
To ensure proper ventilation and eliminate the whistling noise, follow these steps:
- Inspect the Venting System: Check the vent pipes and connections to ensure they are clear of any obstructions, such as debris or nests. Look for any signs of damage, such as cracks or gaps, that may impede the airflow.
- Remove Obstructions: If you find any obstructions in the venting system, carefully remove them to restore proper airflow. Use a brush or a vacuum to clean out any debris or dust that may have accumulated.
- Check for Proper Installation: Ensure that the vent pipes are correctly installed with the appropriate pitch and have the recommended number of bends and angles. Improper installation can cause restricted airflow and result in the whistling noise.
- Adjust the Ventilation System: If you suspect that the venting system is the cause of the whistling noise, you may need to make adjustments. Consult the manufacturer’s instructions or seek professional assistance to ensure proper alignment and installation of the vent pipes.
- Consider Professional Inspection: If you are unsure about the condition of the ventilation system or the appropriate steps to take, it is advisable to consult a professional HVAC technician or plumber. They have the expertise to assess and address any issues with the venting system.
Proper ventilation is essential for the safe and efficient operation of your water heater. By ensuring that the venting system is clear, correctly installed, and free from obstructions, you can eliminate the whistling noise and maintain the performance of your water heater.
In the next section, we will provide a summary of the steps discussed earlier and conclude the article.
Check the pressure relief valve on your water heater. If it’s whistling, it could be a sign of high pressure or a faulty valve. Have a professional inspect and replace if necessary.
Dealing with Water Heater Whistling
Water heater whistling can be a frustrating and concerning issue. However, by identifying the underlying causes and taking appropriate measures, you can effectively deal with this problem. Here is a summary of the steps discussed earlier to help you address water heater whistling:
- Identify the Cause: Determine the potential cause of the whistling noise by considering factors such as sediment buildup, high water pressure, faulty pressure relief valve, loose or damaged heating element, or improper ventilation.
- Take Safety Precautions: Always prioritize safety when working with your water heater. Turn off the power supply and familiarize yourself with the proper handling of the different components.
- Flush the Tank: If sediment buildup is the cause of the whistling noise, drain and flush the water heater tank to remove the accumulated sediment. This will improve the efficiency and reduce the noise.
- Regulate Water Pressure: Adjust the water pressure to the recommended level using a pressure regulator or considering the installation of a pressure reducing valve. This will prevent excessive pressure and eliminate the whistling sound caused by high water pressure.
- Check and Replace the Pressure Relief Valve: Inspect the pressure relief valve for proper operation and replace it if it is faulty. This will ensure the safe release of excess pressure and eliminate the whistling noise associated with a malfunctioning relief valve.
- Inspect and Repair the Heating Element: Check the heating element for looseness or damage. Tighten it securely or replace it if necessary. This will eliminate the vibrations and whistling noise caused by a loose or damaged heating element.
- Ensure Adequate Ventilation: Check the venting system for any obstructions, damage, or improper installation. Clear any blockages, make necessary adjustments, or seek professional assistance to ensure proper airflow and eliminate the whistling sound.
If you are uncertain about safely and effectively dealing with water heater whistling, it is always recommended to consult a professional plumber or HVAC technician. They can provide expert advice and assistance to resolve the issue and ensure the proper functioning of your water heater.
By addressing the underlying causes of water heater whistling, you can not only eliminate the annoying noise but also prolong the lifespan of your water heater and maintain its efficiency.
Remember, regular maintenance and inspection of your water heater is essential to prevent future issues and ensure its optimal performance.
Thank you for reading this article. We hope it has provided you with valuable insights and guidance on dealing with water heater whistling.
Flushing the Tank
Flushing the tank of your water heater is a crucial step in addressing water heater whistling caused by sediment buildup. Over time, minerals and debris in the water can settle at the bottom of the tank, creating a layer of sediment. This buildup not only reduces the efficiency of your water heater but can also lead to rumbling and whistling noises.
Flushing the tank helps to remove the accumulated sediment and improve the overall performance of your water heater. Here is a step-by-step guide on how to flush the tank:
- Turn off the Power: Before starting any maintenance on your water heater, it is essential to turn off the power supply. This can typically be done by switching off the circuit breaker dedicated to the water heater.
- Attach a Hose: Locate the drain valve at the bottom of the water heater and attach a garden hose. You may need to use a wrench to loosen the valve before attaching the hose. Make sure the other end of the hose is directed towards a drain or an appropriate location where the water can safely drain.
- Open the Drain Valve: Once the hose is securely attached, open the drain valve by turning it counterclockwise. This will allow the water to start flowing out of the tank.
- Flush the Tank: Allow the water to flow freely through the hose, carrying away the sediment as it drains out. You may notice initially that the water appears rusty or discolored due to the sediment. Continue the flushing process until the water runs clear.
- Close the Drain Valve: Once the water is running clear, close the drain valve by turning it clockwise. Ensure that it is tightly closed to prevent any leaks.
- Fill the Tank: Remove the hose from the drain valve and position it aside. Close any open faucets or taps in your home. Turn on the cold water supply valve to start refilling the tank. Allow the tank to fill completely.
- Restore the Power: Once the tank is full, you can turn on the power supply to the water heater by switching on the circuit breaker. The water heater will now heat the water to the desired temperature.
Flushing the tank should be done at least once a year to prevent sediment buildup and maintain the efficiency of your water heater. However, if you live in an area with hard water or notice a significant decrease in performance, more frequent flushings may be required.
Remember to follow the manufacturer’s instructions, safety guidelines, and local plumbing codes when performing any maintenance on your water heater. If you are unsure or uncomfortable with the process, it is recommended to seek assistance from a professional plumber.
Flushing the tank is an essential step in addressing water heater whistling caused by sediment buildup. By performing this maintenance task regularly, you can ensure the optimal performance and longevity of your water heater.
Regulating Water Pressure
High water pressure is a common culprit behind water heater whistling. Excessive water pressure puts undue stress on your plumbing system and can lead to a variety of issues, including the whistling sound coming from your water heater. Regulating water pressure is crucial to ensure the safe and efficient operation of your water heater and other plumbing fixtures.
Here are the steps to regulate water pressure and address water heater whistling:
- Measure the Water Pressure: Use a water pressure gauge to measure the water pressure in your home. The ideal water pressure should be around 40-60 psi (pounds per square inch).
- Locate the Main Water Supply: Locate the main water supply line in your home. The pressure regulator is typically installed near this line.
- Adjust the Pressure Regulator: Using a wrench, turn the adjustment screw on the pressure regulator to lower the water pressure. Turn it counterclockwise to decrease the pressure, and clockwise to increase it. Make small adjustments and test the pressure to ensure it remains within the recommended range.
- Monitor the Pressure: After adjusting the pressure regulator, monitor the water pressure using a gauge to ensure it stays within the desired range. It may take some trial and error to achieve the optimal water pressure for your home.
- Consider Installing a Pressure Reducing Valve: If your home does not have a pressure regulator or adjusting the existing regulator does not solve the issue, you can consider installing a pressure reducing valve (PRV). A PRV is a device that can automatically regulate and maintain a consistent water pressure throughout your home.
- Consult a Professional: If you are unsure about regulating the water pressure on your own or if the whistling noise persists after adjusting the pressure, it is advisable to seek assistance from a professional plumber. They have the expertise to accurately assess the water pressure in your home and make the necessary adjustments or installations.
Regulating water pressure is essential to prevent damage to your plumbing system, minimize water waste, and eliminate the whistling sound caused by excessive pressure. By maintaining the water pressure within the recommended range, you can ensure the safe and efficient operation of your water heater and other plumbing fixtures.
If you suspect that high water pressure is the cause of the whistling noise in your water heater, it is important to address it promptly. Excessive pressure can lead to leaks, pipe bursts, and other plumbing issues that can result in costly repairs. Regular monitoring of water pressure and taking corrective measures will help maintain your plumbing system’s longevity and performance.
Checking and Replacing the Pressure Relief Valve
The pressure relief valve is a vital safety component of your water heater. Its purpose is to release excess pressure from the tank and prevent potential explosions. If the pressure relief valve is faulty or not functioning correctly, it can lead to a buildup of pressure within the tank and cause a whistling sound. It is important to regularly check and, if needed, replace the pressure relief valve to ensure the safe operation of your water heater.
Here are the steps to check and replace the pressure relief valve:
- Turn Off the Power: Before working on your water heater, it is essential to turn off the power supply. This can typically be done by switching off the circuit breaker dedicated to the water heater. Safety should always be your top priority.
- Locate the Pressure Relief Valve: The pressure relief valve is usually located on the side or the top of the water heater. It is a small valve with a lever or a probe extending from it.
- Test the Valve for Proper Operation: To check if the valve is functioning correctly, lift the lever or push the probe gently. You should hear a rush of water as the valve opens and releases some pressure. If there is no water flow or if the valve does not release pressure, it indicates a faulty relief valve.
- Drain the Tank (Optional): If you plan to replace the pressure relief valve, it is advisable to drain the tank to prevent water from flowing out when removing the old valve. Connect a hose to the drain valve at the bottom of the tank and carefully drain the water into a suitable drainage area.
- Remove the Old Valve: Once the tank is drained (or if you are not replacing the valve), use a wrench to loosen and remove the old pressure relief valve. Turn it counterclockwise to unscrew it from the tank. Be cautious as residual water may still be present and can leak out.
- Prepare the New Valve: Before installing the new pressure relief valve, prepare it by wrapping the threads with plumber’s tape to create a tight seal. This will help prevent any leaks.
- Install the New Valve: With the threads of the new valve wrapped with plumber’s tape, screw it into the opening where the old valve was removed. Hand-tighten it initially, and then use a wrench to give it a final snug turn. Be careful not to overtighten as it can cause damage to the valve or tank.
- Restore Power and Test: Once the new pressure relief valve is installed, restore the power supply to the water heater by switching on the circuit breaker. Allow the water heater to heat the water, and monitor for any whistling noise. Test the valve by lifting the lever or pushing the probe to ensure it operates correctly and releases pressure.
If you are unsure about checking or replacing the pressure relief valve on your own, it is recommended to consult a professional plumber. They have the expertise to accurately assess the valve’s condition and ensure proper installation.
Regularly inspecting and maintaining the pressure relief valve is crucial for the safe operation of your water heater. By replacing a faulty valve, you can prevent dangerous pressure buildup, eliminate the whistling noise, and ensure the continued safety and efficiency of your water heater.
Inspecting and Repairing the Heating Element
The heating element is a vital component of your water heater responsible for heating the water inside the tank. If the heating element becomes loose or damaged, it can create vibrations or cause a whistling sound. Regularly inspecting and maintaining the heating element is essential to ensure the efficient and reliable operation of your water heater.
Here are the steps for inspecting and repairing the heating element:
- Turn Off the Power: Before inspecting or working on your water heater, always turn off the power supply. Switch off the circuit breaker dedicated to the water heater to prevent any electrical accidents.
- Remove the Access Panel: Locate the access panel on your water heater. It is usually located near the bottom of the unit. Use a screwdriver or a suitable tool to remove the screws and carefully take off the access panel.
- Locate the Heating Element: After removing the access panel, you will see the heating element. It is a metal rod typically located at the bottom or side of the tank. Inspect the element for any visible signs of damage, such as cracks or breaks in the coil.
- Check for Loose Connections: Ensure that the wiring connections to the heating element are secure and tight. Loose connections can cause an unstable connection and lead to vibrations and operational issues.
- Tighten the Element: If the heating element is loose, use a suitable wrench to tighten it securely. Gently but firmly turn the element in a clockwise direction until it is snugly in place. Take care not to overtighten, as it can cause damage to the element or tank.
- Replace the Element (if necessary): If the heating element shows signs of damage, such as cracked or broken coils, it will need to be replaced. Consult the manufacturer’s instructions or seek assistance from a professional plumber to ensure the correct replacement procedure. Make sure to disconnect any electrical connections before removing the old element.
- Install the New Element: With the new heating element ready, carefully install it into the designated spot in the tank. Follow the manufacturer’s instructions to ensure proper alignment and connection. Secure the element tightly but avoid overtightening.
- Restore Power and Test: Once the new heating element is securely installed (or the existing element is tightened), restore the power supply to the water heater. Switch on the circuit breaker and allow the water heater to heat the water. Monitor for any whistling sound, vibrations, or operational issues.
Proper inspection and maintenance of the heating element will help prevent vibrations and eliminate the whistling noise from your water heater. However, if you are uncertain about inspecting or repairing the heating element on your own, it is recommended to consult a professional plumber. They have the expertise to safely and accurately assess the heating element and perform any necessary repairs or replacements.
By ensuring the heating element is secure and in good condition, you can promote the efficient operation of your water heater and eliminate the whistling noise for a more peaceful and reliable hot water supply.
Ensuring Adequate Ventilation
Proper ventilation is vital for the safe and efficient operation of your water heater. Without adequate ventilation, the exhaust gases produced during the combustion process may not be able to escape, leading to a pressure imbalance and, in turn, causing a whistling sound. It is important to ensure that your water heater has proper ventilation to eliminate whistling noises and maintain the optimal functioning of the appliance.
Here are the steps to ensure adequate ventilation:
- Inspect the Venting System: Begin by inspecting the vent pipes and connections to ensure they are clear of any obstructions, such as debris, nests, or other blockages. Look for any signs of damage, including cracks or gaps, that may impede the airflow.
- Remove Obstructions: If you find any obstructions in the venting system, carefully remove them to restore proper airflow. Use a brush or a vacuum cleaner to clean out any debris or dust that may have accumulated.
- Check for Proper Installation: Ensure that the vent pipes are correctly installed with the recommended pitch and the appropriate number of bends and angles. Improper installation can lead to restricted airflow and contribute to the whistling sound. Make any necessary adjustments or corrections.
- Consider Vent Pipe Extension: If the vent pipes are too short or close to obstructions, such as walls or roof overhangs, it can cause backdrafting and affect the airflow. Consider extending the vent pipes to improve the ventilation and prevent the whistling noise.
- Consult a Professional: If you are unsure about the condition of the ventilation system or the appropriate steps to take, it is advisable to consult a professional HVAC technician or plumber. They can accurately assess the ventilation setup and make necessary adjustments or repairs to ensure proper airflow.
Proper ventilation is essential for the safe operation of your water heater. Inadequate ventilation can lead to the buildup of harmful gases, such as carbon monoxide, which poses a significant health risk. It can also cause the whistling noise you might be experiencing.
Regularly inspecting the venting system and ensuring that it is free from obstructions and properly installed will help maintain smooth airflow and prevent the whistling noise. A well-ventilated water heater not only operates more efficiently but also provides increased safety for you and your household.
If you suspect that inadequate ventilation is the cause of the whistling noise in your water heater, it is important to address it promptly. Seek the assistance of a professional if you are uncertain about making the necessary adjustments or repairs. They have the expertise to accurately assess your ventilation system and ensure proper airflow for the optimal functioning of your water heater.
By ensuring adequate ventilation, you can eliminate whistling noises and create a safe and reliable hot water supply for your home.
Read more: Why Does My Air Conditioner Whistle
Conclusion
Water heater whistling can be a frustrating issue, but it is important to address it promptly to ensure the safe and efficient operation of your appliance. By understanding the common causes of water heater whistling and following the appropriate steps, you can effectively deal with this problem.
We covered several potential causes of water heater whistling, including sediment buildup in the tank, high water pressure, faulty pressure relief valve, loose or damaged heating element, and inadequate ventilation. Each cause requires specific actions to address the issue and eliminate the whistling noise.
Flushing the tank to remove sediment buildup, regulating water pressure, checking and replacing the pressure relief valve, inspecting and repairing the heating element, and ensuring adequate ventilation are all important steps you can take to deal with water heater whistling properly.
However, it is important to remember that working with water heaters involves electricity, gas, and water, which can be potentially hazardous. If you are unsure about performing any of these steps, it is recommended to consult a professional plumber or HVAC technician. They have the expertise and knowledge to handle these tasks safely and effectively.
Maintaining your water heater through regular inspections and maintenance is key to preventing water heater whistling and ensuring its optimal performance. Regularly flushing the tank, monitoring and regulating water pressure, and inspecting and maintaining the various components of your water heater will help prevent issues and extend its lifespan.
By taking the necessary steps to address water heater whistling, you can enjoy a reliable and efficient hot water supply without the annoyance of unexpected noises. Remember, safety should always be your priority, so if you are unsure or uncomfortable with any maintenance tasks, seek professional assistance.
We hope this article has provided you with valuable insights and guidance on dealing with water heater whistling. With these tips and information, you can resolve the issue and ensure the proper functioning of your water heater for years to come.
Frequently Asked Questions about Why Is My Water Heater Whistling
Was this page helpful?
At Storables.com, we guarantee accurate and reliable information. Our content, validated by Expert Board Contributors, is crafted following stringent Editorial Policies. We're committed to providing you with well-researched, expert-backed insights for all your informational needs.
0 thoughts on “Why Is My Water Heater Whistling”