Articles
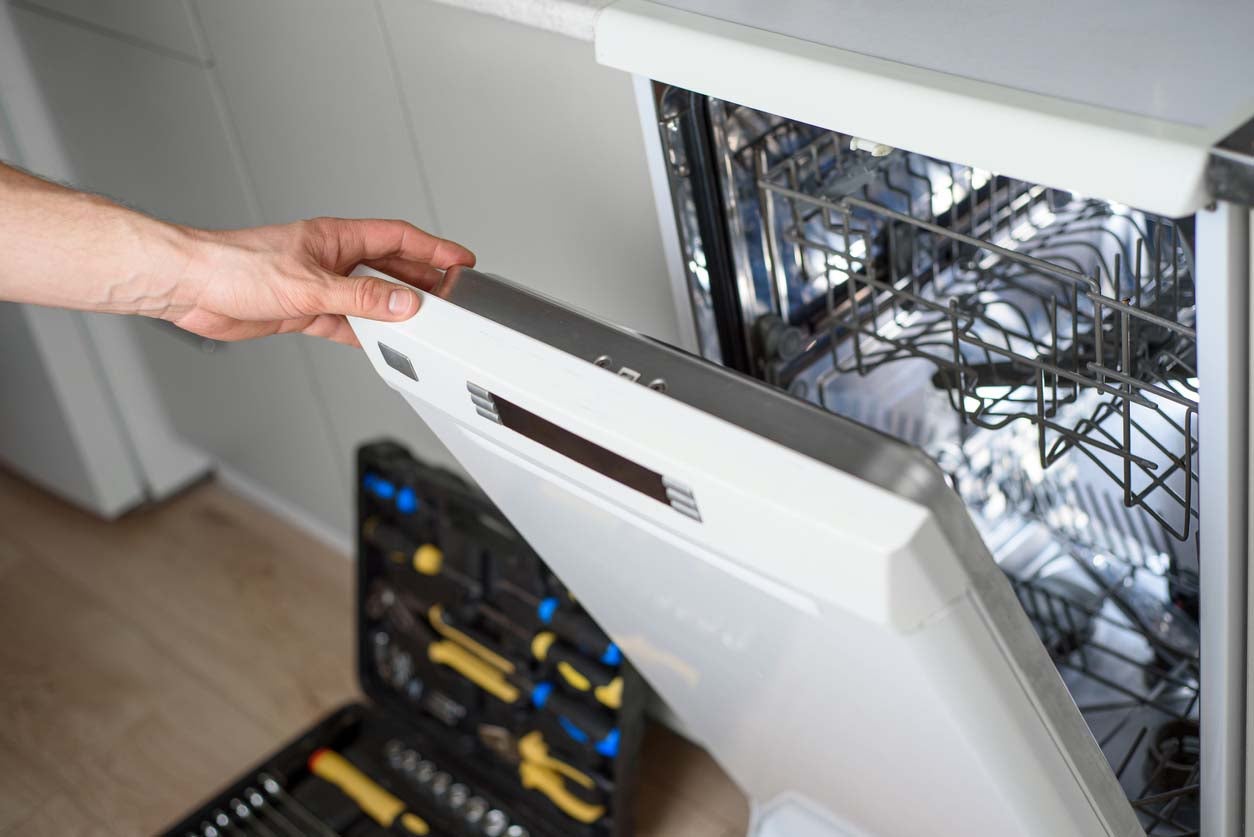
Why Is My Whirlpool Dishwasher Not Draining
Modified: October 20, 2024
Discover common reasons why your Whirlpool dishwasher is not draining and get helpful tips to fix the issue in this informative articles.
(Many of the links in this article redirect to a specific reviewed product. Your purchase of these products through affiliate links helps to generate commission for Storables.com, at no extra cost. Learn more)
Introduction
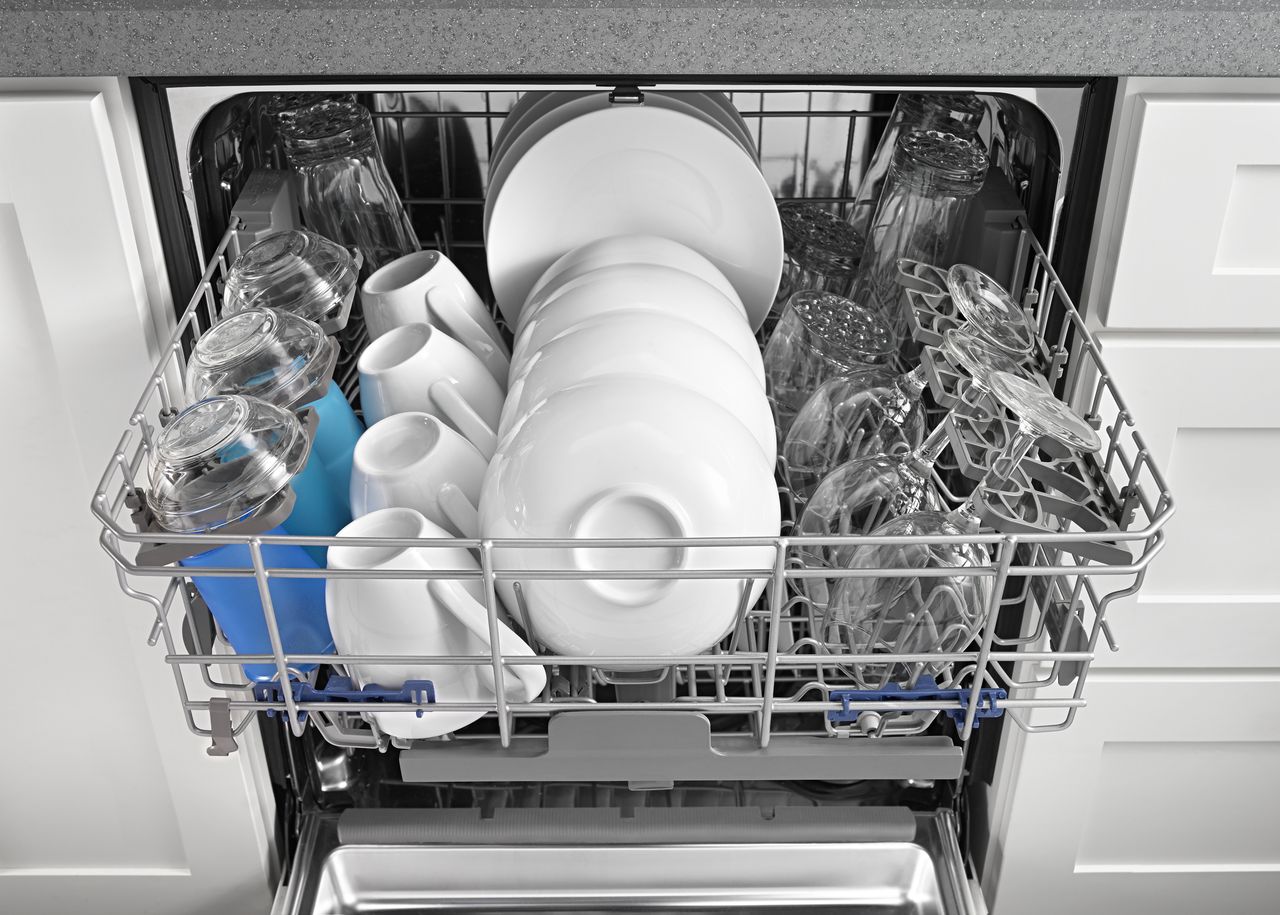
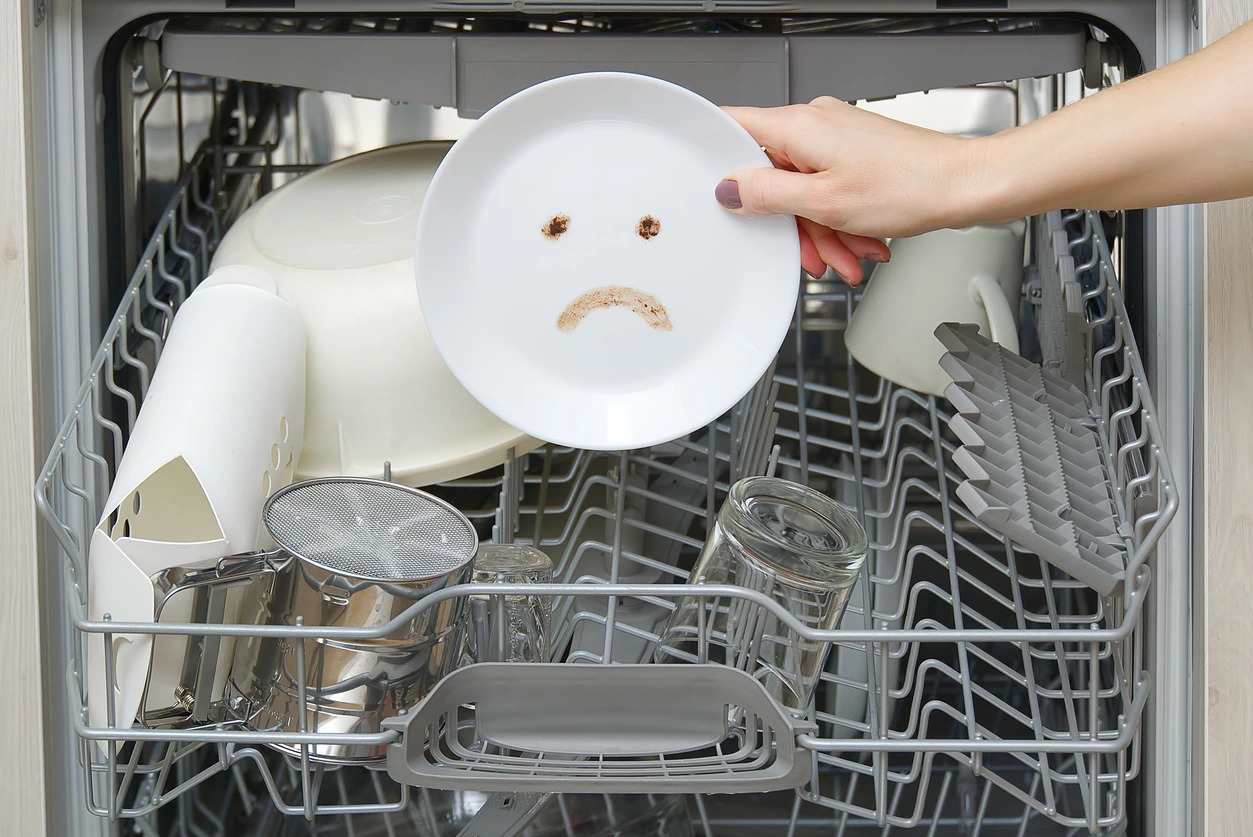
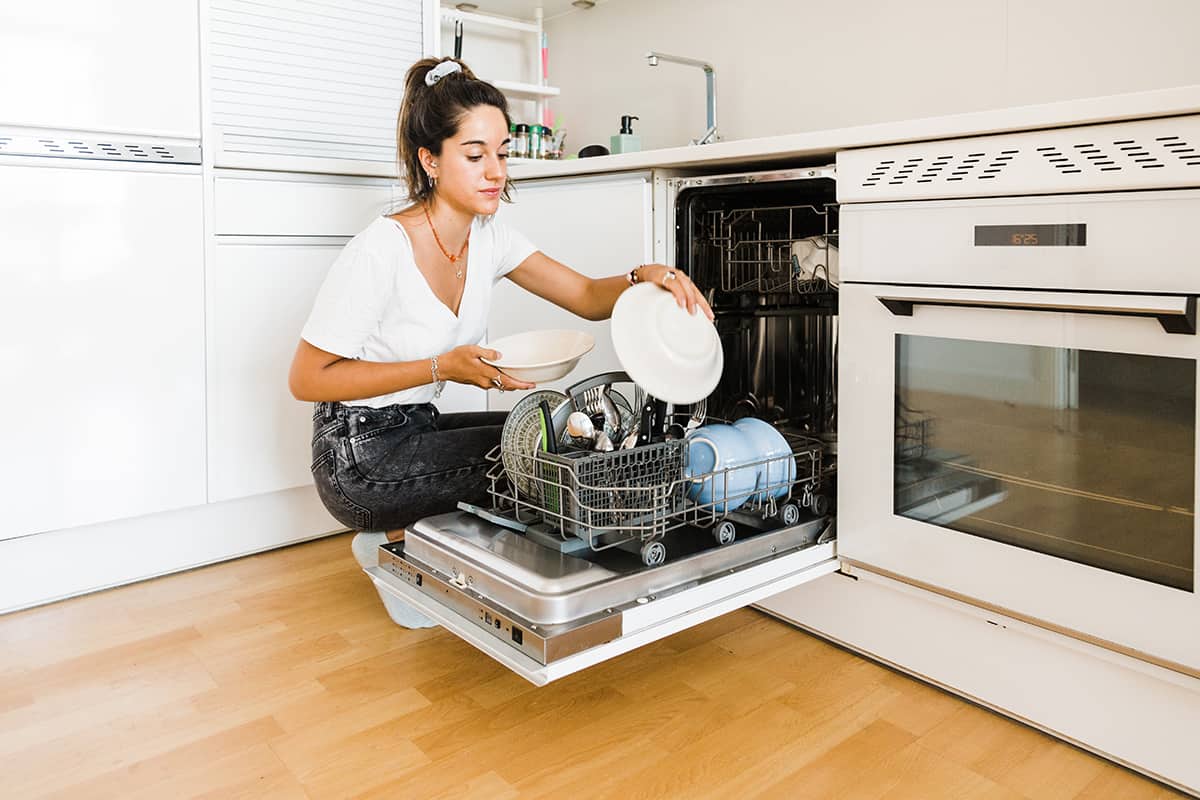
A Whirlpool dishwasher is a convenient appliance that helps to make cleaning up after meals a breeze. However, there may be times when you encounter issues with your dishwasher not draining properly. This can be frustrating as it prevents you from effectively using your dishwasher and can lead to standing water and potential water damage.
Understanding the possible causes of a Whirlpool dishwasher not draining can help you troubleshoot and resolve the issue. In this article, we will explore some common reasons why your dishwasher may not be draining and provide tips on how to fix the problem.
Before we delve into the potential causes, it’s important to note that safety is paramount when working with any electrical appliance. Always ensure that your dishwasher is unplugged and disconnected from the power source before attempting any repairs or inspections.
Now, let’s begin our exploration of the possible causes for a Whirlpool dishwasher not draining.
Key Takeaways:
- Regularly inspect and clean the drain hose, pump, filter, solenoid, impeller, and garbage disposal unit to troubleshoot and resolve drainage issues in your Whirlpool dishwasher, ensuring proper functionality and optimal performance.
- Ensure proper installation, leveling, secure mounting, correct drain hose routing, adequate loop height, and air gap installation to prevent drainage problems, optimize performance, and maintain the efficiency of your Whirlpool dishwasher.
Read more: Why Is My Dishwasher Not Working
Possible Causes of a Whirlpool Dishwasher Not Draining
When your Whirlpool dishwasher is not draining, there can be several factors at play. Understanding these potential causes can help you narrow down the problem and take the necessary steps to resolve it. Here are some common culprits:
- Clogged Drain Hose: One possible cause of a dishwasher not draining is a clogged drain hose. Over time, food particles, grease, and debris can accumulate in the hose, obstructing the flow of water. Inspect the drain hose for any blockages and clean it thoroughly if necessary.
- Malfunctioning Drain Pump: The drain pump is responsible for removing water from the dishwasher tub. If it becomes faulty or damaged, it may fail to pump out the water, resulting in a drainage problem. Check the drain pump for any signs of damage or blockages, and replace it if necessary.
- Clogged Drain Filter: The drain filter is designed to trap food particles and prevent them from clogging the drain system. However, if the filter becomes clogged itself, it can restrict the water flow and lead to drainage issues. Remove the drain filter and clean it thoroughly to ensure proper water flow.
- Faulty Drain Solenoid: The drain solenoid is responsible for opening and closing the drain valve in the dishwasher. If it fails to function properly, the drain valve may not open, causing water to remain in the dishwasher. Test the drain solenoid for continuity using a multimeter, and replace it if it is faulty.
- Issues with the Garbage Disposal Unit: If your dishwasher is connected to a garbage disposal unit, a blockage or malfunction in the disposal unit can cause drainage problems. Check the disposal unit for any clogs or mechanical issues and address them accordingly.
- Problem with the Drain Impeller: The drain impeller is responsible for pushing water out of the dishwasher. If it becomes damaged or obstructed, it may fail to pump out water effectively, leading to poor drainage. Inspect the drain impeller for any signs of damage or blockages and replace it if necessary.
- Improper Installation: In some cases, a dishwasher may not drain properly due to improper installation. This can include issues with the drain hose routing, a lack of air gap, or inadequate loop height. Ensure that your dishwasher is installed correctly according to the manufacturer’s instructions.
Remember, these are just some of the possible causes of a Whirlpool dishwasher not draining. Depending on your specific model and situation, the cause of the problem may vary. It’s essential to methodically inspect and troubleshoot each potential cause to determine the underlying issue.
Checking the Drain Hose
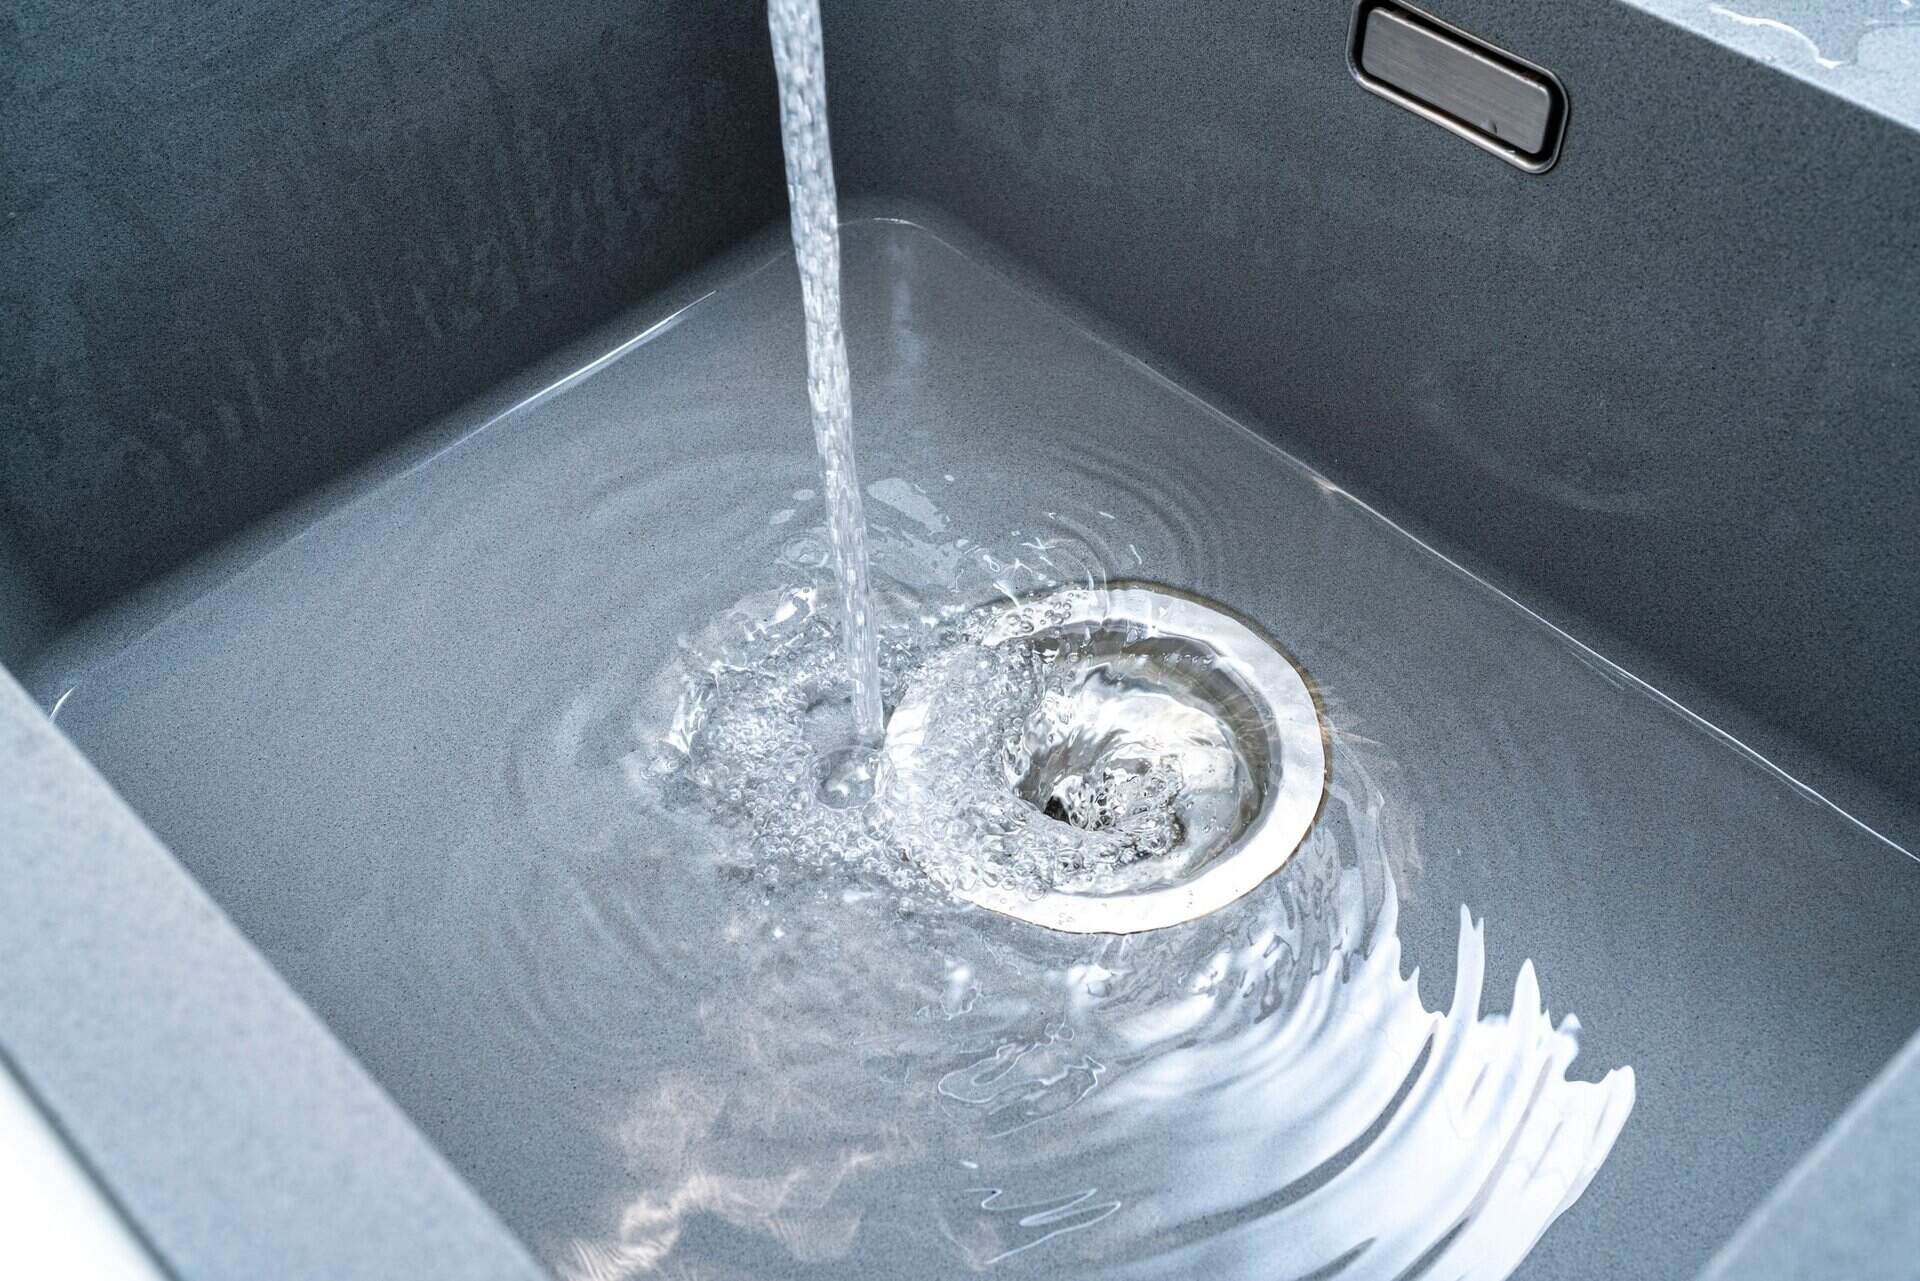
One of the first steps in troubleshooting a Whirlpool dishwasher that is not draining properly is to check the drain hose. The drain hose is responsible for carrying the water out of the dishwasher and into the household drain or disposal unit. A clogged or kinked drain hose can impede the proper flow of water, leading to drainage issues.
To check the drain hose, follow these steps:
- Disconnect the dishwasher: Before inspecting the drain hose, make sure the dishwasher is turned off and unplugged from the power source to avoid any accidents.
- Access the drain hose: Locate the drain hose, which is typically located at the back of the dishwasher. It is connected to a drain pump or an air gap, depending on the model.
- Inspect the hose for blockages: Carefully inspect the entire length of the drain hose for any clogs or obstructions. Use a flashlight if necessary to get a clear view. Pay attention to bends and connections where debris may accumulate.
- Remove any clogs or debris: If you find any blockages in the drain hose, carefully remove them using a long, flexible brush or a pipe cleaner. Avoid using sharp objects that may damage the hose.
- Check for kinks or bends: Ensure that the drain hose is not kinked or bent, as this can restrict water flow. Straighten any kinks or reposition the hose as needed to ensure a smooth, unobstructed path for the water.
- Reconnect the dishwasher: After completing the inspection and making any necessary adjustments, reconnect the dishwasher to the power source and power it back on.
Checking and clearing the drain hose is a simple yet essential step in resolving drainage issues with your Whirlpool dishwasher. If the drain hose appears to be in good condition and free of clogs and kinks, then the issue may lie elsewhere, and further investigation is required.
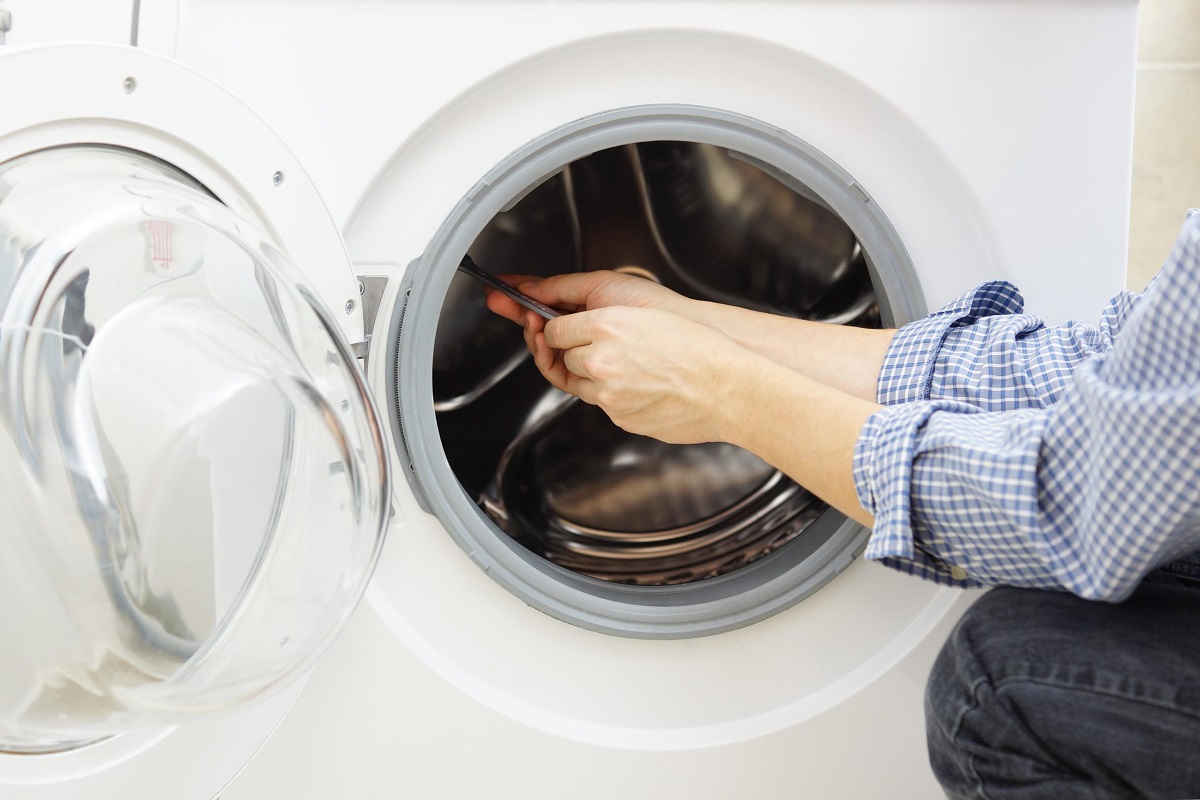
Inspecting the Drain Pump
When a Whirlpool dishwasher is not draining properly, one possible culprit is a malfunctioning drain pump. The drain pump is responsible for removing water from the dishwasher tub and pumping it out through the drain hose. If the drain pump is faulty or clogged, it can hinder the drainage process.
To inspect the drain pump, follow these steps:
- Disconnect the dishwasher: Before attempting to inspect the drain pump, turn off the dishwasher and unplug it from the power source to ensure your safety.
- Locate the drain pump: The drain pump is typically located at the bottom of the dishwasher, near the sump area. It may be enclosed or covered by a protective panel or housing.
- Visually inspect the pump: Carefully examine the drain pump for any visible signs of damage or blockages. Look for debris, such as food particles or broken pieces, that may be obstructing the pump’s impeller or motor.
- Check the impeller: The impeller is a rotating component inside the drain pump that helps to move water out of the dishwasher. Ensure that the impeller can spin freely and is not obstructed or damaged. Use a finger or a small tool to gently rotate the impeller and check for any resistance or irregularities.
- Remove and clean the pump: If you notice any blockages or debris in the drain pump, it may be necessary to remove the pump for a more thorough cleaning. Consult the dishwasher’s user manual or the manufacturer’s instructions for the proper procedure on how to remove the drain pump. Clean the pump using a soft brush, running water, or a mild detergent if needed.
- Reinstall the pump: After inspecting and cleaning the drain pump, carefully reattach it to its original position. Ensure that all connections and seals are secure to prevent any leaks.
- Reconnect the dishwasher: Once the drain pump is properly reinstalled, reconnect the dishwasher to the power source and turn it on to test the drainage functionality.
Inspecting the drain pump is an important step in troubleshooting a Whirlpool dishwasher that is not draining correctly. If, after inspecting the drain pump, you find that it is damaged or not functioning properly, it may need to be replaced. Refer to the manufacturer’s instructions or consult a professional technician for assistance in replacing the drain pump.
Clearing Clogs in the Drain Filter
The drain filter in a Whirlpool dishwasher plays a crucial role in preventing large debris and food particles from entering the drain system. However, over time, the drain filter can become clogged with accumulated food residue, causing water to back up and drainage issues to occur. Clearing clogs in the drain filter is an important step in troubleshooting a dishwasher that is not draining properly.
To clear clogs in the drain filter, follow these steps:
- Disconnect the dishwasher: Before working on the drain filter, ensure that the dishwasher is turned off and unplugged to avoid any electrical mishaps.
- Locate the drain filter: The drain filter is typically located on the bottom of the dishwasher, near the back. It may be covered by a removable panel or located inside the dishwasher tub.
- Remove the drain filter: Depending on the model, the drain filter may twist, lift out, or have a tab that needs to be disengaged. Follow the manufacturer’s instructions to safely remove the drain filter without damaging it.
- Inspect the filter for debris: Once the drain filter is removed, visually inspect it for any debris or clogs. Pay special attention to openings, crevices, and the filter mesh where particles may be trapped.
- Clean the drain filter: Use a soft brush or a toothbrush to gently scrub away any dirt, food particles, or debris that may be clogging the filter. Rinse the filter with running water to remove any remaining residue.
- Clear the filter housing: While the drain filter is removed, take the opportunity to remove any debris or buildup in the filter housing using a damp cloth or sponge.
- Reinstall the drain filter: Carefully reinsert the drain filter back into its designated position in the dishwasher. Ensure that it is properly aligned and securely in place.
- Reconnect the dishwasher: Once the drain filter is successfully reinstalled, plug the dishwasher back into the power source and turn it on to check if the drainage issue has been resolved.
Clearing clogs in the drain filter is a simple yet effective way to restore proper drainage in a Whirlpool dishwasher. By regularly cleaning the drain filter and removing any trapped debris, you can prevent clogs from occurring and maintain the optimal performance of your dishwasher.
Check the dishwasher’s drain hose for clogs or kinks. Remove any blockages and ensure the hose is properly connected to the sink or garbage disposal. If the issue persists, the drain pump or motor may need to be replaced.
Verifying the Functionality of the Drain Solenoid
The drain solenoid is an essential component of a Whirlpool dishwasher’s drainage system. It controls the opening and closing of the drain valve, allowing water to flow out of the dishwasher. If the drain solenoid is faulty or not functioning correctly, it can result in a dishwasher that does not drain properly. Verifying the functionality of the drain solenoid is a crucial step in troubleshooting this issue.
To verify the functionality of the drain solenoid, follow these steps:
- Disconnect the dishwasher: Before inspecting the drain solenoid, ensure that the dishwasher is powered off and unplugged to eliminate the risk of electric shock.
- Locate the drain solenoid: The drain solenoid is typically located at the back of the dishwasher, near the drain valve. It is a small electrical component that is responsible for controlling the flow of water in the drainage system.
- Test for continuity: Using a multimeter set to the continuity or resistance mode, test the drain solenoid for continuity. Place one probe on each terminal of the solenoid. If the multimeter shows a continuous circuit or low resistance, the drain solenoid is functioning correctly. If there is no continuity or high resistance, the solenoid may be faulty and in need of replacement.
- Check for physical damage: Inspect the drain solenoid for any visible signs of damage, such as burn marks, melted plastic, or loose connections. If the solenoid appears damaged, it may need to be replaced to restore proper drainage.
- Ensure proper power supply: Verify that the dishwasher is receiving the proper power supply. In some cases, a lack of power to the drain solenoid can cause drainage issues. Check the dishwasher’s electrical connections and ensure that it is receiving the correct voltage to operate the solenoid.
- Replace the drain solenoid if necessary: If the drain solenoid fails the continuity test or shows signs of physical damage, it may be necessary to replace it. Refer to the dishwasher’s user manual or consult a professional technician for guidance on how to safely remove and replace the drain solenoid.
- Reconnect the dishwasher: Once the drain solenoid has been inspected or replaced, reconnect the dishwasher to the power source and turn it on to test the drainage functionality.
Verifying the functionality of the drain solenoid is an essential troubleshooting step when dealing with a Whirlpool dishwasher that is not draining correctly. By ensuring that the solenoid is working properly, you can help identify and resolve any issues related to its operation, restoring proper drainage in your dishwasher.
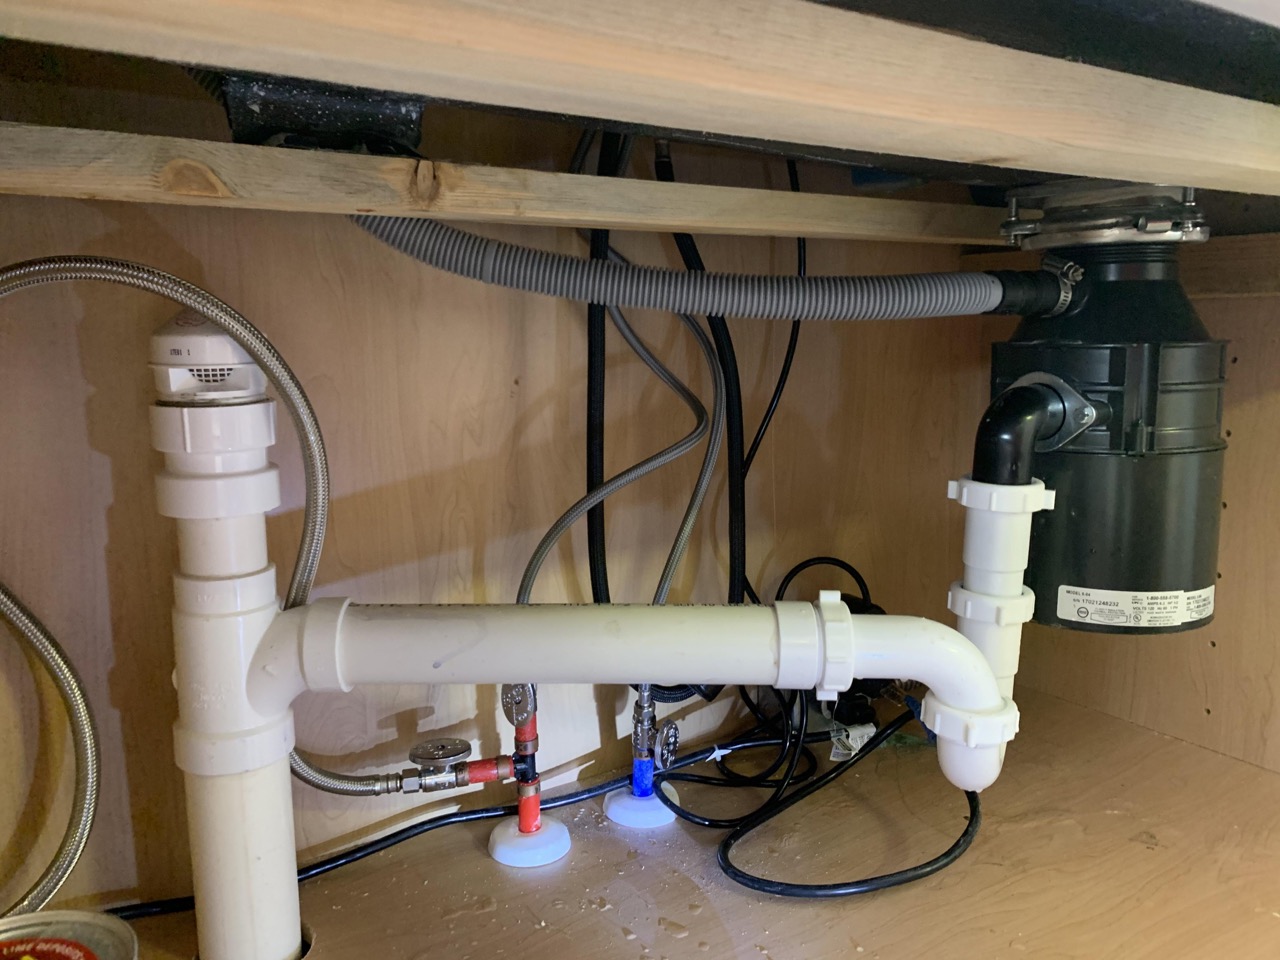
Examining the Garbage Disposal Unit
If your Whirlpool dishwasher is not draining properly, it’s important to examine the garbage disposal unit as it plays a vital role in the overall drainage system. The garbage disposal unit is responsible for grinding and disposing of food waste that is washed down the sink. A malfunctioning or clogged garbage disposal unit can impede proper drainage in the dishwasher, leading to water buildup and drainage issues.
To examine the garbage disposal unit, follow these steps:
- Safety first: Before inspecting the garbage disposal unit, ensure that the dishwasher and any electrical power to the unit are turned off and disconnected to prevent accidents.
- Locate the garbage disposal unit: Depending on the layout of your kitchen, the garbage disposal unit can be found under the sink or in a separate compartment nearby. It is connected to the drain pipe and is usually easily accessible.
- Check for blockages: Inspect the garbage disposal unit for any clogs or blockages. Use a flashlight to have a clear view of the grinding chamber and the drain pipe. Remove any visible debris, such as food scraps or foreign objects, using tongs or a long-handled tool.
- Operate the disposal unit: Turn on the garbage disposal unit and listen for any unusual noises or vibrations. If the unit is running but not grinding the food waste properly, it may indicate a motor or blade issue. In that case, consult the manufacturer’s instructions or a professional technician for further assistance.
- Clear the drain pipe: The drain pipe leading from the garbage disposal unit to the main drain may also become clogged. Disconnect the drain pipe carefully and clear any debris or clogs using a plumbing snake or a pipe cleaner. Be sure to reattach the drain pipe securely once it is clear.
- Test the drainage: After examining and clearing any blockages in the garbage disposal unit and drain pipe, reconnect the dishwasher and test the drainage functionality. Run a short cycle to ensure that water is properly draining from the dishwasher into the garbage disposal unit.
Examining the garbage disposal unit is an important step in troubleshooting a dishwasher that is not draining correctly. By checking for blockages and ensuring that the unit is operating correctly, you can help restore proper drainage in your Whirlpool dishwasher.
Troubleshooting the Drain Impeller
The drain impeller is a critical component of a Whirlpool dishwasher that helps to pump water out of the dishwasher during the drainage cycle. If the drain impeller is damaged, clogged, or not functioning properly, it can lead to drainage issues and water buildup in the dishwasher. Troubleshooting the drain impeller can help identify and resolve these problems.
To troubleshoot the drain impeller, follow these steps:
- Disconnect the dishwasher: Before inspecting the drain impeller, ensure that the dishwasher is turned off and unplugged to avoid any electrical accidents.
- Access the drain impeller: The drain impeller is located at the base of the dishwasher, near the drain pump. In some models, it may be accessible from the inside of the dishwasher, while in others, you may need to remove the dishwasher’s bottom panel to reach it.
- Inspect the drain impeller: Visually inspect the drain impeller for any signs of damage, such as broken or bent blades. If the impeller is visibly damaged, it may need to be replaced. Additionally, check for any debris, such as food particles or foreign objects, that may be blocking the rotation of the impeller.
- Clear any blockages: If you find any debris obstructing the drain impeller, use a pair of tweezers or needle-nose pliers to carefully remove it. Ensure that the impeller can rotate freely without any obstructions.
- Test the impeller’s movement: Gently spin the drain impeller with your finger to ensure that it moves smoothly and without any resistance. If the impeller is stiff or does not move, it may be jammed or damaged.
- Replace the drain impeller if necessary: If the drain impeller is damaged, excessively worn, or does not function properly, it may need to be replaced. Consult the dishwasher’s user manual or contact a professional technician for guidance on how to safely remove and replace the drain impeller.
- Reassemble and test: Once the drain impeller has been inspected and, if needed, replaced, reassemble any panels or components that were removed. Plug the dishwasher back into the power source and run a drain cycle to test the impeller’s functionality and ensure proper drainage.
Troubleshooting the drain impeller is an essential step in resolving drainage issues with your Whirlpool dishwasher. By checking for damage or blockages and ensuring that the impeller can rotate freely, you can restore proper drainage and optimize the performance of your dishwasher.
Ensuring Proper Installation
Proper installation is crucial for the efficient operation of a Whirlpool dishwasher and ensuring the correct draining of water. If a dishwasher is not installed correctly, it can lead to drainage issues and cause water to accumulate in the tub. By ensuring proper installation, you can eliminate potential installation-related problems and improve the overall performance of your dishwasher.
To ensure proper installation of your Whirlpool dishwasher, consider the following factors:
- Proper leveling: Ensure that the dishwasher is level and stable. Use a bubble level to check the front-to-back and side-to-side levelness of the dishwasher. Use adjustable feet or shims to make necessary adjustments and maintain the dishwasher’s stability.
- Secure mounting brackets: Properly secure the mounting brackets to the dishwasher’s sides or top, depending on the model. These brackets help to stabilize the dishwasher and prevent excessive movement or vibration during operation.
- Correct drain hose routing: Ensure that the dishwasher’s drain hose is properly routed, avoiding any kinks, bends, or restrictions. The drain hose should have a gradual slope downward to allow water to flow freely. Improper routing can impede water drainage and cause standing water in the dishwasher.
- Adequate loop height: If the dishwasher’s drain hose is connected to a garbage disposal unit or the sink drain, make sure there is an adequate loop or high point in the hose. This prevents backflow and helps maintain proper water drainage.
- Air gap installation: If required by local plumbing codes, make sure that an air gap is properly installed between the dishwasher and the sink drain or garbage disposal. An air gap prevents wastewater from flowing back into the dishwasher, ensuring proper drainage.
- Tight connections: Check all plumbing connections, including the drain hose, water supply line, and electrical connections, to ensure they are secure and leak-free. Loose or improperly connected lines can lead to drainage issues and potential leaks.
- Refer to manufacturer’s instructions: Always consult the dishwasher’s user manual and follow the manufacturer’s installation instructions to ensure proper setup. This includes any specific requirements or recommendations for your particular model.
By ensuring proper installation of your Whirlpool dishwasher, you can minimize the chances of drainage problems and optimize its performance. If you are unsure about any aspect of the installation process or encounter difficulties, it is recommended to consult a professional technician for assistance.
Read more: Why Is My Bathroom Sink Not Draining
Conclusion
A Whirlpool dishwasher not draining properly can be frustrating and disruptive to your daily routine. However, by understanding the possible causes and taking the necessary troubleshooting steps, you can resolve the issue and restore proper drainage to your dishwasher.
In this article, we explored some of the common causes of a Whirlpool dishwasher not draining, including a clogged drain hose, malfunctioning drain pump, blocked drain filter, faulty drain solenoid, issues with the garbage disposal unit, troubles with the drain impeller, and improper installation. By systematically checking and addressing these factors, you can identify and resolve the underlying problem.
Remember to approach the troubleshooting process with caution and safety in mind. Always disconnect the dishwasher from the power source before any inspection or repair work. If you’re unsure about any steps or encounter difficulties, it’s recommended to consult the dishwasher’s user manual or seek assistance from a professional technician.
By clearing blockages in the drain hose, inspecting and cleaning the drain pump, clearing clogs in the drain filter, verifying the functionality of the drain solenoid, examining the garbage disposal unit, troubleshooting the drain impeller, and ensuring proper installation, you can increase the chances of resolving drainage issues in your Whirlpool dishwasher.
If you’ve exhausted all troubleshooting steps and the problem persists, it may be necessary to contact Whirlpool customer support or schedule a service appointment with a qualified technician to further diagnose and resolve the issue.
With proper maintenance and regular cleaning, you can help prevent future drainage issues in your Whirlpool dishwasher. Remember to read and follow the manufacturer’s instructions, use the dishwasher as intended, and keep an eye out for any signs of potential problems.
By addressing drainage issues promptly and maintaining your Whirlpool dishwasher, you can continue to enjoy the convenience and effectiveness of this essential kitchen appliance for years to come.
Frequently Asked Questions about Why Is My Whirlpool Dishwasher Not Draining
Was this page helpful?
At Storables.com, we guarantee accurate and reliable information. Our content, validated by Expert Board Contributors, is crafted following stringent Editorial Policies. We're committed to providing you with well-researched, expert-backed insights for all your informational needs.
0 thoughts on “Why Is My Whirlpool Dishwasher Not Draining”