Articles
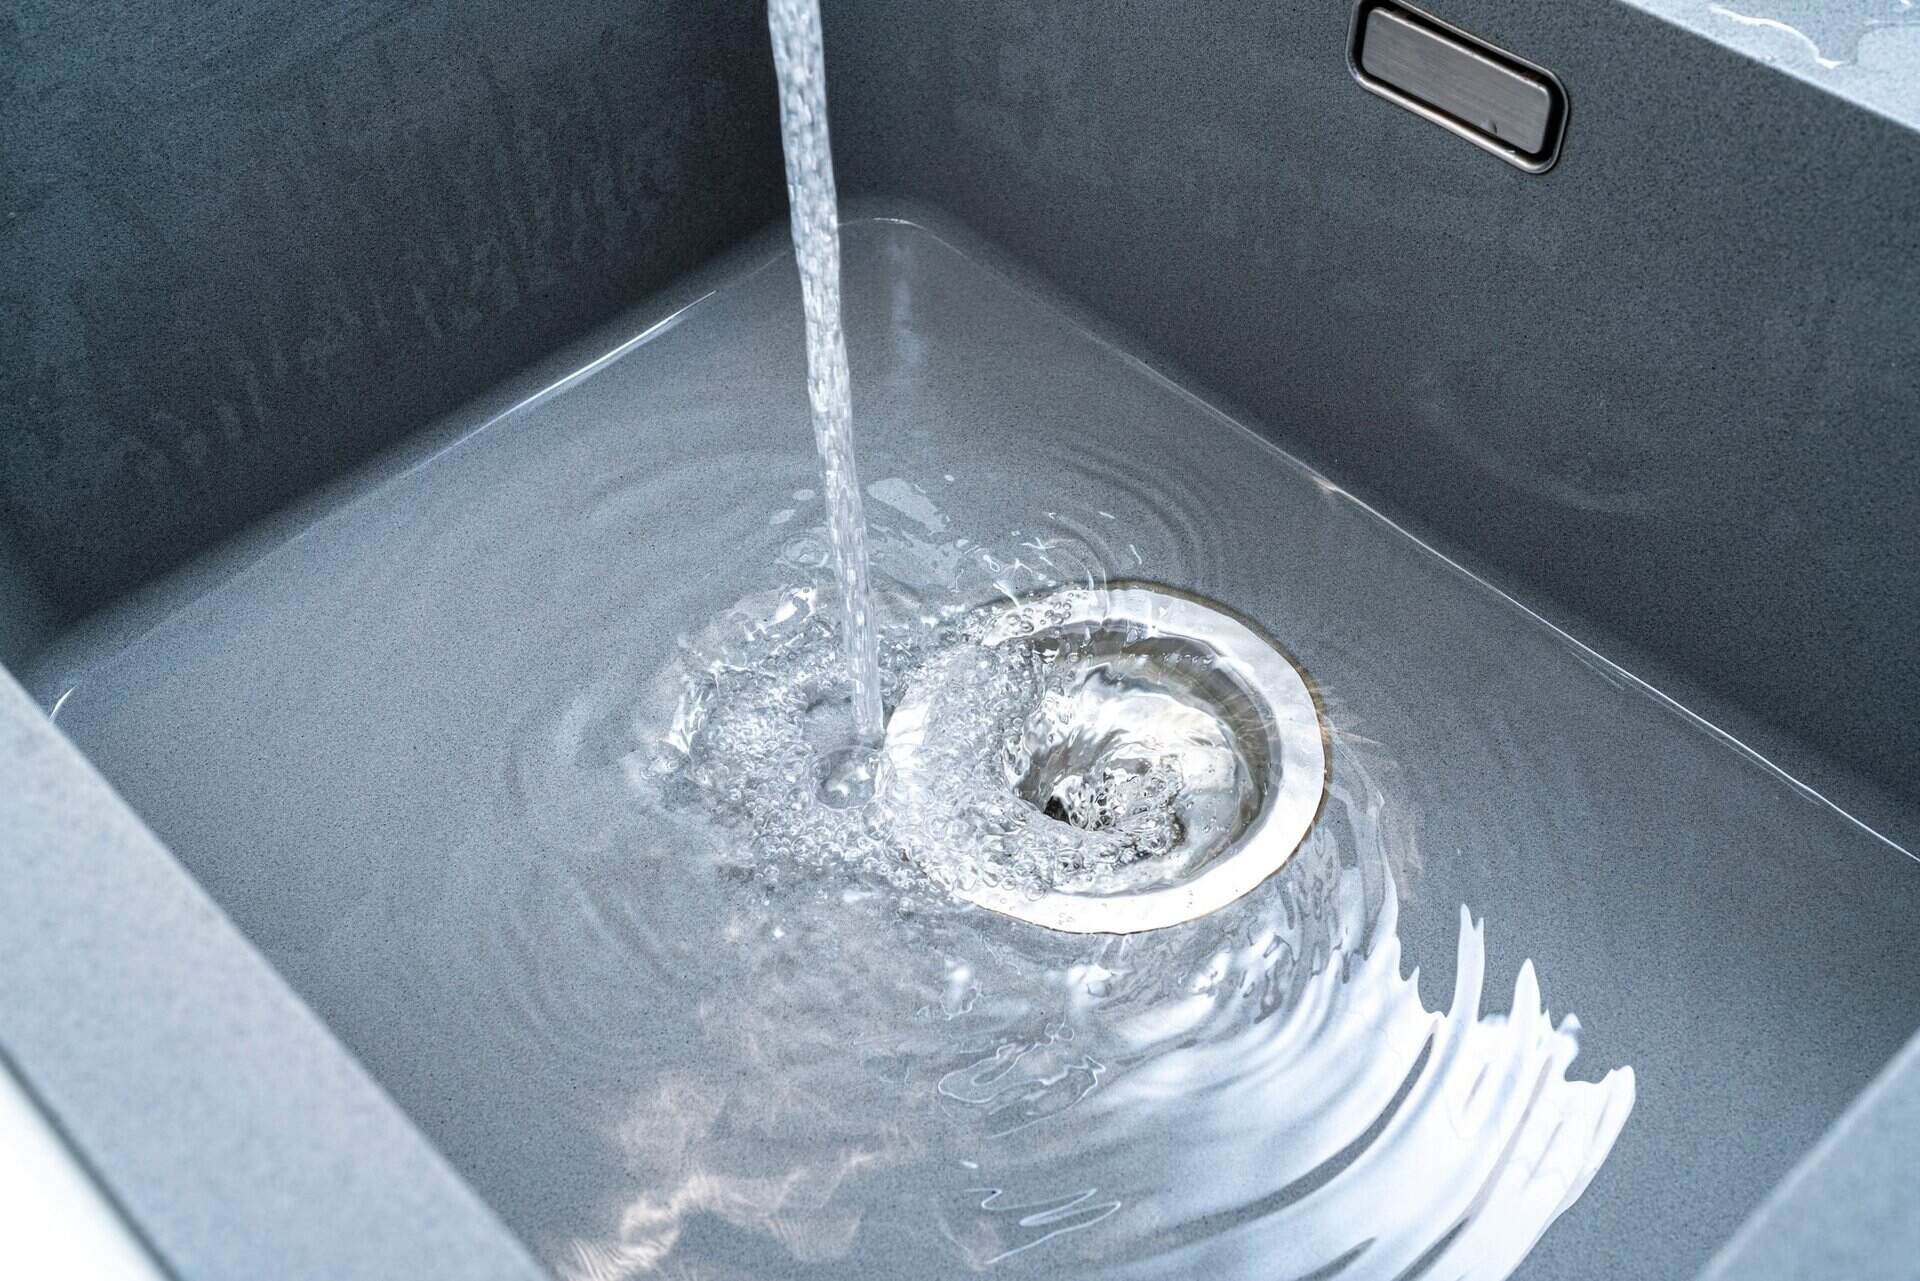
Why Is My Sink Draining Slowly
Modified: October 20, 2024
Learn why your sink is draining slowly and find helpful articles to fix the issue.
(Many of the links in this article redirect to a specific reviewed product. Your purchase of these products through affiliate links helps to generate commission for Storables.com, at no extra cost. Learn more)
Introduction
Have you ever experienced frustration when the water in your sink takes an eternity to drain? It’s a common plumbing issue that many homeowners encounter. A slow-draining sink can disrupt your daily routine and cause inconvenience in the kitchen or bathroom. But what are the reasons behind this sluggishness, and how can you fix it?
In this article, we will explore the common causes of a slow-draining sink and provide you with practical solutions to tackle the problem. By understanding the underlying issues and implementing the right techniques, you can restore the functionality of your sink and enjoy smooth drainage once again.
From clogged drains to ventilation problems, there are several factors that can contribute to a slow-draining sink. Identifying the root cause is essential in determining the appropriate course of action. Whether you’re a seasoned DIY enthusiast or a first-time homeowner, this article will equip you with the knowledge and tools needed to address this frustrating plumbing issue.
So let’s delve into the details and uncover the reasons behind a slow-draining sink, as well as effective methods to diagnose and fix it. Additionally, we’ll explore some preventative measures that can help you avoid this issue in the future, ensuring uninterrupted drainage in your sink.
Key Takeaways:
- Preventing a slow-draining sink is crucial. Use sink strainers, dispose of grease properly, and educate household members to avoid clogs and maintain smooth drainage.
- Regular maintenance and prompt action are essential. From manual cleaning to using natural remedies, addressing slow-draining sinks promptly ensures a smoothly operating household.
Read more: Why Is My Toilet Draining Slowly
Common Causes of a Slow-Draining Sink
A slow-draining sink can be caused by various factors. Understanding these common culprits will enable you to address the issue effectively. Let’s take a closer look at each one:
- Clogged Drain: One of the primary causes of a slow-draining sink is a clogged drain. Over time, hair, soap residue, and other debris can accumulate in the drainpipe, obstructing the flow of water. This build-up restricts the water from freely passing through, causing the sink to drain gradually.
- Blocked P-Trap: The P-Trap is a curved section of the pipe located beneath the sink. Its purpose is to trap debris and prevent sewer gases from entering your home. However, this essential component can get blocked by foreign objects or excessive debris, impeding the flow of water and leading to slow drainage.
- Accumulation of Grease or Food Debris: In the kitchen, the buildup of grease, food particles, and other solid materials can cause a slow-draining sink. These substances can cling to the inner walls of the pipes, gradually narrowing the passage for the water to flow.
- Mineral Deposits: If your home has hard water, mineral deposits can accumulate in your pipes over time. The minerals, such as calcium and magnesium, form a crust on the inner surface of the pipes, restricting water flow and leading to slow drainage.
- Ventilation Issues: Proper ventilation is crucial for efficient drainage. If the plumbing system is improperly vented or there are blockages in the vent pipes, it can create negative pressure, hindering the smooth flow of water and causing the sink to drain slowly.
These common causes of a slow-draining sink highlight the importance of regular maintenance and early detection. By familiarizing yourself with these factors, you can take prompt action to prevent minor issues from escalating into major plumbing headaches.
Clogged Drain
A clogged drain is one of the most common causes of a slow-draining sink. Over time, debris such as hair, soap scum, and food particles can accumulate and create a blockage in the drainpipe. This restricts the flow of water and causes the sink to drain slowly.
Fortunately, there are several methods you can try to unclog a drain and restore proper drainage in your sink:
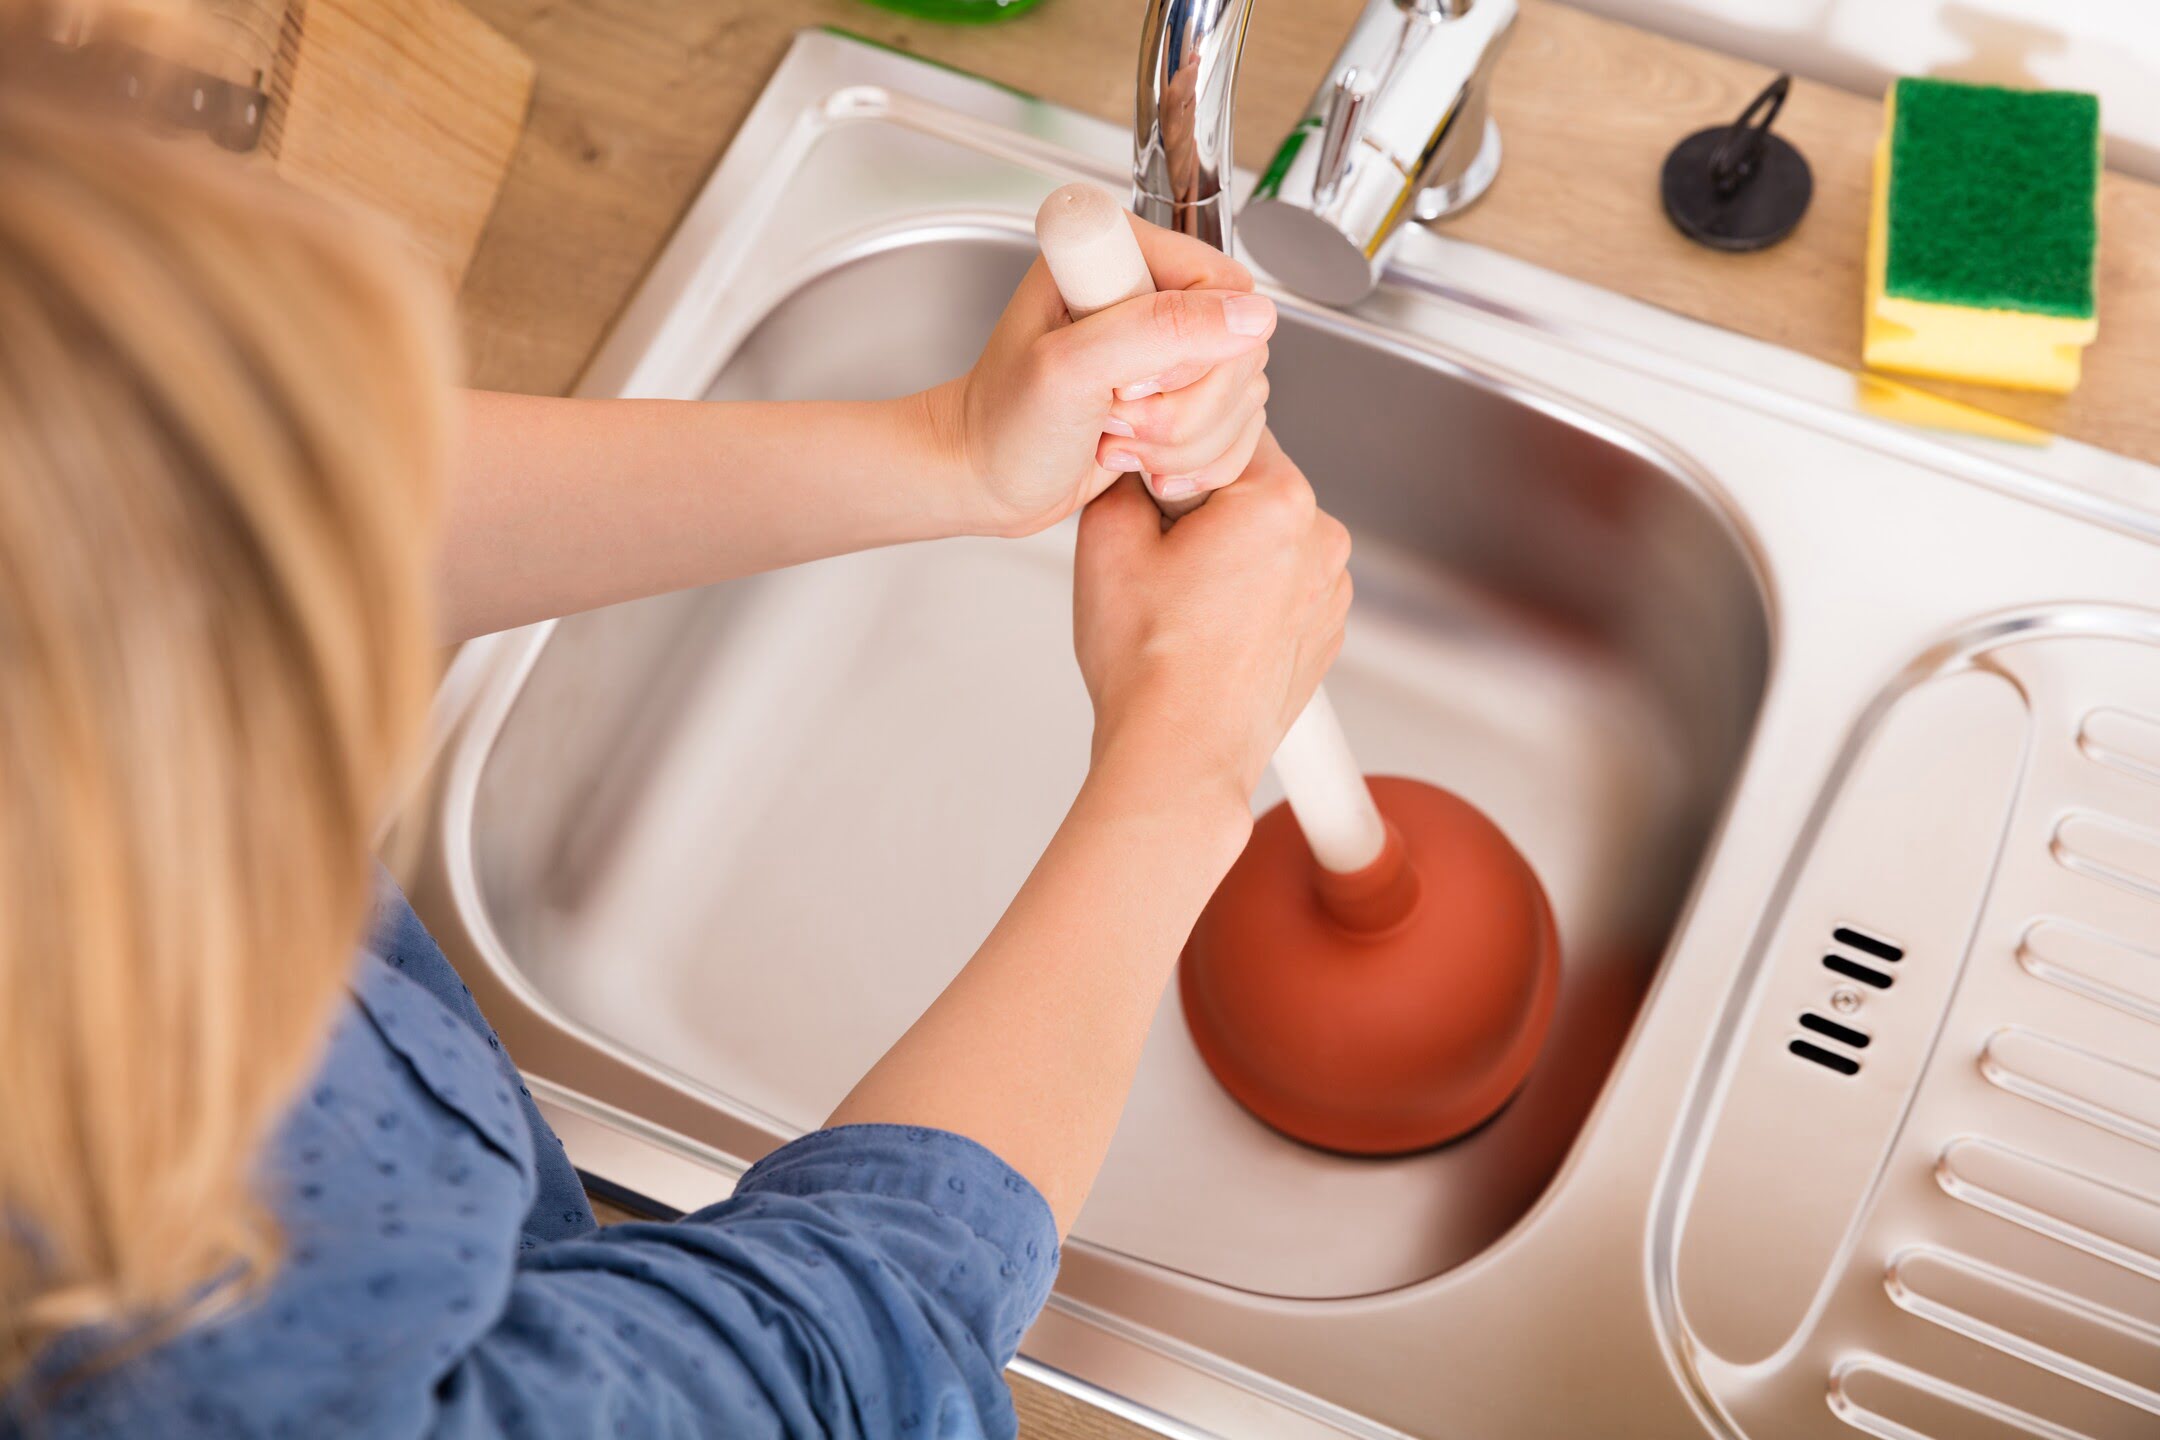
1. Plunger: Start by using a plunger specifically designed for sinks. Place the plunger over the drain, ensuring a tight seal. Then, rapidly push and pull the plunger to create suction and dislodge the blockage. Repeat this process several times until the drain clears and the water begins to flow smoothly.
2. Drain Snake: Another effective tool for unclogging drains is a drain snake, also known as a plumber’s snake. Insert the snake into the drain and turn the handle to navigate it through the pipe. As you rotate the snake, it will grab onto and break apart the clog, allowing water to flow freely. Once the clog is cleared, run hot water through the drain to flush away any remaining debris.
3. Baking Soda and Vinegar: For a more natural approach, you can use a combination of baking soda and vinegar to unclog the drain. Start by pouring a pot of boiling water down the drain to loosen any grease or small clogs. Then, pour 1/2 cup of baking soda followed by 1/2 cup of vinegar into the drain. Cover the drain with a plug or cloth to create a fizzing reaction that helps break down the clog. After about 15 minutes, flush the drain with hot water to clear out the clog.
4. Chemical Drain Cleaners: If the blockage is stubborn and none of the above methods work, you can try using a chemical drain cleaner. However, be cautious when using these products as they contain harsh chemicals that can be harmful to you and the environment. Follow the manufacturer’s instructions carefully and use them as a last resort.
Remember, prevention is always better than cure. To minimize the chances of a clogged drain, install drain covers and regularly remove any visible debris. Additionally, avoid pouring grease, coffee grounds, and other substances down the drain that can contribute to clogs over time.
By utilizing these methods and adopting preventive measures, you can effectively deal with a clogged drain and restore proper drainage to your sink.
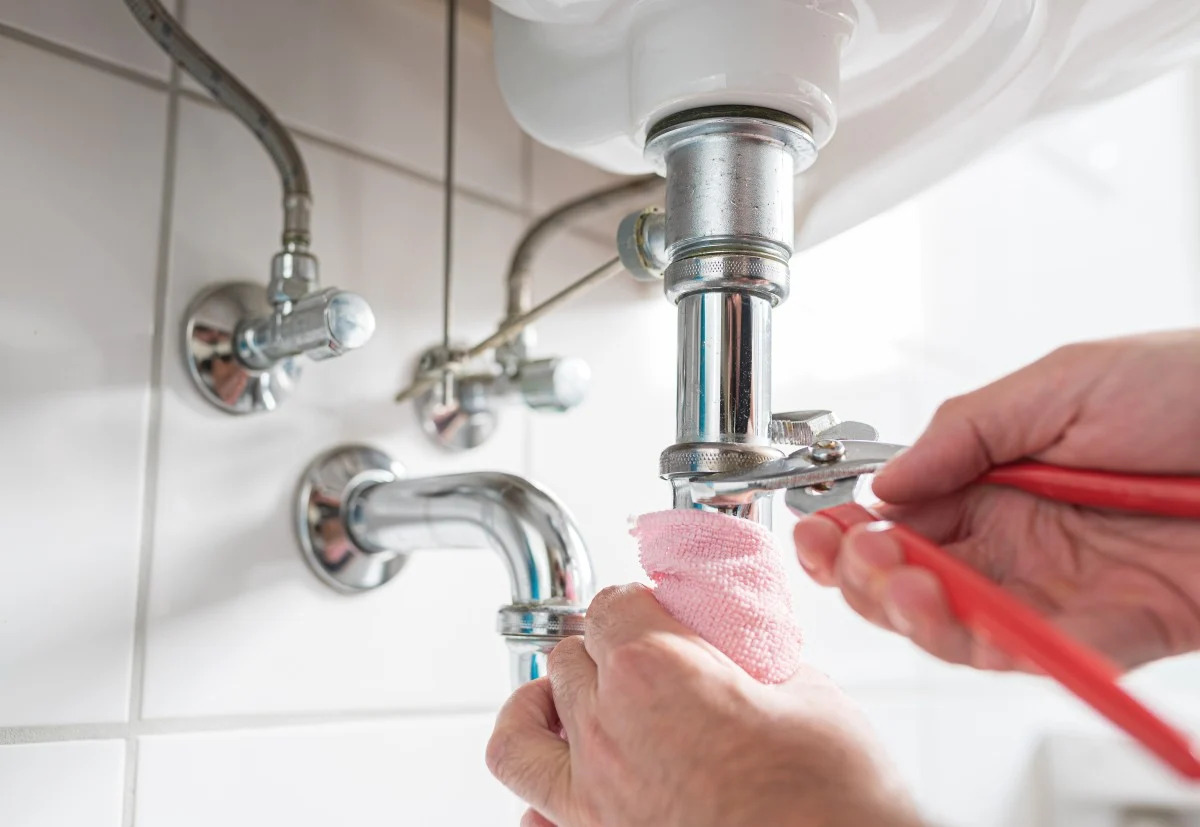
Blocked P-Trap
The P-Trap is a crucial component of the plumbing system located beneath the sink. Its curved shape forms a water seal that prevents sewer gases from entering your home. However, over time, the P-Trap can become blocked, leading to a slow-draining sink.
Here’s how you can clear a blocked P-Trap:
1. Prepare the area: Before you start, place a bucket or container below the P-Trap to catch any water or debris that may come out during the process. This will help prevent any mess and make cleanup easier.
2. Loosen the connections: Using a pair of pliers or a wrench, loosen the slip nuts on both ends of the P-Trap. Be careful not to overtighten or damage the fittings.
3. Remove the P-Trap: Once the slip nuts are loose, gently remove the P-Trap from the pipe. You may need to twist or wiggle it to loosen it fully. Be prepared for some water and debris to come out as you remove it from the pipe.
4. Clean the P-Trap: Inspect the P-Trap for any clogs or debris. Remove any visible blockages by hand or with a brush. You can also use a mixture of warm water and mild soap to clean the P-Trap thoroughly. Ensure that all the gunk and buildup are removed.
5. Reinstall the P-Trap: Once the P-Trap is clean, reinsert it into the pipe and tighten the slip nuts securely. Make sure the connections are snug but not overtightened to avoid any leaks.
6. Test the sink: After reinstalling the P-Trap, turn on the water and check if the sink is draining properly. If the water flows freely without any signs of backup, the P-Trap blockage has been successfully cleared.
If you’re not comfortable performing these steps yourself, it’s always a good idea to call a professional plumber to clear the blocked P-Trap for you. They have the expertise and tools to handle the job efficiently and effectively.
To prevent future blockages in the P-Trap, avoid disposing of large food particles or objects down the sink. Additionally, regular maintenance and cleaning of the P-Trap can help keep it clear and ensure smooth drainage in your sink.
Accumulation of Grease or Food Debris
In the kitchen, the accumulation of grease, oil, and food debris can lead to a slow-draining sink. Over time, these substances can build up inside the pipes, creating a sticky residue that restricts the flow of water. Thankfully, there are several methods you can use to remove these obstructions and restore proper drainage:
1. Hot Water and Dish Soap: Start by bringing a pot of water to a boil. Once the water is hot, pour it down the drain to soften and loosen the grease and debris. Next, add a few tablespoons of dish soap to the drain and let it sit for a few minutes. Finally, flush the drain with hot water to wash away the dissolved grease and debris.
2. Baking Soda and Vinegar: This classic combination is not only useful for cleaning, but it can also help clear clogs caused by grease and food debris. Start by pouring boiling water down the drain to soften the buildup. Then, sprinkle 1/2 cup of baking soda into the drain, followed by 1/2 cup of vinegar. Cover the drain with a plug or cloth to contain the fizzing reaction. After about 15 minutes, flush the drain with hot water to wash away the dissolved grease and debris.
3. Biological Drain Cleaners: If you prefer an eco-friendly approach, consider using biological drain cleaners. These products contain live bacteria and enzymes that break down organic materials, including grease and food debris. Follow the instructions on the product and use it regularly to keep the drains clear and maintain proper drainage.
4. Mechanical Drain Cleaning: In some cases, mechanical cleaning methods may be necessary to remove stubborn grease and food debris. One option is to use a plumbing snake or drain auger to physically break apart the clog and clear the pipe. Another option is to hire a professional plumber who can use specialized tools like hydro-jetting to thoroughly clean the pipes and remove any stubborn buildup.
Remember, prevention is key to avoiding the accumulation of grease and food debris in the first place. Avoid pouring cooking oil, grease, and food scraps down the drain. Instead, dispose of them in the trash or use designated grease disposal containers. Also, consider installing a grease trap or a sink strainer to catch solids before they can enter the drain and contribute to clogs.
By applying these methods and adopting preventative measures, you can effectively address the issue of grease and food debris accumulation, ensuring smooth drainage in your sink.
Read more: Why Is My Bathroom Sink Not Draining
Mineral Deposits
If you live in an area with hard water, mineral deposits can build up in your pipes over time, leading to a slow-draining sink. The minerals, such as calcium and magnesium, form a crust on the inner surface of the pipes, narrowing the passage for water to flow through. To address this issue, consider the following methods:
1. Vinegar Solution: Vinegar is an effective natural cleaner that can help dissolve mineral deposits. Start by creating a solution of equal parts vinegar and water. Pour the solution down the drain and let it sit for a few hours or overnight, allowing the acidic properties of vinegar to break down the mineral buildup. Afterward, flush the drain with hot water to remove the dissolved deposits. Regularly repeating this process can prevent future mineral deposits.
2. Citric Acid Solution: Citric acid, commonly found in lemon juice, can also be used to break down mineral deposits. To create a solution, mix two tablespoons of citric acid powder with one quart of warm water. Pour the solution down the drain and let it sit for a few hours. Then, flush the drain with hot water to wash away the dissolved mineral deposits.
3. Commercial Descaling Products: There are commercial descaling products available that are specifically formulated to remove mineral deposits. These products come in liquid or powder form and can be effective in breaking down and removing stubborn buildup. Follow the instructions provided on the product packaging for best results.
4. Mechanical Removal: If the mineral deposits are severe and cannot be easily removed using cleaning solutions, you may need to resort to mechanical methods. A plumbing snake or drain auger can be used to physically break apart and remove the mineral deposits from the pipes. Consider hiring a professional plumber who has the expertise and tools to perform this task safely and effectively.
It’s important to note that prevention is key when it comes to dealing with mineral deposits. Installing a water softener can help remove the minerals from your water supply, ultimately preventing future buildup in your pipes. Regularly cleaning and maintaining your plumbing system can also help reduce the accumulation of mineral deposits.
By utilizing these methods and implementing preventative measures, you can effectively combat the issue of mineral deposits and ensure optimal drainage in your sink.
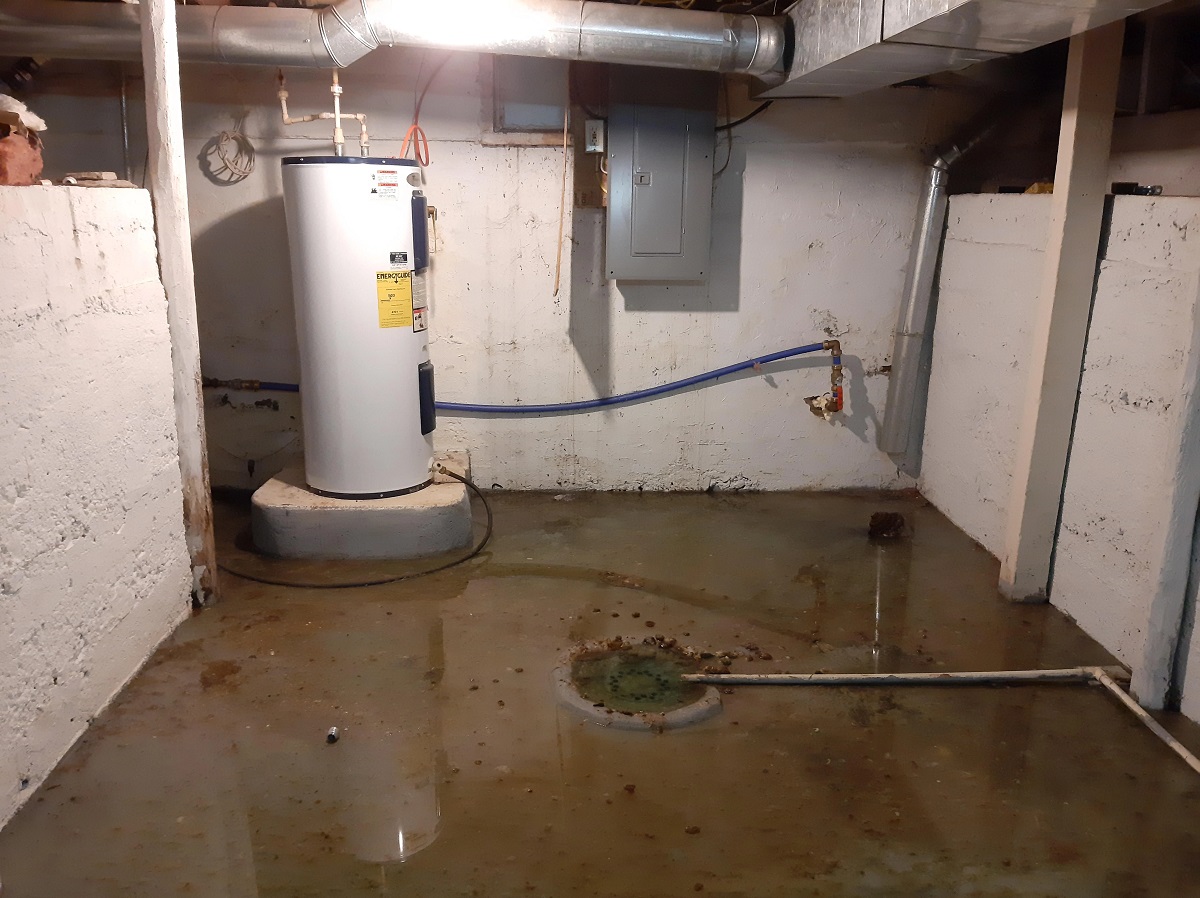
Ventilation Issues
Proper ventilation is essential for efficient drainage in your plumbing system. When there are ventilation issues, negative pressure can be created, hindering the smooth flow of water and causing a slow-draining sink. Here are some common ventilation issues and potential solutions:
1. Blocked Vent Pipes: Vent pipes allow air to enter the plumbing system, equalizing pressure and ensuring proper drainage. However, over time, debris, leaves, or even wildlife can block the vent pipes, impeding the flow of air. To address this issue, visually inspect your vent pipes and remove any visible obstructions. If the blockage is beyond your reach or difficult to clear, it’s advisable to hire a professional plumber who can safely unclog the vent pipes.
2. Improperly Installed Ventilation System: In some cases, ventilation issues can be attributed to an improperly installed plumbing system. If the system lacks the necessary vents or if they are not correctly positioned, it can disrupt the airflow and cause slow drainage. Correcting this issue requires the expertise of a professional plumber who can assess the ventilation system and make the necessary adjustments or installations.
3. Ventilation System Design: In rare cases, ventilation issues may result from poor plumbing system design. If the system does not allow for adequate venting, it can lead to negative pressure and slow drainage. In such situations, it’s crucial to consult with a professional plumber to evaluate and redesign the system to ensure proper ventilation and efficient drainage.
Identifying and resolving ventilation issues can be a complex task, often requiring the assistance of a qualified plumber. They will have the expertise and knowledge to accurately diagnose the problem and devise an appropriate solution.
Regular maintenance is essential in preventing ventilation issues. Periodically inspect your vent pipes and ensure they are free from obstructions. Additionally, during cold weather, make sure to protect your vent pipes from freezing to prevent ventilation problems.
By addressing ventilation issues, you can restore proper airflow, alleviate negative pressure, and effectively resolve the problem of a slow-draining sink.
Diagnosing and Fixing a Slow-Draining Sink
When faced with a slow-draining sink, it’s important to diagnose the underlying cause before attempting to fix the issue. Here are the steps you can take to identify and resolve the problem:
- Observe the Drainage: Pay attention to how the sink is draining. Is the water draining slowly or not at all? Does it gurgle or produce unusual sounds? Observing these details can help you narrow down the possible causes.
- Check Multiple Drains: Determine if the issue is specific to one sink or if multiple drains in your home are experiencing the same problem. If it’s a single sink, the problem is likely localized to that particular drain. However, if multiple drains are affected, it may indicate a deeper issue with your plumbing system.
- Inspect for Visible Blockages: Take a look inside the drain using a flashlight. Look for any visible debris, hair, or other objects that could be obstructing the flow of water. If you can reach the blockage, carefully remove it using gloves or a pair of pliers.
- Attempt Basic Solutions: Try using a plunger to dislodge any minor clogs. Alternatively, pour boiling water down the drain to melt away grease or soap scum build-up. These simple solutions can sometimes resolve the issue without further intervention.
- Consider the Cause: Based on the observed symptoms and any visible blockages, think about the likely cause of the slow drainage. Is it a clogged drain, a blocked P-Trap, accumulation of grease, mineral deposits, or ventilation issues? Each cause may require a different method to fix the problem.
- Implement the Appropriate Fix: Depending on the cause identified, implement the appropriate solution. This may involve using a drain snake to clear a clogged drain, cleaning the P-Trap to remove blockages, using baking soda and vinegar to dissolve grease or food debris, or descaling the pipes to remove mineral deposits. If you’re unsure about the proper method, consult a professional plumber for assistance.
It’s worth mentioning that while DIY fixes can often resolve minor issues, it’s important to know your limits. If you’re uncertain about the cause or unable to resolve the problem yourself, it’s best to seek professional help to avoid causing further damage to your plumbing system.
By carefully diagnosing the cause and implementing the appropriate fix, you can successfully tackle a slow-draining sink and restore proper drainage in your home.
To help unclog a slow-draining sink, try pouring boiling water down the drain to break up and flush away any built-up grease or debris. This can often help improve drainage without the need for harsh chemicals.
Cleaning the Drain
One of the first steps in fixing a slow-draining sink is to clean the drain. Over time, debris, hair, soap scum, and other substances can accumulate in the drainpipe, causing a blockage and hindering the flow of water. Fortunately, there are several methods you can use to effectively clean the drain and restore proper drainage:
1. Manual Removal: Start by removing any visible debris or obstructions from the drain. Wearing gloves, reach into the drain and pull out any hair, food particles, or other objects that may be causing the blockage. Dispose of these materials in the trash to prevent further accumulation.
2. Boiling Water: Pouring boiling water down the drain can help break down and flush away built-up grease and soap residue. Boil a kettle or pot of water and carefully pour it down the drain. This method is particularly effective for mild blockages caused by grease and organic materials.
3. Baking Soda and Vinegar: Create a foaming reaction by using a combination of baking soda and vinegar. Start by pouring boiling water down the drain to loosen any debris. Then, pour half a cup of baking soda into the drain, followed by half a cup of vinegar. Cover the drain with a plug or cloth to contain the fizzing reaction. After 15 minutes, flush the drain with hot water to wash away the dissolved debris.
4. Enzyme-Based Drain Cleaners: Enzyme-based drain cleaners are designed to break down organic materials. These cleaners contain bacteria and enzymes that digest organic substances, such as hair, grease, and food particles. Follow the instructions on the product and ensure that you choose a product suitable for your specific plumbing system.
5. Plumbing Snake or Drain Auger: For more stubborn blockages, using a plumbing snake or drain auger can be effective. Insert the snake into the drain and rotate it while pushing it further into the pipe. This method helps break apart and dislodge the blockage, allowing water to flow freely. Remember to follow the manufacturer’s instructions and use caution to avoid damaging the pipes.
6. Hydro Jetting: In severe cases where other methods fail, hydro jetting may be necessary. Hydro jetting is a professional plumbing technique that uses high-pressure water streams to clear out stubborn blockages and debris from the drainpipe. It is best to hire a professional plumber who specializes in hydro jetting to ensure safe and effective cleaning.
Regularly cleaning your drains can help prevent blockages and maintain optimal drainage in your sink. Additionally, implementing preventative measures, such as using sink strainers to catch debris and avoiding pouring grease down the drain, can significantly reduce the frequency of slow-draining sinks.
By employing these methods and practicing regular maintenance, you can keep your drains clean and enjoy efficient drainage in your sink.
Read more: Why Is My Whirlpool Dishwasher Not Draining
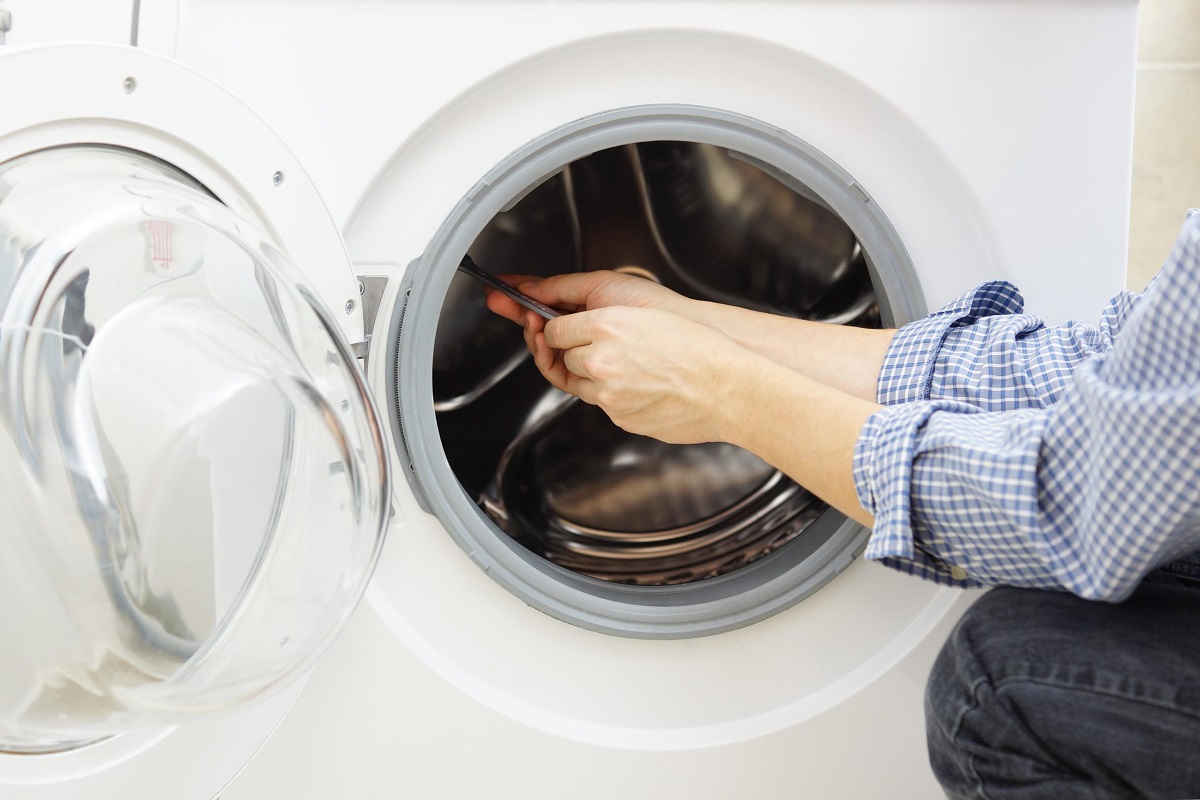
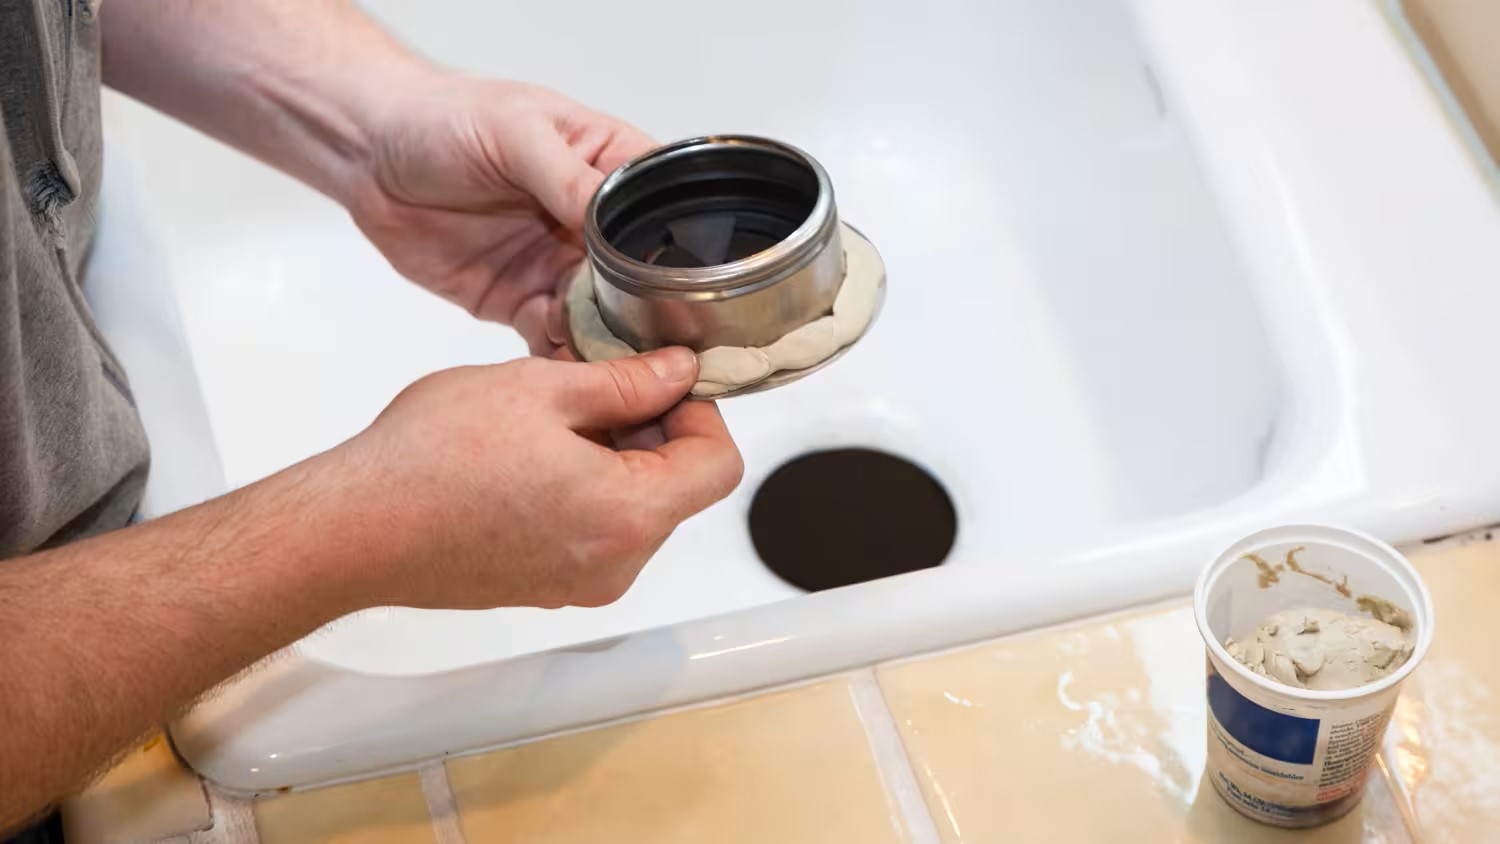
Clearing the P-Trap
If your sink continues to drain slowly even after cleaning the drain, the next step is to clear the P-Trap. The P-Trap is a U-shaped pipe located beneath the sink that traps debris and prevents sewer gases from entering your home. Over time, this essential component can become blocked, restricting water flow and causing a slow-draining sink. Here’s how you can clear the P-Trap:
1. Preparation: Before you begin, gather a bucket or container to catch any water or debris that may come out during the process. It’s also a good idea to wear gloves to protect your hands.
2. Loosen the Connections: Locate the slip nuts on both ends of the P-Trap. Using a pair of pliers or a wrench, loosen the slip nuts by turning them counterclockwise. Be cautious not to overtighten or damage the connections.
3. Remove the P-Trap: Once the slip nuts are loose, carefully remove the P-Trap from the drainpipe. You may need to twist or wiggle it to disconnect it fully. Expect some water and debris to drain out when you remove the P-Trap.
4. Clean the P-Trap: Inspect the P-Trap for any visible blockages or debris. Remove any clogs or buildup by hand or with a brush. You can also use a mixture of warm water and mild soap to thoroughly clean the P-Trap. Ensure that all blockages are dislodged and the trap is clear of debris.
5. Reinstall the P-Trap: Once the P-Trap is clean, reattach it to the drainpipe. Make sure the trap is properly aligned and push it onto the pipe until it fits snugly. Then, tighten the slip nuts by turning them clockwise, ensuring a secure connection. Be careful not to overtighten and cause damage to the fittings.
6. Test the Sink: Turn on the water and check if the sink is draining properly. If the water flows freely without any signs of backup, the P-Trap blockage has been successfully cleared. If the issue persists, consider seeking the assistance of a professional plumber for further evaluation and resolution.
Cleaning the P-Trap is a simple and effective way to address blockages that occur within this component. However, if you’re unsure or uncomfortable with performing these steps yourself, it’s best to consult a professional plumber who can handle the task safely and efficiently.
Remember to practice preventative measures such as regularly cleaning the P-Trap, using drain strainers to catch debris, and avoiding disposing of large objects or food scraps down the sink. These habits can minimize the frequency of slow-draining sinks and keep your plumbing system functioning optimally.
Using Drain Cleaners
If you’ve tried cleaning the drain and clearing the P-Trap but are still dealing with a slow-draining sink, one option to consider is using drain cleaners. Drain cleaners are chemical-based products designed to dissolve or break down clogs and debris that may be causing the obstruction. Here are some steps to follow when using drain cleaners:
1. Choose the Right Drain Cleaner: There are various types of drain cleaners available, so it’s essential to choose the one that is suitable for your specific plumbing system and the nature of the clog. Read the product labels carefully and follow the instructions provided by the manufacturer.
2. Safety Precautions: Before using any drain cleaner, ensure that you take necessary safety precautions. Drain cleaners typically contain harsh chemicals that can be harmful if mishandled. It’s crucial to wear protective gloves and eye goggles to prevent any contact with the skin or eyes. Additionally, work in a well-ventilated area to avoid inhaling fumes.
3. Follow Instructions: Carefully read and follow the instructions provided with the drain cleaner. Different products may have varying application methods and contact times. Adhering to the recommended guidelines ensures the most effective and safe use of the drain cleaner.
4. Apply the Drain Cleaner: Pour the recommended amount of the drain cleaner directly into the affected drain. Take care to avoid any splashing or spills. Some drain cleaners may require dilution with water, while others can be used directly in their concentrated form. Allow the drain cleaner to sit and work on the clog for the specified time indicated on the product label.
5. Flush with Water: After the recommended contact time has elapsed, flush the drain with plenty of water. This will help to remove the dissolved debris and any residue from the drain cleaner itself. Run hot water for several minutes to ensure the drain is thoroughly rinsed.
6. Evaluate the Results: Observe the flow of water after using the drain cleaner. If the sink continues to drain slowly or is still clogged, you may need to repeat the process or consider other methods to resolve the issue. Keep in mind that drain cleaners may not be suitable for all types of clogs or plumbing systems, so it’s crucial to assess the effectiveness of the product for your specific situation.
While drain cleaners can be a convenient solution for clearing certain types of clogs, it’s important to use them as a last resort after attempting other methods like manual cleaning or mechanical removal. If the clog persists or the issue worsens, it’s advisable to consult a professional plumber who has the expertise to address complex blockages and ensure proper resolution.
Remember, prevention is key when it comes to minimizing clogs. Regularly clean your drains, install drain strainers to catch debris, and be mindful of what goes down your sink to maintain optimal drainage and prevent further issues.
Removing Grease or Food Debris
Accumulation of grease and food debris is a common cause of slow-draining sinks, especially in the kitchen. Over time, oils, fats, and leftover food particles can create a stubborn blockage in the drainpipe, reducing water flow. To remove grease or food debris and restore proper drainage, follow these steps:
1. Boiling Water: Boiling water is a simple and effective method to melt away grease and help dislodge food debris. Boil a kettle or pot of water and carefully pour it down the drain. Repeat this step a few times to gradually dissolve the grease and debris. Each time you pour the hot water, allow it to sit in the drain for a few seconds before adding more.
2. Baking Soda and Vinegar: The combination of baking soda and vinegar can help break down grease and food particles. Start by pouring boiling water down the drain to soften the buildup. Then, pour half a cup of baking soda into the drain, followed by half a cup of vinegar. Immediately cover the drain with a plug or cloth to contain the fizzing reaction. After 15 minutes, flush the drain with hot water to wash away the dissolved grease and debris.
3. Salt and Hot Water: Salt is abrasive and can help remove grease and grime from the drain. Mix half a cup of salt with a kettle of hot water. Stir the mixture to dissolve the salt, then pour it down the drain. Let it sit for a few minutes before rinsing with hot water. The salt will act as a scrubbing agent, helping to break down and flush away the grease and debris.
4. Enzyme-Based Drain Cleaners: Enzyme-based drain cleaners are designed to break down organic materials, including grease and food debris. These cleaners contain bacteria and enzymes that feed on the buildup inside the drainpipe. Follow the instructions provided on the product label and allow sufficient contact time for the enzymes to work effectively.
5. Mechanical Removal: If the blockage is stubborn and cannot be cleared with household remedies, consider using a plumbing snake or drain auger. Insert the snake into the drain and rotate it while pushing it further into the pipe. This will help break apart the grease or food debris and allow water to flow freely. Use caution to avoid damaging the pipes and follow the manufacturer’s instructions.
6. Professional Plumbing Assistance: If all else fails, and the grease or food debris is causing persistent issues with the sink’s drainage, it’s recommended to consult a professional plumber. They have the expertise, tools, and experience to handle more complex blockages and provide a long-lasting solution.
To prevent future buildup of grease and food debris, avoid pouring cooking oil, fats, and large food scraps down the drain. Instead, discard them in the trash or use designated grease disposal containers. Regularly clean your kitchen sink and utilize sink strainers to catch any remaining debris before it enters the drain.
By following these steps and practicing preventive measures, you can effectively remove grease and food debris from your sink’s drainpipe and restore proper drainage.
Removing Mineral Deposits
Mineral deposits, often caused by hard water, can accumulate in your sink’s pipes over time and lead to a slow-draining sink. These mineral deposits, which primarily consist of calcium and magnesium, can form a crust on the inner surfaces of the pipes, restricting water flow. To remove mineral deposits and improve drainage, follow these steps:
1. Vinegar Solution: Vinegar is a natural acid that can effectively dissolve mineral deposits. Start by creating a solution of equal parts vinegar and water. Pour the solution down the drain and let it sit for several hours or overnight. The acidity of the vinegar will help break down the mineral buildup. Afterward, flush the drain with hot water to rinse away the dissolved mineral deposits.
2. Citric Acid Solution: Another natural option to remove mineral deposits is a citric acid solution. Mix two tablespoons of citric acid powder with one quart of warm water. Pour the solution down the drain and let it sit for a couple of hours. Then, flush the drain with hot water to wash away the dissolved mineral deposits.
3. Commercial Descaling Products: There are commercial descaling products available that are specifically designed to remove mineral deposits. These products typically come in liquid or powder form and contain chemicals that effectively dissolve minerals. Follow the instructions on the product packaging for the recommended usage and contact time.
4. Mechanical Removal: In some cases, particularly with stubborn mineral deposits, mechanical removal may be necessary. A plumbing snake or drain auger can be used to physically break apart and remove the mineral buildup from the pipes. Be cautious when using these tools to avoid damaging the pipes, and follow the manufacturer’s instructions.
5. Professional Plumbing Assistance: If the mineral deposits are severe or if previous attempts to remove them have been unsuccessful, it’s advisable to seek the assistance of a professional plumber. They have the expertise, equipment, and knowledge to handle more complex cases and ensure that the mineral deposits are effectively removed.
To prevent the recurrence of mineral deposits, consider installing a water softener system in your home, which will remove or reduce the minerals in your water supply. Using water softening agents or using water filters can also help minimize mineral buildup. Regular cleaning and maintenance of your plumbing fixtures can also aid in preventing excessive mineral deposits.
By following these steps and taking preventive measures, you can successfully remove mineral deposits and restore optimal drainage in your sink.
Read more: Why Is My Bathtub Not Draining Water
Checking the Ventilation System
A well-functioning ventilation system is vital to maintaining proper drainage in your plumbing system. Ventilation issues can cause negative pressure, impeding the smooth flow of water and resulting in a slow-draining sink. To ensure your ventilation system is working properly, follow these steps:
1. Examine Vent Pipes: Start by visually inspecting your vent pipes to ensure they are not blocked or obstructed. These pipes are typically located on your roof or exterior walls and allow air to enter the plumbing system, equalizing the pressure and facilitating drainage. Verify that the vent pipes are free from debris, leaves, or any other potential obstructions.
2. Clear Obstructions: If you notice any visible obstructions in the vent pipes, take measures to remove them. Use a long-handled brush or a plumbing snake to gently dislodge and remove the debris. Be cautious not to damage the vent pipes during the process.
3. Check Vents for Proper Placement: Ensure that the vent pipes are correctly positioned and installed in your plumbing system. Improperly placed vents may not effectively release air, causing negative pressure and slow drainage. Consult a professional plumber if you suspect that the venting system is not appropriately designed or installed.
4. Test for Negative Pressure: Negative pressure can disrupt the flow of water and lead to slow drainage. A simple way to test for negative pressure is to observe the drainage of one sink while running water in another nearby sink. If the water in one sink backs up or drains slowly when water is running in another sink, it may indicate ventilation issues. This suggests that the air needed to equalize the pressure is not entering the plumbing system properly.
5. Seek Professional Help: If you’re unable to identify or resolve ventilation issues on your own, it’s best to consult a professional plumber. They have the expertise and specialized tools to locate and address ventilation problems accurately. A plumber can conduct a thorough inspection of your plumbing system, identify any vent blockages or ventilation design issues, and implement appropriate solutions.
Regular maintenance, including periodic checks of your vent pipes, can help prevent potential ventilation issues. Additionally, protecting the vent pipes from freezing during cold weather can avoid any blockages caused by ice formation.
By taking the time to check and address any ventilation issues, you can ensure that your plumbing system operates at its best, promoting efficient drainage and preventing slow-draining sinks.
Preventative Measures for a Slow-Draining Sink
Preventing a slow-draining sink is the ideal approach to avoid the inconvenience and frustration it brings. By implementing some simple preventative measures, you can reduce the likelihood of experiencing drainage issues in your sink. Here are some effective steps you can take:
1. Use Sink Strainers: Install sink strainers in all your drains to catch hair, food scraps, and other debris. These inexpensive devices act as a barrier, preventing solid substances from entering the pipes and causing blockages. Regularly empty and clean the strainers to maintain optimal performance.
2. Dispose of Grease Properly: Avoid pouring cooking oil, grease, and fat down the sink drains. These substances can solidify and create blockages over time. Instead, collect grease in a container and dispose of it in the trash or recycle it if possible. Alternatively, let the grease solidify in a separate container and then dispose of it.
3. Be Mindful of What Goes Down the Sink: Be selective about what you allow to go down the sink drain. Avoid disposing of large food scraps, fibrous materials, coffee grounds, and non-biodegradable items like wipes or paper towels. Even small items can accumulate and cause blockages over time.
4. Clean Drains Regularly: Make it a habit to clean your drains regularly to prevent the buildup of debris and mineral deposits. You can use household remedies such as boiling water, baking soda and vinegar, or enzyme-based cleaners to keep the drains clean and flowing smoothly. Consider scheduling drain cleaning as a part of your routine home maintenance.
5. Maintain Your Plumbing System: Regular maintenance of your plumbing system is essential to prevent slow-draining sinks. Inspect the pipes, connections, and fixtures for any leaks or signs of damage. Promptly address any issues to prevent larger problems down the road. Consider scheduling professional plumbing inspections to ensure your system is functioning optimally.
6. Install Water Softeners or Filtration Systems: If you live in an area with hard water, consider installing water softeners or filters. These systems can reduce the mineral content in your water, preventing the formation of mineral deposits in your plumbing system and minimizing the risk of slow drainage.
7. Educate your Household: Educate everyone in your household about proper drain usage. Explain the importance of not disposing of inappropriate materials down the sink and the significance of using strainers. Encourage responsible habits to prevent clogs and maintain smooth drainage.
By implementing these preventative measures, you can significantly reduce the likelihood of experiencing a slow-draining sink. Regular maintenance, proper usage, and responsible disposal habits will go a long way in ensuring smooth drainage and a functional plumbing system in your home.
Conclusion
A slow-draining sink is a common and frustrating problem that can disrupt your daily routine. However, by understanding the common causes and implementing the appropriate solutions, you can effectively address this issue and restore proper drainage in your sink.
In this article, we explored the various causes of a slow-draining sink, such as clogged drains, blocked P-Traps, accumulation of grease or food debris, mineral deposits, and ventilation issues. Each cause requires a specific approach to resolve the problem. From manual cleaning and using natural remedies to clearing the P-Trap and utilizing drain cleaners or professional services, there are various methods available to tackle these issues.
We also emphasized the importance of prevention in avoiding slow-draining sinks. Using sink strainers, disposing of grease properly, being mindful of what goes down the sink, regular cleaning and maintenance, installing water softeners or filtration systems, and educating household members about responsible drain usage are essential preventive measures.
Remember, while there are many DIY solutions available, it’s important to know your limits. If you’re unsure or uncomfortable with the methods or if the problem persists, it’s best to seek professional assistance from a plumber who can accurately diagnose and resolve the issue.
By taking prompt action, practicing preventative measures, and adopting responsible habits, you can prevent and overcome the frustrations of a slow-draining sink. Maintaining a well-functioning plumbing system not only ensures efficient drainage but also contributes to a smoothly operating household overall.
So, next time you encounter a slow-draining sink, don’t fret. Armed with knowledge and the right approach, you have the power to restore your sink’s functionality and maintain a hassle-free environment in your home.
Frequently Asked Questions about Why Is My Sink Draining Slowly
Was this page helpful?
At Storables.com, we guarantee accurate and reliable information. Our content, validated by Expert Board Contributors, is crafted following stringent Editorial Policies. We're committed to providing you with well-researched, expert-backed insights for all your informational needs.


0 thoughts on “Why Is My Sink Draining Slowly”