Home>Dining>Table Decor>How To Make Wheatgrass Centerpieces
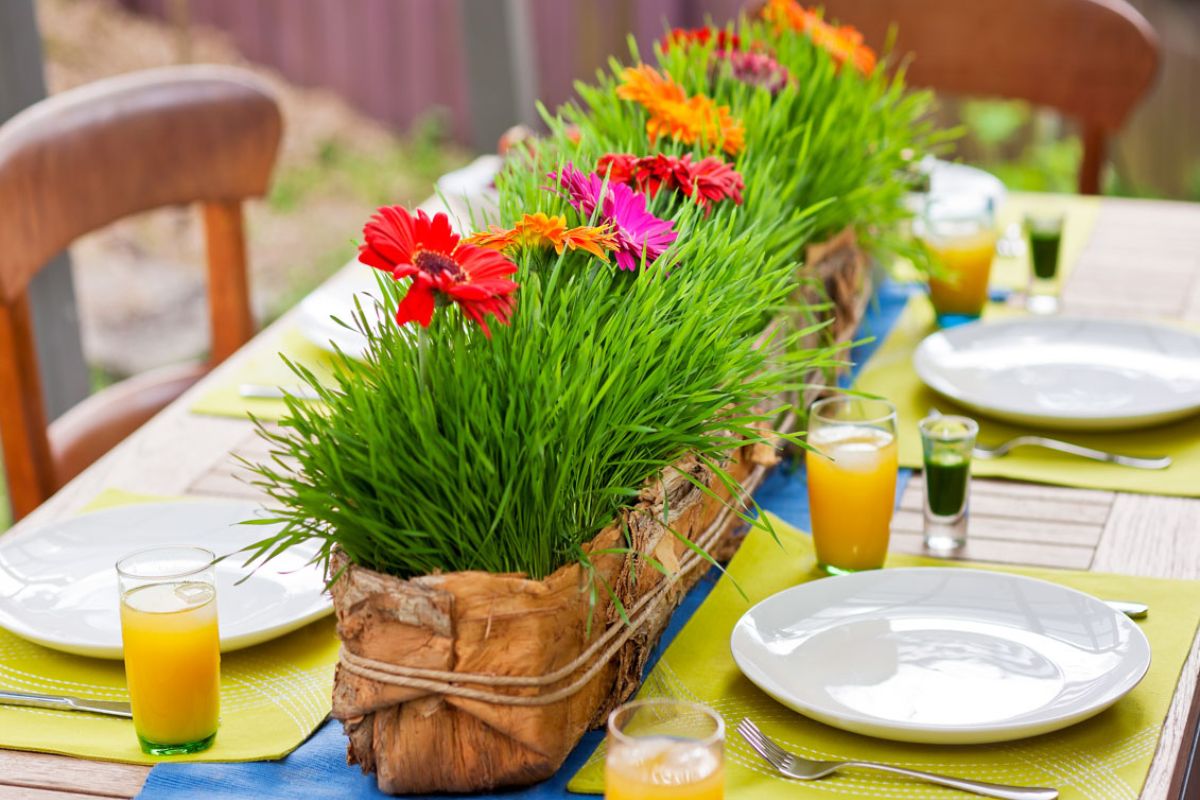
Table Decor
How To Make Wheatgrass Centerpieces
Modified: January 9, 2024
Learn how to create stunning wheatgrass centerpieces for your tables. Discover unique table decor ideas that will impress your guests.
(Many of the links in this article redirect to a specific reviewed product. Your purchase of these products through affiliate links helps to generate commission for Storables.com, at no extra cost. Learn more)
Introduction
Welcome to the world of table decor where creativity meets nature! If you’re looking to add a unique and eye-catching element to your table settings, wheatgrass centerpieces are the perfect choice. These vibrant and lush arrangements bring a touch of greenery to any occasion, whether it’s a wedding, a dinner party, or a special event.
Wheatgrass centerpieces not only add visual appeal to your table, but they also have numerous health benefits. Wheatgrass is packed with vitamins, minerals, and antioxidants, making it a nutritious addition to your decor. Plus, the maintenance of wheatgrass is relatively easy, making it an ideal choice for both seasoned gardeners and those with limited gardening experience.
In this article, we’ll guide you through the step-by-step process of creating stunning wheatgrass centerpieces that will impress your guests. From preparing the wheatgrass to arranging it in beautiful containers, we’ll cover all the essential details. Additionally, we’ll provide some tips on how to maintain your centerpieces so they remain fresh and vibrant throughout your event.
So, let’s roll up our sleeves and get started on this exciting journey of table decor!
Key Takeaways:
- Create vibrant wheatgrass centerpieces for any occasion with easy-to-follow steps. Enhance your table decor with natural, nutrient-rich arrangements that impress guests and provide a touch of greenery.
- Maintain the beauty of your wheatgrass centerpieces with proper care and additional decorations. Infuse your personal style and creativity to make your events truly memorable and visually captivating.
Read more: How To Make Wheatgrass
Materials Needed
Before we dive into creating the wheatgrass centerpieces, let’s gather all the necessary materials. Here’s what you’ll need:
- Wheatgrass seeds: You can easily find wheatgrass seeds at local nurseries or online. Make sure to choose high-quality organic seeds for the best results.
- Containers: Select containers that suit your desired aesthetic and table size. You can use various options such as small pots, planters, trays, or even repurpose old wooden crates or glass jars for a rustic look.
- Potting soil: Opt for nutrient-rich potting soil that promotes healthy growth. Look for soil that drains well and is specifically formulated for indoor plants.
- Watering can or spray bottle: You’ll need a watering can with a narrow spout or a spray bottle to water the wheatgrass gently.
- Scissors or garden shears: Keep a pair of sharp scissors or garden shears handy for trimming the wheatgrass as it grows.
- Additional decorations (optional): Depending on your style and event theme, you may want to add some decorative elements like ribbons, small figurines, or colorful stones to enhance the look of your centerpieces.
Once you have gathered all these materials, you’ll be well-prepared to begin the process of creating your mesmerizing wheatgrass centerpieces. So, let’s move on to the next step!
Step 1: Preparing the Wheatgrass
Before you can start planting the wheatgrass, it’s important to prepare the seeds properly. Here’s how to do it:
- Measure the desired amount of wheatgrass seeds: The amount of seeds you’ll need depends on the number and size of the containers you’re using. As a general guideline, you can use around 1-2 tablespoons of seeds for each container.
- Rinse the seeds: Place the seeds in a fine-mesh sieve and rinse them under running water to remove any dust or debris. Make sure to drain the excess water thoroughly.
- Soak the seeds: Transfer the rinsed seeds to a bowl and fill it with water. Allow the seeds to soak for about 8-12 hours or overnight. This step helps to speed up the germination process.
- Drain the seeds: After soaking, pour the seeds into the sieve once again to drain the water completely. Ensure that the seeds are not left sitting in water, as this can lead to mold or rotting.
Once you’ve completed these steps, the wheatgrass seeds are now ready for planting. So, let’s move on to the next exciting part of creating your stunning wheatgrass centerpieces!
Step 2: Choosing the Containers
The choice of containers plays a significant role in the overall look and feel of your wheatgrass centerpieces, especially when you set your table for any occasion. Here’s a guide to help you select the perfect containers:
- Consider the event theme: Think about the theme of your occasion or the style you want to achieve. If it’s a formal event, elegant ceramic or glass containers might be a suitable choice. For a more rustic or casual gathering, you could opt for wooden crates or mason jars.
- Size and shape: Take into account the size of your table and the available space. If you have a long table, you may want to use a series of smaller containers that can be arranged in a row. For a round table, a larger centerpiece container that serves as a focal point could be ideal.
- Drainage: Ensure that your chosen containers have proper drainage holes or consider using trays or saucers underneath to catch excess water. Good drainage is crucial to prevent waterlogging and maintain the health of your wheatgrass.
- Versatility: If you want to reuse your containers for different occasions, select ones that can be easily cleaned and accommodate different types of centerpieces. Neutral-colored containers are generally more versatile and allow the wheatgrass to stand out.
Remember to consider the number of containers you’ll need based on the size of your event and the desired table arrangement. Once you’ve chosen the containers, it’s time to move on to the next step – planting the wheatgrass!
Step 3: Planting the Wheatgrass
Now that you have your wheatgrass seeds prepared and containers selected, it’s time to start planting! Follow these steps to ensure successful growth:
- Add a layer of potting soil: Fill each container with a layer of nutrient-rich potting soil, leaving about an inch of space at the top. Gently pat down the soil to create a level surface.
- Spread the soaked seeds: Evenly distribute the soaked wheatgrass seeds on top of the soil so that they cover the entire surface. Try to create a dense layer of seeds without overcrowding.
- Press the seeds lightly: Use the back of a spoon or your fingertips to press the seeds lightly into the soil. This ensures good seed-to-soil contact for germination.
- Mist the seeds: Use a spray bottle or a watering can with a gentle, fine mist setting to moisten the seeds. Be careful not to overwater, as this can lead to rotting or mold formation.
- Cover the containers: To create a favorable environment for germination, cover the containers with a clear plastic wrap or a humidity dome. This helps to maintain moisture and warmth.
- Place in a well-lit area: Find a bright location for your containers, preferably near a window with indirect sunlight. Wheatgrass thrives in natural light, but direct sunlight can scorch the delicate grass blades.
Over the next few days, keep the soil consistently moist by misting it regularly. After about 7-10 days, you should start to see the wheatgrass sprouting. At this point, remove the plastic wrap or humidity dome to allow proper air circulation.
Great job! You have successfully planted the wheatgrass and now it’s time to move on to the next step – caring for your growing centerpieces.
When making wheatgrass centerpieces, be sure to water the wheatgrass regularly to keep it fresh and green. Place the centerpiece in a well-lit area to promote healthy growth.
Read more: How To Make Centerpieces With Candy
Step 4: Caring for the Wheatgrass
Now that your wheatgrass is sprouting, it’s important to provide it with proper care to ensure healthy growth. Follow these steps to keep your wheatgrass centerpieces thriving:
- Watering: Check the moisture level of the soil regularly and water the wheatgrass as needed. Aim to keep the soil consistently moist but not waterlogged. Use a watering can or spray bottle to water the plants gently, ensuring that the water reaches the roots without disturbing the seeds or young grass.
- Light requirements: Place the containers in a well-lit area, preferably near a window with indirect sunlight. Wheatgrass needs adequate light to photosynthesize and grow properly. Rotate the containers occasionally to ensure even exposure to sunlight.
- Avoid overwatering: While it’s important to keep the soil moist, avoid overwatering as it can cause root rot or fungus growth. Allow the top layer of soil to dry slightly between watering sessions.
- Trimming: Once the wheatgrass reaches a height of about 3-4 inches, it’s time to trim it. Use scissors or garden shears to trim the grass evenly, about half an inch above the soil level. This encourages fresh growth and keeps the centerpieces looking neat.
Continue to monitor the health of your wheatgrass centerpieces and adjust the care regimen as needed. Now that your wheatgrass is growing beautifully, let’s move on to the next step – arranging the centerpieces!
Step 5: Arranging the Centerpieces
Now that you have lush and vibrant wheatgrass, it’s time to arrange the centerpieces and bring your table decor to life. Follow these steps to create visually appealing displays:
- Consider the table layout: Assess the shape and size of your table to determine the most suitable arrangement. For a long table, you can place multiple containers in a row to create a cohesive look. For a round or square table, a single larger centerpiece placed at the center can serve as a focal point.
- Grouping and spacing: If using multiple containers, group them together while leaving enough space between each arrangement for a balanced look. Experiment with different spacing to achieve the desired visual effect.
- Varying heights: Create visual interest by using containers of different heights. You can place taller containers in the center and surround them with shorter ones, or use decorative elements like small risers to elevate certain containers.
- Uniform or eclectic look: Decide whether you want a uniform arrangement with identical containers or prefer an eclectic mix of sizes and styles. Both options can create stunning centerpieces, so choose the approach that aligns with your overall theme and aesthetic.
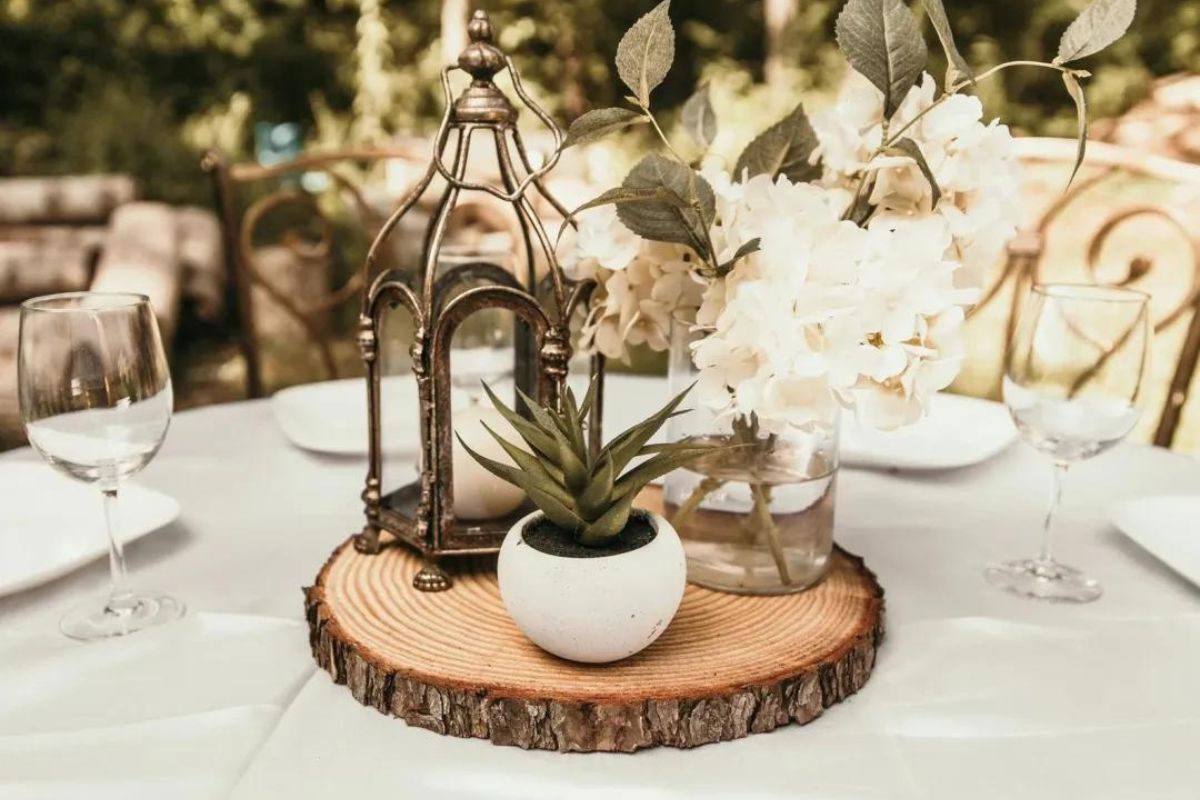
- Fill in gaps: If you notice any gaps or uneven spots, you can fill them by adding decorative elements such as flowers, small ornaments, or votive candles. Just make sure the additional items complement the wheatgrass and do not overcrowd the arrangement.
Take your time to arrange the centerpieces, stepping back occasionally to assess the overall look. Once you’re satisfied with the arrangement, it’s time to move on to the next step – adding additional decorations (if desired)!
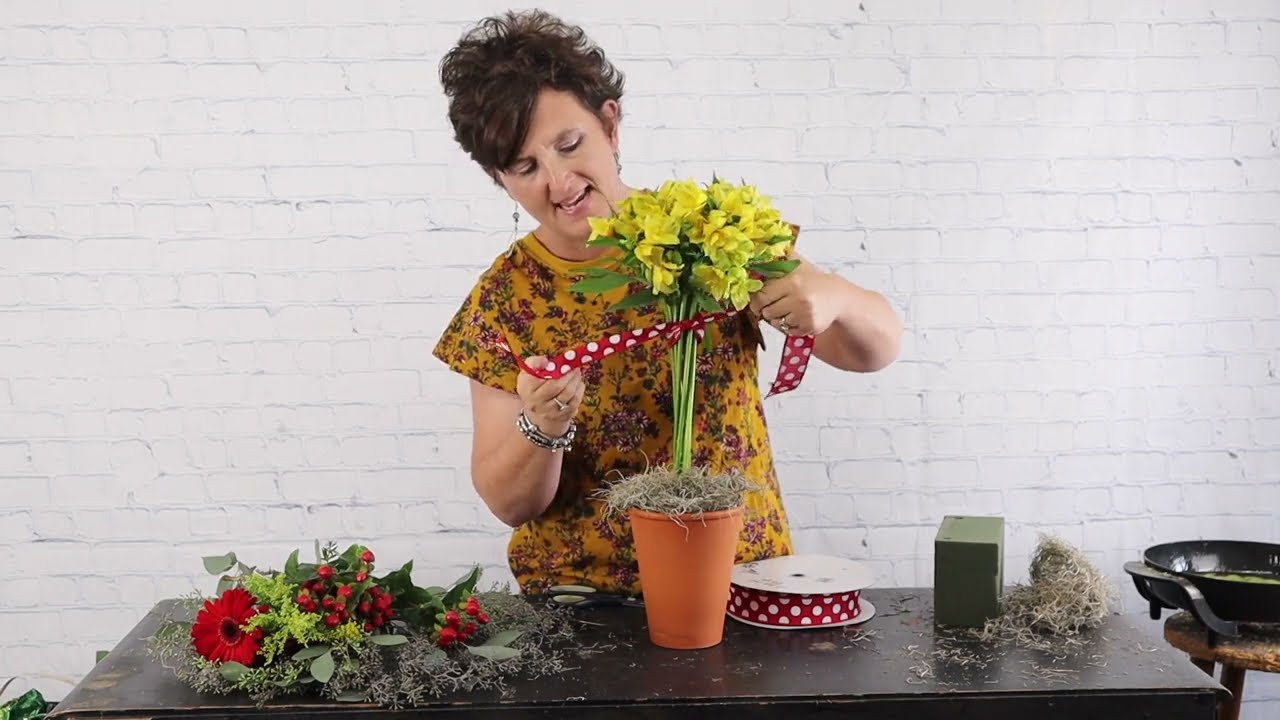
Step 6: Adding Additional Decorations (Optional)
If you want to elevate the aesthetic of your wheatgrass centerpieces even further, you can consider adding additional decorations. These extra touches can enhance the overall look and complement the natural beauty of the wheatgrass. Here are some ideas to inspire you:
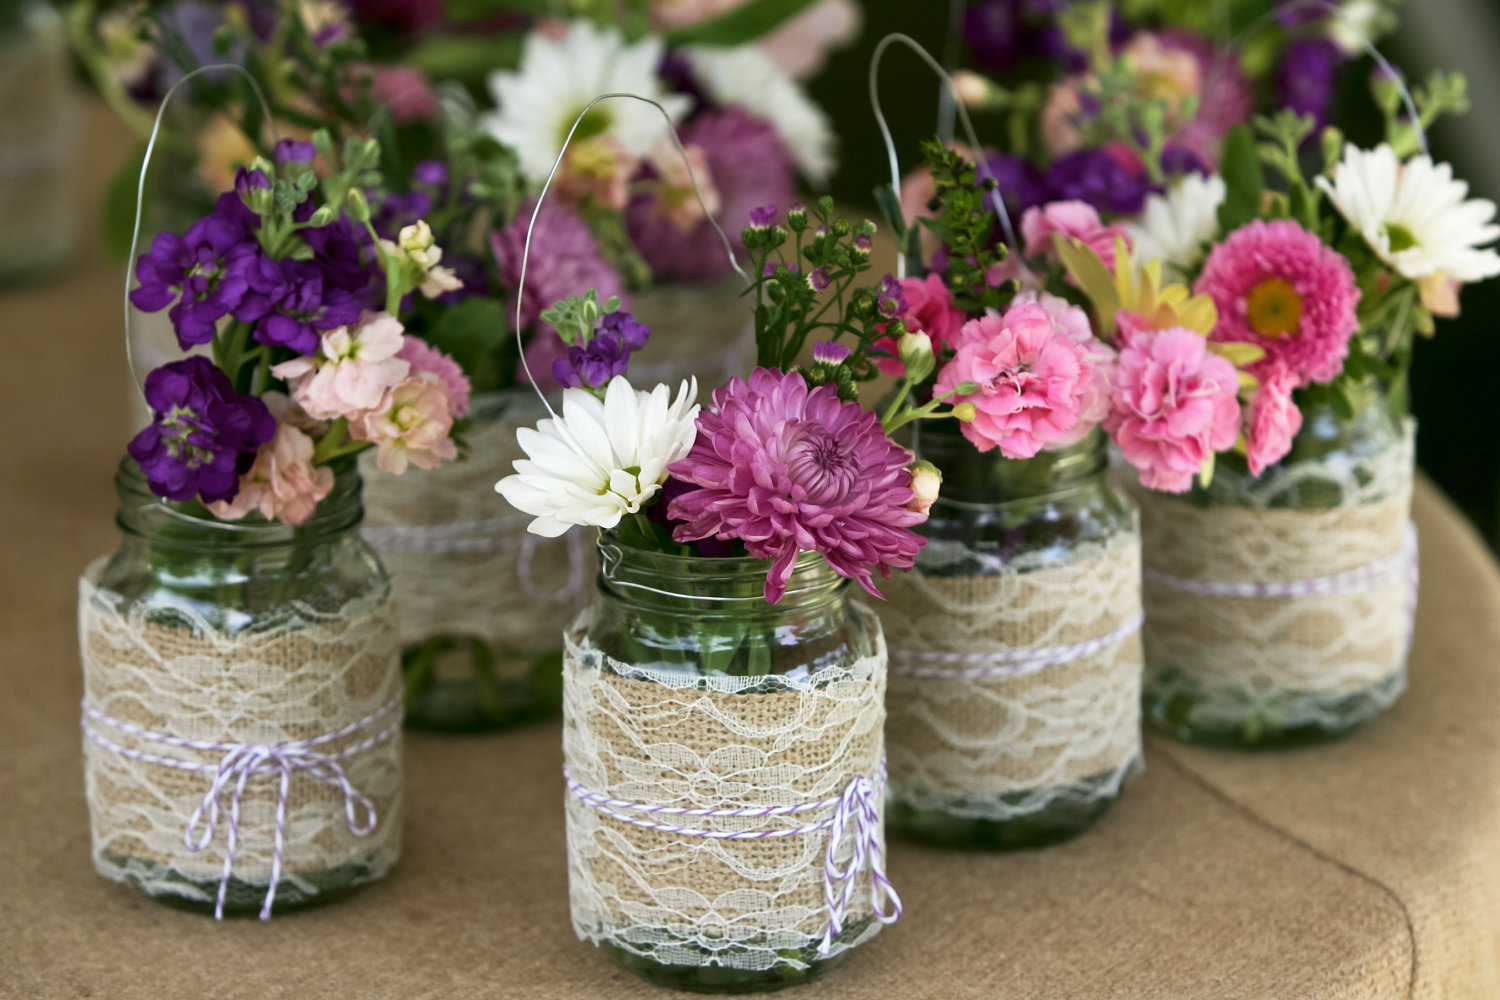
- Ribbons and bows: Wrap colorful ribbons or bows around the containers to add a pop of color and a touch of elegance. Choose ribbons that complement the theme or color scheme of your event.
- Flowers: Integrate fresh flowers into the arrangement to create a beautiful contrast against the lush green of the wheatgrass. Place a small vase or floral foam within the container and arrange the flowers artistically.
- Small figurines or ornaments: Depending on the occasion or theme, you can incorporate small figurines or ornaments into the centerpieces. For example, tiny birds for a spring theme or small pumpkins for an autumn gathering.
- Colored stones or pebbles: Sprinkle colored stones or pebbles on top of the soil to add texture and visual interest. You can choose stones in hues that complement the overall color palette of your event.
- Tealights or LED candles: Place small tealights or LED candles within the arrangement to create a warm and inviting ambiance. Ensure that the flames or heat from the candles do not come into direct contact with the wheatgrass.
Remember, the key is to add decorations in a way that enhances the wheatgrass centerpieces without overwhelming them. Be creative, have fun, and let your personal style shine through. With the added decorations, your centerpieces will truly be the highlight of your table decor.
Once you’re satisfied with the additional decorations, let’s move on to the final step – maintaining the wheatgrass centerpieces.
Step 7: Maintaining the Wheatgrass Centerpieces
Now that your wheatgrass centerpieces are complete, it’s important to maintain them to ensure they stay fresh and vibrant throughout your event. Follow these maintenance tips:
- Watering: Continue to water the wheatgrass regularly, keeping the soil moist but not waterlogged. Use a watering can or spray bottle to gently moisten the grass, taking care not to overwater.
- Trimming: As the wheatgrass continues to grow, periodically trim it to maintain a neat and uniform appearance. Trim about half an inch above the soil level using scissors or garden shears.
- Sunlight exposure: Ensure that the wheatgrass receives adequate light by placing the centerpieces in a well-lit area. Avoid direct sunlight, as it can scorch the grass. Rotate the containers occasionally to promote even growth.
- Avoid excessive heat: Keep the centerpieces away from heat sources that could dry out the soil or damage the grass. Steer clear of vents, radiators, or hot appliances.
- Inspect for pests: Regularly check the wheatgrass for any signs of pests, such as aphids or gnats. If you spot any, gently remove them by hand or use a mild insecticide according to the manufacturer’s instructions.
- Refreshing the centerpieces: For longer events, you may need to refresh the centerpieces by replacing any wilted or yellowing blades of grass. In some cases, you may need to replant new wheatgrass to maintain the vibrancy of the arrangement.
By following these maintenance steps, your wheatgrass centerpieces will continue to look fresh and appealing throughout your event. Enjoy the beauty and natural touch they bring to your table decor!
Congratulations! You’ve completed all the steps to create and maintain stunning wheatgrass centerpieces. Now, it’s time to showcase your beautiful creations and wow your guests with your impeccable table decor!
Remember, the key to success is to infuse your own creativity and personal touch into the process. So, have fun, experiment, and let your unique style shine through. Happy decorating!
Read more: How To Make Tulle Centerpieces
Conclusion
Congratulations on successfully creating your own wheatgrass centerpieces! By following the steps outlined in this guide, you’ve learned how to prepare the seeds, select containers, plant the wheatgrass, arrange the centerpieces, and maintain their beauty. Your table decor will now stand out with vibrant green accents, adding a touch of nature and freshness to any occasion.
Wheatgrass centerpieces not only provide visual appeal but also offer health benefits with their nutrient-rich composition. As a versatile and low-maintenance option, they serve as both a decorative element and a source of natural goodness.
Whether you’re planning a wedding, hosting a dinner party, or celebrating a special event, wheatgrass centerpieces are sure to impress your guests and create a captivating ambiance. You can further enhance the beauty of your centerpieces by incorporating additional decorations, such as ribbons, flowers, or figurines, to match your event’s theme.
Remember to continue caring for your wheatgrass centerpieces by watering them appropriately, providing adequate sunlight, and periodically trimming the blades. With proper maintenance, they will remain vibrant and lush throughout your event.
Now, it’s time to showcase your creativity and enjoy the compliments you’ll receive on your stunning table decor. So, let your imagination run wild, experiment with different container options and decorative elements, and make your events truly memorable!
Thank you for joining us on this journey of creating wheatgrass centerpieces. We hope you’ve gained valuable knowledge and inspiration to incorporate these beautiful arrangements into your future table decorations. Happy crafting!
Frequently Asked Questions about How To Make Wheatgrass Centerpieces
Was this page helpful?
At Storables.com, we guarantee accurate and reliable information. Our content, validated by Expert Board Contributors, is crafted following stringent Editorial Policies. We're committed to providing you with well-researched, expert-backed insights for all your informational needs.


0 thoughts on “How To Make Wheatgrass Centerpieces”