Home>Dining>Table Decor>How To Make Centerpieces With Candy

Table Decor
How To Make Centerpieces With Candy
Modified: October 20, 2024
Learn how to create beautiful table decorations with candy. Discover unique ideas for making candy centerpieces to impress your guests!
(Many of the links in this article redirect to a specific reviewed product. Your purchase of these products through affiliate links helps to generate commission for Storables.com, at no extra cost. Learn more)
Introduction
Welcome to the sweet world of candy centerpieces! Creating a centerpiece with candy is a fun and unique way to add a touch of sweetness and charm to any event or gathering. Whether you’re hosting a birthday party, baby shower, or just want to bring some cheer to your dining table, a candy centerpiece is sure to be a crowd-pleaser.
In this article, we will guide you through the process of making your own candy centerpiece from start to finish. With just a few materials and a little creativity, you’ll be able to craft a stunning centerpiece that will leave your guests impressed.
Are you ready to indulge in some creative fun with candy? Let’s get started!
Key Takeaways:
- Create visually stunning candy centerpieces by selecting a variety of candies in different colors, shapes, and sizes. Let your creativity shine and match the candy selection to the theme or color scheme of your event.
- Elevate your candy centerpiece with finishing touches like ribbons, flowers, or ornaments to make it truly captivating. Display it proudly and keep it refreshed throughout the event for maximum visual appeal and enjoyment.
Read more: How To Make Candy Baskets
Materials Needed
Before you begin creating your candy centerpiece, gather the following materials:
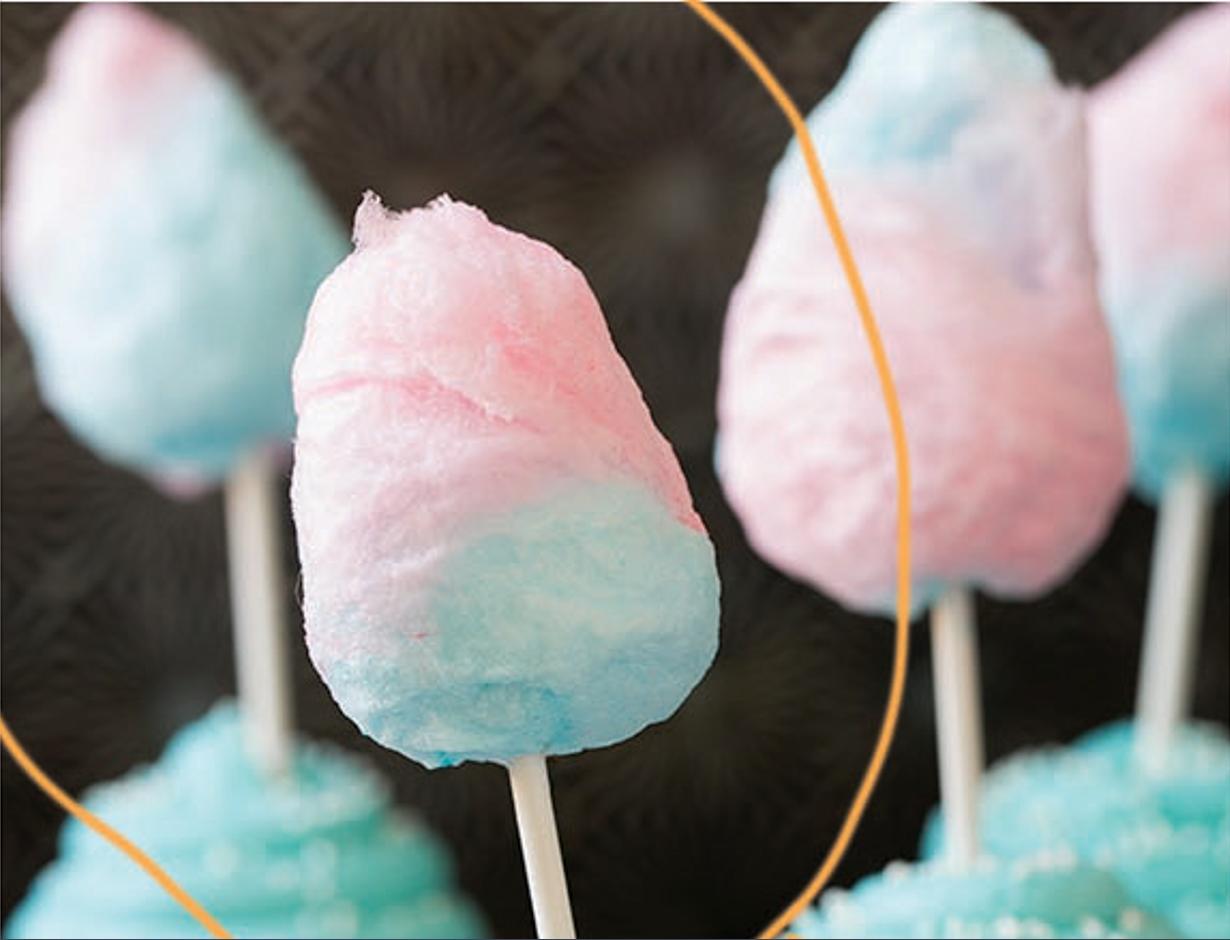
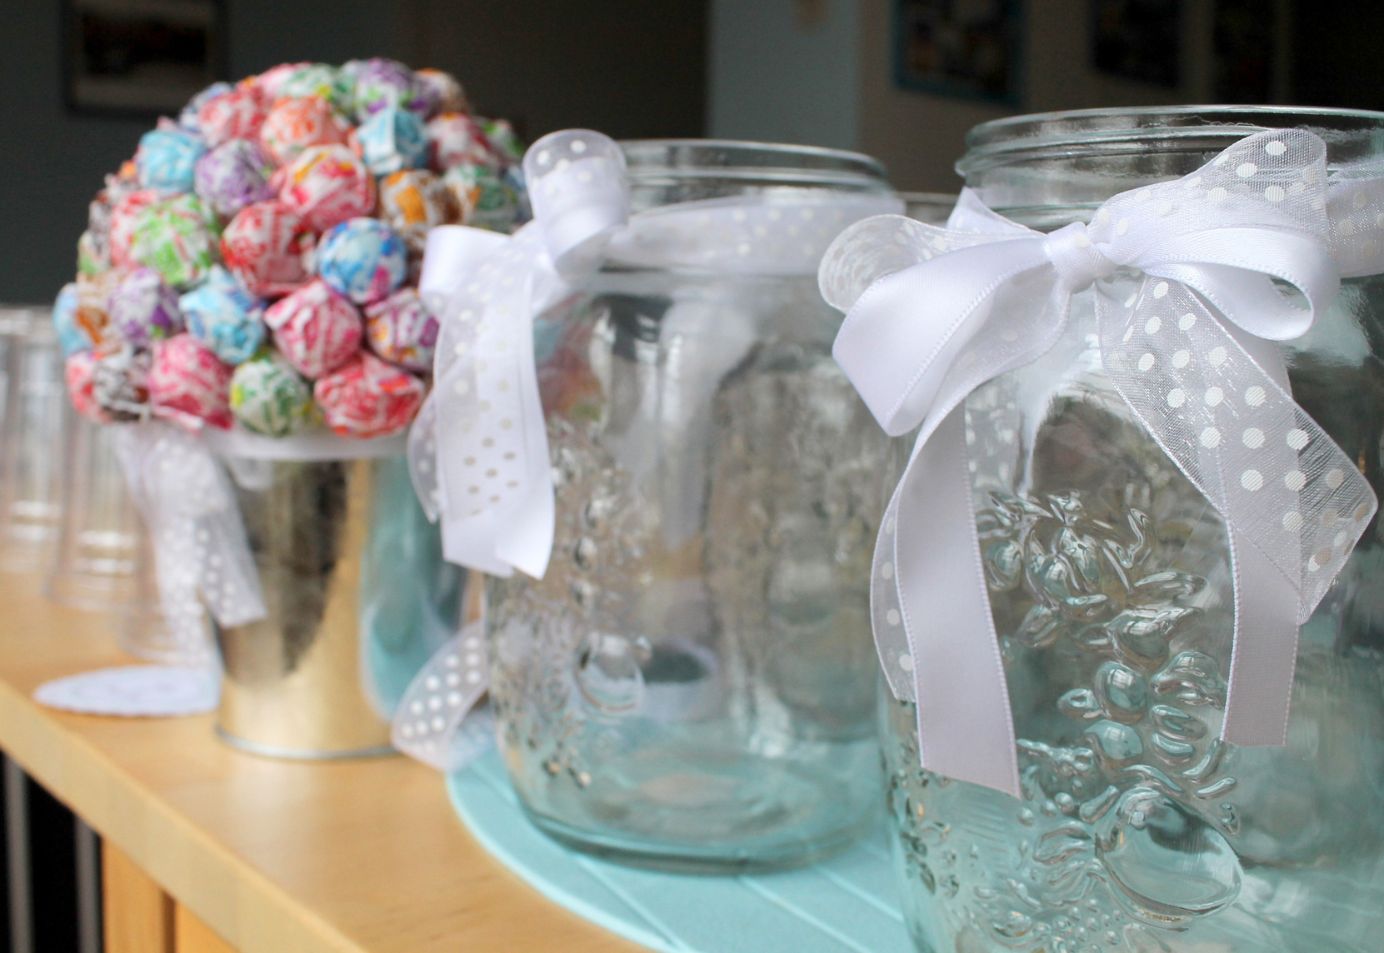
- A selection of candy: Choose a variety of candies in different colors, shapes, and sizes. You can opt for wrapped candies, gummies, lollipops, chocolate treats, or any other candy that you like.
- Base for the centerpiece: You will need a base to hold your candy. This can be a decorative tray, a glass vase, a ceramic bowl, or any other container that suits your style and event theme.
- Floral foam or oasis: This will serve as the foundation for arranging your candy. Make sure to choose foam that fits well inside your container.
- Decorative elements: Consider adding some additional decorative elements to enhance your centerpiece. This can include ribbons, artificial flowers, miniature figurines, or any other items that complement your theme.
- Scissors: A pair of scissors will come in handy for cutting ribbons or floral foam.
- Optional: If you’re planning to create a large or elaborate centerpiece, you may also need some wire, glue, or tape to secure the candy in place.
Once you have gathered these materials, you’re all set to start creating your candy centerpiece. Let’s move on to the next steps!
Step 1: Choose Your Candy
The first step in creating a candy centerpiece is selecting the perfect candies to use. This is where you can let your creativity shine! Consider the theme of your event, the colors you want to incorporate, and the overall look you want to achieve.
Here are some tips to help you choose your candy:
- Variety: Select a mix of candies in different colors, shapes, and sizes to add visual interest to your centerpiece.
- Color scheme: If you have a specific color scheme for your event, choose candies that match or complement those colors.
- Texture: Consider the texture of the candies and how they will look together. Mixing smooth and shiny candies with textured or patterned ones can create a visually appealing contrast.
- Theme: If you have a particular theme for your event, choose candies that align with that theme. For example, if it’s a beach-themed party, opt for candies in beachy colors or shapes like seashells or fish.
Remember to consider your guests’ preferences and any dietary restrictions. Offering a variety of options, such as sugar-free candies or allergen-free alternatives, ensures that everyone can enjoy your centerpiece.
Once you have chosen your candy assortment, it’s time to move on to selecting the base for your centerpiece. Keep reading to learn more in Step 2!
Step 2: Select a Base
Choosing the right base for your candy centerpiece is essential as it sets the foundation for your creation. The base will not only provide stability but also add to the overall visual appeal of your centerpiece. Here are some options to consider:
- Decorative tray: A decorative tray can serve as an excellent base for your candy centerpiece. Look for trays that match the theme or style of your event. You can find trays in various materials such as wood, metal, or glass.
- Glass vase: A clear glass vase allows the candy to be the main focus of attention. You can opt for a tall vase to create a dramatic centerpiece or a shorter one for a more intimate gathering.
- Ceramic bowl: A ceramic bowl can add a touch of elegance to your candy centerpiece. Choose a bowl that complements your event’s color scheme or theme.
- Wicker basket: For a rustic or country-themed event, a wicker basket can be a charming base for your candy centerpiece. It adds a cozy and organic feel to the arrangement.
- Custom container: Get creative and think outside the box! Consider unique containers like vintage teacups, decorative planters, or even a colorful toy box.
When selecting your base, keep in mind the size and shape of the container. Ensure that it is large enough to accommodate your chosen candies and floral foam while still leaving enough space for the centerpiece to stand out.
The base you choose can help tie together the overall theme and aesthetics of your event. Once you have selected the perfect base, you’re ready to move on to the next step: preparing the base. Let’s discover how in Step 3!
Step 3: Prepare the Base
Now that you have chosen the base for your candy centerpiece, it’s time to prepare it for the candy arrangement. Follow these steps to ensure that your base is clean, stable, and ready to showcase your sweet creation:
- Clean the base: Before you begin, make sure to clean your chosen base thoroughly. Remove any dust, dirt, or residue that may be present. This will ensure a clean and polished look for your centerpiece.
- Secure the base: Depending on the type of base you have chosen, you may need to secure it to prevent wobbling or tipping. Use adhesive putty, double-sided tape, or any other appropriate method to secure the base to the surface it will be placed on.
- Protect the base: If you are using a delicate or sensitive surface, such as a wooden table, consider placing a protective barrier like a tablecloth or placemat underneath the base to prevent any potential damage from the weight of the centerpiece.
By taking these steps to prepare your base, you ensure that your candy centerpiece will be stable and beautifully displayed. The next step is to assemble the candy arrangement itself. Let’s move on to Step 4!
Consider using a variety of colorful and different types of candy to create visual interest in your centerpiece. Use a sturdy base, such as a foam block, to anchor the candy and create a stable structure.
Read more: How To Make Glass Candy
Step 4: Assemble the Candy Centerpiece
Now comes the fun part – it’s time to assemble your candy centerpiece! Follow these steps to create a visually appealing and delicious arrangement:
- Place the floral foam: Take your floral foam or oasis and trim it if necessary to fit inside the base. The foam will provide stability and support for your candy arrangement.
- Insert the candy: Start by inserting the larger candies into the foam, evenly spacing them around the center. This will create a solid foundation for your centerpiece.
- Add layers and heights: Build your centerpiece by adding different layers and heights. Use smaller candies or lollipops to create height variations. Mix colors and shapes to create visual interest. Play around with different arrangements until you achieve the desired look.
- Fill in the gaps: As you assemble the centerpiece, fill in any gaps with smaller candies or additional decorative elements like ribbons or artificial flowers. This will give your centerpiece a finished and polished appearance.
- Secure the candies: If necessary, use glue, tape, or wire to secure the candies in place. This will prevent them from shifting or falling out of position.
Remember to step back occasionally and assess the overall look of your centerpiece. Make adjustments as needed to achieve a balanced and visually pleasing arrangement.
Once you are satisfied with the arrangement, it’s time to add the finishing touches. Let’s move on to Step 5!
Step 5: Add Finishing Touches
Now that your candy centerpiece is assembled, it’s time to add some final touches to elevate its visual appeal. These finishing touches will add an extra layer of charm and make your centerpiece truly stand out. Consider the following ideas:
- Ribbons and bows: Add colorful ribbons or bows around the base of the centerpiece for an added pop of color and texture. Coordinate the colors with the candy or event theme for a cohesive look.
- Artificial flowers or greenery: Enhance the overall aesthetic of the centerpiece by incorporating artificial flowers or greenery. Choose flowers that complement the color scheme or theme of your event.
- Miniature figurines or ornaments: For a playful touch, consider adding small figurines or ornaments that align with the theme of your event. This could be anything from little animals to festive characters.
- Sparkle and shine: Add some sparkle to your candy centerpiece with the use of glitter or metallic accents. Sprinkle a touch of edible glitter over the candies or use metallic ribbon to create a shimmering effect.
Remember, the key is to enhance the overall presentation without overpowering the candy arrangement itself. Keep the finishing touches balanced and in line with the theme or style you have chosen.
With the finishing touches complete, it’s time to display and enjoy your beautiful candy centerpiece. Discover how in the next and final step: Step 6!
Step 6: Display and Enjoy
Now that you have put in the effort to create a stunning candy centerpiece, it’s time to display it and let it shine. Follow these final steps to showcase your masterpiece and enjoy its sweet presence:
- Choose the perfect location: Select a prominent location to display your candy centerpiece. This could be the center of the dining table, a buffet table, or even a dedicated dessert table.
- Consider the height: Make sure your centerpiece is at an appropriate height for visibility. If necessary, place it on a cake stand or elevate the base on a stack of books to create more visual impact.
- Set the ambiance: Arrange the surrounding space to complement the centerpiece. Add some coordinating decorations or themed elements to create a cohesive and festive atmosphere.
- Keep it fresh: If your centerpiece includes perishable items like fresh flowers or fruits, ensure they stay fresh by misting them with water or replacing them when needed.
- Enjoy the sweet indulgence: Your candy centerpiece not only provides visual appeal but is also a delicious treat for your guests. Encourage them to enjoy the candies and savor the sweetness.
Throughout your event, keep an eye on the centerpiece and make adjustments as needed. Rearrange candies, refill empty spaces, or add extra decorative elements if desired. This will ensure that your candy centerpiece remains visually appealing and inviting until the end of the event.
Remember, the centerpiece is not only a decoration but also a conversation starter. Guests will admire your creativity and enjoy the delightful touch it adds to the ambiance.
So, go ahead, display your candy centerpiece with pride and indulge in the joy it brings to both the eyes and taste buds!
Congratulations on successfully creating your very own candy centerpiece. We hope this guide has inspired you to unleash your creativity and have fun with candy decorations. Enjoy the process and the sweet rewards!
Happy centerpiecing!
Conclusion
Creating a candy centerpiece is a delightful way to add a touch of sweetness and creativity to any event or gathering. With just a few materials and a sprinkle of imagination, you can craft a stunning centerpiece that will leave your guests in awe.
In this article, we have walked you through the process of making a candy centerpiece, from selecting the perfect candies to assembling the arrangement and adding finishing touches. By following these steps, you can create a visually appealing and delicious centerpiece that will be the talk of the party.
Remember, the key to a successful candy centerpiece is choosing a variety of candies in different colors, shapes, and sizes. Let your creativity run wild and match the candy selection to the theme or color scheme of your event. Selecting an appropriate base and preparing it properly will provide a stable foundation for your centerpiece.
Assembling the candy arrangement is where the magic happens. Play with different heights, textures, and colors to create a visually stunning centerpiece. Add some finishing touches like ribbons, flowers, or ornaments to elevate the overall look and make it truly captivating.
Display your candy masterpiece proudly and enjoy the delight it brings to both the eyes and taste buds of your guests. Keep the centerpiece refreshed and replenished throughout the event to ensure it remains visually appealing until the very end.
Creating a candy centerpiece is not only a fun and engaging activity, but it also allows you to showcase your creativity and personal style. So, let your imagination soar and have fun with designing your very own candy centerpiece!
Thank you for joining us on this journey to create a centerpiece that is both visually appealing and delicious. We hope you have found this guide helpful and inspiring. Now, it’s time to indulge and enjoy the sweet rewards of your creative endeavors.
Happy centerpiecing!
Frequently Asked Questions about How To Make Centerpieces With Candy
Was this page helpful?
At Storables.com, we guarantee accurate and reliable information. Our content, validated by Expert Board Contributors, is crafted following stringent Editorial Policies. We're committed to providing you with well-researched, expert-backed insights for all your informational needs.


0 thoughts on “How To Make Centerpieces With Candy”