Home>diy>Home Improvement>How To Plan A Basement Renovation
Home Improvement
How To Plan A Basement Renovation
Modified: January 5, 2024
Learn how to plan and execute a successful home-improvement project with our expert tips and guidance for basement renovation. Transform your space with our comprehensive planning guide.
(Many of the links in this article redirect to a specific reviewed product. Your purchase of these products through affiliate links helps to generate commission for Storables.com, at no extra cost. Learn more)
Introduction
Welcome to the world of basement renovations! If you’re looking to transform your basement into a beautiful, functional space, you’ve come to the right place. Whether you want to create a cozy home theater, a spacious home office, or an inviting guest suite, a basement renovation can add value and livability to your home.
However, planning a basement renovation can be a daunting task. From assessing the current condition of your basement to setting a budget and creating a design plan, there are several considerations to keep in mind. But fear not! In this article, we’ll walk you through the step-by-step process of planning a basement renovation, ensuring a successful and satisfying outcome.
Before diving into the specifics, it’s important to understand that a basement renovation is a significant undertaking. It requires careful planning, attention to detail, and sometimes the help of professionals. But with the right guidance, you can turn your basement into a space that meets your needs and reflects your personal style.
So, let’s get started by assessing your basement. Take a close look at its current condition to determine what needs to be done and identify any potential issues that may need to be addressed. This will help you form a clear vision of what you want to achieve and set realistic goals for your renovation.
Are you ready? Let’s roll up our sleeves and embark on the exciting journey of planning a basement renovation!
Key Takeaways:
- Transforming a basement into a functional and inviting space involves careful planning, attention to detail, and personal touches. From assessing the space to adding finishing touches, the process is a rewarding journey of creativity and vision.
- Furnishing and decorating a renovated basement allows for personalization and the addition of comfort and character. Thoughtful furniture selection, decorative accents, and personal touches create a space that reflects individual style and enhances functionality.
Read more: How To Plan For Home Renovation
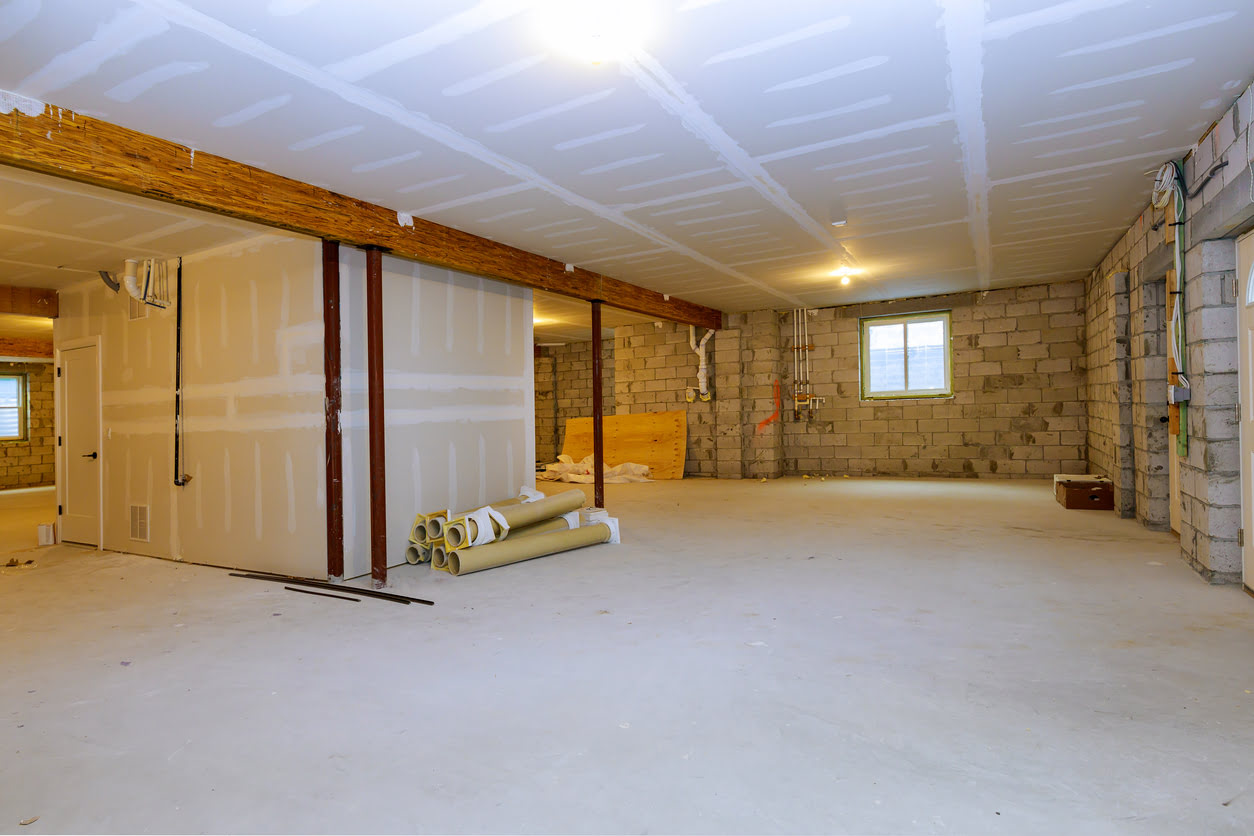
Assessing Your Basement
Before you can start planning your basement renovation, you need to assess the current state of your basement. This step is essential in determining what needs to be done and identifying any potential challenges or limitations.
First, inspect the foundation and walls for any signs of damage or moisture. Look for cracks, water stains, or mold growth. These issues should be addressed before proceeding with any renovations to ensure a dry and structurally sound space.
Next, consider the layout and existing features of your basement. Take note of the location of windows, doors, and any existing plumbing or electrical fixtures. This will help you determine if any modifications or additions need to be made.
Measure the dimensions of the basement to have an accurate understanding of its size. This will be crucial when creating a design plan and selecting appropriate furniture and fixtures.
Consider the height of your basement as well. Building codes often have minimum requirements for ceiling height in habitable spaces. Ensure that your basement meets these requirements or explore options for raising the ceiling if necessary.
Assess the natural lighting situation. Basements tend to have limited natural light, so think about how you can maximize the use of windows and incorporate artificial lighting to create a bright and welcoming atmosphere.
Think about the existing systems in your basement, such as heating, cooling, and ventilation. Evaluate their efficiency and determine if any upgrades or modifications are needed to ensure a comfortable and well-regulated space.
Finally, consider the overall condition of the floor. Decide if you want to keep the existing flooring or if you prefer to install new materials. Keep in mind factors such as durability, moisture resistance, and ease of maintenance when making your decision.
By thoroughly assessing your basement, you’ll gain a comprehensive understanding of its current state and be equipped with the information needed to plan your renovation effectively. This assessment will help you identify any potential challenges or limitations and enable you to make informed decisions throughout the process.
Now that you’ve assessed your basement, it’s time to move on to the next step: setting a budget. Let’s make sure your renovation stays within your financial means while still achieving your desired vision.
Setting a Budget
Setting a budget is a crucial step when planning a basement renovation. It helps you determine the scope of your project, prioritize your expenses, and ensure that you can complete the renovation without exceeding your financial means.
Start by determining how much you are willing to spend on your basement renovation. Consider your overall home improvement budget and allocate a portion of it specifically for the basement project. This will give you a realistic idea of what you can afford to invest in your renovation.
Next, break down your budget into different categories. Allocate funds for construction materials, labor costs, permits and inspections, furniture and fixtures, and any unexpected expenses that may arise during the renovation process.
Research the costs associated with the specific renovations you have in mind. Reach out to contractors or home improvement professionals to get estimates for the different aspects of your project, such as electrical work, plumbing, flooring installation, and painting.
Consider allocating a contingency fund within your budget. This will provide a financial cushion in case unexpected issues or additional expenses come up during the renovation. It’s always better to be prepared for any surprises that may arise.
Keep in mind that there may be additional costs beyond the renovation itself. This could include purchasing new furniture, decor, or any necessary equipment for the space. Make sure to account for these expenses in your budget as well.
During the budgeting process, it’s important to be realistic and consider your priorities. Determine which elements of the renovation are essential and which ones are optional. This will help you make informed decisions and stay within your budget constraints.
Remember to keep track of your expenses throughout the renovation process. Monitor your spending and make adjustments if necessary to ensure that you stick to your budget. This will help you avoid any financial stress as the project progresses.
Setting a budget for your basement renovation is essential to ensure a smooth and successful project. By considering your overall finances, estimating costs, and being mindful of your priorities, you’ll be able to create a realistic budget that aligns with your goals.
Now that you have your budget in place, it’s time to move on to the next step: creating a design plan for your renovated basement.
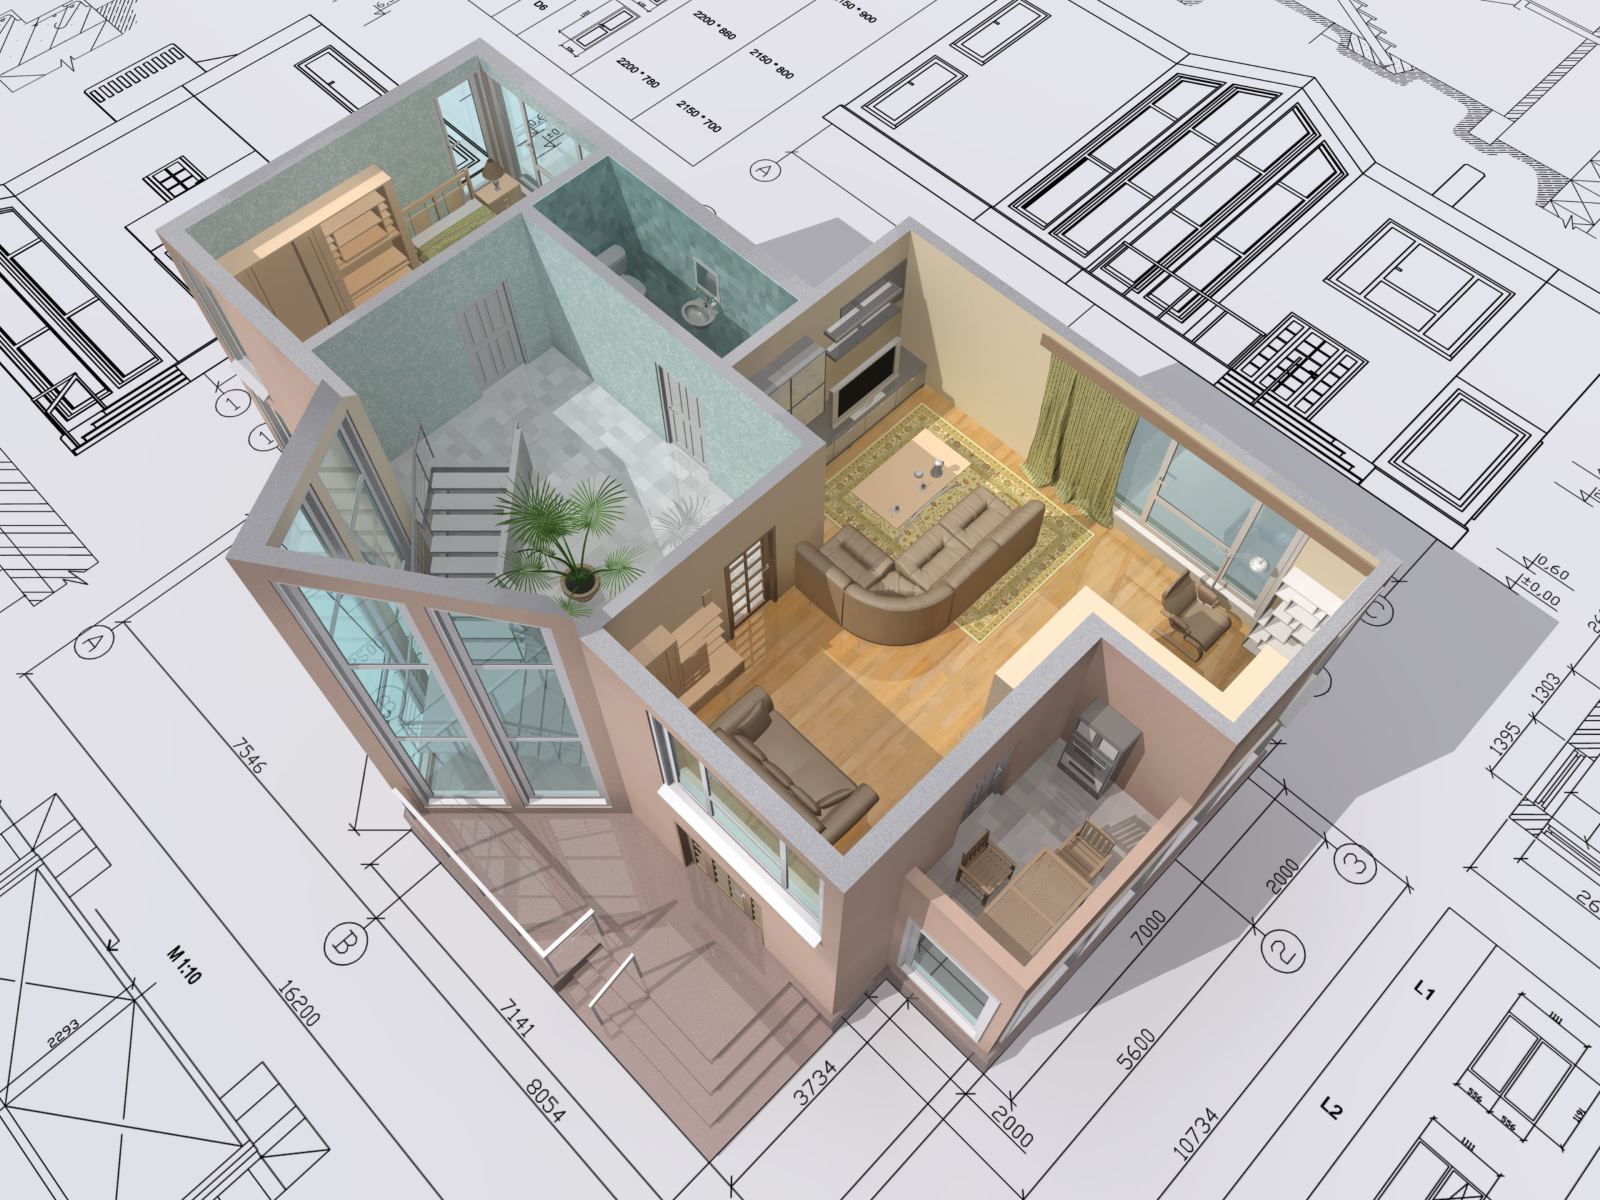
Creating a Design Plan
Creating a design plan is an exciting step in the basement renovation process. It allows you to envision the new layout, choose the color schemes and materials, and bring your desired aesthetic to life. Here are some steps to help you create an effective design plan:
1. Determine the Function of the Space: Decide how you want to use your basement. Will it be a family entertainment area, a home office, or a guest suite? Defining the purpose of the space will guide your design choices and help you allocate the right areas for different activities.
2. Consider the Layout: Assess the existing layout of your basement and determine if any structural changes are required. Take into account where the windows, doors, and utility areas are located. Plan the flow of the space and ensure it is functional and efficient.
3. Choose a Design Style: Think about the design style you want to achieve in your basement. Do you prefer a modern and minimalistic look or a cozy and rustic vibe? Browse through interior design magazines or websites for inspiration and create a mood board to capture your desired aesthetic.
4. Select Colors and Materials: Decide on a color palette that complements the design style you have chosen. Consider the mood you want to create in the space. For instance, soft and neutral tones can create a calming atmosphere, while bold colors add vibrancy and energy. Choose materials that are durable, moisture-resistant, and suitable for the purpose of your basement.
5. Design the Lighting: Lighting plays a crucial role in basement renovations. Natural light may be limited, so incorporate artificial lighting strategically. Combine ambient lighting, task lighting, and accent lighting to enhance the functionality and ambiance of the space. Consider installing dimmer switches to adjust the lighting according to different activities and moods.
6. Evaluate Storage Needs: Assess your storage requirements and plan for adequate storage solutions. Basements are often used for storing seasonal items or serving as a utility space. Determine if you need shelves, cabinets, or built-in storage options to keep your belongings organized and out of sight.
7. Seek Professional Help: If you’re unsure about the design aspects or require guidance, consult with an interior designer or architect. They can provide valuable insights and help you create a cohesive design plan that meets your needs and preferences.
Remember, the design plan is a roadmap for your basement renovation journey. It allows you to envision the end result and make informed decisions about the layout, colors, materials, lighting, and storage options. With a well-thought-out design plan, you’ll be ready to transform your basement into a beautiful and functional space.
Now that you have your design plan in place, it’s time to move forward with the next steps: obtaining necessary permits and deciding whether you will hire professionals or opt for a DIY approach.
Obtaining Necessary Permits
When planning a basement renovation, it’s essential to ensure that you have obtained all the necessary permits and approvals required by your local building department. Obtaining permits not only ensures that you comply with building codes and regulations but also provides you with the peace of mind that your renovation is safe and up to standard.
The specific permits you need will depend on the scope of your renovation and the regulations in your area. In general, basement renovations typically require permits for electrical work, plumbing modifications, structural changes, and any additions or alterations to the existing space.
To start the permit process, contact your local building department. They will provide you with the necessary information, including the specific permits required and the documentation you need to submit. It’s crucial to follow the guidelines and provide accurate details to avoid any potential delays or issues down the line.
If you’re hiring a contractor, they may handle the permit process on your behalf. However, it’s still important to stay involved and ensure that all permits are obtained before any work begins. This will help you avoid potential legal consequences and complications in the future.
When applying for permits, you will typically need to provide architectural plans, engineering reports (if applicable), and a detailed description of the work you intend to do. The building department will review your application to ensure it meets building codes and regulations.
Once your application is approved, you will receive the necessary permits to proceed with your basement renovation. Make sure to display the permits on-site and comply with any inspection requirements throughout the construction process. Inspections will ensure that the work is being done correctly and meets the required standards.
Keep in mind that the permit process may add some time and cost to your renovation project. However, it’s a necessary step to ensure that your basement renovation is legal, safe, and in compliance with building codes.
By obtaining the necessary permits, you demonstrate your commitment to following the regulations and ensuring the safety and integrity of your basement renovation. It may require some additional effort, but the result will be a renovation that is done right and stands the test of time.
Now that you have all the permits in place, it’s time to decide whether you will hire professionals for your basement renovation or take on a do-it-yourself approach. We’ll explore both options in the following section.
Hiring Professionals or DIY
One of the important decisions you’ll face when planning a basement renovation is whether to hire professionals or tackle the project yourself. Both options have their pros and cons, and it’s crucial to consider your skills, the complexity of the renovations, and your budget before making a decision.
Hiring professionals can bring several advantages to your basement renovation. First and foremost, professionals have the expertise and experience to handle various aspects of the project. Whether it’s electrical work, plumbing, or structural changes, professionals can ensure that the renovations are done correctly, safely, and up to code.
Professional contractors also have access to specialized tools and equipment, which can result in more efficient and high-quality work. They may also have established relationships with suppliers, allowing them to source materials at better prices than you could on your own.
In addition, hiring professionals can save you time and stress. Renovations can be time-consuming, and professionals can dedicate their full attention to the project, ensuring efficient progress. They can also handle the necessary paperwork, permits, and inspections, relieving you of administrative burdens.
However, hiring professionals may come at a higher cost. You’ll need to budget for labor costs, which can vary depending on the scope and complexity of the renovations. It’s essential to obtain multiple quotes from different contractors, compare them, and choose one that offers a reasonable price along with quality workmanship.
If you have the time, skills, and motivation, you may consider a do-it-yourself (DIY) approach for your basement renovation. DIY projects can be rewarding, allowing you to have full control over the process and potentially save money on labor costs.
Before choosing the DIY route, assess your skills and knowledge in the areas of construction, electrical work, plumbing, and other necessary tasks. If you feel confident in your abilities and are willing to put in the time and effort to research, learn, and execute the renovations, DIY can be a viable option.
However, keep in mind that DIY projects can be time-consuming and may take longer to complete than if you were to hire professionals. You need to consider if you have the available time and energy to dedicate to the project.
Furthermore, DIY projects can be challenging, especially if you encounter unexpected issues or complications along the way. It’s crucial to have contingency plans, access to resources or guidance, and the ability to adapt to changing circumstances.
Whether you decide to hire professionals or take the DIY approach, remember that open communication is key. Clearly communicate your vision, expectations, and budget constraints to professionals if you hire them. If you choose the DIY route, seek advice from experts, consult online resources, and engage in forums or communities to learn and gather insights from experienced DIYers.
In the end, the decision to hire professionals or go the DIY route depends on your comfort level, budget, and the complexity of the renovations. Take the time to evaluate your options and choose the path that aligns best with your goals and capabilities.
Now that you have decided whether to hire professionals or take the DIY approach, it’s time to prepare your basement for the upcoming renovations. Let’s dive into the next step: preparing the basement.
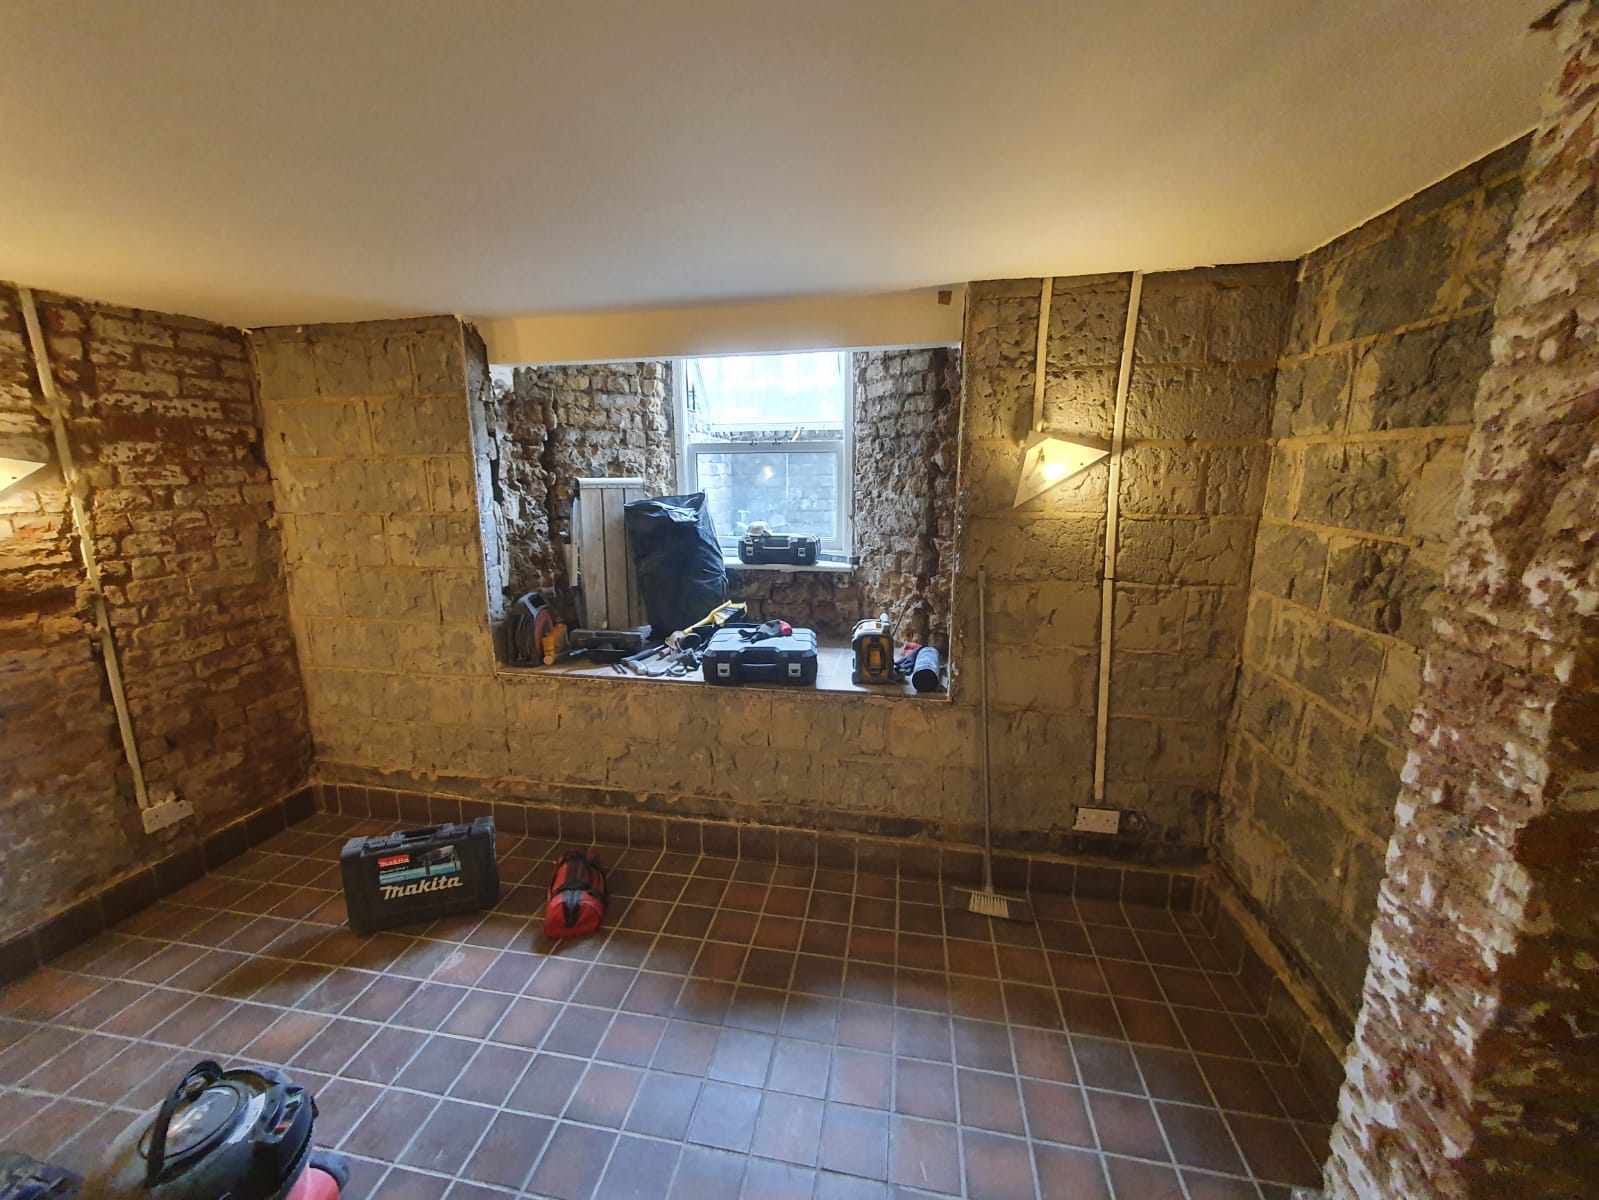
Preparing the Basement
Before you can begin your basement renovation, it’s crucial to properly prepare the space. Preparations will help ensure a smooth and efficient renovation process, as well as lay the foundation for a successful end result. Here are some key steps to follow when preparing your basement:
1. Clear Out the Space: Remove all items, furniture, and belongings from the basement. This will give you a clean slate to work with and allow for easy access during the renovation. Consider renting a storage unit or finding alternative storage solutions for your belongings during this time.
2. Address Moisture Issues: Moisture can be a common problem in basements. Before proceeding with any renovations, it’s essential to address any moisture issues to create a dry environment. Inspect for signs of dampness, leaks, or mold growth. Repair any cracks in the foundation walls, reinforce the waterproofing, and consider installing a sump pump if necessary.
3. Check for Radon: Radon is a naturally occurring gas that can seep into basements and pose health risks. Test your basement for radon levels and take necessary measures to mitigate it if found. Consult with professionals or use radon test kits available in the market.
4. Ensure Proper Ventilation: Basements can often be poorly ventilated spaces, leading to a stagnant or damp environment. Check the existing ventilation system and consider installing additional vents or fans to improve air circulation. This will help maintain a fresh and breathable atmosphere during and after the renovation.
5. Evaluate the Electrical System: Basements may need electrical upgrades to accommodate the specific needs of your renovation project. Inspect the existing electrical system and determine if any changes or additions are necessary. Consider hiring a licensed electrician to handle any electrical work to ensure compliance with safety regulations.
6. Consider Plumbing Requirements: If your basement renovation involves adding a new bathroom or kitchenette, evaluate the existing plumbing system. Determine if any modifications or new plumbing lines need to be installed. Consult with a professional plumber to ensure that your plumbing needs are met effectively.
7. Take Care of Structural Stability: Assess the structural integrity of your basement, focusing on walls, beams, and floor joists. Look out for any signs of damage or deterioration. If you notice any structural issues, consult with a structural engineer or a professional contractor to address them before proceeding with the renovation.
8. Plan for Safety Measures: Prioritize safety throughout your basement renovation project. Install smoke detectors and carbon monoxide detectors, ensure proper lighting in stairways, and have clear emergency exit routes in place. Consider implementing safety measures such as handrails and non-slip flooring to prevent accidents.
By adequately preparing your basement before starting the renovation, you lay the groundwork for a successful and hassle-free project. Taking the time to address moisture issues, evaluate the electrical and plumbing systems, and ensure structural stability will help create a safe and welcoming space for your future basement transformation.
Now that your basement is prepared, it’s time to move on to the next steps in the renovation process: demolition and making any necessary structural changes. Let’s get ready to transform your basement space!
Demolition and Structural Changes
Demolition and structural changes are significant steps in the basement renovation process. This phase involves removing existing elements, making necessary modifications to the structure, and preparing the space for the new layout. Here’s what you need to know about demolition and structural changes:
1. Plan Your Demolition: Before starting demolition, create a detailed plan to guide the process. Identify the areas and items that need to be demolished, such as walls, flooring, or fixtures. Consider the sequence of demolition to ensure a smooth workflow and minimize any potential hazards.
2. Safety First: Prioritize safety during the demolition process. Wear protective gear, including gloves, goggles, and masks, to protect yourself from dust, debris, and potential hazards. Use proper tools and techniques to minimize the risk of accidents. If you are unsure about any aspect of demolition, consider hiring professionals to handle this stage.
3. Remove Non-Load-Bearing Elements: Start by removing non-load-bearing elements, such as drywall, fixtures, and flooring. This will open up the space and allow you to access the underlying structure. Use appropriate tools, such as hammers, pry bars, or reciprocating saws, to carefully remove these elements.
4. Evaluate Structural Changes: If you are planning any structural changes, this is the time to assess the existing structure and determine the modifications required. Consult with a structural engineer or a professional contractor to ensure that any changes you make comply with building codes and regulations. This may involve adding or removing walls, adjusting ceiling heights, or reinforcing load-bearing elements.
5. Hire Professionals for Structural Work: Structural changes can be complex and require expert knowledge. It is advisable to hire professionals with experience in structural renovations to ensure the changes are done safely and effectively. They can handle tasks such as installing support beams, relocating plumbing and electrical lines, or reinforcing the foundation as needed.
6. Electrical and Plumbing Modifications: If your renovation plans include moving or adding electrical and plumbing fixtures, this is the ideal time to make those changes. Consult with licensed professionals for electrical and plumbing work to ensure that everything is done according to code.
7. Ensure Permits and Inspections: Depending on the scope of your renovations, you may need to obtain permits for structural changes and electrical or plumbing modifications. Check with your local building department to determine the necessary permits and inspections required for this phase of the renovation. Compliance with codes and regulations is crucial to ensure the safety and legality of your project.
8. Dispose of Debris Properly: During demolition, debris and waste will accumulate. Dispose of these materials responsibly to comply with local regulations. Rent dumpsters or arrange for construction waste removal services to ensure proper disposal of the debris generated during the demolition process.
By carefully planning and executing the demolition and structural changes, you’ll lay the foundation for a successful basement renovation. Remember to prioritize safety and consult with professionals when required to ensure that the changes comply with building codes and regulations.
Now that the demolition and structural changes are complete, it’s time to move on to the next steps in the renovation process, such as plumbing and electrical work. Let’s keep the momentum going as we transform your basement space!
Plumbing and Electrical Work
Plumbing and electrical work are crucial components of a basement renovation project. Whether you’re adding a bathroom, upgrading electrical wiring, or reconfiguring the layout, proper plumbing and electrical work is essential for creating a functional and safe space. Here’s what you need to know about these critical aspects:
Plumbing Work:
1. Determine Your Plumbing Needs: Decide on the plumbing fixtures and features you want to incorporate into your basement. This may include a bathroom, laundry area, wet bar, or utility sink. Determine the placement of these fixtures based on your design plan and accessibility requirements.
2. Consult with a Licensed Plumber: For complex plumbing installations or modifications, it’s advisable to consult with a licensed plumber. They have the expertise to ensure that your plumbing system meets code requirements and functions properly. They can help with tasks such as installing water supply lines, drains, venting, and connecting fixtures.
3. Consider Drainage Options: Ensure proper drainage for your basement. If there’s already a floor drain, make sure it’s in good condition and functioning correctly. If needed, consult a plumber to install additional floor drains or a sump pump system to prevent water accumulation and protect against potential flooding.
4. Choose Water-Resistant Materials: Basements are prone to higher humidity levels and moisture. When selecting plumbing materials, choose options that are resistant to water damage, such as PVC or PEX pipes. Use moisture-resistant materials for walls and flooring in areas where plumbing fixtures will be located.
5. Insulate Pipes: Insulate exposed pipes to prevent condensation and potential freezing in cold climates. Proper insulation will help maintain consistent water flow and prevent costly repairs due to pipe damage.
Electrical Work:
1. Assess Electrical Needs: Evaluate your electrical requirements based on your design plan and intended use of the basement. Determine the number and location of outlets, light fixtures, switches, and any additional electrical features you may need.
2. Consult with an Electrician: Working with electricity can be dangerous and requires professional expertise. Consult with a licensed electrician to assess your electrical needs, plan the wiring layout, and ensure compliance with electrical codes and safety standards.
3. Upgrade Electrical Panel if Necessary: Renovations often require additional power capacity. If your basement currently has an outdated electrical panel, consider upgrading to accommodate the increased electrical demand. Upgrading the panel will ensure sufficient power supply and prevent overloading.
4. Install Adequate Lighting: Basements typically have limited natural light. Plan for a well-designed lighting scheme that combines ambient, task, and accent lighting. Install light fixtures strategically to brighten the space and create a comfortable and functional environment.
5. Consider Energy Efficiency: Take advantage of the renovation process to incorporate energy-efficient lighting fixtures, switches, and appliances. LED lights, motion sensors, and programmable thermostats can help reduce energy consumption and lower utility costs in the long run.
Remember, both plumbing and electrical work require compliance with building codes and regulations. Properly licensed professionals have the necessary expertise to ensure the safety and functionality of these systems. Work closely with them to execute plumbing and electrical tasks accurately and safely.
With plumbing and electrical work completed, your basement is one step closer to becoming a fully functional and inviting space. We’re almost there! Next, we’ll move on to insulation and drywall installation, which will help make your basement comfortable and aesthetically appealing. Let’s continue the renovation journey!
Insulation and Drywall Installation
Insulation and drywall installation are crucial steps in transforming your basement into a comfortable and visually pleasing space. Insulation helps regulate temperature, minimize moisture, and reduce sound transmission, while drywall provides a smooth and finished surface for the walls and ceilings. Here’s what you need to know about insulation and drywall installation:
Insulation:
1. Choose the Right Insulation: Select the appropriate type of insulation for your basement. Common options include fiberglass batts, foam board insulation, or spray foam insulation. Consider factors such as moisture resistance, energy efficiency, and sound absorption when choosing the insulation materials.
2. Insulate Exterior Walls: Insulating the exterior walls of your basement helps maintain a comfortable and consistent temperature. Install insulation between the wall studs, ensuring a snug fit. Pay attention to sealing any gaps or air leaks to maximize the insulation’s effectiveness.
3. Consider Insulating Interior Walls: If your basement includes interior walls that separate different rooms or areas, consider insulating them as well. This will help with temperature control and reduce noise transfer between rooms.
4. Insulate the Ceiling: Insulating the ceiling of your basement can help control the temperature and minimize noise transfer from the upper floors. Insulate between the floor joists above using the appropriate insulation material.
5. Vapor Barrier Installation: Consider installing a vapor barrier between the insulation and the interior walls. A vapor barrier helps prevent moisture from penetrating into the insulation, reducing the risk of mold or dampness. Consult with insulation professionals to determine if a vapor barrier is necessary based on your basement’s specific conditions.
Read more: How To Plan A Picnic
Drywall Installation:
1. Measure and Plan: Take accurate measurements of your walls and ceilings to determine the amount of drywall needed. Create a plan for the placement and alignment of the drywall sheets, considering any electrical outlets, switches, or other fixtures that need to be accounted for.
2. Prepare the Surfaces: Ensure that the walls and ceilings are clean, dry, and free from any debris or obstructions. Remove any nails or screws that may be protruding from the surface. Repair any visible cracks or imperfections before proceeding with drywall installation.
3. Cut and Install the Drywall: Using a utility knife or drywall saw, cut the drywall sheets to the appropriate sizes according to your measurements. Carefully position the drywall against the walls or ceilings, ensuring a snug fit. Secure the drywall to the studs or joists using drywall screws, spaced at regular intervals.
4. Taping and Mudding: After the drywall sheets are installed, apply joint compound or “mud” to the seams and screw depressions. Place drywall joint tape over the compound and use a taping knife to smooth it out. Apply additional coats of compound, feathering the edges, until the seams are blended seamlessly with the surrounding drywall.
5. Sanding and Finishing: Once the joint compound is dry, carefully sand the seams and any uneven areas to create a smooth surface. Wipe away the dust with a damp cloth or sponge. Prime the drywall and apply paint or other finishes according to your design plan.
Remember, insulation and drywall installation require attention to detail and precision. If you are not experienced in these tasks, it may be best to hire professionals to ensure a high-quality and efficient installation.
With insulation and drywall in place, your basement is starting to take shape. Next, we’ll explore flooring selection and installation, which will further enhance the functionality and aesthetic appeal of your renovated space. Let’s continue building your dream basement!
Flooring Selection and Installation
Flooring is a significant design element that can greatly impact the overall aesthetic and functionality of your basement. It’s important to choose the right flooring materials that are both durable and suitable for the unique challenges of below-grade spaces. Here’s what you need to know about flooring selection and installation in your basement:
Flooring Selection:
1. Consider Moisture Resistance: Basements are prone to moisture, so it’s essential to choose flooring materials that can withstand damp conditions. Opt for moisture-resistant options such as luxury vinyl planks or tiles, ceramic or porcelain tiles, or engineered hardwood with a moisture-barrier backing.
2. Assess Sub-Flooring Requirements: Evaluate the condition of your basement’s sub-flooring. Concrete slabs often require a moisture barrier and sub-flooring material, such as plywood or OSB (oriented strand board), before installing certain types of flooring. Ensure the sub-floor is level and free from any cracks or damage before proceeding with installation.
3. Consider Comfort: Basements tend to be cooler than the rest of the house, so consider flooring materials that provide insulation and comfort underfoot. Carpet tiles or carpet with a moisture-proof backing can add warmth and coziness to your basement. Additionally, area rugs can provide extra comfort in specific areas.
4. Evaluate Durability: Basements often serve multiple purposes, so choose flooring materials that are durable and can withstand heavy foot traffic. Look for options that are resistant to scratches, dents, and moisture damage. Laminate, luxury vinyl, and ceramic tiles are popular choices for their durability and versatility.
5. Choose Your Style: Consider your personal style and the design theme you’ve envisioned for your basement. Choose flooring materials and patterns that complement your overall aesthetic. Whether you prefer a sleek and modern look or a rustic and cozy ambiance, there are many options available to suit your taste.
Flooring Installation:
1. Acclimate the Flooring: Before installation, allow the flooring materials to acclimate to the basement’s environment. Follow the manufacturer’s instructions for recommended acclimation periods, as this step can help prevent any warping or damage to the flooring later on.
2. Prepare the Sub-Floor: Ensure that the sub-floor is clean, level, and free from any debris or imperfections. Repair any cracks or uneven areas, and address any moisture issues before proceeding with the installation.
3. Follow Manufacturer’s Instructions: Different types of flooring have specific installation methods and requirements, so it’s crucial to follow the manufacturer’s instructions carefully. This will ensure a proper and successful installation. Be aware of any specific tools or adhesives that may be required for the specific type of flooring you have chosen.
4. Hire a Professional (if necessary): Some types of flooring, such as ceramic tiles or hardwood, may require specialized skills for proper installation. If you’re unsure about the installation process or lack experience, it’s best to hire a professional flooring installer to ensure a high-quality result.
5. Allow for Expansion Gaps: Basements are prone to humidity and temperature fluctuations, so it’s important to leave small expansion gaps between the flooring and the walls. This will allow for natural expansion and contraction without causing damage to the flooring material.
6. Finish and Seal (if applicable): Depending on the type of flooring you choose, sealing or finishing may be necessary. This step adds an additional layer of protection and helps maintain the appearance and longevity of the floor. Follow the manufacturer’s recommendations for the appropriate finishing or sealing products.
With the right flooring selected and installed, your basement space is now visually appealing, functional, and ready for the finishing touches. In the next steps, we’ll explore lighting and ventilation options, as well as painting and adding the final touches to complete your basement renovation. Let’s bring your vision to life!
Read more: How To Dimension A Floor Plan
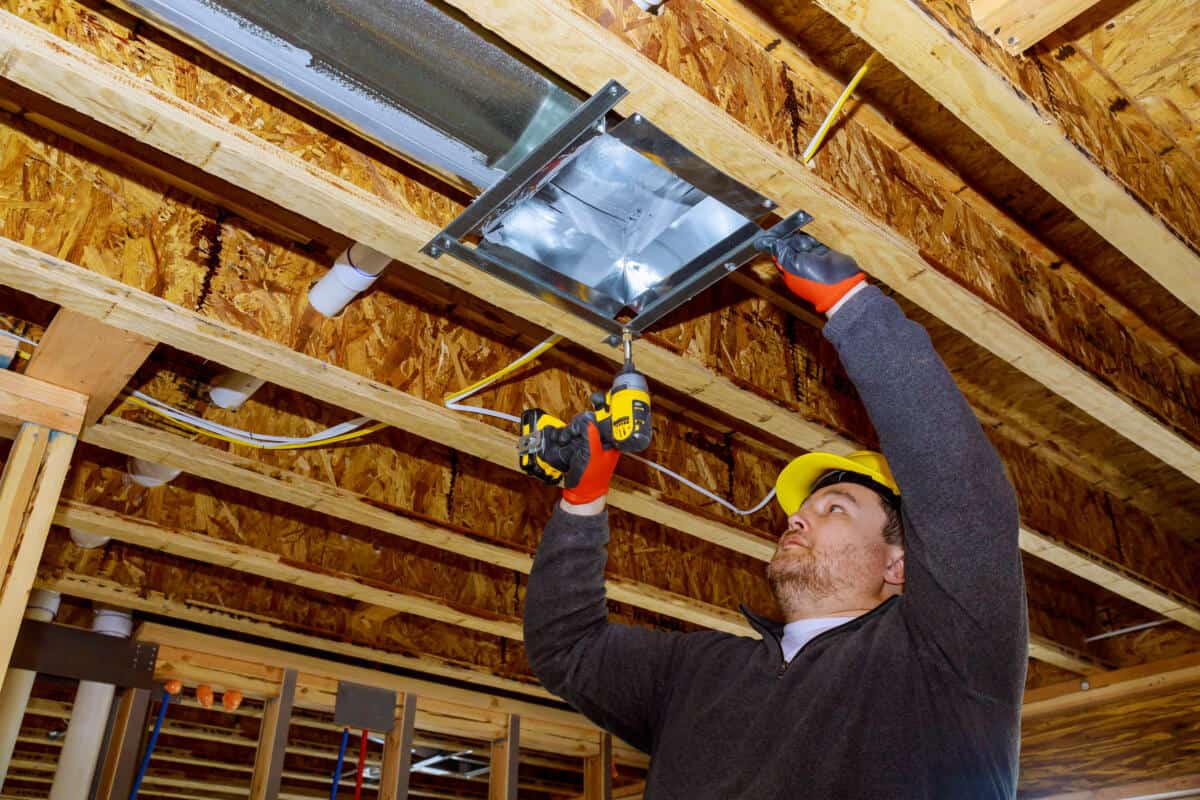
Lighting and Ventilation
Lighting and ventilation are essential elements in creating a comfortable and inviting basement space. Proper lighting can enhance the ambiance and functionality, while effective ventilation helps maintain air quality and prevent moisture issues. Here’s what you need to know about lighting and ventilation for your basement renovation:
Lighting:
1. Plan for Natural Light: While basements typically have limited access to natural light, maximize the use of windows or window wells if available. Clear any obstructions outside the windows to allow more natural light to enter the space. Consider light-colored window coverings or sheer curtains that let in natural light while maintaining privacy.
2. Layer Your Lighting: Create a well-balanced lighting scheme by incorporating different types of lighting. Layer ambient lighting to provide overall illumination. Add task lighting to specific areas such as workstations, reading nooks, or kitchenette counters. Include accent lighting to highlight architectural features, artwork, or focal points in the space.
3. Utilize Recessed Lighting: Recessed or pot lights are a popular choice for basements as they provide a sleek and modern look. Install recessed lights strategically throughout the space to evenly distribute light and minimize shadows. Choose LED bulbs for energy efficiency and longevity.
4. Consider Pendant or Track Lighting: Pendant lights or track lighting can add a decorative element and provide focused lighting in specific areas. Use pendant lights over dining tables, kitchen islands, or seating areas to create a focal point. Track lighting can be directed towards artwork or feature walls to enhance their visibility.
5. Use Dimmers and Controls: Install dimmer switches and lighting controls to customize the ambiance and adjust the lighting level according to different activities or moods. Dimmers allow you to create a soft and soothing atmosphere, while brightening the space for tasks that require more light.
Ventilation:
1. Install Exhaust Fans: Proper ventilation is crucial in basements to control moisture, prevent odors, and improve air circulation. Install exhaust fans in areas such as bathrooms or laundry rooms to remove excess humidity and maintain fresh air. Ensure that the exhaust fans are properly vented to the exterior of the house.
2. Consider HVAC System: Evaluate your existing HVAC system to ensure it can handle the additional load from the renovated basement. Consult with HVAC professionals to determine if any modifications, upgrades, or additions are required for sufficient heating, cooling, and air circulation in the basement.
3. Use Portable Fans: In areas where permanent ventilation solutions are not feasible, such as recreational spaces or seating areas, consider using portable fans for temporary air circulation. Floor or table fans can help keep the air moving and create a more comfortable environment.
4. Openable Windows: If your basement has windows that can be opened, make use of them to promote natural ventilation. Open the windows when weather permits to allow fresh air to circulate and help reduce humidity levels. Install window screens to keep insects out while allowing for airflow.
5. Dehumidifiers: Basements are prone to high humidity levels. Consider using a dehumidifier to control moisture and prevent issues such as mold or musty odors. Choose a dehumidifier with the capacity suitable for the size of your basement and empty or drain it regularly to maintain optimal performance.
Proper lighting and ventilation greatly contribute to the comfort and functionality of your renovated basement. Incorporating a well-thought-out lighting scheme and ensuring adequate airflow will create a pleasant environment for various activities and help maintain a healthy indoor atmosphere.
With lighting and ventilation taken care of, we’re nearing the end of your basement renovation journey. In the final stretch, we’ll explore painting and adding the finishing touches to transform your basement into a space you’ll love. Let’s continue!
Painting and Finishing Touches
Painting and finishing touches are the final steps in your basement renovation, adding personality and character to the space. The right paint colors, decorative elements, and thoughtful details can truly bring your vision to life. Here’s what you need to know about painting and adding those finishing touches:
Read more: How To Plan A Home Renovation
Painting:
1. Choose the Right Colors: Select paint colors that reflect the desired mood and aesthetic of your basement. Lighter colors can create a sense of openness and make the space feel larger, while darker tones can add depth and coziness. Consider the overall style you want to achieve and how the colors will complement your furniture and decor.
2. Test Paint Samples: Before committing to a color, test paint samples on the walls to see how they look in different lighting conditions. Paint a small section and observe how it appears during the day and at night. This will help you make an informed decision and ensure that you’re happy with the final result.
3. Prep the Walls: Proper preparation is key to achieving a smooth and professional finish. Patch any holes or cracks with spackling compound and sand them down. Clean the walls thoroughly to remove any dirt, dust, or grease. Apply a coat of primer to ensure good paint adhesion and to create an even surface.
4. Use Quality Painting Tools: Invest in good-quality painting tools to achieve a clean and smooth finish. Brushes, rollers, and paint trays can make a significant difference in the application process. Consider using a roller with a long handle to reach higher sections of the walls and a smaller brush for cutting in corners and edges.
5. Apply Multiple Coats: Apply paint in multiple thin coats rather than one thick coat. This will help achieve a more even and durable finish. Allow each coat to dry thoroughly before applying the next one. Follow the recommended drying times indicated on the paint can for best results.
Finishing Touches:
1. Install Baseboards and Trim: Install baseboards and trim around doors, windows, and other architectural features to add a finished look to the space. Choose materials and styles that complement the overall design aesthetic of your basement.
2. Hang Curtains and Blinds: Install curtains or blinds to add privacy, control natural light, and enhance the overall appeal of the windows. Choose fabrics and styles that align with the design scheme and provide the desired level of light filtering and insulation.
3. Furnish and Arrange Furniture: Bring in your chosen furniture pieces and arrange them to create functional and inviting spaces. Consider the layout, traffic flow, and focal points in the room. Mix and match different pieces to create an eclectic and personalized feel.
4. Add Decorative Elements: Personalize your basement with decorative elements that reflect your style and interests. Hang artwork, photographs, or mirrors on the walls. Incorporate decorative pillows, throw blankets, and area rugs to add color, texture, and comfort.
5. Create Focal Points: Consider adding focal points to draw the eye and create visual interest. Install a statement light fixture, create an accent wall with wallpaper or a bold paint color, or display a visually stunning piece of furniture or artwork. Focal points can elevate the overall design and give your basement a unique touch.
Remember to have fun and be creative when adding the finishing touches. These details will help bring your vision to life and make your basement feel like a truly personalized space that you and your family will enjoy.
Congratulations on completing your basement renovation! With the painting done and the finishing touches added, your basement is ready to be enjoyed and admired. Take a moment to appreciate the hard work and dedication you’ve put into transforming the space into a beautiful and functional area of your home.
Thank you for joining us on this renovation journey. We hope this guide has been helpful in planning and executing your basement renovation project. Enjoy your new space and may it bring you joy for years to come!
Furnishing and Decorating
Furnishing and decorating your newly renovated basement is the final step in creating a functional and inviting space that reflects your style and meets your needs. This step allows you to add the finishing touches and truly make the space your own. Here’s what you need to know about furnishing and decorating your basement:
Furniture Selection:
1. Assess your Needs: Consider how you plan to use your basement space and choose furniture accordingly. If it’s a media room, consider comfortable seating options like sofas or recliners. For a home office or study area, choose a desk and ergonomic chairs. If it’s a multipurpose space, consider versatile furniture that can be easily rearranged to accommodate different activities.
2. Optimize Space: Basements often have limited square footage, so choose furniture that maximizes the available space. Look for multifunctional pieces that offer storage solutions, such as ottomans with hidden compartments or shelves, or a sofa bed for overnight guests. Utilize wall space with floating shelves or wall-mounted storage units.
3. Consider Scale and Proportion: Measure your basement and choose furniture that fits well within the space. Oversized furniture can make the room feel cramped, while furniture that is too small may make the space appear empty. Maintain a balanced visual appeal by considering the scale and proportion of each piece in relation to the room.
4. Create Comfort: Make your basement a cozy and comfortable retreat by adding soft furnishings such as plush rugs, cushions, and throw blankets. Choose fabrics that are durable, stain-resistant, and suitable for the purpose of the space. Consider adding blackout curtains or blinds to control light and create a theater-like atmosphere if you have a home theater setup.
Read more: How To Plan A Bathroom Renovation
Decorative Accents:
1. Add Color and Texture: Incorporate color and texture through decorative accents such as accent pillows, curtains, rugs, and artwork. Choose a color palette that complements the overall design scheme and adds visual interest. Mix patterns and textures to create depth and dimension in the space.
2. Display Artwork and Photos: Personalize your basement by hanging artwork, photographs, or family portraits. Create a gallery wall or feature a single statement piece as a focal point. Choose art that speaks to your personal taste and adds character to the space.
3. Include Plants and Greenery: Bring the freshness of nature into your basement by adding indoor plants and greenery. Plants not only add beauty but also improve air quality. Choose low-maintenance varieties that thrive in low-light conditions, such as snake plants, pothos, or ZZ plants.
4. Enhance Lighting with Mirrors: Mirrors can help amplify natural light and create an illusion of more space in a basement. Place mirrors strategically across from windows or near light sources to reflect light and make the room appear brighter and larger.
Personal Touches:
1. Display Personal Collections: Showcase your personal interests and hobbies by incorporating items that reflect your passion. Display your book or vinyl record collection, sports memorabilia, or any other cherished collections. These personal touches will make the space feel uniquely yours.
2. Incorporate Ambient Lighting: Aside from functional lighting, consider adding ambient lighting to create a warm and inviting atmosphere. Use table lamps, floor lamps, or string lights to cast a soft and cozy glow in different areas of the basement. Dimmers can help you adjust the lighting to create the desired ambiance.
3. Layer Textures and Fabrics: Create visual depth and texture by layering different fabrics and textures in your furnishings and decor. Mix materials such as plush velvet, woven blankets, smooth leather, and textured rugs to add visual interest and create a cozy atmosphere.
4. Personalize with Accessories: Add the finishing touches with accessories such as candles, vases, decorative trays, and statement pieces that reflect your personal style. These small details can tie the room together and add a sense of personality.
Remember, furnishing and decorating your basement should reflect your individual taste and needs. Take the time to plan and select pieces that bring joy and functionality to the space. With the right furniture, decorative accents, and personal touches, your newly renovated basement will become a favorite spot in your home.
Congratulations on completing your basement renovation! Enjoy your transformed space and embrace the opportunity to create many wonderful memories in your beautifully furnished and decorated basement.
When planning a basement renovation, make sure to consider the necessary permits and building codes in your area. This will ensure that your renovation is compliant and safe.
Conclusion
Congratulations on completing your basement renovation journey! You’ve transformed a once underutilized space into a functional, inviting, and personalized area that adds value to your home. Through careful planning, thoughtful decision-making, and attention to detail, you have created a basement that meets your needs and reflects your style.
Throughout the renovation process, you assessed your basement, set a budget, created a design plan, obtained necessary permits, and made choices regarding hiring professionals or taking on the project yourself. You prepared the space, tackled demolition and structural changes, and handled plumbing and electrical work. You installed insulation and drywall, selected and installed the perfect flooring, and attended to lighting and ventilation. Finally, you painted, added finishing touches, and furnished and decorated your basement with care and personal flair.
Your renovated basement is now a space where you can unwind, entertain guests, pursue hobbies, or simply enjoy quality time with your loved ones. It is a testament to your vision, hard work, and commitment to creating a comfortable and functional extension of your home.
Remember to continue maintaining your basement to ensure its longevity and continued enjoyment. Regular cleaning, proper ventilation, and routine maintenance are key to preserving the beauty and functionality of your renovated space.
We hope that this comprehensive guide has been valuable in assisting you with every step of your basement renovation. From the initial assessment to the final touches, we aimed to provide you with insights and recommendations to create a successful project.
Now, it’s time for you to enjoy the fruits of your labor, relax in your beautifully renovated basement, and make lasting memories in this newfound space. Cherish the joy it brings to your life and share it with your friends and family.
Thank you for allowing us to be a part of your renovation journey. We wish you many wonderful moments in your newly transformed basement!
Frequently Asked Questions about How To Plan A Basement Renovation
Was this page helpful?
At Storables.com, we guarantee accurate and reliable information. Our content, validated by Expert Board Contributors, is crafted following stringent Editorial Policies. We're committed to providing you with well-researched, expert-backed insights for all your informational needs.


0 thoughts on “How To Plan A Basement Renovation”