Home>Furniture>Outdoor Furniture>How To Plan A Decking Project

Outdoor Furniture
How To Plan A Decking Project
Modified: August 27, 2024
Learn how to plan your outdoor furniture decking project with our helpful guide. Design, materials, and tips for a successful project.
(Many of the links in this article redirect to a specific reviewed product. Your purchase of these products through affiliate links helps to generate commission for Storables.com, at no extra cost. Learn more)
Introduction
Welcome to your comprehensive guide on how to plan a decking project. If you’re looking to transform your outdoor space and create a beautiful and functional area for relaxation and entertainment, building a deck is an excellent choice. Whether you’re a DIY enthusiast or planning to hire contractors, this step-by-step guide will walk you through the entire process, from assessing your space to applying the finishing touches. So let’s dive in and turn your outdoor dreams into reality!
Building a deck can significantly enhance the aesthetic appeal and usability of your outdoor area. It provides a versatile and durable surface for various activities such as lounging, dining, or hosting gatherings. Moreover, a well-designed deck can add value to your property and become a favorite spot for family and friends to gather and enjoy the great outdoors.
While the idea of having a deck sounds appealing, planning and executing the project requires careful consideration and attention to detail. By following the steps outlined in this guide, you can ensure that your deck is not only visually appealing but also meets your specific needs and preferences. So let’s get started by assessing your space!
Key Takeaways:
- Planning and building a deck involves assessing space, setting a budget, choosing materials, obtaining permits, and deciding between DIY or hiring contractors. It’s a rewarding process that adds value and functionality to your home.
- The 12-step process includes preparing the site, constructing the deck structure, installing decking boards, adding railings and accessories, and applying finishes and sealants. Regular maintenance ensures the longevity and enjoyment of your outdoor space.
Read more: Free Trellis Plan
Step 1: Assessing Your Space
The first step in planning your decking project is to assess the available space in your outdoor area. Carefully examine the layout, size, and condition of your yard to determine the best location for your deck. Consider factors such as sunlight exposure, privacy, and accessibility. Here are some key points to consider:
- Layout: Take note of any existing structures, such as trees, shrubs, or buildings, that may impact the layout and design of your deck. Consider how these elements can be incorporated into the overall aesthetic and functionality of your outdoor space.
- Size: Determine the size of your deck based on the available area and your intended use. Measure the dimensions of your yard and consider how much space you want to allocate for the deck. Keep in mind any zoning restrictions or setback requirements in your local area.
- Orientation: Observe the direction of sunlight throughout the day to determine the ideal orientation for your deck. Consider whether you want a sunny or shaded deck, and plan accordingly.
- Privacy: Assess the level of privacy you desire for your deck. If you have neighboring properties or a busy street nearby, you may want to incorporate privacy screens, trellises, or landscaping features to create a secluded and intimate space.
- Accessibility: Consider the accessibility of your deck from various points in your home. Determine the most convenient location for access doors and pathways to ensure easy entry and exit.
- Grading and Drainage: Evaluate the terrain and soil conditions in your yard. Ensure that proper grading and drainage are in place to prevent water accumulation on the deck surface. It’s important to address any existing drainage issues before construction begins.
By carefully assessing your space, you can make informed decisions regarding the design and layout of your deck. This step will help you determine the best placement for your deck, taking into account practical considerations and your personal preferences. Once you have a clear understanding of your space, you’re ready to move on to the next step: setting your budget.
Step 2: Setting Your Budget
Setting a budget for your decking project is an essential step in ensuring that you stay within your financial means and avoid any unexpected costs. By determining your budget early on, you can make informed decisions about the materials, design, and size of your deck. Here’s how to set your budget:
- Research Costs: Start by researching the average costs of decking materials, labor, and other necessary supplies in your area. This will give you a ballpark figure to work with and help you set realistic expectations.
- Determine Project Scope: Consider the size and complexity of your desired deck. A larger deck or one with intricate designs and features may require a higher budget. Think about the specific elements you want to include, such as built-in seating, lighting, or a pergola.
- Account for Extras: Don’t forget to account for additional expenses, such as permits, tools, and landscaping. These costs can add up, so it’s important to factor them into your budget to avoid any surprises.
- Consider Long-Term Costs: Think about the maintenance and upkeep of your deck in the long run. Certain materials may require more frequent maintenance, such as regular staining or sealing. Factor in these costs when setting your budget.
- Allocate Contingency Funds: It’s always a good idea to allocate a portion of your budget as a contingency fund for any unexpected expenses or changes that may arise during the construction process. Aim to set aside around 10-15% of your total budget for contingencies.
- Consult with Professionals: If you’re unsure about the costs involved, consider consulting with decking contractors or professionals who can provide you with accurate estimates based on your specific requirements and goals.
Setting a realistic budget will help guide your decision-making process and enable you to prioritize certain aspects of your decking project. It’s important to strike a balance between your desired features and your available budget. With a clear budget in mind, you can move on to the next step: choosing the right materials.
Step 3: Choosing the Right Materials
Choosing the right materials for your decking project is crucial for durability, aesthetics, and maintenance. There are several options available, each with its own advantages and considerations. Here are some popular decking materials to consider:
- Pressure-Treated Wood: Pressure-treated lumber is a popular and cost-effective choice for decking. It undergoes a chemical treatment process to resist rot, decay, and insect damage. However, it requires regular maintenance, such as staining or sealing, to prolong its lifespan.
- Composite Decking: Composite decking is made from a combination of wood fibers and recycled plastic. It offers the look of natural wood but is more resistant to moisture, fading, and staining. Composite decking requires minimal maintenance and is available in various colors and textures.
- Hardwood Decking: Hardwood decking, such as redwood, cedar, or tropical hardwoods like ipe, provides an elegant and natural look. It is known for its durability and resistance to rot and insect damage. Hardwood decking requires regular maintenance, including staining and sealing, to maintain its appearance.
- PVC Decking: PVC decking is made from synthetic materials and offers excellent durability and low maintenance. It is resistant to moisture, stains, and fading. PVC decking is available in various colors and styles, mimicking the look of natural wood.
When choosing the right material, consider factors such as budget, maintenance requirements, desired appearance, and the overall aesthetic of your outdoor space. Additionally, think about the environmental impact of the materials you choose and opt for sustainable options whenever possible.
It’s also essential to select the appropriate decking boards based on the desired look and function of your deck. Choose from traditional deck boards, grooved boards for hidden fasteners, or interlocking deck tiles for a unique design. Consider the width, thickness, and texture of the boards to achieve the desired visual effect.
Take your time to explore different materials, research their pros and cons, and consider your specific needs and preferences. Once you’ve chosen the right materials for your project, you can move on to the next step: designing your deck.
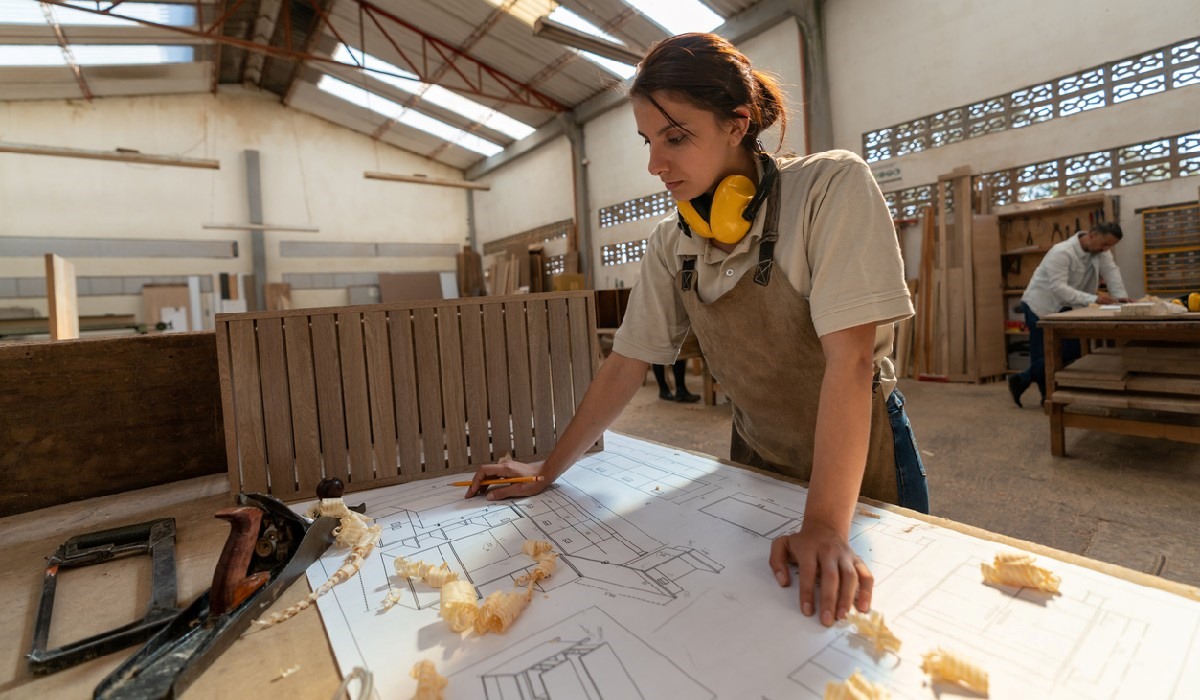
Step 4: Designing Your Deck
Designing your deck is an exciting and creative step in the planning process. It involves determining the layout, shape, and features of your deck that best suit your needs and preferences. Here are some key aspects to consider when designing your deck:
- Functionality: Think about how you intend to use your deck. Do you want a designated dining area? Are you planning to incorporate a grilling station or a bar? Consider the different activities you want to accommodate and plan your deck’s layout accordingly.
- Traffic Flow: Create a functional traffic flow within your deck design. Ensure that there is ample space to move around and that traffic patterns are smooth and unobstructed. Consider the placement of stairs, entrances, and exits for convenient access.
- Elevations and Levels: If your yard has varying elevations or if you want to create visual interest, consider incorporating multiple levels or platforms into your deck design. This can provide designated areas for different activities and add dimension to your outdoor space.
- Railings and Balustrades: Determine whether your deck requires railings or balustrades for safety purposes or to enhance the overall aesthetic. Explore different railing styles and materials that complement your deck design.
- Accessories and Features: Consider incorporating accessories and features that enhance the functionality and appeal of your deck. This can include built-in seating, pergolas or shade structures, lighting fixtures, fire pits, or water features.
- Aesthetics: Choose a design theme that aligns with your personal style and complements the architecture of your home. Consider color schemes, materials, and textures that create a cohesive and visually appealing outdoor space.
- Professional Assistance: If you’re unsure about the design aspects or need expert advice, consider consulting with a landscape architect or decking contractor. They can help you create a customized design that maximizes your outdoor space and meets your specific needs.
Remember, the design of your deck should not only be visually pleasing but also functional and suitable for your lifestyle. Take the time to research and explore different design ideas, sketch out your plan, and create a vision for your dream deck.
Once you have finalized your deck design, it’s time to move on to the next step: obtaining permits and checking regulations in your area.
Read more: How To Build An Angled Deck Step-by-Step
Step 5: Obtaining Permits and Checking Regulations
Before you start building your deck, it’s essential to obtain the necessary permits and ensure compliance with local regulations. Building codes and regulations vary by location, so it’s crucial to check with your local municipality or building department to understand the requirements specific to your area. Here’s what you need to consider:
- Permit Requirements: Determine if you need a building permit for your deck construction. Some jurisdictions require permits for any deck above a certain height or size. Check with your local building department to understand the permit application process and any associated fees.
- Building Codes: Familiarize yourself with the building codes and regulations that apply to deck construction in your area. These codes often govern aspects such as structural integrity, railing height, stair dimensions, and load-bearing capacity. Ensure your deck design meets these requirements to ensure safety and compliance.
- Property Boundaries: Confirm the property boundaries and setback requirements before building your deck. Setback regulations determine the minimum distance your deck must be from property lines or neighboring structures. Ensure your deck design adheres to these boundaries to avoid legal complications in the future.
- Restrictions and Covenants: If you live in a neighborhood or community with homeowner associations (HOAs) or covenants, conditions, and restrictions (CCRs), review their guidelines regarding deck construction. Some associations may have specific rules and regulations that you need to follow when designing and building your deck.
- Environmental Considerations: Be aware of any environmental regulations that may apply to your deck construction. In some areas, there may be restrictions on building near protected habitats, wetlands, or water bodies. Ensure you’re not violating any environmental regulations in your deck design and construction.
- Engaging Professionals: If navigating the permit and regulation process seems overwhelming, consider hiring a professional to help you with the paperwork and ensure compliance. An experienced decking contractor or architect will have knowledge of local building codes and can guide you through the permit application process.
By obtaining the necessary permits and adhering to building codes and regulations, you can ensure the safety, legality, and longevity of your deck. Failure to comply with regulations may lead to fines, penalties, or even the need to demolish or modify your structure in the future. Once you have obtained the required permits, you can proceed to the next step: hiring contractors or deciding to DIY.
Step 6: Hiring Contractors or DIY
When it comes to building your deck, you have two options: hiring a professional contractor or taking on the project as a DIY endeavor. Both options have their advantages and considerations. Here’s what you need to know:
- Hiring a Contractor: Hiring a professional decking contractor can save you time, ensure quality craftsmanship, and provide you with expert advice. Consider the following when hiring a contractor:
- Research: Conduct thorough research and gather recommendations from trusted sources. Look for contractors with experience in deck construction.
- Get Quotes: Obtain multiple quotes from different contractors to compare prices, timelines, and services included. Ask for references and examples of their previous work.
- Check Licensing and Insurance: Ensure that the contractor is licensed, bonded, and insured to protect yourself from liability and ensure compliance with local regulations.
- Review Contracts: Carefully review and understand the terms and conditions of the contract, including payment schedules, warranties, and project timelines.
- DIY (Do-It-Yourself): Taking on a deck-building project yourself can be fulfilling and potentially more cost-effective. However, it requires the right skills, tools, and knowledge. Consider the following when opting for a DIY approach:
- Research and Education: Invest time in researching deck construction techniques, materials, and safety guidelines. Attend workshops or seek guidance from professionals to enhance your knowledge.
- Permits and Regulations: Ensure that you are familiar with local building codes and obtain the necessary permits before starting your DIY project.
- Plan and Prepare: Create a detailed plan, including a materials list and a step-by-step construction process. Gather all the necessary tools and equipment before you begin.
- Safety First: Prioritize safety throughout the project. Use proper protective gear, follow safety guidelines, and seek assistance for tasks that require multiple hands.
Deciding whether to hire a contractor or tackle the project yourself depends on factors such as your skill level, available time, budget, and personal preference. Be realistic about your abilities and resources when making this decision. Remember, a well-built and properly installed deck will provide years of enjoyment and enhance the value of your property. Once you have made your decision, you can move on to the next step: ordering materials.
When planning a decking project, make sure to carefully measure the area where the deck will be installed and consider the layout and design to ensure it meets your needs and complements your home.
Step 7: Ordering Materials
Once you have finalized your deck design and decided on either hiring a contractor or taking the DIY route, it’s time to order the materials needed for your project. Ordering the right materials in advance ensures a smooth construction process and avoids unnecessary delays. Here’s how to go about ordering materials for your deck:
- Make a Materials List: Start by creating a comprehensive list of all the materials required for your deck construction. This includes decking boards, posts, beams, joists, fasteners, and any additional accessories or features you plan to incorporate.
- Estimate Quantities: Calculate the quantities of each material needed based on the dimensions and design of your deck. Take accurate measurements and factor in any waste or margin of error to ensure you have enough materials.
- Research Suppliers: Research reputable suppliers in your area that offer quality decking materials. Look for suppliers who carry the specific materials and brands you need for your project.
- Get Quotes: Contact multiple suppliers and obtain quotes for the materials on your list. Compare prices, availability, and delivery options. Take into account any special offers or discounts the suppliers may have.
- Consider Material Options: If you have decided on a specific decking material, such as natural wood or composite, discuss the different options available within that category. Determine the best choice based on your budget and preferences.
- Check for Additional Supplies: In addition to the basic decking materials, consider any additional supplies you may need for the construction process, such as concrete for footings, gravel for drainage, and tools for installation.
- Place Your Order: Once you have gathered all the necessary information, place your order with the chosen supplier. Provide them with the accurate quantities and specifications to ensure you receive the correct materials.
- Schedule Delivery: Coordinate with the supplier to schedule the delivery of your materials. Ensure that someone will be available to receive the delivery and check for any damaged or missing items upon arrival.
Ordering materials in advance gives you ample time to prepare your workspace and organize the construction process. It also allows for any necessary adjustments or modifications based on the availability of specific materials. By being proactive and organized in your material ordering, you can set yourself up for a successful deck construction project.
With the materials on their way, you’re ready to move on to the next step: preparing the site for construction.
Step 8: Preparing the Site
Preparing the site is a crucial step in the deck construction process. Proper preparation ensures a solid foundation, minimizes potential issues, and allows for smooth progress during the construction phase. Here’s how to prepare your site:
- Clear the Area: Begin by clearing the area where your deck will be constructed. Remove any plants, rocks, or other obstacles that may impede the construction process. If necessary, hire professionals for tree removal or stump grinding.
- Mark the Layout: Use stakes and string to mark the layout of your deck on the ground. This will help visualize the size and shape of the deck and ensure accurate measurements during the construction phase.
- Level the Ground: Ensure that the ground is level and free from any unevenness. Use a shovel, rake, or a plate compactor to level the area and remove any debris. This step is crucial for the stability and longevity of your deck.
- Create Footings: Determine the locations of the footings based on the design and dimensions of your deck. Dig holes for the footings using a post-hole digger or an auger. Follow local building codes and regulations regarding the depth and diameter of the footings.
- Set the Footings: Place concrete or pre-made footing tubes in the holes and ensure they are level and aligned correctly. Allow the concrete to cure according to the manufacturer’s instructions before proceeding.
- Lay Gravel and Weed Barrier: For added stability and to prevent weed growth, spread a layer of gravel over the prepared ground. Then, cover the gravel with a weed barrier fabric to prevent unwanted vegetation from growing under your deck.
- Install Ledger Board: If your deck will be attached to the house, install a ledger board to create a secure connection. Ensure the ledger board is level and properly flashed to prevent water damage.
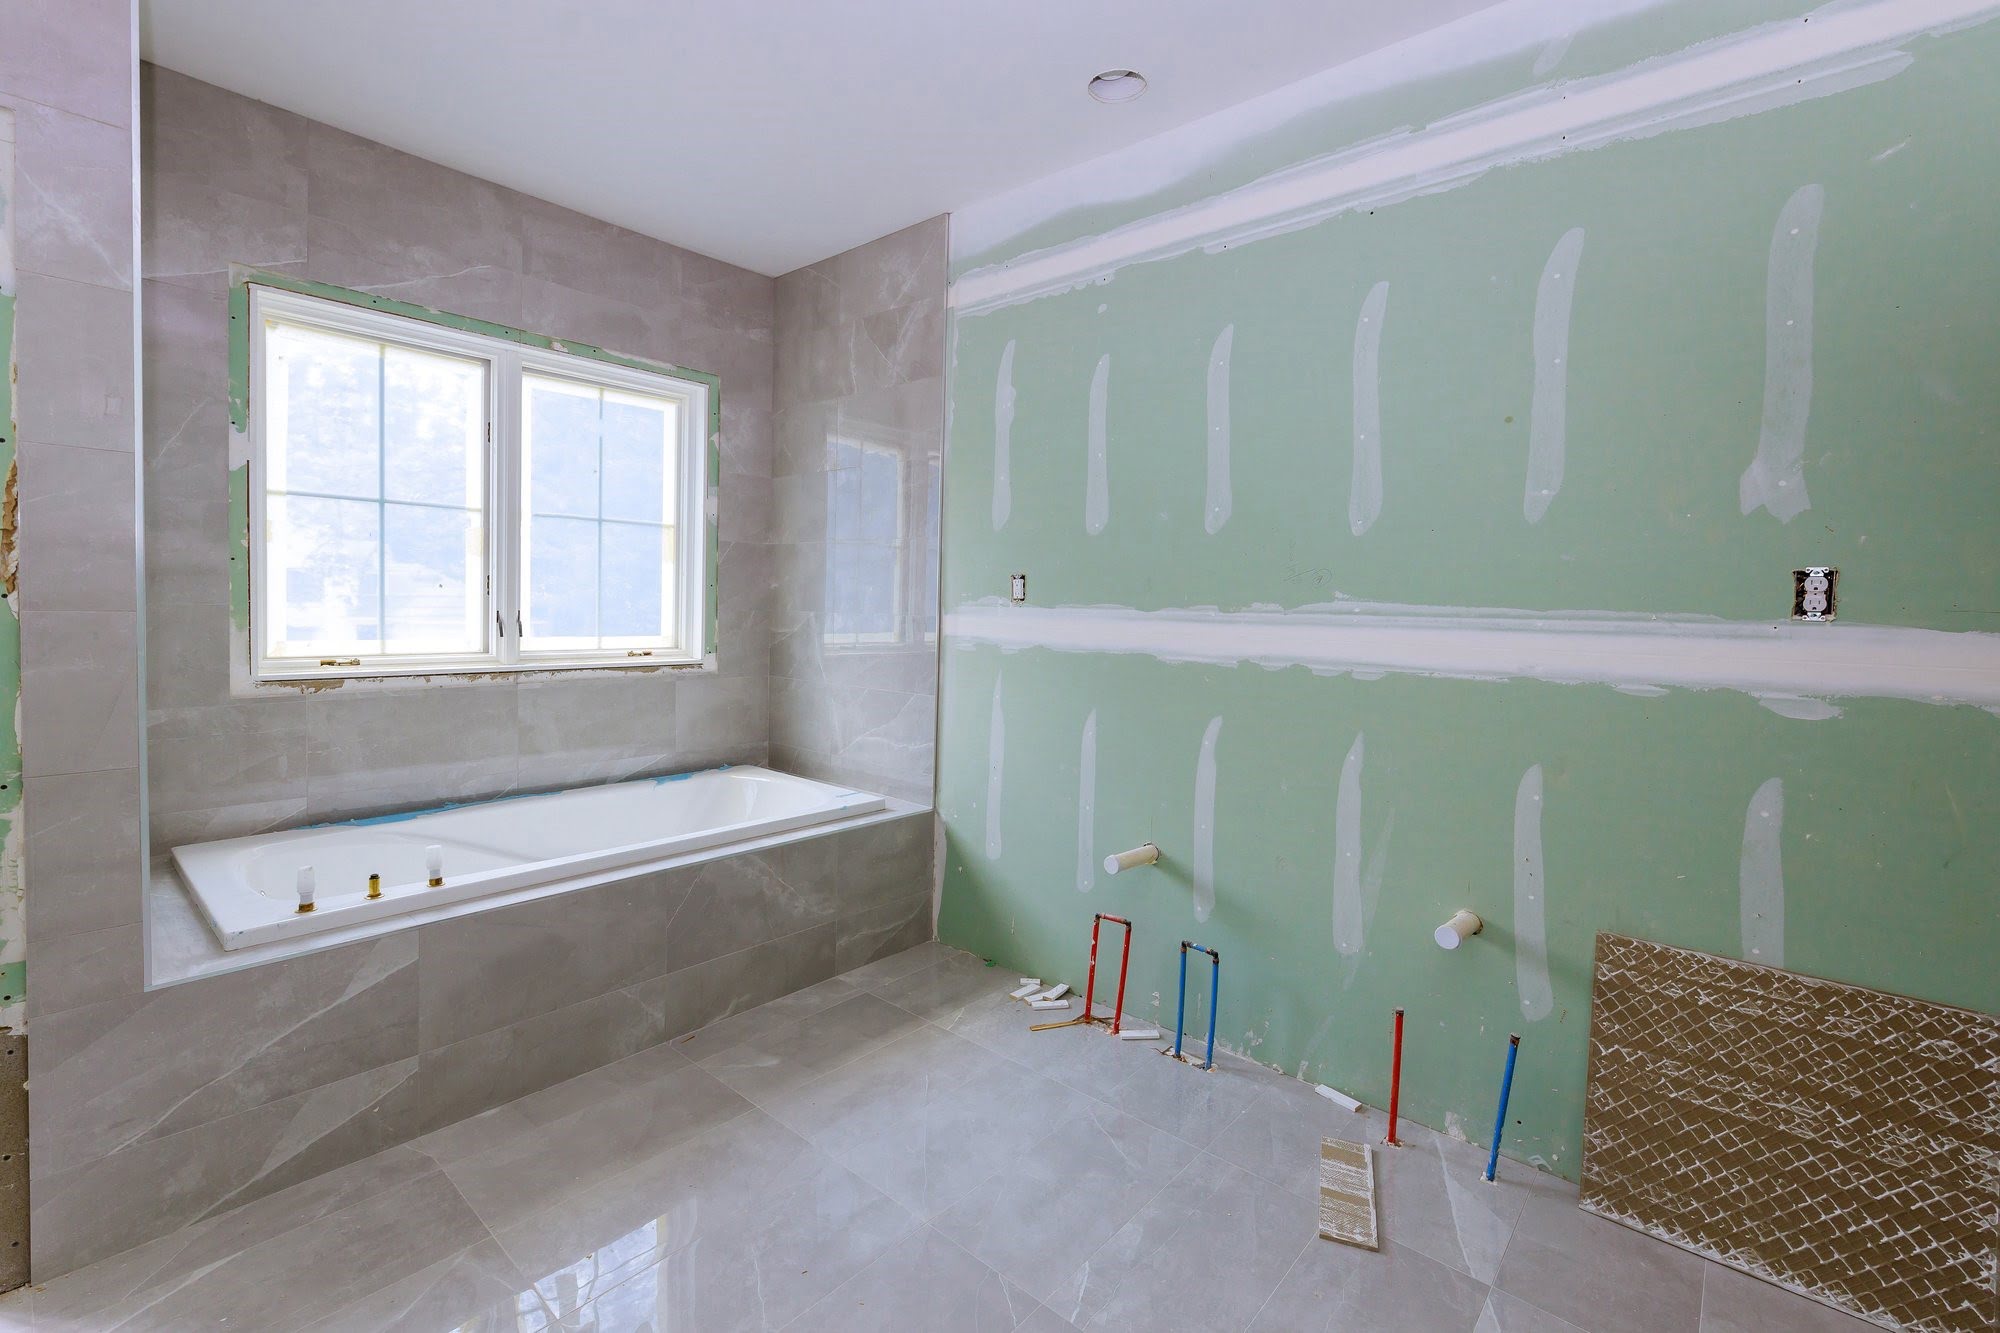
- Prepare for Utilities: If you plan to incorporate utilities such as electricity or plumbing in your deck design, ensure that the necessary wiring or piping is installed and properly protected.
Proper site preparation sets the stage for a successful deck construction project. It ensures a solid and level foundation, minimizes potential issues, and reduces the risk of future problems. Take the time to complete these preparation steps thoroughly, and you will be ready to move on to the next step: building the deck structure!
Step 9: Building the Deck Structure
Now that you have prepared the site and created a solid foundation, it’s time to start building the deck structure. This step involves constructing the framework that will support the decking boards and provide stability to your deck. Here’s how to build the deck structure:
- Install Support Posts: Begin by installing the support posts for your deck. Attach them securely to the footings using appropriate hardware and follow local building codes for required post spacing and height.
- Add Girders and Beams: Attach the girders and beams horizontally to the support posts. Ensure they are level and properly secured using appropriate hardware and techniques. The size and spacing of the girders will depend on the design and load requirements of your deck.
- Attach Joists: Install the joists vertically between the girders, ensuring proper spacing according to local building codes. Secure them with joist hangers or appropriate hardware to ensure a sturdy and even deck surface.
- Double-Check Levelness: Use a level to ensure that the entire deck structure is level, including the posts, girders, beams, and joists. Adjust as necessary to achieve a level and uniform base.
- Add Bracing: Install diagonal bracing between the support posts to provide additional stability and structural integrity. This will help prevent any sway or movement of the deck structure.
- Install Deck Hardware: Attach the necessary deck hardware, such as metal connectors, fasteners, and anchor plates, to reinforce the deck structure and strengthen its connections. Follow the manufacturer’s instructions for proper installation.
- Ensure Proper Drainage: Check that the deck structure allows for proper drainage. Ensure that there are adequate gaps between the decking boards to allow water to drain away effectively.
- Inspect for Sturdiness: Once the deck structure is complete, walk around and inspect the integrity and sturdiness of the framework. Check for any loose connections or areas that require reinforcement.
Building the deck structure is a critical step that forms the foundation for the rest of your deck construction. It’s essential to follow proper techniques, utilize the appropriate hardware, and adhere to local building codes to ensure a strong and stable deck. Once you have built the deck structure, you’re ready to move on to the next step: installing the decking boards!
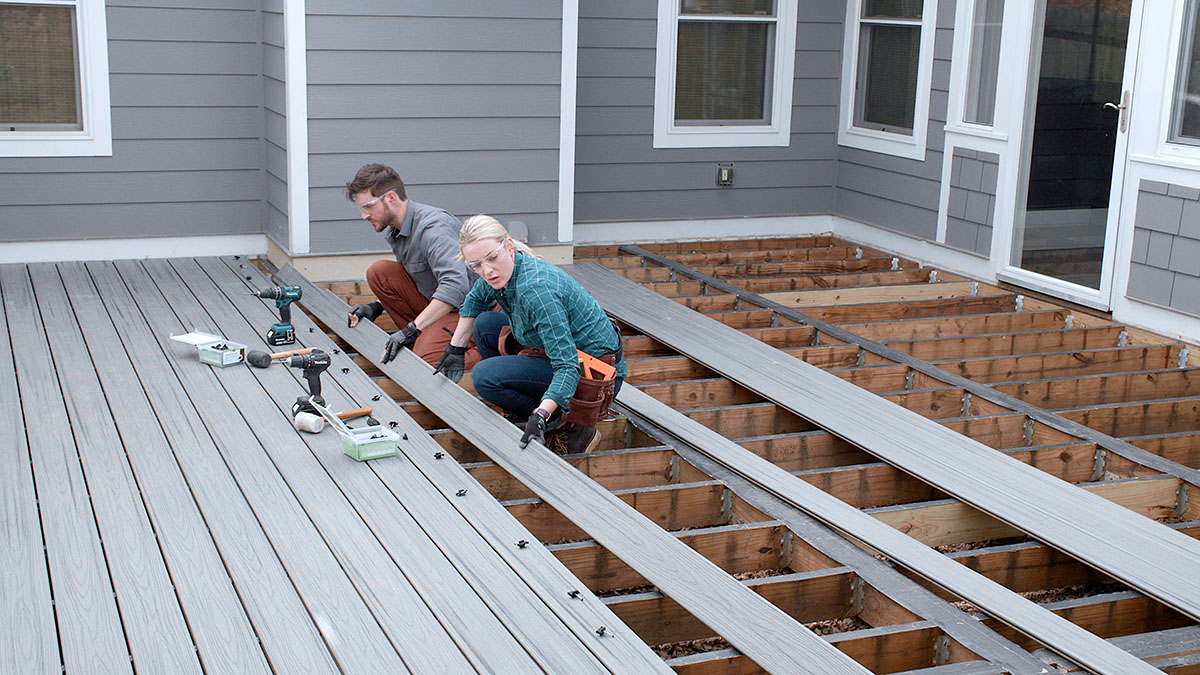
Step 10: Installing the Decking Boards
With the deck structure in place, it’s time to move on to installing the decking boards. This step will bring your deck to life and create the surface where you’ll spend most of your time. Here’s how to install the decking boards:
- Choose the Right Decking Boards: Select the type of decking boards that best suit your design, budget, and maintenance preferences. Ensure that the boards are suitable for outdoor use and have been properly treated or sealed if necessary.
- Plan the Layout: Determine the direction you want to lay the decking boards. Start from the outer edge of the deck and work your way inward. Consider factors such as the overall pattern, efficient use of materials, and ease of installation.
- Pre-drill Holes: To prevent splitting or cracking, pre-drill holes near the ends of each decking board before attaching them to the joists. Make sure the holes are slightly smaller than the diameter of the screws or nails you’ll be using.
- Secure the Boards: Place the first decking board in position, ensuring it is flush with the outer edge of the deck and properly aligned with the joists. Secure the board to the joists using screws or nails, placing them in the pre-drilled holes.
- Continue Installation: Proceed to install the remaining decking boards, leaving a small gap (usually around 1/8 inch) between each board to allow for expansion and drainage. Use spacers or special clips designed for decking boards to maintain consistent spacing.
- Cut and Trim: As you approach the edges of the deck or encounter obstacles such as posts or railings, measure and cut the decking boards to fit properly. Use a circular saw or a jigsaw for precision cuts.
- Inspect for Uniformity: Regularly step back and inspect the decking boards for evenness, alignment, and the overall visual appearance. Make any necessary adjustments or corrections as you go along.
- Apply Finishes (Optional): If desired, apply a wood stain, paint, or protective sealant to the decking boards to enhance their appearance and protect them from the elements. Follow the manufacturer’s instructions for application and drying times.
Installing the decking boards is an exciting step as it transforms the deck structure into a functional and inviting space. Take your time to ensure proper alignment, spacing, and secure attachment of the boards. By following these steps, you’ll be well on your way to completing your deck. Next up is Step 11: adding railings and accessories!
Step 11: Adding Railings and Accessories
Now that you’ve installed the decking boards, it’s time to add the finishing touches to your deck by installing railings and accessories. Railings provide safety, style, and a defined boundary for your deck, while accessories add functionality and aesthetic appeal. Here’s how to complete this step:
- Select Railings: Choose the type of railing that suits your deck design and preferences. Options include wood, metal, glass, or composite railings. Consider factors such as safety, durability, maintenance, and overall style.
- Measure and Plan: Take accurate measurements to determine the length, height, and spacing of your railings. Keep in mind local building codes that dictate the minimum height and spacing requirements.
- Install Posts: Attach the railing posts to the deck structure, ensuring they are secured properly and aligned with the decking boards. Use appropriate hardware and follow manufacturer instructions for installation.
- Attach Balusters or Panels: Install balusters or panels between the railing posts, ensuring they are evenly spaced and securely attached. Depending on your chosen railing style, you may need to cut and trim the balusters or panels to fit properly.
- Add Handrails: Install the handrails on top of the railing posts, providing a secure grip and additional safety. Ensure that the handrails are level and properly attached to the posts.
- Finishing Touches: Sand any rough or sharp edges of the railings or balusters to ensure safety and aesthetics. Consider adding post caps or decorative finials to enhance the visual appeal of your railings.
- Add Accessories: Enhance the functionality and visual appeal of your deck by adding accessories such as built-in seating, planter boxes, lighting fixtures, or a pergola. These accessories can be custom-built or purchased as pre-fabricated units.
- Regular Maintenance: Properly maintain your railings and accessories by cleaning them regularly and inspecting for any damages or loose connections. Follow manufacturer instructions for maintenance to ensure their longevity.
Adding railings and accessories completes the look and functionality of your deck, turning it into a space that truly meets your needs and preferences. Take time to select the right railings and accessories that complement your deck design and enhance its overall appeal. With railings in place and accessories added, your deck is nearly complete. The final step is applying finishes and sealants, which we’ll cover in the next and final step: Step 12!
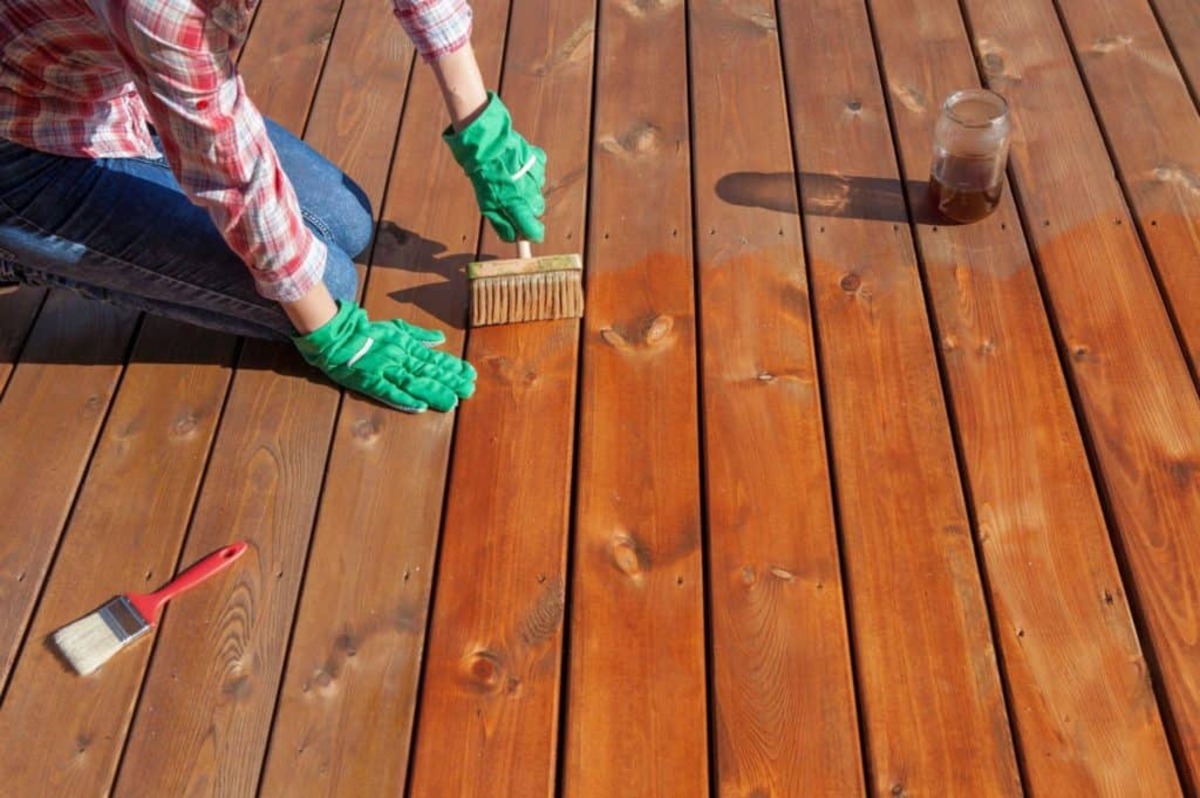
Step 12: Applying Finishes and Sealants
Step 12: Applying finishes and sealants is the final touch to complete your deck construction project. Finishes and sealants protect the wood or decking material from moisture, UV rays, and other outdoor elements. They also enhance the appearance and longevity of your deck. Follow these steps to apply finishes and sealants:
- Clean the Deck: Before applying finishes and sealants, ensure the deck is clean and free of debris. Sweep the surface and remove any dirt, leaves, or other materials that may have accumulated during the construction process.
- Choose the Right Product: Select a high-quality finish or sealant specifically designed for outdoor use. Consider factors such as the type of decking material, desired color or tint, level of protection, and ease of application.
- Apply Stain (Optional): If you prefer a stained look, apply a penetrating stain to enhance the natural color and texture of the wood. Follow the manufacturer’s instructions for application and drying times.
- Seal the Deck: Apply a waterproofing sealant to protect the deck from moisture and prevent warping or rotting. Use a brush, roller, or sprayer to evenly coat the decking boards, ensuring complete coverage.
- Consider Coatings: Consider adding a clear protective coating on top of the sealant for added durability and to enhance the deck’s resistance to stains, scratches, and fading. Consult with the manufacturer for the appropriate coating options.
- Allow for Drying Time: Follow the manufacturer’s instructions regarding the drying time required between coats and before allowing foot traffic. Avoid exposing the deck to moisture or heavy use during this time.
- Maintain Regularly: Regularly inspect and maintain your deck’s finish and sealant to ensure its effectiveness. This may include reapplication of the sealant every few years or as recommended by the manufacturer.
- Protective Measures: Use protective measures such as mats or furniture pads under heavy objects to prevent scratching or denting the deck’s surface. Promptly clean up any spills or stains to minimize the risk of permanent damage.
By applying finishes and sealants, you’ll protect your deck from the elements and keep it looking stunning for years to come. In addition to regular maintenance, periodic inspections and touch-ups will help preserve the beauty and integrity of your deck. With the finishes and sealants applied, you can now fully enjoy your newly constructed deck!
Congratulations! You’ve successfully completed the 12-step process to plan and build your deck. Your outdoor space is now transformed into a beautiful and functional area for relaxation, entertainment, and making lifelong memories.
Conclusion
Congratulations on completing your decking project! You have transformed your outdoor space into a beautiful and inviting area that will provide years of enjoyment and relaxation. By following the 12 steps outlined in this guide, you have successfully planned, designed, and built a deck that meets your needs, preferences, and budget.
Throughout the process, you assessed your space, set a budget, chose the right materials, designed the deck layout, obtained necessary permits, and made the decision whether to hire contractors or embark on a DIY project. You ordered the materials, prepared the site, constructed the deck structure, installed the decking boards, added railings and accessories, and applied finishes and sealants to protect and enhance the appearance of your deck.
Building a deck is a rewarding experience that adds value, functionality, and beauty to your home. It creates a space for relaxation, outdoor entertaining, and connection with nature. Whether you’re enjoying a morning cup of coffee, hosting a barbecue with friends, or simply unwinding after a long day, your deck will be the perfect setting.
Remember to regularly maintain your deck, from cleaning and inspecting for any necessary repairs to reapplying finishes and sealants as needed. This will ensure the longevity and continued enjoyment of your outdoor space.
Thank you for following this comprehensive guide on how to plan and build a deck. We hope it has provided you with the knowledge, inspiration, and confidence to successfully carry out your decking project. Enjoy your new deck and make lasting memories in your outdoor oasis!
Frequently Asked Questions about How To Plan A Decking Project
Was this page helpful?
At Storables.com, we guarantee accurate and reliable information. Our content, validated by Expert Board Contributors, is crafted following stringent Editorial Policies. We're committed to providing you with well-researched, expert-backed insights for all your informational needs.


0 thoughts on “How To Plan A Decking Project”