Home>Furniture & Design>Bathroom Accessories>How Do You Take Out A Bathtub?
Bathroom Accessories
How Do You Take Out A Bathtub?
Modified: October 20, 2024
Learn the step-by-step process of removing a bathtub to upgrade your bathroom accessories. Find out how to take out a bathtub efficiently.
(Many of the links in this article redirect to a specific reviewed product. Your purchase of these products through affiliate links helps to generate commission for Storables.com, at no extra cost. Learn more)
Introduction
Removing a bathtub may seem like a daunting task, but with the right guidance and preparation, it can be a manageable project. Whether you're looking to upgrade your bathroom or address a specific issue, such as a damaged tub or outdated design, understanding the process of removing a bathtub is essential. By following a systematic approach and taking the necessary precautions, you can successfully take out a bathtub and pave the way for a new installation.
In this comprehensive guide, we will walk you through the step-by-step process of removing a bathtub. From preparing the area and disconnecting the plumbing to removing the bathtub surround and disposing of the old tub, each stage is crucial for a smooth and efficient removal. By the end of this guide, you will have a clear understanding of the necessary steps and considerations involved in this home improvement project.
Whether you're a seasoned DIY enthusiast or a homeowner looking to tackle this project for the first time, this guide will equip you with the knowledge and confidence to take on the task. With a focus on safety, precision, and practical tips, you'll be well-prepared to embark on the journey of removing a bathtub and transforming your bathroom space.
Now, let's dive into the first step: preparing the area for the bathtub removal process.
Key Takeaways:
- Removing a bathtub involves careful preparation, plumbing disconnection, surround removal, bathtub extraction, and cleanup. Each step requires attention to detail and safety measures for a successful DIY project.
- Prioritize safety, clear the area, disconnect plumbing, remove the surround, lift the tub, and dispose of it responsibly. With meticulous planning and attention to detail, you can transform your bathroom space effectively.
Read more: How To Take Out Kohler Bathtub Drain
Step 1: Prepare the area
Before you begin the process of removing a bathtub, it's essential to prepare the surrounding area to ensure a safe and efficient removal. Here's a detailed breakdown of the steps involved in preparing the area for this home improvement project:
-
Clear the Surrounding Space: Start by removing any items or accessories near the bathtub, such as shower curtains, bath mats, toiletries, and decorative items. Clearing the space will provide you with ample room to work and maneuver during the removal process.
-
Protect the Flooring: Since the removal of a bathtub involves heavy lifting and potential debris, it's crucial to protect the flooring in the surrounding area. Cover the floor with a durable material, such as cardboard or thick drop cloths, to prevent scratches, dents, or other damage.
-
Turn Off the Water Supply: Locate the shut-off valves for the bathtub's water supply and turn them off to prevent any accidental leaks or water flow during the removal process. It's important to verify that the water supply is completely shut off before proceeding to disconnect the plumbing.
-
Ventilation and Lighting: Ensure that the bathroom is well-ventilated and adequately lit to create a comfortable and safe working environment. Proper ventilation can help dissipate dust and fumes, while good lighting is essential for clear visibility during the removal process.
-
Personal Protective Equipment (PPE): Prioritize safety by wearing appropriate PPE, such as gloves, safety goggles, and a dust mask. These protective measures can safeguard you from potential hazards, including sharp edges, dust, and debris.
-
Assess Accessibility: Evaluate the accessibility of the bathtub and surrounding area. If there are any obstacles or obstructions that could impede the removal process, address them beforehand to streamline the project.
By meticulously preparing the area for the bathtub removal, you set the stage for a smooth and organized process. Taking the time to clear the space, protect the flooring, and ensure safety measures are in place will contribute to a successful start to this home improvement endeavor. With the area prepared, you're ready to proceed to the next step: disconnecting the plumbing.
Step 2: Disconnect the plumbing
Disconnecting the plumbing is a critical phase in the process of removing a bathtub. This step involves shutting off the water supply, disconnecting the drain, and addressing the plumbing connections to ensure a safe and efficient removal. Here's a detailed breakdown of the essential tasks involved in disconnecting the plumbing:
-
Shut Off the Water Supply: Begin by locating the shut-off valves for the bathtub's water supply. These valves are typically located near the tub or in the adjacent utility area. Turn the valves clockwise to shut off the water supply completely. It's crucial to verify that the water flow has ceased before proceeding with the next steps.
-
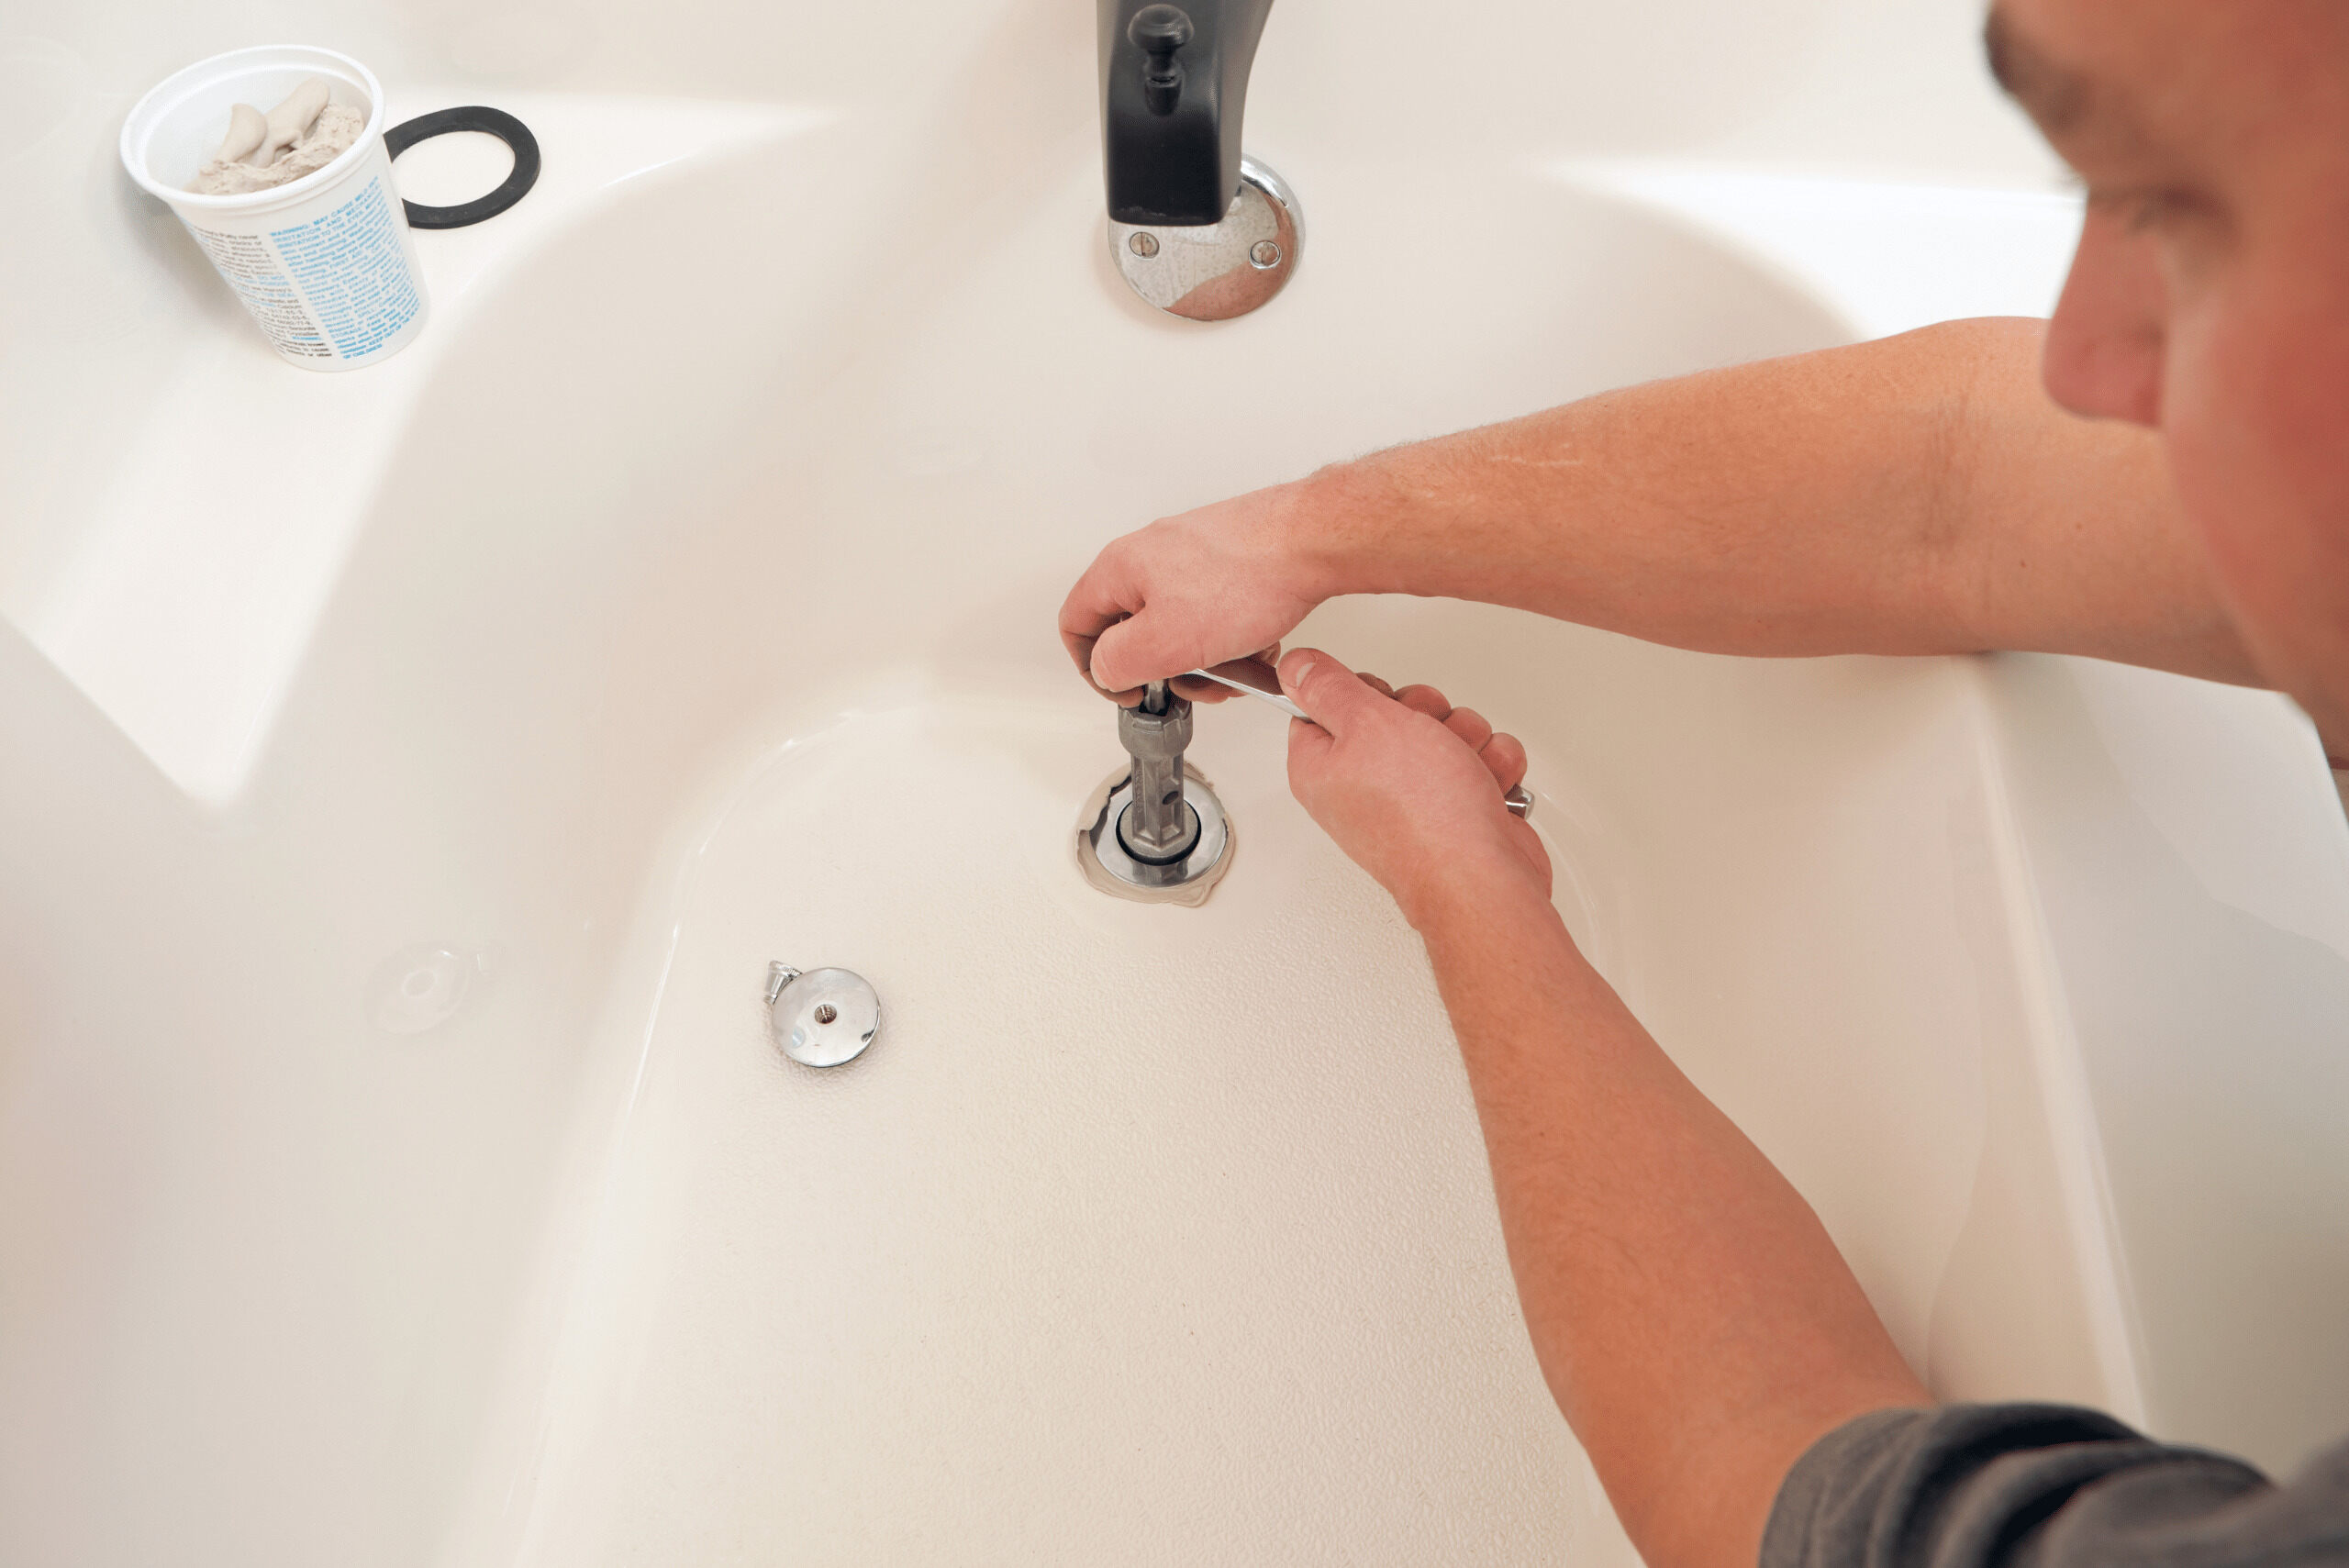
Drain Disconnection: Once the water supply is turned off, the next task is to disconnect the bathtub drain. This involves removing the overflow cover and unscrewing the drain flange to access the drainpipe. Use a drain wrench to loosen and remove the drain flange, allowing access to the drainpipe underneath. Ensure that any residual water in the drainpipe is properly drained before proceeding.
-
Plumbing Connections: In addition to the drain, there may be other plumbing connections, such as the faucet and water supply lines, that need to be addressed. Depending on the bathtub's configuration, you may need to disconnect the faucet handles, spout, and any associated water supply lines. Use appropriate tools, such as a wrench or pliers, to disconnect these plumbing components carefully.
-
Inspect for Leaks: As you disconnect the plumbing, it's important to inspect the connections for any signs of leaks or water damage. Address any existing issues promptly to prevent potential water damage to the surrounding area. Additionally, consider placing a bucket or container beneath the disconnected drain to catch any residual water or debris.
-
Labeling and Documentation: To facilitate the reinstallation process or any future plumbing work, consider labeling the disconnected plumbing components and documenting the disassembly process. This can be particularly helpful if you plan to reinstall the same bathtub or if you need to consult a professional for plumbing assistance.
By meticulously addressing the plumbing disconnection process, you pave the way for a seamless and organized removal of the bathtub. With the water supply shut off, the drain disconnected, and the plumbing components carefully addressed, you're ready to proceed to the next step: removing the bathtub surround.
Step 3: Remove the bathtub surround
Removing the bathtub surround is a crucial step in the process of taking out a bathtub. The surround, which typically consists of panels or tiles that encase the bathtub, must be carefully dismantled to access the bathtub for removal. Here's a detailed guide on how to effectively remove the bathtub surround:
-
Assess the Surround Type: Before initiating the removal process, it's essential to identify the type of bathtub surround you have. Whether it's a one-piece unit, individual panels, or tiled surround, understanding the construction will guide your approach to dismantling it.
-
Inspect for Fixtures and Sealants: Examine the surround for any fixtures, such as grab bars or shelves, that may be attached to it. Additionally, check for sealants or adhesives securing the surround to the wall. These may need to be addressed before the surround can be safely removed.
-
Remove Fixtures and Trim: If there are any fixtures or trim elements attached to the surround, carefully remove them using appropriate tools. This may involve unscrewing hardware, prying off trim pieces, or detaching any accessories that are integrated into the surround.
-
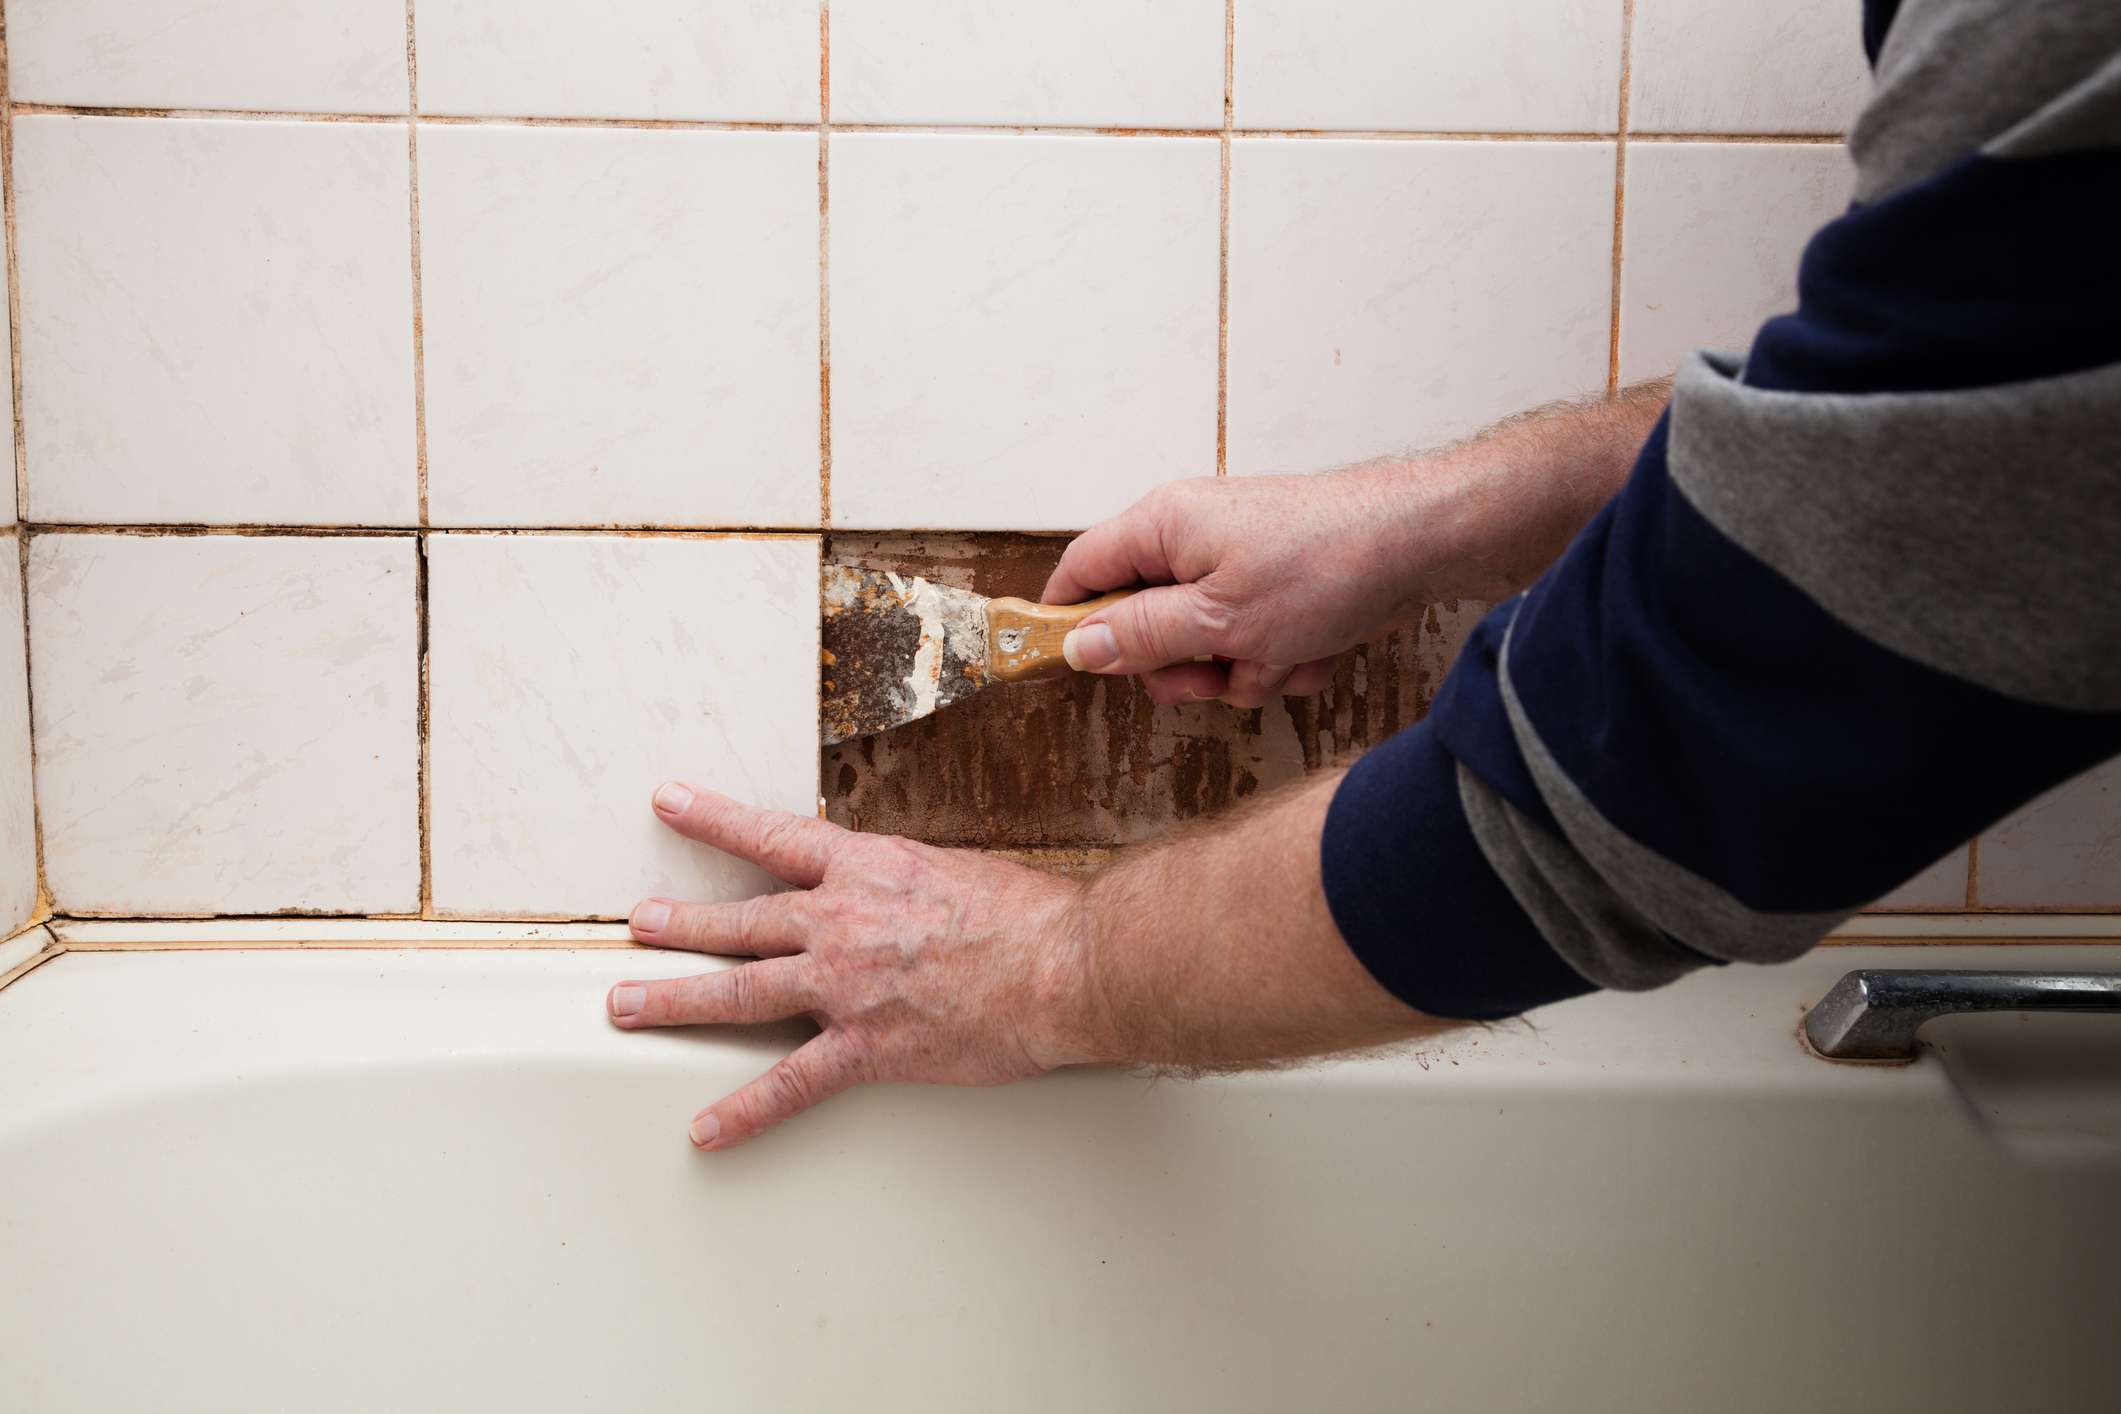
Dismantle Panels or Tiles: For surround units consisting of individual panels or tiles, begin the dismantling process by systematically removing each piece. Use a pry bar or putty knife to gently loosen the panels or tiles from the wall, taking care to avoid damage to the underlying structure.
-
Address Sealants and Adhesives: In cases where the surround is secured with sealants or adhesives, carefully cut through these materials to release the surround from the wall. A utility knife or a specialized adhesive remover can aid in this process, allowing for the safe separation of the surround from the wall surface.
-
Exercise Caution: Throughout the removal process, exercise caution to avoid damaging the surrounding walls or adjacent fixtures. Take your time to delicately detach the surround, ensuring that the underlying structure remains intact and undamaged.
-
Clean and Prepare the Area: Once the surround is successfully removed, take the time to clean the exposed wall surface and prepare it for the subsequent steps of the bathtub removal process. Clear away any residual adhesives, sealants, or debris to create a clean and accessible area for the next phase.
By meticulously following these steps, you can effectively remove the bathtub surround, setting the stage for the final phase of the bathtub removal process: removing the bathtub itself. With the surround dismantled and the area prepared, you're ready to proceed to the next crucial step in this home improvement endeavor.
Before removing a bathtub, turn off the water supply and disconnect the drain and overflow pipes. Then, carefully remove any surrounding tiles or panels before lifting the tub out.
Step 4: Remove the bathtub
Removing the bathtub itself is the pivotal phase in the process of taking out a bathtub. This step requires careful planning, coordination, and physical effort to safely extract the bathtub from its position. Here's a comprehensive guide on how to effectively remove the bathtub:
-
Assess the Installation: Before initiating the removal process, it's crucial to assess how the bathtub is installed. Whether it's a drop-in, alcove, freestanding, or corner tub, understanding the installation type will guide your approach to removing it.
-
Disconnect Plumbing Connections: If any plumbing connections, such as the faucet handles, spout, or water supply lines, are still attached to the bathtub, carefully disconnect them using appropriate tools. Ensure that the water supply is shut off before addressing the plumbing connections.
-
Clear the Surrounding Area: Create a clear and unobstructed path for the bathtub removal. Remove any obstacles, accessories, or items that may impede the extraction process. This includes ensuring that the pathway from the bathroom to the disposal area is accessible.
-
Lift and Maneuver: Enlist the help of others to assist with lifting and maneuvering the bathtub. Depending on the size and weight of the tub, it may require multiple individuals to safely lift and transport it out of the bathroom. Use moving straps or a dolly to aid in the lifting process.
-
Protect the Surrounding Surfaces: As the bathtub is being lifted and moved, take precautions to protect the surrounding surfaces, such as walls, floors, and door frames, from accidental damage. Use furniture blankets, cardboard, or protective padding to shield these areas during the extraction.
-
Navigate Doorways and Corridors: If the bathtub needs to be transported through doorways or narrow corridors, carefully angle and maneuver it to navigate these spaces. Take your time to avoid collisions or damage to the tub and surrounding structures.
-
Dispose of the Bathtub: Once the bathtub is successfully removed from the bathroom, arrange for its disposal or recycling. Depending on local regulations and the condition of the tub, you may need to coordinate with waste management services or recycling facilities for proper disposal.
By meticulously following these steps, you can effectively remove the bathtub, marking a significant milestone in the overall bathtub removal process. With the bathtub successfully extracted, the final step involves cleaning up the area and preparing for any subsequent renovations or installations.
Read more: How Do You Measure A Bathtub
Step 5: Clean up and dispose of the old bathtub
After the successful removal of the old bathtub, the final step involves thorough cleanup and proper disposal of the bathtub. This phase is essential to ensure that the bathroom space is left clean, safe, and ready for any subsequent renovations or installations. Here's a detailed guide on how to effectively clean up and dispose of the old bathtub:
-
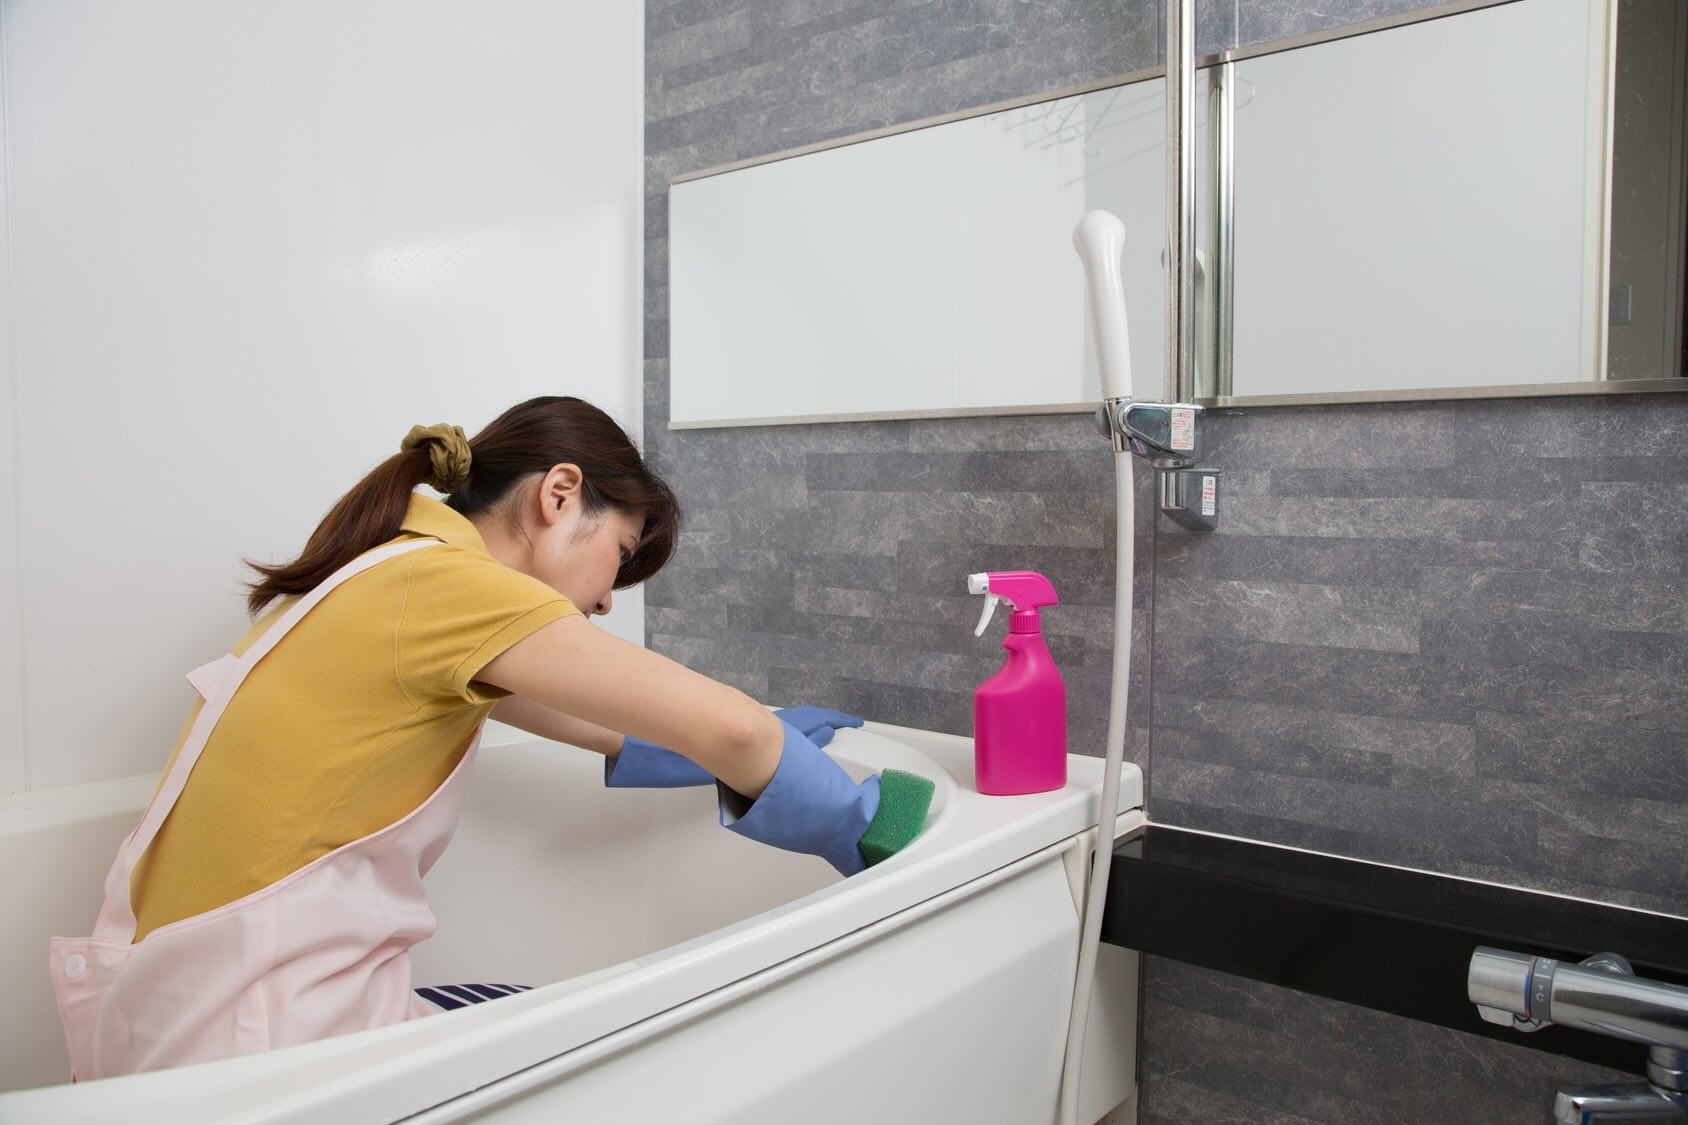
Clear Debris and Residues: Begin by clearing any debris, dust, or residues that may have accumulated during the removal process. Use a vacuum cleaner or broom to thoroughly clean the area around the bathtub and ensure that no loose materials remain.
-
Inspect for Damage: Take the time to inspect the surrounding walls, flooring, and plumbing fixtures for any signs of damage or wear. Address any issues promptly to prevent potential complications during the subsequent renovation or installation phase.
-
Clean the Exposed Area: With the bathtub removed, you now have access to the exposed area where the tub once stood. Clean this space meticulously, removing any adhesive remnants, sealants, or grime that may have accumulated over time. A mild cleaning solution and a scrub brush can be used to achieve a clean and smooth surface.
-
Dispose of the Bathtub: Depending on local regulations and the condition of the old bathtub, you'll need to arrange for its proper disposal. If the bathtub is in good condition, consider donating it to a local charity or salvage organization. Alternatively, if the tub is no longer usable, coordinate with waste management services or recycling facilities for its environmentally responsible disposal.
-
Prepare for Renovations or Installations: Once the cleanup and disposal are complete, assess the space for any necessary repairs, modifications, or preparations for the new bathtub or alternative fixtures. This may involve addressing plumbing connections, wall repairs, or adjustments to accommodate the new installation.
-
Safety and Waste Disposal Compliance: Throughout the cleanup and disposal process, prioritize safety and compliance with local waste disposal regulations. Dispose of any waste materials, packaging, or debris in accordance with environmental guidelines and regulations.
By meticulously following these steps, you can effectively clean up the area and dispose of the old bathtub, setting the stage for any subsequent renovations or installations. With the space cleared, cleaned, and prepared, you're ready to embark on the next phase of enhancing your bathroom space with a new bathtub or alternative fixtures.
Conclusion
In conclusion, the process of removing a bathtub involves a series of meticulous steps, from preparing the area and disconnecting the plumbing to removing the bathtub surround and disposing of the old tub. Each phase of this home improvement endeavor demands careful planning, attention to detail, and a focus on safety to ensure a successful outcome.
By meticulously preparing the area for the bathtub removal, homeowners set the stage for a smooth and organized process. Clearing the space, protecting the flooring, and ensuring safety measures are in place contribute to a successful start. The subsequent step of disconnecting the plumbing involves shutting off the water supply, addressing the drain, and carefully disconnecting other plumbing connections. This phase is crucial for ensuring a safe and efficient removal process.
The removal of the bathtub surround requires a delicate approach, involving the assessment of the surround type, removal of fixtures and trim, and the careful dismantling of panels or tiles. This step sets the stage for accessing the bathtub for removal, paving the way for the pivotal phase of extracting the bathtub itself. Removing the bathtub demands careful coordination, protection of surrounding surfaces, and proper disposal arrangements, marking a significant milestone in the overall bathtub removal process.
The final phase of cleaning up and disposing of the old bathtub ensures that the bathroom space is left clean, safe, and ready for any subsequent renovations or installations. Clearing debris, inspecting for damage, and preparing the area for the new installation are essential steps in this concluding phase.
Overall, the process of removing a bathtub is a transformative endeavor that requires careful planning, attention to detail, and a commitment to safety and cleanliness. Whether homeowners are embarking on a DIY project or seeking professional assistance, understanding the comprehensive process of bathtub removal equips them with the knowledge and confidence to enhance their bathroom space effectively.
With the old bathtub removed and the space prepared for the next phase, homeowners are poised to embark on the journey of revitalizing their bathroom with a new bathtub or alternative fixtures. This marks the beginning of a new chapter in the ongoing evolution of their living space, reflecting their vision for comfort, functionality, and aesthetic appeal.
Frequently Asked Questions about How Do You Take Out A Bathtub?
Was this page helpful?
At Storables.com, we guarantee accurate and reliable information. Our content, validated by Expert Board Contributors, is crafted following stringent Editorial Policies. We're committed to providing you with well-researched, expert-backed insights for all your informational needs.


0 thoughts on “How Do You Take Out A Bathtub?”