Articles
How To Take Out A Fireplace
Modified: February 23, 2024
Learn how to remove a fireplace with our informative articles. Get step-by-step instructions, safety tips, and expert advice.
(Many of the links in this article redirect to a specific reviewed product. Your purchase of these products through affiliate links helps to generate commission for Storables.com, at no extra cost. Learn more)
Introduction
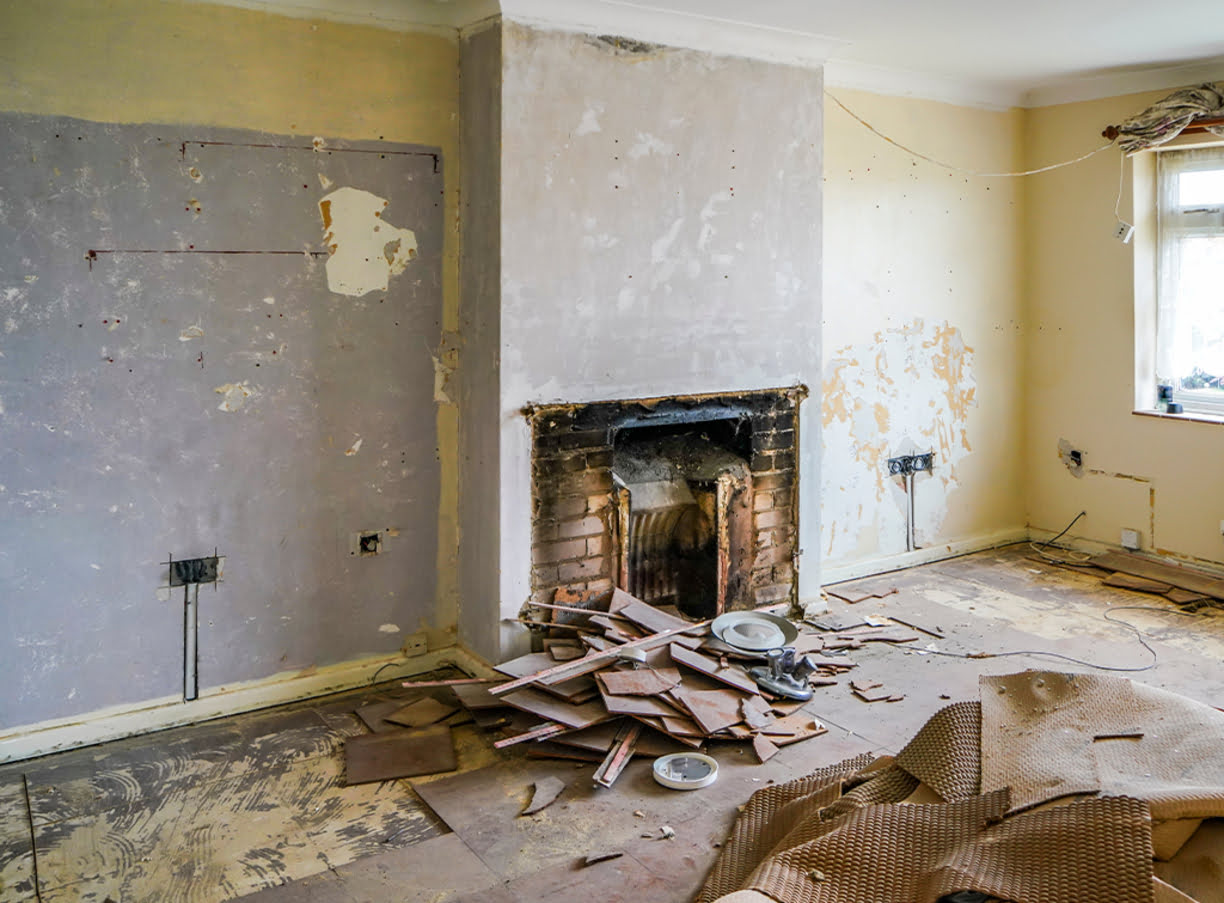
Fireplaces can add warmth, character, and charm to a home. However, there may come a time when you need to remove a fireplace, whether it’s for renovation purposes, to make space for a different feature, or simply because the fireplace is no longer functional or desired. Taking out a fireplace may seem like a daunting task, but with the right tools and knowledge, it can be done safely and efficiently.
In this article, we will guide you through the step-by-step process of removing a fireplace. We’ll cover everything from gathering the necessary tools and materials to cleaning up and disposing of debris. By following these steps, you’ll be able to take out a fireplace and prepare the area for your desired changes.
Before embarking on this project, it’s important to note that removing a fireplace can be a complex task, especially if it involves gas or electrical connections. If you are unsure about any part of the process or if the fireplace removal requires extensive demolition, it is recommended to seek professional assistance. Now, let’s get started with Step 1: Gathering the necessary tools and materials.
Key Takeaways:
- Removing a fireplace requires careful planning, safety precautions, and the right tools. Prioritize safety, prepare the area, and consider professional assistance for gas or electrical connections.
- After successful fireplace removal, you have a blank canvas for home design. Prioritize safety, comply with regulations, and consult professionals for expert advice and assistance.
Read more: How To Put Out Fire In Fireplace
Step 1: Gather the necessary tools and materials
Before you begin removing a fireplace, it is crucial to gather all the necessary tools and materials to ensure a smooth and successful process. Here’s a list of items you will need:
- Protective gear: Start by equipping yourself with safety goggles, gloves, and a dust mask. This will protect you from any debris or hazardous materials.
- Demolition tools: Depending on the type of fireplace and its construction, you may need a variety of demolition tools such as a sledgehammer, pry bar, reciprocating saw, and a chisel. These tools will help you dismantle the fireplace structure safely and efficiently.
- Utility knife: A utility knife will be handy for cutting through any sealants, adhesives, or caulking around the fireplace components.
- Wrench or pliers: If the fireplace has gas or electrical connections, you will need a wrench or pliers to disconnect them. Make sure to turn off the gas supply or electrical power before attempting any disconnections.
- Drop cloths or tarps: To protect the surrounding area from dust and debris, lay down drop cloths or tarps. This will make the cleanup process much easier.
- Dumpster or disposal bags: As you remove the fireplace, you will generate a significant amount of debris. Having a dumpster or heavy-duty disposal bags ready will allow you to quickly dispose of the waste.
- Measuring tape and level: These tools will come in handy if you plan to make any modifications to the wall or floor after removing the fireplace. They will help ensure accurate measurements and level surfaces.
- Patching and repairing materials: Depending on the extent of the fireplace removal, you may need patching materials such as drywall, joint compound, wood filler, or flooring materials to repair any damage left behind.
By gathering these tools and materials before you start, you’ll be fully prepared to take on the task of removing a fireplace. This will save you time and ensure that you have everything you need to complete each step of the process efficiently.
Step 2: Ensure safety precautions
When it comes to removing a fireplace, safety should be your top priority. Before you proceed any further, take the necessary precautions to protect yourself and safeguard your surroundings. Here are some important safety measures to follow:
- Turn off gas and electricity: If your fireplace is connected to a gas line or electrical supply, ensure they are turned off before you begin the removal process. This will prevent any accidents or hazards during the dismantling process.
- Wear protective gear: Put on safety goggles, gloves, and a dust mask to shield yourself from flying debris, dust, and potential harmful substances. Additionally, wear appropriate clothing that covers your arms and legs to minimize the risk of scratches or cuts.
- Ventilate the area: Open windows and doors to provide adequate ventilation while removing the fireplace. This will help dissipate dust and fumes, creating a safer environment for you to work in.
- Secure the work area: Clear the surrounding area of any furniture, decorations, or items that may obstruct your work or pose a risk of damage. Cover nearby furniture and surfaces with drop cloths or tarps to protect them from debris.
- Use proper lifting techniques: Fireplaces can be heavy, especially large or masonry ones. When lifting or moving heavy components, use proper lifting techniques to avoid strain or injury. Consider asking for assistance if needed.
- Be cautious of structural integrity: Pay attention to the structural integrity of the fireplace and the surrounding walls. If you suspect any compromised areas or potential hazards, consult a professional before proceeding.
- Dispose of debris safely: As you dismantle the fireplace, ensure that you dispose of the debris in a safe and responsible manner. Place the waste in a dumpster or heavy-duty disposal bags, following any local regulations or guidelines.
- Have a fire extinguisher nearby: It’s always a good idea to have a fire extinguisher within reach in case of any unexpected situations. Familiarize yourself with its operation and keep it in an easily accessible location.
By adhering to these safety precautions, you can minimize the risk of accidents or injuries during the fireplace removal process. Remember, it’s better to take extra precautions than to compromise your well-being or the safety of your home.
Step 3: Prepare the surrounding area
Before you start dismantling the fireplace, it’s important to properly prepare the surrounding area. This will help protect your home and make the removal process more efficient. Follow these steps to prepare the area:
- Clear the space: Remove any furniture, decorations, or items near the fireplace that may obstruct your work or risk getting damaged. Create a clear and open space to work in.
- Protect flooring: If you have carpet or hardwood flooring near the fireplace, cover it with protective materials such as heavy-duty drop cloths or cardboard sheets. This will prevent any damage from falling debris or scratches.
- Cover nearby surfaces: Place drop cloths or tarps over nearby surfaces, such as walls or countertops, to protect them from dust, debris, and accidental damage.
- Close doors and vents: Seal off the room as much as possible by closing doors and covering vents. This will help contain the dust and prevent it from spreading to other areas of your home.
- Use plastic barriers: If you’re concerned about dust spreading to adjacent rooms or areas, you can also use plastic barriers or sheets to create a containment area around the fireplace. This will help minimize the clean-up process later on.
By taking the time to prepare the surrounding area, you’ll protect your home and make the removal process smoother. It will also make the cleaning up afterward much easier. Once you’ve completed these preparations, you can move on to the next step of removing the fireplace.
Step 4: Disconnect gas or electrical connections
If your fireplace is connected to a gas line or electrical supply, it’s crucial to disconnect these connections before proceeding with the removal. Follow these steps to safely disconnect the gas or electrical connections:
Gas connections:
- Locate the gas shut-off valve: Before you start, locate the gas shut-off valve near the fireplace. It is usually located on the gas supply line, either on the wall or floor, near the fireplace.
- Turn off the gas supply: Using an adjustable wrench, turn the gas shut-off valve to the off position. This will stop the flow of gas to the fireplace.
- Check for any remaining gas: To ensure that the gas supply is turned off completely, test the fireplace by turning it on. If there is no flame or gas flow, it means the gas supply is successfully turned off.
- Disconnect the gas line: Using a wrench or pliers, carefully loosen and disconnect the gas line from the fireplace. Have a container or towel ready to catch any residual gas that may escape.
Electrical connections:
- Locate the electrical junction box: Find the electrical junction box or outlet that powers the fireplace. It is usually located behind the mantel or somewhere near the fireplace.
- Turn off the power: Switch off the circuit breaker that controls the fireplace or unplug the fireplace from the electrical outlet.
- Test the power supply: Use a voltage tester to check if there is any remaining electrical current at the junction box or outlet. If there is still power, switch off the main circuit breaker for that area before proceeding.
- Disconnect the electrical connections: Carefully remove any wire nuts or connectors that secure the electrical wires together. Separate and disconnect the wires from the fireplace.
Always prioritize safety when dealing with gas or electrical connections. If you are unsure about any part of the process or lack the necessary knowledge, it is recommended to consult a professional for assistance. Once you have successfully disconnected the gas or electrical connections, you can proceed to the next step of removing the fireplace.
Read more: How To Clean Out A Gas Fireplace
Step 5: Remove the mantel and surround
Now that you have disconnected the gas or electrical connections, it’s time to remove the mantel and surround of the fireplace. Follow these steps to safely remove these components:
- Inspect the mantel and surround: Carefully examine the mantel and surround to determine how they are attached to the wall. Look for screws, nails, brackets, or adhesive that may be holding them in place.
- Remove any fasteners: Using a screwdriver or a pry bar, remove any screws, nails, or brackets securing the mantel and surround. Be cautious of any hidden fasteners and take your time to avoid damaging the surrounding wall.
- Apply a gentle force: Once the fasteners are removed, apply a gentle force to see if the mantel and surround come loose. If they are held in place with adhesive, use a utility knife to carefully cut through the adhesive before attempting to remove them.
- Work from top to bottom: Start by removing the mantel first, as it is usually the topmost component. Once the mantel is removed, proceed to remove the side pieces and then the bottom piece of the surround.
- Use caution when handling: Mantels and surrounds can be heavy and fragile, especially if they are made of stone or other delicate materials. Enlist the help of another person if needed and handle the components with care to avoid injury or damage.
- Set aside for disposal or future use: Once removed, set the mantel and surround aside for disposal or future use, depending on their condition and your plans for them.
It’s important to note that the process of removing the mantel and surround may vary depending on the specific design and construction. If you encounter any difficulties or complexities, it is advisable to consult a professional for guidance or assistance. Once the mantel and surround are successfully removed, you can move on to the next step of dismantling and removing the hearth.
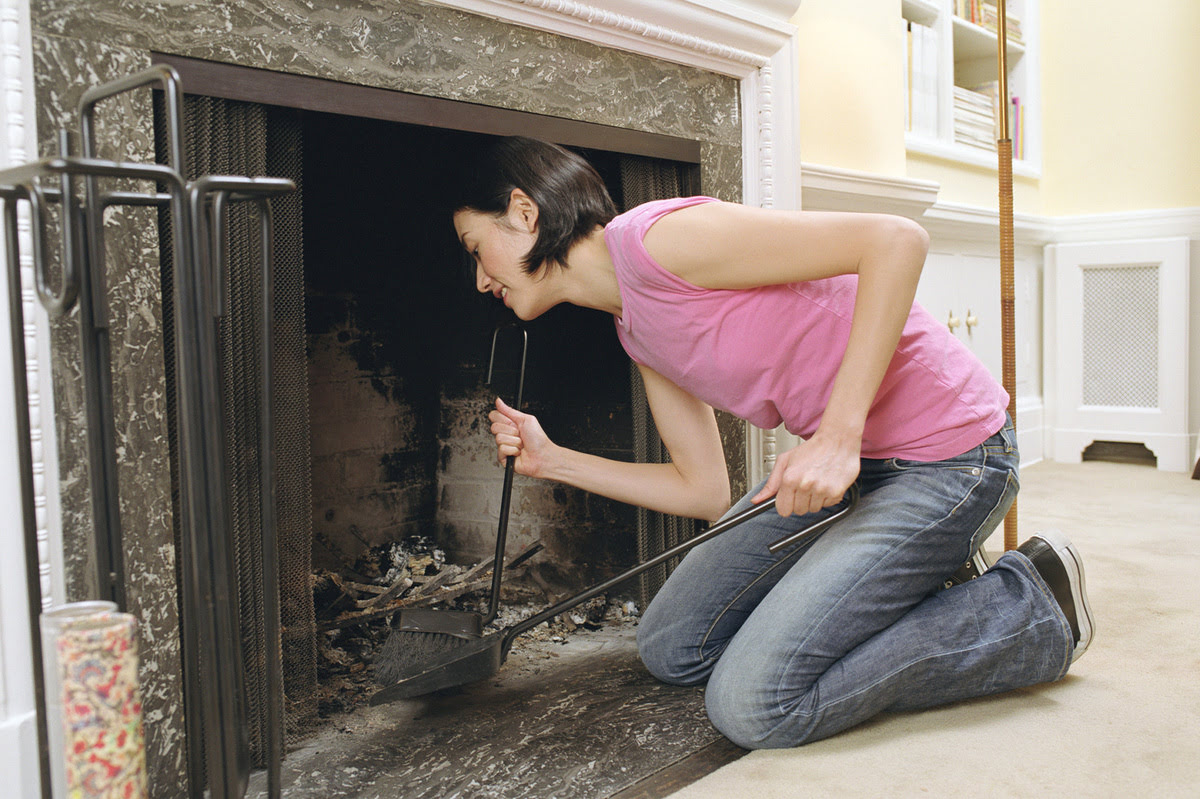
Before removing a fireplace, make sure to turn off the gas supply and disconnect any electrical connections. Protect the surrounding area with a tarp and wear protective gear to prevent injury.
Step 6: Dismantle and remove the hearth
With the mantel and surround removed, it’s time to focus on dismantling and removing the hearth of the fireplace. Follow these steps to safely accomplish this:
- Assess the hearth construction: Take a close look at the hearth to understand how it is built and secured. Note any screws, nails, adhesive, or mortar that may be holding it in place.
- Protect the surrounding area: Place drop cloths or tarps around the hearth area to catch any debris or dust that may be generated during the dismantling process.
- Remove visible fasteners: Using a screwdriver or pry bar, remove any visible screws, nails, or brackets from the hearth. Be careful not to damage the floor or surrounding walls.
- Break mortar or adhesive seals: If the hearth is secured with mortar or adhesive, gently tap a chisel or small pry bar along the edges to break the seal. Take your time and work methodically to prevent any unnecessary damage.
- Apply gradual force: Once the seals are broken, apply gradual and gentle force to lift the hearth. You may need the help of another person to lift heavier hearths or those made of stone or concrete.
- Inspect for additional fasteners: Check under the hearth to ensure there are no hidden fasteners. If there are additional screws, nails, or brackets, remove them before fully lifting and removing the hearth.
- Dispose of the hearth: Once the hearth is completely removed, dispose of it properly according to local regulations. If the hearth is in good condition, you may consider repurposing or donating it.
Be mindful of the weight and fragility of the hearth, especially if it is made of heavy or delicate materials. Take your time and work with caution to prevent injuries or damage to yourself or your surroundings. Once the hearth is dismantled and removed, you can move on to the next step of demolishing and removing the fireplace structure.
Step 7: Demolish and remove the fireplace structure
Now that the mantel, surround, and hearth have been removed, it’s time to focus on demolishing and removing the fireplace structure itself. Follow these steps to safely accomplish this:
- Assess the construction: Take a close look at the fireplace structure to understand its construction and identify any potential challenges or complications.
- Prepare for demolition: Clear the area surrounding the fireplace, ensuring there are no obstacles or hazards. Consider using drop cloths or tarps to protect the floor and surrounding areas from debris.
- Use appropriate tools: Select the appropriate tools based on the material of the fireplace structure. Common tools used for demolishing include a sledgehammer, reciprocating saw, pry bar, and chisel.
- Start with the chimney: If your fireplace has a chimney, start by carefully removing any bricks or blocks that make up the chimney structure. Work from the top down, taking small and controlled swings with the sledgehammer or using the reciprocating saw to cut through mortar.
- Dismantle the fireplace structure: Once the chimney is out of the way, move on to dismantling the remaining fireplace structure. Use the appropriate tools to break apart the bricks, stones, or other materials, taking care to avoid damaging the surrounding walls or floor.
- Work in sections: It’s advisable to work in sections, focusing on one area at a time. This will make the demolition process more organized and manageable.
- Dispose of debris: As you demolish the fireplace structure, collect the debris and dispose of it properly. Use a dumpster or heavy-duty disposal bags for easy cleanup.
- Inspect for hidden concerns: While demolishing the fireplace, keep an eye out for any hidden concerns such as mold, water damage, or structural issues. If you come across any major concerns, it’s recommended to consult a professional for further evaluation and assistance.
Demolition can be a physically demanding and potentially messy task. Ensure that you are wearing appropriate protective gear, such as safety goggles, gloves, and a dust mask, to protect yourself from dust and debris. Take breaks as needed and proceed with caution to ensure your safety at all times.
Once the fireplace structure has been completely demolished and removed, you can move on to the next step of cleaning up and disposing of the debris.
Step 8: Clean up and dispose of debris
After the fireplace structure has been demolished and removed, it’s time to clean up the area and dispose of the debris. Follow these steps to effectively clean up and dispose of the remnants:
- Gather necessary cleaning tools: Collect brooms, dustpans, vacuum cleaners, and other cleaning supplies to help with the cleanup process.
- Sweep and vacuum the area: Use a broom or vacuum cleaner to thoroughly remove any loose debris, dust, or ashes left behind. Pay attention to corners, crevices, and hard-to-reach areas.
- Wipe down surfaces: Use a damp cloth or sponge to wipe down surfaces, including walls, floors, and any remaining parts of the fireplace structure. This will help remove any lingering dust or dirt.
- Dispose of debris: Place the demolished materials, including bricks, stones, and other remnants, into heavy-duty disposal bags or a dumpster. If the debris is too heavy or voluminous, consider renting a debris removal service or hiring professionals to handle it.
- Check local regulations: Before disposing of the debris, make sure to check local regulations regarding proper disposal methods for construction and demolition waste. Follow these guidelines to ensure compliance and environmental responsibility.
- Clean surrounding areas: Once the immediate area is clear of debris, clean the surrounding space as well. This may involve vacuuming or sweeping adjacent rooms, wiping down surfaces, and removing any drop cloths or protective coverings used during the removal process.
Cleaning up and properly disposing of the debris will not only leave your space tidy but also contribute to a safer environment. If you encounter any challenges during the cleanup process or if the debris is too extensive, consider seeking assistance from a professional cleaning service or debris removal company.
With the area cleaned up and the debris properly disposed of, you can move on to the next step of patching and repairing the wall or floor where the fireplace used to be.
Read more: How To Take Out A Toilet
Step 9: Patch and repair the wall or floor
Now that the fireplace has been removed and the area has been cleaned up, it’s time to patch and repair the wall or floor where the fireplace used to be. Follow these steps to effectively complete this task:
- Assess the damage: Inspect the wall or floor to determine the extent of the damage caused by the fireplace removal. Look for any cracks, holes, or uneven surfaces.
- Prepare the surface: Clean the area thoroughly by removing any loose debris, dust, or residue. Use a damp cloth or sponge to wipe down the surface and ensure it is free from any dirt or grime.
- Repair cracks or holes: Fill in any cracks or holes with an appropriate patching compound, such as joint compound or spackle for drywall, or concrete patch for masonry surfaces. Follow the manufacturer’s instructions for application and drying times.
- Smooth out the surface: Once the patching compound has dried, use sandpaper or a sanding block to smooth out the repaired areas. This will ensure a seamless and even finish.
- Prime the surface: If necessary, apply a primer to the repaired areas. This will help create a uniform surface and improve the adhesion of the paint or finish.
- Paint or finish the surface: Match the color and texture of the surrounding wall or floor and apply the appropriate paint or finish to the patched areas. Use a brush or roller for paint, and follow the instructions for the specific type of finish you are using.
- Allow for proper drying time: Allow the paint or finish to dry completely according to the manufacturer’s instructions. This will ensure a durable and professional-looking result.
Patching and repairing the wall or floor is essential to restore the appearance and integrity of the space after removing the fireplace. Take your time during this step to achieve a high-quality finish. If you are unsure about any aspect of the patching and repair process, consider consulting a professional or seeking guidance from a home improvement expert.
With the wall or floor properly patched and repaired, you have successfully completed this step. The final step is to consider seeking professional assistance if needed for any remaining tasks or complexities.
Step 10: Consider professional assistance if needed
Removing a fireplace can be a complex and demanding task, especially if it involves gas or electrical connections, extensive demolition, or if you’re unsure about certain aspects of the process. In such cases, it is wise to consider seeking professional assistance. Here are a few scenarios where professional help might be beneficial:
- Gas or electrical connections: If your fireplace is connected to a gas line or electrical supply, it’s important to have a qualified professional handle the disconnection. They have the expertise and knowledge to safely disconnect these connections, minimizing the risk of accidents or damage.
- Structural considerations: If you encounter any structural concerns, such as load-bearing walls, weakened supports, or compromised foundations during the removal process, it’s essential to consult a professional contractor or structural engineer. They can assess the situation and provide guidance on how to proceed safely.
- Extensive demolition and reconstruction: If your fireplace removal involves extensive demolition or if you plan to undertake major modifications to the surrounding area, it’s advisable to enlist the help of a professional contractor or construction company. They can navigate the complexities of the project, ensure compliance with building codes, and execute the required reconstruction and remodeling tasks.
- Time and expertise constraints: If you’re limited on time or lack the necessary expertise or tools to complete the project, hiring professionals can save you time and effort. They can efficiently handle the removal process, complete the necessary repairs, and leave you with a finished result that meets your expectations.
- Safety and peace of mind: Working with professionals provides an added layer of safety and peace of mind. They are trained in handling potentially hazardous materials, have the appropriate safety equipment, and follow industry-standard practices to ensure a safe and successful fireplace removal.
When considering professional assistance, research and choose reputable contractors or service providers with experience in fireplace removal. Obtain multiple quotes, check their credentials, and read reviews or testimonials from previous clients to ensure you’re hiring a reliable and qualified professional.
By involving professionals when needed, you can ensure that the fireplace removal process is carried out safely, efficiently, and in accordance with any specific requirements or regulations. Ultimately, this will give you peace of mind and help you achieve the desired results for your home.
With Step 10 considered, you have completed the comprehensive process of removing a fireplace. You’ve successfully gathered the necessary tools, ensured safety precautions, prepared the area, disconnected gas or electrical connections, removed the mantel and surround, dismantled and removed the hearth, demolished and removed the fireplace structure, cleaned up and disposed of debris, patched and repaired the wall or floor, and considered professional assistance if needed. Congratulations on your successful fireplace removal project!
Conclusion
Removing a fireplace is a significant undertaking that requires careful planning, preparation, and execution. Throughout the comprehensive process outlined in this article, you have learned how to gather the necessary tools and materials, ensure safety precautions, prepare the surrounding area, disconnect gas or electrical connections, remove the mantel and surround, dismantle and remove the hearth, demolish and remove the fireplace structure, clean up and dispose of debris, patch and repair the wall or floor, and consider professional assistance if needed.
It’s important to remember that while this guide provides a step-by-step approach, every fireplace removal project is unique. Different fireplaces may have varying complexities and challenges. It is essential to adapt the process to fit your specific situation and seek professional assistance when necessary, especially when dealing with gas or electrical connections, structural concerns, or extensive demolition.
Throughout the entire process, prioritize safety by wearing appropriate protective gear and following proper techniques. Take your time, be thorough, and approach each step with caution. This will help ensure a successful and safe fireplace removal experience.
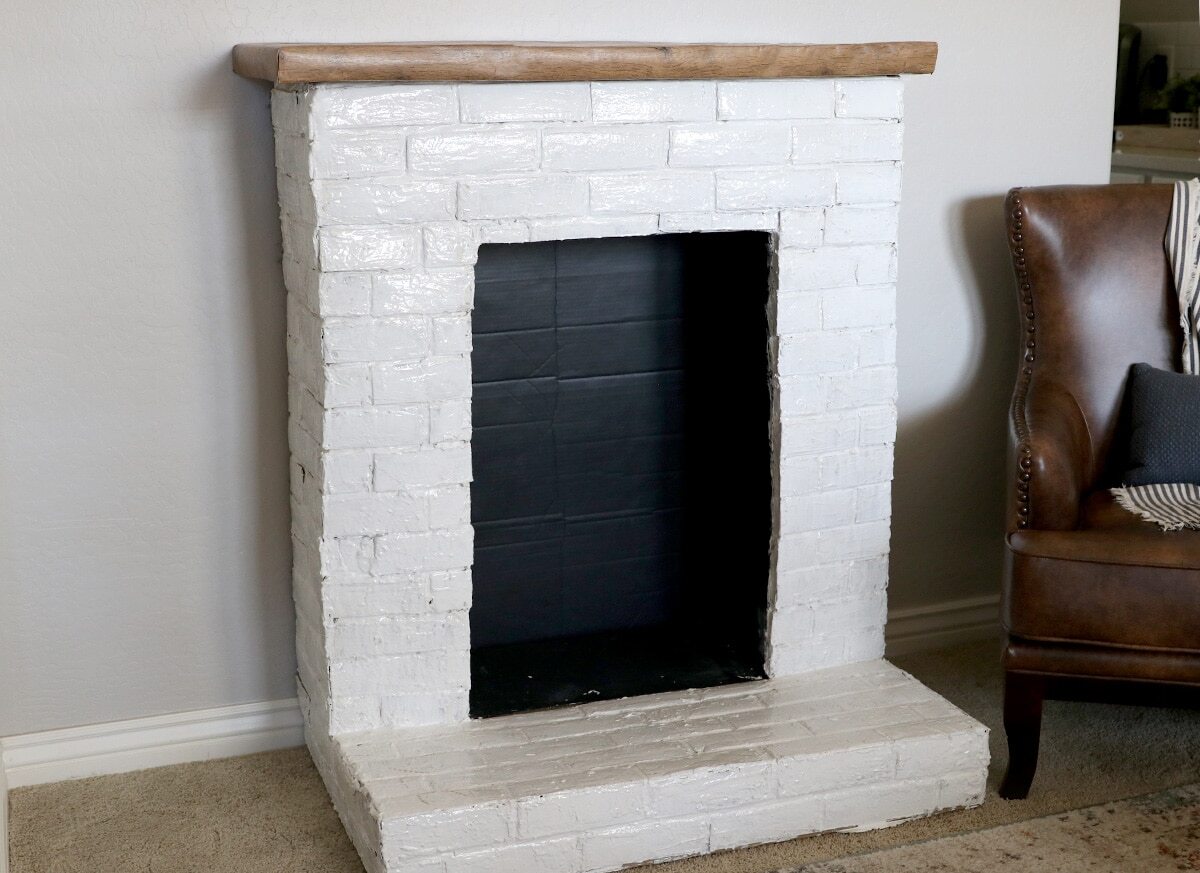
With the fireplace removed, you now have a blank canvas to explore new home design possibilities or create the space you envision. Whether you’re looking to replace the fireplace with a different feature, gain additional floor space, or renovate the area, it’s an opportunity to transform your living space to suit your lifestyle and design preferences.
Remember to consult local regulations and guidelines for proper disposal of debris and comply with any necessary permits or inspections. By doing so, you contribute to a clean and sustainable environment while avoiding any legal issues.
We hope that this comprehensive guide has provided you with the knowledge and confidence to successfully remove a fireplace. However, if you still have any doubts or concerns, consult professionals in the field, such as contractors, electricians, or plumbers, who can provide expert advice and assistance throughout the process.
Good luck with your fireplace removal project, and may your home transformation be both rewarding and fulfilling!
Frequently Asked Questions about How To Take Out A Fireplace
Was this page helpful?
At Storables.com, we guarantee accurate and reliable information. Our content, validated by Expert Board Contributors, is crafted following stringent Editorial Policies. We're committed to providing you with well-researched, expert-backed insights for all your informational needs.


0 thoughts on “How To Take Out A Fireplace”