Home>Furniture & Design>Bathroom Accessories>How Do You Regrout A Bathtub?

Bathroom Accessories
How Do You Regrout A Bathtub?
Modified: August 26, 2024
Learn how to regrout a bathtub and give your bathroom a fresh look with our expert tips and advice on bathroom accessories. Transform your space today!
(Many of the links in this article redirect to a specific reviewed product. Your purchase of these products through affiliate links helps to generate commission for Storables.com, at no extra cost. Learn more)
Assessing the condition of the existing grout
The first step in the process of regrouting a bathtub involves assessing the condition of the existing grout. This critical step sets the stage for the entire regrouting process, as it determines the extent of work required and the best approach to achieve optimal results.
Read more: How Do You Measure A Bathtub
Signs of Deterioration
Begin by closely examining the grout lines in your bathtub. Look for signs of deterioration, such as cracks, crumbling, discoloration, or mold and mildew growth. These are indicators that the grout is no longer effectively sealing the joints between the tiles, which can lead to water seepage and further damage if left unaddressed.
Integrity of the Tiles
Assess the integrity of the tiles themselves. Check for any loose or wobbly tiles, as these could indicate underlying issues with the grout and the substrate. Additionally, look for any missing or chipped tiles that may need to be replaced before regrouting.
Water Damage
Inspect the surrounding areas for any signs of water damage, such as peeling paint, swollen drywall, or water stains. These could be indications of water penetration through the grout lines, highlighting the urgency of regrouting to prevent further structural damage.
Grout Staining
Observe the overall appearance of the grout. If the grout lines appear heavily stained and discolored, regular cleaning may no longer be effective, necessitating the need for regrouting to restore the aesthetic appeal of the bathtub.
Read more: How Do You Take Out A Bathtub?
Sealing Effectiveness
Test the sealing effectiveness of the existing grout by splashing some water onto the grout lines. If the water beads up and remains on the surface, the grout is still adequately sealed. However, if the water is absorbed into the grout, it indicates that the sealing has been compromised and regrouting is imperative to prevent water damage.
By thoroughly assessing the condition of the existing grout, you can gain valuable insights into the specific issues that need to be addressed during the regrouting process. This comprehensive evaluation sets the foundation for a successful regrouting endeavor, ensuring that the subsequent steps are tailored to effectively restore the integrity and aesthetics of your bathtub.
Key Takeaways:
- Assess the condition of existing grout before regrouting to identify issues like cracks, discoloration, and water damage. This helps plan the regrouting process effectively and restore the bathtub’s integrity and appearance.
- Meticulously clean and prepare the grout lines before applying new grout to ensure a durable and visually appealing finish. This sets the stage for a successful regrouting, promoting long-lasting results and a rejuvenated bathing space.
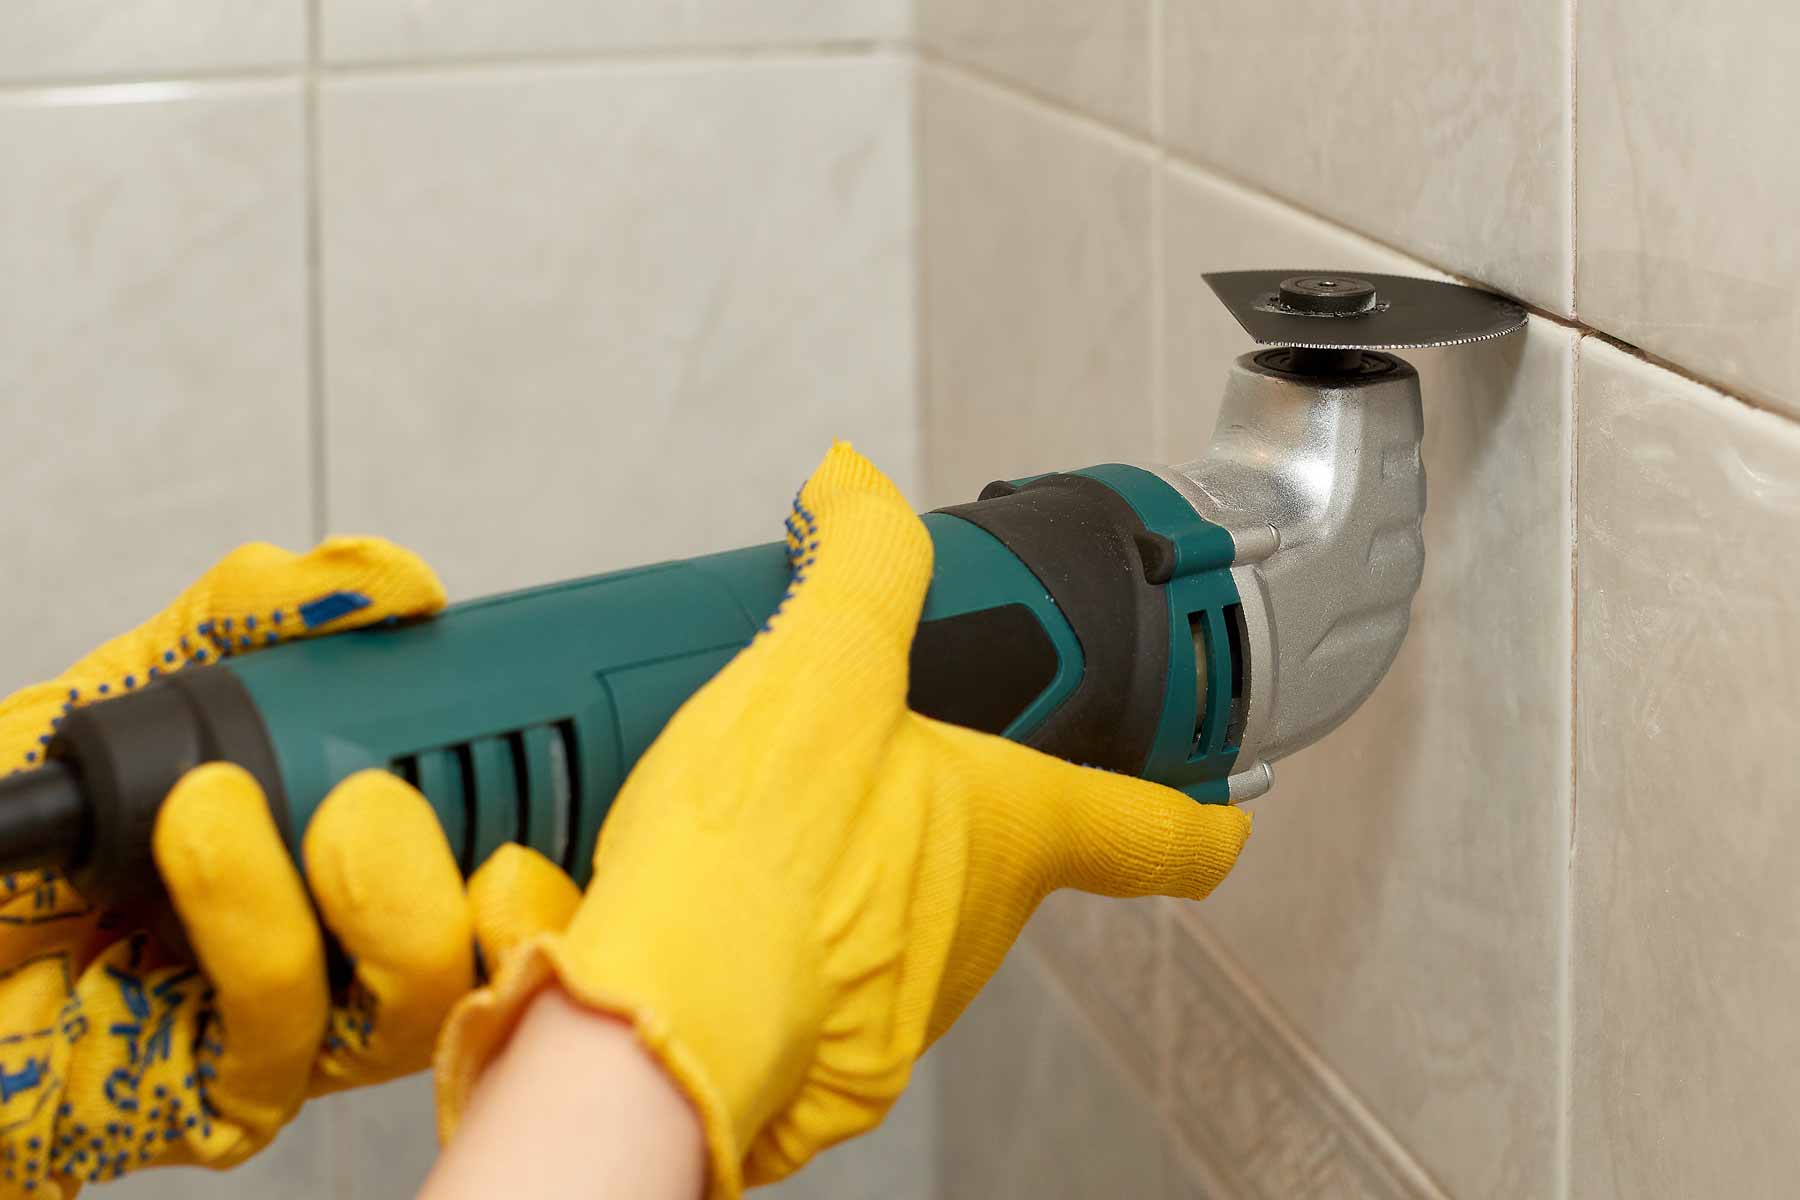
Removing the old grout
Removing the old grout is a crucial phase in the regrouting process, as it sets the stage for the application of new grout and ensures a durable and long-lasting finish. The removal of old grout is essential for achieving proper adhesion and preventing future issues such as mold and mildew growth. Here's a detailed look at the steps involved in effectively removing the old grout from your bathtub.
Tools and Equipment
Before commencing the grout removal process, gather the necessary tools and equipment. A grout saw or rotary tool with a grout removal attachment is commonly used to carefully eliminate the old grout. Additionally, safety goggles and a dust mask are essential to protect your eyes and respiratory system from the fine grout particles that will be generated during the removal process.
Methodical Approach
Begin by carefully running the grout saw or rotary tool along the grout lines, ensuring that the old grout is systematically removed. Exercise caution to avoid damaging the surrounding tiles while effectively eliminating the old grout. It's important to work methodically, focusing on small sections at a time to maintain precision and control throughout the process.
Read more: How Do You Make Bathtub Gin
Thorough Removal
Pay close attention to completely remove the old grout from the joints between the tiles. Any residual grout left behind can compromise the adhesion of the new grout and lead to uneven application, affecting the overall aesthetic and structural integrity of the regrouted bathtub.
Clean-Up
Once the old grout has been successfully removed, thoroughly clean the grout lines and surrounding area to eliminate any remaining grout particles and dust. A vacuum cleaner or a small brush can be used to ensure that the grout lines are free from debris, providing a clean surface for the subsequent steps in the regrouting process.
By meticulously removing the old grout, you create a clean and receptive surface for the application of new grout, setting the stage for a successful regrouting endeavor. This diligent approach ensures that the new grout will adhere effectively, promoting a seamless and visually appealing finish while preventing potential issues associated with inadequate grout removal.
Cleaning the grout lines and surrounding area
Cleaning the grout lines and the surrounding area is a pivotal step in the regrouting process, as it sets the stage for the application of new grout and ensures a pristine surface for the final finish. This meticulous cleaning phase not only enhances the visual appeal of the bathtub but also plays a crucial role in promoting the adhesion and longevity of the new grout. Here's a detailed look at the essential steps involved in effectively cleaning the grout lines and surrounding area.
Preparing the Cleaning Solution
Begin by preparing a suitable cleaning solution to effectively remove any residual grout particles, dirt, and grime from the grout lines. A mixture of water and white vinegar or a specialized grout cleaner can be used to create an effective cleaning solution. The acidic properties of vinegar can help dissolve stubborn stains and mineral deposits, while a commercial grout cleaner is formulated to target grout-specific issues, such as mold and mildew.
Read more: How Do You Drain A Portable Bathtub
Application and Agitation
Apply the cleaning solution generously onto the grout lines, ensuring thorough coverage. Using a grout brush or an old toothbrush, gently agitate the cleaning solution into the grout lines, targeting areas with visible stains or discoloration. The mechanical action of the brush helps dislodge embedded dirt and grime, allowing the cleaning solution to penetrate deeper into the porous grout.
Dwell Time
Allow the cleaning solution to dwell on the grout lines for a sufficient period as per the product instructions or, in the case of a vinegar solution, for at least 10-15 minutes. This dwell time is crucial as it allows the cleaning agents to effectively break down and lift the accumulated dirt, stains, and residues from the grout, preparing it for thorough removal.
Aggressive Stain Treatment
For particularly stubborn stains or areas heavily affected by mold and mildew, a more aggressive approach may be necessary. Oxygen bleach or hydrogen peroxide can be applied to these areas, providing powerful stain-fighting properties without compromising the integrity of the grout.
Rinse and Dry
After the dwell time, thoroughly rinse the grout lines with clean water to remove the cleaning solution and loosened debris. A sponge or a clean cloth can be used to wipe down the tiles and grout, ensuring that all residues are effectively removed. Once rinsed, allow the grout lines to dry completely before proceeding with the application of new grout.
By meticulously cleaning the grout lines and the surrounding area, you create an optimal surface for the application of new grout, ensuring a durable and visually appealing finish. This diligent cleaning process not only revitalizes the appearance of the bathtub but also sets the stage for a successful regrouting endeavor, promoting long-lasting results and a rejuvenated bathing space.
Read more: How To Regrout Countertops
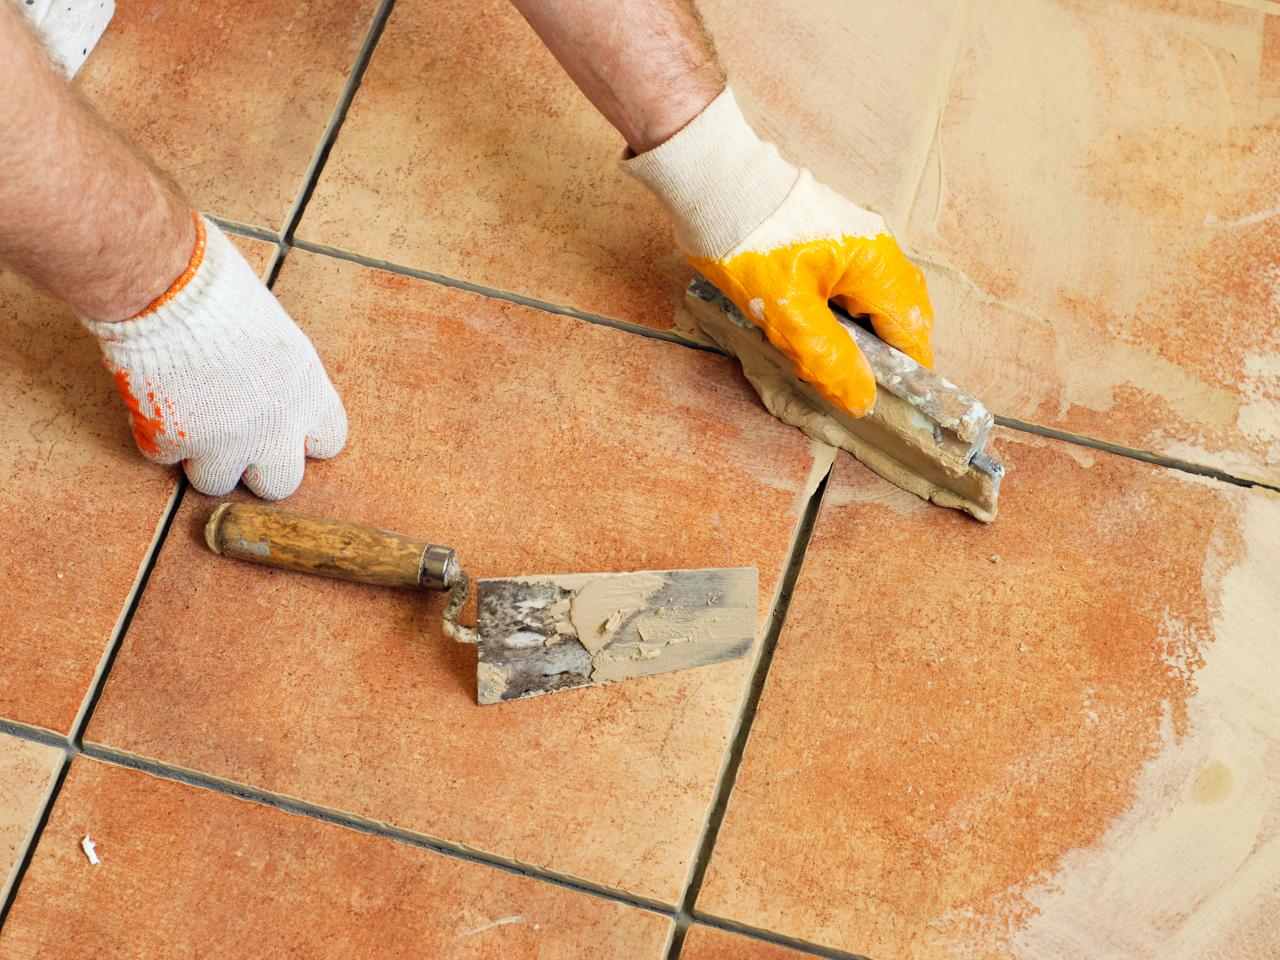
Mixing and applying new grout
The process of mixing and applying new grout is a pivotal stage in the regrouting journey, as it involves the precise blending and application of the grout mixture to rejuvenate the bathtub's appearance and structural integrity. This phase requires careful attention to detail and a methodical approach to ensure a seamless and durable finish. Here's a comprehensive guide to effectively mixing and applying new grout to achieve optimal results.
Grout Mixing
Begin by selecting a high-quality grout product that is suitable for the specific requirements of your bathtub. It's essential to choose a grout color that complements the tiles and enhances the overall aesthetic appeal of the bathing space. Follow the manufacturer's instructions to determine the appropriate water-to-grout ratio for mixing. Use a clean bucket to combine the grout powder with water, ensuring a smooth and lump-free consistency.
Thoroughly mix the grout using a margin trowel or a grout-mixing paddle attached to a power drill. The goal is to achieve a homogeneous mixture with uniform color and texture. Avoid over-mixing, as this can introduce air bubbles into the grout, potentially compromising its strength and adhesion properties.
Application Process
Once the grout is properly mixed, allow it to rest for a few minutes as per the manufacturer's recommendations. This resting period, known as slaking, allows the grout particles to fully hydrate, ensuring optimal performance and workability.
Using a rubber grout float, apply the mixed grout onto the tile surface, pressing it firmly into the grout lines at a 45-degree angle. Work in small sections to ensure that the grout is evenly distributed and fully packed into the joints between the tiles. Avoid leaving any voids or gaps within the grout lines, as these can compromise the overall integrity of the regrouting.
Grout Removal
After applying the grout, use the rubber grout float to remove excess grout from the tile surface. Hold the float at a sharp angle and diagonally drag it across the tiles to scrape off the surplus grout, leaving the grout lines uniformly filled and the tile surfaces clean.
Read more: How Do You Think The Bathtub Ring Formed
Initial Cleaning
Once the excess grout has been removed, use a damp grout sponge to gently clean the tile surfaces and smooth the grout lines. Rinse the sponge frequently and avoid applying excessive pressure to prevent dislodging the freshly applied grout.
Curing and Final Cleaning
Allow the newly applied grout to cure for the duration specified by the manufacturer, typically 24-72 hours. Once the grout has fully cured, use a clean, dry cloth to buff away any remaining grout haze from the tile surfaces, revealing the revitalized appearance of the regrouted bathtub.
By meticulously following the steps for mixing and applying new grout, you can achieve a professional-quality finish that enhances the visual appeal and structural integrity of your bathtub. This meticulous process ensures that the new grout adheres effectively, providing long-lasting protection and a rejuvenated bathing space for years to come.
Finishing touches and maintenance
After completing the regrouting process, attention to finishing touches and ongoing maintenance is essential to ensure the longevity and visual appeal of the newly regrouted bathtub. These final steps not only contribute to the overall aesthetic of the bathing space but also play a crucial role in preserving the integrity of the grout and tiles. Here's a detailed guide to the finishing touches and maintenance practices that will help you enjoy a pristine and durable bathtub for years to come.
Sealing the Grout
Once the new grout has fully cured, consider applying a high-quality grout sealer to enhance its resistance to water, stains, and mold. A grout sealer acts as a protective barrier, preventing moisture penetration and minimizing the risk of discoloration and deterioration. Follow the manufacturer's instructions to apply the sealer evenly across the grout lines, ensuring comprehensive coverage for maximum effectiveness.
Read more: How Do You Remove The Drain From A Bathtub?
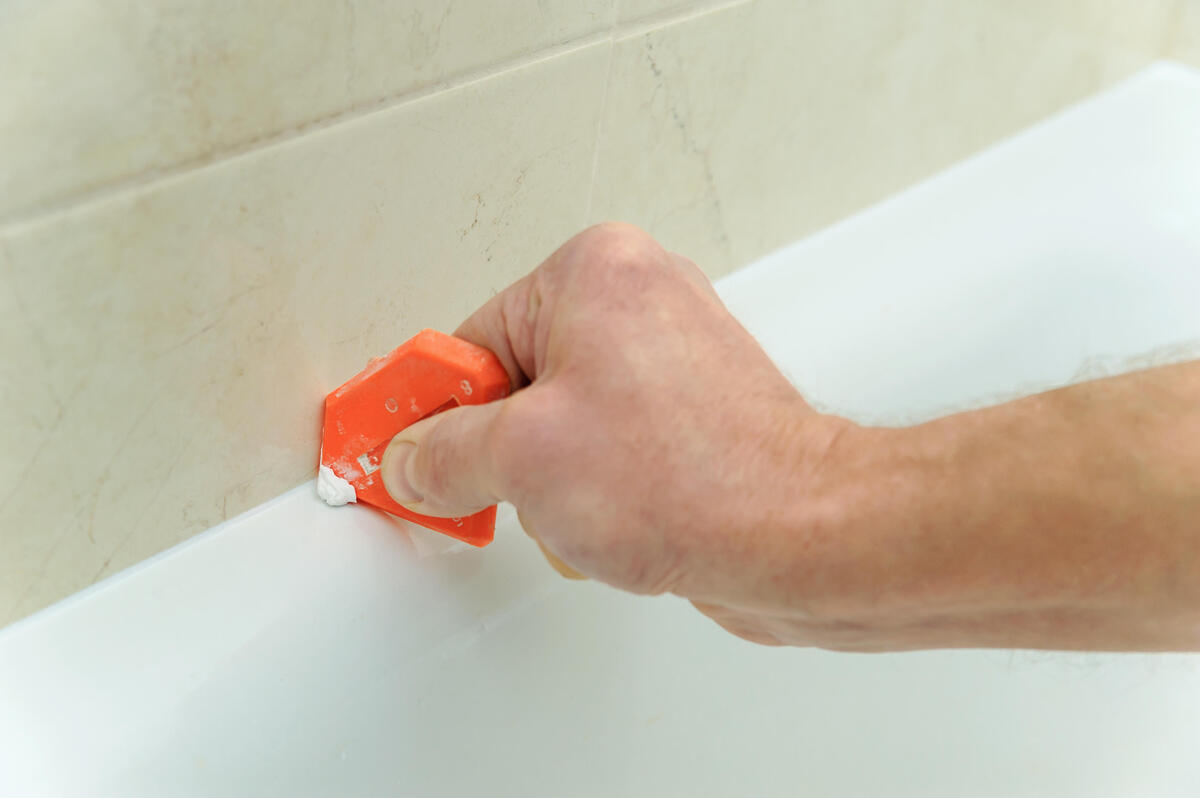
Caulking
Inspect the perimeter of the bathtub, particularly the joint between the tub and the tiles. If the existing caulk shows signs of wear, cracking, or discoloration, it's advisable to remove the old caulk and reapply a fresh bead of silicone or acrylic caulk. Proper caulking not only enhances the visual cohesion of the bathtub but also serves as a crucial barrier against water intrusion, safeguarding the underlying structure from potential damage.
Regular Cleaning
Establish a routine cleaning schedule to maintain the pristine appearance of the regrouted bathtub. Use a mild, pH-neutral cleaner to regularly clean the tiles and grout lines, preventing the accumulation of dirt, soap scum, and mineral deposits. Avoid harsh cleaning agents that can compromise the integrity of the grout and opt for gentle yet effective cleaning solutions to preserve the rejuvenated look of the bathtub.
Preventive Maintenance
Incorporate preventive measures to minimize the risk of grout and tile deterioration. Use a squeegee to remove excess water from the bathtub surfaces after each use, reducing the opportunity for water to seep into the grout lines. Additionally, address any plumbing issues promptly to prevent water leaks that can compromise the newly regrouted surfaces.
Periodic Inspection
Regularly inspect the grout lines and tiles for any signs of damage, discoloration, or mold growth. Early detection of issues allows for timely intervention, preventing minor concerns from escalating into more extensive regrouting projects. Address any identified issues promptly to maintain the pristine condition of the bathtub.
By attending to these finishing touches and embracing proactive maintenance practices, you can ensure that the regrouted bathtub remains a visually appealing and structurally sound element of your bathroom. These measures not only preserve the aesthetic appeal of the bathtub but also contribute to the long-term durability and functionality of the regrouted surfaces, allowing you to enjoy a rejuvenated bathing space for years to come.
Frequently Asked Questions about How Do You Regrout A Bathtub?
Was this page helpful?
At Storables.com, we guarantee accurate and reliable information. Our content, validated by Expert Board Contributors, is crafted following stringent Editorial Policies. We're committed to providing you with well-researched, expert-backed insights for all your informational needs.


0 thoughts on “How Do You Regrout A Bathtub?”