Home>Furniture & Design>Bathroom Accessories>How To Install A Heated Towel Rack
Bathroom Accessories
How To Install A Heated Towel Rack
Modified: August 16, 2024
Learn how to easily install a heated towel rack in your bathroom. Explore our selection of bathroom accessories for a stylish upgrade.
(Many of the links in this article redirect to a specific reviewed product. Your purchase of these products through affiliate links helps to generate commission for Storables.com, at no extra cost. Learn more)
Introduction
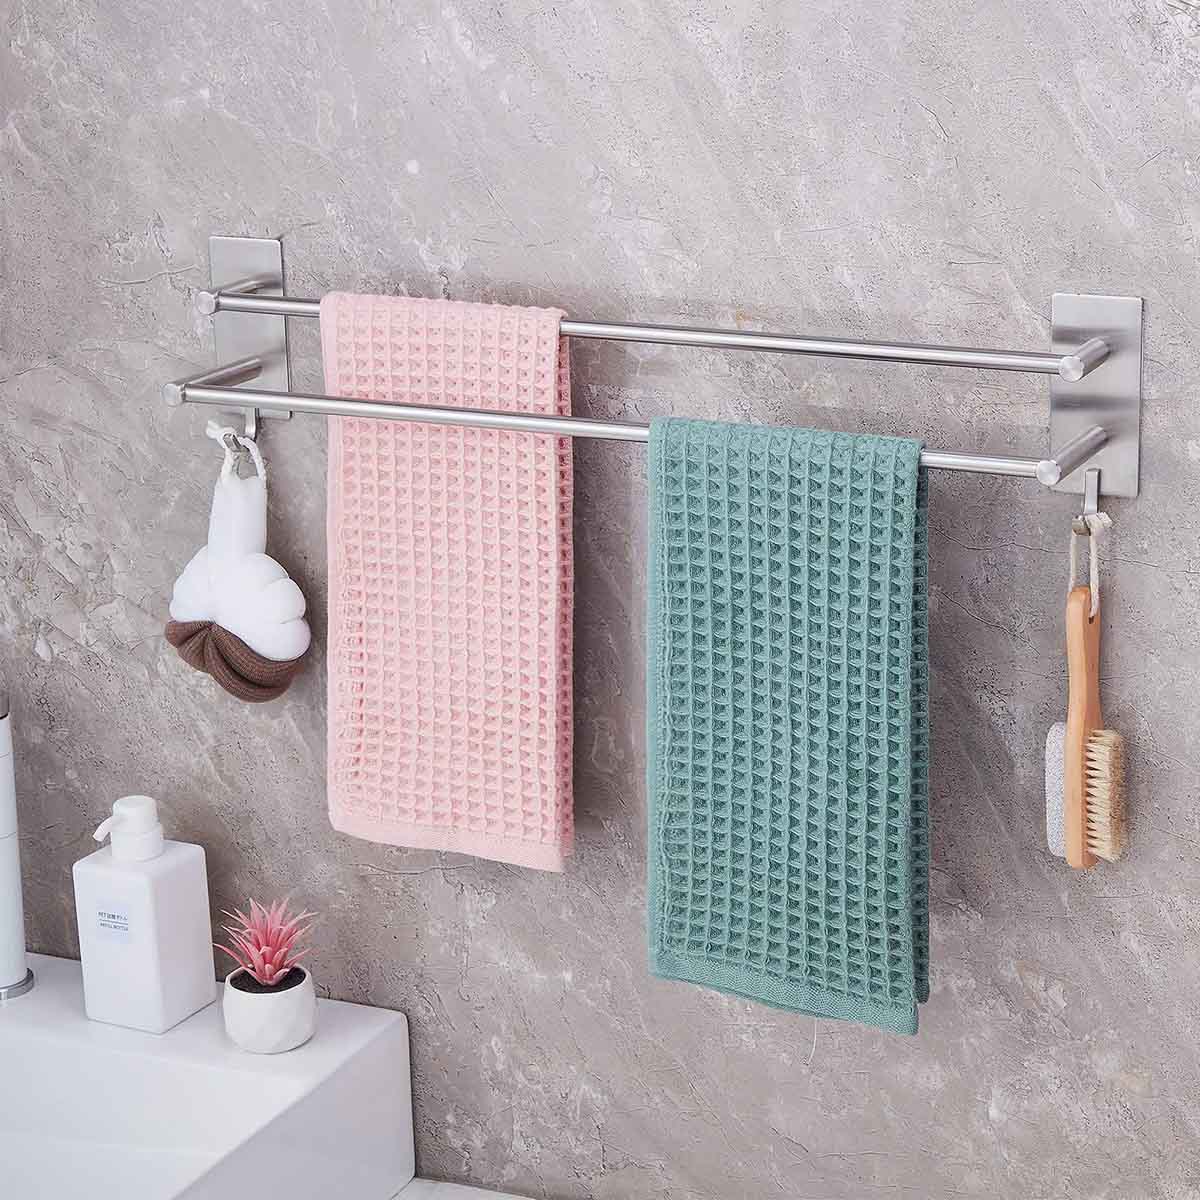
Are you tired of stepping out of the shower only to be greeted by a cold, damp towel? If so, it might be time to consider installing a heated towel rack in your bathroom. Not only does a heated towel rack add a touch of luxury to your space, but it also ensures that you always have a warm, dry towel at your fingertips.
In this comprehensive guide, we will walk you through the step-by-step process of installing a heated towel rack in your bathroom. Whether you're a seasoned DIY enthusiast or a novice looking to take on a new project, this guide will equip you with the knowledge and confidence to complete the installation with ease.
From gathering the necessary tools and materials to safely connecting the electrical wiring, each step is outlined in detail to ensure a smooth and successful installation. By the end of this guide, you'll be ready to enjoy the comfort and convenience of a heated towel rack in your own home.
So, roll up your sleeves and get ready to transform your bathroom into a cozy oasis with the simple addition of a heated towel rack. Let's dive in and make your bathroom experience even more enjoyable and indulgent.
Key Takeaways:
- Enjoy the luxury of warm, toasty towels by installing a heated towel rack in your bathroom. Follow the step-by-step guide to create a cozy oasis and elevate your daily routine.
- Prioritize safety and precision when installing a heated towel rack. Gather the necessary tools, turn off the power, and follow the manufacturer’s instructions for a successful and indulgent DIY project.
Step 1: Gather the Necessary Tools and Materials
Before you begin the installation process, it’s essential to gather all the tools and materials you’ll need to complete the project. By having everything on hand, you can streamline the installation and minimize interruptions. Here’s a comprehensive list of the tools and materials you’ll require:
- Heated Towel Rack: Ensure you have the heated towel rack unit, including any accompanying brackets and hardware.
- Measuring Tape: A reliable measuring tape will be essential for accurately marking the mounting points for the heated towel rack.
- Pencil or Marker: Use a pencil or marker to make precise markings on the wall where the rack will be installed.
- Screwdriver Set: A set of screwdrivers, including both flathead and Phillips head varieties, will be necessary for securing mounting brackets and electrical connections.
- Level: To ensure that the heated towel rack is installed perfectly straight, a level will be indispensable for achieving a professional-looking result.
- Wire Strippers and Electrical Tape: If the heated towel rack requires electrical wiring, wire strippers and electrical tape will be needed to make secure and safe connections.
- Drill and Bits: Depending on the type of wall surface, you may need a drill and appropriate drill bits for creating pilot holes and securing mounting brackets.
- Anchors and Screws: If the heated towel rack will be mounted on drywall or a similar surface, anchors and screws will be necessary for secure installation.
- Electrical Tester: For safety purposes, an electrical tester will allow you to verify that the power is off before working on the electrical connections.
By ensuring that you have all the required tools and materials at your disposal, you’ll be well-prepared to move on to the next steps of the installation process. With everything in place, you can proceed with confidence, knowing that you have everything you need to successfully install your heated towel rack.
Step 2: Turn Off the Power
Before you begin any work involving electrical components, it is crucial to prioritize safety. If your heated towel rack requires electrical power, the first step is to turn off the power supply to the area where you will be working. This ensures that you can handle the electrical connections without any risk of electric shock.
To turn off the power, locate your home’s electrical panel or fuse box. Once you have identified the correct circuit breaker or fuse, switch it to the "off" position to cut the power supply to the designated area. It’s a good practice to use a non-contact voltage tester to double-check that the power is indeed off before proceeding with the installation.
Remember, electrical safety should always be a top priority when working on any project that involves wiring or electrical components. By taking the time to turn off the power and verify that it is off, you can ensure a safe and secure installation process.
With the power safely turned off, you can proceed to the next steps of the installation with confidence, knowing that you have taken the necessary precautions to protect yourself and others from potential electrical hazards.
Step 3: Measure and Mark the Mounting Points
Accurate measurements and precise marking of the mounting points are essential for ensuring that your heated towel rack is installed securely and level. Before making any marks on the wall, carefully consider the height and location where the towel rack will be most convenient for daily use.
Using a measuring tape and a pencil, measure and mark the desired height for the bottom of the towel rack. Take into account the size of your towels and the clearance needed between the rack and any adjacent fixtures or the floor. Additionally, consider the location of the electrical outlet if your heated towel rack requires a power source.
Once you have determined the ideal placement, use a level to ensure that the mounting points are perfectly aligned. This step is crucial for achieving a professional and polished look once the installation is complete. Take your time to double-check the measurements and ensure that the marks are accurate before proceeding to the next step.
Remember, the success of your installation hinges on the precision of your measurements and markings. By taking the time to measure and mark the mounting points carefully, you can set the stage for a seamless and visually appealing installation of your heated towel rack.
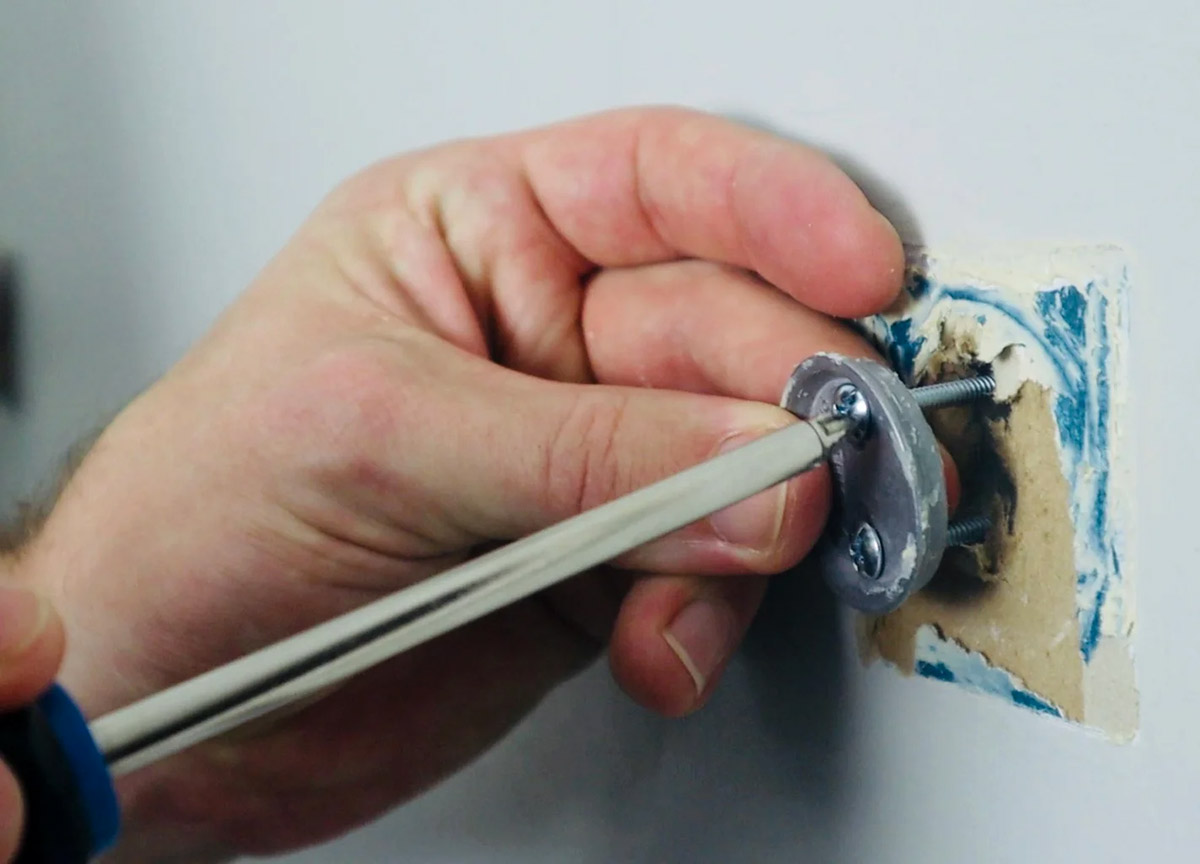
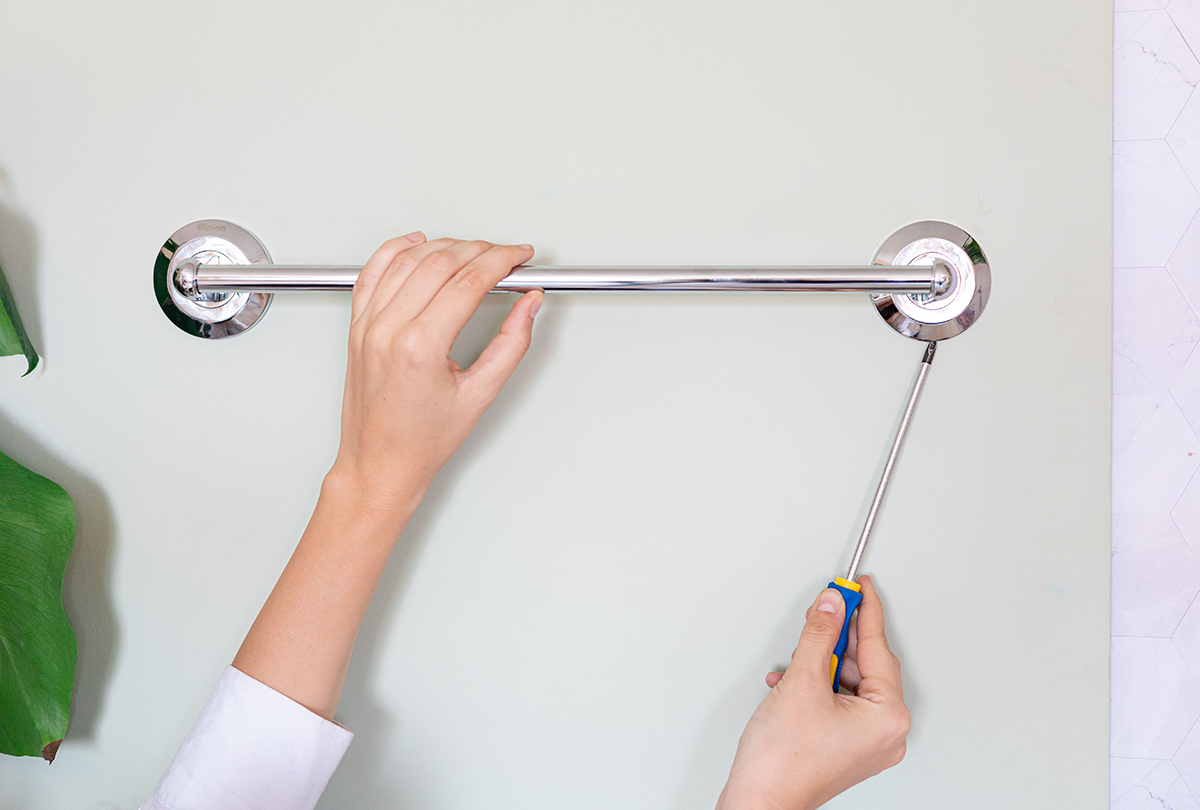
Step 4: Install the Mounting Brackets
With the mounting points marked and the height of the heated towel rack determined, it’s time to install the mounting brackets that will support the weight of the rack. Depending on the design of your towel rack, the mounting brackets may vary in style and configuration. Follow these general steps to securely install the brackets:
- Align the Brackets: Position the mounting brackets on the marked points of the wall, ensuring that they are level and aligned with each other. Use a level to verify that the brackets are perfectly horizontal before proceeding.
- Mark the Screw Holes: Once the brackets are aligned, use a pencil or marker to mark the locations of the screw holes on the wall. This will serve as a guide for drilling pilot holes to accommodate the screws.
- Drill Pilot Holes: Using an appropriate drill bit, carefully drill pilot holes at the marked locations. Be mindful of the wall surface and select the correct type of drill bit to ensure secure anchoring of the brackets.
- Secure the Brackets: With the pilot holes in place, use screws and a screwdriver to secure the mounting brackets to the wall. Ensure that the brackets are firmly attached and can support the weight of the heated towel rack.
- Double-Check Alignment: Once the brackets are installed, use a level to confirm that they are still perfectly aligned. Making any necessary adjustments at this stage will ensure that the final installation appears professional and visually appealing.
By following these steps, you can confidently install the mounting brackets for your heated towel rack, setting the stage for the next phase of the installation process. With the brackets securely in place, you are one step closer to enjoying the convenience and comfort of a warm towel within arm’s reach.
Before installing a heated towel rack, make sure to turn off the power to the area where you will be working to avoid any electrical accidents. Always follow the manufacturer’s instructions for installation to ensure safety and proper function.
Read more: How To Hang Towels On A Towel Rack
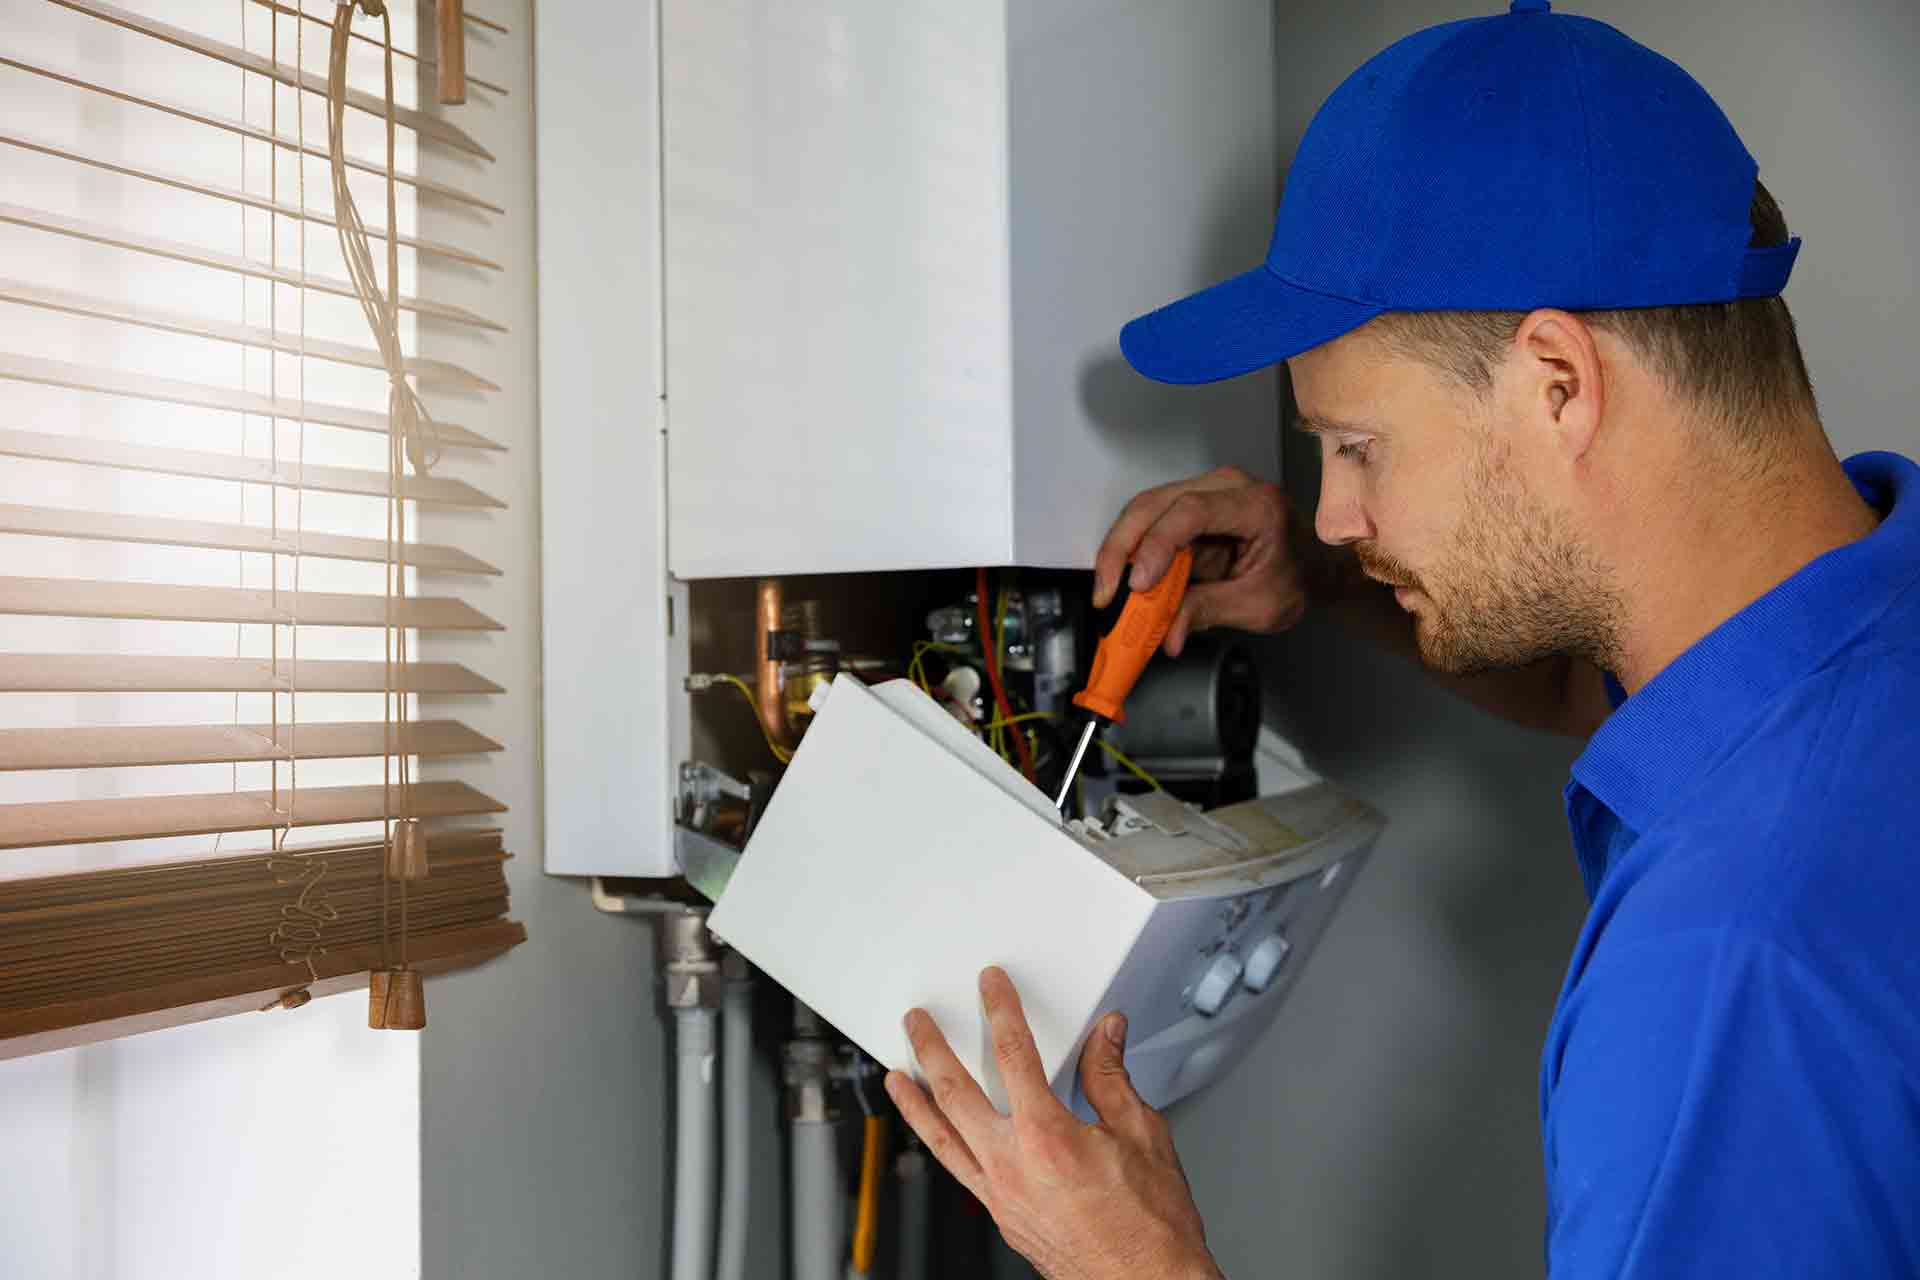
Step 5: Connect the Electrical Wiring
If your heated towel rack requires electrical power, the next crucial step is to connect the electrical wiring. Before proceeding, ensure that the power supply to the designated area is turned off at the electrical panel or fuse box to prevent any electrical hazards.
Follow these general guidelines for safely connecting the electrical wiring for your heated towel rack:
- Review the Manufacturer’s Instructions: Refer to the manufacturer’s guidelines and instructions provided with your heated towel rack. These instructions will outline the specific electrical requirements and wiring procedures for your particular model.
- Prepare the Wiring: If the towel rack comes with a pre-wired cord, carefully thread the cord through the designated openings or channels on the rack. For hardwired installations, ensure that the electrical wiring is appropriately prepared for connection.
- Make Secure Connections: For pre-wired models, follow the manufacturer’s instructions to make secure electrical connections, typically involving wire nuts or other approved connectors. If hardwiring, use wire strippers to prepare the electrical wires and connect them according to the specified wiring diagram.
- Secure and Insulate the Connections: After making the electrical connections, use electrical tape or other approved insulation materials to secure and insulate the wiring connections. This step is crucial for safety and to prevent any exposed wires or loose connections.
- Tuck Away Excess Wiring: Once the connections are secure, carefully tuck away any excess wiring within the designated compartments or channels on the heated towel rack. This will ensure a clean and tidy appearance once the installation is complete.
By following these steps and adhering to the manufacturer’s instructions, you can confidently connect the electrical wiring for your heated towel rack. Prioritizing safety and precision during this phase of the installation will ensure that your towel rack operates reliably and safely for years to come.
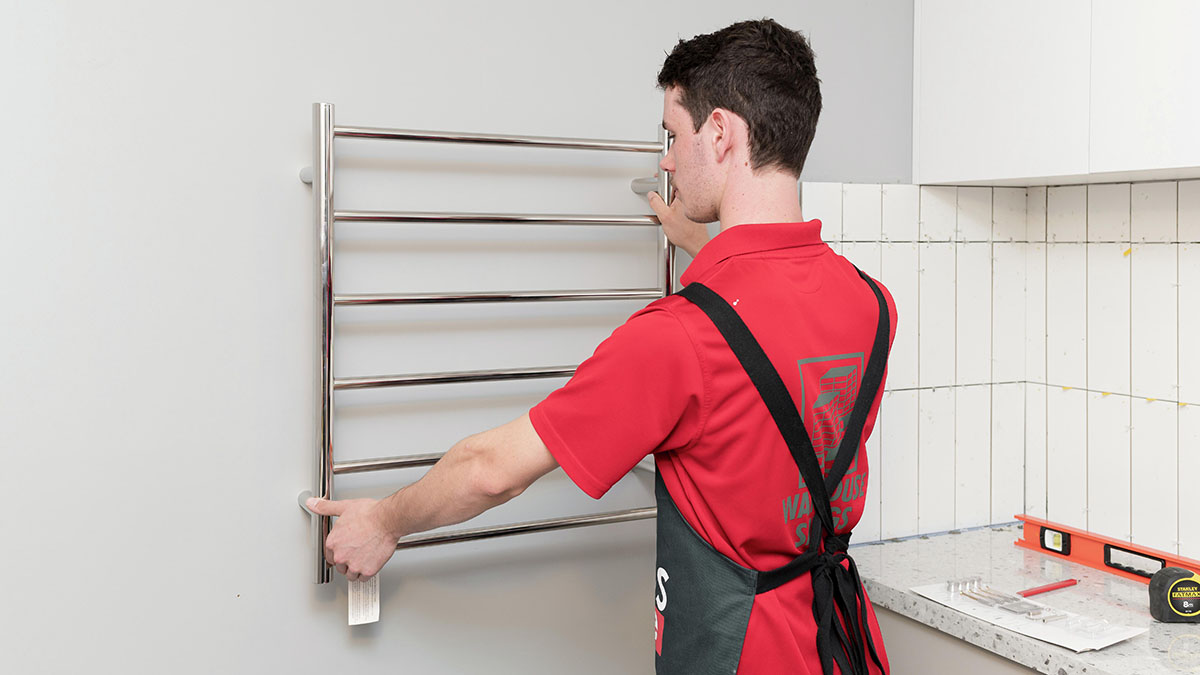
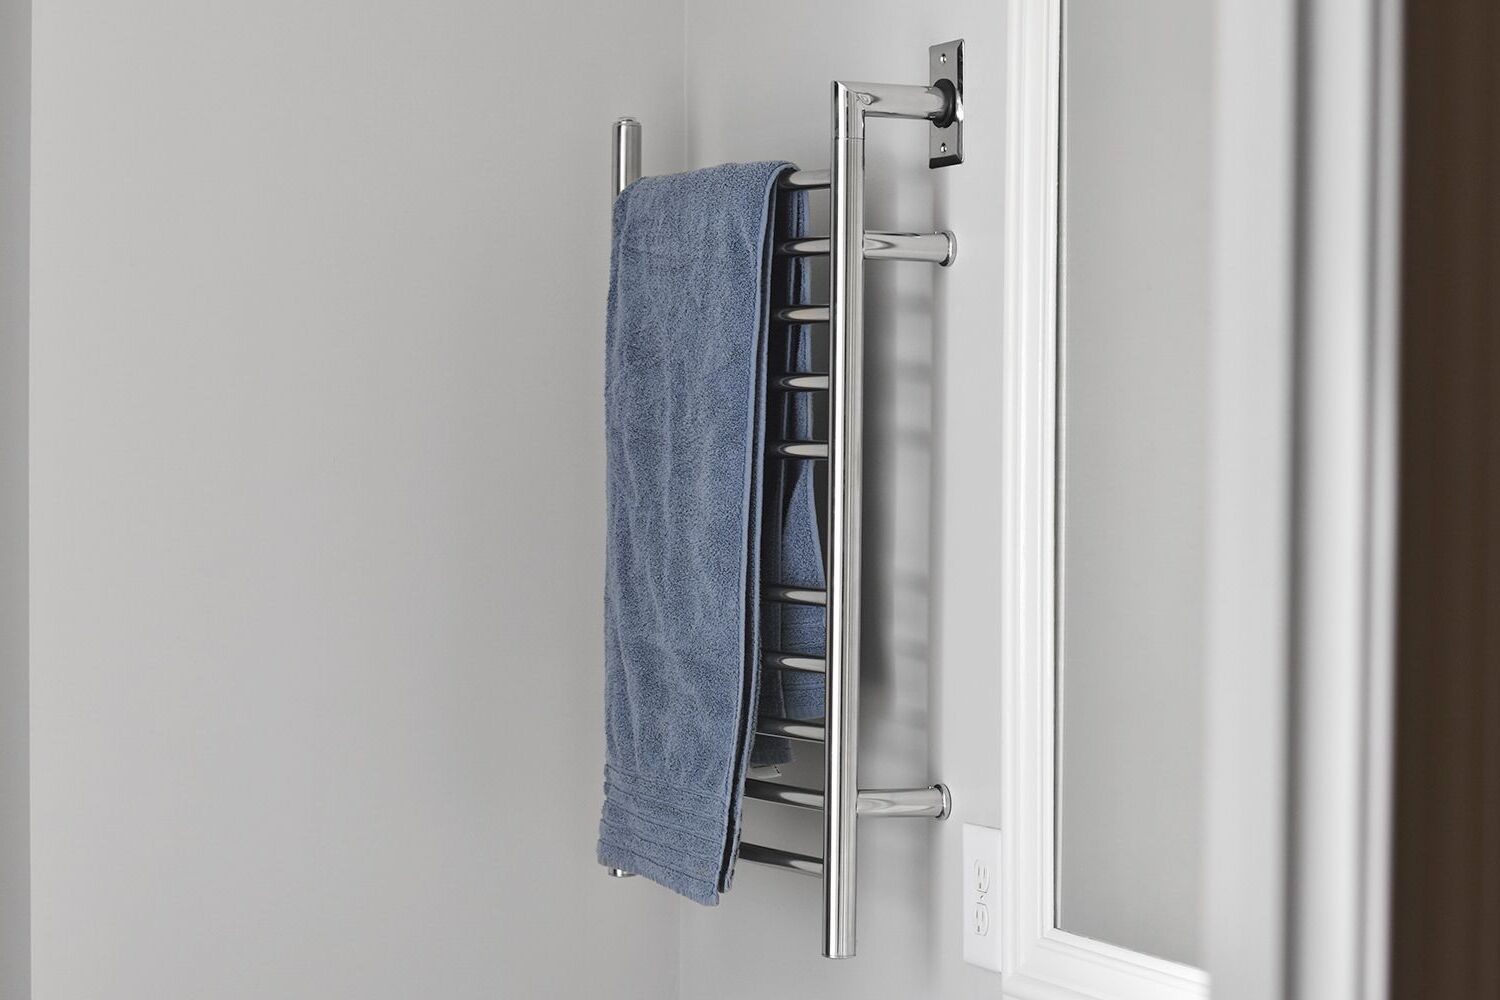
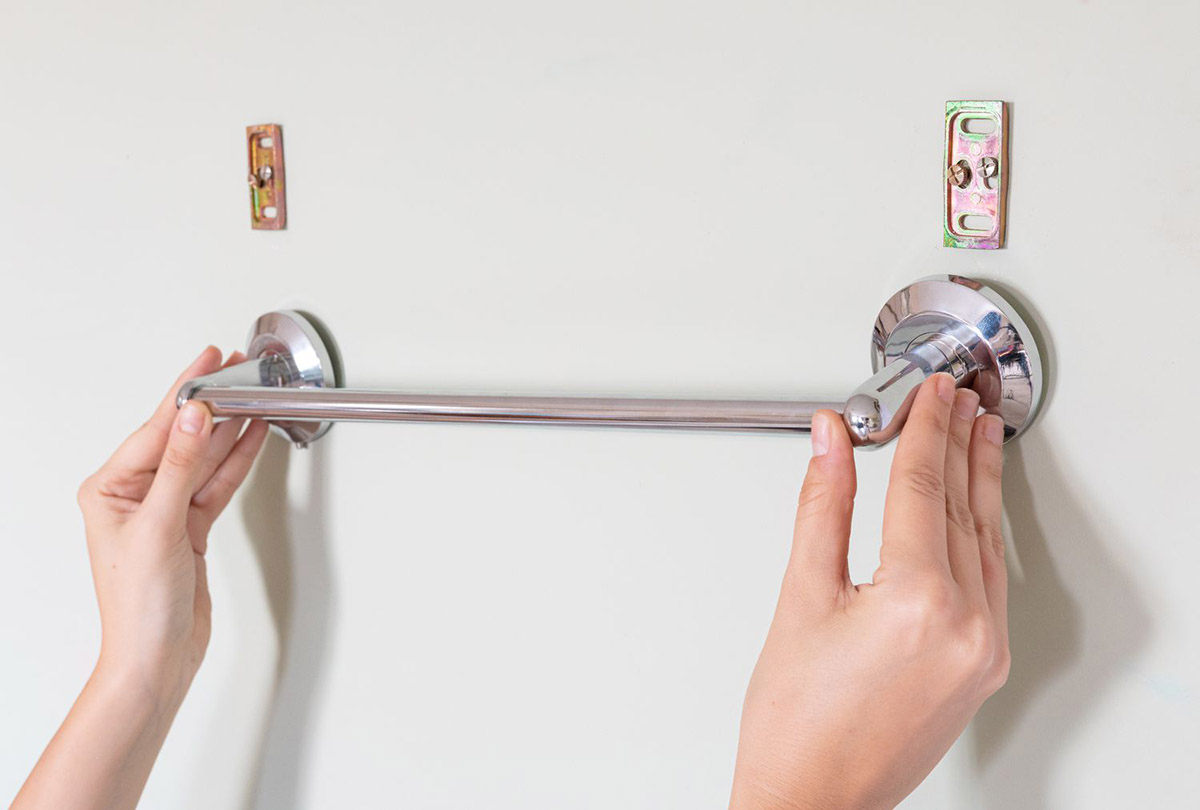
Step 6: Mount the Heated Towel Rack
With the mounting brackets securely in place and the electrical wiring connected, it’s time to mount the heated towel rack onto the brackets. Follow these steps to ensure a smooth and secure mounting process:
- Align the Rack: Carefully position the heated towel rack so that it aligns with the installed mounting brackets. Take your time to ensure that the rack is level and centered between the brackets for a professional and symmetrical appearance.
- Secure the Rack: Depending on the design of the towel rack, use the provided hardware or fasteners to secure the rack to the mounting brackets. Ensure that the rack is firmly attached and can support the weight of towels without any risk of instability.
- Double-Check Alignment: Once the rack is secured, use a level to confirm that it is still perfectly aligned and level. Making any necessary adjustments at this stage will ensure a visually appealing and professional installation.
- Tidy Up Excess Hardware: If applicable, use a screwdriver to tighten any visible hardware or fasteners and ensure that the appearance of the rack is clean and polished. Tuck away any excess wiring if your towel rack is hardwired for a neat and tidy finish.
By following these steps, you can confidently mount your heated towel rack onto the installed brackets, bringing you one step closer to enjoying the comfort and convenience of warm, toasty towels in your bathroom.
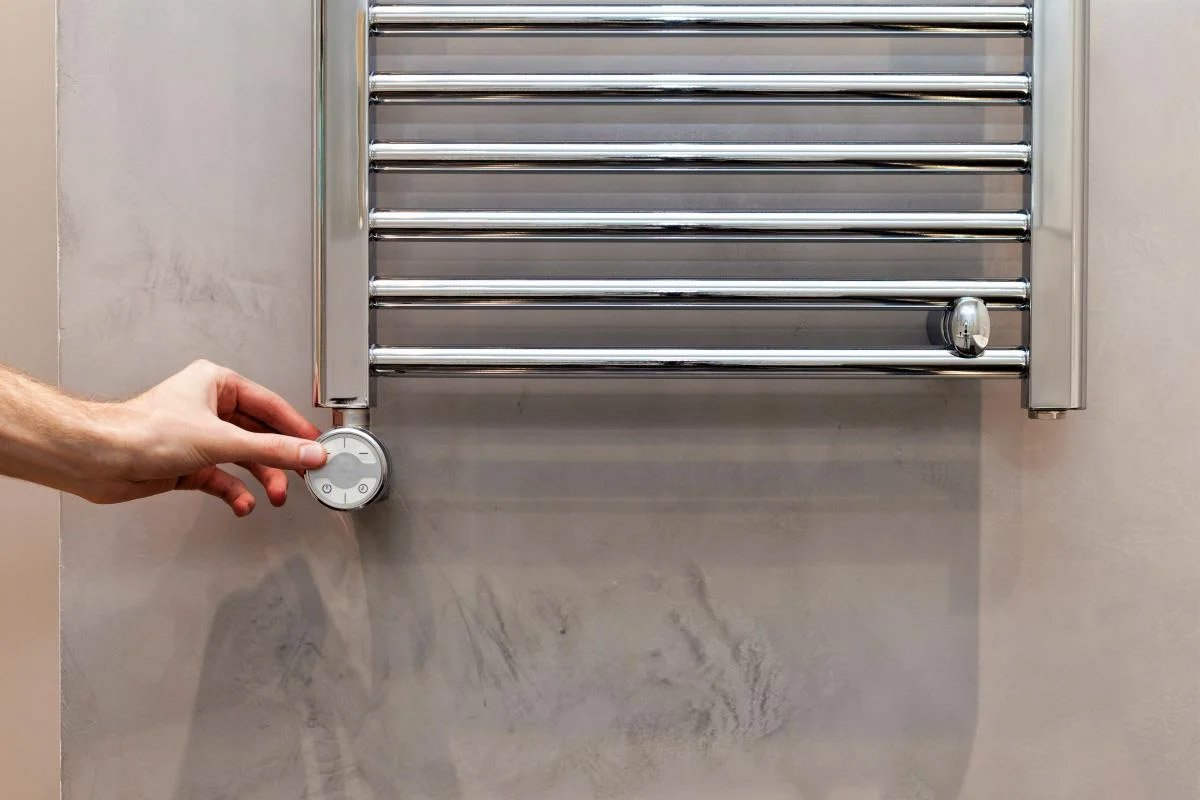
Step 7: Test the Heated Towel Rack
Before considering the installation complete, it’s crucial to test the functionality of your newly installed heated towel rack. This step ensures that the rack is operating as intended and that all electrical connections are secure. Follow these steps to test the heated towel rack:
- Restore Power: If you turned off the power supply during the installation process, carefully restore the power at the electrical panel or fuse box. This will activate the electrical components of the heated towel rack.
- Switch On the Rack: If your towel rack has an on/off switch or a designated control panel, switch it on to activate the heating elements. Allow the rack to operate for a few minutes to ensure that it reaches the desired temperature.
- Verify Heating Function: Gently touch the heated bars of the towel rack to verify that they are warming up as expected. Take note of any unusual odors or sounds, which could indicate a potential issue with the heating elements or electrical connections.
- Check Towel Warmth: Place a clean towel on the heated bars of the rack and allow it to warm up for a few minutes. Verify that the towel becomes comfortably warm, indicating that the rack is functioning properly.
- Test Timer and Settings: If your heated towel rack features adjustable settings or a timer, test these functions to ensure that you can customize the heating operation according to your preferences.
By conducting these tests, you can confirm that your heated towel rack is operating safely and efficiently. If you encounter any issues during the testing phase, such as a malfunctioning heating element or unusual behavior, it’s essential to address these concerns promptly to ensure the long-term functionality of your towel rack.
Once you have verified that the heated towel rack is operating as intended, you can confidently consider the installation process complete. With a warm, luxurious towel at your disposal, you can now enjoy the comfort and convenience that a heated towel rack brings to your daily routine.
Conclusion
Congratulations on successfully installing your heated towel rack! By following the comprehensive steps outlined in this guide, you have transformed your bathroom into a cozy oasis of comfort and luxury. The addition of a heated towel rack not only enhances the functionality of your bathroom but also elevates the overall ambiance, providing a touch of indulgence to your daily routine.
As you bask in the warmth of your freshly installed towel rack, take a moment to appreciate the meticulous effort and attention to detail that went into the installation process. From gathering the necessary tools and materials to carefully connecting the electrical wiring and mounting the rack, each step contributed to the seamless integration of this convenient and comforting feature in your bathroom.
With your heated towel rack in place, you can look forward to the delightful sensation of wrapping yourself in a warm, toasty towel after every shower. The convenience and luxury it brings will undoubtedly enhance your daily routine and elevate your bathroom experience to new heights.
As you revel in the comfort and convenience of your heated towel rack, take pride in the accomplishment of a successful DIY project. Your dedication to creating a welcoming and functional space has resulted in a transformation that you can enjoy every day.
Thank you for allowing us to guide you through the installation process of your heated towel rack. We hope this guide has empowered you to take on future DIY projects with confidence, knowing that you have the knowledge and skills to enhance your living space in meaningful and enjoyable ways.
Here’s to many cozy and comforting moments with your new heated towel rack. Enjoy the warmth and luxury it brings to your home!
Frequently Asked Questions about How To Install A Heated Towel Rack
Was this page helpful?
At Storables.com, we guarantee accurate and reliable information. Our content, validated by Expert Board Contributors, is crafted following stringent Editorial Policies. We're committed to providing you with well-researched, expert-backed insights for all your informational needs.


0 thoughts on “How To Install A Heated Towel Rack”