Home>Furniture & Design>Bathroom Accessories>How To Remove Tushy Bidet
Bathroom Accessories
How To Remove Tushy Bidet
Modified: May 6, 2024
Learn how to remove a Tushy bidet and make changes to your bathroom accessories with our step-by-step guide. Upgrade your bathroom with ease!
(Many of the links in this article redirect to a specific reviewed product. Your purchase of these products through affiliate links helps to generate commission for Storables.com, at no extra cost. Learn more)
Introduction
Removing a Tushy bidet may seem like a daunting task, but with the right guidance, it can be a straightforward process. Whether you're looking to replace your bidet, perform maintenance, or relocate it to a different toilet, understanding the steps involved is crucial. By following a systematic approach, you can ensure a smooth and hassle-free removal process.
In this comprehensive guide, we will walk you through the step-by-step process of removing a Tushy bidet from your toilet. From turning off the water supply to cleaning the area post-removal, each step is essential for a successful bidet removal. By the end of this guide, you will have the knowledge and confidence to tackle this task with ease.
So, if you're ready to bid adieu to your Tushy bidet, let's dive into the detailed steps that will enable you to remove it effectively. Whether you're a seasoned DIY enthusiast or a novice looking to expand your home maintenance skills, this guide is designed to equip you with the necessary know-how to complete the task efficiently.
Now, without further ado, let's embark on this journey to remove your Tushy bidet and ensure that you have all the information and guidance required to accomplish this task with precision and confidence.
Key Takeaways:
- Removing a Tushy bidet is a step-by-step process involving turning off the water supply, disconnecting the bidet from the toilet, removing the bidet attachment, and cleaning the area post-removal. Each step ensures a safe and efficient bidet removal experience.
- By following the detailed steps in this guide, you can successfully remove your Tushy bidet with precision and confidence. From turning off the water supply to cleaning the area post-removal, each step plays a crucial role in ensuring a seamless and efficient bidet removal process.
Read more: What Is A Tushy Bidet
Step 1: Turn off the Water Supply
Before initiating the process of removing your Tushy bidet, it is crucial to start by turning off the water supply to the bidet. This step is essential to prevent any water leakage or spillage during the removal process. Here's a detailed guide on how to effectively turn off the water supply:
-
Locate the Water Shut-Off Valve: The water shut-off valve is typically located on the wall behind the toilet. It is essential to identify the correct valve to ensure that the water supply to the bidet is effectively turned off.
-
Turn the Valve Clockwise: Once you have located the water shut-off valve, use your hand to turn the valve in a clockwise direction. This action will stop the flow of water to the bidet, preventing any potential leaks or water-related issues during the removal process.
-
Check for Water Flow: After turning off the valve, it is advisable to flush the toilet and operate the bidet to ensure that the water supply has been successfully cut off. This step will help you confirm that the shut-off valve has effectively stopped the flow of water to the bidet.
-
Prepare for Residual Water: Despite turning off the water supply, there may still be residual water within the bidet and the connecting hoses. To address this, it is recommended to have a towel or a small container ready to catch any remaining water that may drain out during the removal process.
By following these steps to turn off the water supply, you can ensure a safe and efficient start to the bidet removal process. This initial step sets the foundation for the subsequent stages of removing the Tushy bidet, allowing you to proceed with the confidence that the water supply has been effectively cut off.
With the water supply successfully turned off, you are now ready to proceed to the next step of disconnecting the bidet from the toilet, bringing you one step closer to completing the bidet removal process.
Step 2: Disconnect the Bidet from the Toilet
With the water supply effectively turned off, the next crucial step in removing your Tushy bidet is to disconnect it from the toilet. This process involves separating the bidet attachment from the toilet fixture, allowing for a seamless and safe removal. Here's a detailed guide on how to effectively disconnect the bidet from the toilet:
-
Prepare the Necessary Tools: Before proceeding with the disconnection process, it is essential to gather the required tools. These may include an adjustable wrench, pliers, and a screwdriver, depending on the specific installation of your Tushy bidet. Having the necessary tools at hand will streamline the disconnection process and ensure that you can address any fixtures or connections securely.
-
Locate the Attachment Points: Take a moment to identify the attachment points that connect the bidet to the toilet. This may include securing bolts, nuts, or brackets that fasten the bidet in place. Understanding the attachment points will provide clarity on the areas that require attention during the disconnection process.
-
Loosen and Remove Fasteners: Using the appropriate tools, carefully loosen and remove the fasteners that secure the bidet to the toilet. This may involve unscrewing bolts or nuts that hold the bidet attachment in place. Exercise caution and ensure that the bidet is adequately supported as you remove the fasteners to prevent any accidental damage or mishaps.
-
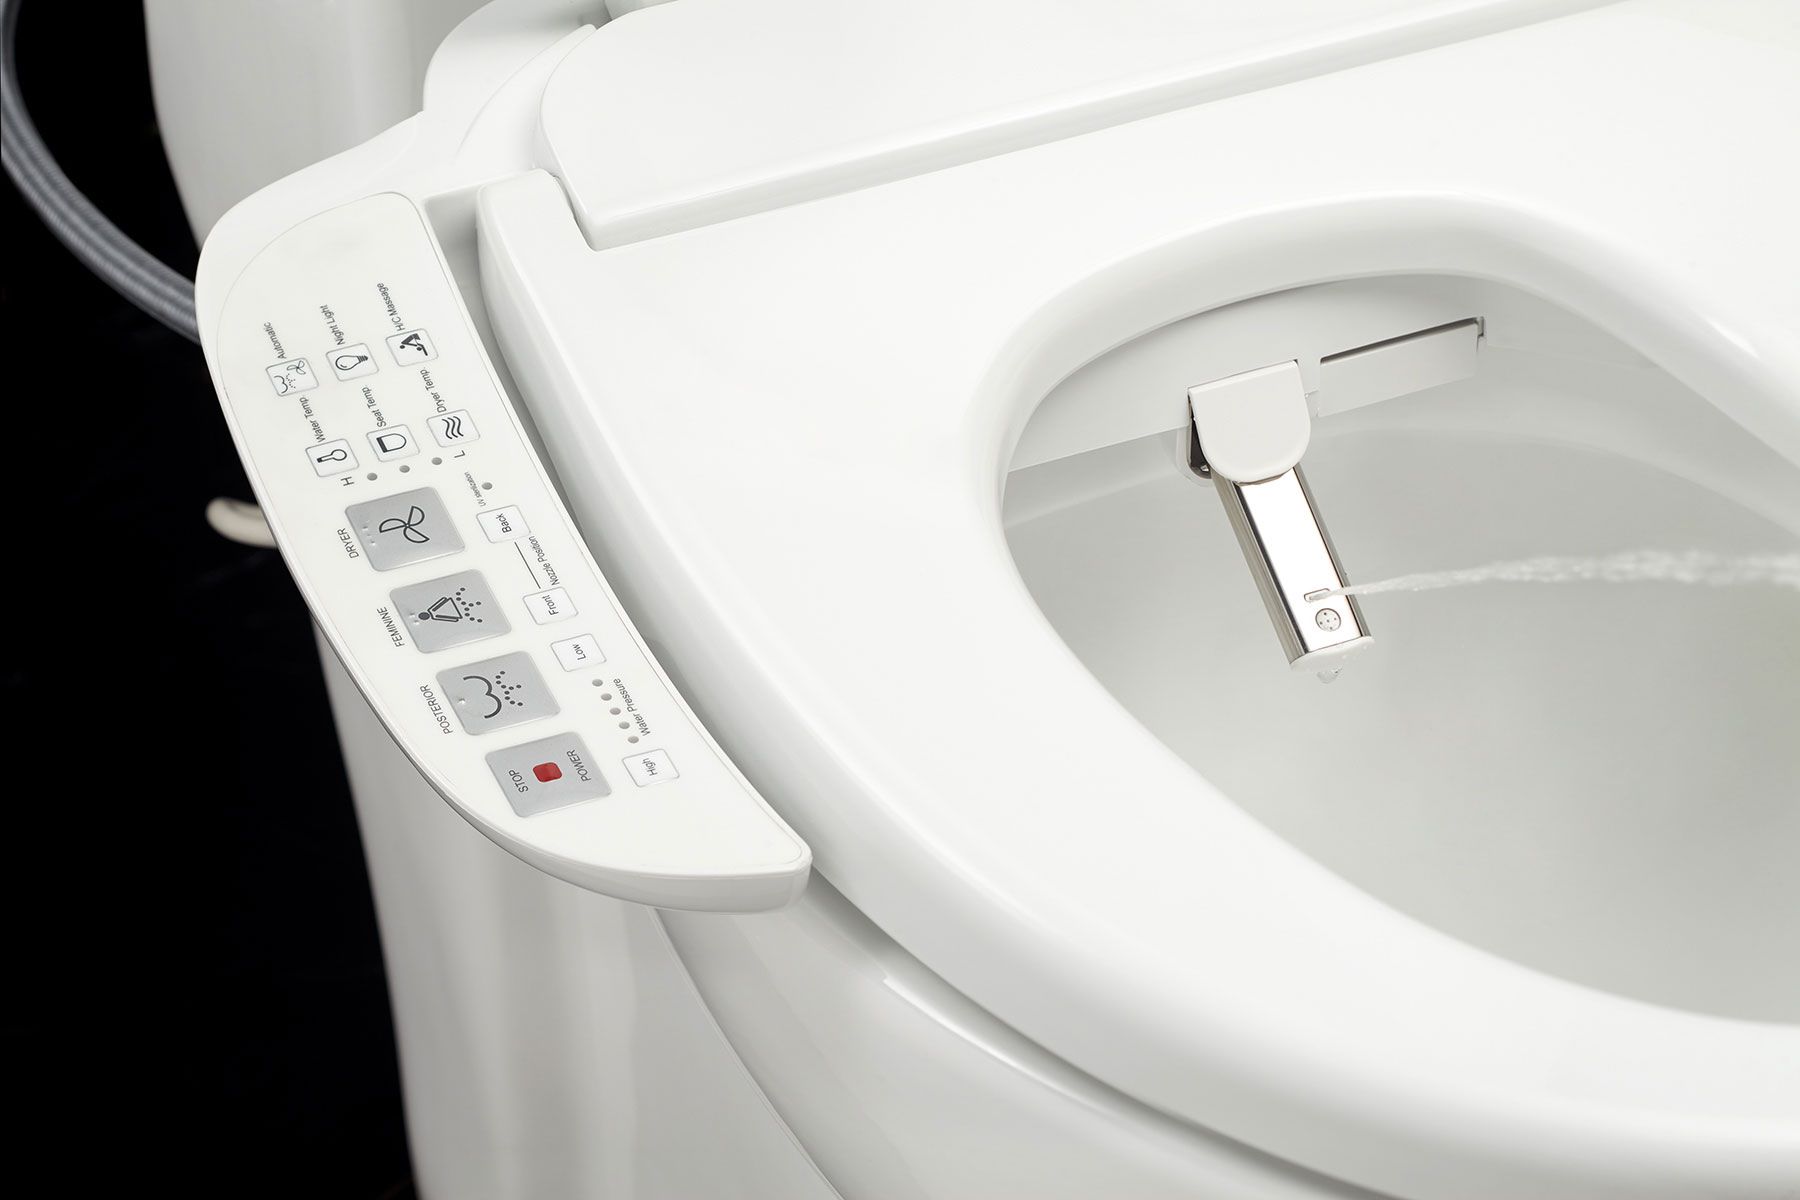
Disconnect Water Hoses: Once the bidet is no longer secured to the toilet, proceed to disconnect the water hoses that supply water to the bidet. Depending on the specific configuration, there may be one or two water hoses connected to the bidet. Use pliers to carefully loosen the hose connections and detach them from the bidet, allowing for the complete separation of the water supply.
-
Inspect for Residual Water: After disconnecting the water hoses, it is advisable to inspect the bidet and the surrounding area for any residual water. Any remaining water within the hoses or the bidet itself should be carefully drained or wiped to ensure a clean and dry disconnection process.
By following these detailed steps to disconnect the bidet from the toilet, you can effectively navigate the disconnection process with precision and confidence. This pivotal stage brings you closer to successfully removing your Tushy bidet, setting the stage for the subsequent steps in the bidet removal process.
To remove a Tushy bidet, start by turning off the water supply and disconnecting the bidet hose. Then, unscrew the mounting bracket and carefully remove the bidet from the toilet. Finally, clean the area and plug the hole if necessary.
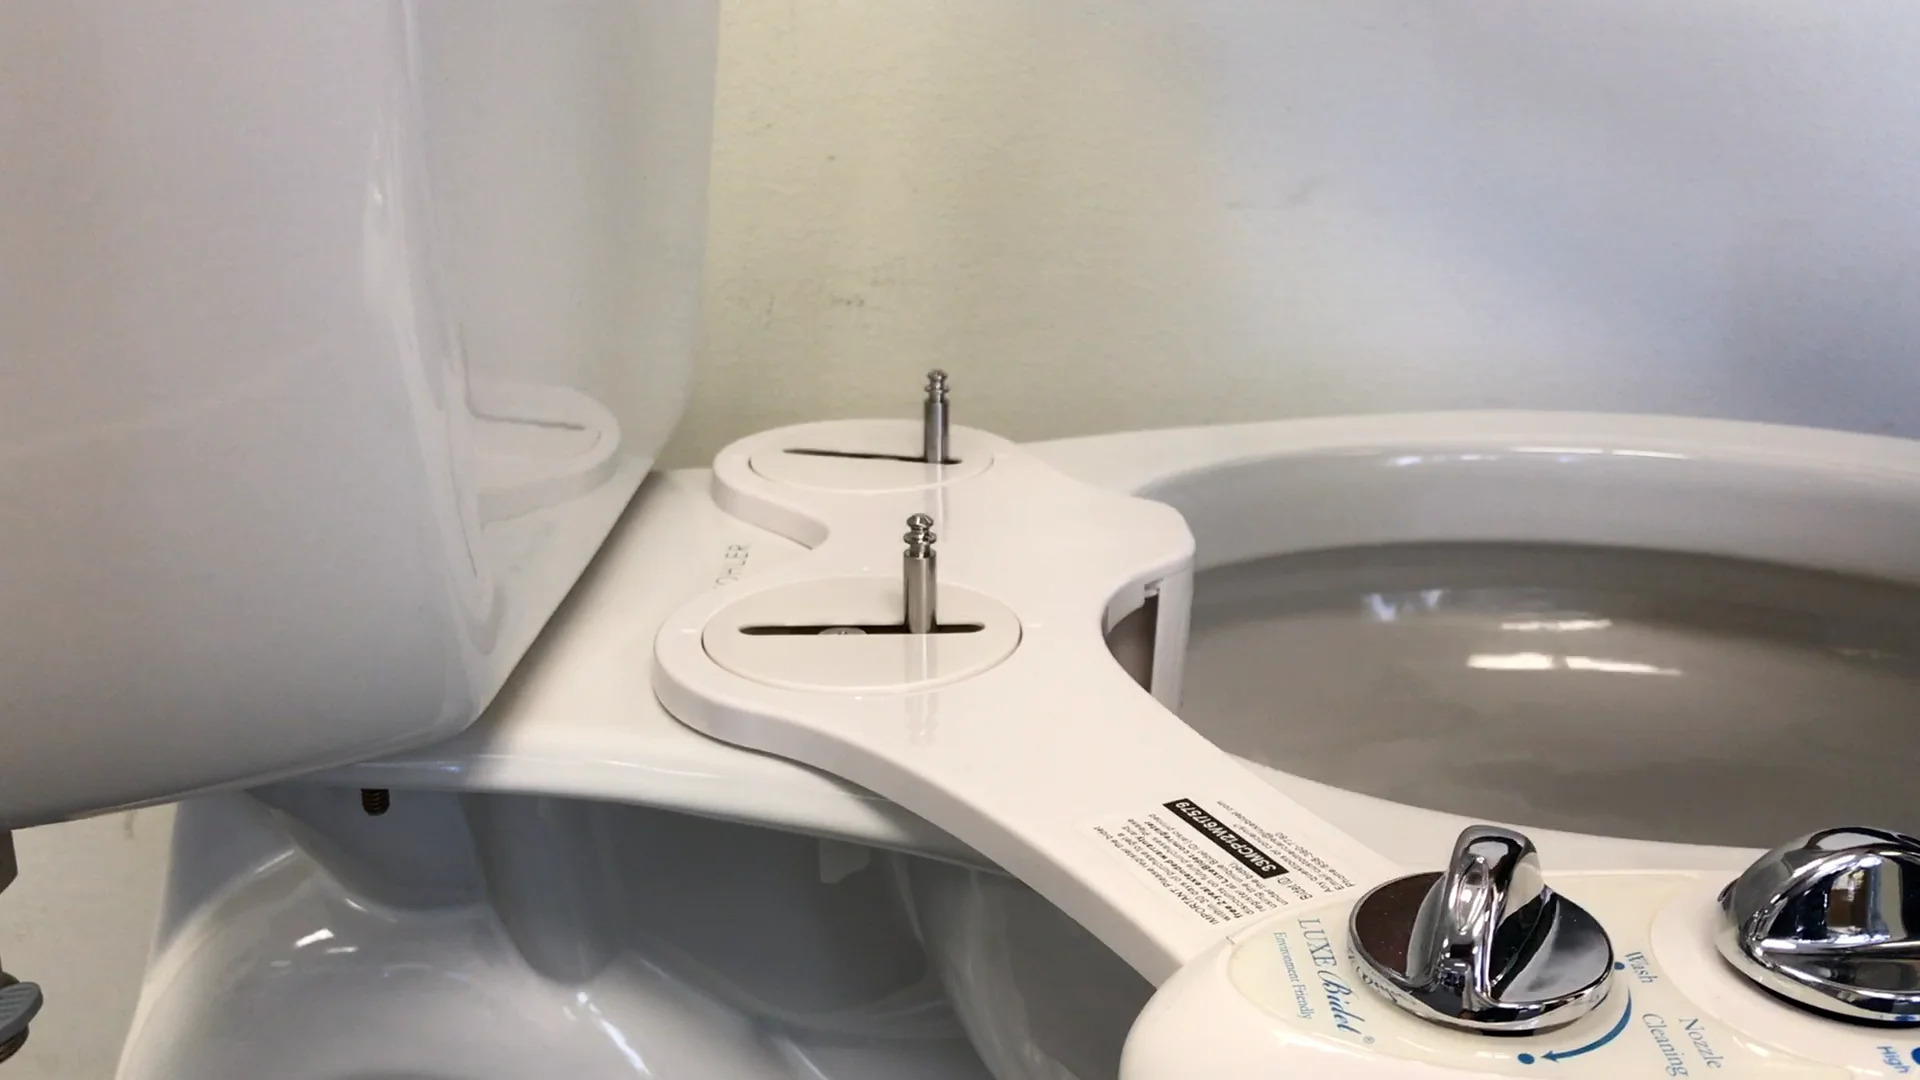
Step 3: Remove the Bidet Attachment
With the bidet effectively disconnected from the toilet, the next critical step in the removal process is to focus on removing the bidet attachment itself. This stage involves detaching the bidet unit from its mounting bracket or base, allowing for a complete separation from the toilet fixture. Here's a detailed guide on how to effectively remove the bidet attachment:
-
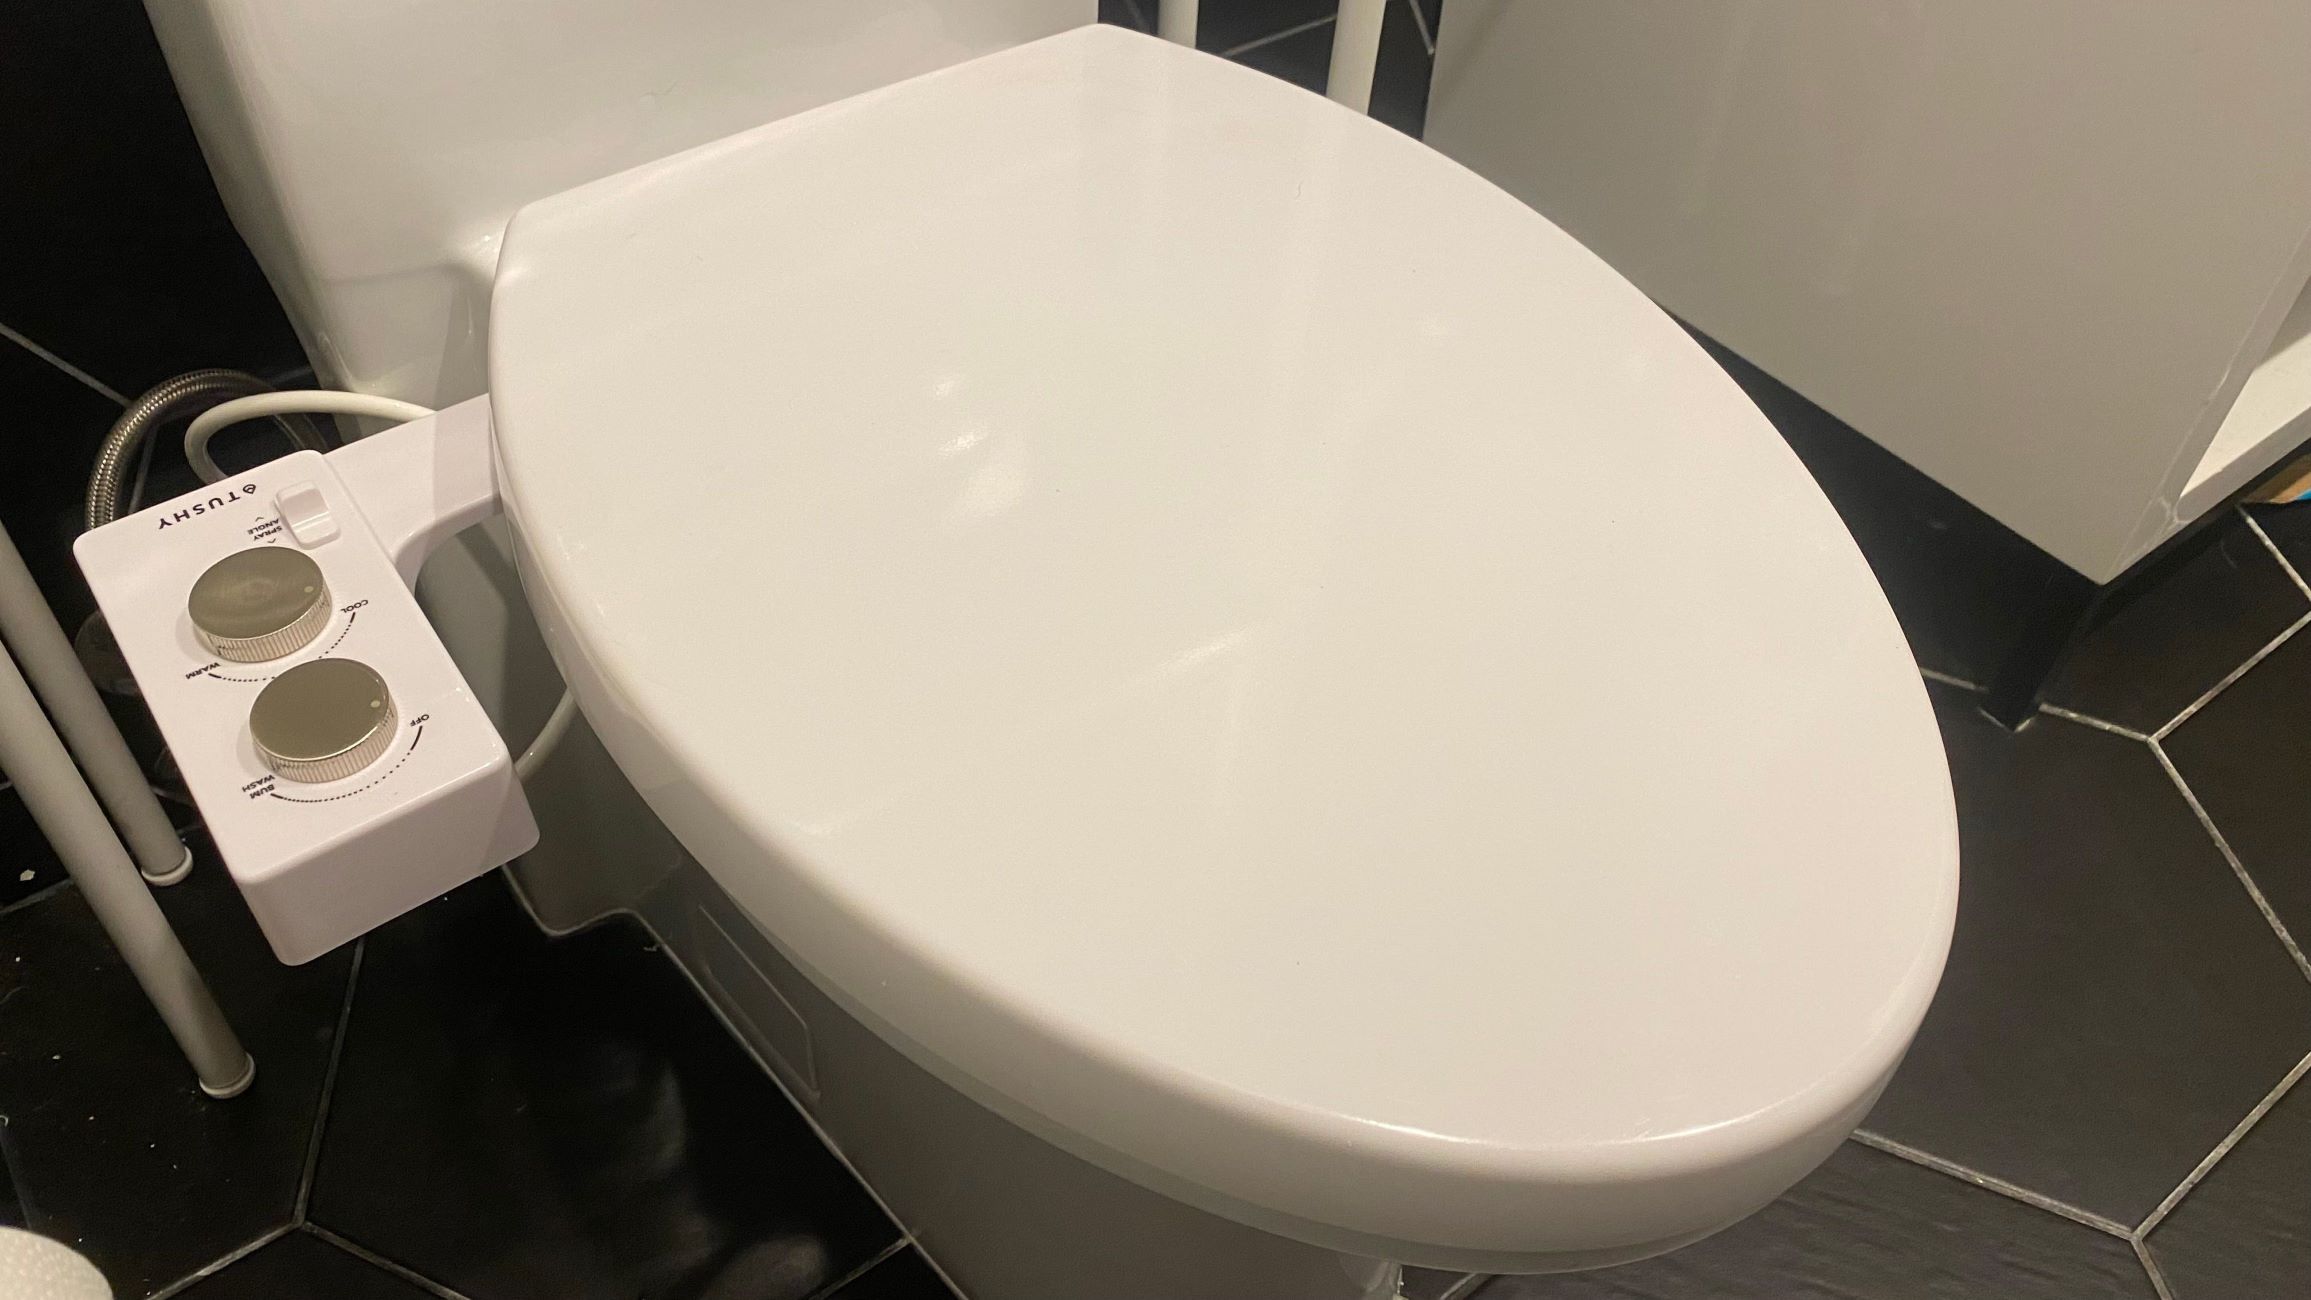
Assess the Mounting Mechanism: Take a moment to assess the specific mounting mechanism used to secure the bidet attachment. This may include a mounting bracket, adhesive pads, or other fastening methods. Understanding the mounting mechanism will provide clarity on the approach required for safe and secure removal.
-
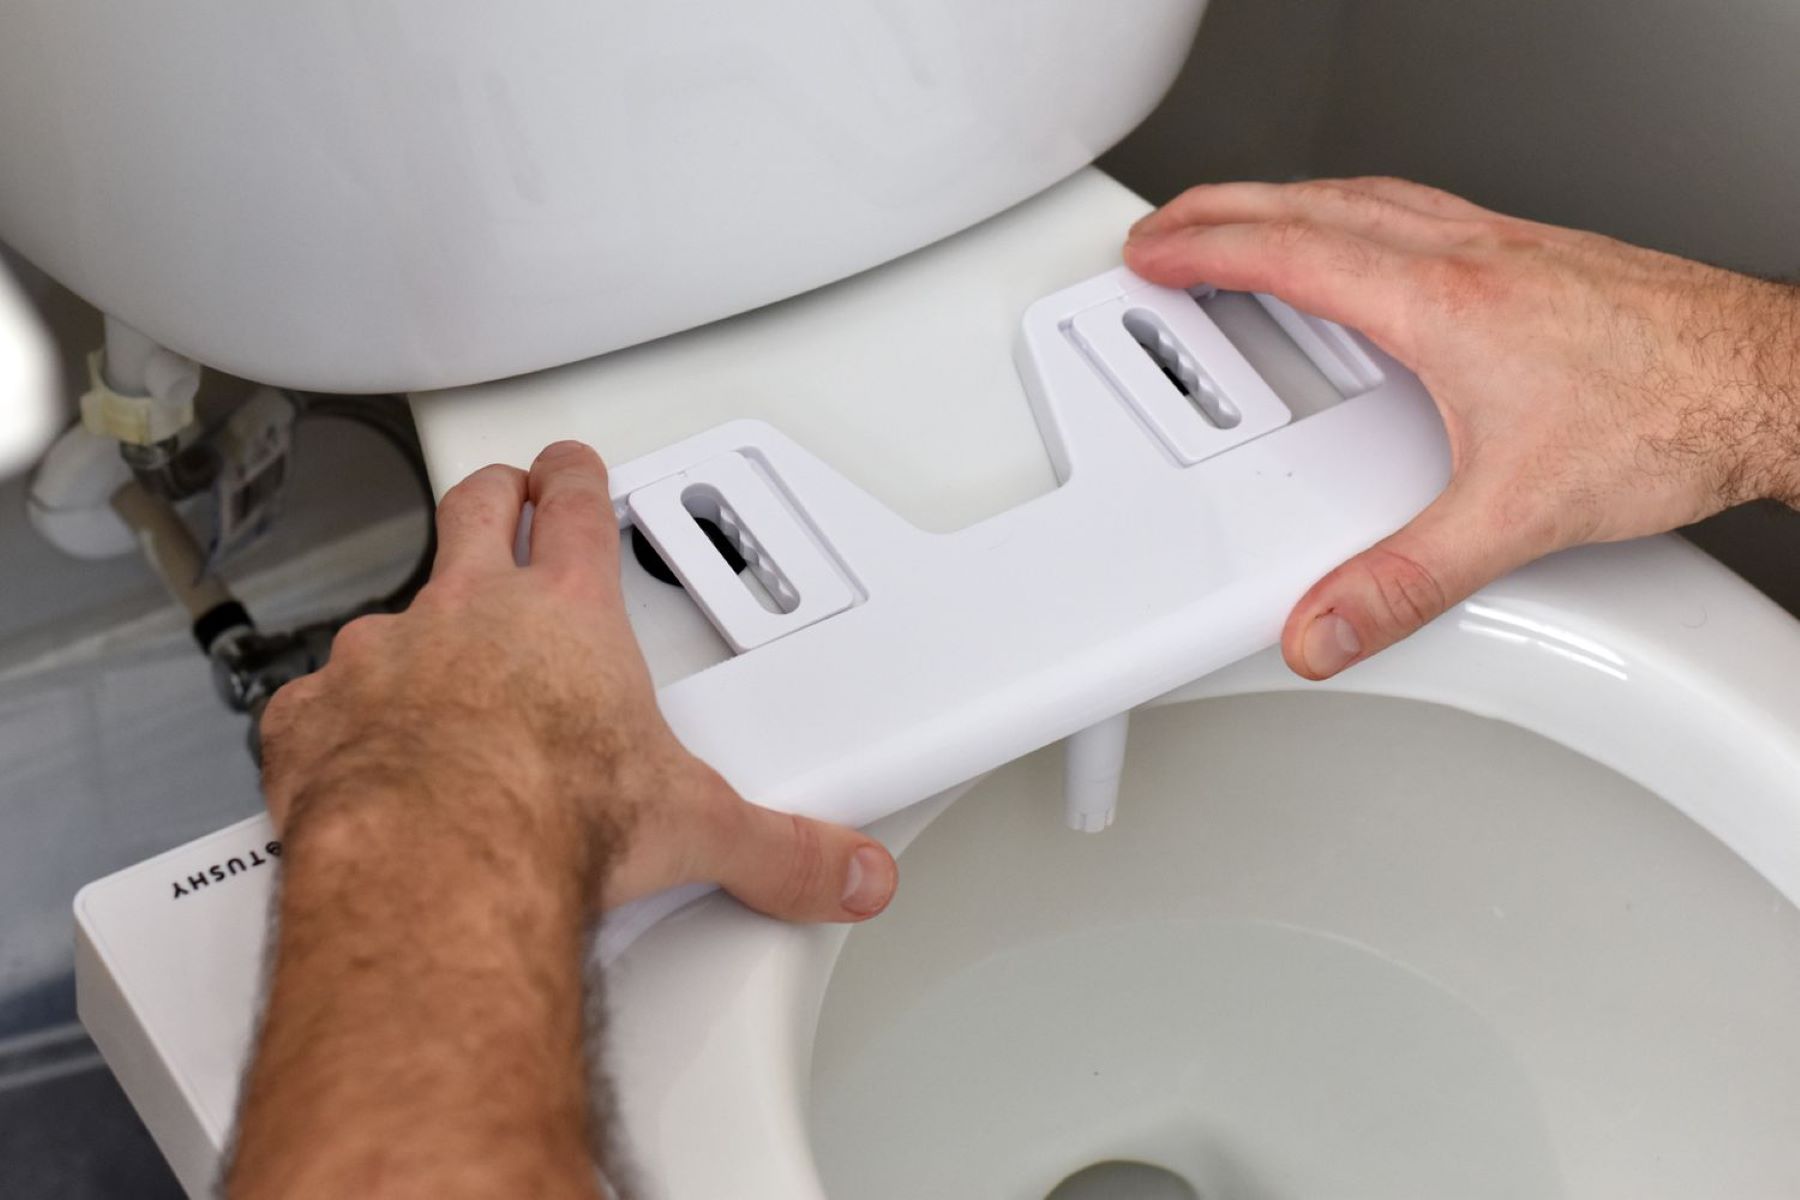
Release the Bidet from the Mounting: Depending on the type of mounting used, carefully release the bidet from its attachment point. If the bidet is secured with a mounting bracket, use a screwdriver or appropriate tool to loosen and remove the screws or fasteners holding it in place. For adhesive pads, gently pry the bidet away from the surface, ensuring a gradual and controlled release.
-
Support the Bidet during Removal: As you release the bidet from its mounting, it is essential to provide adequate support to prevent any sudden drops or damage. Ensure that the bidet is securely held as it is being detached, maintaining a stable and controlled removal process.
-
Inspect for Residue: After removing the bidet attachment, inspect the mounting area for any adhesive residue or leftover fasteners. If adhesive pads were used, gently remove any remaining adhesive and clean the surface to prepare it for potential reinstallation or alternative use.
-
Secure the Bidet for Storage or Disposal: Once the bidet attachment has been successfully removed, it is advisable to secure it for storage or disposal, depending on your specific requirements. If you plan to reinstall the bidet in the future, store it in a safe and dry location to maintain its condition.
By following these detailed steps to remove the bidet attachment, you can effectively navigate this crucial stage of the bidet removal process. With the bidet attachment successfully detached, you are one step closer to completing the removal process and addressing any subsequent maintenance or installation needs.
This comprehensive guide provides the necessary insights and guidance to empower you to remove your Tushy bidet with confidence and precision, ensuring a seamless and efficient removal process.
Step 4: Clean the Area
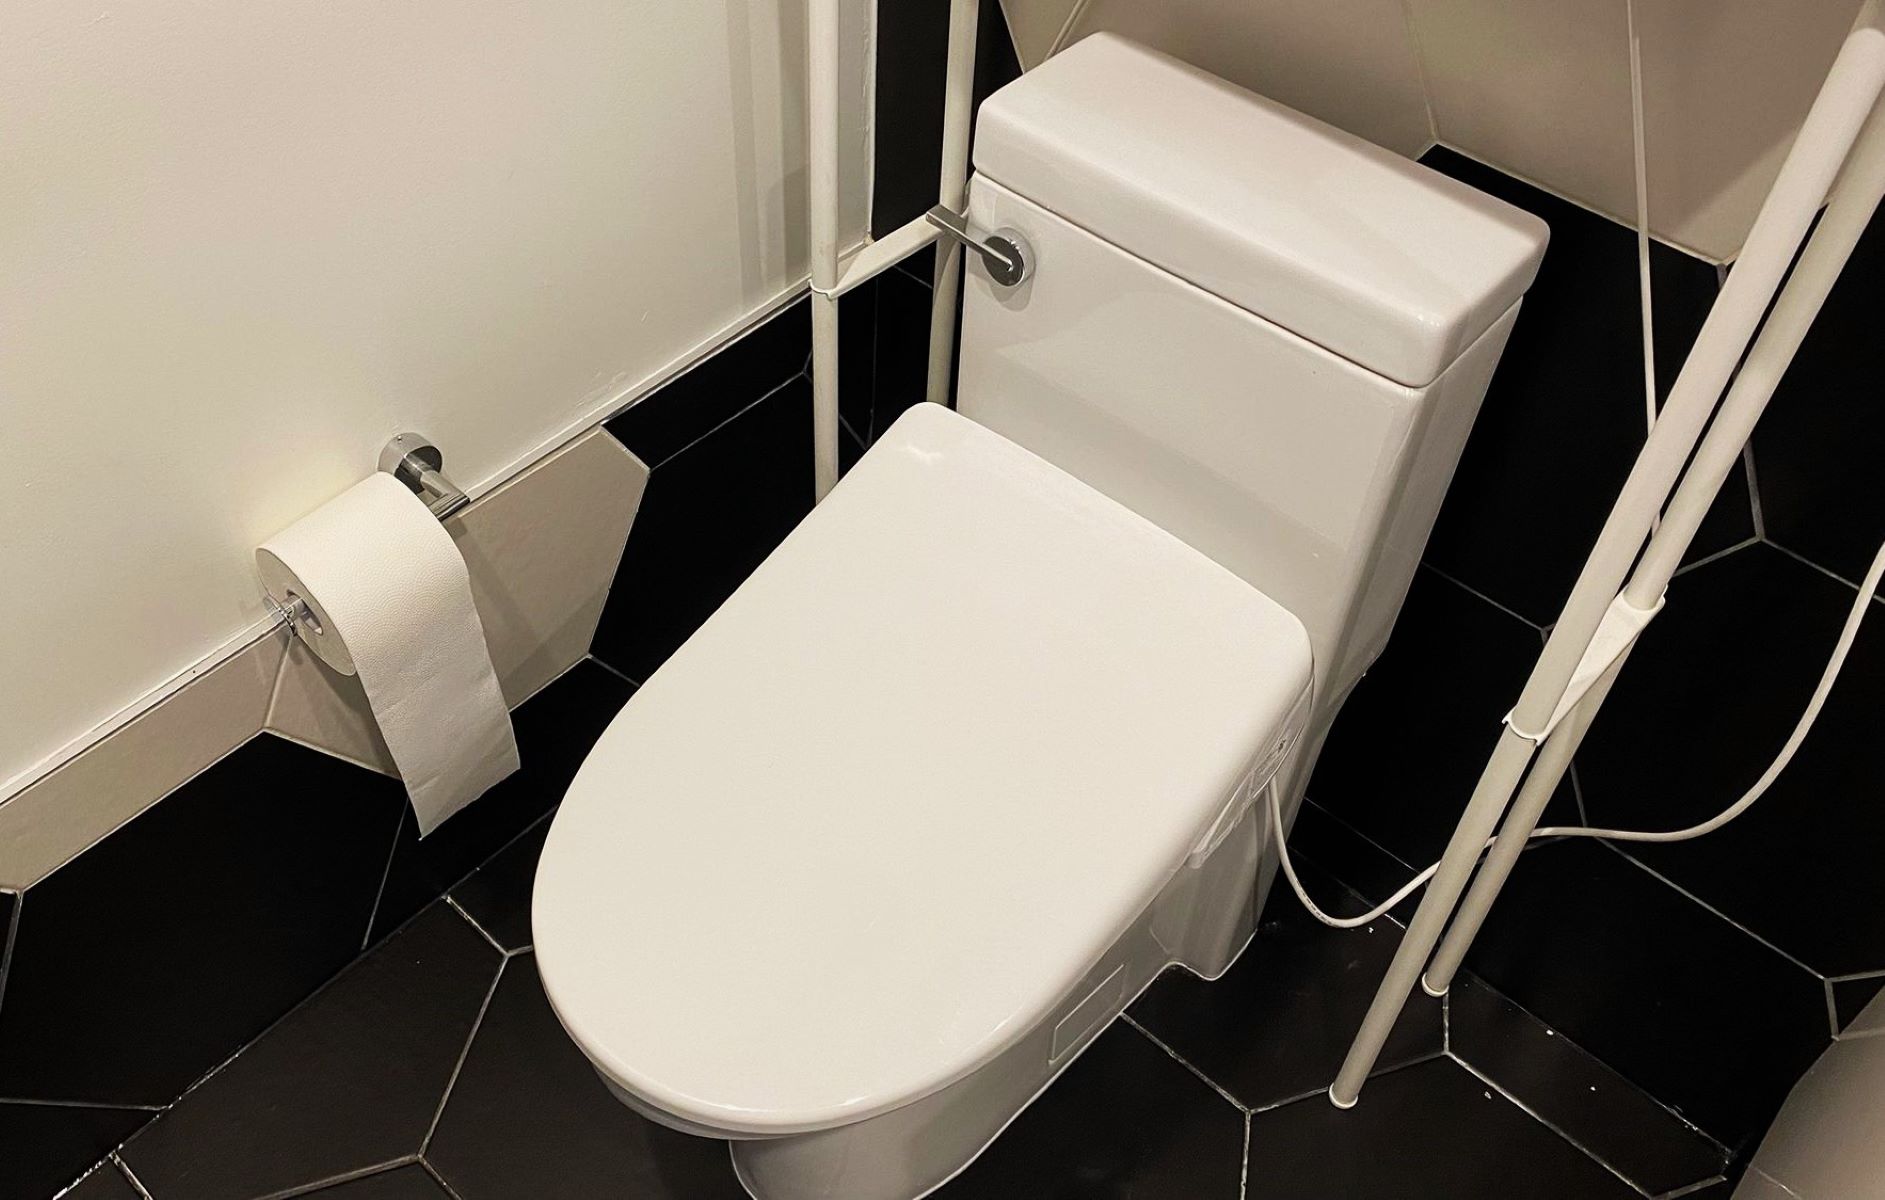
Once the Tushy bidet has been successfully removed from the toilet, it is essential to focus on cleaning the surrounding area to ensure a tidy and well-maintained space. This step not only contributes to the overall aesthetics of the bathroom but also sets the stage for potential reinstallation or the use of the space for alternative purposes.
Here's a detailed guide on how to effectively clean the area after removing the bidet:
-
Clear Debris and Residue: Begin by clearing any debris or residual materials around the area where the bidet was installed. This may include dust, small particles, or leftover fasteners. Use a soft brush or a damp cloth to gently remove any accumulated debris, ensuring a clean and clear surface.
-
Inspect for Stains or Marks: Take a moment to inspect the area for any potential stains or marks left behind by the bidet attachment. Depending on the surface material, such as porcelain or ceramic, use an appropriate cleaning solution to address any visible marks. A mild mixture of water and vinegar can effectively tackle stubborn stains without causing damage to the surface.
-
Sanitize the Surrounding Area: Prioritize the sanitation of the area by using a disinfectant cleaner or a mild soap solution. Wipe down the surrounding surfaces, including the toilet fixture and the immediate area where the bidet was installed, to ensure a hygienic and germ-free environment. Pay attention to corners and crevices that may harbor dirt or grime.
-
Address Water Residue: If there is any residual water or moisture present after the bidet removal, use a dry cloth or towel to absorb and remove it. Ensuring that the area is completely dry is essential to prevent any potential water-related issues and to maintain the overall cleanliness of the space.
-
Prepare for Reinstallation or Alternative Use: If you plan to reinstall a bidet or utilize the space for alternative purposes, take this opportunity to prepare the area accordingly. This may involve ensuring that the toilet fixture is securely in place, evaluating the condition of the water supply connections, and considering any potential adjustments for future installations.
By following these detailed steps to clean the area post-bidet removal, you can effectively restore the space to its optimal condition. This final stage of the bidet removal process sets the foundation for potential future use or reinstallation, ensuring that the area is well-maintained and ready for its next purpose.
Read more: How To Uninstall Tushy Bidet
Conclusion
Congratulations on successfully removing your Tushy bidet! By following the comprehensive steps outlined in this guide, you have effectively navigated the bidet removal process with precision and confidence. As you reflect on the journey from turning off the water supply to cleaning the area post-removal, it's evident that each step played a crucial role in ensuring a seamless and efficient bidet removal experience.
The process of turning off the water supply marked the initial step, setting the stage for a safe and controlled removal process. By carefully locating the water shut-off valve and confirming the cessation of water flow, you took a proactive approach to prevent any potential water-related issues during the bidet removal.
Subsequently, the meticulous disconnection of the bidet from the toilet showcased your attention to detail and commitment to a secure removal process. By identifying the attachment points, loosening and removing fasteners, and disconnecting water hoses with precision, you effectively separated the bidet from the toilet fixture, laying the groundwork for the next stage.
Removing the bidet attachment itself required a methodical approach, ensuring the safe release of the bidet from its mounting while maintaining adequate support and attention to detail. Your commitment to inspecting for residue and securing the bidet for storage or disposal exemplified your dedication to completing the removal process with care and consideration.
Finally, the thorough cleaning of the area post-bidet removal underscored your commitment to maintaining a tidy and well-prepared space. By clearing debris, addressing stains, sanitizing the area, and preparing for potential reinstallation or alternative use, you have set the stage for the next chapter in the space's utilization.
As you reflect on the journey of removing your Tushy bidet, it's essential to acknowledge the knowledge and skills gained throughout the process. Whether you're considering a bidet replacement, maintenance, or exploring alternative bathroom accessories, the experience of bidet removal has equipped you with valuable insights and capabilities.
With the bidet successfully removed and the area restored to its optimal condition, you are now poised to embark on the next phase of your home maintenance journey. Whether it involves exploring new bathroom accessories, reimagining the space, or simply reveling in the satisfaction of a task well done, the successful bidet removal marks a significant accomplishment in your home maintenance endeavors.
As you celebrate this milestone, remember that the knowledge and skills acquired during the bidet removal process will continue to serve you in future home maintenance endeavors. Whether it's tackling new DIY projects or sharing your expertise with others, the experience of bidet removal has enriched your capabilities and contributed to your journey as a confident and resourceful homeowner.
So, as you bid adieu to your Tushy bidet and embrace the possibilities that lie ahead, take pride in the successful completion of the removal process and the newfound expertise that accompanies this accomplishment. Your journey as a homeowner is filled with opportunities for growth, learning, and the joy of transforming your living space according to your vision and preferences.
Now that you've mastered removing your Tushy bidet, why not consider giving your bathroom a complete makeover? Our next guide dives into timelines and tips for a smooth transformation. Wonder how long the entire process might take? Check out our detailed breakdown to help plan your project efficiently and avoid common pitfalls that could delay progress.
Frequently Asked Questions about How To Remove Tushy Bidet
Was this page helpful?
At Storables.com, we guarantee accurate and reliable information. Our content, validated by Expert Board Contributors, is crafted following stringent Editorial Policies. We're committed to providing you with well-researched, expert-backed insights for all your informational needs.

0 thoughts on “How To Remove Tushy Bidet”