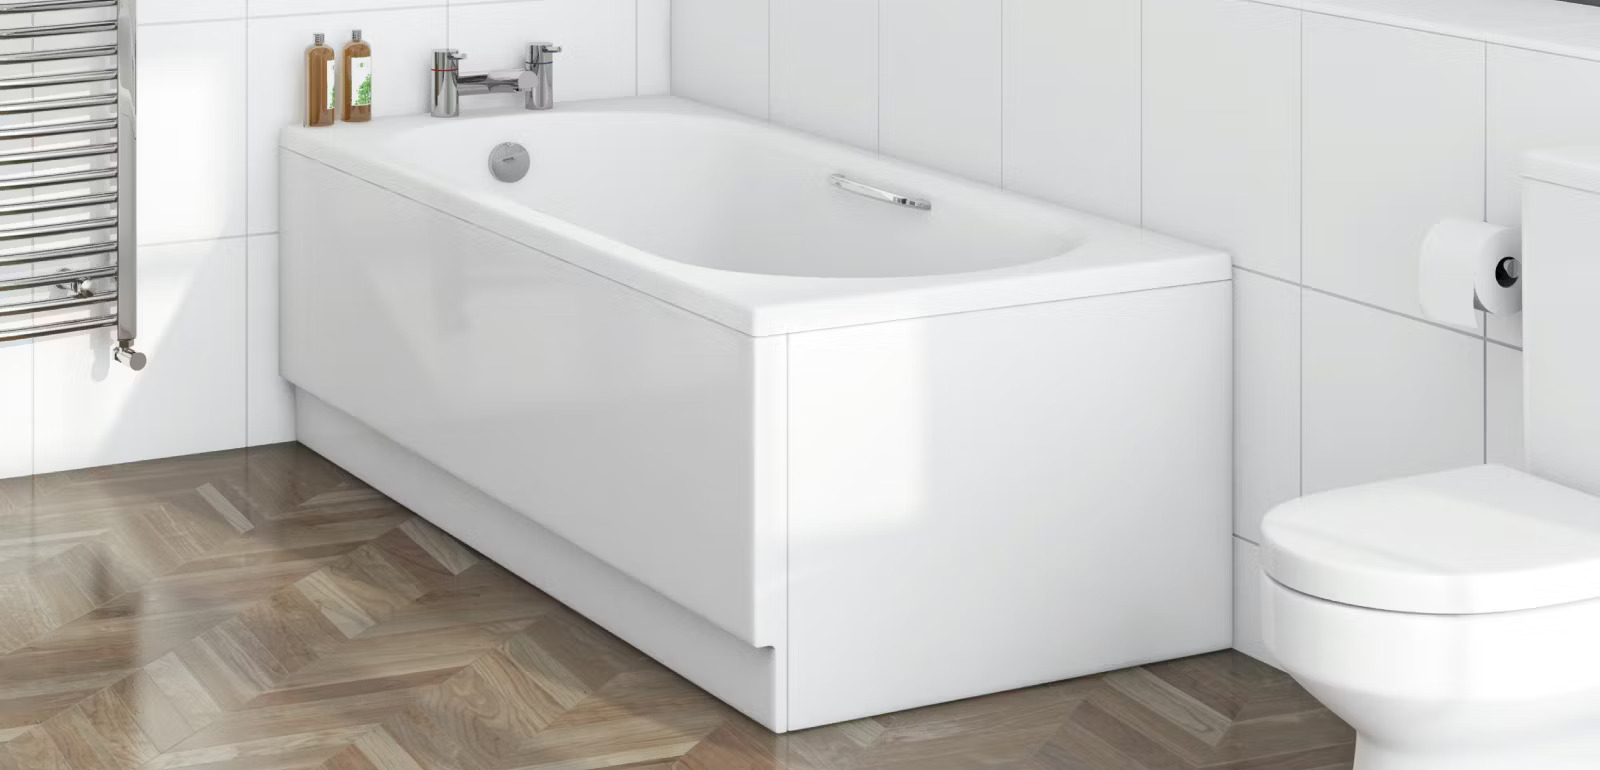
Home>Furniture & Design>Bathroom Accessories>How To Reseal Bathtub

Bathroom Accessories
How To Reseal Bathtub
Published: February 17, 2024
Learn how to reseal your bathtub with our easy step-by-step guide. Find the best bathroom accessories and sealants for a professional finish. Keep your bathroom looking fresh and clean!
(Many of the links in this article redirect to a specific reviewed product. Your purchase of these products through affiliate links helps to generate commission for Storables.com, at no extra cost. Learn more)
Introduction
Resealing a bathtub is a crucial maintenance task that can help prevent water damage and maintain the overall integrity of your bathroom. Over time, the caulk around the bathtub can deteriorate, leading to leaks and potential mold growth. By resealing the bathtub, you can ensure a watertight seal, enhance the aesthetic appeal of the bathroom, and prolong the lifespan of the tub and surrounding areas.
In this comprehensive guide, we will walk you through the step-by-step process of resealing your bathtub, providing you with valuable insights and practical tips to achieve professional-looking results. Whether you're a seasoned DIY enthusiast or a novice homeowner looking to tackle this project for the first time, this guide will equip you with the knowledge and confidence to successfully reseal your bathtub with ease.
By following the outlined steps and utilizing the right materials, you can transform the appearance of your bathtub while safeguarding it against water damage. From gathering the necessary supplies to applying and smoothing out the new caulk, each step is essential in ensuring a durable and aesthetically pleasing seal. With a little time and effort, you can revitalize your bathroom and enjoy the peace of mind that comes with a properly sealed bathtub.
So, roll up your sleeves, gather your materials, and let's dive into the process of resealing your bathtub. With the right guidance and a can-do attitude, you'll be well on your way to achieving a professional-quality seal that will stand the test of time.
Key Takeaways:
- Keep your bathtub in top shape by resealing it to prevent water damage and mold growth. Follow the step-by-step guide for a professional-quality seal that enhances your bathroom’s appearance and longevity.
- Gather the right materials, clean the bathtub, remove old caulk, apply and smooth out the new caulk, and let it dry for a durable and visually appealing bathtub seal.
Read more: How To Polish A Bathtub
Step 1: Gather the necessary materials
Before embarking on the task of resealing your bathtub, it's essential to gather all the necessary materials to ensure a smooth and efficient process. Having the right tools and supplies at your disposal will not only streamline the project but also contribute to the quality and longevity of the seal. Here's a comprehensive list of materials you'll need:
Materials:
-
Caulk: Select a high-quality silicone or acrylic caulk specifically designed for bathroom use. Look for a waterproof and mold-resistant formula to ensure durability and longevity.
-
Caulk Gun: A caulk gun is essential for applying the new caulk evenly and with precision. Opt for a sturdy, reliable caulk gun that allows for smooth dispensing of the caulk.
-
Utility Knife or Caulk Removal Tool: To effectively remove the old caulk, you'll need a utility knife or a specialized caulk removal tool. This will facilitate the process of clearing out the old sealant, preparing the surface for the new application.
-
Cleaner or Solvent: Use a suitable cleaner or solvent to thoroughly clean the area around the bathtub before applying the new caulk. This will ensure that the surface is free of any residue or debris, allowing for better adhesion of the new sealant.
-
Masking Tape: Masking tape is useful for creating clean, straight lines along the edges of the bathtub, preventing any accidental smearing of the caulk onto unwanted areas.
-
Rags or Paper Towels: Keep rags or paper towels handy to wipe away excess caulk and to clean up any spills or smudges during the application process.
-
Rubbing Alcohol: Use rubbing alcohol to wipe down the surface after cleaning to remove any remaining residue and to promote optimal adhesion of the new caulk.
-
Gloves: Protect your hands with a pair of gloves, especially when using solvents or cleaners. This will also help prevent direct contact with the caulk, making cleanup easier.
-
Ventilation: Ensure proper ventilation in the bathroom by opening windows or using a fan to dissipate fumes from the caulk and cleaning products.
By gathering these essential materials, you'll be well-prepared to tackle the task of resealing your bathtub with confidence and efficiency. With the right tools at your disposal, you can proceed to the next steps of the process, knowing that you have everything you need to achieve a professional-quality seal.
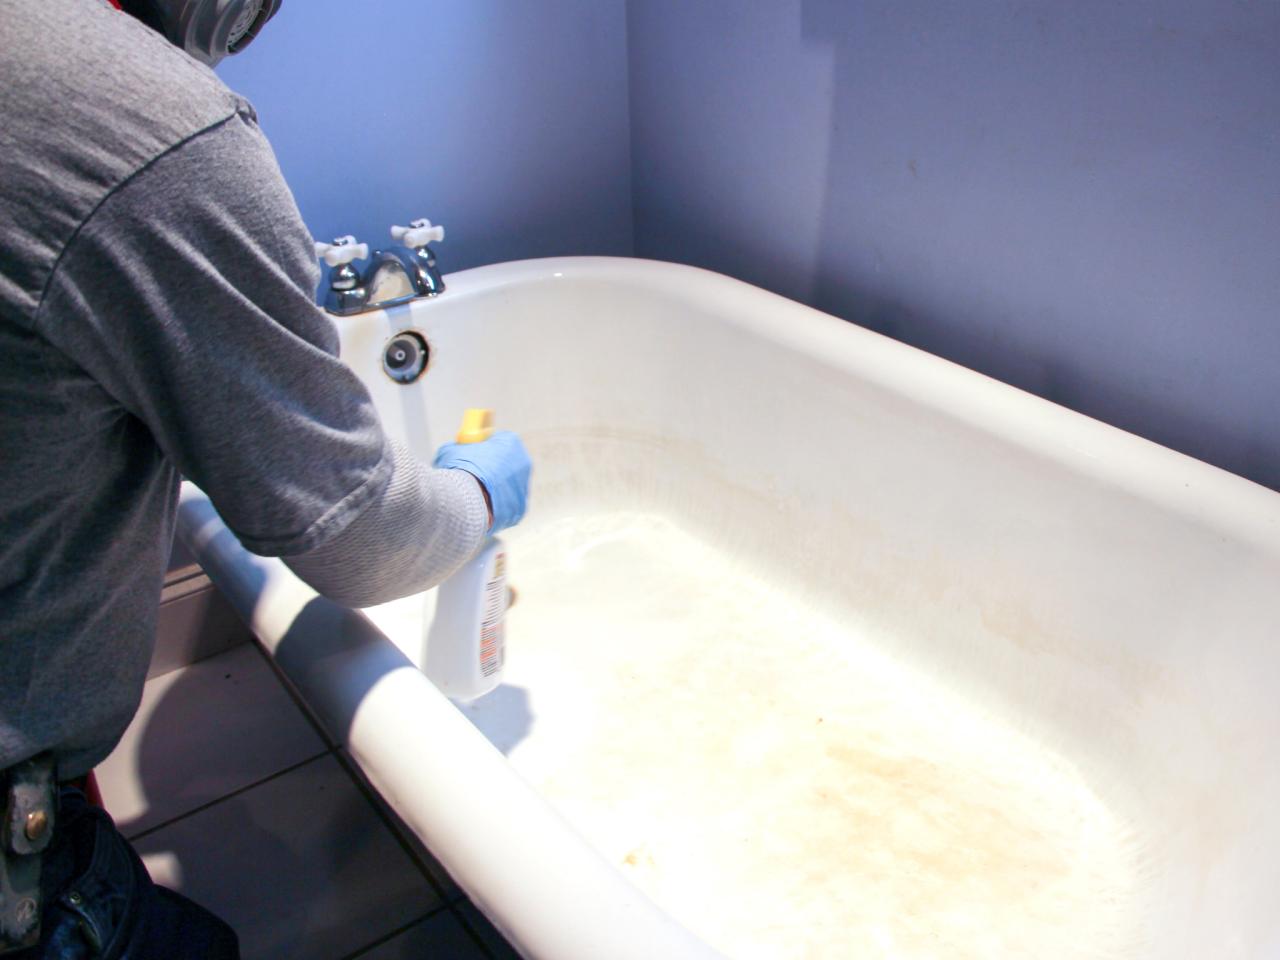
Step 2: Clean the bathtub
Properly cleaning the bathtub is a crucial preparatory step before resealing. A clean surface ensures optimal adhesion for the new caulk, promoting a durable and professional-looking seal. Here's a detailed guide on how to effectively clean the bathtub in preparation for resealing:
1. Remove Existing Residue:
Begin by removing any existing residue, soap scum, or mineral deposits from the surface of the bathtub. Use a suitable cleaner or solvent designed for bathroom surfaces. Apply the cleaner generously and allow it to sit for a few minutes to loosen stubborn buildup.
Read more: How To Cover A Bathtub
2. Scrubbing:
Using a non-abrasive scrubbing pad or sponge, gently scrub the entire surface of the bathtub, paying particular attention to the areas where the old caulk was removed. Ensure thorough coverage, and focus on removing any lingering residue or grime. For tough stains, a mild abrasive cleaner can be used, but be cautious not to damage the bathtub's finish.
3. Rinse Thoroughly:
After scrubbing, thoroughly rinse the bathtub with clean water to remove the cleaning solution and any loosened debris. Ensure that all traces of the cleaner are completely washed away, leaving the surface clean and free of any residue.
4. Dry the Surface:
Use a clean, dry cloth or towel to dry the bathtub completely. It's essential to eliminate any moisture before proceeding with the resealing process, as moisture can hinder the adhesion of the new caulk.
5. Final Cleaning:
To further prepare the surface, wipe down the bathtub with rubbing alcohol. This step removes any remaining residue and ensures that the surface is completely clean and ready for the application of the new caulk.
By following these steps, you'll effectively clean the bathtub, creating an ideal foundation for the resealing process. A clean and properly prepared surface sets the stage for a successful application of the new caulk, ultimately leading to a watertight and visually appealing seal around your bathtub.
Read more: How To Frame A Bathtub
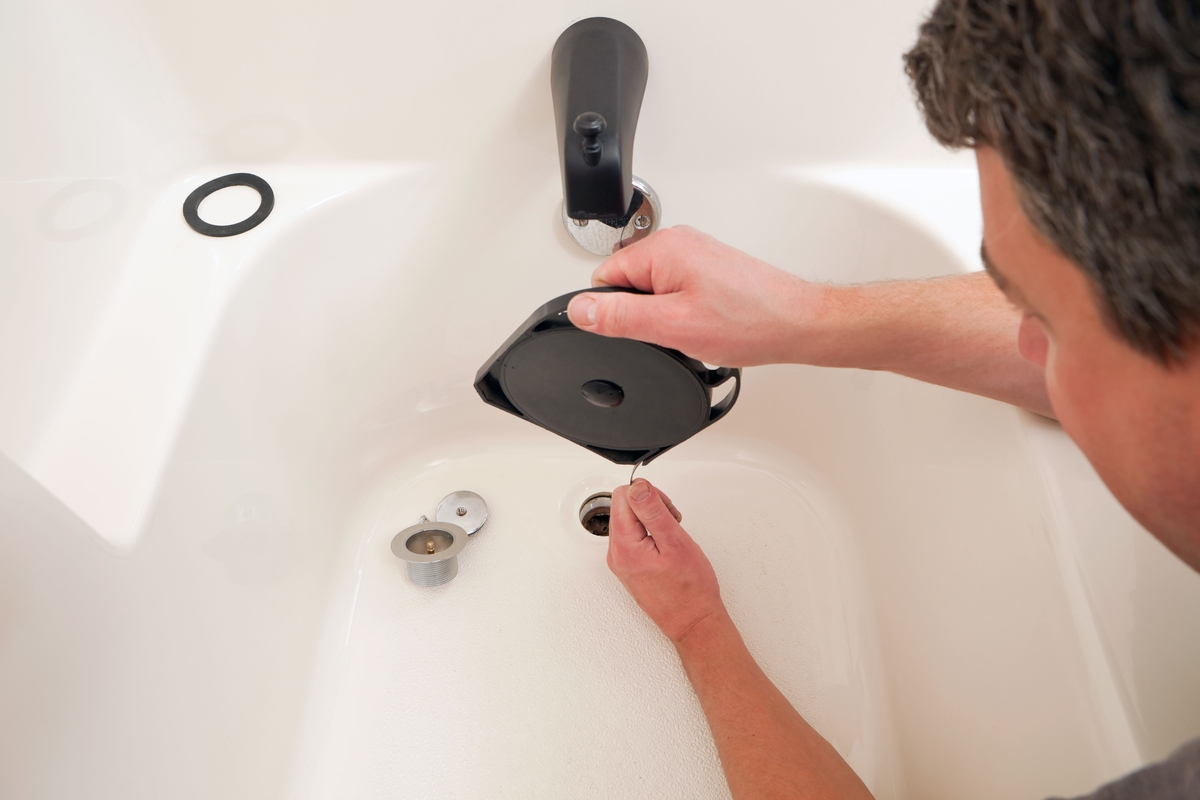
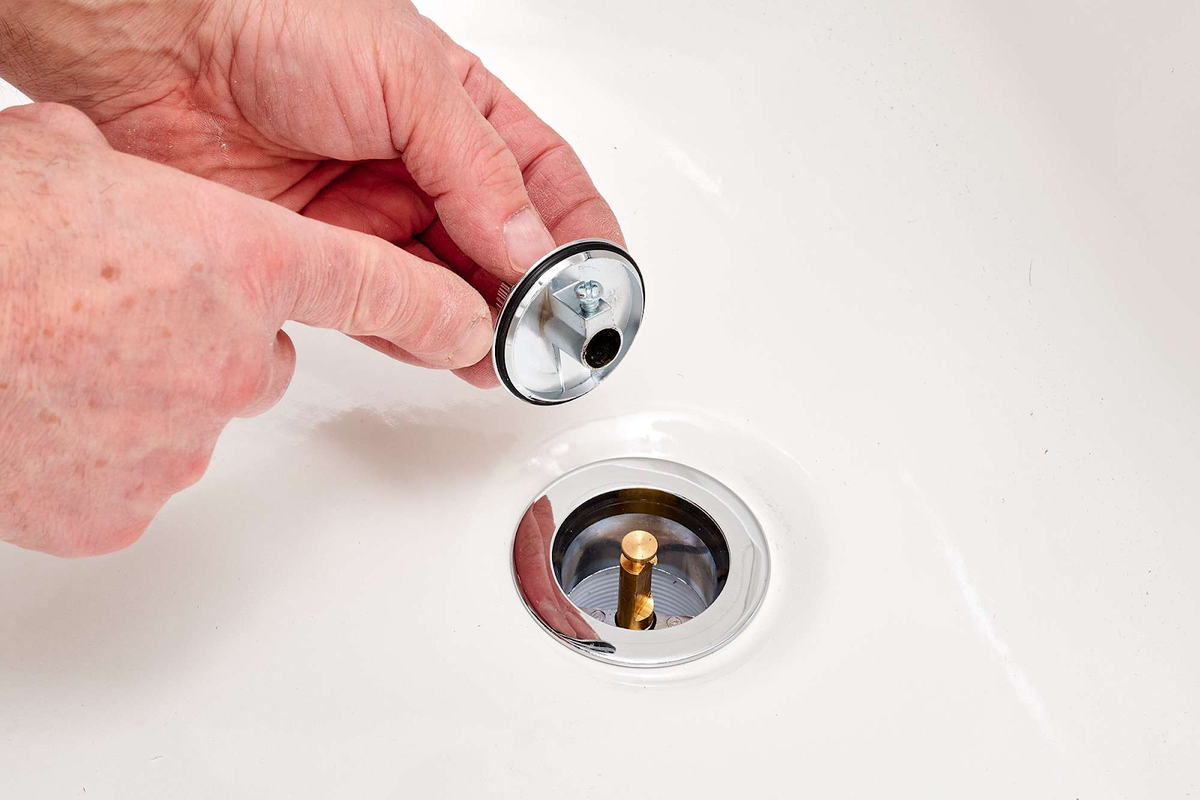
Step 3: Remove old caulk
Removing the old caulk is a critical step in the process of resealing your bathtub. Over time, caulk can deteriorate, discolor, or develop mold, compromising its effectiveness and visual appeal. By thoroughly removing the old caulk, you create a clean canvas for the application of the new sealant, ensuring a strong and long-lasting bond with the bathtub surface. Here's a detailed guide on how to effectively remove the old caulk:
-
Assess the Condition: Begin by inspecting the old caulk to determine its condition. Look for signs of cracking, peeling, or mold growth. Use a utility knife or a specialized caulk removal tool to carefully score along the edges of the caulk, creating clean lines for easier removal.
-
Loosen and Lift: After scoring the caulk, use a caulk removal tool or a putty knife to gently loosen and lift the old caulk from the joint. Work methodically, ensuring that the caulk is completely detached from the bathtub and surrounding surfaces. Take care not to damage the bathtub or adjacent tiles during this process.
-
Thorough Clearing: Once the majority of the caulk has been lifted, use needle-nose pliers or a similar tool to pull out any remaining stubborn pieces of caulk. It's essential to clear the joint completely, leaving no traces of the old caulk behind. A clean and smooth surface will facilitate the adhesion of the new caulk.
-
Clean the Area: After removing the old caulk, thoroughly clean the joint and surrounding areas to eliminate any residual caulk, debris, or dust. Use a vacuum or a damp cloth to ensure that the surface is free of any remnants, preparing it for the application of the new sealant.
-
Final Inspection: Once the old caulk has been removed and the area is cleaned, inspect the joint carefully to ensure that it is free of any remaining caulk or debris. A smooth and clear surface is essential for achieving a professional-quality seal with the new caulk.
By diligently removing the old caulk and preparing the joint for the application of the new sealant, you set the stage for a successful resealing process. This meticulous approach ensures that the new caulk will adhere effectively, providing a watertight and visually appealing seal around your bathtub.
Step 4: Apply new caulk
With the old caulk removed and the bathtub surface thoroughly cleaned, it's time to apply the new caulk. This step is crucial in creating a watertight seal that not only enhances the appearance of the bathtub but also safeguards it against water damage and mold growth. Here's a detailed guide on how to effectively apply the new caulk:
1. Load the Caulk Gun:
Begin by loading the caulk gun with the tube of new caulk. Cut the tip of the caulk tube at a 45-degree angle to create an opening that matches the width of the joint. Insert the caulk tube into the caulk gun, ensuring a secure fit.
2. Apply the Caulk:
Starting at one end of the joint, hold the caulk gun at a consistent angle and apply a steady bead of caulk along the seam. Use a slow and even motion to ensure that the caulk fills the joint completely. Maintain a consistent pressure on the caulk gun to achieve a uniform application.
Read more: How To Shower In A Bathtub?
3. Smooth the Caulk:
After applying the caulk, dampen your finger with water and run it along the freshly applied bead of caulk. This helps to smooth out the caulk and create a clean, professional finish. Alternatively, you can use a caulk finishing tool or a plastic spoon to achieve a smooth surface.
4. Remove Excess Caulk:
As you smooth out the caulk, be mindful of any excess caulk that may accumulate. Use a damp cloth or paper towel to wipe away any surplus caulk, ensuring that the joint is neat and free of smudges.
5. Seal the Ends:
Once the majority of the joint is caulked, pay special attention to the ends where the caulk bead meets the bathtub and surrounding surfaces. Create a tapered finish by gradually reducing the amount of caulk as you approach the ends, ensuring a seamless transition.
6. Let the Caulk Cure:
Allow the newly applied caulk to cure according to the manufacturer's instructions. This typically involves letting the caulk dry for a specified period, during which it forms a strong bond with the bathtub surface.
By following these steps, you can effectively apply the new caulk, creating a durable and visually appealing seal around your bathtub. The meticulous application and smoothing of the caulk contribute to a professional-quality finish that enhances the overall aesthetics of your bathroom while providing long-lasting protection against water intrusion.
Read more: How To Not Slip In The Bathtub
Step 5: Smooth out the caulk
After applying the new caulk along the seam of the bathtub, the next crucial step is to ensure that the caulk is smoothed out to create a clean and professional finish. This process not only enhances the visual appeal of the seal but also contributes to its effectiveness in preventing water penetration and mold growth. Here's a detailed guide on how to effectively smooth out the caulk:
1. Dampen Your Finger or Caulk Finishing Tool:
Once the caulk has been applied, dampen your finger with water or utilize a caulk finishing tool. This step is essential in achieving a smooth finish and ensuring that the caulk conforms to the joint seamlessly. The moisture helps prevent the caulk from sticking to your finger or the tool, allowing for easier manipulation.
2. Run Your Finger or Tool Along the Caulk Bead:
Gently run your dampened finger or caulk finishing tool along the freshly applied bead of caulk. Apply consistent pressure to ensure that the caulk is evenly distributed and that any uneven areas are smoothed out. This process helps eliminate any visible ridges or imperfections, resulting in a uniform and professional-looking seal.
3. Wipe Away Excess Caulk:
As you smooth out the caulk, be mindful of any excess caulk that may accumulate along the joint. Use a damp cloth or paper towel to carefully wipe away any surplus caulk, ensuring that the area around the seam remains clean and free of smudges. This meticulous step contributes to the overall neatness and precision of the seal.
Read more: How To Lift A Bathtub
4. Focus on the Transition Points:
Pay special attention to the ends of the caulk bead where it meets the bathtub and surrounding surfaces. Use your finger or caulk finishing tool to create a tapered finish, gradually reducing the amount of caulk as you approach the ends. This technique ensures a seamless transition and a professional-quality appearance.
5. Check for Uniformity:
After smoothing out the caulk, visually inspect the entire length of the seam to ensure that the caulk is uniformly distributed and free of any visible imperfections. Any areas that require further attention can be gently touched up with your finger or the caulk finishing tool to achieve a consistent and polished finish.
By meticulously smoothing out the caulk, you contribute to the overall quality and durability of the seal around your bathtub. This attention to detail not only enhances the visual appeal of the bathroom but also ensures that the caulk effectively fulfills its role in maintaining a watertight and mold-resistant barrier.
Step 6: Let the caulk dry
Allowing the newly applied caulk to dry is a crucial final step in the process of resealing your bathtub. The drying period is essential for the caulk to form a strong and durable bond with the bathtub surface, ensuring a watertight seal that effectively prevents leaks and water damage. Here's a detailed guide on how to effectively manage the drying process:
-
Follow Manufacturer's Instructions:
It's important to adhere to the specific drying guidelines provided by the manufacturer of the caulk. Different types of caulk may have varying drying times and curing requirements. Refer to the product packaging or instructions for the recommended drying duration. -
Minimize Disturbance:
Once the caulk has been applied and smoothed out, it's crucial to minimize any disturbance to the freshly sealed joint. Avoid using the bathtub or shower during the drying period to prevent any potential damage or disruption to the caulk. -
Optimal Environmental Conditions:
Create an environment conducive to the drying process. Ensure adequate ventilation in the bathroom to facilitate air circulation, which can expedite the drying of the caulk. Additionally, maintain a moderate room temperature to promote optimal curing conditions. -
Patience is Key:
Exercise patience and allow sufficient time for the caulk to dry completely. Rushing this step can compromise the integrity of the seal. Depending on the type of caulk used, the drying period may range from a few hours to a day or more. -
Visual Inspection:
After the recommended drying time has elapsed, visually inspect the caulk to ensure that it has formed a firm and solid bond with the bathtub surface. The caulk should appear smooth, uniform, and free of any tackiness. -
Test for Readiness:
Gently touch the dried caulk to verify that it is no longer soft or pliable. A fully dried caulk should feel firm and resilient to the touch, indicating that it has successfully cured and formed a strong seal.
By allowing the caulk to dry thoroughly, you ensure that the resealing process is completed with precision and care. The drying period is essential for the caulk to achieve its maximum strength and durability, ultimately contributing to the long-term protection and aesthetic enhancement of your bathtub.
Conclusion
Congratulations! By following the comprehensive steps outlined in this guide, you have successfully resealed your bathtub, ensuring a watertight and visually appealing seal that will stand the test of time. The meticulous process of gathering the necessary materials, cleaning the bathtub, removing the old caulk, applying the new caulk, smoothing it out, and allowing it to dry has culminated in a professional-quality finish that enhances the overall integrity of your bathroom.
Resealing your bathtub is not only a practical maintenance task but also a transformative endeavor that revitalizes the appearance of your bathroom while safeguarding it against water damage and mold growth. The attention to detail and precision applied throughout the resealing process have resulted in a durable and aesthetically pleasing seal that contributes to the overall functionality and visual appeal of your bathtub.
As you stand back and admire your handiwork, take pride in knowing that you have taken proactive steps to maintain the condition of your bathtub and the surrounding areas. The newly sealed joint not only enhances the cleanliness and hygiene of your bathroom but also provides peace of mind, knowing that potential water leaks and mold issues have been effectively addressed.
Moving forward, it's important to maintain regular inspections of the caulked joint to ensure that it remains in optimal condition. Periodic checks can help identify any signs of wear or damage, allowing for timely touch-ups or resealing as needed. By staying proactive in your maintenance efforts, you can prolong the lifespan of the seal and continue to enjoy a pristine and well-protected bathtub for years to come.
In conclusion, the successful resealing of your bathtub is a testament to your dedication to maintaining a clean, functional, and visually appealing bathroom. By following the steps outlined in this guide and infusing your efforts with care and attention to detail, you have achieved a professional-quality seal that elevates the overall ambiance of your home. Embrace the satisfaction of a job well done and revel in the enhanced beauty and functionality of your newly resealed bathtub.
Frequently Asked Questions about How To Reseal Bathtub
Was this page helpful?
At Storables.com, we guarantee accurate and reliable information. Our content, validated by Expert Board Contributors, is crafted following stringent Editorial Policies. We're committed to providing you with well-researched, expert-backed insights for all your informational needs.

0 thoughts on “How To Reseal Bathtub”