Home>Furniture & Design>Bathroom Accessories>How To Rough In A Bathtub

Bathroom Accessories
How To Rough In A Bathtub
Modified: October 19, 2024
Learn how to rough in a bathtub and install bathroom accessories with our step-by-step guide. Ensure a smooth installation process for your new bathtub.
(Many of the links in this article redirect to a specific reviewed product. Your purchase of these products through affiliate links helps to generate commission for Storables.com, at no extra cost. Learn more)
Introduction
Roughing in a bathtub is a crucial step in the construction or renovation of a bathroom. This process involves preparing the space, installing the necessary plumbing components, and positioning the bathtub before the final connections are made. Proper rough-in ensures that the bathtub will function effectively and seamlessly once the project is completed.
When roughing in a bathtub, it's essential to consider the layout and design of the bathroom. This includes determining the best location for the tub, ensuring that the plumbing connections are correctly positioned, and verifying that the area is structurally sound to support the weight of the bathtub and the water it will hold.
Additionally, understanding the local building codes and regulations is vital to ensure compliance and safety. These codes often dictate specific requirements for the installation of bathtubs, including the type of materials to be used, the dimensions of the rough-in space, and the proper slope and venting of the plumbing system.
In this comprehensive guide, we will walk through the essential steps involved in roughing in a bathtub, providing detailed instructions and insights to help you navigate this process with confidence. From preparing the area and installing the drain and overflow to connecting the plumbing and securing the bathtub in place, each step is crucial to the successful rough-in of a bathtub.
By following these instructions and understanding the importance of each step, you can ensure that the rough-in process is completed accurately and efficiently. Whether you are a seasoned contractor, a DIY enthusiast, or a homeowner overseeing a renovation project, mastering the art of roughing in a bathtub is a valuable skill that can contribute to the functionality and aesthetic appeal of any bathroom space.
Key Takeaways:
- Properly preparing the area, installing the drain and overflow, and positioning the bathtub are crucial steps in ensuring a successful and reliable bathtub installation. Attention to detail and adherence to plumbing standards are essential for a seamless process.
- Connecting the plumbing, securing the bathtub in place, and testing for leaks are vital for the longevity and functionality of the bathtub. Meticulous attention to each step ensures a reliable and leak-free plumbing system.
Read more: How To Rough In Plumbing For Slab
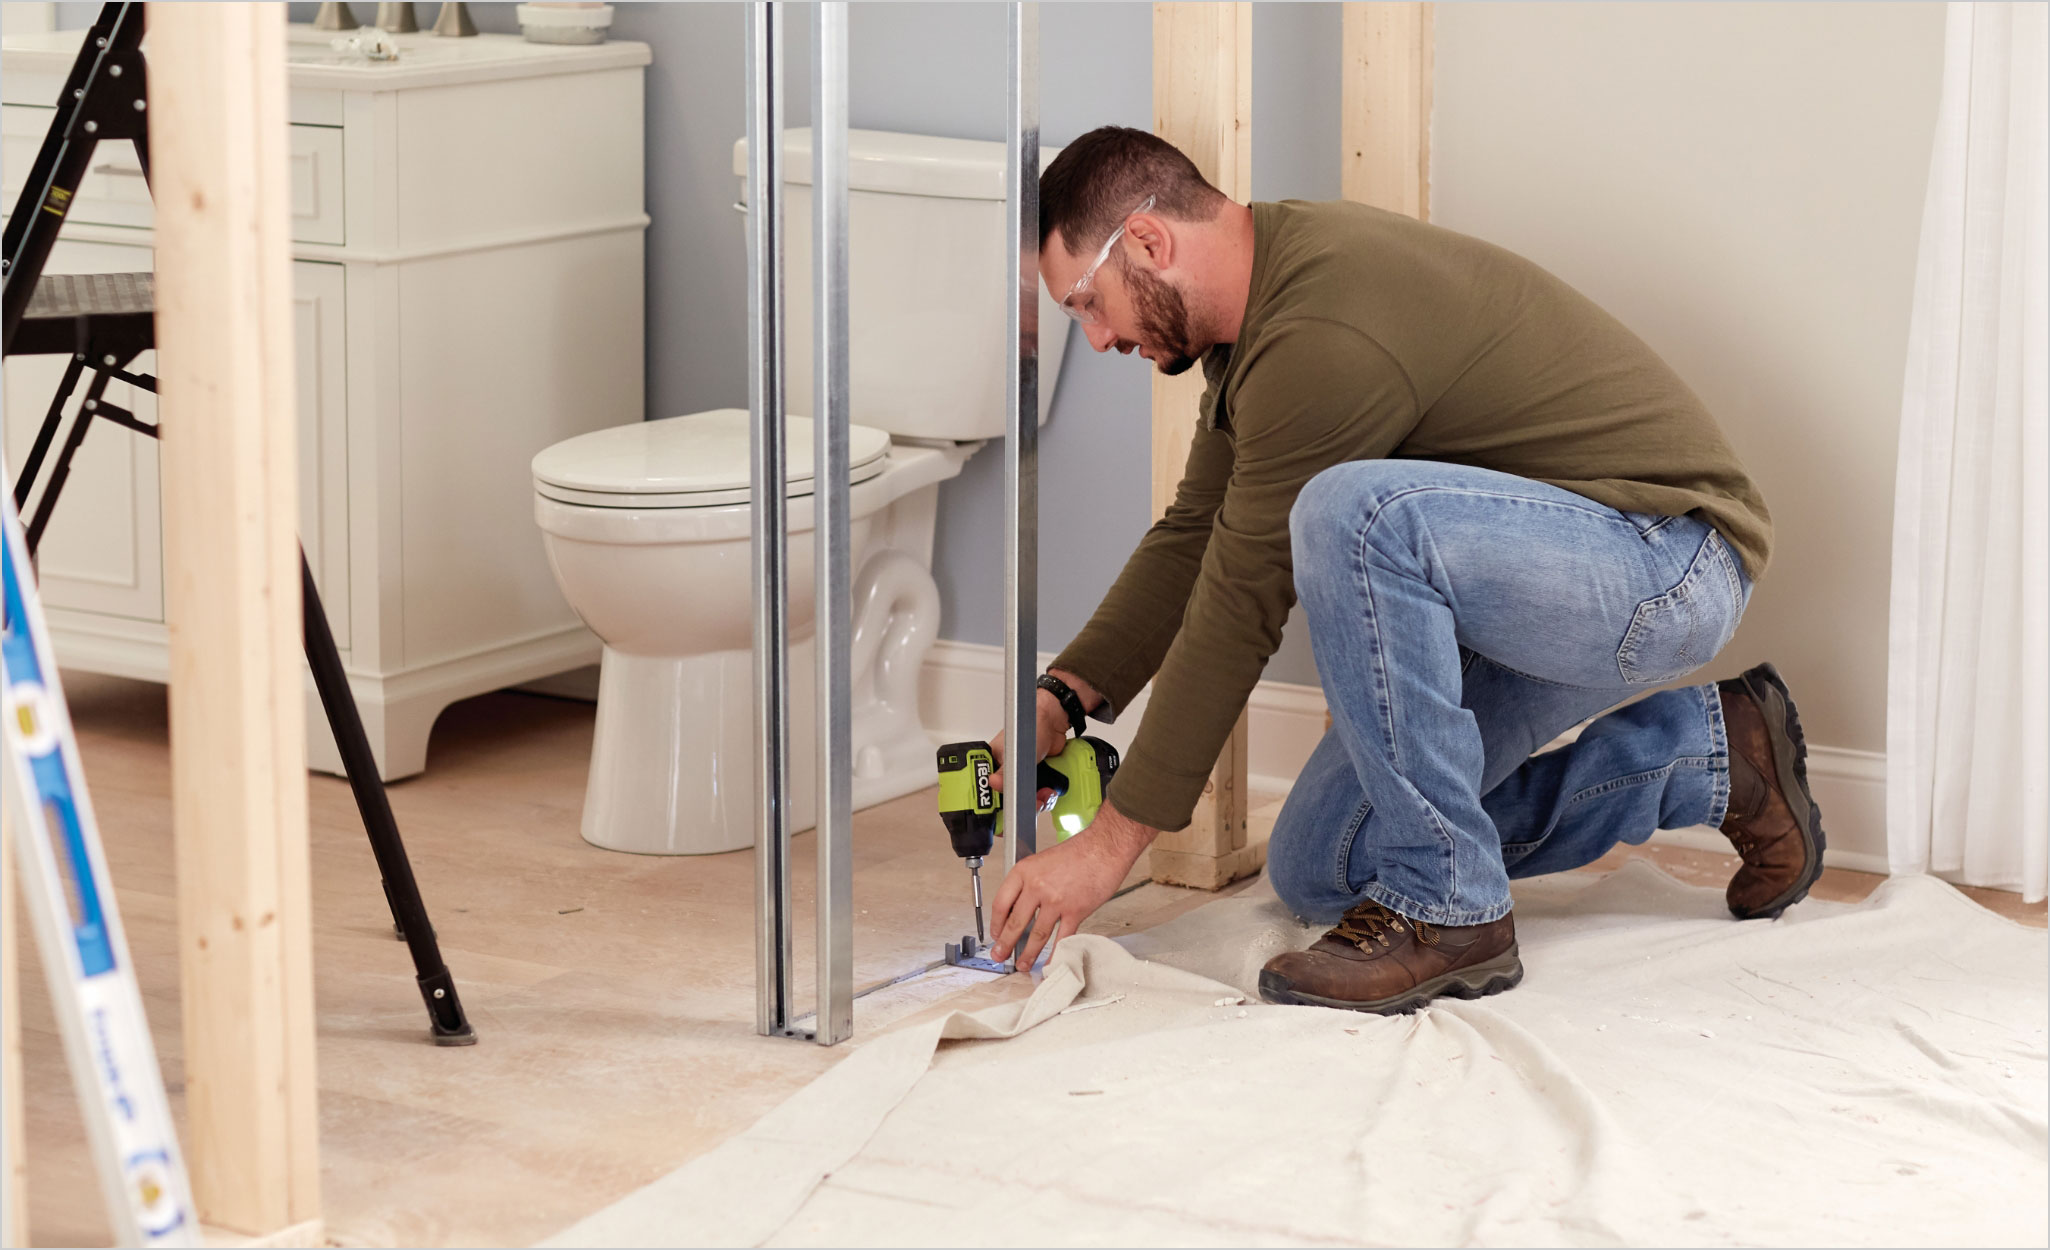
Step 1: Prepare the Area
Before beginning the rough-in process for a bathtub, it's essential to prepare the area to ensure a smooth and efficient installation. Proper preparation sets the foundation for the subsequent steps and contributes to the overall success of the project. Here's a detailed breakdown of the key tasks involved in preparing the area for roughing in a bathtub:
-
Clear the Space: Start by clearing the designated area where the bathtub will be installed. Remove any existing fixtures, debris, or obstructions to create an open and accessible workspace. This step is crucial for assessing the structural integrity of the floor and ensuring that the rough-in space is free from any hindrances.
-
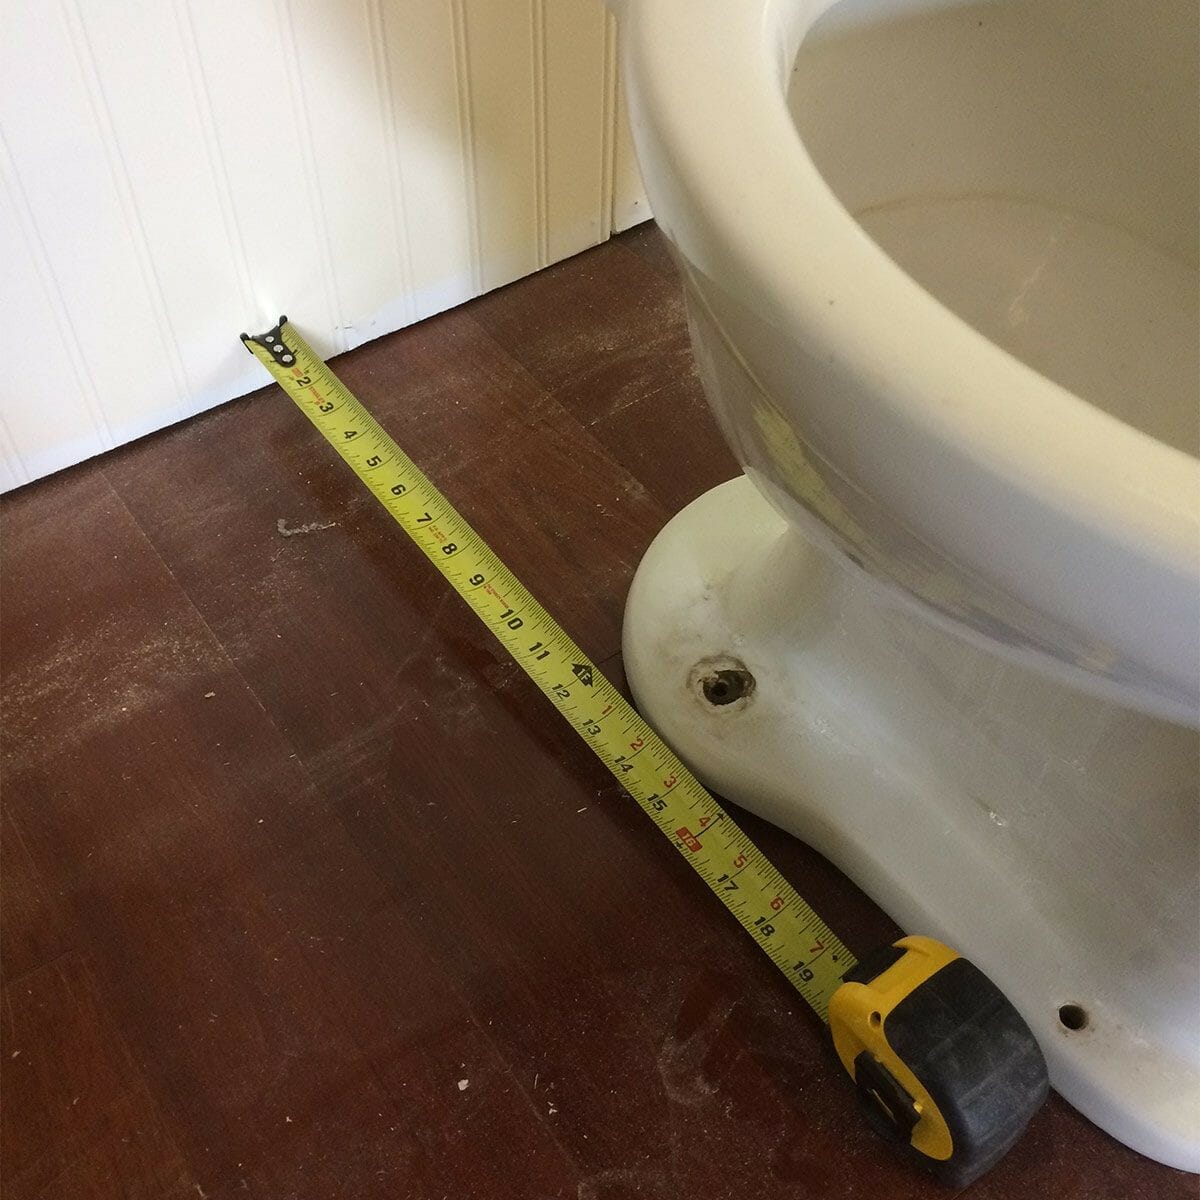
Measure and Mark: Accurately measure the dimensions of the rough-in space to confirm that it aligns with the specifications of the chosen bathtub. Use a tape measure and marking tools to outline the boundaries where the bathtub will be positioned. This step helps to visualize the layout and ensures that the rough-in area meets the required size and configuration.
-
Assess the Floor: Inspect the floor beneath the rough-in area to evaluate its condition and stability. Ensure that the floor is level and capable of supporting the weight of the bathtub and the water it will hold. Address any structural issues or uneven surfaces to create a solid foundation for the bathtub installation.
-
Check for Obstructions: Examine the surrounding walls and plumbing fixtures to identify any potential obstructions that may impact the installation process. This includes assessing the placement of water supply lines, drain pipes, and electrical wiring to determine if any adjustments or repositioning are necessary to accommodate the bathtub.
-
Review Building Codes: Familiarize yourself with the local building codes and regulations pertaining to bathtub installations. Verify the specific requirements for the rough-in space, including clearance dimensions, framing specifications, and any additional considerations mandated by the building authorities. Adhering to these codes is essential for ensuring compliance and safety.
By meticulously preparing the area for roughing in a bathtub, you establish a solid groundwork for the subsequent steps, setting the stage for a successful and efficient installation process. This attention to detail and thorough preparation contributes to the overall quality and longevity of the bathtub installation, ensuring that it meets both functional and regulatory standards.
Step 2: Install the Drain and Overflow
Installing the drain and overflow is a critical aspect of roughing in a bathtub, as it establishes the essential plumbing connections that facilitate proper drainage and water containment. This step involves positioning and securing the components that form the drainage system, ensuring that they are aligned with the bathtub's design and the overall layout of the bathroom. Here's a detailed breakdown of the key tasks involved in installing the drain and overflow for a bathtub:
-
Position the Drain: Begin by identifying the precise location for the bathtub drain based on the manufacturer's specifications and the layout of the rough-in area. The drain should be strategically positioned to align with the designated opening on the underside of the bathtub. Carefully mark the location of the drain on the floor, ensuring that it corresponds to the center of the tub's drain opening.
-
Connect the Drain Assembly: Install the drain assembly by attaching the drain shoe to the drainpipe beneath the floor. Apply plumber's putty or silicone sealant to create a watertight seal between the drain shoe and the drainpipe. Secure the connection using the appropriate tools, ensuring that the assembly is firmly in place and aligned with the marked position.
-
Install the Overflow: Position the overflow assembly on the side of the bathtub, aligning it with the overflow opening. Connect the overflow pipe to the waste and overflow assembly, ensuring a secure and leak-free connection. Verify that the overflow plate is properly aligned and fastened to the bathtub, completing the installation of the overflow component.
-
Test the Drainage System: Conduct a preliminary test to ensure that the drain and overflow components are functioning as intended. Pour a small amount of water into the bathtub and observe the drainage process to identify any potential leaks or issues. This initial test helps to validate the proper installation of the drain and overflow, allowing for adjustments if necessary.
-
Secure the Components: Once the drain and overflow are installed and tested, secure the components in place using the appropriate fasteners and supports. This step ensures that the plumbing connections remain stable and aligned during the subsequent stages of the rough-in process, minimizing the risk of displacement or misalignment.
By meticulously installing the drain and overflow components, you establish the fundamental infrastructure for the bathtub's drainage system, laying the groundwork for the subsequent plumbing connections and fixture installations. This meticulous approach ensures that the bathtub's functionality and performance are optimized, setting the stage for a successful and reliable rough-in process.
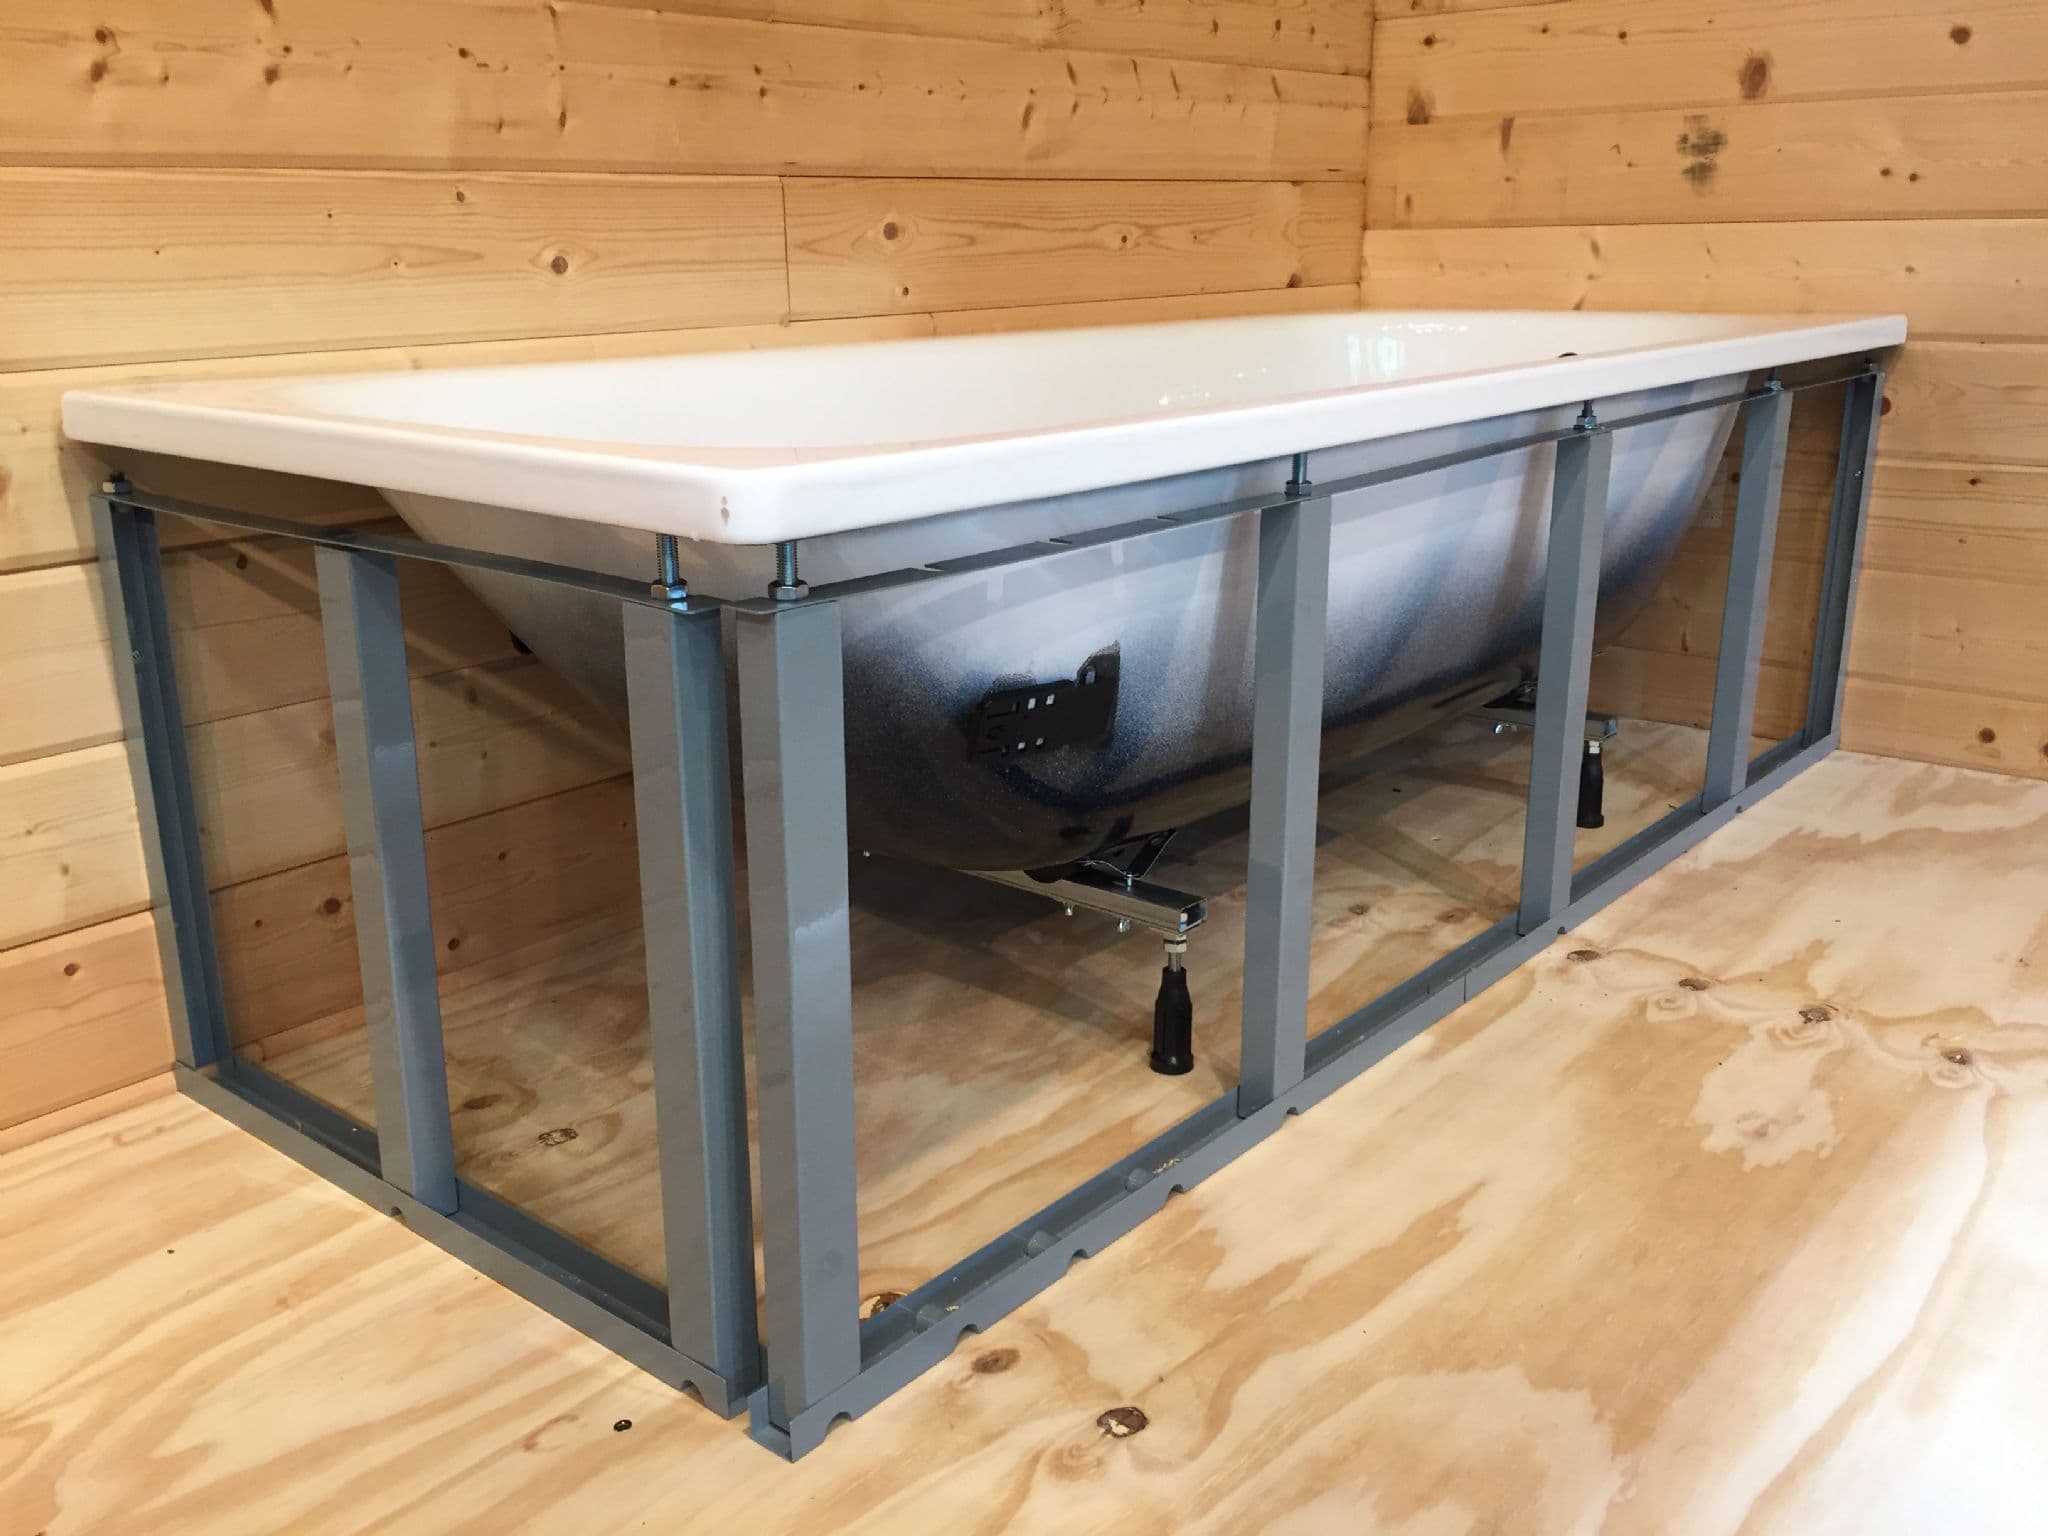
Step 3: Position the Bathtub
Positioning the bathtub is a pivotal step in the rough-in process, as it determines the alignment, stability, and functionality of the fixture within the designated space. Proper positioning ensures that the bathtub integrates seamlessly with the surrounding elements, such as the plumbing connections, walls, and flooring, creating a cohesive and structurally sound installation. Here's a detailed exploration of the key considerations and tasks involved in positioning the bathtub during the rough-in process:
-
Assess the Alignment: Begin by carefully assessing the alignment of the bathtub within the rough-in space. Verify that the dimensions and orientation of the bathtub correspond to the markings and measurements previously established during the preparation phase. This step is crucial for ensuring that the bathtub is positioned accurately and in accordance with the intended layout of the bathroom.
-
Adjust for Leveling: Evaluate the levelness of the bathtub to ensure that it rests evenly on the floor surface. Use a spirit level to check for any discrepancies in the horizontal orientation of the bathtub. If necessary, make adjustments to the supporting structure or floor surface to achieve a level position, which is essential for the proper functioning and stability of the bathtub.
-
Secure the Support: Once the bathtub is aligned and leveled, secure the support structure to maintain its position. This may involve attaching the bathtub flange to the wall studs or floor joists, depending on the specific design and installation requirements. Use appropriate fasteners and anchors to firmly secure the bathtub in place, preventing any shifting or movement during and after the rough-in process.
-
Verify Clearance: Confirm that the bathtub has adequate clearance from the surrounding walls and fixtures, allowing for the installation of the necessary plumbing connections and ensuring accessibility for future maintenance and repairs. Pay close attention to the spacing between the bathtub rim and the adjacent surfaces, ensuring that the required clearances are maintained as per the manufacturer's recommendations and building codes.
-
Integrate with Drain and Overflow: Align the bathtub's drain and overflow openings with the corresponding plumbing connections installed in the previous step. Ensure that the components fit seamlessly together, creating a watertight and secure interface between the bathtub and the drainage system. This integration is essential for facilitating proper water drainage and containment during the bathtub's usage.
By meticulously positioning the bathtub within the rough-in space, you establish the foundation for a successful and reliable installation, setting the stage for the subsequent plumbing connections and fixture installations. This meticulous approach ensures that the bathtub's functionality and performance are optimized, contributing to the overall quality and longevity of the rough-in process.
Make sure to measure and mark the exact location for the bathtub drain and overflow before roughing in. This will ensure that the plumbing lines up correctly when it’s time to install the bathtub.
Step 4: Connect the Plumbing
Connecting the plumbing is a pivotal phase in the rough-in process of a bathtub installation, as it involves integrating the necessary water supply lines, drain pipes, and fixtures to ensure the functionality and efficiency of the bathtub's plumbing system. This step requires meticulous attention to detail and adherence to plumbing standards to facilitate proper water flow, drainage, and containment. Here's a comprehensive exploration of the key tasks and considerations involved in connecting the plumbing during the rough-in process:
-
Install Water Supply Lines: Begin by installing the water supply lines that will deliver hot and cold water to the bathtub. Position the supply lines according to the manufacturer's specifications and local plumbing codes, ensuring that they are securely connected to the existing water supply system. Use appropriate fittings and connectors to create watertight joints, minimizing the risk of leaks and ensuring consistent water flow to the bathtub.
-
Connect the Drainage System: Integrate the bathtub's drain and overflow components with the existing drain pipes and waste system. Ensure that the connections are properly aligned and sealed to prevent any potential leaks or drainage issues. Verify that the slope and venting of the drain pipes comply with the plumbing standards, facilitating efficient water removal from the bathtub and preventing clogs or backups.
-
Install Fixtures and Valves: Position and install the necessary fixtures and valves, such as the bathtub faucet, handles, and diverter, to regulate the water flow and temperature. Securely connect these components to the water supply lines, following the manufacturer's instructions and ensuring that they are aligned with the bathtub's design and layout. Test the functionality of the fixtures to confirm proper operation and water control.
-
Pressure Test the System: Conduct a pressure test to evaluate the integrity of the plumbing connections and identify any potential leaks or weaknesses. Pressurize the water supply lines and drainage system to the specified pressure levels, monitoring for any fluctuations or indications of leakage. This test helps to validate the reliability of the plumbing connections and ensures that the system is ready for the final stages of the rough-in process.
-
Verify Compliance and Safety: Double-check that the connected plumbing components adhere to the relevant building codes and regulations governing bathtub installations. Confirm that the materials, dimensions, and configurations meet the required standards, promoting safety and compliance with plumbing guidelines. Address any discrepancies or non-compliance issues to ensure the overall quality and legality of the rough-in process.
By meticulously connecting the plumbing components, you establish the essential infrastructure for the bathtub's water supply and drainage systems, setting the stage for the final stages of the rough-in process. This meticulous approach ensures that the bathtub's plumbing functionality is optimized, contributing to the overall quality and reliability of the installation.
Read more: What Is A Rough In Plumbing
Step 5: Secure the Bathtub in Place
Securing the bathtub in place is a critical step in the rough-in process, as it ensures the stability, structural integrity, and safety of the fixture within the designated space. Proper securing minimizes the risk of displacement, movement, or instability, thereby contributing to the longevity and functionality of the bathtub installation. Here's a detailed exploration of the key tasks and considerations involved in securing the bathtub in place during the rough-in process:
-
Anchor the Bathtub: Begin by anchoring the bathtub to the surrounding structure, such as the wall studs or floor joists, using appropriate fasteners and anchors. This step is crucial for preventing any shifting or movement of the bathtub, especially during and after the rough-in process. Securely fastening the bathtub to the structural elements ensures that it remains firmly in place, enhancing its stability and overall performance.
-
Apply Sealant: Utilize a high-quality sealant or adhesive to create a watertight seal between the bathtub and the adjacent surfaces, such as the walls and floor. Apply the sealant along the perimeter of the bathtub, ensuring that it forms a secure and durable bond. This sealant not only enhances the structural integrity of the installation but also helps to prevent water seepage and potential damage to the surrounding areas.
-
Check Levelness: Verify that the bathtub remains level and evenly positioned after securing it in place. Use a spirit level to confirm that the fixture maintains its horizontal orientation, minimizing the risk of uneven weight distribution or stress on specific areas. Adjust the support structure or fasteners if necessary to achieve and maintain the desired levelness of the bathtub.
-
Reinforce Support: Evaluate the supporting structure beneath the bathtub and reinforce it as needed to enhance the fixture's stability. This may involve adding additional bracing, blocking, or support beams to distribute the weight of the bathtub evenly and minimize the risk of sagging or structural strain. A well-supported bathtub contributes to the overall durability and reliability of the installation.
-
Inspect Accessibility: Ensure that the necessary access panels or openings are available to facilitate future maintenance, repairs, or inspections of the bathtub's plumbing components. Accessibility is essential for addressing any potential issues that may arise with the plumbing system, allowing for efficient and timely interventions without the need for extensive demolition or disruption.
By meticulously securing the bathtub in place, you establish a robust and reliable installation that meets both functional and safety requirements. This meticulous approach ensures that the bathtub integrates seamlessly with the surrounding elements, contributing to the overall quality and longevity of the rough-in process.
Step 6: Test for Leaks
Testing for leaks is a crucial and final step in the rough-in process of a bathtub installation. This step is essential to ensure the integrity of the plumbing connections, the drainage system, and the overall functionality of the bathtub. By conducting thorough leak tests, any potential issues can be identified and addressed before the final installation of fixtures and finishing touches. Here's a detailed exploration of the key tasks and considerations involved in testing for leaks during the rough-in process:
-
Visual Inspection: Begin by visually inspecting all the plumbing connections, including the drain, overflow, water supply lines, and fixtures. Look for any signs of moisture, water stains, or drips around the connections. Additionally, check for any visible cracks or gaps in the sealant or adhesive used to secure the bathtub and plumbing components.
-
Fill and Drain Test: Fill the bathtub with water to the recommended level, allowing it to remain filled for a period of time. Observe the drain and overflow components for any signs of leakage or seepage. After the water has been drained, inspect the surrounding areas for any residual moisture or signs of water accumulation, which may indicate potential leaks.
-
Pressure Test: Utilize a pressure testing kit to pressurize the plumbing system, including the water supply lines and drainage system. Monitor the pressure levels for any fluctuations or drops, which could indicate leaks in the connections. This test helps to identify any weaknesses in the plumbing system and ensures that it can withstand the normal operating pressures without issues.
-
Dye Testing: Introduce a colored dye, specifically designed for plumbing tests, into the bathtub and drainage system. The dye will flow through the plumbing connections, allowing you to visually detect any leaks or seepage. This method is particularly effective in identifying small or hidden leaks that may not be immediately apparent during a visual inspection.
-
Inspect Seals and Gaskets: Check the integrity of the seals, gaskets, and washers used in the plumbing connections. Ensure that they are properly seated and compressed, creating a secure and watertight seal. Replace any damaged or worn seals to prevent potential leaks in the future.
-
Addressing Identified Leaks: If any leaks are detected during the testing process, promptly address them by tightening or resealing the affected connections. Replace any damaged components or seals to ensure the integrity of the plumbing system. Conduct additional tests to verify that the leaks have been effectively resolved.
By meticulously testing for leaks, you can identify and rectify any potential issues before the final installation of the bathtub. This proactive approach ensures that the plumbing system is reliable and leak-free, contributing to the overall quality and longevity of the rough-in process.
Conclusion
In conclusion, the rough-in process of a bathtub installation is a multifaceted endeavor that demands meticulous attention to detail, adherence to plumbing standards, and a comprehensive understanding of the structural and functional requirements. Each step, from preparing the area and installing the drain and overflow to positioning the bathtub, connecting the plumbing, securing the fixture in place, and testing for leaks, plays a pivotal role in ensuring the successful and reliable installation of a bathtub.
By meticulously preparing the area, individuals can create a solid foundation for the subsequent steps, ensuring that the rough-in space meets the required size, configuration, and structural integrity. This initial phase sets the stage for a seamless and efficient installation process, minimizing potential obstacles and streamlining the overall project.
The installation of the drain and overflow components is crucial for establishing the fundamental infrastructure of the bathtub's drainage system. Proper positioning and secure integration of these components contribute to the efficient water containment and drainage, laying the groundwork for the subsequent plumbing connections and fixture installations.
Positioning the bathtub within the rough-in space requires careful alignment, leveling, and integration with the surrounding elements. This step ensures that the fixture integrates seamlessly with the plumbing connections, walls, and flooring, creating a cohesive and structurally sound installation.
Connecting the plumbing components is a pivotal phase that demands meticulous attention to detail and adherence to plumbing standards. The integration of water supply lines, drain pipes, fixtures, and valves ensures the functionality and efficiency of the bathtub's plumbing system, setting the stage for the final stages of the rough-in process.
Securing the bathtub in place is essential for ensuring its stability, structural integrity, and safety within the designated space. Proper anchoring, application of sealant, and reinforcement of the supporting structure contribute to the longevity and reliability of the bathtub installation.
Finally, testing for leaks is a critical and final step that ensures the integrity of the plumbing connections, the drainage system, and the overall functionality of the bathtub. Thorough leak tests help identify and address potential issues before the final installation of fixtures and finishing touches, ensuring a reliable and leak-free plumbing system.
In essence, mastering the art of roughing in a bathtub requires a combination of technical expertise, attention to detail, and a commitment to quality and safety. By following the comprehensive guide outlined in this article, individuals can navigate the rough-in process with confidence, ensuring that the bathtub installation meets both functional and regulatory standards, and contributes to the overall functionality and aesthetic appeal of the bathroom space.
Frequently Asked Questions about How To Rough In A Bathtub
Was this page helpful?
At Storables.com, we guarantee accurate and reliable information. Our content, validated by Expert Board Contributors, is crafted following stringent Editorial Policies. We're committed to providing you with well-researched, expert-backed insights for all your informational needs.


0 thoughts on “How To Rough In A Bathtub”