Home>Furniture & Design>Bathroom Accessories>How To Repair A Chip In A Bathtub

Bathroom Accessories
How To Repair A Chip In A Bathtub
Published: February 20, 2024
Learn how to easily repair a chip in your bathtub with our step-by-step guide. Get your bathroom accessories looking good as new!
(Many of the links in this article redirect to a specific reviewed product. Your purchase of these products through affiliate links helps to generate commission for Storables.com, at no extra cost. Learn more)
Introduction
A chipped bathtub can be a source of frustration and concern for homeowners. Not only does it detract from the overall aesthetics of the bathroom, but it can also lead to further damage if left unaddressed. Fortunately, repairing a chip in a bathtub is a manageable task that can be accomplished with the right materials and a bit of know-how.
In this comprehensive guide, we will walk you through the process of repairing a chip in a bathtub, providing step-by-step instructions and valuable tips to help you achieve a professional-looking result. Whether you're a seasoned DIY enthusiast or a novice homeowner looking to tackle a small repair project, this guide will equip you with the knowledge and confidence to restore your bathtub to its former glory.
By following the methods outlined in this article, you can save time and money by avoiding the need for a costly bathtub replacement. Additionally, addressing the chip promptly can prevent it from developing into a larger, more serious issue, ultimately preserving the integrity and appearance of your bathroom.
So, roll up your sleeves and get ready to learn the ins and outs of bathtub chip repair. With the right approach and a willingness to take on a DIY challenge, you'll soon be on your way to enjoying a beautifully restored bathtub that enhances the overall appeal of your bathroom space. Let's dive in and explore the steps involved in assessing the damage, gathering the necessary materials, repairing the chip, and adding the finishing touches to complete the repair process.
Key Takeaways:
- Don’t let a chipped bathtub stress you out! With the right materials and know-how, you can easily repair it yourself, saving time and money while preserving the integrity of your bathroom.
- By following simple steps and gathering the right materials, you can repair a chipped bathtub like a pro. With patience and attention to detail, you’ll achieve a seamless, long-lasting result that enhances your bathroom’s appeal.
Read more: Why Is My Bathtub Chipping
Assessing the Damage
Before embarking on the repair process, it's crucial to thoroughly assess the extent of the chip in your bathtub. This initial step will provide valuable insights into the size of the damage and the best approach for addressing it effectively. Here's how to assess the damage:
-
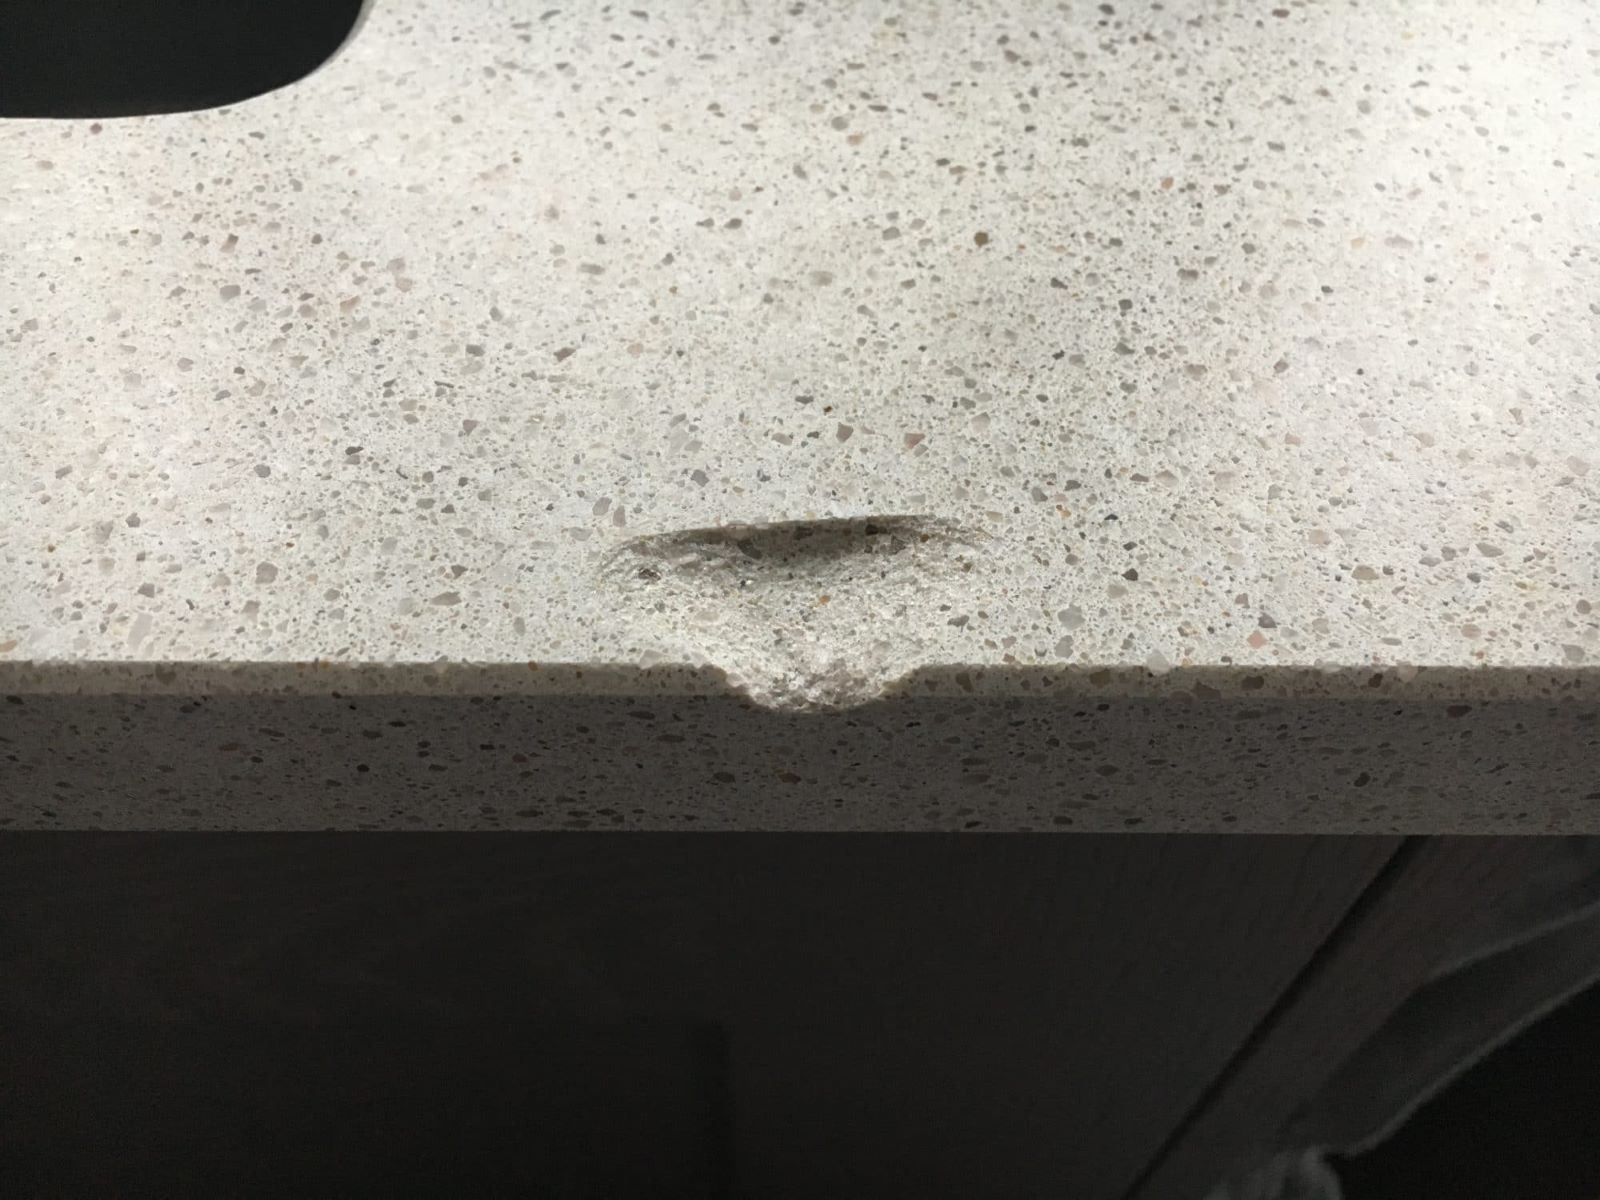
Examine the Chip: Begin by closely inspecting the chipped area of the bathtub. Take note of the size and depth of the chip, as well as any surrounding damage or potential causes. Understanding the specifics of the chip will guide your approach to the repair process.
-
Check for Sharp Edges: Carefully run your fingers along the edges of the chip to determine if there are any sharp or jagged areas. Sharp edges can pose a safety hazard and may need to be smoothed out during the repair process.
-
Evaluate the Location: Consider the location of the chip within the bathtub. Chips near the drain or water fixtures may require different repair techniques than those located on the flat surface of the tub.
-
Assess the Impact on Functionality: Determine whether the chip has affected the functionality of the bathtub. For instance, if the chip is causing water to accumulate or compromising the tub's ability to hold water, it may require immediate attention to prevent further issues.
-
Inspect for Cracks: In addition to the chip itself, inspect the surrounding area for any hairline cracks or damage that may have resulted from the impact. Identifying additional damage will ensure that the repair process addresses all related issues.
By carefully assessing the damage, you'll gain a comprehensive understanding of the chip's characteristics and its impact on the bathtub. This knowledge will inform your approach to gathering the necessary materials and selecting the most suitable repair method for achieving a successful outcome.
Gathering the Necessary Materials
To effectively repair a chip in a bathtub, it's essential to gather the necessary materials before proceeding with the repair process. Having the right tools and supplies at hand will streamline the repair and ensure a professional-looking result. Here's a comprehensive list of materials you'll need for repairing a bathtub chip:
-
Bathtub Repair Kit: Invest in a quality bathtub repair kit that includes epoxy or filler specifically designed for repairing chips and cracks in bathtubs. These kits typically contain all the essential components, such as filler compounds, catalysts, sandpaper, and application tools, needed to complete the repair.
-
Protective Gear: Prioritize safety by wearing protective gear, including gloves and safety goggles, to shield yourself from any potentially harmful chemicals or materials used during the repair process.
-
Cleaning Supplies: Gather cleaning supplies such as a mild detergent, clean cloths, and rubbing alcohol to thoroughly clean the chipped area and ensure optimal adhesion for the repair materials.
-
Sandpaper: Obtain fine-grit sandpaper to smooth the edges of the chip and create a suitable surface for applying the repair compound. The sandpaper will help blend the repaired area seamlessly with the surrounding bathtub surface.
-
Masking Tape: Use masking tape to outline the chipped area and protect the surrounding surfaces from accidental damage during the repair process. This will help maintain a clean and precise repair area.
-
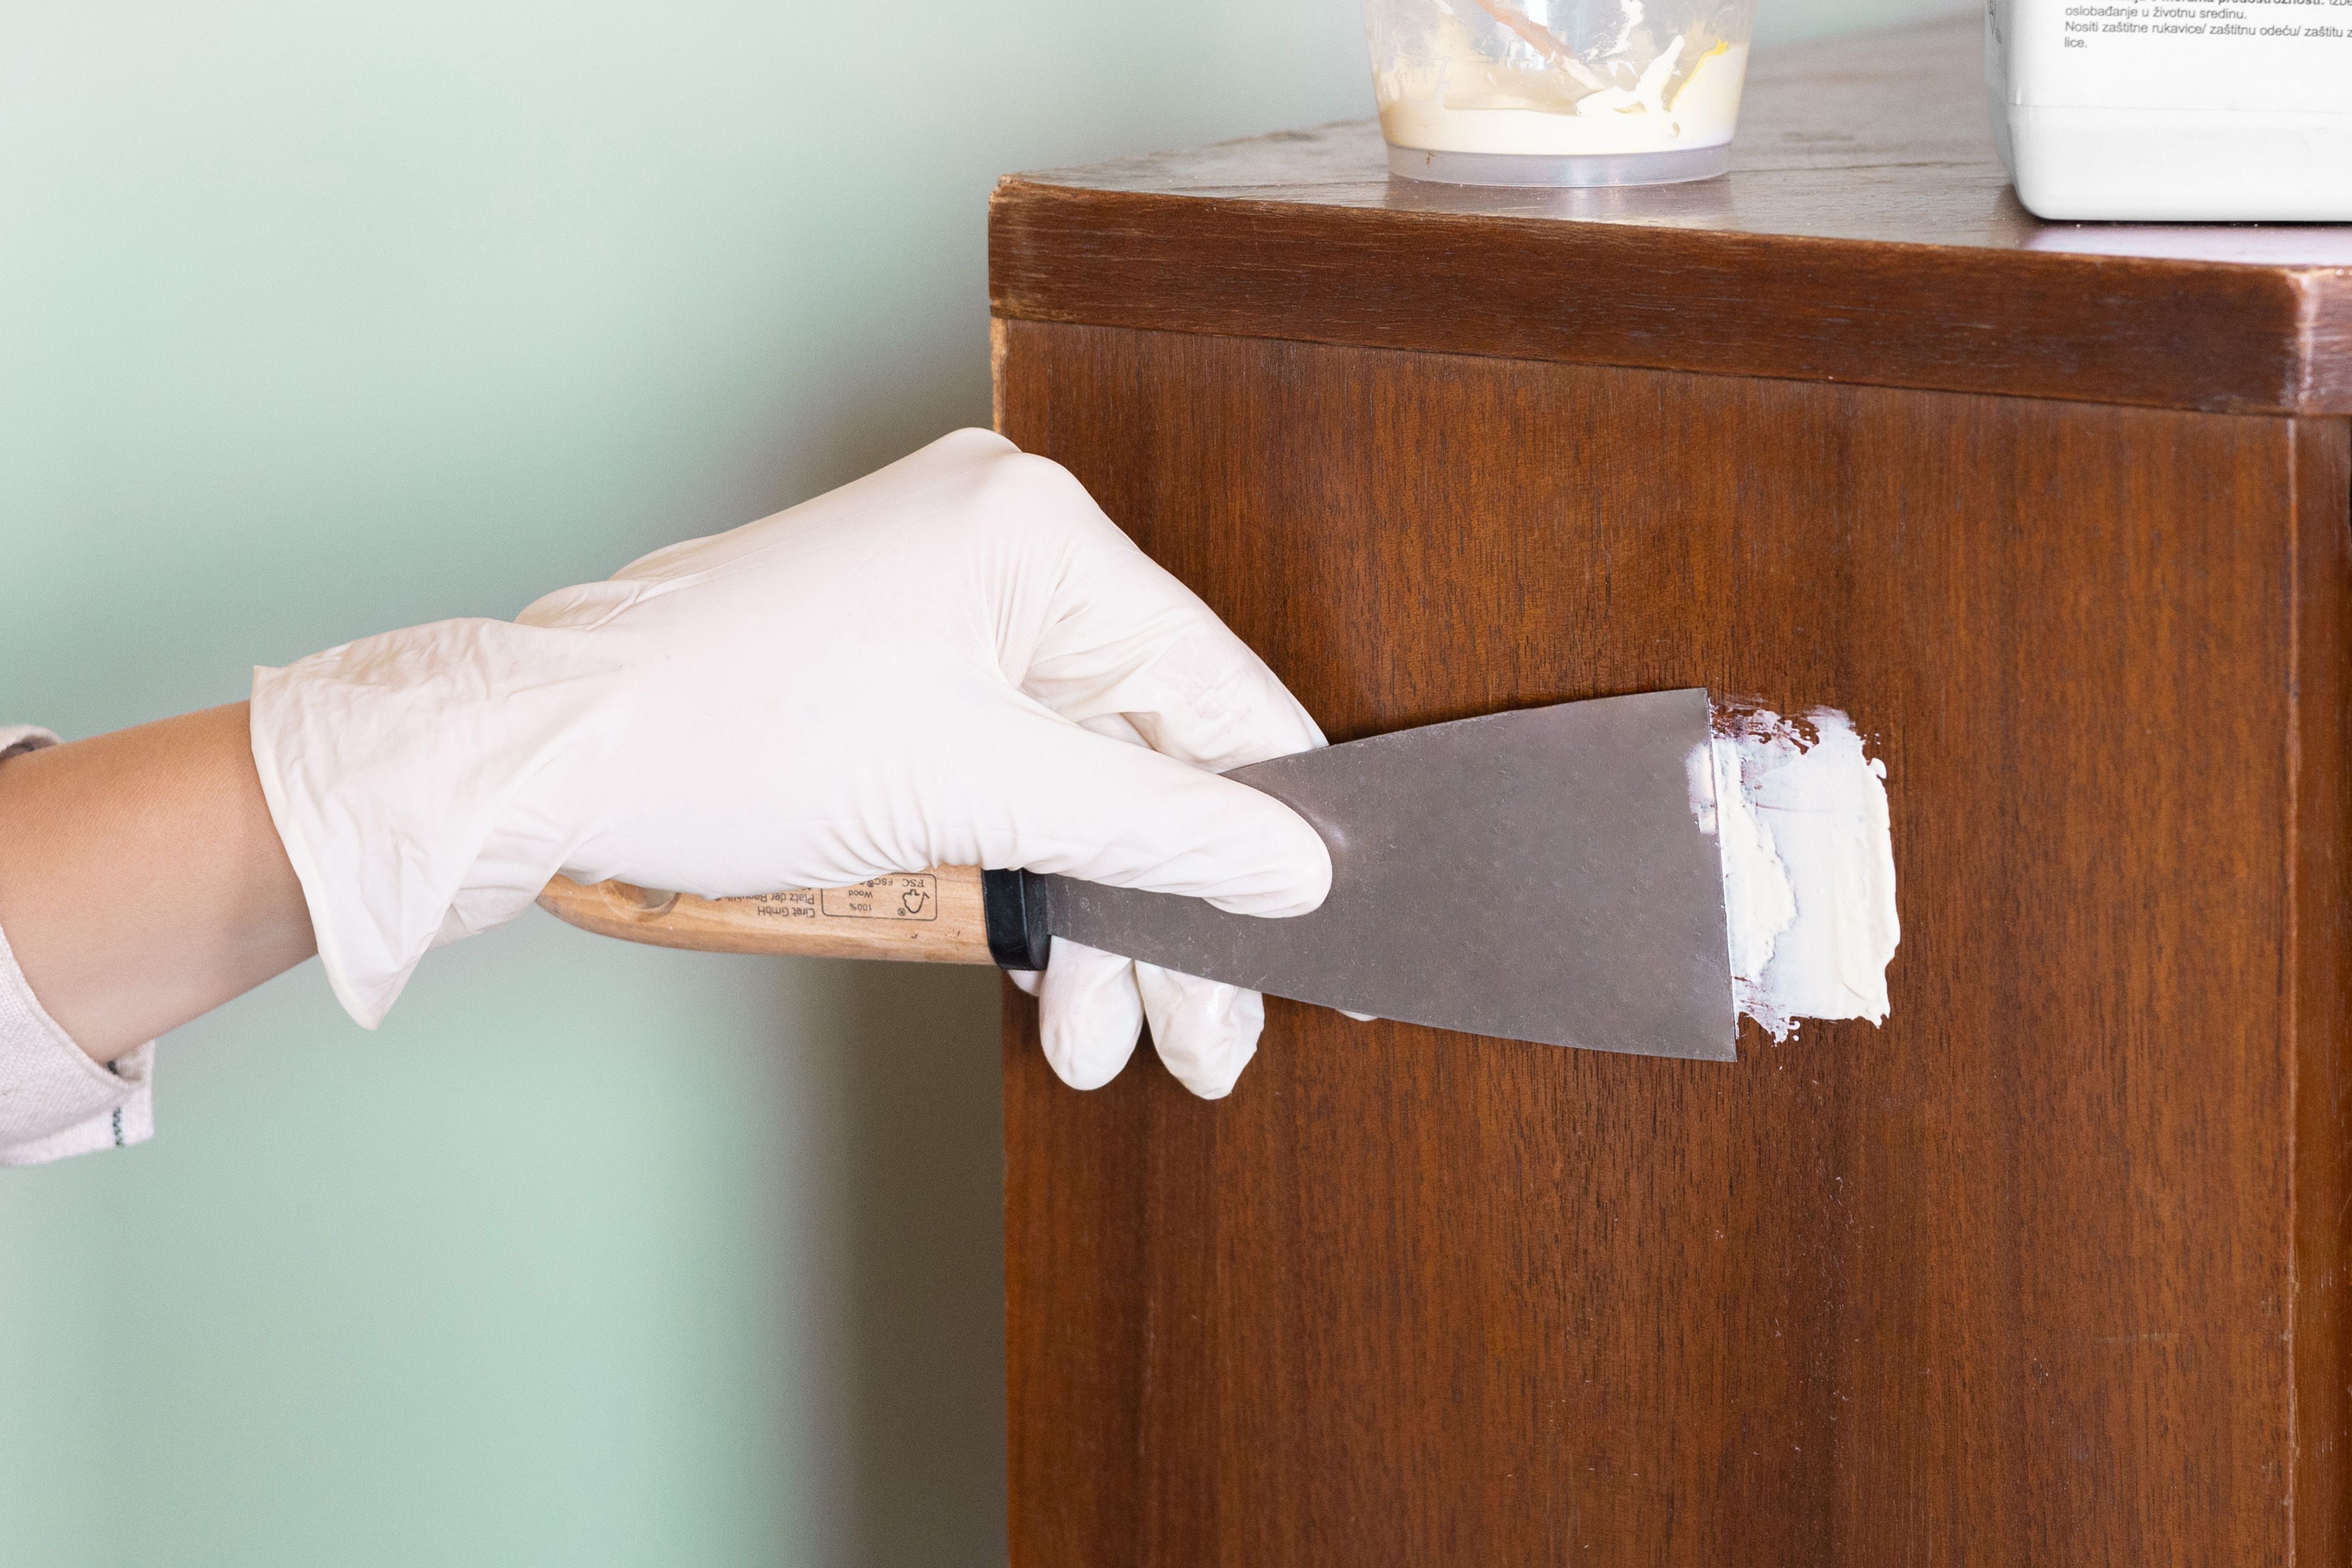
Putty Knife or Spatula: A putty knife or spatula is essential for applying the repair compound evenly and smoothly over the chipped area. It allows for precise application and helps achieve a seamless finish.
-
Epoxy or Filler: Depending on the type of bathtub repair kit you've selected, ensure that you have an adequate amount of epoxy or filler to fill the chip and create a durable, long-lasting repair.
-
Primer and Paint: If the bathtub's surface requires refinishing after the chip repair, have bathtub primer and paint on hand to match the color and finish of the existing bathtub surface.
By gathering these essential materials, you'll be well-prepared to tackle the bathtub chip repair with confidence and precision. With the right tools and supplies at your disposal, you can proceed to the next step of the repair process, ready to restore your bathtub to its original condition.
Use a bathtub repair kit to fill in the chip, following the instructions carefully. Sand the area smooth and apply a waterproof sealant for a lasting fix.
Repairing the Chip
With a thorough assessment of the chip and all necessary materials at hand, you're now ready to embark on the crucial step of repairing the chip in your bathtub. Follow these detailed instructions to effectively repair the chip and restore the integrity of your bathtub:
-
Clean the Area: Begin by cleaning the chipped area of the bathtub with a mild detergent and water. Ensure that the surface is free from any dirt, grime, or residue that could hinder the adhesion of the repair materials. Once cleaned, use a cloth dampened with rubbing alcohol to further remove any lingering debris and to promote optimal adhesion.
-
Prepare the Filler: If you're using a bathtub repair kit that includes a filler compound, carefully follow the manufacturer's instructions to prepare the filler. This typically involves mixing the filler with a catalyst to activate the bonding process. Ensure that the filler is thoroughly mixed to achieve a consistent texture and optimal performance.
-
Apply the Filler: Using a putty knife or spatula, carefully apply the prepared filler to the chipped area of the bathtub. Fill the chip evenly, ensuring that the filler is slightly raised above the surface of the bathtub to account for any shrinkage during the drying process. Smooth out the filler to create a seamless transition between the repaired area and the surrounding bathtub surface.
-
Allow for Drying: Once the filler is applied, allow it to dry and cure according to the manufacturer's instructions. This typically involves a waiting period to ensure that the filler sets and adheres securely to the bathtub surface. Be mindful of the recommended drying time to prevent any premature disturbances to the repair.
-
Sand the Repair: After the filler has fully dried, use fine-grit sandpaper to carefully sand the repaired area. This step is crucial for smoothing out any imperfections, blending the repaired section with the surrounding surface, and achieving a uniform finish. Take care to maintain a gentle and consistent sanding motion to avoid damaging the repaired area.
-
Inspect and Refine: Once the repair is sanded, inspect the area to ensure that the chip has been effectively filled and that the surface is smooth and even. If necessary, repeat the filling and sanding process to refine the repair until it meets your satisfaction.
By following these detailed steps, you can effectively repair the chip in your bathtub and achieve a professional-looking result. With patience and precision, you'll be able to restore the integrity and visual appeal of your bathtub, ensuring that it remains a functional and aesthetically pleasing fixture in your bathroom.
Finishing Touches
After completing the repair process for the chipped bathtub, it's essential to add the finishing touches to ensure a seamless and polished outcome. These final steps will not only enhance the visual appeal of the repaired area but also contribute to the overall longevity and durability of the repair. Here's how to add the finishing touches to your bathtub chip repair:
-
Clean the Surface: Once the repair compound has been applied and sanded, thoroughly clean the entire bathtub surface to remove any dust or debris resulting from the repair process. Use a mild detergent and water to clean the bathtub, ensuring that the repaired area is free from any residual particles that could affect the adhesion of subsequent materials.
-
Apply Primer (If Necessary): If the bathtub's surface requires refinishing to match the repaired area, apply a suitable bathtub primer according to the manufacturer's instructions. The primer will facilitate optimal adhesion for the paint and ensure a uniform finish across the entire bathtub surface.
-
Paint the Repaired Area: Using a high-quality bathtub paint that matches the color and finish of the existing bathtub surface, carefully apply a thin, even coat of paint to the repaired area. Follow the manufacturer's guidelines for proper application and drying times to achieve a seamless blend between the repaired section and the rest of the bathtub.
-
Allow for Proper Drying: After applying the paint, allow sufficient time for it to dry and cure completely. Avoid using the bathtub during this drying period to prevent any potential damage to the freshly painted surface. Adhering to the recommended drying times will ensure a durable and long-lasting finish.
-
Inspect the Final Result: Once the paint has dried, inspect the repaired area to ensure that it seamlessly integrates with the surrounding bathtub surface. Look for any imperfections or inconsistencies and make any necessary touch-ups to achieve a flawless finish.
-
Restore the Bathtub Fixtures: If any fixtures or accessories were removed during the repair process, such as faucet handles or drain covers, carefully reinstall them to complete the restoration of your bathtub to its fully functional state.
By meticulously attending to these finishing touches, you can elevate the quality of your bathtub chip repair and achieve a result that is not only visually appealing but also built to withstand the rigors of daily use. With a well-executed repair and attention to detail, your bathtub will regain its original charm and functionality, allowing you to enjoy a beautifully restored bathroom space for years to come.
Read more: How To Repair A Chip In A Porcelain Bathtub
Conclusion
In conclusion, repairing a chip in a bathtub is a manageable task that, when approached with the right knowledge and materials, can yield professional-looking results. By following the step-by-step process outlined in this guide, homeowners can effectively restore the integrity and visual appeal of their bathtubs, ultimately enhancing the overall aesthetics of their bathroom spaces.
The initial assessment of the chip's size, depth, and location sets the stage for a targeted and informed approach to the repair process. Understanding the specific characteristics of the chip allows homeowners to gather the necessary materials and select the most suitable repair method, ensuring a successful outcome.
Gathering the essential materials, including a bathtub repair kit, protective gear, cleaning supplies, and application tools, equips homeowners with everything they need to tackle the repair with confidence and precision. With these materials at hand, the repair process can proceed seamlessly, leading to a restored bathtub surface that seamlessly integrates with the existing fixture.
The repair process itself, involving cleaning the area, preparing and applying the filler, allowing for proper drying, and refining the repair through sanding and inspection, empowers homeowners to take an active role in restoring their bathtubs. By following these detailed steps, individuals can achieve a professional-quality repair that addresses the chip effectively and ensures a durable, long-lasting result.
Adding the finishing touches, such as cleaning the surface, applying primer and paint, allowing for proper drying, and inspecting the final result, elevates the repair to a polished and seamless finish. These concluding steps contribute to the overall longevity and visual cohesiveness of the repair, allowing homeowners to enjoy a fully restored bathtub that enhances the functionality and aesthetics of their bathroom.
In essence, the process of repairing a chip in a bathtub is not only a practical endeavor but also an opportunity for homeowners to take pride in maintaining and enhancing their living spaces. By investing time and effort into the repair process, individuals can achieve a sense of accomplishment and satisfaction, knowing that they have successfully revitalized a key element of their home.
Ultimately, this comprehensive guide empowers homeowners to address bathtub chips with confidence, providing them with the knowledge and resources needed to achieve a professional-quality repair. With the right approach and a willingness to take on a DIY challenge, individuals can transform a chipped bathtub into a beautifully restored fixture that contributes to the overall comfort and appeal of their home.
Frequently Asked Questions about How To Repair A Chip In A Bathtub
Was this page helpful?
At Storables.com, we guarantee accurate and reliable information. Our content, validated by Expert Board Contributors, is crafted following stringent Editorial Policies. We're committed to providing you with well-researched, expert-backed insights for all your informational needs.


0 thoughts on “How To Repair A Chip In A Bathtub”