
Furniture
How To Update A Dresser
Modified: October 20, 2024
Learn how to update a dresser with our step-by-step guide. Transform your old furniture into a statement piece with our DIY tips and tricks.
(Many of the links in this article redirect to a specific reviewed product. Your purchase of these products through affiliate links helps to generate commission for Storables.com, at no extra cost. Learn more)
Introduction:
Updating a dresser is an excellent way to breathe new life into your furniture and transform the look of your space. Whether you’re looking to update your bedroom, living room, or any other area of your home, giving your dresser a fresh coat of paint or a new finish can make a significant impact. It’s a budget-friendly and creative project that allows you to put your personal touch on your furniture.
In this article, we will guide you through the steps to update a dresser and provide you with tips and ideas to make the process smooth and enjoyable. From gathering supplies to reattaching hardware, you’ll learn everything you need to know to give your old dresser a stunning makeover.
Key Takeaways:
- Transform your dresser with a budget-friendly and creative update. From gathering supplies to reattaching hardware, follow the steps to achieve a stunning and personalized piece that reflects your style and personality.
- Unleash your creativity and infuse your personality into the dresser update project. Whether it’s a bold color, distressed finish, or intricate stenciling, take your time and enjoy the process to create a dresser that you love.
Read more: How To Update Wardrobe
Step 1: Gather Supplies
Before embarking on your dresser update project, it’s essential to gather all the necessary supplies. Having everything prepared in advance will ensure a smoother and more efficient process. Here are the supplies you’ll need:
- Old dresser
- Screwdriver
- Sandpaper (various grits: coarse, medium, fine)
- Wood filler
- Primer
- Paint or stain
- Paintbrush or foam roller
- Drop cloth or old sheets
- Clean cloth or sponge
- Painter’s tape
- Optional: decorative accents or stencils
- Clear coat or sealer
- New hardware (optional)
Make sure to choose the appropriate supplies based on the type of dresser and the finish you want to achieve. For instance, if you plan on painting the dresser, opt for latex or acrylic paint in your preferred color. If you prefer a stained finish, choose a wood stain that matches your desired look.
Additionally, consider the size of your dresser when selecting your supplies. A larger dresser may require more paint or stain, while a smaller one may need less. It’s better to have a little extra than to run out in the middle of your project.
Once you have all your supplies, find a well-ventilated area to work in. It’s a good idea to lay down a drop cloth or old sheets to protect your flooring from any accidental spills or drips. Now that you’re fully prepared, you can move on to the next step of the process: removing hardware and cleaning the dresser.
Step 2: Remove Hardware and Clean the Dresser
Before you can begin updating your dresser, it’s important to remove any hardware and thoroughly clean the surface. This step allows for an even application of primer and paint, ensuring a smooth and professional-looking finish. Here’s how to do it:
- Start by removing the hardware: Use a screwdriver to carefully unscrew and remove any knobs, handles, or drawer pulls from the dresser. Keep the hardware in a safe place so you can clean or replace it later. If you plan on replacing the hardware, take measurements to ensure you purchase the correct size and style.
- Clean the dresser: With the hardware removed, it’s time to clean the dresser. Use a clean cloth or sponge dampened with water and a mild soap or a wood cleaner to remove any dirt, dust, or grime from the surface. Pay close attention to any intricate details or edges. Wipe down the dresser thoroughly and allow it to dry completely before moving on to the next step.
- Repair any damage: Inspect the dresser for any signs of damage or wear. If you notice any scratches, dents, or chips in the wood, now is the time to address them. Use wood filler to fill in any imperfections and smooth them out with sandpaper once it’s dry. This will ensure a seamless finish once the dresser is painted or stained.
Taking the time to remove hardware and clean the dresser sets the foundation for a successful update. By removing the hardware, you’ll be able to paint or stain the dresser more easily and achieve a consistent finish. Cleaning the surface ensures that the paint or stain adheres properly and enhances the overall look of the dresser.
Once you’ve finished removing hardware and cleaning the dresser, you can move on to the next step: sanding the surface.
Step 3: Sand the Surface
Sanding the surface of your dresser is a crucial step in the updating process as it helps to create a smooth and even base for the primer and paint or stain. Sanding also helps to remove any remaining rough patches, old finishes, or imperfections on the wood. Here’s how to properly sand the surface of your dresser:
- Gather your sandpaper: You will need sandpaper in various grits, such as coarse (80-100 grit), medium (120-150 grit), and fine (220-240 grit). Start with the coarsest sandpaper and work your way to the finest for a smooth result.
- Begin sanding: Start by using the coarsest sandpaper to sand the entire surface of the dresser. Sand along the grain of the wood in smooth, even strokes. Apply light to moderate pressure and keep the sander or sandpaper moving consistently. This will help to remove any rough patches, blemishes, or old finishes. Take care not to sand too aggressively, as this can damage the wood.
- Switch to a medium-grit sandpaper: Once you have sanded the entire surface with the coarsest sandpaper, switch to a medium-grit sandpaper to further smooth out the surface. Repeat the same sanding process, this time focusing on creating a more refined and even texture.
- Finish with fine-grit sandpaper: Lastly, use the finest-grit sandpaper to achieve a smooth and polished surface. This final sanding step helps to remove any fine scratches or rough spots and prepares the surface for the application of primer, paint, or stain.
- Clean the dresser: After sanding, use a clean cloth or brush to remove any dust or debris created from the sanding process. It’s important to start with a clean surface before moving on to the next step of the update.
Sanding the surface of your dresser not only helps to improve the overall appearance, but it also creates a better adhesion surface for the primer and paint or stain. It’s a vital step in achieving a professional-looking finish. With the sanding complete, you can move on to the next step: priming the dresser.
Step 4: Prime the Dresser
Priming your dresser is an essential step in the updating process, as it creates a smooth and stable base for the paint or stain to adhere to. Primer helps to achieve better coverage, enhances the color of the paint or stain, and improves the overall durability of the finish. Follow these steps to properly prime your dresser:
- Select the right primer: Choose a high-quality primer that is suitable for the type of paint or stain you plan to use. If you’re painting the dresser, use a primer specifically designed for wood surfaces. If you’re staining the dresser, opt for a wood conditioner or stain-specific primer.
- Prepare the area: Place a drop cloth or old sheets underneath your dresser to protect the surrounding area from any primer spills or drips. Make sure you’re working in a well-ventilated space to allow proper airflow during the priming process.
- Apply the primer: Using a paintbrush or foam roller, apply an even coat of primer to the entire surface of the dresser. Work in long, smooth strokes, following the grain of the wood. Pay close attention to details and hard-to-reach areas, making sure the primer is evenly distributed. If necessary, use a smaller brush to get into corners or intricate areas.
- Allow the primer to dry: Follow the manufacturer’s instructions for drying time. Typically, it takes a few hours for the primer to dry. Make sure the primer is fully dry before moving on to the next step.
- Lightly sand the primer: Once the primer is completely dry, lightly sand the surface with fine-grit sandpaper to remove any imperfections. This will create a smooth surface for the paint or stain to adhere to.
- Clean the dresser: After sanding the primer, use a clean cloth or brush to remove any dust or debris. It’s important to start with a clean and smooth surface before applying the final finish.
Priming your dresser ensures better adhesion, longer-lasting results, and a more professional-looking finish. It’s a crucial step in the updating process that should not be skipped. With the dresser properly primed and prepared, you’re ready to move on to the exciting part: painting or staining!
Read more: How To Update Dining Table
Step 5: Paint the Dresser
Painting your dresser is a creative and transformative step in the updating process. It allows you to customize the look of your furniture and bring your personal style into the space. Follow these steps to paint your dresser with precision and achieve a beautiful and professional finish:
- Choose the right paint: Select a high-quality paint that is specifically formulated for wood surfaces. Consider the type of paint finish you desire, such as matte, satin, or glossy. Take into account the overall style and color scheme of your space.
- Prepare the area: Lay down a drop cloth or old sheets to protect your flooring from paint splatters or spills. Ensure you’re working in a well-ventilated area to allow for proper airflow during the painting process.
- Stir the paint: Before you start painting, give your paint can a thorough stir to ensure a consistent color and texture throughout.
- Apply the paint: Use a paintbrush or foam roller to apply an even coat of paint to the dresser’s surface. Start with larger areas and work your way to smaller details. Use long, smooth strokes, following the grain of the wood. Apply multiple thin coats for better coverage, allowing each coat to dry before applying the next one.
- Precision in details: Pay special attention to any intricate details or edges on the dresser. Use a smaller paintbrush or an artist’s brush for those hard-to-reach areas. Take your time to ensure every nook and cranny is covered with paint.
- Allow the paint to dry: Follow the manufacturer’s instructions for drying time between coats. Depending on the type of paint and the humidity level, it may take a few hours to dry. Make sure each coat is completely dry before applying the next one.
- Optional: Add a second coat: Once the first coat of paint is dry, assess if additional coats are needed for better coverage or a more vibrant color. Apply a second coat using the same techniques as before.
- Clean up: Clean your paintbrushes and rollers with soap and water or the recommended cleaner for the type of paint you used.
Painting your dresser can completely transform the look and feel of the furniture piece and your room. Whether you choose a bold and vibrant color or a subtle and neutral tone, painting allows you to express your personal style and create a unique piece of furniture. With the painting complete, you’re one step closer to unveiling your beautifully updated dresser.
Consider updating the hardware on your dresser for a quick and easy refresh. Swapping out old knobs and pulls for new ones can give your dresser a whole new look without a lot of effort.
Step 6: Optional: Add Decorative Accents or Stencils
To add an extra touch of creativity and personalization to your updated dresser, consider incorporating decorative accents or stencils. This step allows you to showcase your artistic skills and further enhance the visual appeal of the furniture piece. Follow these steps to add decorative accents or stencils to your dresser:
- Choose your design: Determine the decorative accents or stencil design you wish to incorporate into your dresser. It could be a floral motif, geometric patterns, words, or any other design that complements your style and the overall aesthetic of your space.
- Prepare the dresser surface: Ensure that the painted surface is completely dry and clean before proceeding with the decorative accents or stencils. Use painter’s tape to protect any areas that you want to remain untouched.
- Position the stencils: If you’re using stencils, position them on the desired areas of the dresser. Secure them in place with painter’s tape or a temporary adhesive to prevent movement while painting.
- Apply paint or stain: Using a small brush or foam stencil brush, apply the paint or stain of your choice onto the stencils. Take care to apply an even layer of paint without smudging or bleeding outside the stencil boundaries.
- Remove the stencil: Gently remove the stencil while the paint or stain is still wet, being careful not to smudge the design. Allow the painted design to dry completely before continuing to the next step.
- Optional: Add additional accents: If desired, you can use other decorative accents, such as decals, appliques, or metallic details, to further enhance the design and add a unique touch to your dresser. Follow the manufacturer’s instructions for applying these accents.
Adding decorative accents or stencils to your dresser allows you to create a customized and visually stunning furniture piece. It adds a unique element to your space and can become a focal point in the room. These creative details give your updated dresser an extra level of personalization and showcase your artistic flair.
Once your decorative accents or stencils have been applied and dried, it’s time to move on to the next step: protecting your updated dresser with a clear coat or sealer.
Step 7: Apply a Clear Coat for Protection
To ensure the longevity and durability of your freshly updated dresser, it’s important to apply a clear coat or sealer. This step adds a protective layer that guards against scratches, stains, and general wear and tear. Follow these steps to apply a clear coat and protect your updated dresser:
- Choose the right clear coat: Select a clear coat or sealer that is compatible with the type of paint or stain you used on your dresser. Look for a product that offers protection against UV rays, water damage, and daily use.
- Prepare the area: Ensure that your dresser is clean and free from any dust or debris. Lay down a drop cloth or old sheets to protect the surrounding area from any drips or spills.
- Stir the clear coat: Give the clear coat or sealer a good stir before applying to ensure a consistent and smooth finish.
- Apply the clear coat: Using a clean paintbrush or foam roller, apply an even and thin coat of clear coat over the entire surface of the dresser. Work in long, smooth strokes, following the grain of the wood. Take care to avoid any drips or pooling of the clear coat.
- Allow the clear coat to dry: Follow the manufacturer’s instructions for drying time. It typically takes a few hours for the clear coat to dry, but it’s best to allow it to cure overnight for optimal results.
- Optional: Apply additional coats: If desired, you can apply multiple coats of clear coat for added protection. Remember to lightly sand the surface with fine-grit sandpaper between coats to achieve a smooth and flawless finish.
- Clean up: Clean your paintbrushes and rollers with soap and water or the recommended cleaner for the clear coat product you used.
Applying a clear coat or sealer adds the final layer of protection to your updated dresser. It not only safeguards the surface from daily use but also enhances the overall appearance of the furniture piece. The clear coat imparts a beautiful, glossy sheen while keeping your dresser looking fresh and vibrant for years to come.
With the clear coat applied and fully dried, you’re now ready for the final step of the process: reattaching the hardware to complete your updated dresser.
Step 8: Reattach Hardware
After completing the painting and protective coating of your dresser, it’s time to reattach the hardware to give it a polished and finished look. The hardware, such as knobs, handles, or drawer pulls, adds a decorative element and functional purpose to your updated dresser. Here are the steps to correctly reattach the hardware:
- Organize the hardware: Lay out all the hardware in an organized manner, ensuring you have the necessary screws and any additional components for each piece.
- Align the hardware: Position each piece of hardware onto the dresser in its desired location. Take into consideration the spacing and alignment, ensuring that the hardware is uniformly placed across the dresser.
- Attach the hardware: Insert the screws into the pre-existing holes on the back of the hardware piece. Use a screwdriver to tighten the screws, ensuring they are snug but not overly tight, as it may strip the holes or damage the hardware.
- Test the hardware: Once the hardware is attached, test its functionality by opening and closing drawers or doors. Make any necessary adjustments if the hardware is too loose or too tight.
Reattaching the hardware is the final touch that will complete the updated look of your dresser. Ensure all the hardware is securely fastened to prevent any mishaps or accidents. Take your time to align the pieces properly and make any adjustments as needed.
With the hardware now reattached to your updated dresser, you can step back and marvel at the transformation you’ve achieved.
Read more: How To Update A Shower Tile
Step 9: Enjoy Your Updated Dresser
Congratulations! You’ve successfully completed the steps to update your dresser and have transformed it into a stunning piece of furniture. Now it’s time to sit back, relax, and enjoy the fruits of your labor. Here are a few tips to make the most out of your updated dresser:
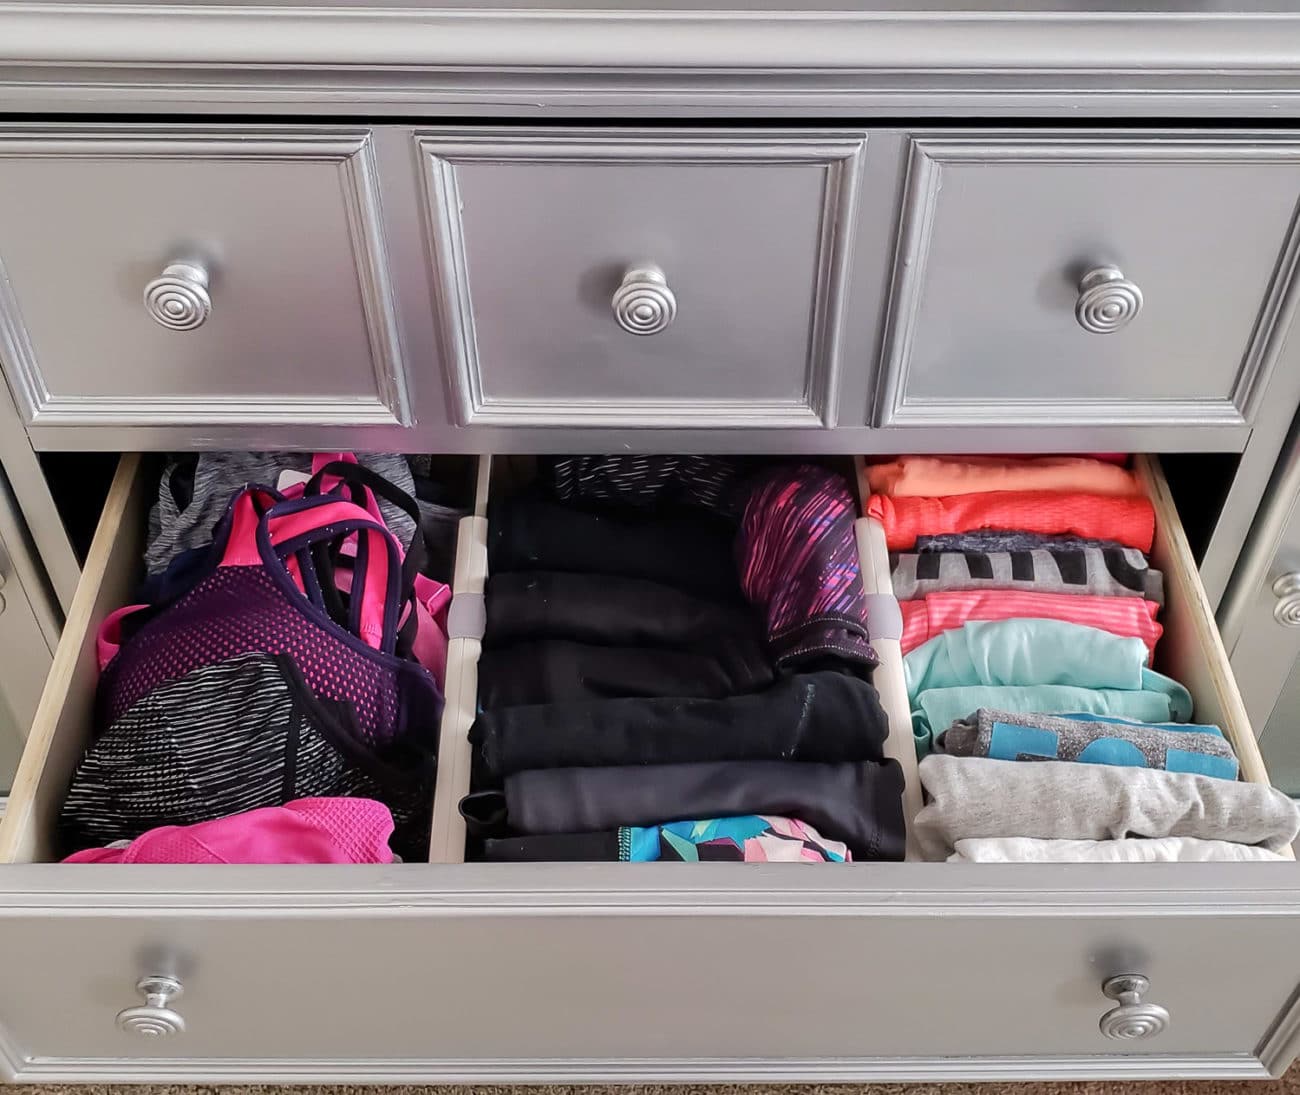
- Arrange your dresser: Organize your dresser in a way that is visually appealing and functional. Use drawer dividers or organizers to keep your belongings neat and tidy.
- Accessorize: Personalize your dresser by adding decorative items such as a stylish mirror, picture frames, or a vase of fresh flowers. This will help create a cohesive and aesthetically pleasing vignette.
- Care for your dresser: Maintain the beauty of your updated dresser by cleaning it regularly with a soft, damp cloth. Avoid using harsh chemicals that could damage the finish.
- Show it off: Proudly showcase your updated dresser to family and friends. Share your DIY journey and inspire others to take on their own furniture update projects.
- Consider other furniture updates: If you enjoyed the process of updating your dresser, why not take on other furniture pieces in your home? Apply your newfound skills and creativity to revitalize your entire space.
Updating your dresser is a gratifying project that allows you to give a new lease of life to an old piece of furniture. Not only does it enhance the aesthetic appeal of your space, but it also provides a sense of accomplishment and satisfaction in creating something unique.
So sit back, admire your updated dresser, and relish in the beauty and functionality it brings to your home. Enjoy the transformation and the joy it brings for years to come!
Happy decorating!
Conclusion:
Updating a dresser is a fantastic way to unleash your creativity, breathe new life into your furniture, and transform the look of your space. By following the steps outlined in this guide, you can easily update your dresser and create a stunning piece that reflects your style and personality.
From gathering the necessary supplies to reattaching the hardware, each step in the process contributes to the successful transformation of your dresser. Removing hardware, cleaning the surface, sanding, priming, painting, and adding decorative accents or stencils all work together to create a beautifully updated piece of furniture.
It’s important to note that while this guide provides a comprehensive approach, feel free to get creative and adapt the steps to suit your preferences and the existing condition of your dresser. Allow your imagination to guide you and infuse your personality into the project. Whether you choose a bold color, a distressed finish, or intricate stenciling, the goal is to create a dresser that you love.
Remember to take your time with each step, ensuring proper preparation and allowing for adequate drying or curing time between coats. This attention to detail will result in a professional-looking finish and a dresser that will stand the test of time.
Once your dresser is updated, enjoy the satisfaction that comes with a DIY project and appreciate the beauty and functionality it brings to your home. Explore different ways to arrange and accessorize your dresser to make it a focal point in your space.
Lastly, don’t stop at just updating your dresser. Let this project inspire you to take on other furniture updates and unleash your creativity throughout your entire home. With some time and effort, you can transform your space into a reflection of your unique style and taste.
So roll up your sleeves, gather your supplies, and embark on the journey of updating your dresser. Enjoy the process, showcase your creativity, and create a masterpiece that you’ll admire for years to come.
Happy updating!
Frequently Asked Questions about How To Update A Dresser
Was this page helpful?
At Storables.com, we guarantee accurate and reliable information. Our content, validated by Expert Board Contributors, is crafted following stringent Editorial Policies. We're committed to providing you with well-researched, expert-backed insights for all your informational needs.


0 thoughts on “How To Update A Dresser”