Furniture
How To Hang A Chandelier Off-Center
Modified: February 17, 2024
Learn how to hang a chandelier off-center and add a stylish touch to your furniture arrangement. Step-by-step guide for perfect placement
(Many of the links in this article redirect to a specific reviewed product. Your purchase of these products through affiliate links helps to generate commission for Storables.com, at no extra cost. Learn more)
Introduction
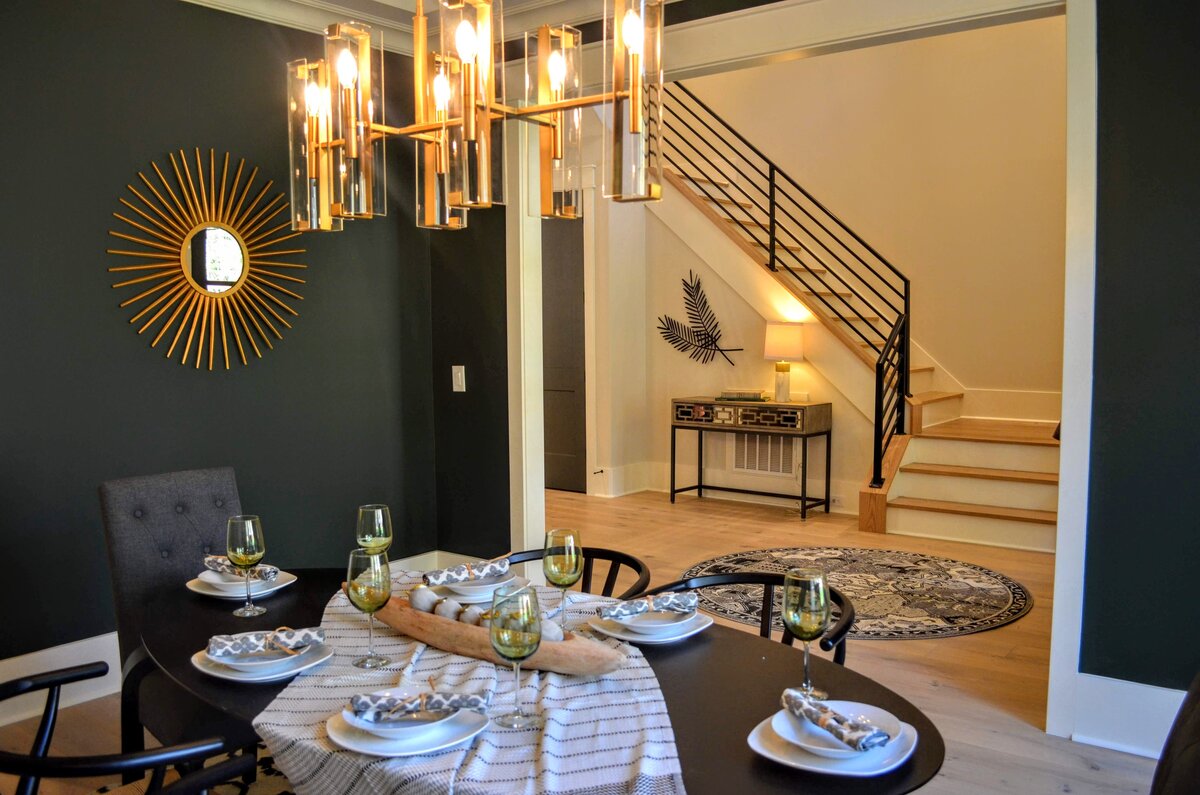
Welcome to the world of interior design, where every element in a space plays a crucial role in creating the perfect ambiance. One essential piece that can completely transform the atmosphere of a room is a chandelier. However, what do you do when the traditional ceiling placement for a chandelier doesn’t quite work with your room’s layout?
In situations like these, hanging a chandelier off-center can be a great solution. It allows you to maintain the elegance and beauty of a chandelier while ensuring that it aligns with the architectural aspects of your space. However, it’s crucial to follow the correct steps to ensure safety, stability, and a visually pleasing result.
In this guide, we will walk you through the process of hanging a chandelier off-center, providing you with the necessary knowledge and step-by-step instructions to accomplish this task with confidence.
Before we dive into the technical aspects, it’s essential to assess your space and make sure that the off-center placement will create the desired effect. Consider the room’s dimensions, layout, and existing lighting fixtures to determine the optimal location for your chandelier.
Once you have identified the perfect spot, it’s time to find the ceiling joist. This structural element will provide the necessary support for your chandelier and ensure its stability. Use a stud finder or knock on the ceiling to locate the joist’s position.
Now that you have assessed the space and found the ceiling joist, you can gather the tools and materials needed for the installation process. The specific requirements may vary based on the type and weight of your chandelier, so ensure you have the appropriate hardware, including a ceiling hook, electrical wires, wire nuts, and a voltage tester.
Next, measure, mark, and prepare the placement for your chandelier. It’s crucial to take accurate measurements to ensure that the chandelier hangs at the desired height and falls in line with the room’s architectural features. Mark the spot with a pencil or painter’s tape for reference during installation.
Now it’s time for installation. Begin by installing the ceiling hook according to the manufacturer’s instructions. This step will provide a secure anchor point for your chandelier. Make sure you screw it into the ceiling joist for maximum stability.
Once the ceiling hook is in place, it’s time to hang the chandelier. Carefully connect the electrical wires, making sure to match the corresponding colors. Use wire nuts to secure the connections and prevent any loose ends.
With the chandelier hanging, adjust its height and position to achieve the desired look. You can rely on a measuring tape or the naked eye to ensure it aligns with the room’s architectural elements. Take the time to step back and assess the overall balance and aesthetic appeal.
After adjusting the height and position, it’s important to secure the chandelier properly. Use additional hardware, such as chains or decorative ropes, to keep it in place and prevent any swinging or swaying.
Finally, test the stability and safety of your off-center chandelier. Give it a gentle shake and observe if there are any signs of instability or looseness. Verify that all electrical connections are secure and that the chandelier is hung at a safe distance from any surrounding objects or furniture.
Once you have completed these steps and are confident in the stability and safety of your off-center chandelier, you can step back and admire the stunning transformation it brings to your space.
Remember, hanging a chandelier off-center requires careful planning, precise measurements, and adherence to safety guidelines. By following these steps and taking the necessary precautions, you can create a unique and visually appealing focal point in your room that speaks to your personal style and design aesthetic.
Now, let’s dive into the process of hanging a chandelier off-center and turn your space into a showcase of elegance and sophistication.
Key Takeaways:
- Hanging a chandelier off-center requires careful assessment of the space, precise measurements, and adherence to safety guidelines. It adds elegance and sophistication, transforming the ambiance of a room.
- Proper installation involves finding the ceiling joist, gathering necessary tools, and securing the chandelier. Regular maintenance ensures stability and safety, allowing you to enjoy the captivating allure of your off-center chandelier.
Read more: How To Hang Heavy Chandelier
Assessing the space
Before you begin the process of hanging a chandelier off-center, it’s crucial to assess your space and determine the optimal location for the installation. There are a few key factors to consider to ensure that the off-center placement will achieve the desired effect and enhance the overall aesthetics of the room.
The first thing to consider is the dimensions of the room. Take note of the size and layout, as well as any architectural elements such as windows, doors, or alcoves. These features will play a significant role in determining where the off-center chandelier will have the most visual impact and complement the space’s design.
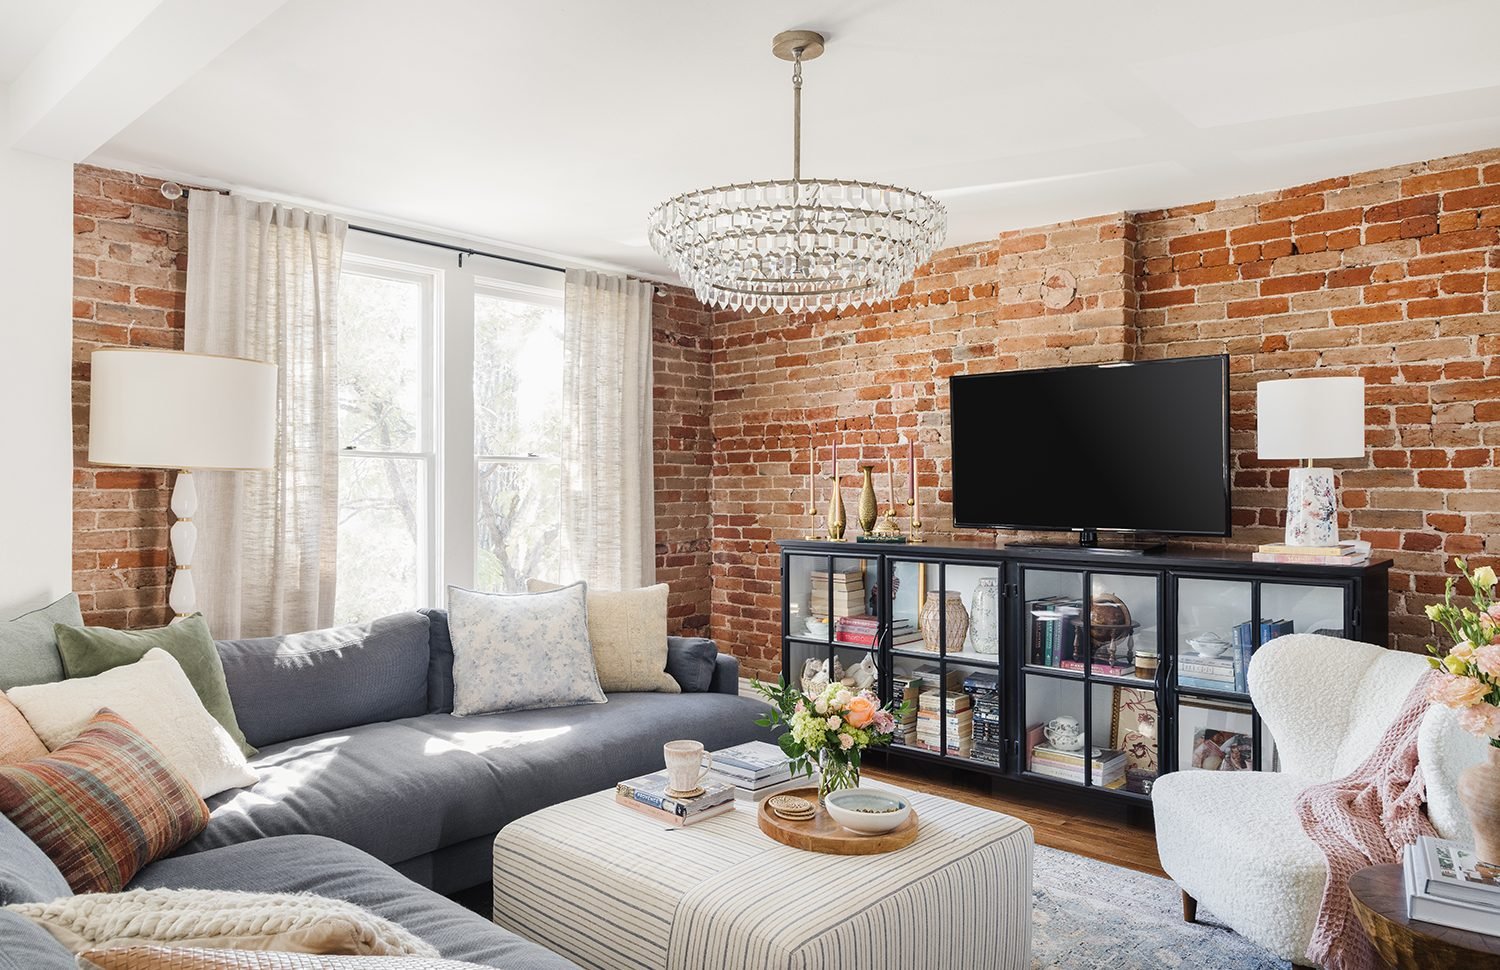
Another element to keep in mind is the existing lighting fixtures in the room. Consider the placement and style of any ceiling lights, wall sconces, or floor lamps. You’ll want to choose a location for the off-center chandelier that doesn’t conflict with or overshadow these existing sources of light. Instead, it should complement and enhance the overall lighting scheme of the room.
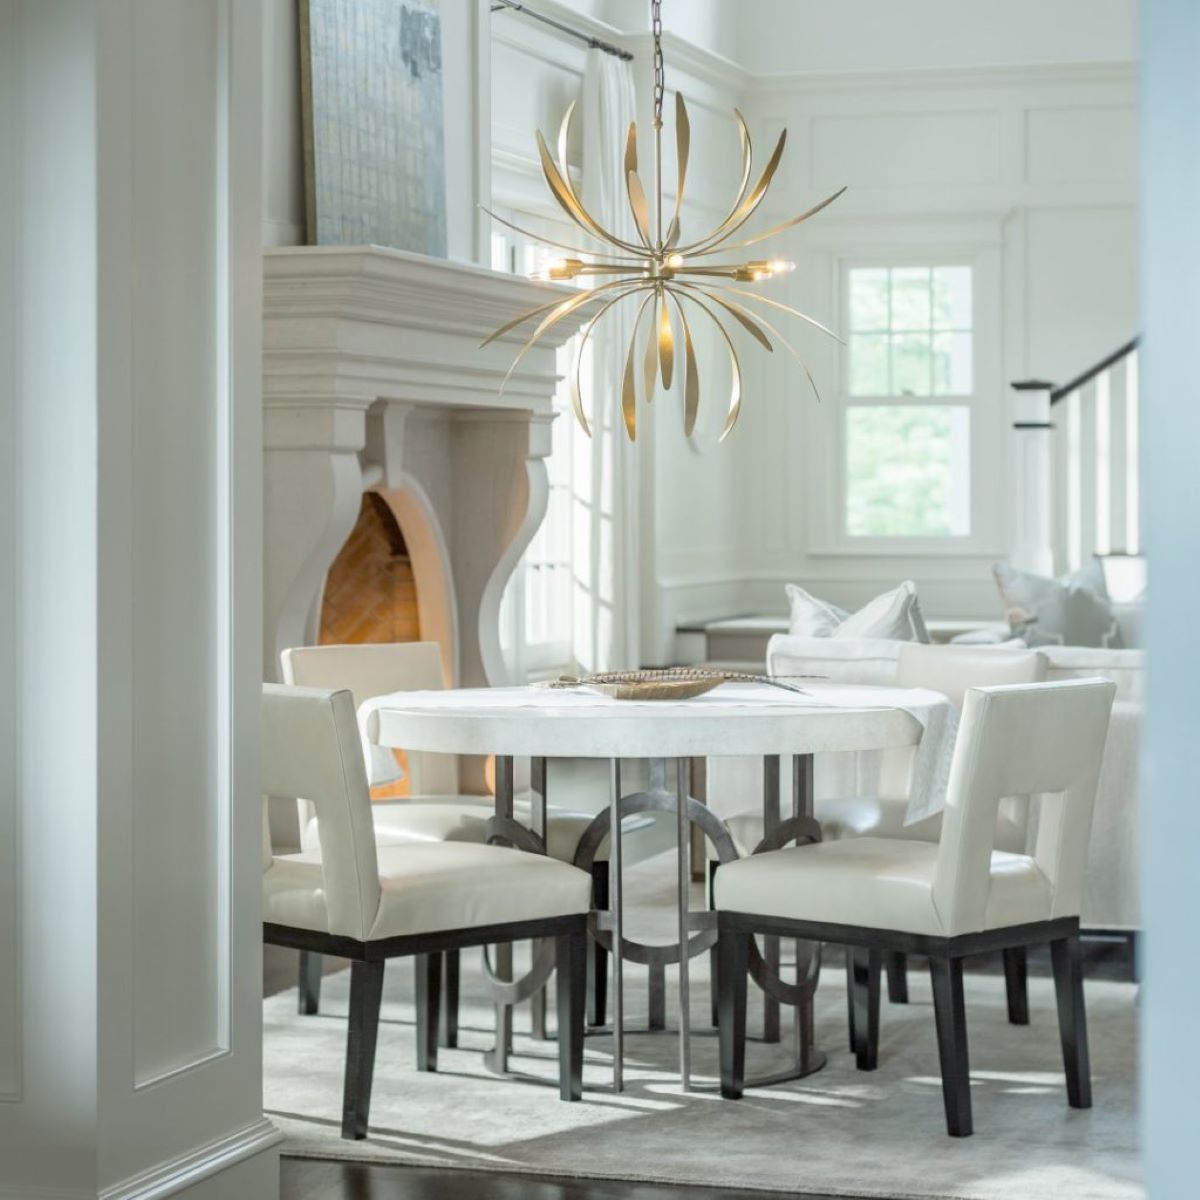
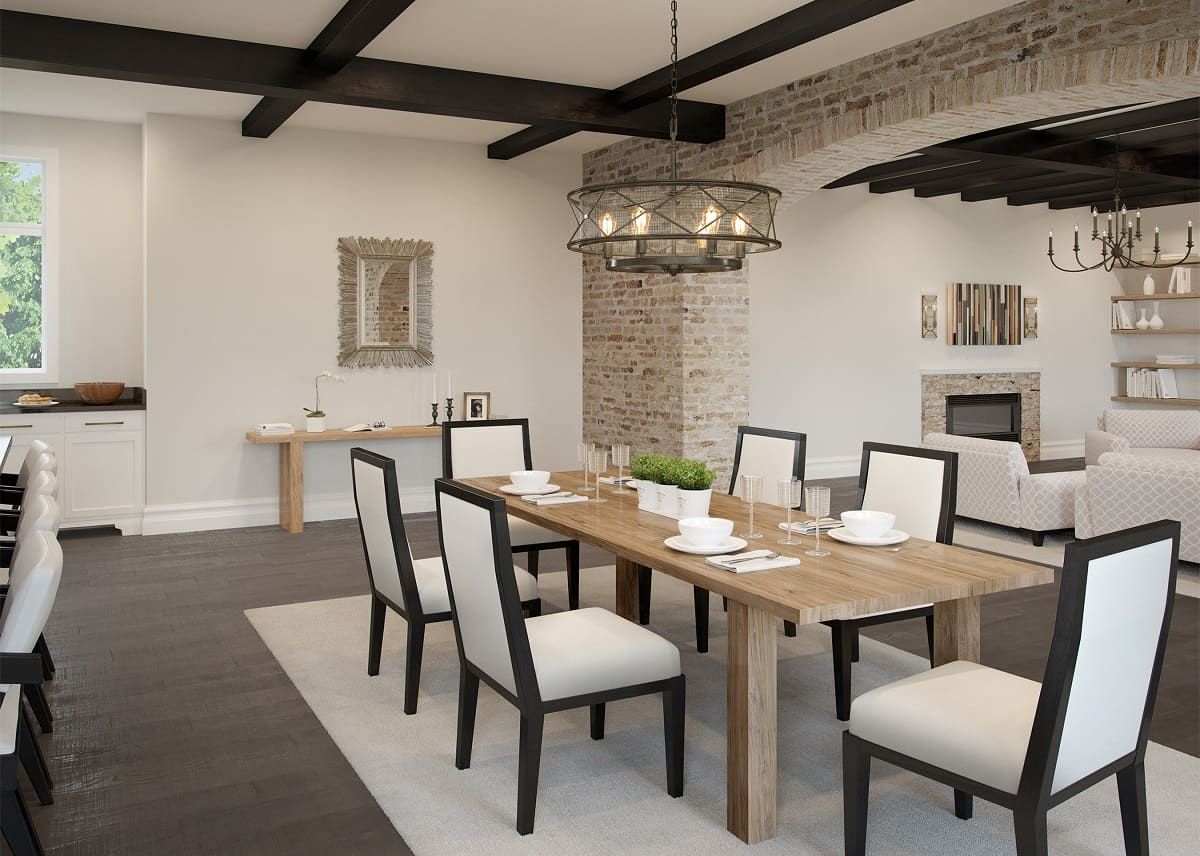
Additionally, think about the function of the space. Understanding how the room will be used on a daily basis and the activities that take place within it will help you determine the best location for the chandelier. For example, if the room is a dining area, you may want to position the chandelier above the dining table to create an intimate and inviting ambiance.
Consider the room’s focal points and architectural features as well. These could include a fireplace, a large window with a picturesque view, or a beautiful piece of artwork. Positioning the off-center chandelier in a way that draws attention to these focal points can create a visually stunning and harmonious design.
Lastly, take into account the overall aesthetic and style of the room. The chandelier should complement the existing decor and furnishings, whether it’s a modern, contemporary, or traditional style. Consider the size, shape, and materials of the chandelier to ensure that it blends seamlessly with the room’s overall design concept.
By carefully assessing the space and considering these factors, you can identify the perfect location for your off-center chandelier. Remember, the goal is to create a visually pleasing and harmonious design that adds an element of elegance and sophistication to your space.
Now that you have evaluated the space, let’s move on to the next step: choosing the correct location for your off-center chandelier.
Choosing the correct location
Now that you have assessed the space and considered various factors, it’s time to determine the correct location for your off-center chandelier. This step is crucial for achieving the desired visual impact and ensuring that the chandelier complements the room’s overall design.
Start by identifying a focal point within the room. This could be a dining table, a seating area, or any other area where you want to draw attention. The off-center chandelier should be positioned in a way that highlights this focal point and creates a visually pleasing balance.
Consider the size and scale of the room when choosing the location. If the room is small, a large and elaborate chandelier may overwhelm the space. Conversely, a small and intricate chandelier may get lost in a large and spacious room. Find the right balance by selecting a chandelier that is proportionate to the room’s size.
Think about the ceiling height as well. A chandelier that hangs too low in a room with a low ceiling can make the space feel cramped and claustrophobic. On the other hand, a chandelier that hangs too high in a room with high ceilings may appear insignificant. Aim to position the chandelier at a height that allows it to be a focal point without overpowering the room.
Consider the architectural elements of the room and how they interact with the chandelier. For example, if there is a large window or a skylight in the room, you may want to position the chandelier to catch the natural light and create a captivating play of light and shadows.
It’s also important to ensure that the off-center chandelier does not interfere with any existing lighting fixtures in the room. Avoid positioning the chandelier in a way that creates conflicting light patterns or shadows, as this can disrupt the overall lighting scheme and create a visually confusing environment.
Finally, take into account your personal style and design preferences. The off-center chandelier should reflect your taste and enhance the overall aesthetic of the room. Consider the chandelier’s design, materials, and finish to ensure that it blends seamlessly with the existing decor and furnishings.
By carefully choosing the correct location for your off-center chandelier, you can create a visually stunning and harmonious design that adds a touch of sophistication and elegance to your space. Once you have determined the ideal location, you can move on to the next step: finding the ceiling joist.
Finding the ceiling joist
One of the most critical steps in hanging a chandelier off-center is finding the ceiling joist. The ceiling joist is a structural element that provides the necessary support and stability for your chandelier. Properly securing the chandelier to the joist ensures its safety and prevents any accidents.
There are a few methods you can use to locate the ceiling joist:
- Stud finder: A stud finder is a handy tool that uses electronic sensors to detect changes in density within the ceiling. Simply move the stud finder along the ceiling until it indicates the presence of a stud or joist. Mark the location with a pencil or painter’s tape.
- Knocking: Another simple method is to use your fist or a small hammer to gently tap the ceiling. As you tap, listen for a solid sound rather than a hollow one. The solid sound indicates the presence of a joist. Mark the spot for reference.
- Measurements: In some cases, you can determine the location of the ceiling joist by taking measurements from a known reference point, such as a wall. Joists are typically spaced at regular intervals, such as 16 or 24 inches apart. Measure the distance from a wall to estimate where the nearest joists may be located.
Once you have identified the general location of the ceiling joist, it’s essential to confirm its exact position before proceeding with the installation. You can do this by using a small drill bit to create a pilot hole in the ceiling at the marked location. If you encounter resistance, you have likely found the joist. If the drill bit goes through easily without resistance, try another spot nearby.
Once you have confirmed the location of the ceiling joist, make sure to mark it clearly. You can use a pencil, painter’s tape, or any other method that will allow you to easily identify the spot during the installation process.
Keep in mind that if you are unsure or uncomfortable with finding the ceiling joist yourself, it is always recommended to consult a professional for assistance. They have the necessary tools and expertise to locate the joist accurately, ensuring a safe and secure installation.
Now that you have found the ceiling joist, you can move on to gathering the necessary tools and materials for hanging your off-center chandelier.
Gathering the necessary tools and materials
Before you begin the installation process, it’s essential to gather all the necessary tools and materials for hanging your off-center chandelier. Being prepared with the right equipment will help streamline the installation and ensure a successful outcome.
Here are the tools and materials you will need:
- Ceiling hook: Choose a sturdy and reliable ceiling hook that can support the weight of your chandelier. The hook should be able to screw into the ceiling joist securely. Consider the weight and size of your chandelier when selecting the appropriate hook.
- Ladder or step stool: Depending on the height of your ceiling, you will need a ladder or step stool to reach the installation area safely. Make sure it is stable and secure before climbing on it.
- Electrical wires and wire nuts: If your off-center chandelier requires electrical wiring, you will need the appropriate wires and wire nuts to connect it to the power source. Ensure that the wires are rated for the voltage required by your chandelier.
- Voltage tester: A voltage tester is a crucial tool for ensuring that you are working with a safe electrical connection. It allows you to test if the power is turned off before starting any electrical work.
- Wire cutters/strippers: These tools are necessary for cutting and stripping the electrical wires to prepare them for connection.
- Screwdriver or drill: Depending on the type of ceiling hook, you may need either a screwdriver or a drill to secure it in place.
- Additional hardware: Depending on the specific requirements of your chandelier and installation, you may need additional hardware such as chains, decorative ropes, or mounting brackets to ensure stability and adjust the height and position of the chandelier.
- Pencil or painter’s tape: These items will come in handy for marking the placement of the chandelier and confirming the location of the ceiling joist.
By collecting all the necessary tools and materials in advance, you can avoid delays or interruptions during the installation process. It’s always a good idea to double-check that you have everything you need before starting, as this will save you time and ensure a smooth installation.
Now that you are equipped with the proper tools and materials, it’s time to move on to the next step: measuring and marking the placement of your off-center chandelier.
Read more: How To Take Off A Chandelier
Measuring and marking the placement
Now that you have gathered all the necessary tools and materials, it’s time to measure and mark the placement of your off-center chandelier. Accurate measurements and precise markings are essential to ensure that the chandelier hangs at the desired height and aligns with the architectural features of the room.
Follow these steps to measure and mark the placement of your off-center chandelier:
- Choose the center point: Start by identifying the center point of the area where you want to hang the chandelier. If you are positioning it over a specific object, such as a dining table, make sure the center point aligns with that object.
- Measure and mark: Use a measuring tape to measure the desired distance from the center point to the spot where you want the chandelier to hang. Make sure to measure both vertically (height) and horizontally (distance from the center). Use a pencil or painter’s tape to mark the exact placement on the ceiling.
- Consider the chandelier’s size: Take into account the size and shape of your chandelier when marking the placement. Make sure there is enough clearance around the chandelier so that it doesn’t obstruct any surrounding objects or furniture.
- Align with architectural features: If there are any architectural features in the room, such as a beam or a window, consider aligning the chandelier with those features to create a cohesive and visually pleasing design.
- Step back and assess: Once you have marked the placement, take a step back and assess the overall balance and aesthetics of the room. Make any necessary adjustments to the markings to achieve the desired look.
It’s important to take your time during this step to ensure accuracy. Remember that the measurements and markings will directly impact the final result of your off-center chandelier installation.
Once you are satisfied with the measurements and markings, you are ready to move on to the next step: installing the ceiling hook.
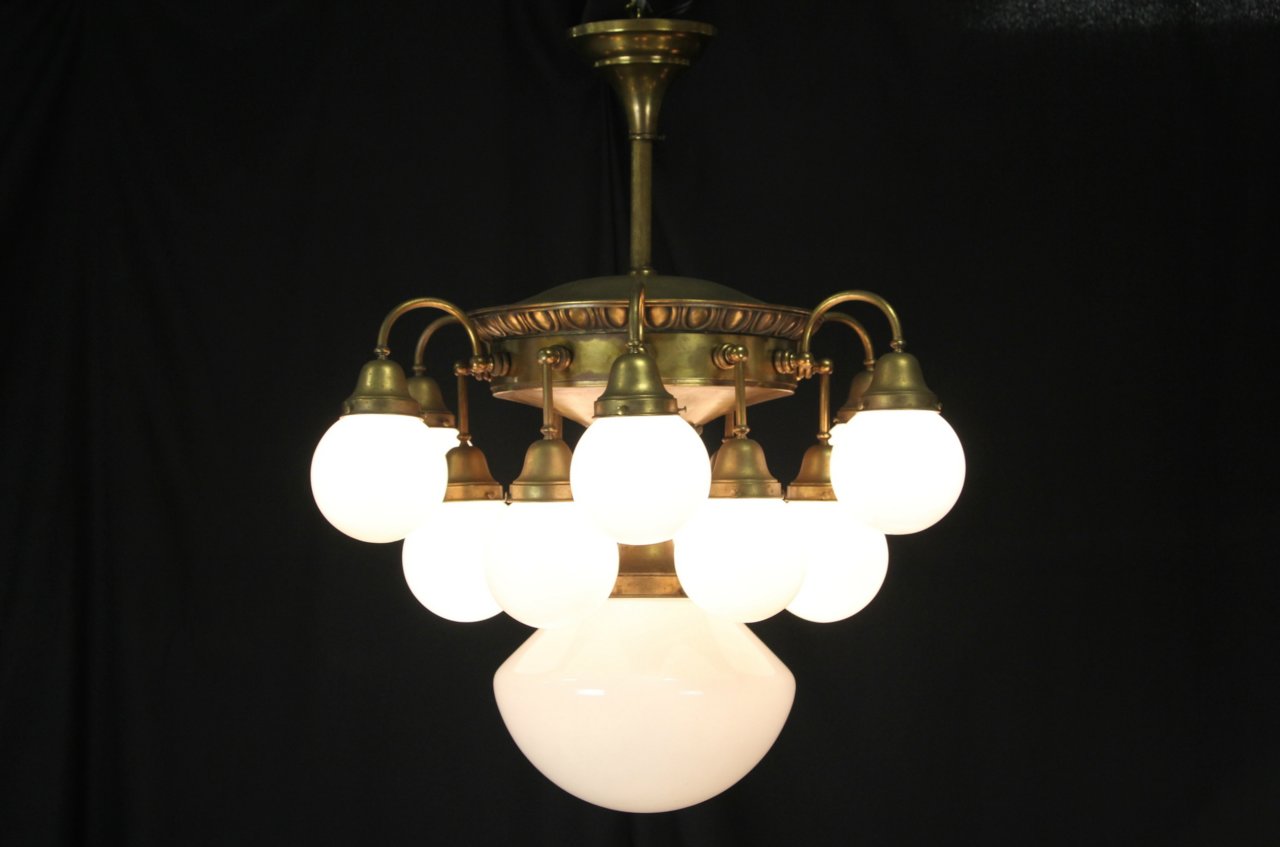
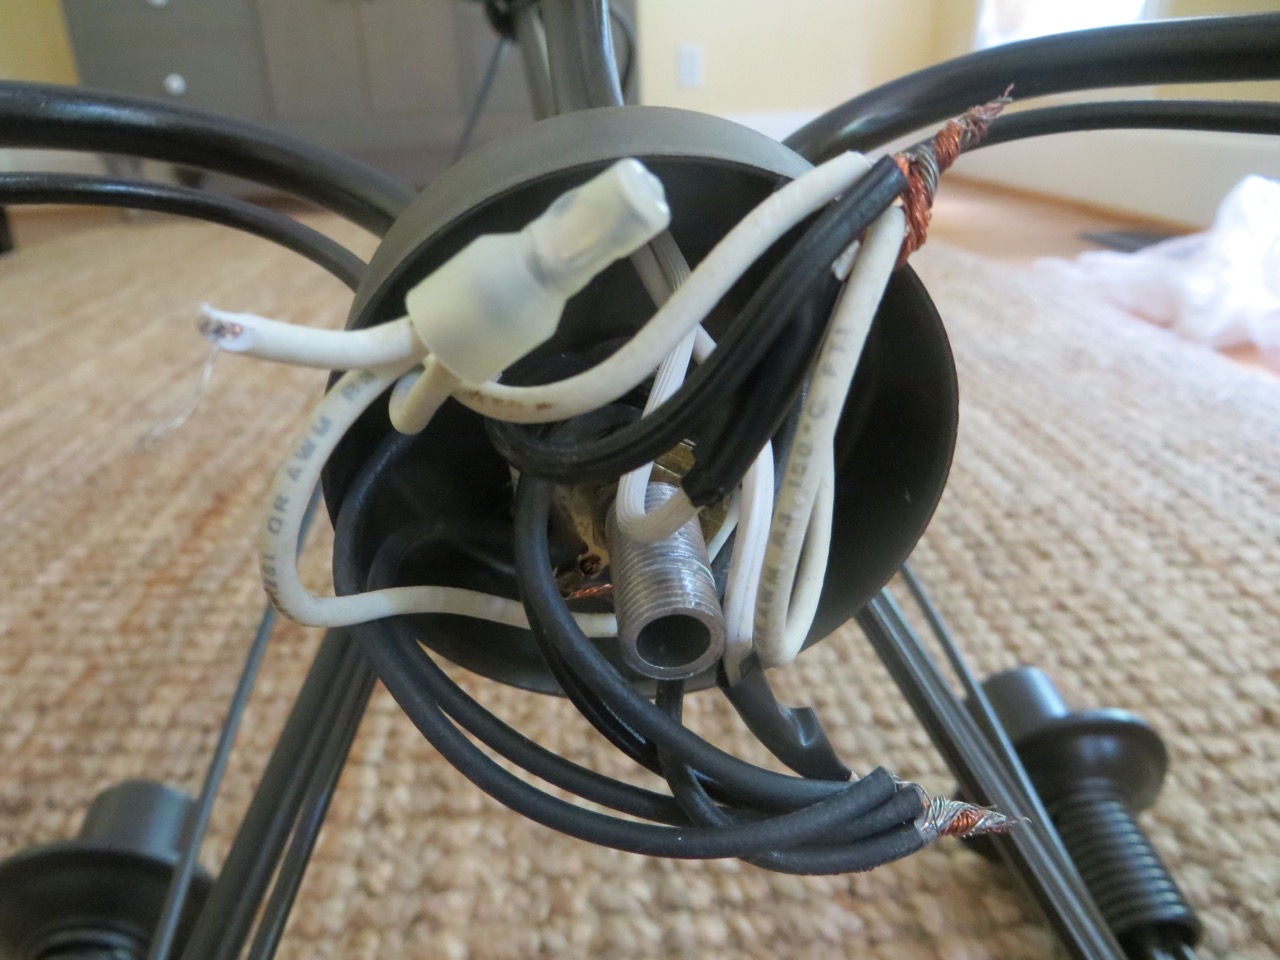
Use a swag hook to hang the chandelier off-center from the electrical box. Install the swag hook into a ceiling joist and use a chain to hang the chandelier in the desired location.
Installing the ceiling hook
With the placement of your off-center chandelier marked, it’s time to move on to the installation of the ceiling hook. The ceiling hook will provide the necessary anchor point for your chandelier, ensuring its stability and safety.
Follow these steps to install the ceiling hook:
- Prepare the area: Clear the installation area and remove any furniture or obstacles that may hinder your access or movement. Place a sturdy ladder or step stool beneath the marked placement to provide a stable platform.
- Position the hook: Hold the ceiling hook at the marked spot and ensure that it aligns with the desired placement of the chandelier. If necessary, use a level to check that the hook is straight and aligned with the room’s architectural features.
- Secure the hook: Depending on the type of ceiling hook you are using, use a screwdriver or drill to secure it in place. Follow the manufacturer’s instructions, making sure to screw the hook into the ceiling joist for maximum stability.
- Test the hook: Once the hook is secured, give it a gentle tug to ensure that it is firmly in place. Testing the hook’s stability will give you peace of mind and help avoid any issues when hanging the chandelier.
It’s important to note that the weight and size of your chandelier will dictate the type of ceiling hook you need. If you are unsure about which hook to use, consult the manufacturer’s guidelines or seek advice from a professional to ensure that the hook can safely support the weight of your chandelier.
Once the ceiling hook is securely installed, you are now ready to move on to the exciting part: hanging your off-center chandelier.
Hanging the chandelier
Now that the ceiling hook is in place, it’s time to hang your off-center chandelier. This step requires careful attention to detail and proper handling to ensure a secure and visually appealing installation.
Follow these steps to hang your chandelier:
- Prepare the chandelier: Before you begin, ensure that you have prepared your chandelier for installation. This may involve attaching any additional hardware, such as chains or decorative ropes, that will help adjust the height and position of the chandelier.
- Connect the electrical wires: If your chandelier requires electrical wiring, carefully connect the wires following the manufacturer’s instructions. Make sure to match the corresponding wire colors, using wire nuts to secure the connections.
- Double-check the electrical connections: Once the wires are connected, use a voltage tester to ensure that the power is turned off before proceeding. Safety should always be a top priority when working with electrical components.
- Attach the chandelier: With the electrical connections secured, carefully hang the chandelier from the ceiling hook. Take your time to ensure that the chandelier hangs straight and aligned with the room’s architectural features.
- Adjust the height and position: Step back and assess the height and position of the chandelier. If necessary, make any adjustments to achieve the desired look and balance within the space. This may involve adjusting the length of the chains or decorative ropes.
During the installation process, it’s important to be mindful of the chandelier’s weight and size. If the chandelier is heavy, it may require additional assistance or a sturdy support system. If you are unsure about the weight capacity of the ceiling hook or any other aspect of the installation, consult a professional to ensure a safe and secure hanging.
Once the chandelier is hung and adjusted to your satisfaction, take a moment to step back and admire the incredible transformation it brings to your space. The off-center placement adds a unique and visually captivating element to the room, creating a focal point that grabs attention and enhances the overall aesthetic.
Now that your chandelier is hanging beautifully, it’s time to ensure its stability and safety.
Adjusting the height and position
Once your off-center chandelier is hung, it’s time to fine-tune its height and position to achieve the desired look and balance within the space. Properly adjusting the height and position of the chandelier is crucial for creating a visually pleasing installation that complements the room’s design.
Follow these steps to adjust the height and position of your chandelier:
- Step back and assess: Take a few steps back and assess the overall arrangement of the room. Consider the chandelier in relation to the architectural elements, furniture, and other lighting fixtures. Pay attention to how it interacts with the space and whether any adjustments are needed.
- Consider the purpose of the room: Think about the room’s function and how the chandelier aligns with that purpose. For example, if it’s a dining area, you may want to adjust the height so that the chandelier hangs at an ideal level above the dining table, creating a warm and inviting atmosphere.
- Take measurements, if necessary: If you have specific height requirements, use a measuring tape to ensure that the chandelier is at the desired height. Take into account the height of the ceiling and any other objects or furnishings that might be in the way.
- Make adjustments: Depending on the design of your chandelier, you may be able to adjust the height using chains or decorative ropes. Carefully raise or lower the chandelier to achieve the desired height and position. Take your time to ensure that it hangs straight and aligns with the room’s architectural elements.
- Consider visual balance: As you make adjustments, consider the visual balance of the space. The chandelier should feel like a natural and harmonious part of the room. Take note of any asymmetries and make small adjustments to ensure a visually pleasing arrangement.
Remember, the height and position of your off-center chandelier are subjective and depend on your personal preferences and the specific requirements of your space. Take your time to experiment with different heights and positions until you achieve the desired look.
Once you are satisfied with the height and position of your chandelier, it’s time to ensure its stability and security.
Read more: How To Hang A Chandelier From The Ceiling
Securing the chandelier
After adjusting the height and position of your off-center chandelier, it’s crucial to ensure its stability and secure it properly. This step is essential to prevent any incidents or accidents and to ensure that the chandelier remains safely in place.
Follow these steps to securely fasten your chandelier:
- Check the connections: Inspect the electrical connections of your chandelier to ensure they are tight and secure. Double-check that all the wires are properly connected and that the wire nuts are securely fastened. This will prevent any loose ends or potential electrical hazards.
- Use additional hardware, if necessary: Depending on the specific requirements of your chandelier, you may need additional hardware to secure it. This could include chains, decorative ropes, or mounting brackets. Ensure that the additional hardware is properly installed and provides the necessary support and stability.
- Check for any swinging or swaying: Give the chandelier a gentle shake to test its stability. If you notice any excessive swinging or swaying, make adjustments to enhance its stability. You may need to tighten the connections, add support chains or ropes, or reposition the chandelier slightly.
- Verify the secure placement: Take a comprehensive look at the overall arrangement of the chandelier. Confirm that it is securely fastened to the ceiling hook and that it hangs straight and aligned with the room’s architectural elements. Make any necessary adjustments to achieve a visually balanced and stable installation.
Remember, the weight and size of your chandelier will dictate the necessary level of support and security. If you have any concerns about the stability or safety of the chandelier, it’s always recommended to consult a professional for assistance.
Once you have securely fastened the chandelier, it’s time to move on to the final step: testing the stability and safety of your off-center chandelier.
Testing the stability and safety
After hanging and securing your off-center chandelier, it’s crucial to thoroughly test its stability and safety. Ensuring that the chandelier is securely installed will give you peace of mind and prevent any potential accidents or damage in the future.
Follow these steps to test the stability and safety of your off-center chandelier:
- Gentle shaking: With caution, give the chandelier a gentle shake to test its stability. Pay attention to any excessive swinging or swaying. If the chandelier moves excessively or feels unstable, it may indicate that further adjustments or reinforcements are needed.
- Inspect the connections: Examine the electrical connections, making sure they are still secure. Check that all wires are tightly connected and that the wire nuts are properly fastened. Inspect for any signs of loose or exposed wires that may pose a safety risk.
- Check for clearance: Verify that the chandelier has adequate clearance from any surrounding objects, such as furniture or walls. Ensure that it is not in danger of hitting or interacting with any other items in the room.
- Observe movement: Over a period of time, closely monitor the chandelier for any signs of movement or instability. Take note of any unusual sounds or shifts that may indicate a problem. Rectify any issues promptly to maintain a safe and secure installation.
If you discover any issues during the stability and safety testing, it’s important to address them promptly. This may involve making further adjustments, reinforcing the installation with additional hardware, or seeking professional assistance if needed.
Remember, safety should always be a top priority when it comes to hanging and maintaining a chandelier. Regularly inspect the installation, check for any signs of wear or damage, and follow the manufacturer’s guidelines for maintenance and care.
By ensuring the stability and safety of your off-center chandelier, you can enjoy its beauty and elegance without any worries. Now, sit back, relax, and bask in the enchanting ambiance your chandelier brings to your space.
Congratulations on successfully hanging and securing your off-center chandelier! Your efforts have paid off, creating a stunning focal point in your room that adds a touch of sophistication and charm. Enjoy the mesmerizing beauty it brings to your space for years to come.
If you have any further questions or need additional assistance, don’t hesitate to consult a professional or reach out to experts in the field. They can provide guidance and advice specific to your unique situation.
Now that you’ve completed all the necessary steps, your off-center chandelier is ready to illuminate and elevate the atmosphere of your room. Enjoy the enchanting allure it brings to your space and seize every opportunity to delight in its radiant presence!
Conclusion
Congratulations on successfully hanging your chandelier off-center! With careful planning, attention to detail, and the right tools, you have created a visually stunning and unique focal point in your space.
Throughout this guide, we walked you through the process of assessing the space, choosing the correct location, finding the ceiling joist, gathering the necessary tools and materials, measuring and marking the placement, installing the ceiling hook, hanging the chandelier, adjusting the height and position, securing the chandelier, and testing the stability and safety. Each step was critical to ensure the success and safety of your off-center chandelier installation.
Remember that the off-center placement of a chandelier allows you to create a harmonious design, highlighting architectural elements, and maintaining balance within the room. It adds a touch of elegance and sophistication, transforming the atmosphere and making a statement.
As you enjoy your beautifully hung chandelier, it’s important to regularly inspect and maintain its stability and safety. Check the connections, ensure proper clearance, and monitor for any signs of movement or wear. By doing so, you will extend the lifespan of your chandelier and continue to bask in its radiant glow for years to come.
If at any point during the installation process you felt unsure or uncomfortable, don’t hesitate to seek professional assistance. Experts can provide guidance, expertise, and ensure that your chandelier is installed correctly and safely.
We hope this guide has empowered you to confidently hang your chandelier off-center, adding a touch of charm and elegance to your space. Remember to consider the unique features of your room, follow safety guidelines, and infuse your personal style and design preferences to create a truly captivating installation.
Now, it’s time to step back, admire your handiwork, and revel in the enchanting beauty of your off-center chandelier. Enjoy the warm and inviting ambiance it creates, and let it become a treasured centerpiece that brings joy and sophistication to your surroundings.
Thank you for joining us on this journey, and we wish you many delightful moments in the captivating glow of your off-center chandelier!
Frequently Asked Questions about How To Hang A Chandelier Off-Center
Was this page helpful?
At Storables.com, we guarantee accurate and reliable information. Our content, validated by Expert Board Contributors, is crafted following stringent Editorial Policies. We're committed to providing you with well-researched, expert-backed insights for all your informational needs.


0 thoughts on “How To Hang A Chandelier Off-Center”