

Furniture
How To Install A Chandelier
Modified: March 1, 2024
Learn step-by-step how to effortlessly install a beautiful chandelier in your home. Discover the best techniques for hanging furniture with ease.
(Many of the links in this article redirect to a specific reviewed product. Your purchase of these products through affiliate links helps to generate commission for Storables.com, at no extra cost. Learn more)
Introduction
Installing a chandelier is a great way to bring a touch of elegance and sophistication to any space. Whether you’re looking to add a statement piece to your dining room, create a stunning focal point in your living room, or enhance the ambiance of your bedroom, a chandelier can instantly transform the look and feel of a room.
While the idea of installing a chandelier might seem daunting at first, with the right tools and step-by-step guidance, you can tackle this project with confidence. In this article, we will walk you through the process of installing a chandelier, from gathering the necessary tools and materials to safely connecting the wiring and mounting the fixture.
Before we dive into the step-by-step instructions, it’s important to note that electrical work should always be approached with caution. If you are uncomfortable working with electricity or unsure about any part of the installation process, it is highly recommended to seek professional assistance. Your safety should always be the top priority.
Now, let’s get started on this exciting journey to install your very own chandelier!
Key Takeaways:
- Transform Your Space with Elegance
Installing a chandelier can instantly elevate the ambiance of any room, adding sophistication and style. With the right tools and guidance, you can confidently bring a touch of elegance to your space. - Prioritize Safety and Success
Approach chandelier installation with caution and prioritize safety. If unsure, seek professional assistance. Follow the step-by-step guide to create a stunning focal point that enhances your room’s design and ambiance.
Read more: How Much To Install A Chandelier
Step 1: Gather the necessary tools and materials
Before you begin installing your chandelier, it is crucial to gather all the necessary tools and materials to ensure a smooth and successful installation. Having everything you need on hand will save you time and frustration during the process. Here’s a list of the essential items you will need:
- Chandelier – Choose a chandelier that fits your style and the dimensions of the room.
- Ladder – Depending on the height of your ceiling, you may need a ladder to reach the installation area.
- Electrical tester – This tool will help you confirm that the power supply is turned off before you start working.
- Screwdriver – A screwdriver is essential for removing the existing light fixture and attaching the chandelier.
- Wire strippers – These will be needed to properly strip the insulation from the electrical wires.
- Wire nuts – Wire nuts are used to secure the electrical connections.
- Electrical tape – Use electrical tape to insulate the wire connections.
- Mounting bracket – This is needed to securely attach the chandelier to the ceiling.
- Wire connectors – Wire connectors are used to join the electrical wires together.
- Pliers – Pliers will help you twist the wire connectors tight.
- Ceiling medallion – If desired, a ceiling medallion can add a decorative touch to the installation.
It’s important to note that the specific tools and materials required may vary depending on the type and size of the chandelier you are installing. Always consult the manufacturer’s instructions for any additional tools or materials that may be needed.
Now that you have gathered all the necessary tools and materials, you are ready to move on to the next step of the installation process – turning off the power supply.
Step 2: Turn off the power supply
Before you start working on the installation of your chandelier, it is crucial to turn off the power supply to the area where you will be working. This step is essential to ensure your safety and prevent any electrical accidents.
To turn off the power supply, follow these steps:
- Locate the circuit breaker panel in your home. This panel houses the switches that control the power supply to different areas of your house.
- Identify the breaker that controls the electricity to the room where you will be installing the chandelier.
- Flip the switch for that particular breaker to the “off” position. This will cut off the power supply to the designated area.
It is strongly recommended to use an electrical tester to confirm that the power is indeed turned off. This device will help you check for the presence of any live electrical wires.
Follow these steps to use the electrical tester:
- Insert the tip of the electrical tester into an electrical outlet or touch it against a wire.
- If the tester beeps or lights up, it indicates the presence of live electricity. In this case, double-check your circuit breaker to ensure you have turned off the correct switch.
- If the tester does not beep or light up, it indicates that there is no live electricity, and it is safe to proceed with the installation.
Remember, safety should always be your top priority when working with electricity. Double-checking and confirming that the power supply is turned off will minimize the risk of accidents or electrical shocks.
Now that you have ensured that the power is turned off, you can proceed to the next step, which involves removing the existing light fixture.
Step 3: Remove the existing light fixture
Now that the power supply is turned off, it is time to remove the existing light fixture that is currently installed in the area where you plan to hang your chandelier. The steps required to remove the fixture may vary depending on the type of fixture you have, but the general process remains the same.
Follow these steps to remove the existing light fixture:
- Start by unscrewing any screws or bolts that are holding the fixture to the ceiling or wall. Be sure to keep a firm grip on the fixture as you remove the fasteners to prevent it from falling.
- Once the screws or bolts are removed, gently lower the fixture and disconnect any electrical wires that are connected to it. Take note of the wire colors and how they are connected, as you will need this information when installing the new chandelier.
- If necessary, remove any additional mounting hardware or brackets that are attached to the ceiling or wall.
- Inspect the electrical box where the fixture was mounted. Ensure that it is in good condition and properly secured to the ceiling or wall. If any repairs or adjustments are needed, take the necessary steps to address them before proceeding.
- Once the existing fixture and associated hardware are removed, carefully set them aside in a safe place. You may need to refer to them later or repurpose them if needed.
It’s important to note that if you encounter any difficulties or are unsure about the removal process, it is best to consult the manufacturer’s instructions or seek professional assistance. Taking the necessary precautions will help ensure a smooth and successful installation of your new chandelier.
With the existing light fixture successfully removed, you are now ready to move on to the next step, which involves checking the compatibility of the electrical box with your new chandelier.
Step 4: Check the electrical box compatibility
Before proceeding with the installation of your new chandelier, it is important to check the compatibility of the electrical box with the weight and size requirements of your fixture. This step ensures that the electrical box can safely support the weight of the chandelier and provides a secure foundation for installation.
Follow these guidelines to check the compatibility of the electrical box:
- Inspect the electrical box to determine its type. There are different types of electrical boxes, including standard boxes, fan-rated boxes, and heavy-duty boxes.
- Refer to the specifications of your chandelier to determine its weight. This information can usually be found in the manufacturer’s instructions or on the packaging.
- Check the rating of the electrical box. The rating should be clearly marked on the box and will indicate the maximum weight it can support. Ensure that the weight of your chandelier does not exceed the rating of the electrical box.
- If the weight of your chandelier exceeds the rating of the current electrical box, you will need to replace it with a fan-rated or heavy-duty box that can support the weight.
- Verify that the electrical box is securely fastened to the ceiling or wall. It should be tightly connected and should not move or wobble when pressure is applied.
- Inspect the electrical box to ensure that it has the necessary wiring and mounting hardware for the chandelier installation. Pay attention to the presence of a grounding wire and appropriate mounting brackets or screws.
If you are uncertain about the compatibility or condition of the electrical box, it is highly recommended to consult with a professional electrician. They can assess the situation and make any necessary modifications or replacements to ensure the safety and stability of the installation.
With the compatibility of the electrical box confirmed, you can now proceed to the next step, which involves preparing the chandelier for installation.
Read more: Installing A Chandelier And Dimmer Switch
Step 5: Prepare the chandelier for installation
Before you can install your chandelier, it is important to prepare it for the installation process. This step involves inspecting the chandelier, checking its components, and making any necessary adjustments or modifications.
Follow these steps to prepare the chandelier for installation:
- Unpack the chandelier from its packaging and lay out all the components. Take care to keep any delicate pieces or crystals protected and organized.
- Inspect the chandelier for any visible damage or defects. Check for loose wires, bent metalwork, or missing parts. If you discover any issues, contact the manufacturer or retailer for a resolution.
- Ensure that all the components and hardware needed for installation are included. This includes the mounting bracket, screws, decorative chain or downrod, and any other necessary accessories.
- Look for any assembly or installation instructions provided by the manufacturer. Familiarize yourself with the recommended steps and requirements specific to your chandelier model.
- If necessary, make any adjustments or modifications to the chandelier. This could include adjusting the length of the chain or downrod, attaching additional crystals or shades, or any other customization options available.
- Clean and polish the chandelier to remove any dust or smudges. Use caution when handling delicate components and avoid using harsh cleaning agents that could damage the finish or crystals.
By properly preparing your chandelier, you ensure that it is in optimal condition for installation and that all the necessary components are accounted for. This step also allows you to customize and personalize your chandelier to fit your desired aesthetic.
Now that your chandelier is ready, it’s time to proceed to the next step: installing the mounting bracket.
When installing a chandelier, always turn off the power at the circuit breaker before starting. This will ensure your safety while working with electrical components.
Step 6: Install the mounting bracket
Installing a sturdy and secure mounting bracket is crucial for ensuring the stability and safety of your chandelier. The mounting bracket serves as the foundation that will hold the weight of the fixture and keep it securely attached to the ceiling or wall.
Follow these steps to install the mounting bracket:
- Start by identifying the location where you want to hang your chandelier. Ensure that the location aligns with the wiring and support structure in the ceiling or wall.
- Hold the mounting bracket against the ceiling or wall in the desired location. Use a level to ensure that the bracket is straight and aligned.
- With the bracket in position, mark the screw holes on the ceiling or wall using a pencil or marker.
- Set down the bracket and drill pilot holes at the marked locations. The size of the pilot holes should match the diameter of the screws that will be used to secure the bracket.
- Align the bracket with the pilot holes and insert the screws through the bracket holes into the pilot holes.
- Tighten the screws securely, but be careful not to overtighten and strip the holes or damage the bracket.
- Once the mounting bracket is securely attached, give it a gentle tug to ensure it is firmly in place and can support the weight of the chandelier.
It’s important to note that the specific mounting bracket and installation process may vary depending on the design and style of your chandelier. Refer to the manufacturer’s instructions for any specific guidelines or requirements.
With the mounting bracket successfully installed, your chandelier is one step closer to being properly suspended. The next step involves connecting the wiring to ensure the chandelier is safely powered. We’ll explore this step in detail in the following section.
Step 7: Connect the wiring
Connecting the wiring is a crucial step in the installation process of your chandelier. This step involves safely and securely connecting the electrical wires from your chandelier to the corresponding wires in the electrical box.
Follow these steps to connect the wiring:
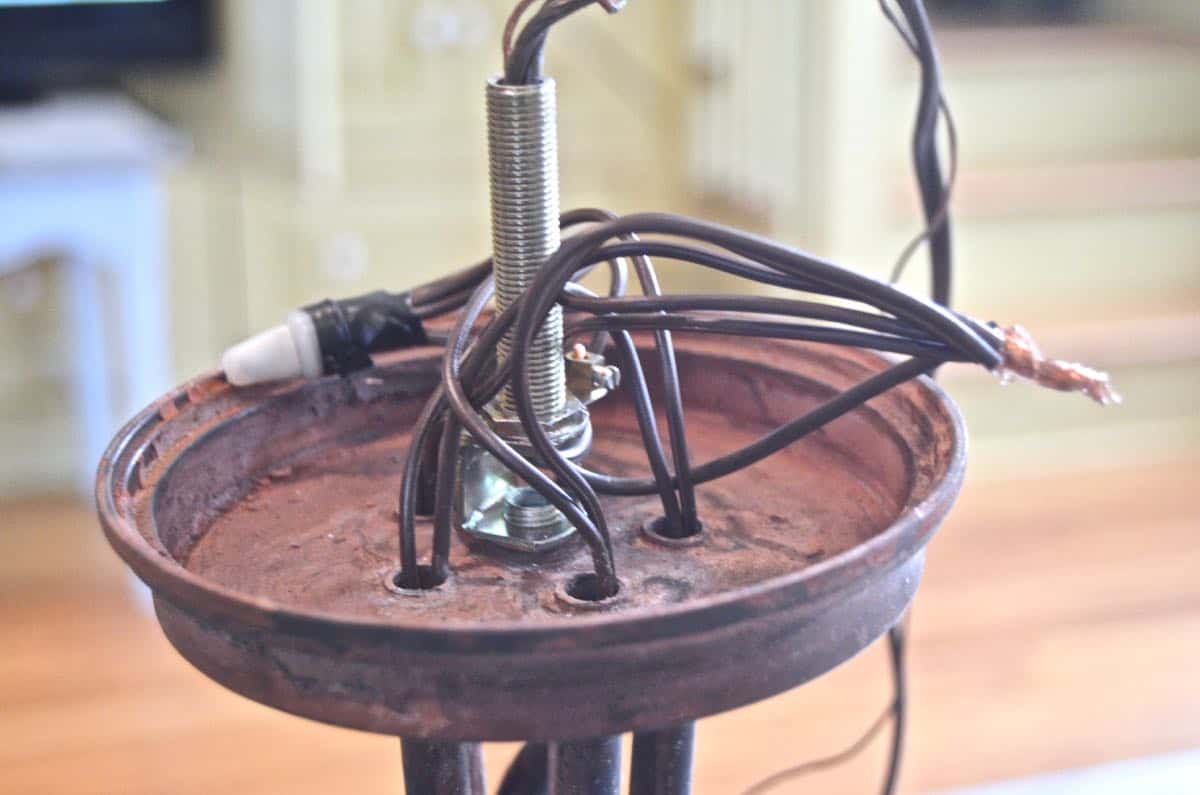
- Start by carefully threading the chandelier’s wires through the center hole of the mounting bracket. Take care not to damage or strain the wires during this process.
- Identify the electrical wires of your chandelier, which are typically color-coded. The most common colors are black (hot), white (neutral), and green or bare copper (grounding).
- Turn off the power supply at the circuit breaker to ensure safety while working with the electrical wires.
- Strip off about half an inch of insulation from the end of each chandelier wire using wire strippers.
- Locate the corresponding wires in the electrical box. The black wire connects to the black (hot) wire, the white wire connects to the white (neutral) wire, and the green or bare copper wire connects to the grounding wire.
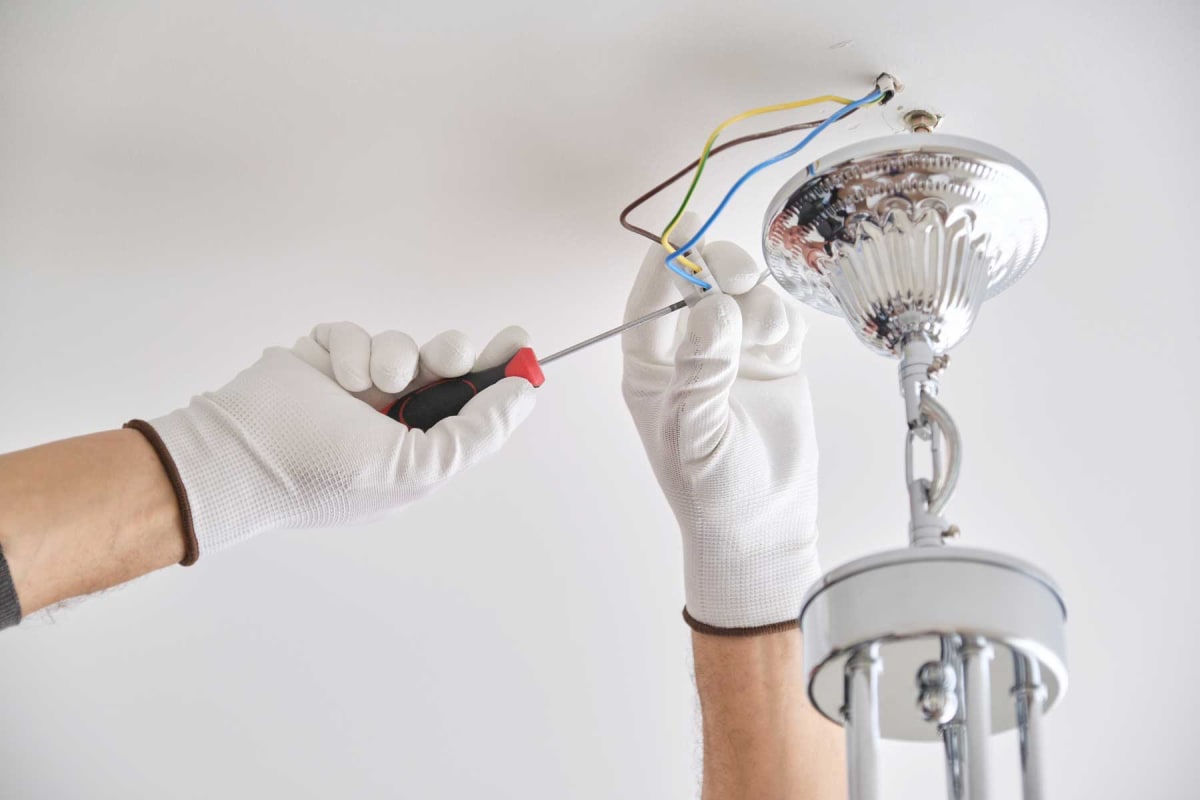
- Twist the exposed end of the chandelier’s black wire with the black (hot) wire from the electrical box. Secure them tightly together using a wire nut.
- Repeat the process for the white (neutral) wires, twisting them together and capping them with a wire nut.
- If necessary, connect the grounding wire from the chandelier to the grounding wire in the electrical box. Twist them together and use a wire nut to secure the connection.
- Once all the wire connections are made, use electrical tape to wrap around each wire nut, providing an extra layer of insulation and protection.
As you make the wire connections, ensure that each connection is tight and secure. A loose connection can cause electrical issues or a flickering chandelier. Double-check that each wire is properly attached and insulated.
It is crucial to follow electrical safety guidelines and consult with a professional if you are unsure about connecting the wiring. Electricity can be dangerous, and your safety should always be the priority.
With the wiring successfully connected, you can move on to the next step: mounting the chandelier itself. We’ll explore this step in detail in the following section.
Step 8: Mount the chandelier
Now that the wiring is properly connected, it’s time to mount your chandelier to the installed bracket. Mounting the chandelier securely will ensure stability and allow for proper functionality and aesthetics.
Follow these steps to mount the chandelier:
- Retrieve your chandelier and carefully lift it up towards the mounting bracket.
- Align the holes in the chandelier canopy or base plate with the screws or hooks on the mounting bracket.
- Gently slide the canopy or base plate onto the mounting bracket, ensuring a snug fit.
- If your chandelier requires additional hardware, such as decorative chains or a downrod, attach them according to the manufacturer’s instructions.
- Once securely mounted, give the chandelier a gentle tug to ensure it is properly seated and stable. If it swings or wobbles, adjust the mounting or tighten any loose connections.
It’s important to note that chandeliers come in various shapes and sizes, so the mounting process may differ slightly depending on your specific fixture. Always refer to the manufacturer’s instructions for any additional steps or considerations.
Throughout the mounting process, take care to avoid putting excessive pressure or weight on delicate parts, such as crystals or decorative elements. Handle the chandelier with caution and attention to detail.
With the chandelier successfully mounted, you’re almost ready to enjoy its beautiful illumination. However, before flipping the power back on, there are a few more steps to complete to ensure a safe and properly adjusted installation.
Continue reading to learn about securing and adjusting the chandelier in the next step.
Step 9: Secure and adjust the chandelier
After mounting the chandelier, it’s essential to secure and adjust it to ensure it is properly aligned, balanced, and level. This step will help enhance the aesthetics of the fixture and prevent any potential issues such as tilting or uneven lighting.
Follow these steps to secure and adjust the chandelier:
- Check that all the screws and fasteners holding the chandelier to the mounting bracket are securely tightened. Use a screwdriver or the appropriate tool to ensure a firm connection.
- If your chandelier has adjustable arms or branches, arrange them in the desired position. Make sure they are evenly spaced and symmetrically arranged for a visually pleasing effect.
- If your chandelier features adjustable chains or a downrod, ensure that it is hanging at the desired height. Adjust the length as needed to fit the space and achieve the desired aesthetic.
- Use a level to check if the chandelier is hanging straight. Adjust the chains, downrod, or mounting bracket as necessary to achieve a balanced and level position.
- If your chandelier has shades, adjust them so they are evenly positioned and facing the desired direction. Make any necessary adjustments to ensure optimal lighting distribution.
- Take a step back and visually inspect the chandelier from different angles. Make any final adjustments to ensure it is visually appealing and aligned with the overall design of the room.
By securing and adjusting the chandelier, you not only ensure its stability and safety but also enhance its overall appearance. A well-balanced and properly aligned chandelier adds elegance and charm to any space.
After completing this step, you are almost ready to enjoy the beautiful illumination of your chandelier. However, there is one crucial step left: turning on the power supply and testing the chandelier.
Keep reading to learn about the final step of the installation process.
Step 10: Turn on the power supply and test the chandelier
After completing the installation and adjustments, it’s time to turn on the power supply and test your chandelier to ensure it is functioning correctly. This step allows you to verify that all the connections are secure, the bulbs are working, and the chandelier is providing the desired lighting effect.
Follow these steps to turn on the power supply and test the chandelier:
- Double-check that all the wire connections between the chandelier and the electrical box are secure and properly insulated.
- Return to the circuit breaker panel and locate the switch that corresponds to the power supply of the chandelier’s location.
- Flip the switch to the “on” position, restoring the power to the chandelier.
- Observe the chandelier to ensure that all the bulbs light up. If any bulbs are not functioning, check if they are loose or burned out, and replace them if necessary.
- Take a few moments to appreciate the beauty of your newly installed chandelier. Observe the illumination it provides and confirm that it meets your expectations.
- If you notice any flickering lights, buzzing sounds, or other electrical issues, turn off the power supply immediately and consult a professional for assistance.
It’s important to exercise caution and be aware of any irregularities during the testing process. Safety should always be a priority, and if you have any concerns about the electrical performance or functionality of the chandelier, seek professional help to diagnose and address the issue.
Congratulations! You have successfully installed and tested your chandelier. Take a moment to admire its exquisite beauty and the ambiance it creates in your space. Enjoy the elegance and warmth that your chandelier brings to your room for years to come.
If you ever need to replace bulbs or perform maintenance on your chandelier, you can refer back to the manufacturer’s instructions for guidance.
Thank you for following these step-by-step instructions. We hope you found them helpful and that your chandelier installation journey was a success!
Conclusion
Installing a chandelier can have a transformative effect on the ambiance and style of a room, adding elegance and sophistication to your space. While the process may seem daunting at first, with the right tools, materials, and guidance, you can successfully install a chandelier and enjoy its beautiful illumination for years to come.
In this comprehensive guide, we walked you through the step-by-step process of installing a chandelier. We covered everything from gathering the necessary tools and materials to turning off the power supply, removing the existing light fixture, checking the electrical box compatibility, preparing the chandelier for installation, installing the mounting bracket, connecting the wiring, mounting the chandelier, securing and adjusting its position, and finally, turning on the power supply and testing the chandelier.
Throughout the installation process, it’s important to prioritize safety and exercise caution when working with electrical components. If at any point you feel uncertain or uncomfortable, it is highly recommended to seek professional assistance to ensure a safe and successful installation.
By following the steps outlined in this guide, you can confidently install your chandelier, creating a stunning focal point that enhances the overall design and ambiance of your room. The elegance and warmth provided by a well-chosen and properly installed chandelier are sure to leave a lasting impression on both you and your guests.
Remember, each chandelier installation may have its unique considerations and requirements. Always refer to the manufacturer’s instructions for specific guidance pertaining to your chandelier model.
We hope this guide has been informative and helpful, guiding you through the process of installing your chandelier. Now, it’s time to sit back, relax, and enjoy the beauty and radiance of your newly installed chandelier!
Frequently Asked Questions about How To Install A Chandelier
Was this page helpful?
At Storables.com, we guarantee accurate and reliable information. Our content, validated by Expert Board Contributors, is crafted following stringent Editorial Policies. We're committed to providing you with well-researched, expert-backed insights for all your informational needs.






0 thoughts on “How To Install A Chandelier”