Furniture
How To Light A Gas Lamp Post
Modified: January 4, 2024
Learn how to properly light a gas lamp post with our comprehensive furniture guide. Illuminate your outdoor space with style and safety.
(Many of the links in this article redirect to a specific reviewed product. Your purchase of these products through affiliate links helps to generate commission for Storables.com, at no extra cost. Learn more)
Introduction
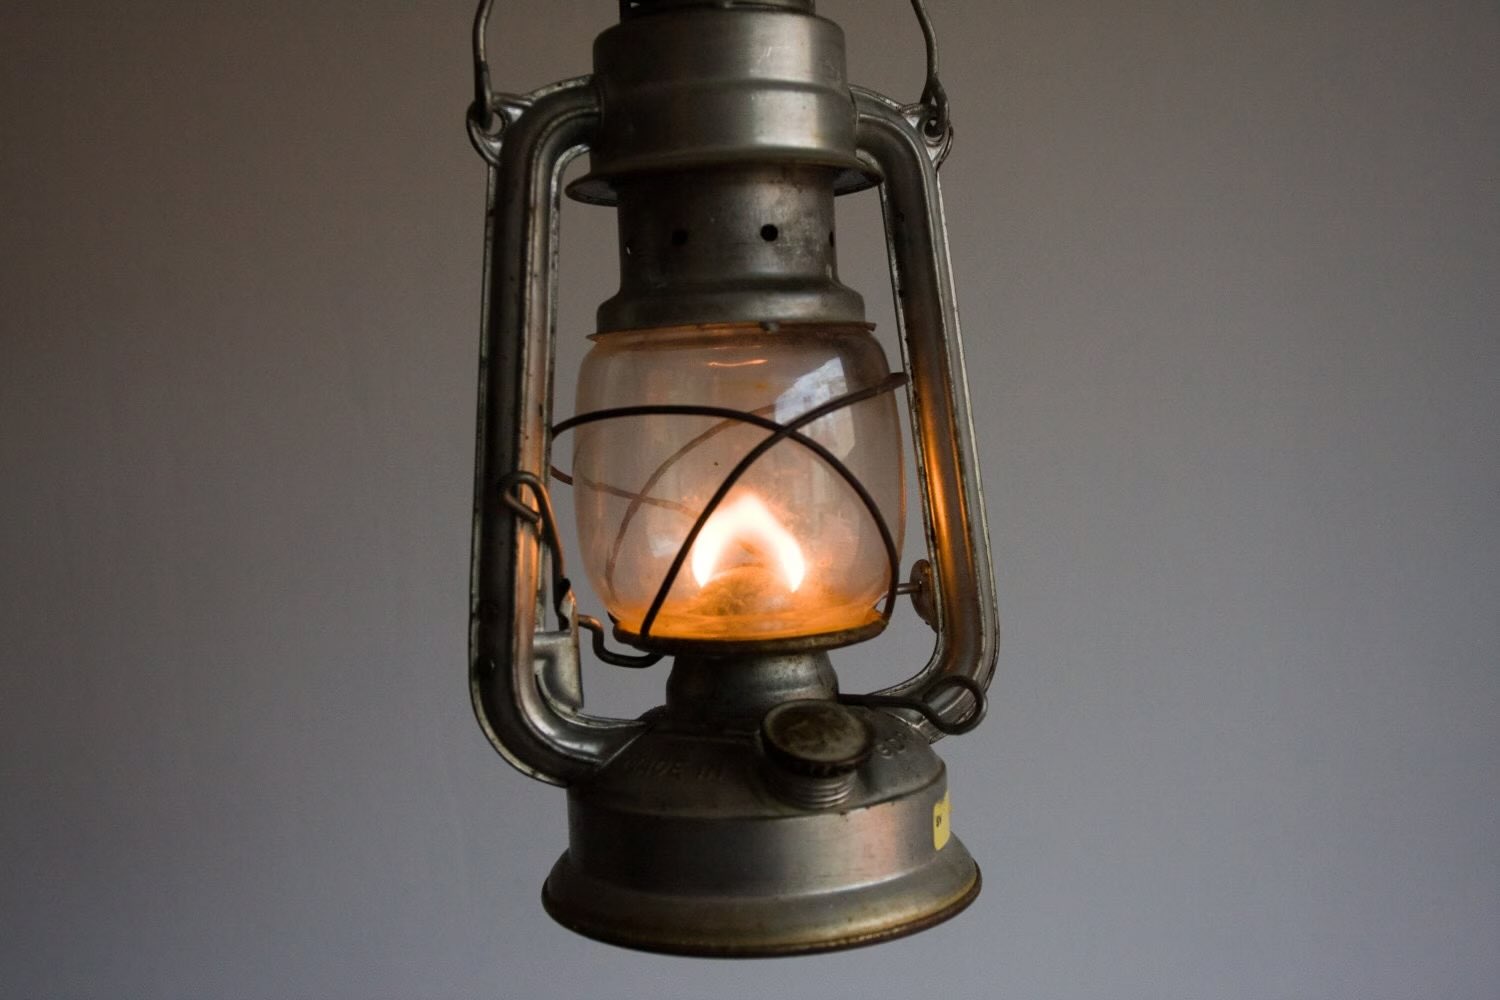
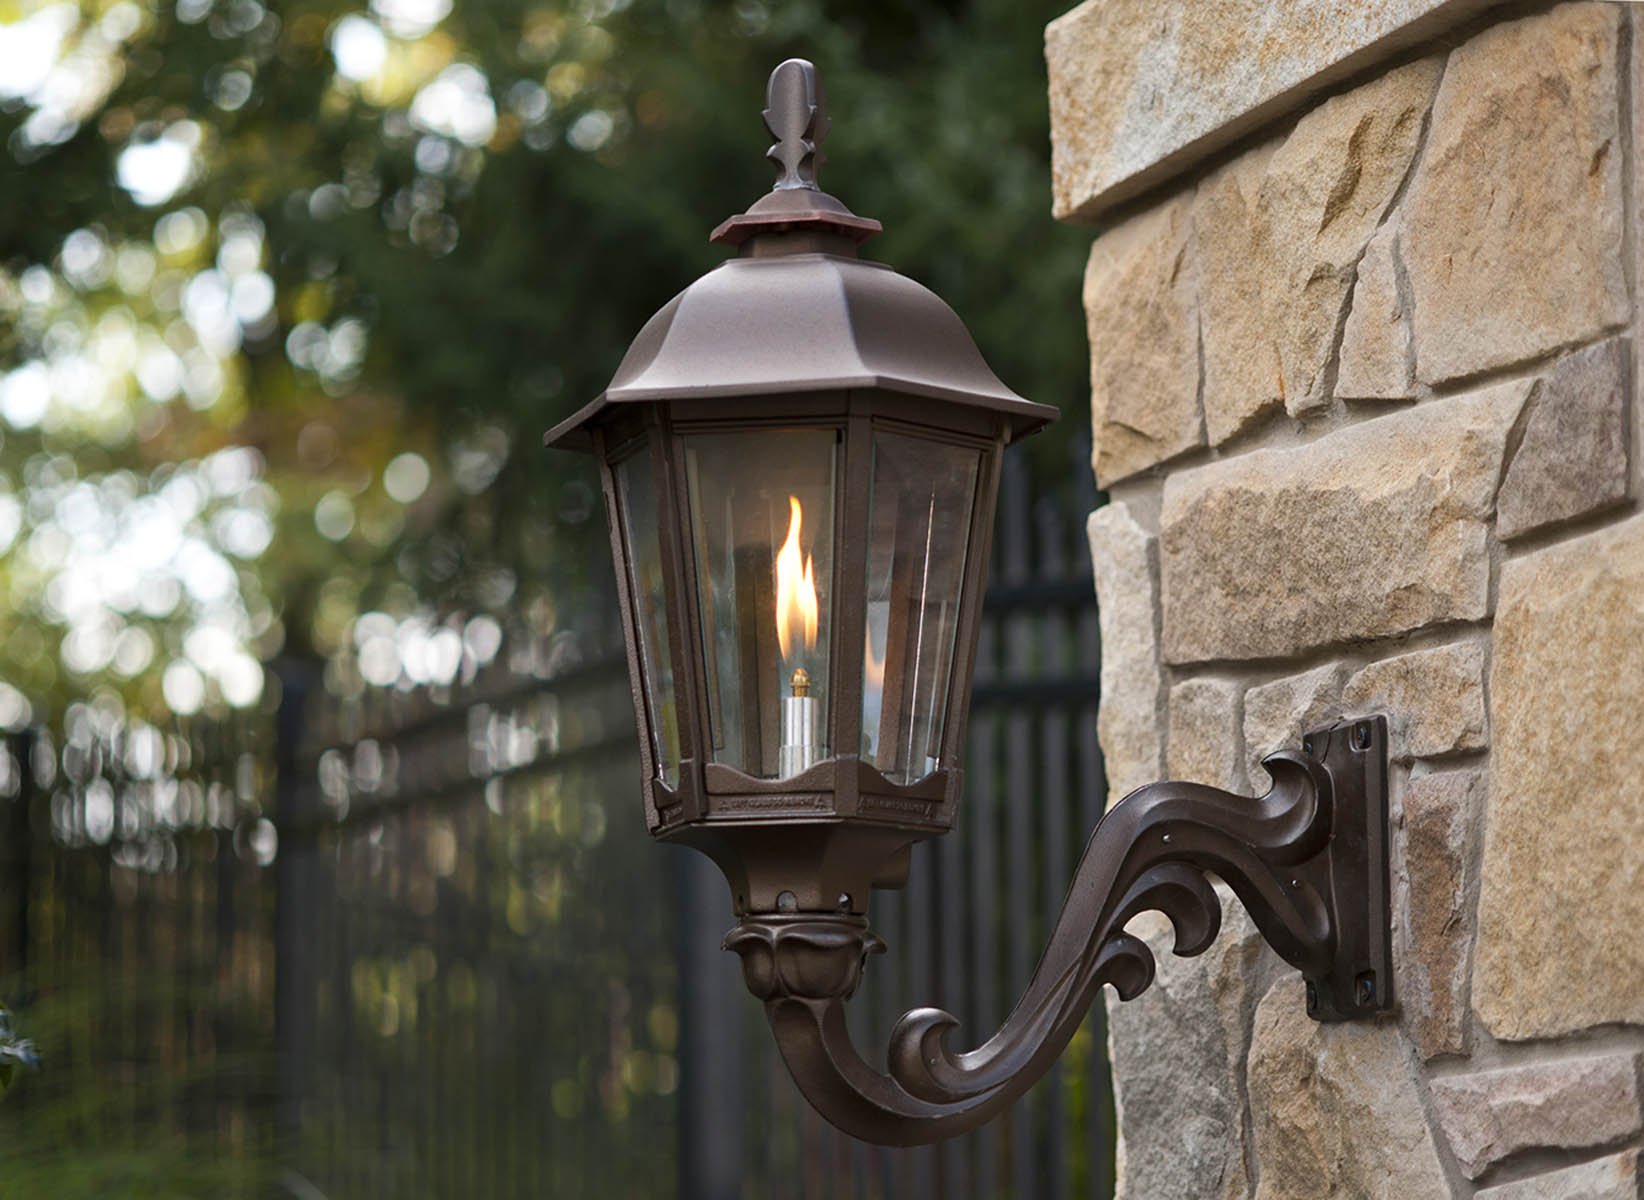
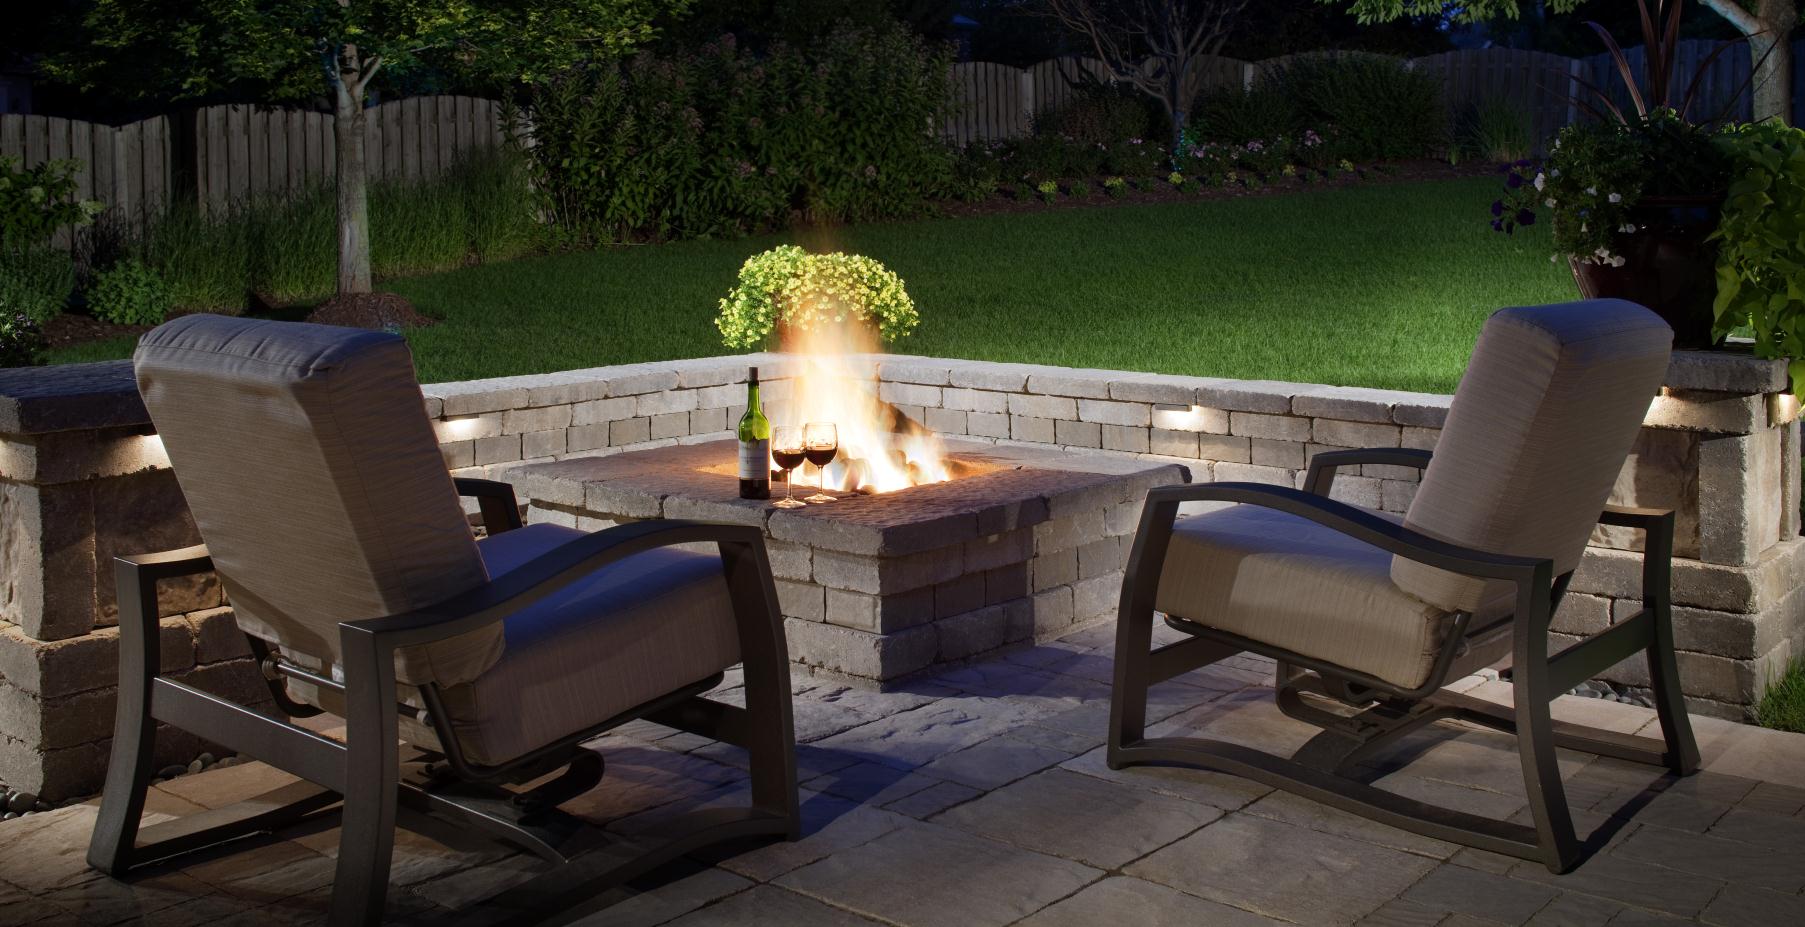
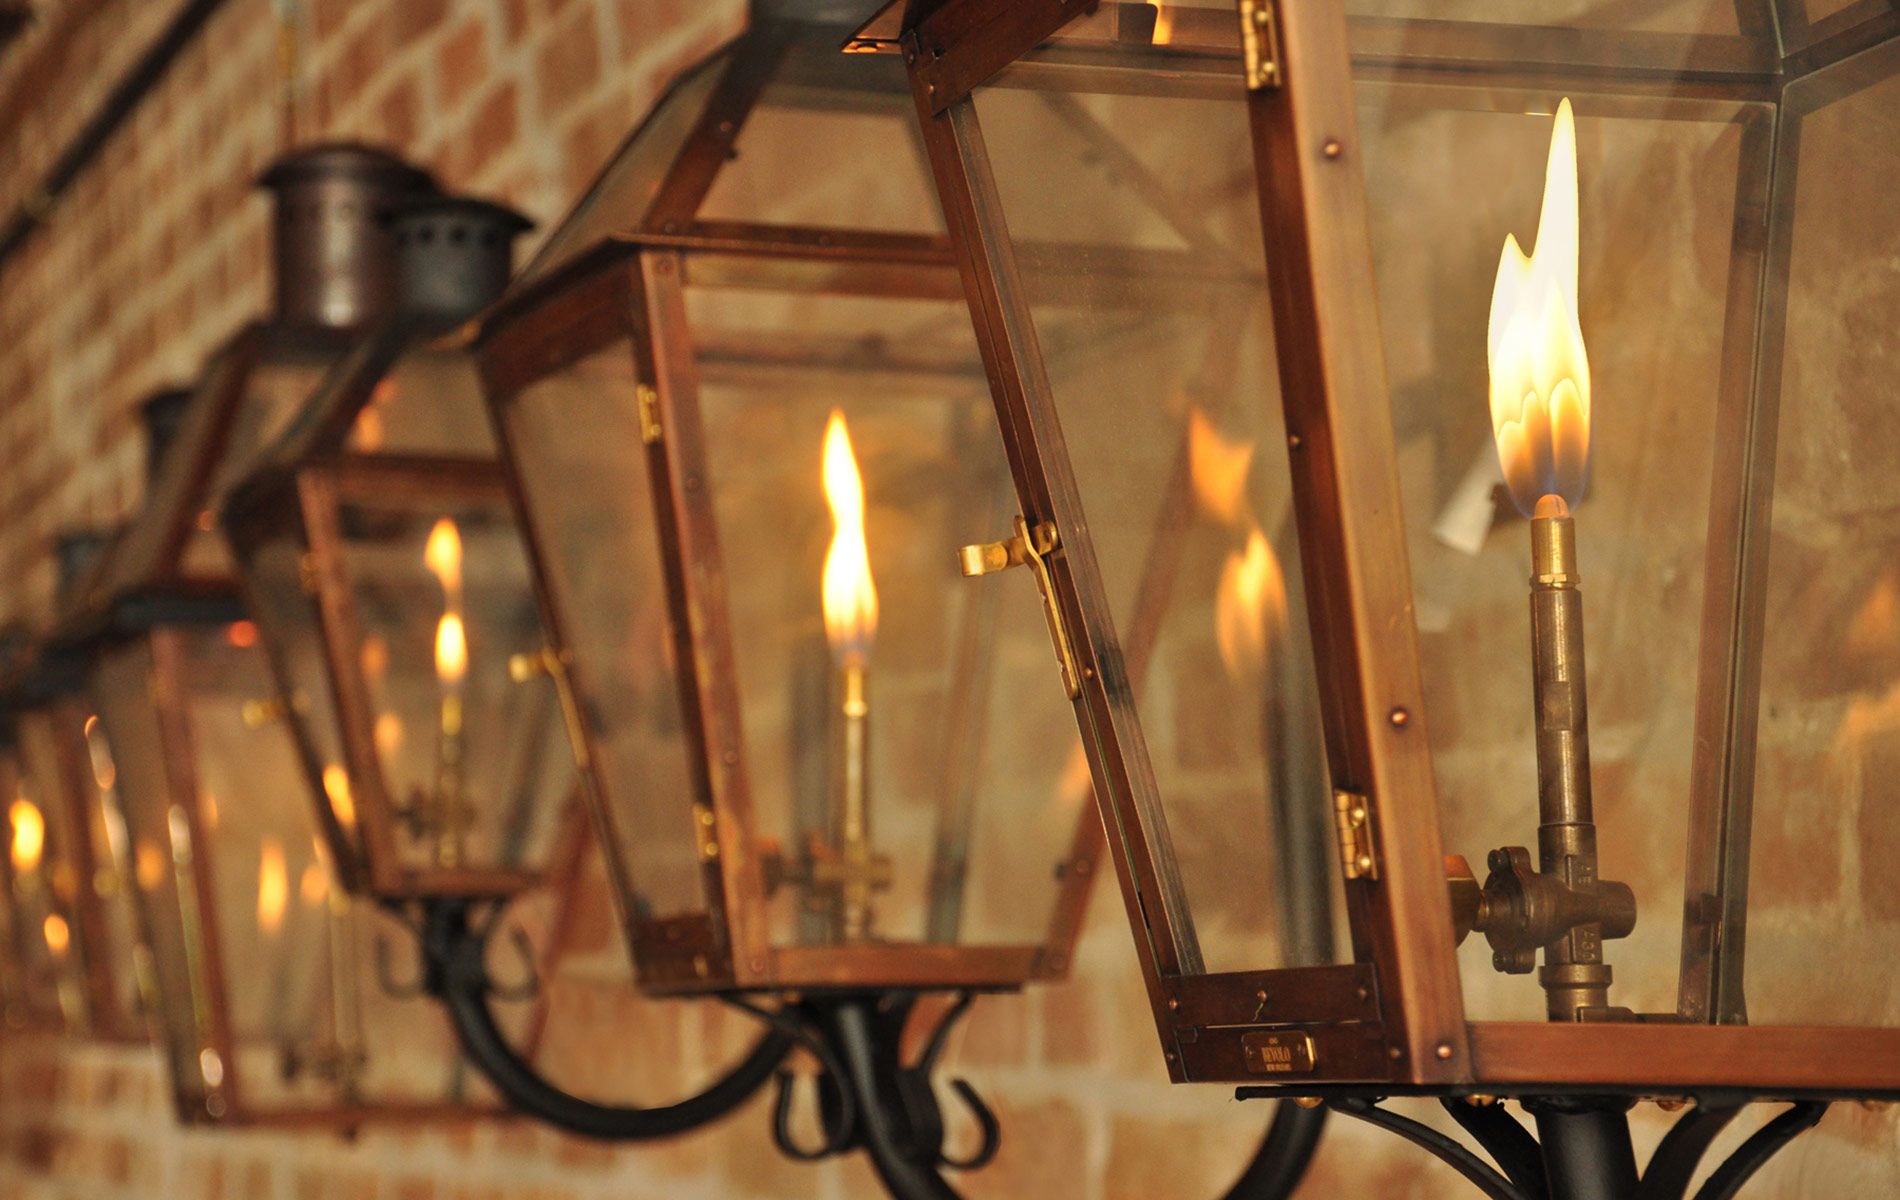
Gas lamp posts have a timeless charm that can add a touch of elegance to any outdoor space. These vintage-style light fixtures not only provide illumination but also create a warm and inviting ambiance. Whether you have a gas lamp post already installed or are considering adding one to your landscape, it’s essential to know how to properly light and maintain it.
In this article, we will guide you through the process of lighting a gas lamp post, from assessing the lamp to maintaining it for long-term use. We’ll cover the tools and supplies you’ll need, the steps to prepare the lamp, how to safely light it, and tips for ongoing maintenance. By following these steps, you’ll be able to enjoy the gentle glow of a gas lamp post and enhance the beauty of your outdoor space.
So, let’s get started by assessing your gas lamp post and ensuring you have everything you need to light it up!
Key Takeaways:
- Embrace the timeless charm of a gas lamp post by assessing, preparing, and safely lighting it. Regular maintenance ensures optimal performance, creating a warm and inviting ambiance in your outdoor space.
- Prioritize safety and follow manufacturer guidelines when lighting and maintaining your gas lamp. Troubleshoot common issues and enjoy the enchanting glow of your outdoor space.
Read more: How To Wire A Lamp Post Light Sensor
I. Assessing the Gas Lamp Post
Before you begin lighting your gas lamp post, it’s important to assess its condition to ensure safe and effective operation. Here are a few key areas to examine:
- Structure and Stability: Check for any signs of damage or instability in the lamp post. Inspect the base, pole, and any connecting parts for cracks, rust, or wear that could affect its stability. If you notice any issues, it’s best to address them before proceeding with lighting.
- Glass Enclosure: Examine the glass enclosure surrounding the light source. Look for any cracks or chips that could compromise its structural integrity. It’s crucial to have a sturdy and intact glass enclosure to protect the flame and prevent any accidents.
- Gas Connections: Check the gas connections of the lamp post to ensure they are secure and leak-free. Look for any signs of gas leakage, such as hissing sounds or a noticeable smell of gas. If you detect a leak, it’s essential to address the issue before attempting to light the lamp.
- Maintenance Needs: Take note of any areas that require cleaning or maintenance. Over time, debris, dirt, or insects may accumulate in and around the lamp post. Cleaning these areas regularly will not only improve the overall appearance but also prevent any obstructions that may affect the flame’s performance.
By thoroughly assessing the gas lamp post, you can identify any potential safety hazards or maintenance needs. If you have any concerns or doubts about the condition of your lamp post, it’s advisable to consult a professional for inspection and repairs. Once you are confident in the lamp post’s structural integrity, you can move on to gathering the necessary tools and supplies to light it up.
II. Gathering Required Tools and Supplies
Before you can successfully light your gas lamp post, it’s important to gather the necessary tools and supplies. Here’s a list of what you’ll need:
- Gas Lantern: Ensure you have a fully functioning gas lantern specifically designed for your lamp post. The lantern should be in good condition with no signs of damage. If you need to purchase a lantern, consult with the manufacturer or a reputable store specializing in gas lamp post accessories.
- Match or Lighter: You will need a match or a lighter to ignite the gas lamp. Opt for a long-reach lighter or matches to ensure your safety, especially if the gas lamp post’s flame is positioned higher.
- Gas Valve Key or Pliers (optional): Some gas lamp posts may require a gas valve key or pliers to turn the gas supply on or off. Check the manufacturer’s instructions or consult with a professional to determine if you need to have these tools on hand.
- Cleaning Supplies (optional): Depending on the condition of your gas lamp post, you may need cleaning supplies. This could include a soft cloth, mild soap, and water to remove any dirt or grime from the glass enclosure or other components.
It’s important to ensure that all the tools and supplies are easily accessible before attempting to light the gas lamp post. Taking the time to gather everything upfront will save you from potential delays or frustration during the process.
Once you have your tools and supplies ready, you can proceed to the next step—preparing the gas lamp for lighting.
II. Gathering Required Tools and Supplies
- Gas Lantern: The gas lantern is the centerpiece of your gas lamp post and the primary light source. When choosing a gas lantern, make sure it is compatible with your lamp post and meets the necessary safety standards. Consider factors such as the size, style, and fuel type of the lantern to ensure a proper fit.
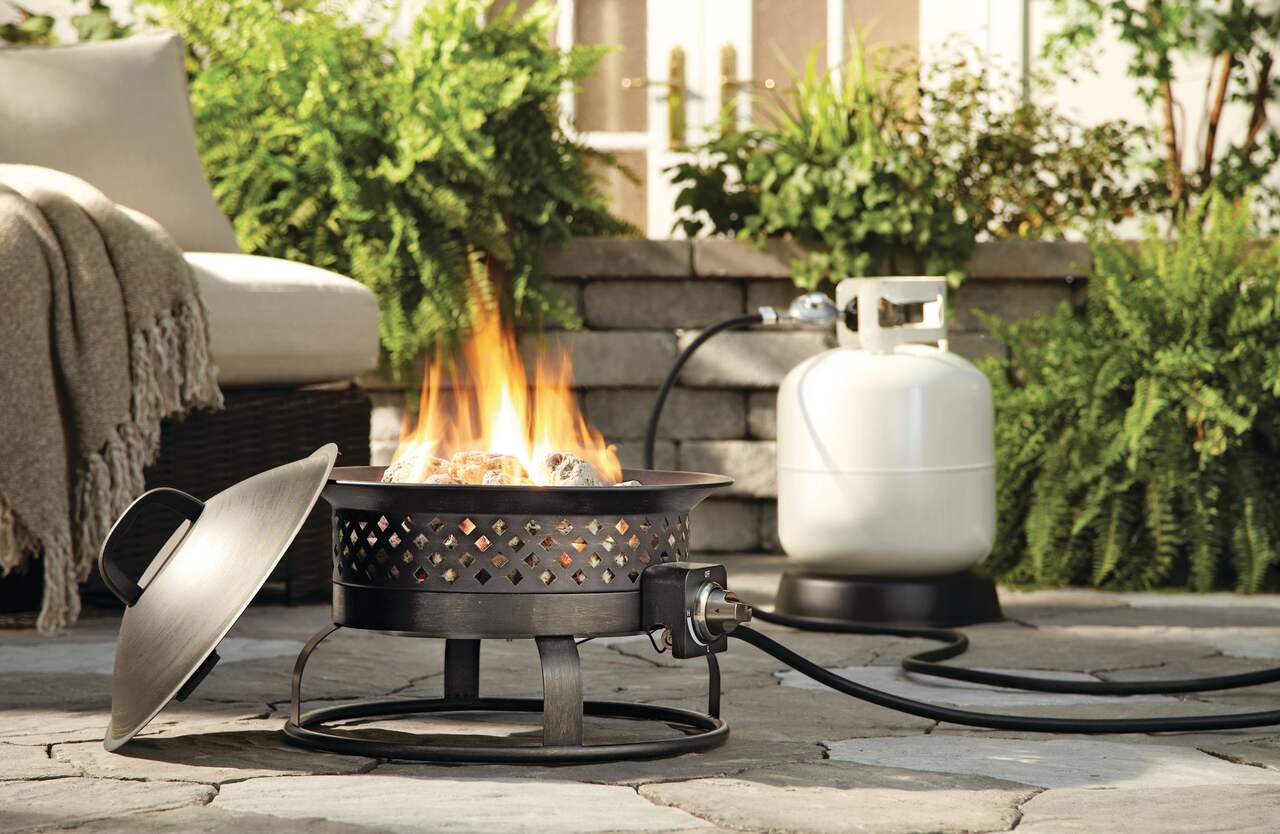
When selecting a gas lantern, you have two main fuel options: natural gas or propane. Natural gas is a convenient option if your property is already connected to a gas line, as you can directly connect the lantern to the supply. Propane, on the other hand, provides more flexibility as it allows you to place the gas lamp post anywhere without needing a gas line connection.
Gas lanterns come in a variety of styles, from traditional to modern designs. Choose a lantern that complements the overall aesthetic of your outdoor space and reflects your personal taste. Some lanterns feature decorative elements such as glass panes, intricate metalwork, or colored finishes, adding an extra touch of elegance to your gas lamp post.
When purchasing a gas lantern, ensure that it is in good working condition. Inspect the body, burner, and fuel system for any signs of damage or wear. Test the functionality of the lantern to ensure it ignites properly and produces a steady flame. If you encounter any issues or have concerns about the gas lantern’s performance, consult the manufacturer or a professional for assistance.
Remember, the gas lantern is the heart of your gas lamp post, providing both illumination and ambiance. Choose a reliable and high-quality lantern to ensure a beautiful and functional lighting experience.
II. Gathering Required Tools and Supplies
- Match or Lighter: A match or lighter is essential for igniting the gas lantern and lighting your gas lamp post. When selecting a match or lighter, consider the length and reach to ensure that you can safely light the lantern, especially if the flame is positioned higher up.
If you prefer using a match, choose long-reach matches to avoid getting too close to the flame. Long-reach matches typically have a longer wooden stem, allowing you to reach the gas lantern’s burner without risking burns or injury. These matches are available in most hardware stores and supermarkets.
If you opt for a lighter, select a reliable and easy-to-use model. There are various options available, such as standard lighters, butane lighters, or safety lighters. Choose one that you are comfortable with and fits your preferences. Some lighters may have a longer neck or flexible head, making it easier to light the gas lantern from a safe distance.
When using a match or lighter, always exercise caution. Ensure that your hand is a safe distance away from the flame to prevent any accidental burns. Keep the match or lighter away from any flammable materials or objects, and follow the manufacturer’s instructions for safe usage.
It’s a good idea to keep extra matches or a backup lighter handy in case the primary one fails or runs out. This way, you can ensure uninterrupted lighting of your gas lamp post, especially during outdoor events or gatherings.
By having a reliable match or lighter, you’ll be ready to illuminate your gas lamp post and enjoy its enchanting glow when the sun sets.
II. Gathering Required Tools and Supplies
- Gas Valve Key or Pliers (optional): Depending on the design of your gas lamp post, you may need a gas valve key or pliers to turn the gas supply on or off. These tools are typically used to operate the gas valve located on the post or gas line connected to the lamp.
A gas valve key is a specialized tool designed to fit the valve mechanism of your gas lamp post. It is used to manually control the flow of gas to the burner. Gas valve keys come in various sizes and shapes, so it’s important to choose the one that matches the specific gas valve on your lamp post. These keys can usually be found at local hardware stores or online retailers specializing in gas lamp accessories.
If your gas lamp post does not require a gas valve key and instead has a valve that can be turned with pliers, make sure to have a pair of pliers on hand. Opt for pliers with a comfortable grip and a size suitable for the valve on your lamp post.
Though not always necessary, these tools can be beneficial for controlling the gas supply to your gas lamp post. They allow you to easily turn the gas on or off, ensuring safety and convenience during maintenance or in case of emergencies. If your gas lamp post requires the use of a gas valve key or pliers, be sure to locate the key or keep the pliers easily accessible for any adjustments that may be needed.
Remember, if you’re unsure about the use of a gas valve key or pliers with your gas lamp post, consult the manufacturer’s instructions or seek advice from a professional to ensure proper and safe operation.
II. Gathering Required Tools and Supplies
- Cleaning Supplies (optional): Depending on the condition of your gas lamp post, you may need some cleaning supplies to maintain its appearance and functionality. These supplies can help remove dirt, dust, and debris that may accumulate over time.
Here are a few cleaning supplies that you might find useful for your gas lamp post:
- Soft Cloth: A soft cloth, such as microfiber or cotton, can be used to gently wipe down the surfaces of the gas lamp post. This will help remove any accumulated dirt or dust without scratching or damaging the materials.
- Mild Soap and Water: If your gas lamp post has stubborn stains or grime, you can mix a small amount of mild soap with water to create a gentle cleaning solution. Dip the cloth into the soapy water and use it to clean the affected areas. Be sure to rinse off any soap residue with clean water afterward.
When using cleaning supplies, it’s important to take appropriate precautions. Avoid using harsh chemicals or abrasive cleaners that can damage the finishes or materials of your gas lamp post. Additionally, if your lamp post has electrical components or sensitive areas, be sure to follow the manufacturer’s recommendations for cleaning to prevent any damage.
Regular cleaning and maintenance can help keep your gas lamp post looking its best and functioning optimally. By removing dirt, debris, and any potential obstructions, you can ensure that the flame is not obstructed and the light is evenly distributed. This not only enhances the visual appeal of your gas lamp post but also helps prolong its lifespan.
Remember, cleaning supplies are optional but can be beneficial for maintaining the beauty and performance of your gas lamp post. Use them in moderation and with care to preserve the integrity of the materials and finishes without causing any damage.
III. Preparing the Gas Lamp
Before you can light your gas lamp, it’s important to go through a few preparatory steps to ensure a safe and efficient lighting process. Here’s what you need to do:
- Shutting off the gas supply: Begin by locating the gas supply valve connected to your gas lamp post. Turn the valve clockwise to shut off the gas flow. This step is crucial for safety, as it prevents any gas from escaping while you prepare the lamp for lighting.
- Removing the glass enclosure: Most gas lamp posts have a glass enclosure surrounding the flame to protect it from wind and other elements. Carefully remove the glass enclosure by loosening any screws or fastening mechanisms. Set it aside in a safe place, ensuring that it won’t be damaged or cause any obstruction to your workspace.
- Cleaning the glass and frame (optional): If your glass enclosure or lamp frame has accumulated dirt or grime, now is a good time to clean them. Use a soft cloth and mild soap mixed with water to gently wipe down the glass and frame. Be sure to rinse off any soap residue and allow the glass and frame to completely dry before reassembling them.
By shutting off the gas supply, you prevent any potential gas leaks or accidents while working on your gas lamp. Removing the glass enclosure allows for better access to the burner and makes it easier to light the lamp. Additionally, cleaning the glass and frame helps maintain the aesthetics of your lamp post and ensures optimal performance.
Once you have completed these preparatory steps, you are ready to move on to the next stage—lighting the gas lamp.
III. Preparing the Gas Lamp
- Shutting off the gas supply: Before you begin any work on your gas lamp, it is crucial to shut off the gas supply. Locate the gas supply valve connected to your gas lamp post, which is typically located near the base or along the gas line. Turn the valve clockwise, or as per the manufacturer’s instructions, to shut off the gas flow.
Shutting off the gas supply is an essential safety measure to prevent any gas leaks or accidents while you prepare and work on your gas lamp. By turning off the valve, you ensure that no gas is flowing into the lamp post, reducing the risk of fire or explosion.
It’s important to familiarize yourself with the location of the gas supply valve for your specific gas lamp post. Take note of any labels, markings, or indicators that indicate the “off” position. If you are unsure of the exact location or operation of the valve, consult the manufacturer’s instructions or seek assistance from a professional.
Turning off the gas supply also allows for easier access to the lamp components, such as the burner or gas connections, during cleaning, maintenance, or lighting procedures. By taking this precautionary step, you can confidently proceed with the subsequent tasks, knowing that you have minimized potential risks associated with gas flow.
Remember, safety should always be a top priority when working with gas appliances. Never ignore or underestimate the importance of shutting off the gas supply before working on your gas lamp. By doing so, you create a safe environment for yourself and others and enable a smooth and worry-free lamp preparation process.
III. Preparing the Gas Lamp
- Removing the glass enclosure: Most gas lamp posts have a glass enclosure that surrounds the flame and provides protection from wind and other elements. To properly prepare your gas lamp, you will need to remove this glass enclosure.
To remove the glass enclosure, you will typically need to locate and loosen any screws or fastening mechanisms that hold it in place. Carefully inspect the lamp post to identify the points of attachment for the glass enclosure. These attachment points may vary depending on the specific design of your lamp post.
Once you have identified the fastening mechanisms, use the appropriate tools, such as a screwdriver or wrench, to loosen and remove them. Take care not to damage the glass or frame during this process. Slowly and gently lift the glass enclosure away from the lamp post, making sure to support its weight and prevent any accidental drops or breakage.
Set the glass enclosure aside in a safe and secure location where it won’t be damaged. Avoid placing it in a spot where it could be knocked over or stepped on. Take note of the orientation of the glass enclosure, especially if it has specific positioning or alignment requirements when reassembling.
Removing the glass enclosure allows for easier access to the burner and other components of the gas lamp. It also gives you a clear view of the interior, making it easier to clean if necessary. By removing the glass enclosure, you can ensure that there are no obstructions when lighting the lamp and that the flame will receive proper ventilation.
Remember to handle the glass enclosure with care to avoid any accidental breakage. Glass is fragile and can be sharp when broken. If your gas lamp post is equipped with multiple glass panels, repeat the process for each panel, ensuring that all of them are safely removed.
With the glass enclosure removed, you are now ready to proceed with cleaning, if desired, or move on to the next steps of preparing and lighting your gas lamp.
III. Preparing the Gas Lamp
- Cleaning the glass and frame (optional): While not always necessary, cleaning the glass enclosure and frame of your gas lamp post can help maintain its appearance and ensure optimal performance.
If you notice any dirt, dust, or grime on the glass enclosure or frame, you can opt to clean them before reassembling the lamp. Here’s how you can go about cleaning these components:
- Remove loose debris: Start by gently brushing off any loose debris or dirt from the glass enclosure and frame. Use a soft brush or cloth to carefully remove any surface-level dust or particles. This step helps prevent scratches or damage to the glass during the cleaning process.
- Prepare a cleaning solution: For mild dirt or smudges, you can create a cleaning solution using mild soap and water. Mix a small amount of mild soap or dish detergent with warm water in a bucket or container.
- Clean the glass enclosure: Dip a soft cloth or sponge into the soapy water, wring out any excess moisture, and gently wipe the glass enclosure. Start from the top and work your way down. Pay attention to any stubborn spots or stains and apply gentle pressure if needed. Avoid using abrasive materials or harsh chemicals that could scratch or damage the glass.
- Clean the frame: Use the same cloth or sponge to clean the frame of the gas lamp post. Wipe away any dirt or grime, ensuring you reach all corners and crevices. Be mindful of any decorative or intricate details on the frame and clean them with extra care.
- Rinse and dry: Once you have finished cleaning, rinse the glass enclosure and frame with clean water to remove any soap residue. Then, use a dry, lint-free cloth to gently dry the components. Ensure they are completely dry before reassembling them to prevent any water spots or potential damage.
Cleaning the glass enclosure and frame of your gas lamp post can help restore its shine and clarity. It can also promote better light distribution and enhance the overall aesthetic appeal of the lamp. However, if the glass enclosure or frame is in good condition and free from noticeable dirt or stains, skipping this step is also acceptable.
Remember, when cleaning the glass enclosure and frame, always handle them with care to avoid any accidental breakage or damage. Take your time, use gentle cleaning motions, and avoid using abrasive materials or harsh chemicals that could harm the glass or frame surfaces.
Once you have completed the cleaning process (if desired), you are now ready to move on to the next steps of preparing and lighting your gas lamp.
When lighting a gas lamp post, always make sure to follow the manufacturer’s instructions for safe and proper use. Check the gas supply and connections for any leaks before lighting. Keep the area around the lamp post clear of any flammable materials.
IV. Lighting the Gas Lamp
Now that you have assessed and prepared your gas lamp post, it’s time to move on to the exciting part – lighting the lamp! Follow these steps to safely and effectively light your gas lamp:
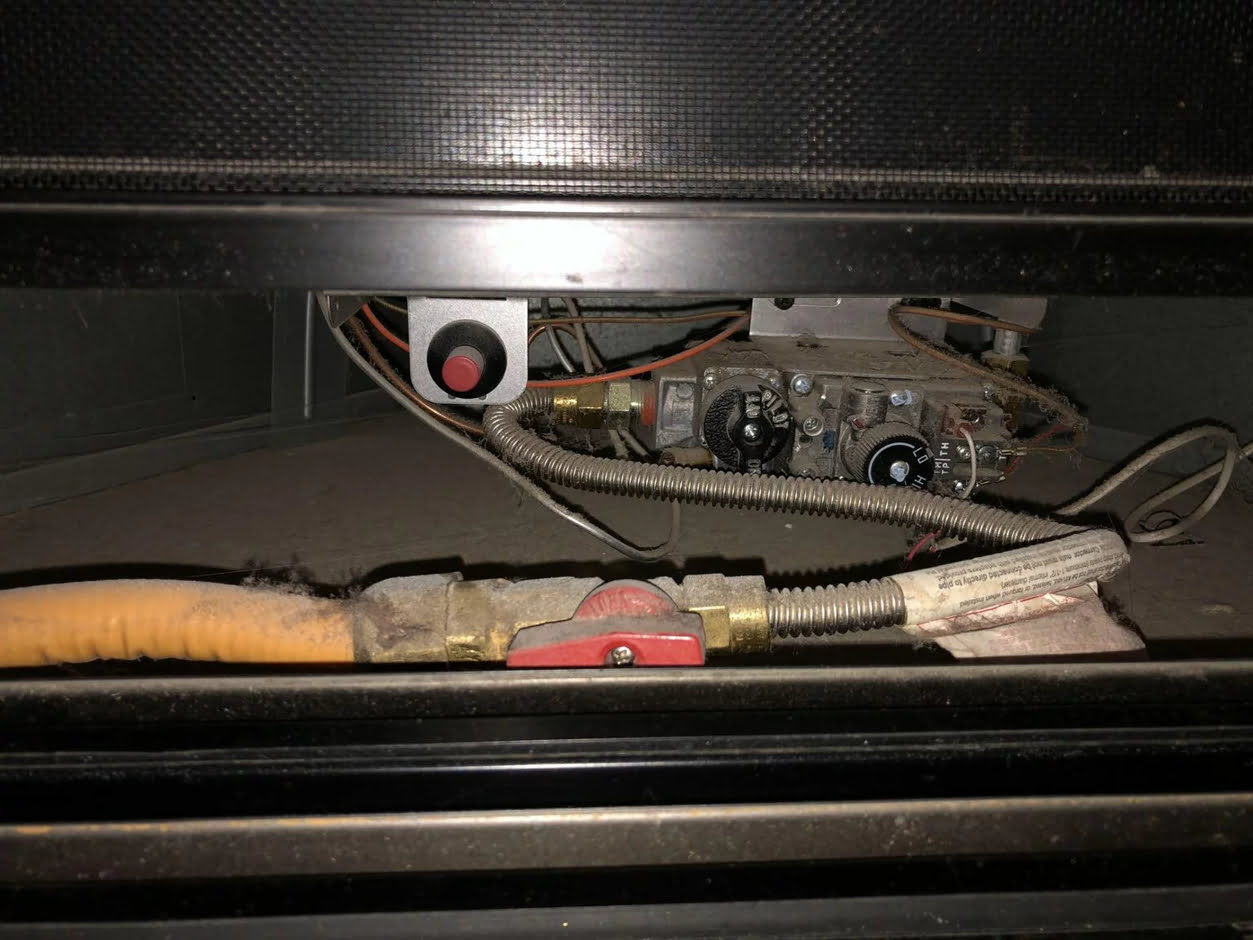
- Checking the gas valve: Ensure that the gas valve, which you previously shut off during the preparation stage, is still in the closed position. This step is essential to avoid any accidents or gas leakage while lighting the lamp.
- Lighting the match or lighter: Take your match or lighter and hold it near the burner of the gas lamp. If using a match, make sure to use a long-reach match to maintain a safe distance from the flame. If using a lighter, ensure that it is ignited and has a steady flame.
- Igniting the gas lantern: Carefully bring the flame of the match or lighter towards the burner of the gas lantern. Position the flame close to the burner, allowing the gas to catch fire. The gas lantern should ignite and produce a steady flame.
- Adjusting the flame: Once the gas lantern is lit, observe the flame’s size and quality. The flame should be steady, with a blue or yellowish-orange color. If the flame appears uneven or too high, you may need to adjust the gas flow using the gas valve on your lamp post or any control knobs provided with your specific model. Consult the manufacturer’s instructions for guidance on making these adjustments.
During the process of lighting the gas lamp, it’s important to prioritize safety. Make sure to keep flammable materials, such as curtains or leaves, away from the flame. Always exercise caution when working near an open flame and avoid touching the burner or any hot surfaces.
Once you have successfully lit the gas lamp and adjusted the flame to your desired level, take a moment to appreciate the warm and inviting glow that it provides. The flickering light and the gentle ambiance of a gas lamp can create a magical atmosphere in your outdoor space.
Finally, remember to double-check that the gas valve is closed securely after you have finished lighting your gas lamp. This will ensure that the gas flow is completely shut off when the lamp is not in use.
Congratulations! You have now successfully lit your gas lamp and can bask in the beautiful glow it emits. In the next section, we will discuss the importance of maintaining your gas lamp for long-term enjoyment.
When lighting a gas lamp post, always make sure to follow the manufacturer’s instructions for safe and proper use. Check the gas supply and connections for any leaks before lighting. Keep the area around the lamp post clear of any flammable materials.
IV. Lighting the Gas Lamp
- Checking the gas valve: Before proceeding with lighting the gas lamp, it is essential to double-check the position of the gas valve. Ensure that the valve is turned off or in the closed position. This step is crucial for safety and prevents the release of gas while you prepare to ignite the lamp.
Locate the gas valve on your gas lamp post, which is typically located near the base or along the gas line. It may be labeled or have specific markings indicating the “off” position. Take a moment to carefully inspect the valve and confirm that it is in the closed position.
If you’re not sure about the exact location or operation of the gas valve, consult the manufacturer’s instructions or seek guidance from a professional. It’s better to be safe and confident in the correct positioning of the valve before proceeding with lighting your gas lamp.
Checking the gas valve is an important safety measure that helps prevent any potential gas leakage or accidents during the lighting process. By ensuring that the valve is closed, you can eliminate the risk of gas flow and create a safe environment when working with an open flame.
Always remember to exercise caution and prioritize safety when working with gas appliances. If you smell gas or suspect a gas leak, immediately evacuate the area, contact the gas supplier, and do not attempt to light the lamp until the issue has been resolved by a professional.
Once you have verified that the gas valve is securely closed, you can confidently move on to the next steps of lighting your gas lamp and enjoying its beautiful illumination.
When lighting a gas lamp post, always make sure to follow the manufacturer’s instructions for safe and proper use. Check the gas supply and connections for any leaks before lighting. Keep the area around the lamp post clear of any flammable materials.
IV. Lighting the Gas Lamp
- Lighting the match or lighter: With the gas valve securely closed, it’s time to light the match or lighter that will ignite the flame of your gas lamp. Follow these steps to safely light the lamp:
Hold the match or lighter in your hand, ensuring a firm grip. If using a match, make sure you have a long-reach match to maintain a safe distance from the flame. Light the match by striking it against the designated striking surface or, in the case of a lighter, press the ignition button to produce a flame.
Once the match or lighter is ignited, position the flame near the burner of the gas lamp. Approach the burner slowly and carefully, ensuring that the flame is close enough to ignite the gas but not so close that it causes any hazards or burns.
Take caution to avoid placing your fingers too close to the flame and be mindful of any flammable materials nearby. Keep a safe distance and direct the flame towards the burner, allowing the gas to catch fire.
It may take a few seconds for the gas to ignite and for the flame to become steady. Continue to hold the match or keep the lighter’s flame near the burner until the gas catches fire and a confident flame is established.
If the gas does not ignite within a reasonable amount of time, or if you encounter any difficulties, do not attempt to relight it immediately. Close the gas valve, wait a few minutes, and then attempt to relight the lamp again. If problems persist, refer to the manufacturer’s instructions or consult a professional for assistance.
Remember, always exercise caution when working with an open flame. Avoid touching the burner or any other hot surfaces, and ensure that flammable materials are kept at a safe distance. Safety should be your top priority throughout the lighting process.
Once you have successfully ignited the gas lamp, the warm and gentle glow will enhance the ambiance of your outdoor space, creating a cozy and inviting atmosphere.
Proceed to the next step to learn how to adjust the flame to your desired level and ensure optimal performance of your gas lamp.
When lighting a gas lamp post, always make sure to follow the manufacturer’s instructions for safe and proper use. Check the gas supply and connections for any leaks before lighting. Keep the area around the lamp post clear of any flammable materials.
IV. Lighting the Gas Lamp
- Igniting the gas lantern: With the match or lighter in hand, it’s time to ignite the gas lantern and bring the beautiful flame to life. Follow these steps to safely ignite the gas lantern of your gas lamp:
Hold the match or lighter near the burner of the gas lantern, ensuring a safe distance from the flame. If using a match, make sure you have a long-reach match to maintain a comfortable distance. If using a lighter, ensure that it is ignited and has a steady flame.
Gently bring the flame of the match or lighter close to the burner. Position it near the burner, allowing the gas to catch fire. Take care to avoid touching the burner or any hot surfaces with your fingers.
As you bring the flame closer to the burner, you will notice the gas igniting and a flame starting to form. The flame should steadily grow and become more pronounced as the gas lantern ignites. You may hear a faint whoosh sound as the gas ignites, which is normal.
Continue to hold the match or lighter near the burner until the gas lantern is fully ignited. It may take a few seconds for the flame to stabilize and create a consistent, warm glow. Once the flame is steady and burning comfortably, you can remove the match or lighter, maintaining a safe distance from the burner.
Observe the flame of the gas lantern. It should have a steady, flickering quality and exhibit a blue or yellowish-orange color. A properly ignited flame ensures effective combustion and provides optimal illumination.
If the gas lantern does not ignite or the flame is not steady, you may need to repeat the process or adjust the gas flow. Double-check that the gas valve is fully open and the gas supply is reaching the burner. If issues persist, refer to the manufacturer’s instructions or seek assistance from a professional to ensure proper operation of your gas lantern.
It’s important to remember that safety is paramount when working with an open flame. Take precautions to prevent accidental contact with the flame or hot surfaces, and always keep flammable materials at a safe distance.
Now that you have successfully ignited the gas lantern, revel in the warm glow and enjoy the cozy ambiance it brings to your outdoor space. Proceed to the next step to learn how to adjust the flame for your desired level and ensure optimal performance of your gas lamp.
When lighting a gas lamp post, always make sure to follow the manufacturer’s instructions for safe and proper use. Check the gas supply and connections for any leaks before lighting. Keep the area around the lamp post clear of any flammable materials.
IV. Lighting the Gas Lamp
- Adjusting the flame: Once the gas lantern is lit and the flame is steady, you may want to adjust the flame to your desired level. Follow these steps to safely and effectively adjust the flame of your gas lamp:
Observe the flame of the gas lantern closely. It should have a steady quality and a color that is predominantly blue or yellowish-orange. If the flame appears uneven or too high, you can make adjustments to the gas flow to achieve the desired flame height and appearance.
Start by locating the gas valve on your gas lamp post. Depending on the design, you may need a gas valve key or another tool to access and adjust the valve. Refer to the manufacturer’s instructions to determine the specific method for adjusting the flame on your gas lamp.
Slowly and gently turn the gas valve, either clockwise or counterclockwise, to adjust the gas flow. Begin with small increments to avoid sudden changes. As you make adjustments to the gas flow, observe the change in the flame height and appearance.
To increase the flame height, turn the gas valve slightly in the appropriate direction. This will allow more gas to flow to the burner, resulting in a higher flame. Conversely, to decrease the flame height, turn the gas valve in the opposite direction to reduce the gas flow.
Continue making small adjustments and closely observe the flame after each turn of the gas valve. Aim for a flame that is visually pleasing and provides optimal illumination without being too high or too low.
It’s important to find a balance with the flame height. A flame that is too high may waste gas, produce excessive heat, or create a flickering effect that is not desirable. On the other hand, a flame that is too low may compromise the brightness and efficiency of the gas lamp.
Take the time to experiment and find the ideal flame height for your specific preferences and outdoor setting. Keep in mind that the flame may vary slightly depending on external factors such as wind conditions.
Remember to handle the gas valve with care and avoid applying excessive force. If you encounter any difficulties or if the flame adjustment seems challenging, consult the manufacturer’s instructions or seek assistance from a professional who is experienced with gas lamps.
Once you are satisfied with the flame height and appearance, take a moment to admire the warm and inviting glow of your gas lamp. It’s now ready to illuminate your outdoor space and create a cozy atmosphere.
In the next section, we will discuss the importance of regular maintenance and care for your gas lamp.
V. Maintaining the Gas Lamp
To ensure the longevity and optimal performance of your gas lamp, it’s important to establish a regular maintenance routine. Here are some key steps to help you maintain your gas lamp:
- Regular cleaning and maintenance: Clean the glass enclosure, frame, and other components of the gas lamp periodically to remove dirt, dust, and debris. Use a soft cloth and mild soap to gently wipe down the surfaces. Avoid using abrasive materials or harsh chemicals that could damage the finishes or glass.
- Inspect and replace parts if necessary: Regularly inspect the various parts of your gas lamp, including the burner, gas lines, and control mechanisms. Look for signs of wear, rust, or damage. If you notice any issues, such as a damaged burner or deteriorating gas lines, consult the manufacturer’s instructions or a professional technician to determine the appropriate steps for repair or replacement.
- Keep the gas supply in check: Periodically check the gas supply to ensure that there are no leaks or disruptions. If you detect any gas odor or suspect a leak, immediately turn off the gas valve and consult a professional technician to rectify the issue.
- Protect your gas lamp from the elements: Gas lamps can be sensitive to harsh weather conditions, such as heavy rain, strong winds, or extreme temperatures. Consider installing a protective cover or shelter to shield the lamp from these elements when not in use. This will help prevent damage and prolong its lifespan.
- Follow manufacturer’s guidelines: Always refer to the manufacturer’s instructions and guidelines for specific maintenance recommendations. They will provide valuable insights on maintenance schedules, cleaning techniques, and any specific care instructions for your gas lamp model.
- Troubleshooting common issues: Familiarize yourself with common issues that may arise with gas lamps, such as uneven flames, difficulty in lighting, or gas odor. Refer to troubleshooting guides provided by the manufacturer or seek assistance from a professional technician to address these issues effectively.
By following these maintenance practices, you can prolong the life of your gas lamp and ensure that it continues to provide a warm and enchanting glow to your outdoor space. Regular maintenance not only enhances the overall aesthetic appeal of the lamp but also contributes to its safe and efficient operation.
Remember, if you are uncertain about any aspect of maintaining your gas lamp, it’s always best to consult a professional technician or the manufacturer for guidance. They can provide expert advice specific to your gas lamp model and ensure that you are taking the necessary steps to keep it in optimal condition.
Now that you have learned about maintaining your gas lamp, you are equipped with the knowledge to enjoy its beauty and functionality for years to come.
V. Maintaining the Gas Lamp
- Regular cleaning and maintenance: Cleaning and maintaining your gas lamp on a regular basis is crucial for its longevity and optimal performance. Here’s how you can effectively clean and maintain your gas lamp:
Clean the glass enclosure: The glass enclosure of your gas lamp can accumulate dirt, grime, and debris over time, which can hinder the light output and diminish the lamp’s appearance. To clean the glass, mix a mild soap or dishwashing liquid with warm water in a bucket or container. Dip a soft cloth or sponge into the soapy water, wring out any excess moisture, and gently wipe the glass surfaces. Pay attention to any stubborn stains or spots and apply a little more pressure if needed. Rinse the glass with clean water and use a lint-free cloth to dry it thoroughly before reassembling.
Maintain the lamp frame and other components: In addition to cleaning the glass enclosure, regularly inspect and clean the lamp frame, burner, gas lines, and other components. Remove any debris or dust using a soft cloth or brush. Inspect for any signs of wear, rust, or damage. If you notice any issues, refer to the manufacturer’s instructions or consult a professional for guidance on repair or replacement.
Address lamp post materials: If your gas lamp post has materials such as metal or wood, take appropriate care to maintain their integrity. For metal components, use a metal cleaner or polish to remove oxidation or rust spots. If your lamp post has wooden parts, treat and seal them periodically to protect against weathering, rotting, or insect damage. Follow the manufacturer’s recommendations or consult a professional for the appropriate products and techniques.
Check for gas leaks: Regularly inspect the gas lines and connections for any signs of leakage. Start by checking that the gas valve is fully closed when the lamp is not in use. You can then use a solution of soapy water and carefully apply it around the connections and valves. If you see bubbles forming, it indicates a gas leak. If you suspect a gas leak or notice a distinct gas odor, immediately shut off the gas supply and contact a professional technician to address the issue.
Establish a cleaning schedule: Create a regular cleaning schedule for your gas lamp based on the environment and usage. In general, cleaning every few months should be sufficient, but if your lamp is exposed to harsh elements or located in an area prone to dirt and debris, you may need to clean it more frequently. Additionally, after major storms or windy conditions, inspect your lamp for any signs of damage or debris accumulation that may affect its performance.
Keep safety in mind: When performing any cleaning or maintenance, prioritize safety. Ensure that the gas supply is turned off and the lamp is completely cool before starting any work. Always follow the manufacturer’s instructions, wear protective gear if necessary, and use caution when handling any chemicals or tools.
Regular cleaning and maintenance not only enhance the visual appeal of your gas lamp but also contribute to its longevity and safe operation. By dedicating time to the care of your gas lamp, you can continue to enjoy its warm glow and create a welcoming ambiance for your outdoor space.
V. Maintaining the Gas Lamp
- Replacing parts if necessary: Properly maintaining your gas lamp also involves identifying and replacing any worn-out or damaged parts. Here’s what you need to know about replacing parts to ensure the optimal performance of your gas lamp:
Regularly inspect the lamp: Conduct periodic inspections of your gas lamp to identify any parts that may need replacement. Carefully examine the burner, gas lines, control mechanisms, glass enclosure, and other components for signs of wear, corrosion, or damage. Look for broken or loose parts, cracks, rust, or any other issues that may affect the functionality or safety of the lamp.
Refer to manufacturer guidelines: Consult the manufacturer’s documentation or instructions that came with your gas lamp for specific information on parts replacement. They may provide details on when and how to replace certain components, ensuring that you maintain the lamp’s warranty and operate it safely.
Contact the manufacturer or supplier: If you identify any parts that require replacement, contact the manufacturer or supplier of your gas lamp. They can provide you with the necessary replacement parts and guide you on the proper procedures for replacing them. Provide them with the model number or any other relevant information to ensure accurate identification and compatibility of the parts.
Work with a professional technician: Some parts replacement may require specialized tools, expertise, or knowledge. If you’re uncertain or uncomfortable replacing the parts yourself, it’s best to hire a professional technician experienced with gas lamps. They can ensure the proper installation of the new components and verify the gas lamp’s overall functionality and safety.
Keep a maintenance record: It’s a good practice to maintain a record of the maintenance and parts replacement activities for your gas lamp. Note down the date, components replaced, and any other relevant details. This record can serve as a useful reference for future inspections and help you track the lamp’s maintenance history.
Ensure proper disposal of old parts: When replacing parts on your gas lamp, discard the old or worn-out components responsibly. Follow local regulations for the disposal of gas lamp parts or contact your local waste management facility for guidance on appropriate disposal methods.
By promptly replacing any worn-out or damaged parts, you can maintain the optimal performance, safety, and longevity of your gas lamp. Regular inspections, adherence to manufacturer guidelines, and working with professionals when needed will help ensure that your gas lamp continues to illuminate your outdoor space for years to come.
V. Maintaining the Gas Lamp
- Troubleshooting common issues: Gas lamps, like any other devices, may encounter problems from time to time. Here are some common issues you may encounter with your gas lamp and steps to troubleshoot them:
Uneven or flickering flame: If you notice that the flame of your gas lamp is uneven or flickering, it could indicate an issue with the gas flow or ventilation. Check if the gas valve is fully open, ensuring proper gas supply to the burner. Also, inspect the ventilation elements, such as the chimney or vents, to make sure they are not obstructed or clogged with debris. Clear any blockages, and if the issue persists, seek the advice of a professional technician to examine the gas pressure or identify any underlying problems.
Difficulty in lighting the lamp: If you are experiencing difficulties lighting your gas lamp, ensure that the gas valve is open and that there is an adequate gas supply reaching the burner. Check that the gas lines are not clogged or obstructed and that the surrounding area is free from debris. If using a match, ensure that it is long enough to reach the burner safely. If using a lighter, make sure it is ignited and producing a steady flame. If the problem persists, consult the manufacturer’s instructions or seek professional assistance to diagnose and resolve the issue.
Gas odor or leak: The presence of a gas odor or suspected gas leak is a serious matter that requires immediate attention. If you smell gas, evacuate the area and contact your gas supplier or emergency services. Do not attempt to light the lamp or operate any electrical devices. A qualified technician should inspect the gas lines, connections, and any potential leakage points to ensure proper sealing and safety. Gas leaks should not be ignored or taken lightly, as they can pose a significant safety risk.
Ignition or control problems: If you are experiencing issues with the ignition or control mechanisms of your gas lamp, it may indicate a problem with the ignition system, gas valve, or control knobs. Check if the ignition system is properly connected and functional. Test the control knobs to ensure smooth operation and proper gas flow control. If the issue persists, consult the manufacturer’s instructions or seek the assistance of a professional technician to diagnose and repair the problem.
Dim or low light output: If your gas lamp is producing a dim or low light output, it may be due to a partially clogged burner or a problem with the gas pressure. Inspect the burner for any obstructions or debris and clean it if necessary. Ensure that the gas supply is properly regulated, and check the gas pressure to ensure it is within the manufacturer’s recommended range. If the issue persists, consult a professional technician for further investigation and resolution.
When troubleshooting issues with your gas lamp, always prioritize safety. If you are uncertain about any aspects of the troubleshooting process or suspect a more serious underlying problem, it is best to consult a professional technician or the manufacturer for guidance. They can provide expert advice specific to your gas lamp model and help ensure a safe and effective resolution to any issues you may encounter.
VI. Conclusion
In conclusion, knowing how to properly light and maintain a gas lamp post is key to enjoying its timeless charm and warmth in your outdoor space. By following the steps outlined in this article, you can confidently light your gas lamp and create a beautiful ambiance that enhances the overall atmosphere of your surroundings.
We began by assessing the condition of the gas lamp post, ensuring its stability and identifying any maintenance needs. Next, we discussed the importance of gathering the necessary tools and supplies, such as a gas lantern, matches or a lighter, a gas valve key, or pliers, and optional cleaning supplies.
The process of preparing the gas lamp involved shutting off the gas supply, removing the glass enclosure, and optionally cleaning the glass and frame. We then moved on to the steps of lighting the gas lamp, which included checking the gas valve, lighting the match or lighter, igniting the gas lantern, and adjusting the flame to the desired level.
In the maintenance section, we highlighted the significance of regular cleaning and maintenance to keep your gas lamp in optimal condition. This includes cleaning the glass enclosure and frame, inspecting and replacing parts if necessary, checking for gas leaks, protecting the lamp from the elements, and following manufacturer guidelines. We also discussed troubleshooting common issues to address any challenges that may arise.
By incorporating these practices into your routine, your gas lamp will not only provide a captivating glow but also ensure safety and efficiency. Remember, if you have any doubts or encounter complex issues, it’s always best to consult a professional technician or refer to the manufacturer’s instructions for appropriate guidance.
Now, it’s time to embrace the enchanting ambiance and natural beauty that your gas lamp post brings to your outdoor space. Enjoy the soft and inviting glow as you create unforgettable moments under its gentle radiance.
Thank you for joining us on this journey to learn about lighting and maintaining a gas lamp. Here’s to many delightful evenings and cherished memories illuminated by the enchantment of your gas lamp post!
Frequently Asked Questions about How To Light A Gas Lamp Post
Was this page helpful?
At Storables.com, we guarantee accurate and reliable information. Our content, validated by Expert Board Contributors, is crafted following stringent Editorial Policies. We're committed to providing you with well-researched, expert-backed insights for all your informational needs.