Home>Garden Essentials>How Do I Make An Invoice For Landscaping
Garden Essentials
How Do I Make An Invoice For Landscaping
Modified: March 8, 2024
Learn how to create professional invoices for landscaping services with our step-by-step guide. Manage your garden business efficiently and get paid on time.
(Many of the links in this article redirect to a specific reviewed product. Your purchase of these products through affiliate links helps to generate commission for Storables.com, at no extra cost. Learn more)
Introduction
Welcome to the world of landscaping! Whether you are a professional landscaper or a homeowner looking to beautify your outdoor spaces, it’s important to understand how to create an effective invoice for landscaping services. An invoice serves as a formal request for payment and helps ensure a smooth financial transaction between the service provider and the client.
In this article, we will guide you through the process of creating an invoice for landscaping services. We will discuss the necessary information to include, how to set up a template, how to calculate costs and pricing, and provide tips for creating professional invoices. So, let’s dive in and get started!
Before we delve into the specifics of creating an invoice, it’s important to gather all the necessary information. This includes the client’s name, contact details, and address. Additionally, make sure to have a detailed list of the services provided, including any materials or plants used. Having this information ready will help you create a clear and accurate invoice.
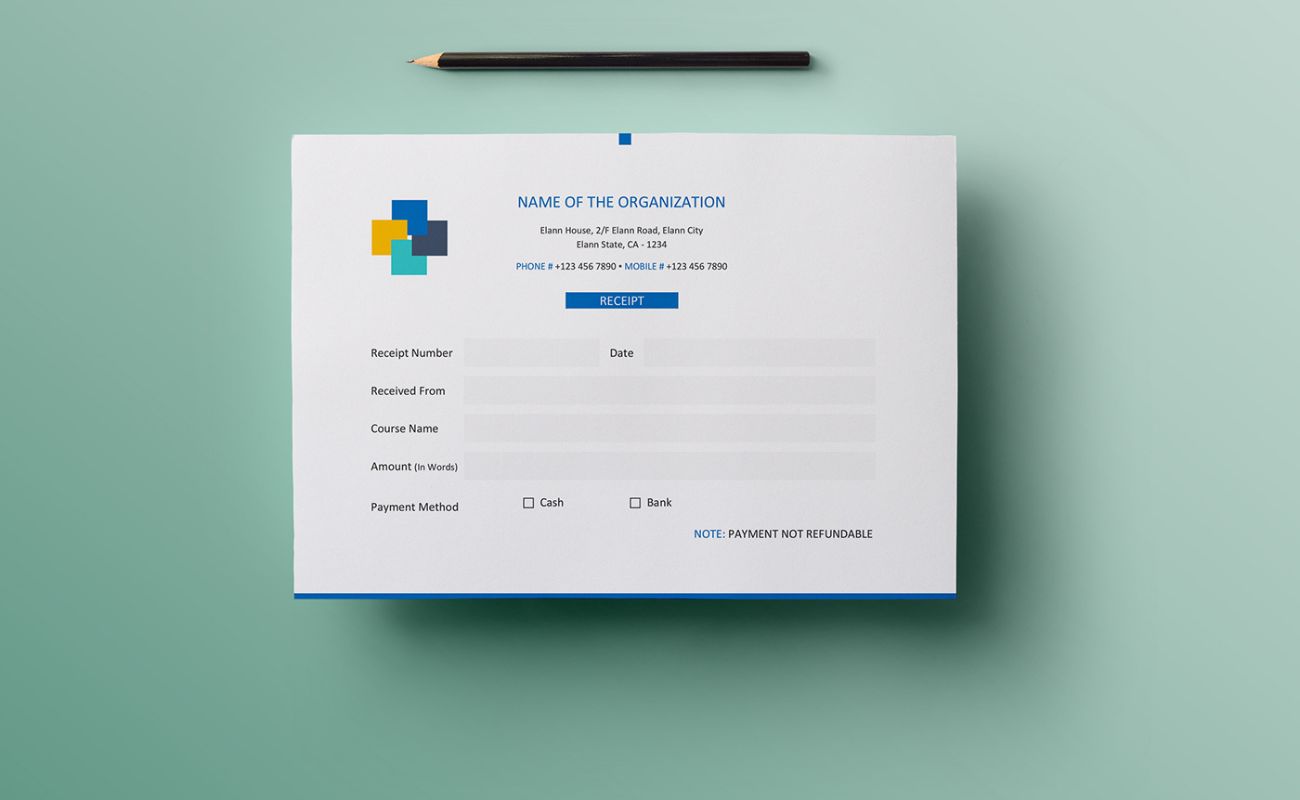
Now that we have the necessary information, let’s move on to setting up the invoice template. You can use a software program specifically designed for invoicing or create a custom template using a spreadsheet program like Microsoft Excel or Google Sheets. The template should include your company name, logo, contact information, and any relevant licensing or certification numbers. This will not only make your invoice look professional but also help build trust with your clients.
Once the template is set up, you need to include the appropriate details and descriptions. Start by clearly stating the invoice number, date, and payment due date. Include a brief but descriptive title for the services provided, such as “Landscaping Maintenance” or “Garden Design and Installation.” Provide a detailed breakdown of each service, including quantities and hourly rates if applicable. The more specific and transparent you are, the easier it will be for the client to understand the charges.
Calculating the costs and pricing is the next crucial step in creating an invoice. You need to determine how much to charge for your landscaping services based on factors like time spent, materials used, labor costs, and any additional expenses. Consider the complexity of the project, the size of the area being landscaped, and the market rates in your area. Be sure to include a subtotal for each service and provide a grand total at the bottom of the invoice.
If applicable, you can also add taxes and discounts to the invoice. Check your local tax regulations to determine if you need to include sales tax or any other applicable taxes. If you offer any discounts or promotions, clearly state them along with their corresponding deductions on the invoice. This will help your clients understand the final amount due.
Key Takeaways:
- Gathering client info, using clear language, and setting a due date are crucial for creating professional landscaping invoices. It ensures smooth payment and positive client relationships.
- Including detailed descriptions, using consistent formats, and offering multiple payment options help build trust and professionalism in landscaping invoice creation.
Read more: How To Make A Lawn Care Invoice
Gathering Information for an Invoice
Before you can create an effective invoice for your landscaping services, it’s important to gather all the necessary information. Having accurate and complete information will not only ensure that your invoice is clear and professional, but it will also help streamline the payment process between you and your clients. Let’s explore the key components of gathering information for an invoice:
Client Information: Start by collecting the client’s name, contact details, and address. Ensure that you have the correct spelling of their name and accurate contact information so that the invoice reaches them promptly. Having this information readily available will also help with future communication and record-keeping.
Service Details: Make sure you have a clear understanding of the services you provided to the client. This includes the scope of work, any specific tasks performed, and the timeline of the project. If you provided various services, it’s helpful to have a detailed breakdown of each service and the corresponding costs.
Materials and Plants Used: If you used any materials or plants in the landscaping project, keep a record of them. Include the type of materials, quantity, and the cost. Having this information will help accurately calculate the total cost of the project and provide transparency to your clients.
Time and Labor: If your services involved hourly rates or labor charges, ensure that you have precise records of the hours worked. Keep track of the time spent on various tasks and include this information in your invoice. This is especially important for services like landscape maintenance, where the time spent can vary depending on the specific tasks performed.
Prior Agreements or Contracts: If you have a signed agreement or contract with the client, make sure to reference it in the invoice. This helps maintain clarity and ensures that both parties are on the same page regarding the terms and conditions of the project.
Payment Terms: Clearly define your payment terms, such as the due date, accepted payment methods, and any late-payment penalties or discounts if applicable. Including these details upfront will help avoid any confusion or delays in the payment process.
Invoice Frequency: Determine how frequently you will be invoicing your clients. This could be at the completion of each project, monthly, or on another agreed-upon basis. Establishing a consistent invoicing schedule will help you maintain a steady cash flow and keep your financial records organized.
By gathering all the necessary information, you can create comprehensive and accurate invoices for your landscaping services. This will not only help you get paid promptly but also build trust and professionalism with your clients. Remember to keep your records organized and maintain a clear communication channel with your clients throughout the invoicing process.
Setting Up the Invoice Template
Creating a well-designed and professional invoice template is essential for successfully managing your landscaping business. A properly set up template not only ensures that you provide all the necessary information to your clients but also helps you maintain consistency and professionalism in your invoicing process. Here are some key considerations when setting up your invoice template:
Choose the Right Software: There are various software options available that can help you create and manage your invoices. Look for an invoicing software that is user-friendly, offers customizable templates, and provides features like automatic calculations and invoice tracking. Some popular options include QuickBooks, FreshBooks, and Wave.
Logo and Company Information: Start by adding your company logo and contact information to the top of your invoice. Including your business name, address, phone number, and website not only enhances the professional appearance but also makes it easier for clients to reach out to you if they have any questions or concerns.
Invoice Numbering: Assign a unique invoice number to each invoice you generate. This helps with organizing and tracking your invoices, making it easier for both you and your clients to reference them in the future. You can use a sequential numbering system or incorporate a prefix such as the year or client initials to differentiate between invoices.
Date and Payment Due Date: Clearly state the date of the invoice and the payment due date. This provides a clear timeline for your clients to make their payments and helps you keep track of outstanding invoices. Including specific payment terms, such as “Payment due within 30 days” or “Payment upon receipt,” helps avoid any confusion or delays.
Itemization of Services: List the services you provided to the client in a clear and organized manner. Include a brief but descriptive title for each service, along with its corresponding quantity, rate, and total cost. This allows your clients to see the breakdown of charges and understand what they are paying for.
Subtotals and Totals: At the end of each section or for each service, provide subtotals that summarize the costs. This makes it easier for clients to review and understand the overall charges. Finally, calculate the grand total at the bottom of the invoice, which is the sum of all the services provided.
Tax Information: Check your local tax regulations to determine if you need to include sales tax or any other applicable taxes on your invoices. If taxes are applicable, clearly state the tax rate and calculate the tax amount separately or include it in the subtotal before calculating the grand total.
Payment Instructions: Clearly communicate the available payment methods and instructions for your clients. Include details such as your preferred methods (e.g., check, bank transfer, or online payment platforms), payment names or account numbers, and any additional information or documents required for the payment process.
Terms and Conditions: Consider including a section with your standard terms and conditions. This can include information on late payment penalties, discounts for early payment, refund policies, and any other important legal or contractual information that applies to your landscaping services.
Preview and Test: Before using your invoice template with clients, take the time to preview and test it. Review all the elements, ensure that the calculations are accurate, and check for any spelling or formatting errors. This will help you avoid any potential issues or confusion when providing invoices to your clients.
Remember, a well-designed invoice template not only improves the professionalism and efficiency of your invoicing process but also reflects positively on your brand. Take the time to create a customized template that aligns with your business identity and provides a clear and organized representation of your services and charges.
Including the Appropriate Details and Descriptions
One of the crucial aspects of creating an effective invoice for landscaping services is including the appropriate details and descriptions. The information you provide on the invoice should be clear, concise, and informative, helping your clients understand the services rendered and the associated costs. Here’s a breakdown of the key elements to include in this section:
Service Title: Start by providing a descriptive title for each service rendered. For example, if you provided lawn mowing, you could use a title like “Weekly Lawn Mowing Service.” This allows your clients to easily identify the specific service they received.
Itemized List of Services: Create an itemized list of all the services provided. Break it down into specific tasks or components to give your clients a clear understanding of what they are being charged for. This can include items such as lawn mowing, weed control, pruning, fertilization, or landscape design.
Service Descriptions: Alongside each listed service, provide a brief description to further clarify the nature of the work performed. These descriptions should be concise but informative, outlining the scope of each service. For example, if you provided landscape design services, you could include a description like “Creation of a customized landscape design plan, including plant selection and hardscape layout, based on client preferences.”
Quantities: Include the quantities or measurements associated with each service or item. This could be the square footage of the lawn mowed, the number of trees pruned, or the quantity of plants installed. Adding these details helps your clients understand the scale of the work performed and how it directly affects the overall cost.
Unit Costs: Specify the unit cost for each service or item. This could be an hourly rate, a per-square-foot rate, or a fixed amount. By providing a clear breakdown of the costs, your clients can see exactly how the total amount was calculated.
Line-item Subtotals: Calculate the subtotal for each service or item separately. This allows your clients to see the cost breakdown for each line item and understand its contribution to the total invoice amount. Clearly specifying the subtotals creates transparency and builds trust with your clients.
Additional Charges: If there are any extra charges that need to be included, such as materials, equipment rental, or disposal fees, clearly outline them in a separate section. Be transparent about these charges and provide detailed explanations when necessary.
Descriptions for Additional Charges: Alongside any additional charges, provide clear descriptions to explain what they entail. For example, if you incurred equipment rental costs for a specific project, state it as “Equipment Rental: Bobcat usage for site grading.”
Notes or Comments: Include a section for any notes or comments that you would like to communicate to your clients. This could be a reminder of any future appointments or follow-up services, additional instructions for ongoing maintenance, or special considerations for the work performed.
Grand Total: Calculate the grand total by summing up all the subtotals, additional charges, and taxes (if applicable). Clearly state the final amount due on the invoice.
By including these appropriate details and descriptions, your clients will have a clear understanding of the services provided and associated costs. This level of transparency builds trust and ensures that there are no ambiguities or misunderstandings regarding the work performed and the charges on the invoice.
Calculating the Costs and Pricing
Calculating the costs and pricing for your landscaping services is a crucial step in creating an accurate and fair invoice. It involves considering various factors such as the complexity of the project, the time and effort required, the materials used, and the market rates in your area. Taking the time to calculate costs and pricing properly ensures that you are compensated fairly for your work. Here’s a breakdown of important considerations:
Evaluate the Scope of Work: Begin by evaluating the scope of the landscaping project. Consider the size of the area to be landscaped, the specific tasks and services required, and any unique challenges or requirements. A larger and more complex project may warrant a higher price due to the increased time, labor, and materials involved.
Consider Overhead Costs: Take into account your overhead costs, such as equipment maintenance, licensing fees, insurance, and any administrative expenses. These costs should be factored into your pricing to ensure that your business remains sustainable and profitable.
Research Market Rates: Research the prevailing market rates for landscaping services in your area. This will give you an idea of the standard pricing range and help you determine a fair and competitive price for your services. Take into consideration factors such as your expertise, experience, and the quality of your work when setting your rates.
Estimate Time and Labor: Estimate the amount of time and labor required to complete the project. Consider factors such as the complexity of the design, the size of the area, and the specific tasks involved. This will help you determine the appropriate hourly rates or project-based pricing for your services.
Breakdown Costs: Break down the costs into specific components. Consider the cost of materials such as plants, soil, mulch, and any other supplies. Factor in your labor costs, including the time spent on planning, design, installation, and maintenance. Be sure to include any subcontractor costs if you hire other professionals for specialized tasks.
Consider Seasonal Variations: Take into account seasonal factors that may affect the pricing of your landscaping services. For example, the demand for services like lawn maintenance may be higher during the spring and summer months, which could impact pricing. Additionally, the availability and cost of certain plants or materials may differ depending on the time of year.
Account for Profit Margin: Make sure your pricing includes a profit margin that reflects the value you provide as a landscaper. Your profit margin should account for your expertise, creativity, and the quality of your work. It also helps cover any unexpected expenses and allows for business growth and investment.
Consider Competitive Pricing: While it’s important to set fair and profitable pricing for your services, it’s also essential to consider the competition. Take into account the pricing models and rates offered by other landscaping companies in your area. Striking a balance between offering competitive pricing and maintaining profitability is key.
Utilize Pricing Tools: Take advantage of pricing tools or cost calculators available online. These tools can help you estimate costs based on factors such as square footage, materials used, and specific services provided. They can provide you with a starting point for calculating your prices and ensure that you don’t overlook any cost elements.
Review and Adjust Pricing Regularly: Regularly review and adjust your pricing based on market conditions, changes in overhead costs, and any fluctuations in demand. By regularly evaluating your pricing, you can ensure that your rates remain competitive and aligned with the value you provide.
Calculating the costs and pricing for your landscaping services requires careful consideration of various factors. By taking into account the scope of work, overhead costs, market rates, time and labor, and maintaining a fair profit margin, you can create a pricing structure that accurately reflects the value of your services and ensures the success and sustainability of your landscaping business.
Be sure to include your company’s name, contact information, a description of the landscaping services provided, the quantity and cost of each service, and the total amount due on the invoice.
Read more: How To Organize Invoices
Adding Taxes and Discounts (If Applicable)
When creating an invoice for your landscaping services, it’s essential to include any applicable taxes and discounts. This ensures transparency in your pricing and helps your clients understand the final amount due. Here’s an overview of how to properly add taxes and discounts to your invoices:
Add Taxes: Before adding taxes to your invoice, familiarize yourself with the tax regulations in your region or country. Determine if you need to charge sales tax, value-added tax (VAT), or any other applicable taxes. Verify the tax rate that applies to your services. Once you have this information, calculate the tax amount for each service provided. You can either calculate taxes separately and add them to the subtotal, or include taxes in the prices of each service directly.
Specify Tax Amount: Clearly state the tax amount and the corresponding tax rate on your invoice. This provides transparency and reassures your clients that they are being charged the correct tax amount. Displaying the tax separately allows clients to see how the overall invoice amount is allocated.
Include Discounts: If you offer any discounts, such as promotional offers or discounts for repeat clients, be sure to include them on the invoice. Clearly indicate the discount amount and the reason for the discount. This helps your clients understand the reduced pricing and encourages them to continue working with you.
Specify Discount Details: Alongside each discounted service or item, provide a brief explanation of the discount. Whether it’s a percentage-based discount or a specific dollar amount, clearly state the discount and how it is applied. For example, you could mention “10% off Spring Cleanup” or “Promotional Discount: $50 off Landscape Design Package.”
Calculate Discounts Correctly: Ensure that you calculate discounts accurately. Whether you deduct a percentage or a fixed amount from the original price, double-check your calculations to avoid any errors. Display the discounted amount separately or deduct it directly from the subtotal to give your clients a clear breakdown of the discounted pricing.
Consider Early Payment Discounts: You may also choose to offer discounts for early payment. This can incentivize clients to pay promptly and help improve your cash flow. Clearly state any early payment discounts and the terms associated with them, such as the percentage or amount of the discount and the deadline for payment to qualify for the discount.
Clearly Label the Final Amount Due: After adding taxes and applying any discounts, clearly state the final amount due on the invoice. Ensure that it is prominently displayed so that your clients can easily identify the total payment required. This provides clarity and eliminates any confusion regarding the final invoice amount.
Communicate Discount Expirations: If your discounts have an expiration date, clearly mention it in your invoice. This helps establish a sense of urgency and encourages clients to take advantage of the discounted pricing before the deadline. Including an expiration date also avoids any misunderstandings or disputes in the future.
By adding taxes and discounts accurately and transparently, you can create an invoice that accurately reflects the final amount due for your landscaping services. This ensures that your clients have a clear understanding of the pricing and any deductions applied, and it promotes trust and satisfaction in your business relationship.
Including Payment Terms and Methods
When creating an invoice for your landscaping services, it’s important to clearly outline the payment terms and methods. This ensures a smooth payment process and minimizes any potential confusion or delays. Here are some key points to consider when including payment terms and methods on your invoice:
Due Date: Clearly specify the due date for payment on your invoice. This indicates when the full payment is expected from your clients. You can choose a specific date, such as “Due on or before [date],” or specify a timeframe, such as “Payment due within 30 days of invoice date.” Setting a clear due date helps maintain a timely and organized payment process.
Accepted Payment Methods: Clearly outline the accepted payment methods on your invoice. This includes specifying which forms of payment you accept, such as cash, check, credit card, or bank transfer. If you accept online payment platforms or have a preferred payment provider, mention that as well. Providing multiple payment options allows your clients to choose the method that is most convenient for them.
Partial or Installment Payments: If you allow for partial or installment payments, clearly state the terms and conditions for these arrangements. Specify the amounts and due dates for each installment, as well as any penalties or interest charges for late or missed payments. This helps manage expectations and provides clarity for both you and your clients.
Late Payment Penalties: In case of late payments, mention any late payment penalties or fees that may apply. These penalties serve as an incentive for clients to make their payments on time and compensate you for any additional administrative efforts or costs incurred as a result of late payments. Clearly communicate the penalty amount or percentage and when it will be applied.
Discounts for Early Payments: If you offer discounts for early payments, clearly state the terms and conditions for these discounts. Outline the amount or percentage of the discount, the deadline for payment to qualify for the discount, and any specific instructions for applying the discount. This encourages your clients to make timely payments and can help improve your cash flow.
Payment Instructions: Provide clear and concise instructions for making payments on your invoice. Include any relevant information or account details required for each payment method. For example, if you accept bank transfers, provide your bank account information. If payments are to be made by check, provide the address where the check should be mailed. Utilize bullet points or a numbered list to make the instructions easy to follow.
Security Measures: Assure your clients that their payment information is secure by mentioning any security measures you have in place. If you use encrypted payment systems or adhere to strict privacy policies, mention it on your invoice. This helps build trust with your clients and demonstrates your commitment to protecting their sensitive information.
Contact Information: Provide your contact information on the invoice so that clients can reach out to you with any payment-related questions or concerns. Include your business phone number, email address, and any additional contact details. This ensures open communication and allows for prompt resolution of any payment issues.
Additional Notes: Include any additional notes or information related to payments that you want to communicate to your clients. This could include instructions for reference numbers or payment descriptions to include when making the payment. If there are any specific terms or conditions related to late payments, refunds, or disputes, make sure to clearly state them here.
By including payment terms and methods on your invoice, you establish clear expectations and facilitate a smoother payment process. This not only helps you receive timely payments but also enhances the professionalism and efficiency of your landscaping business.
Sending and Following Up on the Invoice
Once you have created an invoice for your landscaping services, it’s important to send it promptly and follow up to ensure timely payment. Sending and following up on the invoice ensures that your clients are aware of their outstanding balance and helps maintain a healthy cash flow for your business. Here are some steps to consider:
Sending the Invoice: Send the invoice to your clients as soon as possible after completing the services. Promptly sending the invoice increases the chances of receiving timely payment. You can send the invoice via email in PDF format or through a dedicated invoicing software. Ensure that the invoice is attached and clearly labeled in the email or included as an accessible link.
Professional Cover Message: Include a brief, professional cover message when sending the invoice. Express your appreciation for the opportunity to work with your client and politely remind them of the outstanding balance. The message can also provide any additional instructions or clarify any details related to the invoice, such as payment methods or due dates.
Follow-Up Reminder: If the payment due date is approaching, it’s essential to follow up with a friendly reminder. Send a follow-up email or make a phone call to politely remind your client that the payment due date is nearing or has passed. Clearly state the outstanding balance, payment methods, and any other necessary information. Be firm but maintain professionalism and courtesy in your communication.
Offer Payment Options: Make it convenient for your clients to pay by offering multiple payment options. Include details about accepted payment methods in your follow-up reminder. For example, you can provide a link to an online payment portal, instructions for bank transfers, or information on where to mail a check. The more flexible and accessible the payment options, the higher the likelihood of receiving payment.
Personalize the Follow-Up: Whenever possible, personalize the follow-up communication. Use your client’s name and refer to the specific services or project that the invoice relates to. This personal touch shows that you value their business and care about their satisfaction. It also helps avoid any confusion if you have multiple clients or projects at the same time.
Track Payment Status: Keep a record of the payment status for each invoice. Maintain a spreadsheet or use invoicing software that allows you to track which invoices have been paid, which are outstanding, and any partial payments received. This helps you stay organized, identify any overdue payments, and plan your cash flow accordingly.
Professional and Polite Tone: Maintain a professional and polite tone when communicating about payment. Even if the payment is overdue or there are issues with the payment, avoid using aggressive or confrontational language. Instead, be firm but understanding, and offer assistance if there are any questions or concerns regarding the invoice or payment process.
Escalate if Necessary: If your follow-up attempts don’t yield any response or payment, you may need to escalate the situation. Consider sending a more formal and assertive notice or engaging a collections agency as a last resort. However, before taking any drastic measures, try to engage in open communication to understand the reasons behind the delay or non-payment.
Maintain Professional Relationships: Throughout the process, it’s important to maintain professionalism and give your clients the benefit of the doubt. Payment delays can sometimes occur due to unforeseen circumstances. By being understanding and maintaining open lines of communication, you can strengthen your professional relationships and potentially resolve payment issues in a mutually beneficial manner.
Remember, sending an invoice is not the end of the payment process. Following up appropriately and professionally ensures that you receive payment in a timely manner and maintains a healthy financial flow for your landscaping business. With effective communication and diligent tracking, you can foster positive client relationships and establish a reputation for reliability and professionalism.
Tips for Creating Professional Invoices
Creating professional invoices is not just about requesting payment; it’s an opportunity to showcase your professionalism and build trust with your clients. A well-crafted invoice can leave a lasting impression and contribute to the success of your landscaping business. Here are some tips to help you create professional invoices:
Use a Consistent Format: Develop a standard format for your invoices and use it consistently across all your clients. This helps establish brand consistency and makes it easier for clients to recognize and process your invoices. Include your logo, contact information, and any relevant licensing or certification numbers to add a professional touch.
Be Clear and Concise: Use clear and concise language when describing your services and the associated costs. Avoid jargon or technical terms that may confuse your clients. Clearly itemize your services, quantities, rates, and subtotals to provide transparency and make it easy for clients to understand the breakdown of charges.
Include Complete Contact Information: Ensure that your contact information, including your business name, address, phone number, and email address, is clearly displayed on the invoice. This makes it convenient for clients to reach out to you with any questions or concerns regarding the invoice.
Number your Invoices Sequentially: Assign a unique invoice number to each invoice you generate. Use a sequential numbering system to keep your invoices organized and easily trackable. This also provides a professional appearance and helps in record-keeping.
Proofread and Double-Check: Take the time to thoroughly proofread your invoice before sending it to clients. Check for any spelling or grammatical errors and ensure that all the details are accurate, including names, quantities, rates, and calculations. A well-presented and error-free invoice reflects positively on your attention to detail and professionalism.
Make Payment Terms Clear: Clearly state your payment terms, including the due date, accepted payment methods, and any late payment penalties or discounts for early payment. Providing this information upfront eliminates any confusion and helps ensure a smooth payment process.
Create a Detailed Description: Provide a detailed description for each service or item listed on the invoice. This helps clients understand the specifics of the work performed and justifies the charges. Use concise language and be specific about the nature of the services rendered.
Include Terms and Conditions: Consider including a section for your terms and conditions on the invoice. This can cover topics such as liability, warranty, dispute resolution, or any other important legal or contractual information. Including terms and conditions demonstrates professionalism and sets clear expectations for your clients.
Use Professional Invoicing Software: Utilize invoicing software to streamline your invoicing process. These tools offer customizable templates, automatic calculations, and tracking features. They also provide a more professional appearance and save you time and effort in generating and managing invoices.
Send Invoices Promptly: Send your invoices promptly after completing the services. This shows professionalism and helps ensure that the payment process starts as soon as possible. Timely invoicing also helps maintain a steady cash flow for your landscaping business.
Follow Up on Outstanding Invoices: Regularly follow up on any outstanding invoices with friendly and professional reminders. This demonstrates your commitment to collecting payment and helps resolve any potential issues or concerns your clients may have.
By implementing these tips, you can create invoices that not only expedite the payment process but also enhance your professional image. Professional invoices contribute to the overall customer experience and foster trust and confidence in your landscaping services.
Read more: Landscaping: How Much Do You Make
Conclusion
Creating professional and effective invoices for your landscaping services is a crucial part of running a successful business. It ensures that you are properly compensated for your work and helps maintain positive relationships with your clients. By following the tips and guidelines outlined in this article, you can create professional invoices that facilitate a smooth and efficient payment process.
Gathering all the necessary information, setting up a well-designed invoice template, and including the appropriate details and descriptions are fundamental steps in crafting an effective invoice. Calculating the costs and pricing accurately, adding taxes and discounts where applicable, and specifying the payment terms and methods are essential to ensure clarity and transparency in the invoicing process.
Furthermore, sending the invoice in a timely manner and following up on outstanding payments are vital steps to maintain a healthy cash flow for your landscaping business. By remaining professional, polite, and persistent in your communication, you can foster positive relationships with your clients while ensuring that you receive timely payments for your services.
Remember to utilize professional invoicing software, proofread your invoices for accuracy, and provide complete contact information. Incorporating terms and conditions, using consistent formats, and including detailed descriptions in your invoices help establish professionalism and build trust with your clients.
Ultimately, a well-crafted and professional invoice not only facilitates smooth financial transactions but also contributes to your overall brand image. It showcases your attention to detail, reliability, and commitment to delivering quality services.
So, take the time to implement these tips and guidelines in your invoicing process. By creating professional invoices, you can ensure that your clients understand and appreciate the value of your landscaping services, leading to long-term customer satisfaction, repeat business, and a prosperous landscaping business.
Frequently Asked Questions about How Do I Make An Invoice For Landscaping
Was this page helpful?
At Storables.com, we guarantee accurate and reliable information. Our content, validated by Expert Board Contributors, is crafted following stringent Editorial Policies. We're committed to providing you with well-researched, expert-backed insights for all your informational needs.


0 thoughts on “How Do I Make An Invoice For Landscaping”