Home>Garden Essentials>How To Get Chestnuts To Germinate
Garden Essentials
How To Get Chestnuts To Germinate
Modified: March 15, 2024
Learn the secrets of germinating chestnuts in your garden. Discover step-by-step instructions and useful tips to ensure successful chestnut growth.
(Many of the links in this article redirect to a specific reviewed product. Your purchase of these products through affiliate links helps to generate commission for Storables.com, at no extra cost. Learn more)
Introduction
Welcome to the wonderful world of chestnuts! If you’ve ever dreamed of growing your own chestnut trees, you’re in the right place. Chestnuts are not only delicious, but they also make beautiful additions to any garden or backyard. However, before you can enjoy the bounty of their tasty nuts, you need to know how to get chestnuts to germinate.
Chestnut germination can be a bit tricky, but with the right knowledge and techniques, you can successfully grow chestnut trees from seeds. In this article, we will guide you through the process and provide you with all the information you need to ensure successful germination.
Before we dive into the details, it’s important to understand the basics of chestnut germination. Chestnuts are a unique type of seed that require a specific set of conditions to sprout. They have a hard outer shell that needs to be softened and broken through a process known as stratification. Stratification mimics the natural winter conditions that chestnuts experience in order to trigger germination.
Once the chestnuts have gone through the stratification process, they can be planted in a suitable growing medium and provided with the right care to encourage healthy growth. With patience and a little bit of effort, you can witness the magic of chestnut germination and enjoy the satisfaction of nurturing your very own chestnut trees.
In the next sections, we will walk you through the key steps involved in chestnut germination, from selecting healthy chestnuts to caring for germinating seeds. So, roll up your sleeves and let’s get started on this exciting journey!
Key Takeaways:
- Growing chestnut trees from seeds requires selecting healthy chestnuts, preparing them for germination, and providing the right conditions for successful sprouting. It’s a rewarding journey that teaches patience and the joy of nurturing life.
- To germinate chestnuts, mimic natural winter conditions through stratification, choose suitable germination methods, and provide care for the seedlings. Embrace setbacks as learning opportunities and enjoy the process of growing your own chestnut trees.
Read more: How To Store Cooked Chestnuts
Understanding Chestnut Germination
Before diving into the process of germinating chestnuts, it’s important to have a basic understanding of how the germination process works. Chestnuts, like many other tree seeds, have a built-in dormancy mechanism that prevents them from sprouting immediately after they fall from the tree.
When a chestnut seed is mature and falls to the ground, it enters a period of dormancy to protect it from unfavorable growing conditions. This dormancy allows the seed to remain viable until the conditions are right for germination. Without this dormancy mechanism, the seeds would germinate prematurely and may not survive.
The dormancy period for chestnuts is typically around 3 to 5 months, during which the seed undergoes a natural stratification process. Stratification is a series of physiological changes that occur within the seed in response to the changing environmental conditions, particularly exposure to cold temperatures.
During the stratification process, the cold temperature triggers biochemical changes within the seed that break down the growth inhibitors and prepare the embryo for sprouting. This process also softens the outer shell of the chestnut, making it easier for the seedling to emerge.
It’s important to note that chestnut seeds have different germination requirements depending on the variety. Some chestnut varieties have a higher dormancy period and require longer stratification, while others may have shorter dormancy requirements.
Understanding the natural behavior of chestnut seeds and the importance of stratification is crucial when trying to successfully germinate them. By replicating and controlling these conditions, we can encourage the seeds to break dormancy and initiate the germination process.
In the next sections, we will explore the steps involved in selecting healthy chestnuts and preparing them for stratification. We will also delve into various stratification methods and germination techniques that can help you achieve successful chestnut germination. Let’s dig deeper into the fascinating world of chestnut germination!
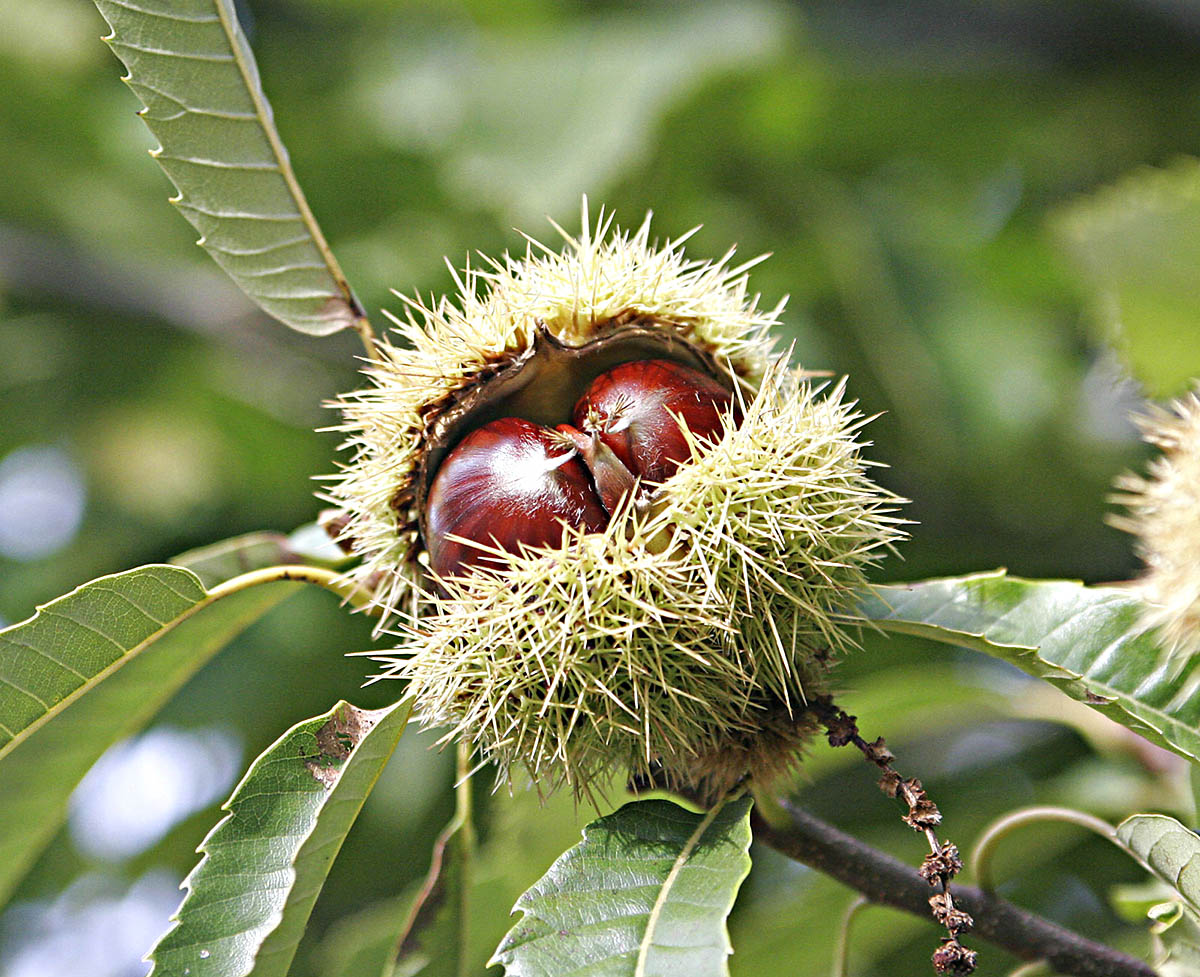
Selecting Healthy Chestnuts
When it comes to germinating chestnuts, selecting healthy seeds is a crucial step. Healthy chestnuts are more likely to have higher germination rates and produce strong, healthy seedlings. Here are some tips to help you choose the best chestnuts for germination:
- Choose fresh chestnuts: Fresh chestnuts have a higher chance of germinating compared to older ones. Look for chestnuts that are plump, firm, and free from signs of decay or insect damage. The fresher the chestnuts, the better their chances of germination.
- Check for mold or fungus: Avoid chestnuts that have mold or fungus growth on the shell. This indicates that the chestnut may be rotting and is less likely to germinate successfully.
- Inspect the shell: Examine the shell of the chestnut for any cracks or holes. While a slightly damaged shell can still produce viable seeds, it’s best to choose chestnuts with intact shells, as they have a higher chance of survival during germination.
- Size matters: Larger chestnuts tend to have a higher chance of germination compared to smaller ones. Look for chestnuts that are plump and well-developed, as they are more likely to contain a healthy embryo.
- Consider the variety: Different chestnut varieties have different germination rates and requirements. If possible, choose chestnuts from a variety known for its good germination rates and adaptability to your region.
It’s important to note that chestnuts obtained from wild or foraged sources may have lower germination rates compared to chestnuts purchased from a reputable seed supplier. However, if you decide to collect chestnuts from the wild, follow the same selection criteria mentioned above and increase the number of chestnuts you collect to compensate for potential lower germination rates.
By selecting healthy chestnuts, you set the foundation for successful germination and the growth of robust chestnut trees. Next, let’s move on to preparing the chestnuts for germination and overcoming their natural dormancy mechanism.
Preparing the Chestnuts for Germination
Before you can begin the process of germinating chestnuts, it’s important to properly prepare them and overcome their natural dormancy mechanism. Here are the steps to prepare chestnuts for germination:
- Collect chestnuts: Begin by collecting fresh, healthy chestnuts from suitable sources. Choose chestnuts that are plump, firm, and free from any signs of damage or decay.
- Clean the chestnuts: Gently brush off any dirt or debris from the chestnut shells using a soft-bristled brush. This will help prevent the growth of mold or bacteria during storage.
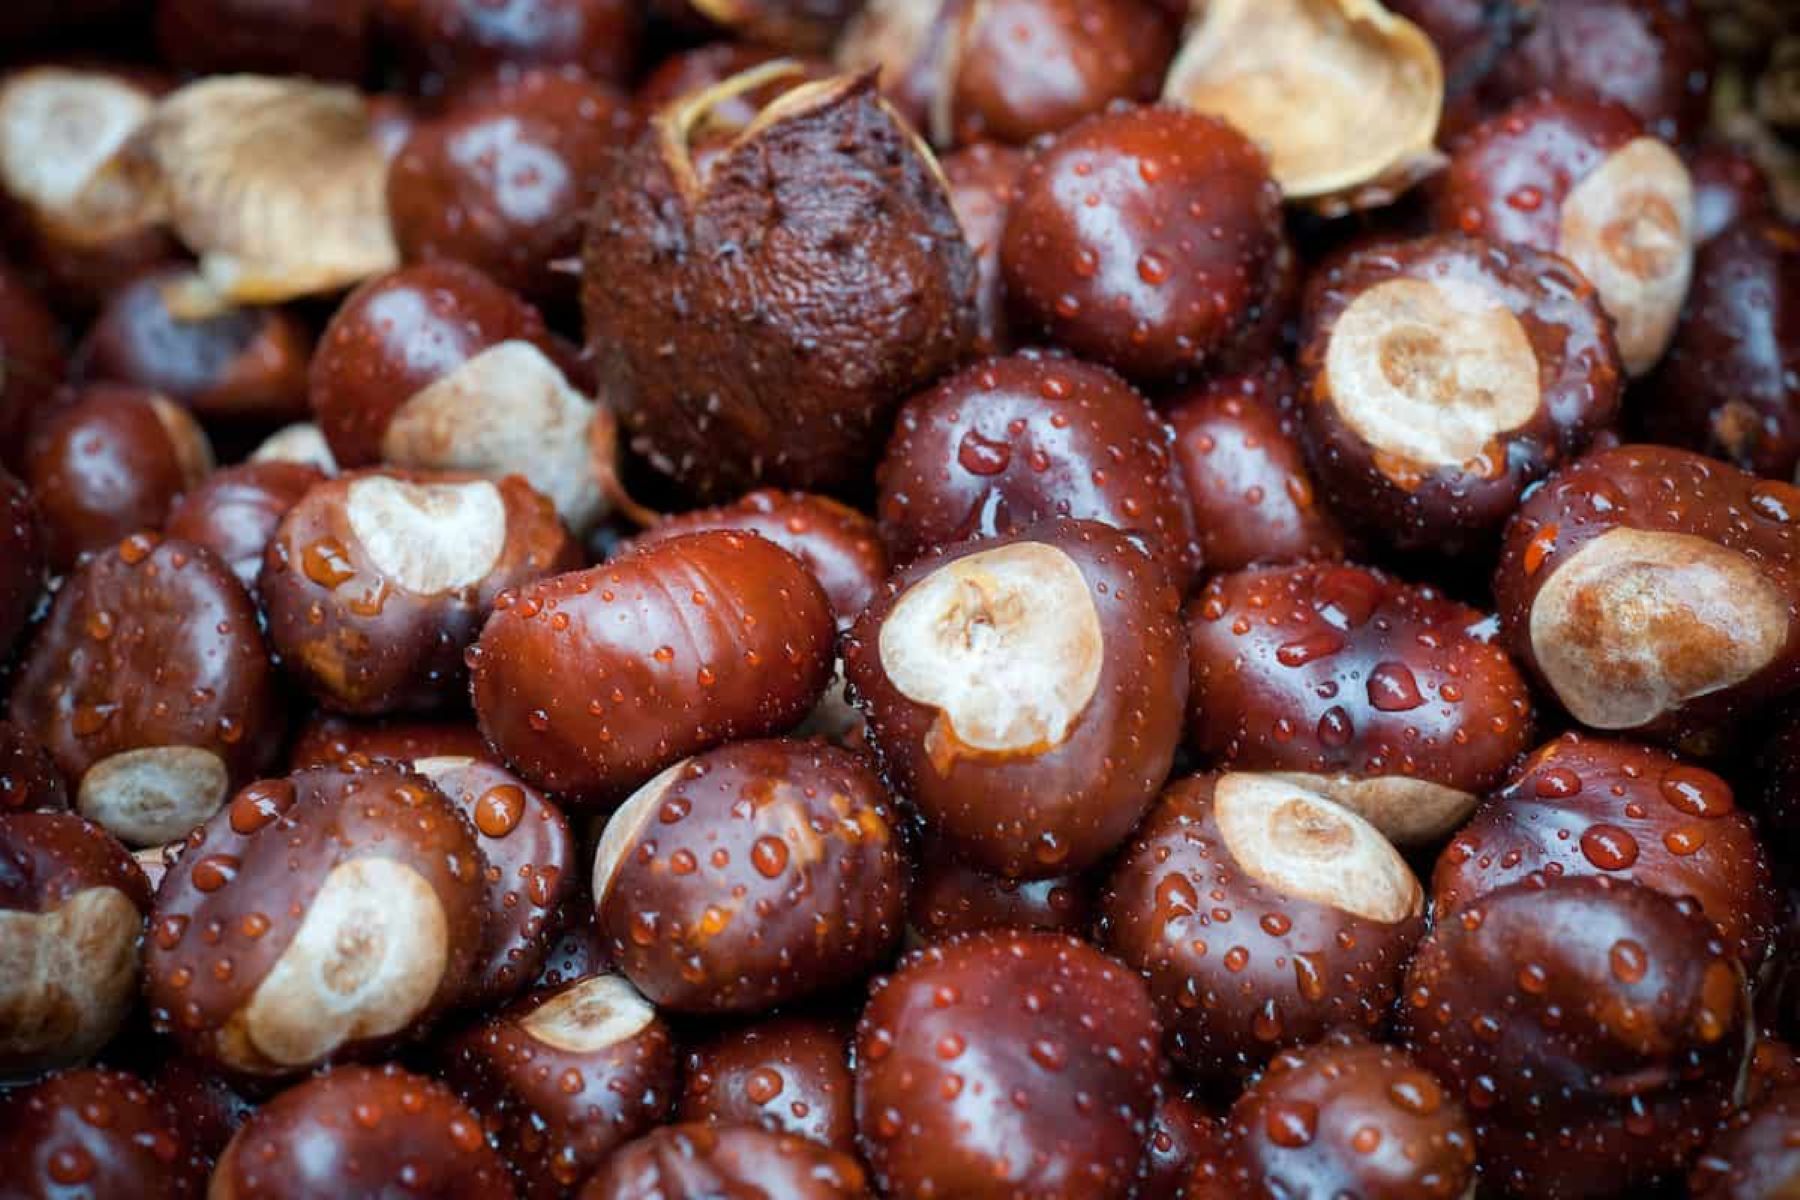
- Check for floaters: Fill a bowl with water and place the chestnuts in the bowl. Discard any chestnuts that float as they may be empty or not viable for germination.
- Score the shell: To facilitate water absorption during the stratification process, carefully score or nick the shell of each chestnut using a small knife or razor blade. Make a shallow cut across the flat side of the chestnut to penetrate the hard outer shell. Be careful not to cut too deeply and damage the seed inside.
- Soak the chestnuts: Once the chestnuts are scored, place them in a container filled with water. Allow them to soak for 24 to 48 hours. This hydration process helps to further soften the shell and prepare the seed for germination.
- Drain and dry: After soaking, drain the water from the container and spread the chestnuts out on a clean towel or paper towel to dry. Make sure they are not touching each other to prevent mold formation.
- Prepare for stratification: Once the chestnuts are dry, they are ready for stratification. You can choose from different stratification methods, such as cold stratification or moist stratification, to mimic the natural winter conditions that trigger germination.
Properly preparing the chestnuts for germination sets the stage for successful stratification and subsequent germination. In the next sections, we will explore different stratification methods and germination techniques that can help you achieve the best results. Get ready to give your chestnuts the conditions they need to break dormancy and sprout into beautiful chestnut trees!
Stratification Methods
Stratification is a critical step in the germination process for chestnuts. It involves subjecting the seeds to specific conditions that mimic the natural cold and moist period they would experience during the winter. This allows the seeds to break dormancy and prepare for germination. Here are a few stratification methods you can use for your chestnuts:
- Cold stratification: This is the most commonly used method for stratifying chestnuts. To cold stratify, place the prepared chestnuts in a sealed plastic bag or container with a moist growing medium, such as sand, peat moss, or vermiculite. Make sure the medium is damp, but not soaked. Put the container in the refrigerator, preferably in the vegetable drawer, where the temperature is around 32 to 45°F (0 to 7°C). Check the moisture level periodically and add water if necessary to maintain the desired humidity.
- Moist stratification: Moist stratification, also known as damp stratification, is an alternative method to cold stratification. In this method, instead of using a refrigerator, you can place the chestnuts in a container with a damp growing medium, such as damp paper towels or sphagnum moss. Again, make sure the medium is moist, but not overly wet. Put the container in a cool and dark location, such as a basement or garage, where the temperature remains between 32 to 45°F (0 to 7°C).
- Natural stratification: If you have suitable outdoor conditions, you can also consider using natural stratification. This method involves planting the prepared chestnuts directly into a garden bed or outdoor container in the fall. The chestnuts will experience the natural winter conditions, including cold temperatures and moisture, which will break their dormancy and trigger germination in the spring.
Regardless of the stratification method you choose, it’s important to monitor the moisture levels regularly. The growing medium should be kept consistently moist, but not waterlogged, to avoid rotting or mold formation. Make sure to check the chestnuts periodically during the stratification period to ensure they are viable and healthy.
The duration of stratification will vary depending on the chestnut variety and the specific conditions you are providing. In general, chestnuts require a stratification period of 60 to 120 days to break dormancy and prepare for germination.
Now that you have learned about different stratification methods, it’s time to move on to the exciting step of germinating the chestnuts. In the next section, we will explore various germination techniques that can help you achieve successful sprouting. Get ready to witness the magic of chestnut germination!
Soak chestnuts in water for 24 hours before planting to soften the shell and encourage germination. Plant in well-draining soil and keep moist.
Read more: How To Store Fresh Chestnuts
Germination Techniques
Germinating chestnuts is an exciting process that involves coaxing the seeds out of their dormant state and encouraging them to sprout into seedlings. There are several techniques you can use to facilitate germination and ensure the best chances of success:
- Direct planting: One of the simplest germination techniques is direct planting. Once the chestnuts have gone through the stratification period and have started to show signs of germination (such as a cracked shell or a tiny sprout emerging), you can plant them directly into a suitable growing medium, such as a pot filled with well-draining soil. Make sure to plant them with the sprout facing up and cover them with a thin layer of soil. Keep the soil moist but not waterlogged and place the pot in a location with indirect sunlight.
- Paper towel method: This method is an alternative to direct planting and allows for better visibility of the germination process. Take a damp paper towel and place the stratified chestnuts on it. Fold the paper towel over the chestnuts to cover them, creating a moist environment. Put the paper towel in a sealed plastic bag and leave it in a warm location, such as on top of a refrigerator or near a heat source. Check the chestnuts regularly to monitor their progress and transfer them to pots filled with soil once they have sprouted.
- Seed starting trays: Seed starting trays or containers with individual cells can be used to germinate chestnuts. Fill each cell with a well-draining potting mix and press the stratified chestnuts gently into the soil, making sure not to bury them too deep. Place the tray in a warm location and keep the soil evenly moist. As the chestnuts start to sprout, you can transfer them to larger pots or directly into the ground.
- Rooting hormone: Some gardeners use rooting hormone to enhance the germination process of chestnuts. Rooting hormone contains auxins that stimulate root growth in plants. You can dip the bottom of the sprouted chestnut seedlings in rooting hormone before planting them. This may help promote stronger root development and improve overall seedling vigor.
- Bottom heat: Applying gentle bottom heat to the germinating chestnuts can help expedite the germination process. You can use a heating mat or a warm spot in your home to provide consistent, mild heat to the pots or trays. Be cautious not to overheat the seeds, as excessive heat can damage them. Monitor the temperature and ensure it remains within the optimal range for chestnut germination.
Remember to provide your germinating chestnuts with the right conditions, including adequate light, proper moisture levels, and a suitable growing medium. Be patient and attentive during this stage, as chestnut germination can take anywhere from a few weeks to a couple of months.
Now that you know various germination techniques, it’s time to learn how to care for the germinating chestnuts and ensure their healthy growth. In the next section, we will explore important care tips and potential troubleshooting issues. Stay tuned!
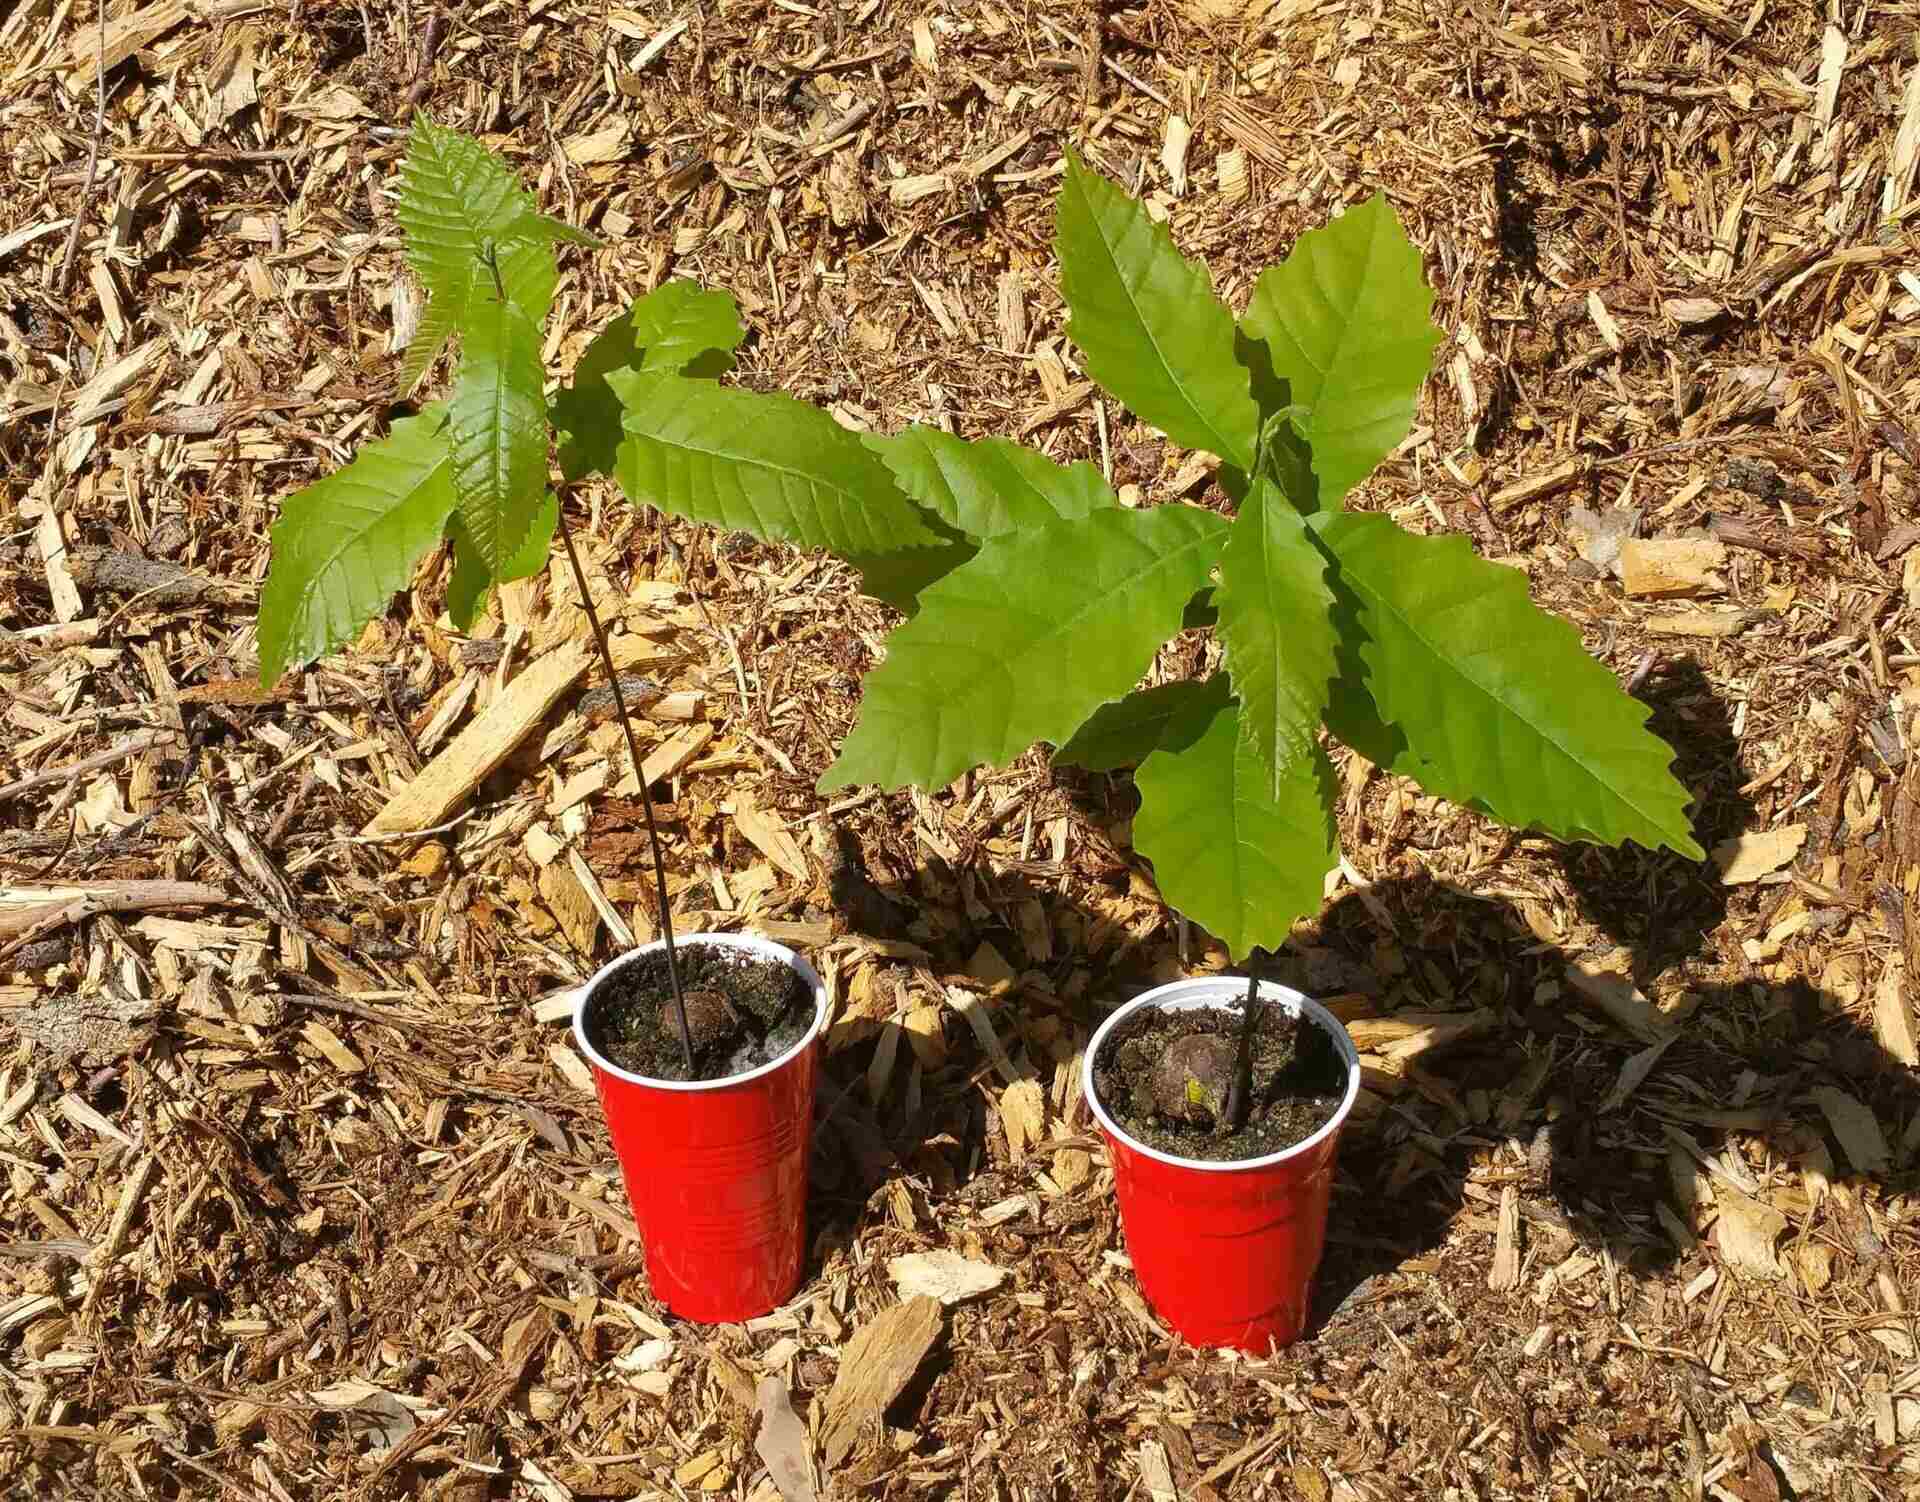
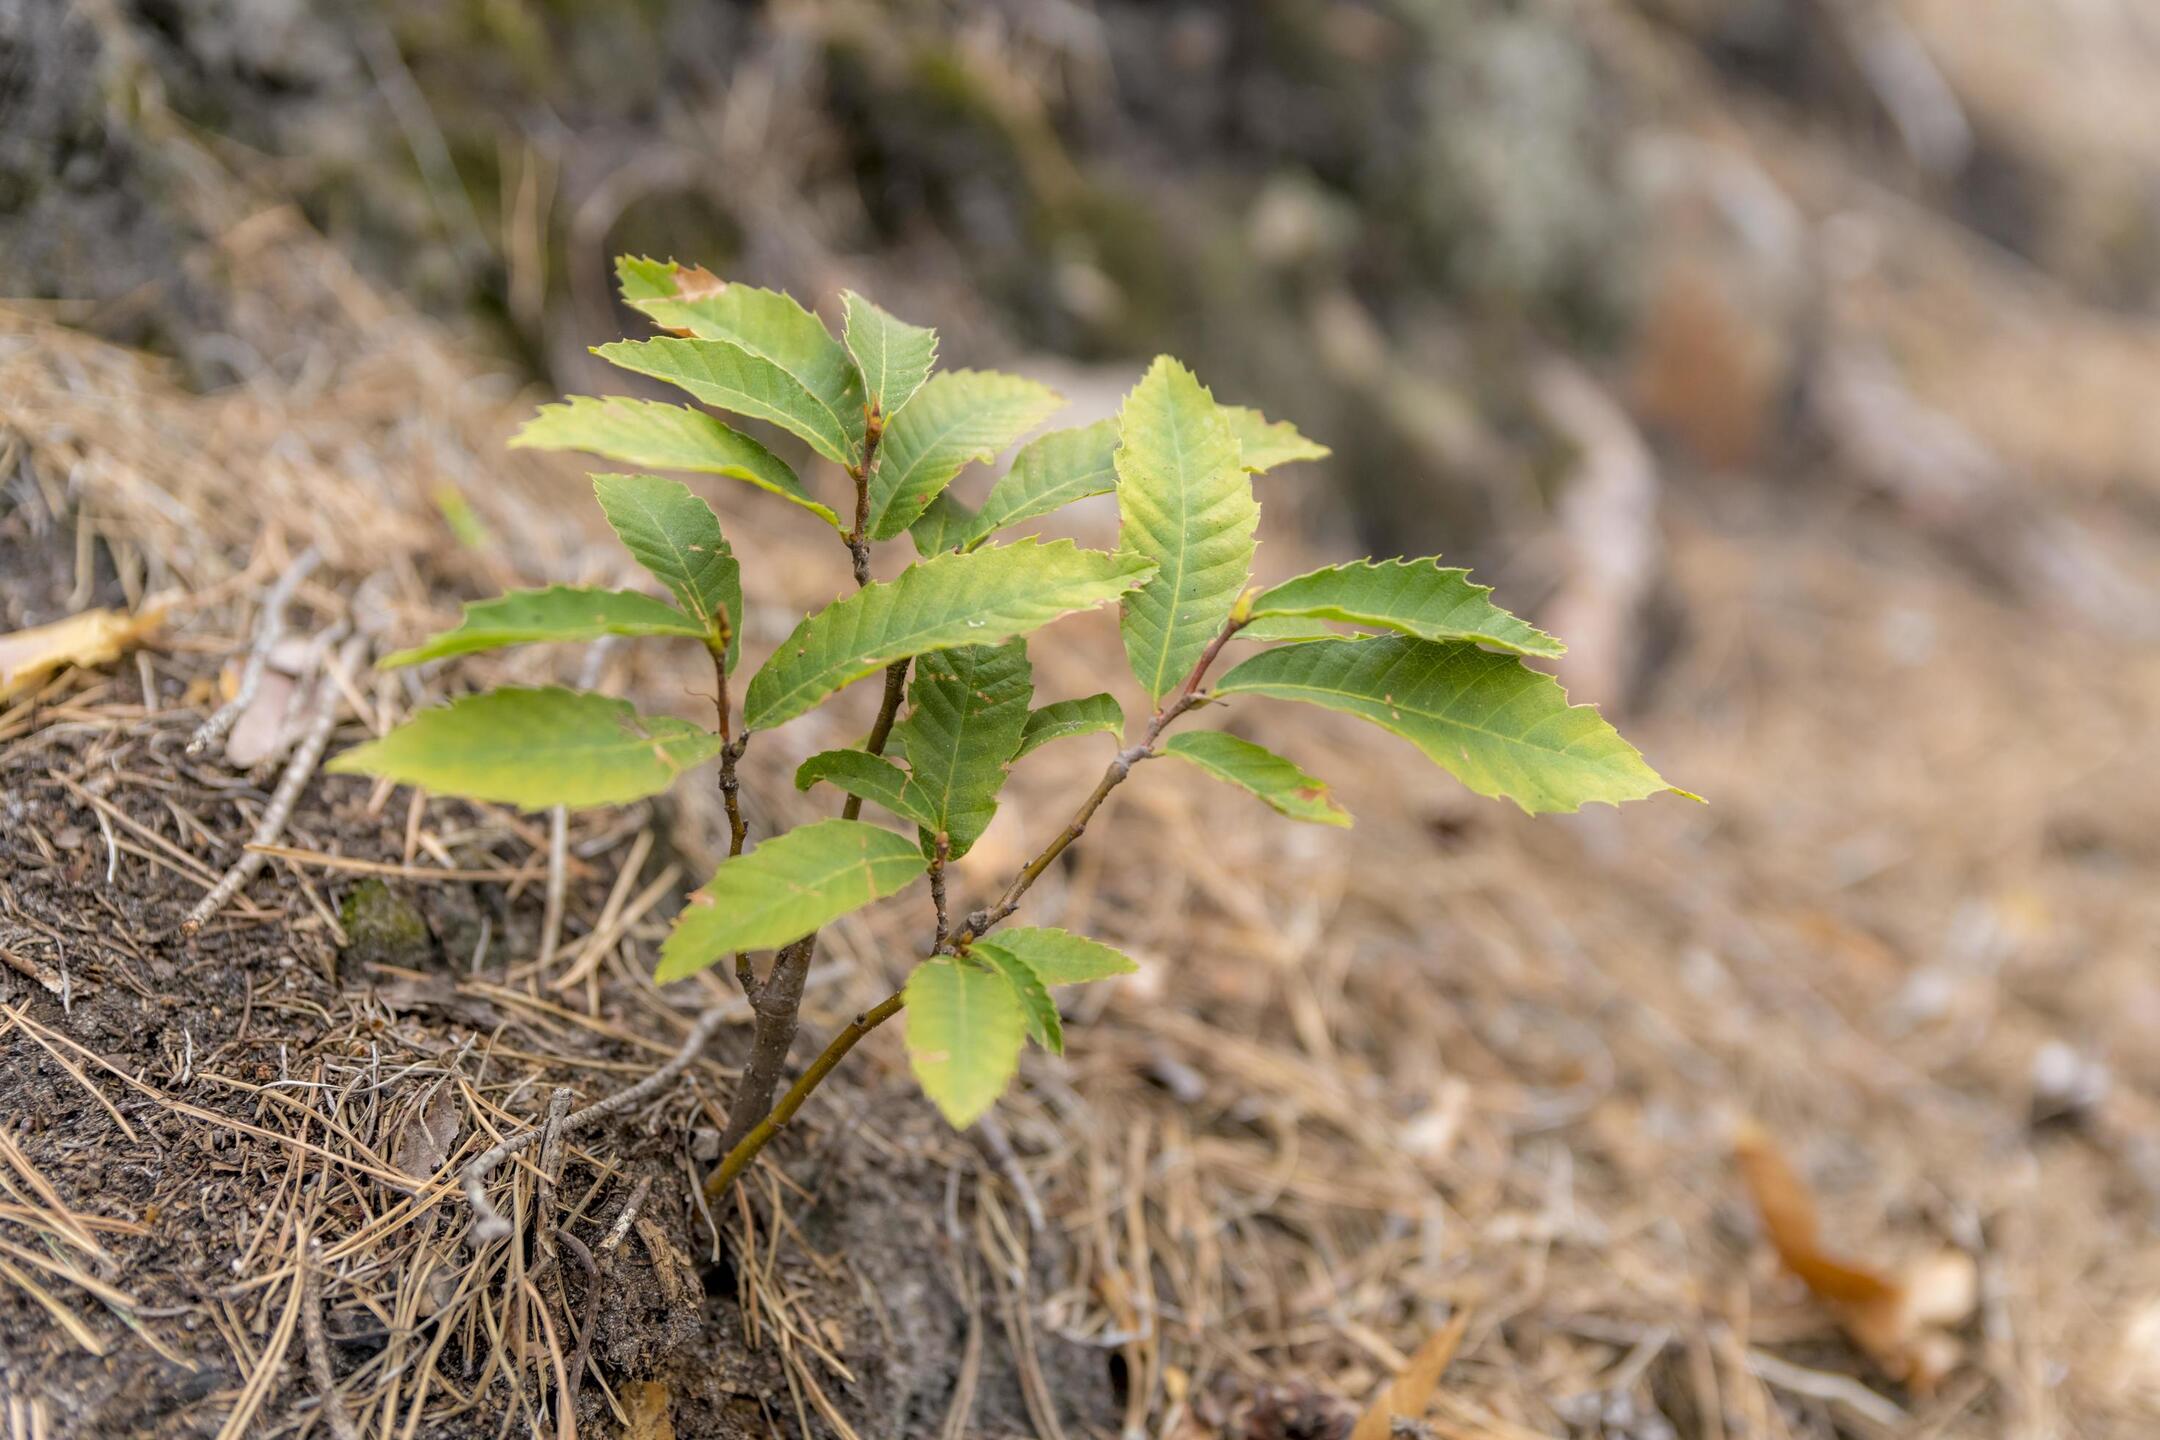
Caring for Germinating Chestnuts
Once your chestnuts have successfully germinated and started their journey as seedlings, it’s important to provide them with proper care to ensure their healthy growth. Here are some essential care tips for germinating chestnuts:
- Light and temperature: Place your germinating chestnuts in a location with bright, indirect sunlight. Avoid exposing them to direct sunlight, as this can lead to leaf scorch and stunted growth. Additionally, ensure that the temperature is kept within the optimal range for chestnut seedling growth, which is typically around 60 to 75°F (15 to 24°C).
- Watering: Keep the soil consistently moist, but not waterlogged. Overwatering can lead to root rot, while underwatering can cause the seedlings to dry out and die. Check the moisture level of the soil regularly and water when the top inch feels slightly dry. Water gently and avoid soaking the seedlings.
- Fertilization: Once the seedlings have developed their first set of true leaves, you can start fertilizing them. Use a balanced, water-soluble fertilizer diluted to half the recommended strength. Apply the fertilizer every two to three weeks, following the package instructions. Avoid overfertilization, as it can lead to nutrient burn and damage the seedlings.
- Transplanting: As the seedlings grow and develop, they will eventually outgrow their initial containers. At this point, it’s important to transplant them into larger pots or directly into the ground. Choose well-draining soil and provide enough space for the roots to spread. Handle the seedlings carefully during the transplanting process to avoid damaging their delicate roots.
- Protecting from pests: Keep a close eye on your chestnut seedlings and protect them from common garden pests. Slugs, snails, and rodents can damage or eat the young seedlings. Use organic pest control methods if necessary, such as diatomaceous earth or natural repellents, to keep pests at bay.
- Pruning: As your chestnut seedlings grow, you may need to do some light pruning to shape their growth and remove any damaged or crossing branches. Pruning can help promote better airflow and prevent the seedlings from becoming overcrowded.
- Mulching: Applying a layer of organic mulch around the base of your seedlings can help conserve moisture, suppress weed growth, and regulate soil temperature. Use a layer of mulch about 2-3 inches thick, making sure to keep it a few inches away from the seedling stem to prevent rot.
By providing the right care and attention, your germinating chestnuts will thrive and grow into strong, healthy trees. Remember to observe your seedlings regularly for any signs of stress or problems and address them promptly to ensure their well-being.
Now that you have learned how to care for germinating chestnuts, let’s explore some common issues that may arise during the germination process and how to troubleshoot them in the next section.
Troubleshooting Germination Issues
Germinating chestnuts can be a rewarding process, but sometimes issues can arise that hinder the successful growth of the seedlings. Here are some common germination issues you may encounter and how to troubleshoot them:
- Poor germination rates: If you notice that only a small percentage of your chestnuts are successfully germinating, it could be due to poor seed quality or improper storage conditions before stratification. To improve germination rates, ensure you select fresh, healthy chestnuts and store them properly in a cool, dry location before stratification. If the issue persists, consider exploring different chestnut varieties known for higher germination rates.
- Mold or rot: Excessive moisture or poor air circulation during stratification can lead to the development of mold or rot on the chestnuts. To prevent this, make sure the stratification medium is damp, but not overly wet. Ensure proper ventilation and periodically check the chestnuts for any signs of mold or rot. If you notice any affected chestnuts, remove them promptly to prevent the spread of mold to other seeds.
- Dry or shriveled chestnuts: If your chestnuts appear dry or shriveled during the stratification period, it could indicate insufficient moisture or improper storage conditions. Ensure the stratification medium is adequately moist and that the chestnuts have been properly hydrated before stratification. If the chestnuts remain dry or shriveled, they may not be viable and may not germinate successfully.
- No signs of sprouting: If your chestnuts have gone through the stratification period but are not showing any signs of sprouting, it could be due to various factors. Firstly, check the temperature – if it was too low or too high, it may have affected the germination process. Secondly, evaluate the quality and viability of the seeds you used – older or damaged seeds may have lower germination rates. Lastly, be patient as some chestnut varieties have longer germination periods, and it may take more time for sprouting to occur.
- Pale or weak seedlings: If your germinated chestnut seedlings appear pale or weak, it may indicate insufficient light or nutrient deficiency. Ensure the seedlings are receiving adequate indirect sunlight and consider providing supplemental grow lights if needed. Also, check if the fertilization regimen is appropriate, as nutrient deficiencies can affect the overall health of the seedlings. Adjust the fertilization accordingly and monitor the seedlings for improvement.
- Pest damage: If you notice pest damage to your germinating chestnuts, such as holes in the leaves or missing sections, take immediate action. Identify the pests responsible for the damage and choose suitable organic pest control methods to protect your seedlings. Regularly inspect the plants and apply preventive measures to keep pests at bay.
Keep in mind that germination issues can sometimes be unpredictable, even with the best care and efforts. However, by following good practices, selecting high-quality seeds, and addressing problems promptly, you can increase the chances of successful chestnut germination.
With proper troubleshooting and care, your chestnut seedlings will overcome challenges and grow into strong and healthy trees, ready to provide you with a bountiful harvest for years to come.
Now that we’ve explored troubleshooting germination issues, let’s wrap up our journey and reflect on the exciting process of growing chestnuts from seeds.
Conclusion
Congratulations on completing your journey into the fascinating world of growing chestnuts from seeds! Germinating chestnuts can be a rewarding and fulfilling experience that allows you to witness the magic of nature unfold right before your eyes. By understanding the process of chestnut germination, selecting healthy seeds, and providing the right conditions, you can successfully grow your very own chestnut trees.
Throughout this article, we discussed the importance of understanding chestnut germination and the role of stratification in breaking dormancy. We explored the steps involved in selecting healthy chestnuts and preparing them for germination. The various stratification methods and germination techniques were also examined in detail. Additionally, we covered important care tips for germinating chestnuts and troubleshooting common issues that may arise during the process.
As you embark on your chestnut growing journey, remember to be patient and attentive. Growing chestnuts from seeds requires time, effort, and a little bit of trial and error. Don’t be discouraged by setbacks or challenges along the way – they are all part of the learning process. Embrace them as opportunities for growth and improvement.
Once your chestnut seedlings have developed into strong, healthy trees, they will provide you with a range of benefits. Not only will they grace your garden or backyard with their majestic presence, but they will also reward you with delicious, nutrient-rich chestnuts that can be enjoyed roasted or used in various culinary creations.
Whether you’re a seasoned gardener or a novice, growing chestnuts from seeds is a journey worth taking. It allows you to connect with nature, learn about the germination process, and experience the joy of nurturing life from the very beginning. So, roll up your sleeves, gather your fresh chestnuts, and embark on this exciting adventure.
Remember, each chestnut seed holds the potential to become a magnificent tree, and with your care and dedication, you can witness the transformation of tiny seeds into towering chestnut trees. Happy germinating, and may your journey be filled with growth, beauty, and the joys of nature!
Frequently Asked Questions about How To Get Chestnuts To Germinate
Was this page helpful?
At Storables.com, we guarantee accurate and reliable information. Our content, validated by Expert Board Contributors, is crafted following stringent Editorial Policies. We're committed to providing you with well-researched, expert-backed insights for all your informational needs.


0 thoughts on “How To Get Chestnuts To Germinate”