Home>Garden Essentials>How To Get Geranium Seeds
Garden Essentials
How To Get Geranium Seeds
Modified: March 15, 2024
Learn how to get geranium seeds for your garden with our easy-to-follow guide. Discover the best methods and tips for successful germination and growth.
(Many of the links in this article redirect to a specific reviewed product. Your purchase of these products through affiliate links helps to generate commission for Storables.com, at no extra cost. Learn more)
Introduction
Welcome to the world of gardening! If you’re an avid nature enthusiast, chances are you’ve heard about geraniums. These beautiful flowering plants are a popular choice among gardeners due to their vibrant colors and delightful fragrance. One of the best ways to start growing geraniums is by getting geranium seeds. In this article, we will guide you through the process of obtaining geranium seeds and help you successfully grow these stunning plants.
Geranium seeds offer an affordable and accessible way to add beauty and fragrance to your garden. Plus, growing geraniums from seeds is a rewarding experience that allows you to witness the life cycle of these plants from start to finish. Whether you’re a seasoned gardener or just starting your gardening journey, getting geranium seeds is a fantastic way to expand your botanical repertoire.
In this comprehensive guide, we will cover everything you need to know about getting geranium seeds, from selecting the right variety to caring for seedlings and harvesting seeds. So, roll up your sleeves, grab your gardening tools, and let’s dive into the wonderful world of geranium seeds!
Key Takeaways:
- Getting geranium seeds is an exciting and rewarding way to start your gardening journey. Consider factors like climate, space, and soil quality before choosing the right variety and preparing the soil for successful germination.
- Harvesting geranium seeds allows you to continue the cycle of growth, adding diversity and beauty to your garden. Protect your geraniums from pests and diseases, and enjoy the therapeutic escape and connection with nature that gardening provides.
Read more: How To Get Seeds From Geraniums
Geranium Seeds: A Brief Overview
Before we delve into the process of getting geranium seeds, let’s take a moment to understand what geranium seeds are and why they are a great addition to your garden.
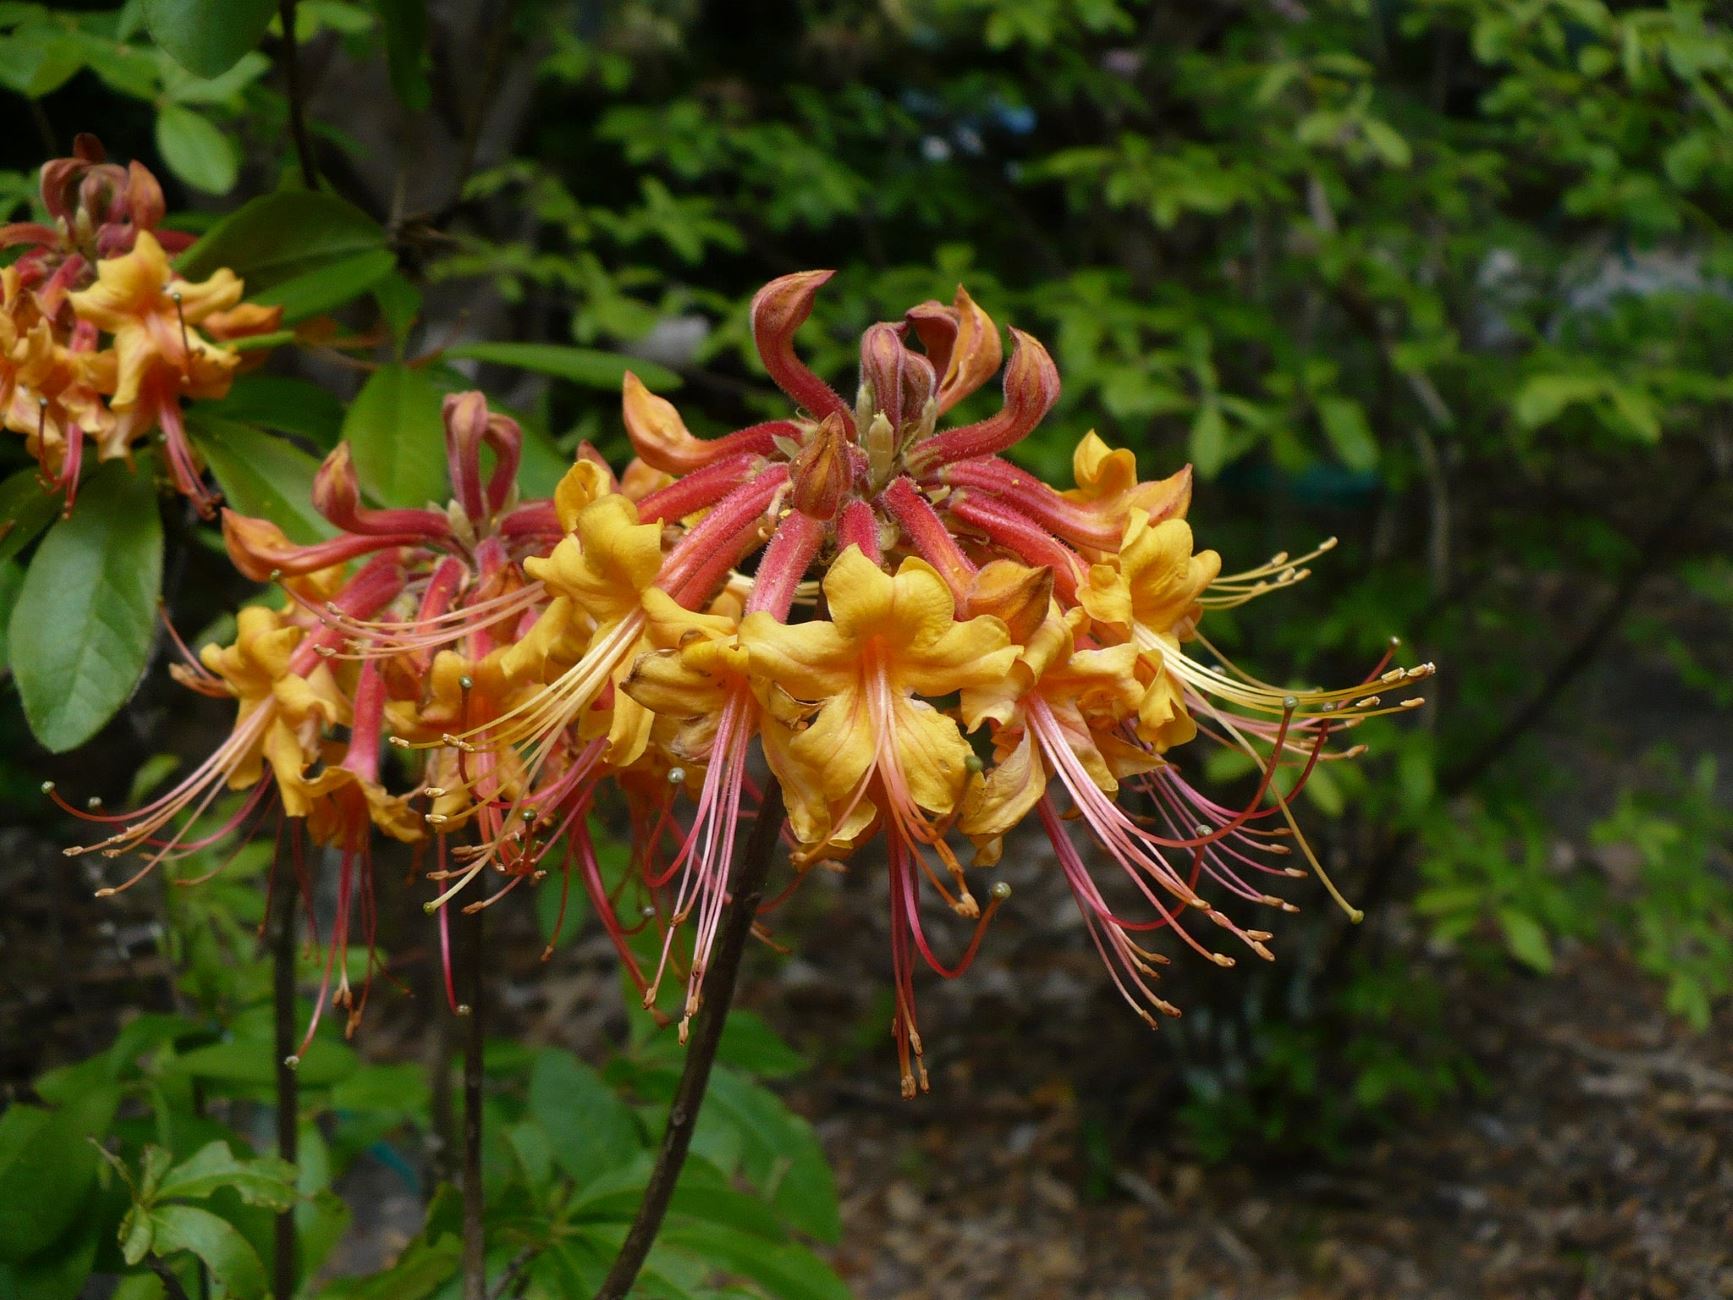
Geraniums, scientifically known as Pelargonium, are flowering plants native to South Africa. They are widely cultivated for their vibrant blooms and aromatic leaves. Geraniums come in various colors, including shades of red, pink, purple, and white, making them a versatile choice for any garden.
Geranium seeds are the reproductive structures produced by mature geranium plants. These seeds contain the genetic information necessary for germination and growth. They can be collected from existing geranium plants or purchased from seed suppliers.
Getting geranium seeds offers several advantages. Firstly, it allows you to have a wide selection of geranium varieties to choose from. Whether you prefer zonal geraniums, ivy geraniums, or scented geraniums, you can find a vast array of seeds available in nurseries or online stores. Secondly, propagating geraniums from seeds is a cost-effective option, as compared to buying mature plants. Lastly, starting from seeds allows you to witness the entire life cycle of geraniums, from seed to bloom, giving you a sense of accomplishment and joy.
Geranium seeds require specific conditions for successful germination and growth. They need well-draining soil, consistent moisture, and proper care to ensure healthy and robust plants. By understanding the requirements of geranium seeds, you can provide the ideal environment for their growth and enjoy a flourishing geranium garden.
Now that we have a basic understanding of geranium seeds, let’s explore the factors to consider before getting them.
Factors to Consider Before Getting Geranium Seeds
Before embarking on your journey to get geranium seeds, it’s important to consider a few factors that will contribute to the success of your geranium growing endeavor. Let’s take a look at these factors:
1. Climate: Geraniums thrive in certain climates and may struggle in others. It’s essential to determine whether your climate is suitable for geraniums before getting the seeds. Geraniums generally prefer moderate temperatures with plenty of sunlight, but they can tolerate a range of conditions. Research the specific geranium variety you’re interested in to ensure it can adapt to your local climate.
2. Space: Consider the available space in your garden or the area where you plan to grow geraniums. Geraniums come in different sizes, ranging from compact varieties suitable for containers to larger varieties that require more space in the ground. Ensure you have enough space to accommodate the mature size of the geranium plants you choose.
3. Soil Quality: Geraniums prefer well-draining soil that is rich in organic matter. Before getting geranium seeds, assess the quality of your soil. If it’s heavy clay or poorly draining, consider amending it with organic matter, such as compost, to improve drainage and nutrient content.
4. Sunlight Exposure: Geraniums require a significant amount of sunlight to bloom and thrive. Assess the sunlight exposure in your garden and choose a spot that receives at least 6 hours of direct sunlight daily. If your garden has areas with shade, opt for shade-tolerant geranium varieties for those spots.
5. Watering and Maintenance: Geraniums have specific watering and maintenance requirements. Determine if you have the time and resources to provide proper care for geranium plants. They generally require regular watering, but be cautious not to overwater, as this can lead to root rot. Additionally, geraniums benefit from occasional deadheading and pruning to promote continuous blooming.
Considering these factors beforehand will help set the stage for successful geranium cultivation. Now that you have evaluated these aspects, it’s time to move on to the next step: choosing the right geranium variety!
Step 1: Choosing the Right Geranium Variety
Choosing the right geranium variety is an exciting and crucial step in the process of getting geranium seeds. With a wide range of options available, it’s important to select varieties that align with your gardening goals and preferences. Here are a few factors to consider when choosing the right geranium variety:
1. Flower Type: Geraniums come in various flower types, including single, double, and semi-double blooms. Single blooms have a central set of petals, while double blooms have multiple layers of petals, creating a fuller appearance. Consider the flower type that appeals to you and matches your garden aesthetic.
2. Growth Habit: Geranium plants have different growth habits, such as upright or trailing. Upright geraniums are more compact and grow in an upward direction, making them suitable for borders or container gardens. Trailing geraniums have a cascading growth habit, perfect for hanging baskets or trailing down walls and containers.
3. Color Palette: Geraniums offer a stunning array of colors, allowing you to create vibrant and visually appealing displays in your garden. Consider the color palette that blends well with your existing plants or the overall theme of your garden. You can choose from classic reds and pinks, calming blues and purples, or opt for unique colors like white or bi-color varieties.
4. Fragrance: Some geranium varieties have aromatic leaves that release a pleasant scent when touched or brushed against. If fragrance is important to you, consider scented geranium varieties that offer delightful aromas, such as lemon, rose, or mint.
5. Growing Conditions: Assess the growing conditions in your garden, such as sunlight availability, soil type, and climate. Make sure to choose geranium varieties that are well-suited for your specific conditions. Some geraniums thrive in full sun, while others tolerate partial shade. Similarly, certain varieties are more drought-tolerant or cold-hardy, making them suitable for specific climates.
Take your time to research and explore the wide range of geranium varieties available. Look for reputable seed suppliers or local nurseries that offer a diverse selection. By choosing the right geranium variety that aligns with your preferences and growing conditions, you’ll set yourself up for a successful and visually appealing geranium garden.
Step 2: Where to Buy Geranium Seeds
Now that you have decided on the right geranium variety, it’s time to find a reliable source to purchase your geranium seeds. There are several options available for buying geranium seeds, both online and offline. Here are a few places where you can find high-quality geranium seeds:
1. Local Nurseries and Garden Centers: Visit your local nurseries and garden centers to check if they carry a variety of geranium seeds. These establishments often have a selection of seeds available, and the staff can provide valuable advice on choosing the right varieties for your garden. Supporting local businesses also ensures that you get fresh and regionally-suitable seeds.
2. Seed Catalogs and Websites: Many seed companies have extensive catalogs or websites where you can browse and order geranium seeds. These catalogs and websites provide detailed descriptions and growing information for each variety, making it easier for you to make informed choices. Some reputable seed companies known for their quality geranium seeds include Burpee, Park Seed, and Johnny’s Selected Seeds.
3. Garden Shows and Expos: Attending local garden shows and expos is a great way to connect with seed vendors and discover unique geranium varieties. These events often have a wide range of seeds available for purchase, and you may even get a chance to speak directly with seed experts for guidance.
4. Online Marketplaces: Online marketplaces like Amazon and eBay can also be sources for geranium seeds. However, it’s important to thoroughly research the sellers and read customer reviews to ensure the authenticity and quality of the seeds.
5. Seed Exchanges and Gardening Communities: Participating in seed exchanges or joining gardening communities can be a cost-effective way to obtain geranium seeds. These platforms allow you to trade seeds with fellow gardeners or request seeds from those who have spare quantities. It’s a wonderful opportunity to connect with like-minded individuals and discover unique geranium varieties.
When purchasing geranium seeds, always prioritize quality and choose suppliers with a good reputation. Look for seeds that are fresh, well-packaged, and properly labeled with the variety and expiration date. It’s also a good idea to check if the supplier offers any guarantee or customer support in case you encounter any issues with the seeds.
Once you’ve obtained your geranium seeds, it’s time to prepare the soil and create the optimal conditions for germination. This leads us to step 3: how to prepare the soil for geranium seeds.
Read more: How To Grow Geraniums From Seed
Step 3: How to Prepare the Soil for Geranium Seeds
Proper soil preparation is essential for the successful germination and growth of geranium seeds. Geraniums prefer well-draining soil that is rich in organic matter. Follow these steps to prepare the soil for geranium seeds:
1. Choose the Right Spot: Select a location in your garden that receives at least 6 hours of direct sunlight daily. Geraniums thrive in sunny spots, so choose an area that provides ample light for optimum growth.
2. Clear the Area: Clear any weeds, rocks, or debris from the planting area. This ensures that the geranium seeds have a clean and unobstructed space for germination and growth.
3. Loosen the Soil: Use a garden fork or a tiller to loosen the soil to a depth of about 6-8 inches. This loosening process helps improve drainage and allows the roots to penetrate the soil easily.
4. Amend the Soil: Geraniums prefer soil that is well-draining and rich in organic matter. Incorporate compost or well-rotted manure into the soil to improve its fertility and structure. Aim for a ratio of 1 part compost to 4 parts soil.
5. Test the pH: Geraniums thrive in slightly acidic to neutral soil with a pH range of 6.0 to 7.0. Test the pH of your soil using a soil testing kit, and if necessary, adjust it by adding lime to increase alkalinity or sulfur to increase acidity.
6. Level and Rake the Soil: Once the amendments are incorporated, level the soil surface using a rake. This helps create a uniform surface for sowing geranium seeds.
By following these steps, you’ll create a favorable environment for geranium seed germination and subsequent plant growth. Remember to water the soil lightly before sowing the seeds to provide moisture for the germination process.
Now that the soil is prepared, it’s time to move on to the next step: the germination and planting process of the geranium seeds. Stay tuned!
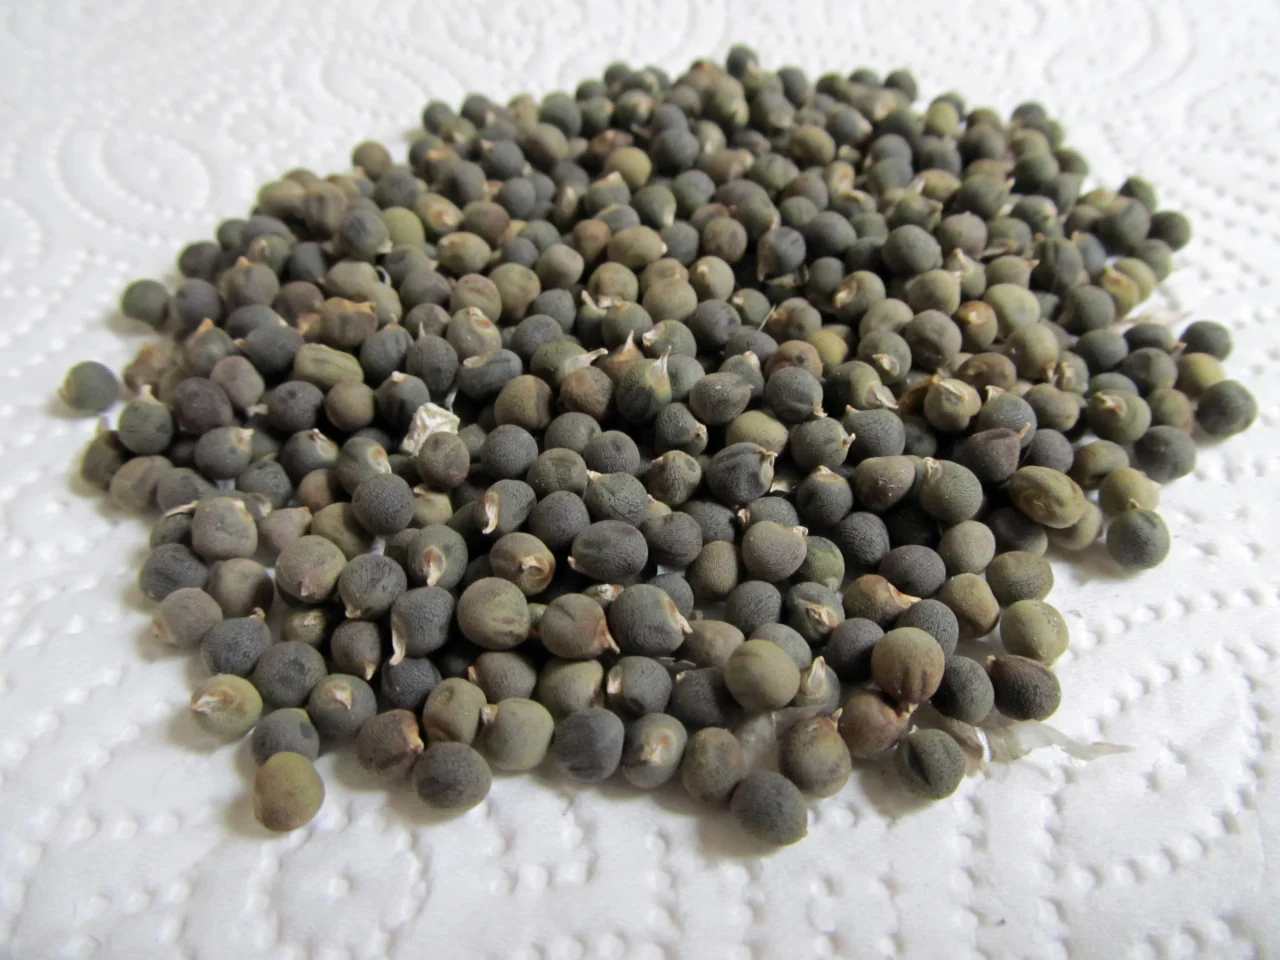
To get geranium seeds, wait for the flowers to fade and form seed pods. Once the pods are dry, collect the seeds and store them in a cool, dry place until ready to plant.
Step 4: Germination and Planting Process
Now comes the exciting part of germinating and planting your geranium seeds. The process may vary slightly depending on the geranium variety and the specific instructions provided by the seed supplier. Follow these general steps for successful germination and planting:
1. Start Indoors: Geranium seeds are typically started indoors, about 8-10 weeks before the last frost date in your area. Fill seed trays or small pots with a good quality seed-starting mix. Moisten the mix with water, ensuring it is evenly moist but not soggy.
2. Sow the Seeds: Place one or two geranium seeds on top of the soil in each cell or pot. Gently press the seeds into the soil, but do not bury them too deep. Geranium seeds require light to germinate, so they should be sown on the surface.
3. Provide Ideal Conditions: Cover the trays or pots with a plastic dome or place them in a plastic bag to create a mini greenhouse effect. This helps retain moisture and create a warm environment for germination. Place the trays or pots in a warm location with a temperature range of 70-75°F (21-24°C).
4. Monitor Moisture Levels: Check the moisture level of the soil regularly. Geranium seeds need consistent moisture for successful germination. Use a spray bottle or mist the soil gently to keep it moist, but avoid overwatering, as it can lead to fungal diseases.
5. Germination Period: Germination typically takes 7-14 days, but it may vary depending on the variety and growing conditions. Once the seedlings emerge, remove the plastic cover and place the trays or pots in a bright location with indirect sunlight.
6. Thin Out Seedlings: Once the seedlings have developed their first true leaves, thin out the weaker or overcrowded seedlings, leaving only the strongest ones to grow. This allows each seedling to have sufficient space and resources for healthy development.
7. Harden Off: About a week before you plan to transplant the seedlings outdoors, gradually expose them to outdoor conditions. Start by placing them in a sheltered spot for a few hours each day, gradually increasing the exposure time. This helps the seedlings acclimate to the outdoor environment.
8. Transplant Outdoors: After the danger of frost has passed and the seedlings have been hardened off, transplant them into your prepared garden beds or containers. Space the seedlings according to the specific recommendations for your chosen geranium variety.
By following these steps, you’ll be well on your way to growing beautiful and healthy geranium plants. In the next step, we will explore how to care for your geranium seedlings to ensure their continued growth and vigor. Stay tuned!
Step 5: Caring for Geranium Seedlings
Once your geranium seedlings are transplanted outdoors, it’s essential to provide proper care to ensure their healthy growth and development. Follow these tips for caring for geranium seedlings:
1. Watering: Keep the soil evenly moist but not waterlogged. Water the seedlings at the soil level to prevent fungal diseases. Be cautious not to overwater, as geraniums are susceptible to rot if the soil remains too wet.
2. Fertilizing: Feed your geranium seedlings with a balanced fertilizer, such as a 10-10-10 or 20-20-20 formulation, every two to three weeks. Dilute the fertilizer according to the package instructions and apply it around the base of the plants. This provides the necessary nutrients for healthy growth.
3. Mulching: Apply a layer of organic mulch, such as straw or wood chips, around the base of the seedlings. Mulching helps conserve moisture, suppresses weed growth, and maintains a consistent soil temperature.
4. Pruning: Pinch back the growing tips of the seedlings regularly to promote branching and bushier growth. This helps create a fuller and more compact plant. You can also remove any yellowing or dead leaves to maintain plant cleanliness.
5. Staking and Support: Depending on the variety and growth habit, some geraniums may benefit from staking or support. Use bamboo stakes or plant supports to provide stability and prevent sprawling. Tie the stems gently using twine or plant clips as needed.
6. Regular Inspection: Regularly inspect your geranium seedlings for any signs of pests or diseases. Common pests that may affect geraniums include aphids, whiteflies, and spider mites. If detected, take appropriate measures to control pest infestations. Inspect the plants for any yellowing leaves, spots, or fungal growth and address any issues promptly.
7. Deadheading: Remove spent flowers regularly to encourage continuous blooming and prolong the flowering season. Pinch off the faded blooms just above the nearest set of healthy leaves or on the stem.
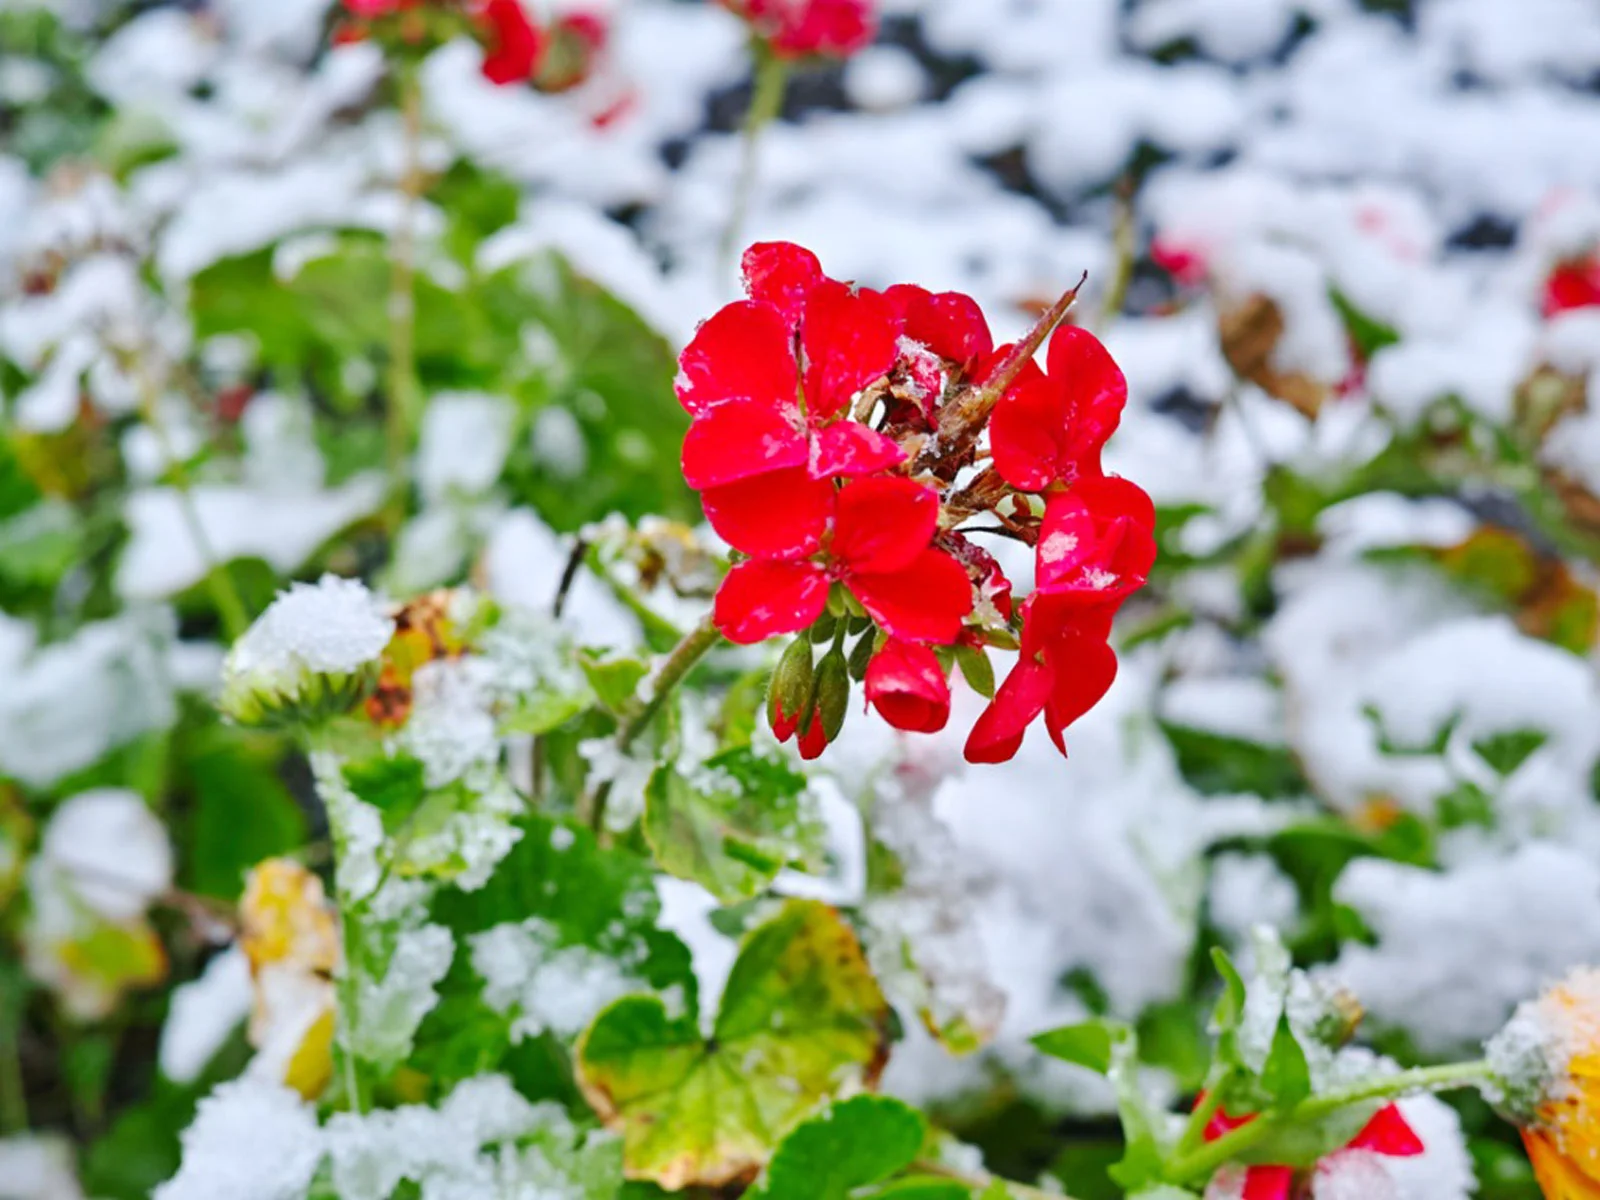
8. Protection from Extreme Weather: Geraniums are generally hardy plants, but extreme weather conditions like heavy rain or strong winds can damage them. Provide protection during adverse weather by temporarily moving containers to a sheltered area or covering garden beds with a fabric row cover.
By providing proper care and attention to your geranium seedlings, you’ll ensure their healthy growth and vibrant blooms. In the next step, we will discuss the process of transplanting geraniums once they have reached a certain size. Stay tuned!
Step 6: Transplanting Geraniums
Transplanting geraniums is an important step in their growth journey, especially when they’ve outgrown their current containers or garden beds. Follow these steps to successfully transplant your geraniums:
1. Timing: Choose to transplant your geraniums when the weather is consistently warm and there is no longer a risk of frost. Transplanting during the cooler parts of the day, such as early morning or late afternoon, can help reduce stress on the plants.
2. Prepare the New Location: Before transplanting, prepare the new location where your geraniums will be planted. Ensure the soil is well-draining and has been enriched with compost or organic matter. Dig a hole that is slightly larger than the root ball of the geranium plant.
3. Gently Remove the Geranium: Carefully remove the geranium from its current container or garden bed. If it’s in a container, gently slide the plant out, being mindful of the root system. If it’s in the ground, use a small gardening fork or trowel to loosen the soil around the plant. Lift the geranium from the ground, taking care not to damage the roots.
4. Planting: Place the geranium in the prepared hole in the new location. Ensure that the top of the root ball is level with the surrounding soil. Backfill the hole with soil, gently firming it around the root ball to eliminate air pockets.
5. Water Thoroughly: Give the transplanted geranium a thorough watering to help settle the soil and encourage root establishment. Water at the soil level, avoiding wetting the leaves excessively, as this can lead to fungal diseases.
6. Provide Support (if needed): If your geranium is tall or prone to tipping over, consider providing support. Stake the plant and secure it gently with twine or plant ties to keep it upright.
7. Adjust Care Routine: After transplanting, monitor the geranium closely during the first few weeks. Ensure it receives adequate sunlight, water, and fertilizer. Make any necessary adjustments to your care routine based on the specific needs of your geranium variety.
8. Maintain Regular Care: Continue caring for your transplanted geraniums by watering consistently, fertilizing appropriately, and maintaining a clean and pest-free environment. Regularly remove spent flowers and prune when necessary to encourage healthy growth and continuous blooming.
Transplanting geraniums gives them the opportunity to establish and thrive in a more suitable environment. With proper care and attention, your transplanted geraniums will reward you with a beautiful display of colorful blooms. In the next step, we’ll explore how to protect your geraniums from pests and diseases. Stay tuned!
Read more: What Does A Geranium Seed Pod Look Like
Step 7: Protecting Geraniums from Pests and Diseases
Protecting your geraniums from pests and diseases is crucial for ensuring their overall health and longevity. Fortunately, with some preventative measures and proper care, you can keep these issues at bay. Follow these steps to protect your geraniums:
1. Monitor Regularly: Regularly inspect your geranium plants for any signs of pests or diseases. Look for chewed leaves or holes, discolored or wilting foliage, and presence of pests like aphids, whiteflies, or spider mites. Early detection allows for prompt action and effective control.
2. Provide Proper Air Circulation: Proper air circulation around the plants helps prevent fungal diseases. Avoid overcrowding your geraniums and maintain adequate spacing between plants. This allows for better airflow and reduces the chances of fungal infections.
3. Water Wisely: Overwatering or excessive moisture can lead to root rot and other fungal infections. Water your geraniums at the soil level and avoid wetting the foliage. Water in the morning, allowing sufficient time for the leaves to dry during the day.
4. Use Organic Pest Control Methods: Employ organic pest control methods to manage common geranium pests. Consider using insecticidal soaps, neem oil, or horticultural oils to control aphids, whiteflies, and other soft-bodied insects. Introduce beneficial insects like ladybugs or lacewings that prey on common pests.
5. Remove Infected Leaves or Plants: If you notice any signs of disease, promptly remove and dispose of infected leaves or plants to prevent the disease from spreading. Ensure proper sanitation by cleaning your gardening tools after each use.
6. Mulch to Prevent Soil-borne Diseases: Applying organic mulch around the base of your geranium plants can help suppress soil-borne diseases. The mulch acts as a barrier, reducing the likelihood of soil splashing onto the leaves and spreading pathogens.
7. Rotate Crops: If you grow geraniums in the same location year after year, consider practicing crop rotation. This helps prevent the buildup of pests and diseases in the soil, reducing the risk of recurring issues.
8. Follow Good Gardening Practices: Maintaining overall plant health is key to preventing pest and disease problems. Provide proper nutrition through regular fertilization, ensure adequate sunlight, and remove weeds that can harbor pests or diseases.
By following these steps and staying vigilant, you can protect your geraniums from common pests and diseases. A healthy and thriving geranium garden will reward you with beautiful blooms and foliage. In the next step, we’ll explore the process of harvesting geranium seeds. Stay tuned!
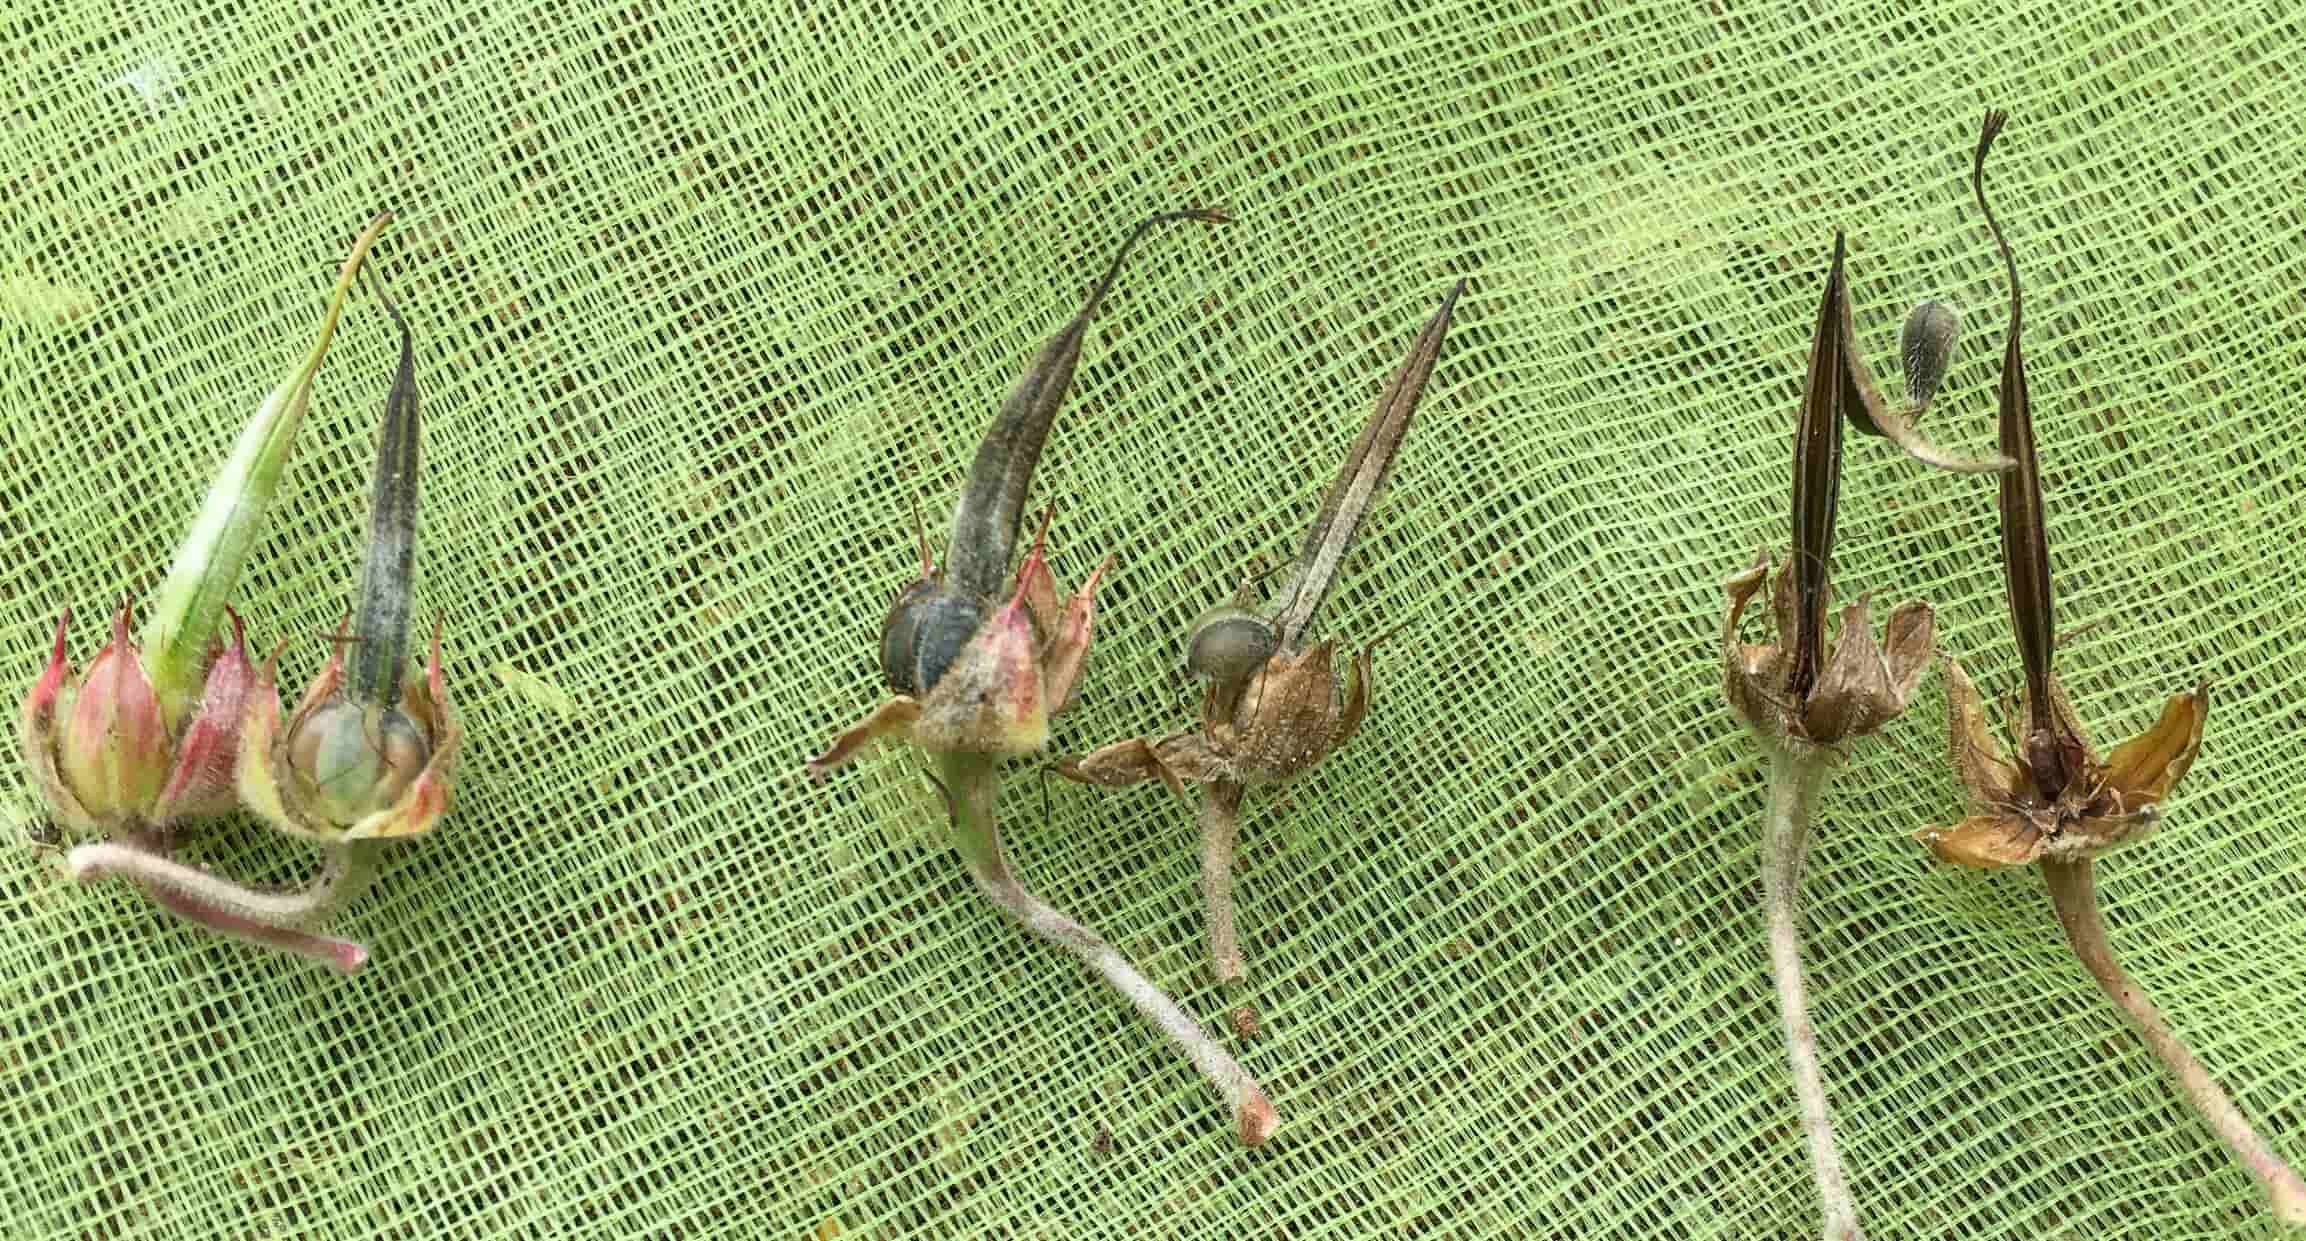
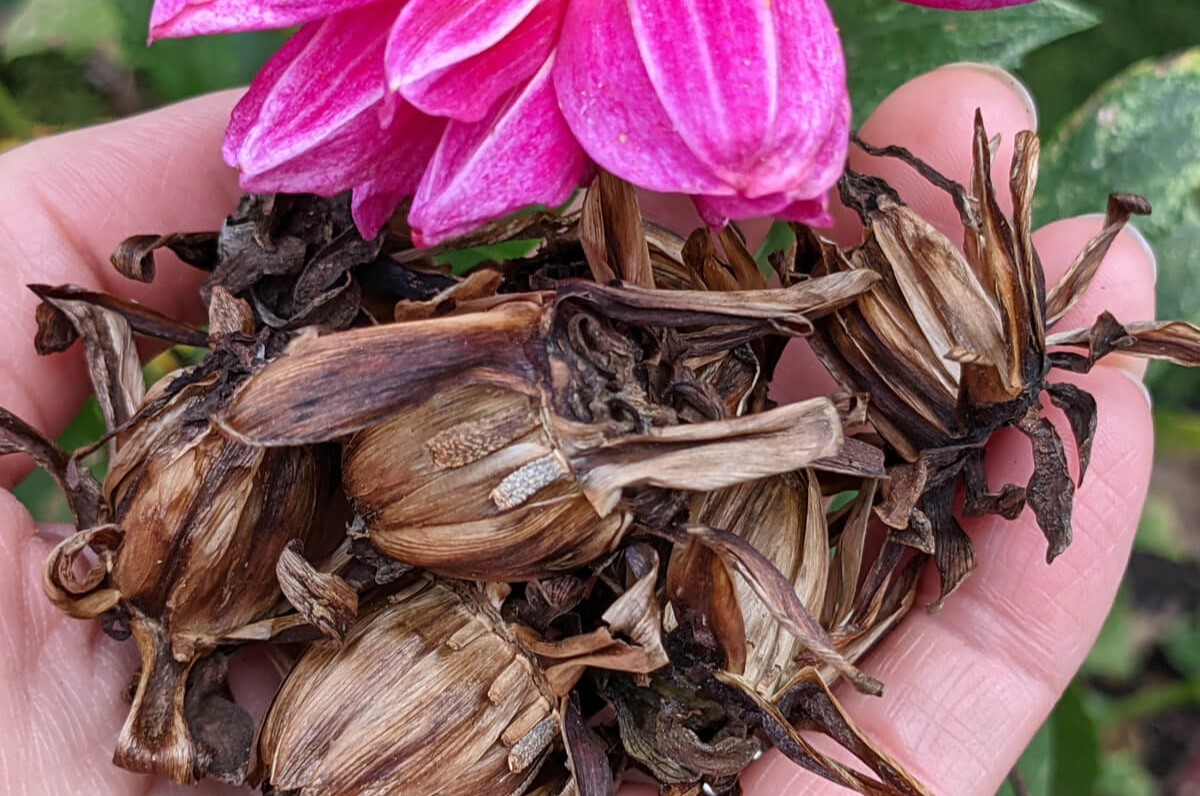
Step 8: Harvesting Geranium Seeds
Harvesting geranium seeds is a rewarding culmination of your efforts in growing these beautiful plants. With proper timing and techniques, you can collect and save seeds for future planting. Follow these steps to harvest geranium seeds:
1. Wait for Seed Pods to Develop: Allow your geranium flowers to mature and fade. Once the petals have fallen off, small seed pods will develop in their place. These seed pods are where the geranium seeds are contained.
2. Monitor Seed Pod Ripeness: Keep a close eye on the seed pods as they mature. The pods will turn brown and dry out when the seeds are ready for harvesting. The outer covering of the seed pod may also split open, revealing the tiny geranium seeds inside.
3. Harvesting Geranium Seeds: When the seed pods are fully dry and starting to split open, it’s time to harvest the geranium seeds. Gently pluck the seed pods from the plant. Place them in a paper bag or envelope to catch any seeds that may still be dropping.
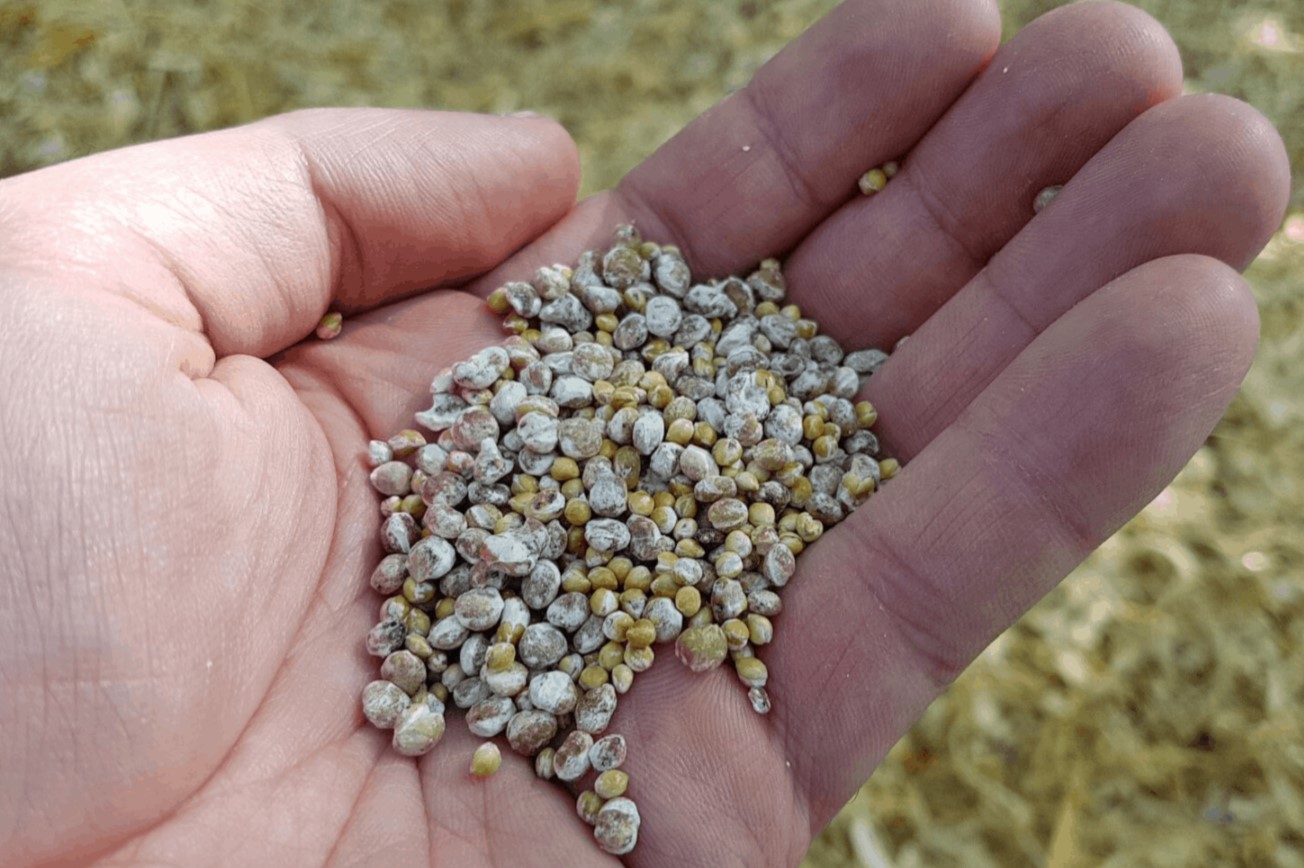
4. Extracting Geranium Seeds: Once you have harvested the seed pods, open them carefully to extract the geranium seeds. Sometimes, the seeds will easily release when the pods are dry. Other times, you may need to gently rub the seed pods between your fingers to loosen the seeds.
5. Cleaning Geranium Seeds: After extracting the seeds, remove any debris or dried plant material from the seeds. One method is to place the seeds in a fine-mesh sieve and gently shake or blow away the debris. Another option is to lightly rub the seeds between your fingers to remove any remaining material.
6. Drying Geranium Seeds: Spread the cleaned geranium seeds on a paper towel or a fine mesh screen to air dry for a few days. Ensure they are in a cool, dry location away from direct sunlight. The seeds should be completely dry before storing them.
7. Storing Geranium Seeds: Store the dried geranium seeds in a cool, dark, and dry place. Use airtight containers or small envelopes to keep the seeds safe from moisture and pests. Label the containers with the variety and date of harvesting for future reference.
8. Testing Geranium Seed Viability: If you’re unsure about the germination rate of your stored seeds, perform a viability test by sprouting a few seeds on a damp paper towel. If a high percentage of seeds germinate successfully, the seeds are still viable for planting.
By following these steps, you can harvest and save geranium seeds for future use. Share them with fellow gardeners or use them to grow a new generation of beautiful geraniums in your garden. Congratulations on completing all the steps in successfully getting geranium seeds! Enjoy the fruits of your labor and continue to nurture your geranium plants for a flourishing garden.
Thank you for joining us on this journey of learning and exploration. Happy gardening!
Conclusion
Congratulations! You have now learned the essential steps to successfully get geranium seeds and grow vibrant geranium plants. By following these steps, you can embark on a fulfilling gardening journey and create a stunning geranium garden in your own backyard.
From carefully choosing the right geranium variety to harvesting seeds for future planting, each step in the process plays a crucial role in the success of your geranium cultivation. By considering factors like climate, space, and soil quality, you ensure that your geraniums have the ideal growing conditions. Obtaining geranium seeds from reliable sources and preparing the soil properly sets the stage for healthy germination and growth.
As you care for your geranium seedlings, remember the importance of watering, fertilizing, and proper maintenance. Protecting your geraniums from pests and diseases through regular inspection and organic pest control methods helps maintain their health and vitality. And finally, harvesting geranium seeds allows you to continue the cycle of growth, adding diversity and beauty to your garden year after year.
Throughout this journey, remember to infuse your personal creativity and passion for gardening. Experiment with different geranium varieties, color combinations, and planting arrangements to create a unique and enchanting garden space. Enjoy the process and take pride in watching your geraniums flourish under your thoughtful care.
Gardening is not just a hobby; it’s a therapeutic escape and an opportunity to connect with nature. As you spend time tending to your geraniums, take in the sights, smells, and sounds of your garden. Share your gardening experiences with others in the community and learn from fellow green thumbs along the way.
So, grab your gardening tools, follow the steps outlined in this guide, and immerse yourself in the world of geranium cultivation. Remember, each seed you sow is a little promise of hope and beauty, waiting to unfold and bring joy to your garden and your life.
Happy gardening and may your geraniums bloom abundantly!
Frequently Asked Questions about How To Get Geranium Seeds
Was this page helpful?
At Storables.com, we guarantee accurate and reliable information. Our content, validated by Expert Board Contributors, is crafted following stringent Editorial Policies. We're committed to providing you with well-researched, expert-backed insights for all your informational needs.

0 thoughts on “How To Get Geranium Seeds”