Home>Garden Essentials>How To Get Seeds From Hydrangea

Garden Essentials
How To Get Seeds From Hydrangea
Modified: October 20, 2024
Learn how to get seeds from a hydrangea plant and enhance your garden with beautiful blooms. Discover step-by-step techniques for successful seed harvesting.
(Many of the links in this article redirect to a specific reviewed product. Your purchase of these products through affiliate links helps to generate commission for Storables.com, at no extra cost. Learn more)
Introduction
Growing hydrangeas can be a rewarding and enjoyable experience. These beautiful flowering plants add a touch of elegance to any garden or landscape. While most gardeners are familiar with propagating hydrangeas through cuttings or division, obtaining seeds from hydrangeas can be a less common but equally fascinating method of propagation.
In this article, we will guide you through the process of collecting and germinating hydrangea seeds. Whether you’re a seasoned gardener looking to expand your collection or a beginner eager to try your hand at seed propagation, we have you covered.
Before we dive into the steps involved in obtaining seeds from hydrangeas, let’s explore why seed collection can be a worthwhile endeavor. Hydrangea seeds hold the potential to produce unique variations and new cultivars. By collecting and growing seeds, you can discover new colors, shapes, and even disease-resistant traits that may not exist in the parent plant.
Additionally, collecting seeds from hydrangeas allows you to share the beauty of these plants with friends and family. It can also be a cost-effective way of expanding your garden, as purchasing fully-grown hydrangea plants can be quite costly.
So, if you’re ready to embark on a journey of seed collection and propagation, let’s get started with selecting the proper hydrangea variety.
Key Takeaways:
- Collecting and growing hydrangea seeds can lead to discovering unique flower colors and forms, making it an exciting and cost-effective way to expand your garden with beautiful and diverse plants.
- By following the steps of seed collection, planting, and care, you can experience the magical journey of nurturing tiny seeds into stunning hydrangea plants, bringing joy and beauty to your garden.
Read more: How To Grow Hydrangeas From Seeds
Step 1: Selecting the Proper Hydrangea Variety
When it comes to obtaining hydrangea seeds, it is important to choose the right variety. Different hydrangea species have varying characteristics, growth habits, and care requirements. Here are a few popular hydrangea varieties that are commonly grown from seed:
- Hydrangea macrophylla: Also known as mophead hydrangea, this variety is renowned for its large, round clusters of flowers. It comes in a range of colors, including pink, blue, and white. Hydrangea macrophylla seeds offer the potential for a wide range of flower colors and forms.
- Hydrangea paniculata: This variety is known for its conical-shaped flower clusters, which start off white and gradually turn pink as they mature. Hydrangea paniculata seeds can produce plants with different flower shapes and sizes.
- Hydrangea arborescens: Often called smooth hydrangea, this variety produces round, white flowers. Hydrangea arborescens seeds can yield plants with variations in flower size and foliage color.
- Hydrangea quercifolia: Commonly known as oakleaf hydrangea, this variety offers large, cone-shaped flower clusters and distinctive oak-like leaves that change color in the fall. Hydrangea quercifolia seeds can result in plants with unique leaf patterns and flower colors.
Do some research and choose the hydrangea variety that best suits your preferences and growing conditions. Keep in mind that not all hydrangea varieties produce viable seeds, so it’s important to check if the variety you have chosen is capable of seed production.
Once you have selected the proper hydrangea variety, it’s time to move on to the next step: identifying the optimal time for seed collection.
Step 2: Identifying the Optimal Time for Seed Collection
Timing is crucial when it comes to collecting seeds from hydrangeas. You need to wait until the flowers have matured and the seeds are fully developed before harvesting. Here are some general guidelines to help you determine the optimal time for seed collection:
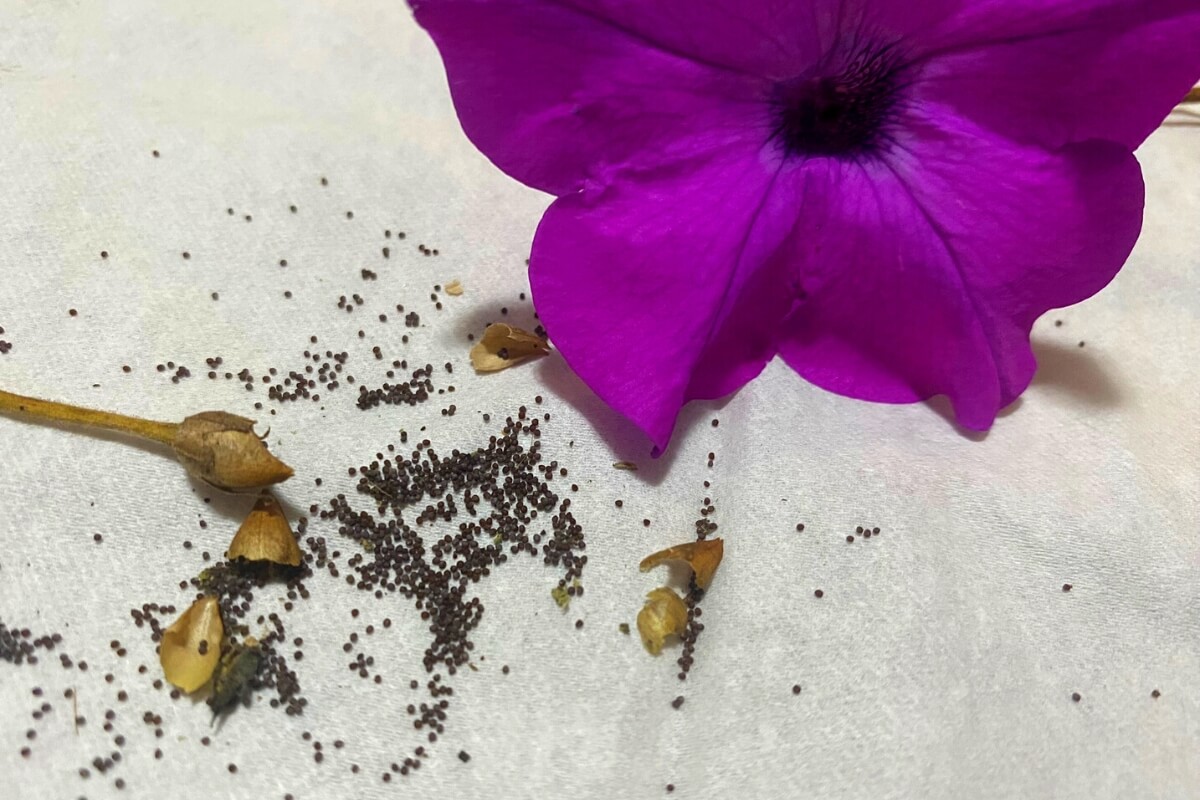
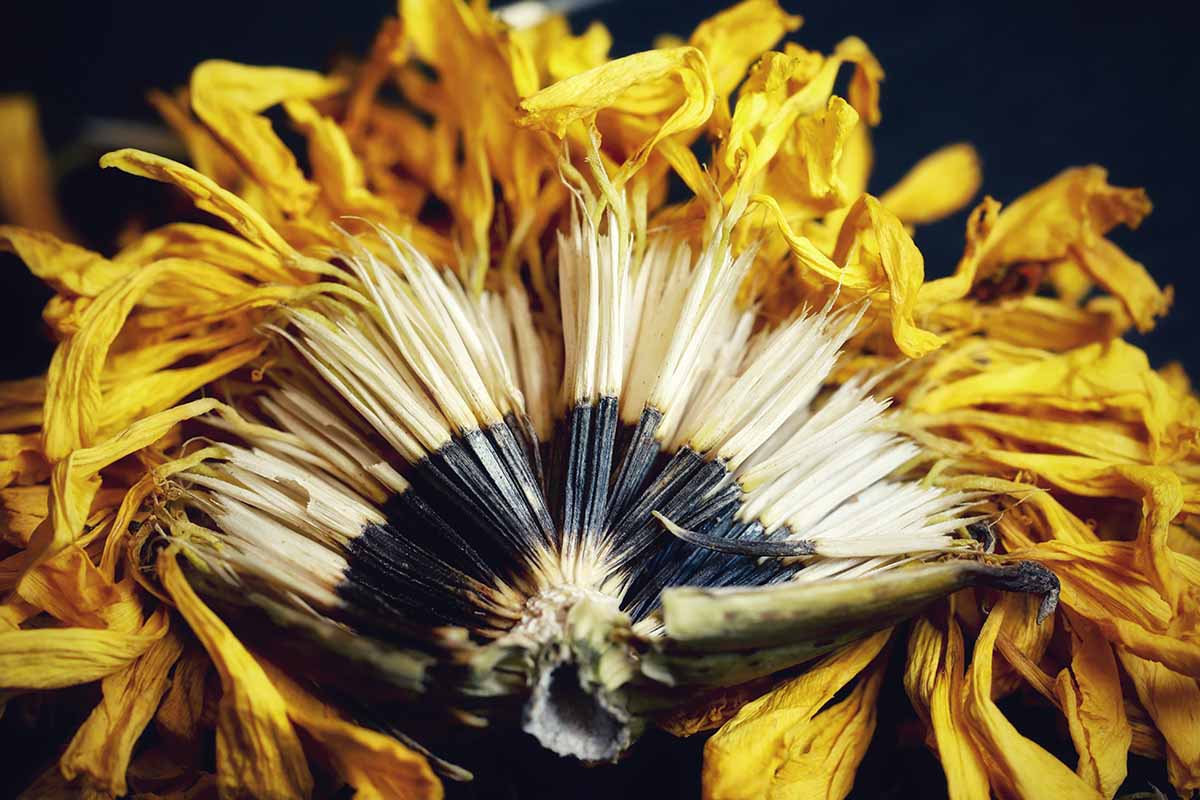
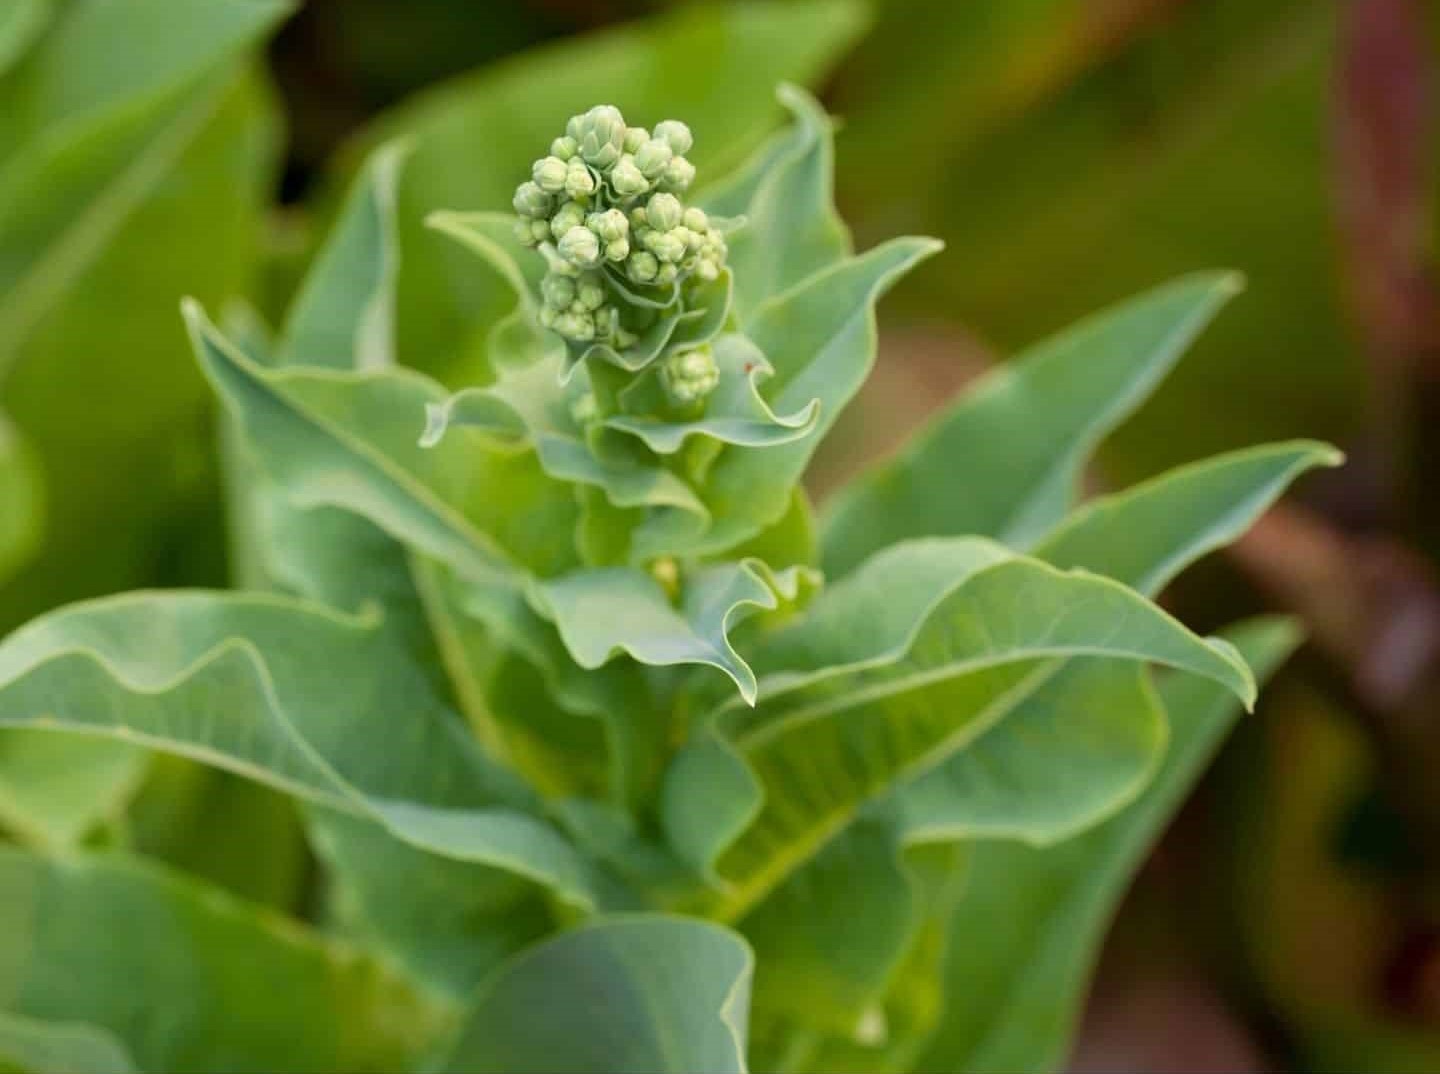
- Observe the flower heads: Watch the flowers closely as they go through their blooming cycle. Once the flower heads have turned a brownish color and feel dry to the touch, it is usually a sign that the seeds are ready for collection.
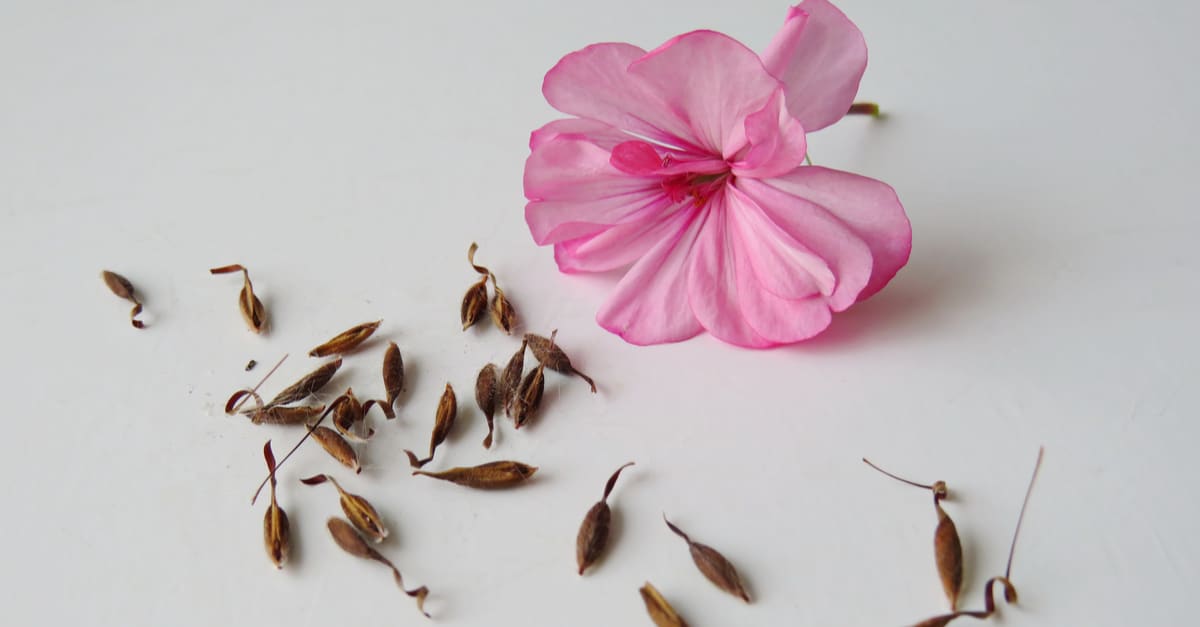
- Check for seed formation: Carefully examine the faded flower heads to see if they have started to form seed capsules. The seed capsules are small, papery structures that contain the seeds. If you see developed seed capsules, it’s a good indication that the seeds are ripe and can be harvested.
- Timing varies by variety: Different hydrangea varieties may have slight variations in the timing of seed development. Some may produce viable seeds earlier in the season, while others may take longer. It’s important to research the specific variety you are working with to understand its seed development timeline.
It’s worth noting that collecting hydrangea seeds too early may result in unripe or non-viable seeds. On the other hand, waiting too long may lead to the seeds dispersing naturally, making it more challenging to collect them. So, keep a close eye on your plants and aim to collect the seeds when they are fully mature but before they are released.
Now that you know when to collect the seeds, it’s time to gather the necessary tools and equipment for the seed collection process. Let’s move on to the next step.
Step 3: Preparing the Tools and Equipment
Before you begin collecting hydrangea seeds, it’s important to gather the necessary tools and equipment to ensure a smooth and successful process. Here are the essentials you’ll need:
- Gloves: A pair of gloves will protect your hands from any prickly or thorny stems while handling the hydrangea plants.
- Pruning shears: Use sharp pruning shears to cut the mature flower heads from the hydrangea plants. Make sure the blades are clean and sterile to minimize the risk of introducing any infections to the plants.
- Paper bags or envelopes: Prepare paper bags or envelopes to hold the harvested flower heads. These will allow the seeds to dry naturally while preventing mold or moisture buildup.
- Marker or labels: It’s important to label your paper bags or envelopes with the variety and date of collection. This will help you keep track of your seeds and ensure you can identify them accurately later on.
- Storage containers: As we’ll discuss in a later step, you’ll need proper storage containers for the dried seeds. Small glass jars or seed envelopes are suitable options for storing the seeds once they are cleaned and fully dried.
Having these tools and equipment ready beforehand will make the seed collection process more organized and efficient. Once you have everything prepared, it’s time to move on to the exciting part – harvesting the hydrangea seeds!
In the next step, we will guide you through the process of harvesting the seeds from the mature hydrangea flower heads. Let’s proceed to step 4.
Step 4: Harvesting Hydrangea Seeds
Now that you have selected the proper hydrangea variety, identified the optimal time for seed collection, and prepared the necessary tools and equipment, it’s time to harvest the hydrangea seeds. Follow these steps to ensure a successful harvest:
- Put on your gloves to protect your hands from any thorns or prickly stems.
- Inspect the hydrangea plant and locate the mature flower heads that have turned a brownish color and feel dry to the touch.
- Using sharp pruning shears, carefully cut the mature flower heads from the hydrangea plant, ensuring that you have a section of stem attached to the flower head.
- Place the harvested flower heads into a paper bag or envelope, making sure to label it with the variety and the date of collection. This will help you keep track of the seeds.
- Continue harvesting flower heads from different plants, especially if you are aiming to collect seeds from multiple hydrangea varieties.
- Once you have collected all the flower heads, bring them indoors to a cool and well-ventilated area for further processing.
It’s important to handle the harvested flower heads gently to prevent the seeds from falling out prematurely. Now that you have successfully harvested the hydrangea seeds, it’s time to move on to the next step – cleaning and drying the seeds.
Stay tuned for step 5, where we will guide you through the process of cleaning and drying your collected hydrangea seeds.
Read more: How Long To Grow Hydrangeas From Seed
Step 5: Cleaning and Drying the Seeds
After harvesting the hydrangea flower heads and bringing them indoors, it’s time to clean and dry the seeds. Cleaning the seeds helps remove any debris or pulp, while drying them ensures their longevity and viability. Follow these steps to clean and dry your collected hydrangea seeds:
- Take each harvested flower head and gently separate it into individual florets. Inside each floret, you will find small, papery seed capsules.
- Use your fingers or a pair of tweezers to carefully remove the seed capsules from the florets.
- Place the seed capsules in a clean, dry container.
- Crush the seed capsules gently using a mortar and pestle or by rubbing them between your fingers. This will help release the seeds from the capsules.
- Next, transfer the crushed seed capsules into a fine-mesh sieve or strainer.
- Hold the sieve under running water and gently wash away any remaining debris or pulp from the seeds.
- Once the seeds are clean, spread them out onto a paper towel or a labeled seed tray, ensuring they are in a single layer. Allow them to air dry in a cool and well-ventilated area.
- It’s crucial to monitor the drying seeds regularly and gently stir or turn them to ensure even drying and prevent mold or mildew formation.
- Leave the seeds to dry completely for about one to two weeks, or until they are completely dry and brittle to the touch.
Once the seeds are thoroughly dried, they are ready for storage. In the next step, we will discuss the importance of proper seed storage and guide you on how to store your hydrangea seeds for future planting.
Stay tuned for step 6, where we will cover the storage process and provide tips to maintain seed viability.
To get seeds from hydrangea, wait until the flower heads dry out and turn brown. Then, carefully remove the seeds and plant them in a well-draining soil mix. Keep the soil consistently moist and provide indirect sunlight for best results.
Step 6: Storing the Hydrangea Seeds
After cleaning and drying your hydrangea seeds, it’s crucial to store them properly to ensure their long-term viability. Proper storage conditions will help maintain the seeds’ germination potential and increase your chances of successful future plantings. Follow these steps to store your hydrangea seeds:
- Ensure that your dried hydrangea seeds are completely cool and dry before storing them.
- Transfer the seeds to an airtight container, such as a small glass jar or a sealable plastic bag.
- Optionally, you can add a desiccant packet to the container to absorb any excess moisture and maintain the seeds’ dryness.
- Label the container with the variety and date of collection for future reference.
- Place the labeled container in a cool, dark, and dry location. A refrigerator or a cool basement is ideal for long-term seed storage.
- Keep the container away from direct sunlight, excessive heat, and fluctuations in temperature and humidity.
- Regularly check the stored seeds for any signs of moisture or mold. If you notice any, remove the affected seeds immediately to prevent them from spoiling the rest.
- For best results, it’s recommended to use the stored hydrangea seeds within one to three years. While some seeds may remain viable for longer periods, their germination rates may start to decline over time.
By storing your hydrangea seeds properly, you’ll ensure their longevity and increase the chances of success when you’re ready to plant them in the future. In the next step, we will guide you through the process of planting hydrangea seeds and provide tips for successful germination.
Stay tuned for step 7, where we will delve into the exciting process of planting your hydrangea seeds.
Step 7: Planting Hydrangea Seeds
Now that you have properly stored your hydrangea seeds, it’s time to move on to the exciting step of planting them. Planting hydrangea seeds can be a rewarding experience as you watch the tiny seeds grow into beautiful plants. Follow these steps to successfully plant your hydrangea seeds:
- Start by preparing a seed-starting tray or small pots with a well-draining seed-starting mix. Alternatively, you can use a combination of peat moss and perlite.
- Moisten the seed-starting mix slightly before you begin planting. Avoid making it too wet, as excess moisture can lead to seed rot.
- Firmly press the hydrated seed-starting mix into the containers and make small depressions using your fingertip or the tip of a pencil. The depressions should be about ¼ inch deep.
- Place one or two hydrangea seeds in each depression. It’s good to plant multiple seeds to improve the chances of successful germination.
- Lightly cover the seeds with a thin layer of the seed-starting mix. Avoid burying them too deep, as hydrangea seeds require light to germinate.
- Mist the soil surface gently with water to ensure the seeds are moist but not overly wet.
- Cover the trays or pots with a plastic dome or a clear plastic bag to create a greenhouse-like atmosphere. This will help maintain humidity levels and promote germination.
- Place the trays or pots in a warm location with indirect sunlight. The optimal temperature for germination is around 70 to 75 degrees Fahrenheit (21 to 24 degrees Celsius).
- Keep the soil consistently moist but not waterlogged. Check the trays or pots regularly and water as needed to prevent the soil from drying out.
- Germination can take anywhere from a few weeks to a couple of months, so be patient and continue to monitor the progress of your seeds.
As the seedlings emerge and grow, it’s essential to provide them with adequate light, gradually expose them to direct sunlight, and ensure they have proper watering and care. In the next step, we will discuss how to care for your hydrangea seedlings.
Stay tuned for step 8, where we will guide you through the process of caring for your growing hydrangea seedlings.
Step 8: Caring for Hydrangea Seedlings
Once your hydrangea seedlings have emerged from the soil, it’s important to provide them with proper care to ensure their healthy growth. Follow these steps to care for your hydrangea seedlings:
- Transplant the seedlings: Once the seedlings have developed their first true leaves, they can be transplanted into larger pots or containers. Use a well-draining potting mix and ensure there are drainage holes in the containers to prevent waterlogging.
- Provide adequate sunlight: Place the seedlings in a location with bright, indirect sunlight. Gradually acclimate them to more direct sunlight over several weeks to prevent leaf burn.
- Water regularly: Keep the soil evenly moist, but avoid overwatering, as hydrangeas are susceptible to root rot. Water the seedlings when the top inch of soil feels dry to the touch.
- Fertilize lightly: After the seedlings have been growing for a few weeks, you can start fertilizing them with a diluted, balanced liquid fertilizer. Apply the fertilizer once every two to three weeks during the growing season.
- Monitor for pests and diseases: Keep an eye out for any signs of pests, such as aphids or spider mites, and treat them promptly with organic pest control methods. Additionally, watch for signs of diseases like powdery mildew, and take appropriate measures to prevent or treat any issues.
- Prune for shape and vigor: As the seedlings grow, you can selectively prune them to encourage branching and create a more compact and bushy shape. Regular pruning will also help improve air circulation and maintain plant health.
- Transplant into the garden: When the seedlings have grown to a sufficient size and the risk of frost has passed, you can transplant them into their permanent spots in the garden. Choose a location with well-draining soil and partial shade to protect the young plants from harsh sunlight.
- Continue regular maintenance: Once your hydrangea seedlings are established in the garden, continue to provide regular care, including watering, fertilizing, and monitoring for pests and diseases. Prune any dead or damaged growth as needed.
By following these care guidelines, you will help your hydrangea seedlings thrive and develop into healthy, mature plants. In the next step, we will discuss the process of transplanting your hydrangea seedlings into their permanent positions in the garden.
Stay tuned for step 9, where we will guide you through the exciting process of transplanting your hydrangea seedlings.
Read more: How To Get Seeds From Lettuce
Step 9: Transplanting Hydrangea Seedlings
As your hydrangea seedlings grow and become strong, it’s time to transplant them into their permanent positions in the garden. Transplanting hydrangea seedlings can be an exciting step, as it allows them to thrive and fulfill their full potential. Follow these steps to transplant your hydrangea seedlings:
- Choose the right time: Plan to transplant your seedlings in early spring or fall when the weather is mild and there is less stress on the plants. Avoid transplanting during extreme heat or cold.
- Prepare the planting hole: Dig a hole in the garden that is twice as wide and slightly deeper than the root ball of your seedling. Loosen the soil and amend it with organic matter to improve drainage and provide nutrients.
- Carefully remove the seedling from its container: Gently tap the sides of the container or squeeze it to loosen the root ball. Then, carefully slide the seedling out, taking care not to damage the roots.
- Place the seedling in the hole: Position the seedling in the center of the hole, ensuring that the top of the root ball is level with the surrounding soil surface. Backfill the hole with soil, gently firming it around the roots.
- Water thoroughly: Give the newly transplanted seedling a thorough watering to settle the soil and eliminate any air pockets around the roots. Ensure that the soil remains consistently moist, but not soaked, during the first few weeks after transplantation.
- Apply a layer of mulch: Mulching around the base of the seedling will help retain moisture, suppress weeds, and regulate soil temperature. Use organic mulch, such as wood chips or shredded leaves, and spread it evenly around the plant, leaving a small gap around the stem to prevent moisture buildup and potential rot.
- Provide shade and protection: If transplanting during a hot or sunny period, it’s beneficial to provide some shade for the newly transplanted seedlings. You can use shade cloth or temporary shading materials to shield them from direct sunlight for a few days or until they become established.
- Maintain regular care: Continue watering the transplanted seedlings regularly, especially during dry spells. Monitor their growth, and provide additional support, such as stakes or trellises, if needed, to help them establish themselves in their new location.
- Enjoy your thriving hydrangea plants: With time, care, and patience, your transplanted hydrangea seedlings will grow, flourish, and reward you with their stunning blooms. Take pride in your gardening success!
Transplanting hydrangea seedlings is a crucial step in their journey towards becoming established, healthy plants. By following these transplanting guidelines, you give them the best chance to thrive in their new environment. Now, sit back and watch your beautiful hydrangeas grow and adorn your garden for years to come.
Congratulations on reaching this stage! You have successfully completed all the steps involved in obtaining, planting, and caring for hydrangea seeds. With your newly acquired knowledge, you can now enjoy the beauty and satisfaction of growing your own hydrangeas from seed. Happy gardening!
Conclusion
Growing hydrangeas from seeds is a rewarding and fulfilling experience that allows you to witness the magical transformation from tiny seeds to beautiful flowering plants. By selecting the proper hydrangea variety, identifying the optimal time for seed collection, and preparing the necessary tools and equipment, you can set yourself up for success in the seed collection process.
Harvesting mature hydrangea seeds and cleaning them carefully ensures their viability, while proper storage techniques maintain their germination potential for future plantings. Planting the seeds in a well-draining seed-starting mix, providing adequate light, and watering consistently help the seedlings thrive.
Caring for the hydrangea seedlings as they grow, including regular watering, fertilizing, and monitoring for pests and diseases, promotes healthy development. Transplanting the seedlings into their permanent positions in the garden allows them to establish and flourish, bringing joy and beauty to your outdoor space.
Remember, growing hydrangeas from seed requires patience and attentiveness, but the end result is well worth the effort. You have the opportunity to witness the unique colors, shapes, and characteristics of each plant as it matures.
So, if you’re ready to embark on a journey of growing hydrangeas from seeds, follow the steps outlined in this guide, and let your gardening adventure begin. Get ready to enjoy the enchanting and breathtaking beauty of these stunning flowering plants in your own backyard.
Happy gardening!
Frequently Asked Questions about How To Get Seeds From Hydrangea
Was this page helpful?
At Storables.com, we guarantee accurate and reliable information. Our content, validated by Expert Board Contributors, is crafted following stringent Editorial Policies. We're committed to providing you with well-researched, expert-backed insights for all your informational needs.
0 thoughts on “How To Get Seeds From Hydrangea”