Home>Garden Essentials>How To Grow Hog Plum From Seed
Garden Essentials
How To Grow Hog Plum From Seed
Modified: August 17, 2024
Learn how to grow hog plum from seed in your garden and enjoy the delicious fruits. Follow our step-by-step guide for successful cultivation.
(Many of the links in this article redirect to a specific reviewed product. Your purchase of these products through affiliate links helps to generate commission for Storables.com, at no extra cost. Learn more)
Introduction
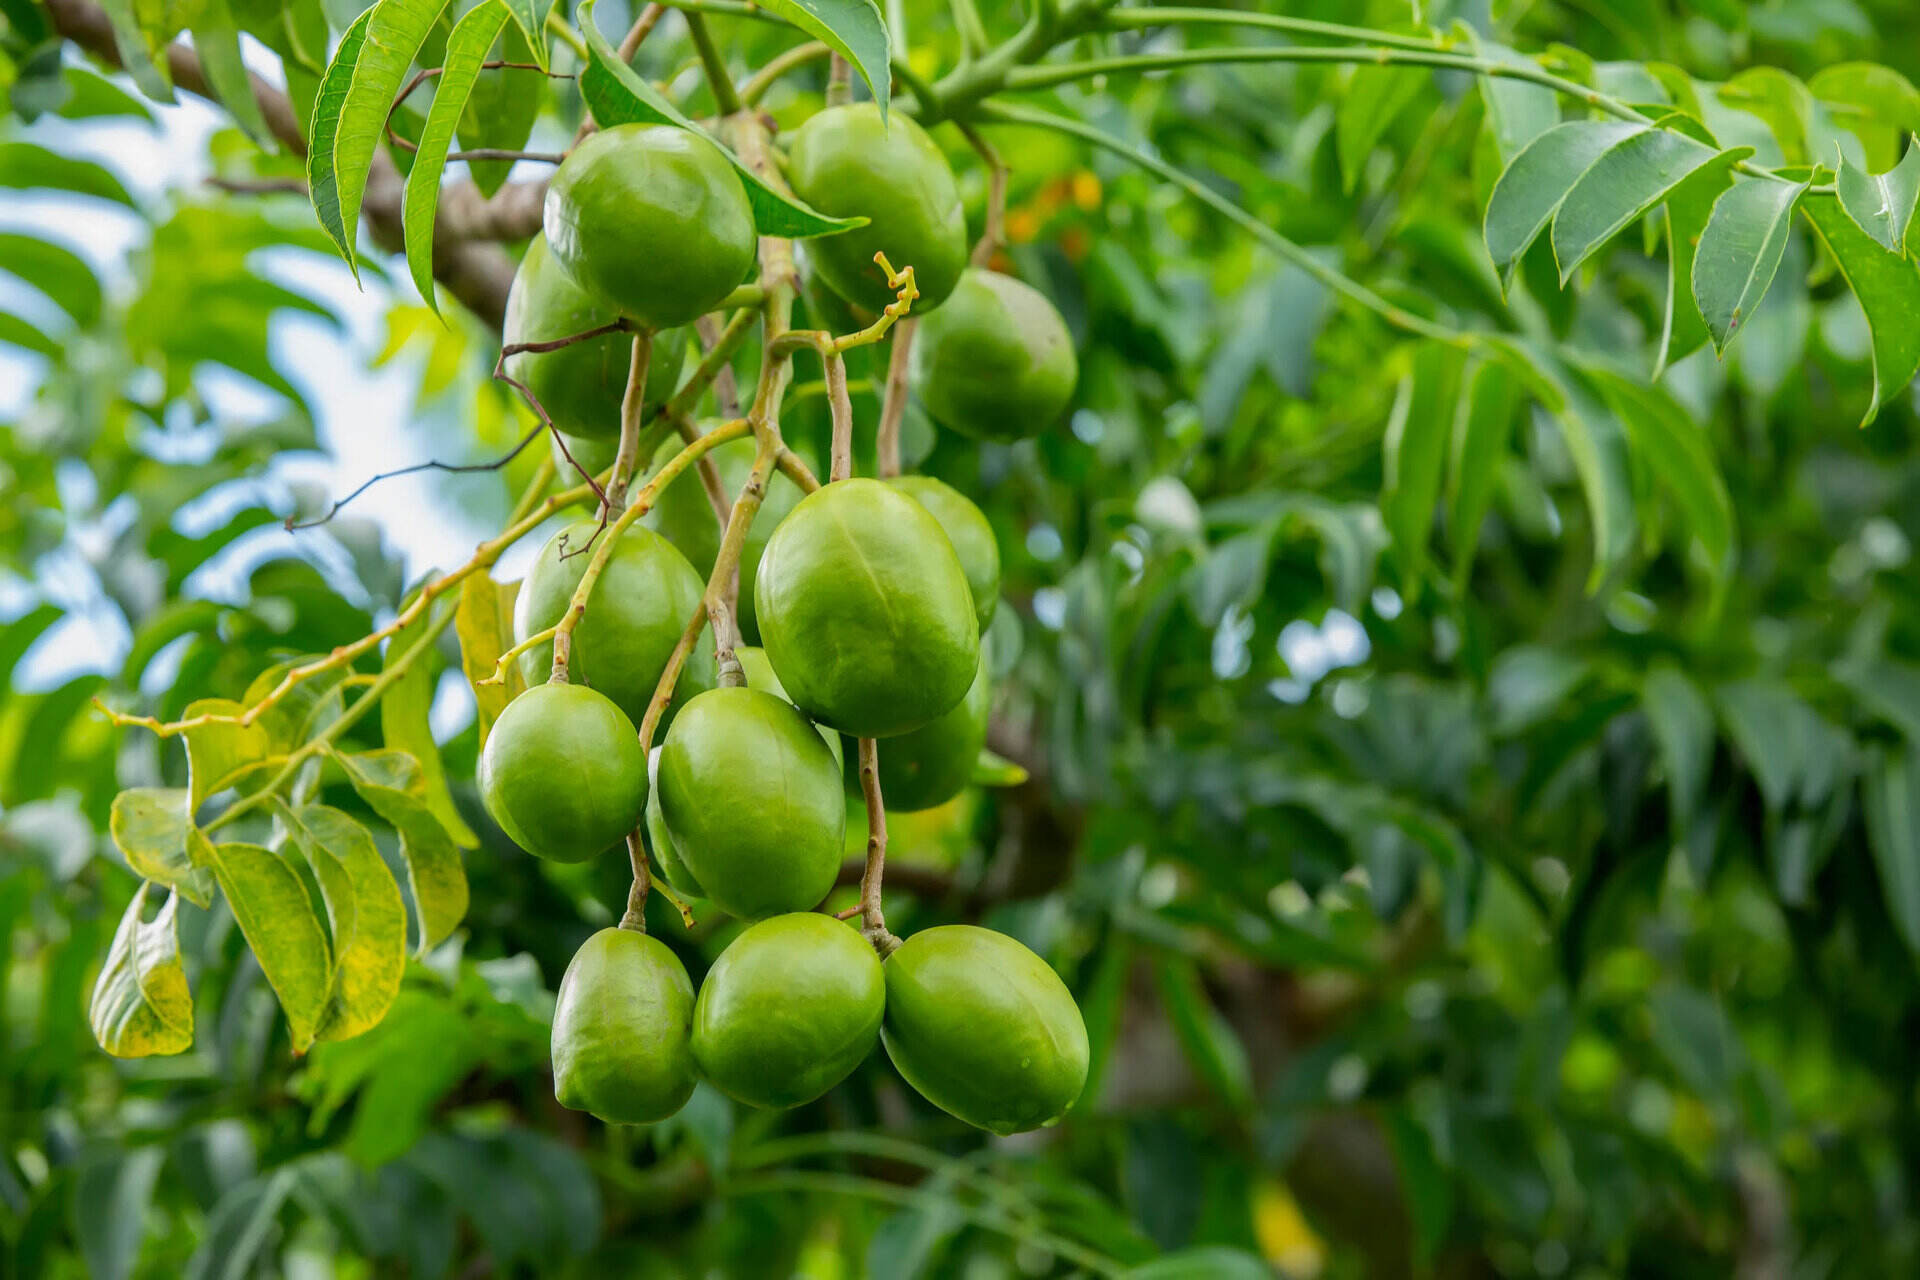
Welcome to the world of gardening, where you can bring nature’s bounty right into your own backyard. One of the most rewarding experiences in gardening is seeing your plants grow from a tiny seed to a lush, fruitful tree. If you are looking for a unique and delicious addition to your garden, why not consider growing hog plum? Hog plum, also known as ambarella, is a tropical fruit tree native to Southeast Asia. It is known for its tangy and juicy fruit, which can be eaten fresh or used in jams, chutneys, and desserts.
In this article, we will guide you through the process of growing hog plum from seed, so you can enjoy the satisfaction of nurturing your own tree and harvesting its delicious fruits. With proper care and attention, you can have a thriving hog plum tree that will provide you with fresh fruit for years to come.
Key Takeaways:
- Growing hog plum from seed is a rewarding journey that requires patience and care. From preparing the seeds to harvesting the fruits, you can enjoy the unique flavor of hog plums in your own garden.
- By following the step-by-step guide, you can successfully grow your own hog plum tree. Enjoy the process, connect with nature, and savor the satisfaction of nurturing a tree from seed to fruit.
Read more: How To Grow Plum From Seed
Step 1: Gathering Supplies
Before you begin the process of growing hog plum from seed, it is important to gather all the necessary supplies. Here is a list of items you will need:
- Fresh hog plum seeds: Look for ripe hog plums at your local farmer’s market or grocery store. The seeds should be removed from the fruit and cleaned before planting.
- Seed starting trays or pots: Choose containers that are at least 2-3 inches deep and have drainage holes at the bottom to ensure proper water drainage.
- Seed starting soil mix: Opt for a well-draining and nutrient-rich soil mix specifically formulated for starting seeds. You can find these at garden centers or online.
- Humidity dome or plastic wrap: To create a greenhouse-like environment, cover the seed trays with a humidity dome or use plastic wrap to retain moisture.
- Grow lights or sunny windowsill: Hog plum seeds require ample light to germinate and grow. Place them in a sunny spot or consider using grow lights if you don’t have access to sufficient natural light.
- Watering can or spray bottle: Maintain consistent moisture levels by using a watering can with a fine spout or a spray bottle to mist the soil.
- Fertilizer: Once your seedlings have sprouted, you will need a balanced fertilizer to provide them with essential nutrients for healthy growth. Look for a fertilizer specifically formulated for fruit trees.
By gathering these supplies beforehand, you will be well-prepared to begin the process of growing hog plum from seed.
Step 2: Preparing the Seeds
Now that you have all your supplies ready, it’s time to prepare the hog plum seeds for planting. Follow these steps to ensure the best chances of successful germination:
- Remove the seeds: Start by carefully removing the seeds from the hog plum fruit. You can do this by cutting the fruit and gently scooping out the seeds. Rinse the seeds under running water to remove any remaining pulp or debris.
- Scarify the seeds: Hog plum seeds have a hard outer coat that can inhibit germination. To improve germination rates, you can scarify the seeds. Gently file or sand the outer coat of the seed until it becomes slightly scratched or nicked. Be careful not to damage the seed or remove too much of the outer layer.
- Soak the seeds: After scarifying, soak the hog plum seeds in a bowl of water overnight. This will help soften the outer coat and promote quicker germination.
Once you have completed these steps, your hog plum seeds are ready to be planted. The scarification process and overnight soaking will help break dormancy and increase the chances of successful germination. Now let’s move on to the next step: planting the seeds!
Step 3: Planting the Seeds
Now that your hog plum seeds are prepared, it’s time to plant them and watch them grow into seedlings. Follow these steps to ensure proper planting:
- Prepare the seed trays: Fill the seed trays or pots with the seed starting soil mix, leaving about half an inch of space at the top. Gently pat down the soil to remove any air pockets.
- Plant the seeds: Make a small indentation in the soil, about half an inch deep. Place one hog plum seed in each indentation and cover it lightly with soil. Don’t bury the seed too deep, as it needs to access light for germination.
- Provide moisture: After planting the seeds, ensure the soil is moist but not soggy. Use a watering can with a fine spout or a spray bottle to water the soil gently. Avoid overwatering, as it can lead to rotting.
- Create a greenhouse environment: To promote germination, cover the seed trays with a humidity dome or use plastic wrap to create a greenhouse-like environment. This helps retain moisture and warmth.
- Place in a suitable location: Put the seed trays in a warm, well-lit area, either near a sunny windowsill or under grow lights. Hog plum seeds require temperatures around 75-85°F (24-29°C) to germinate.
- Monitor and water regularly: Check the soil moisture daily and mist the soil as needed to maintain consistent moisture levels. Avoid letting the soil dry out completely.
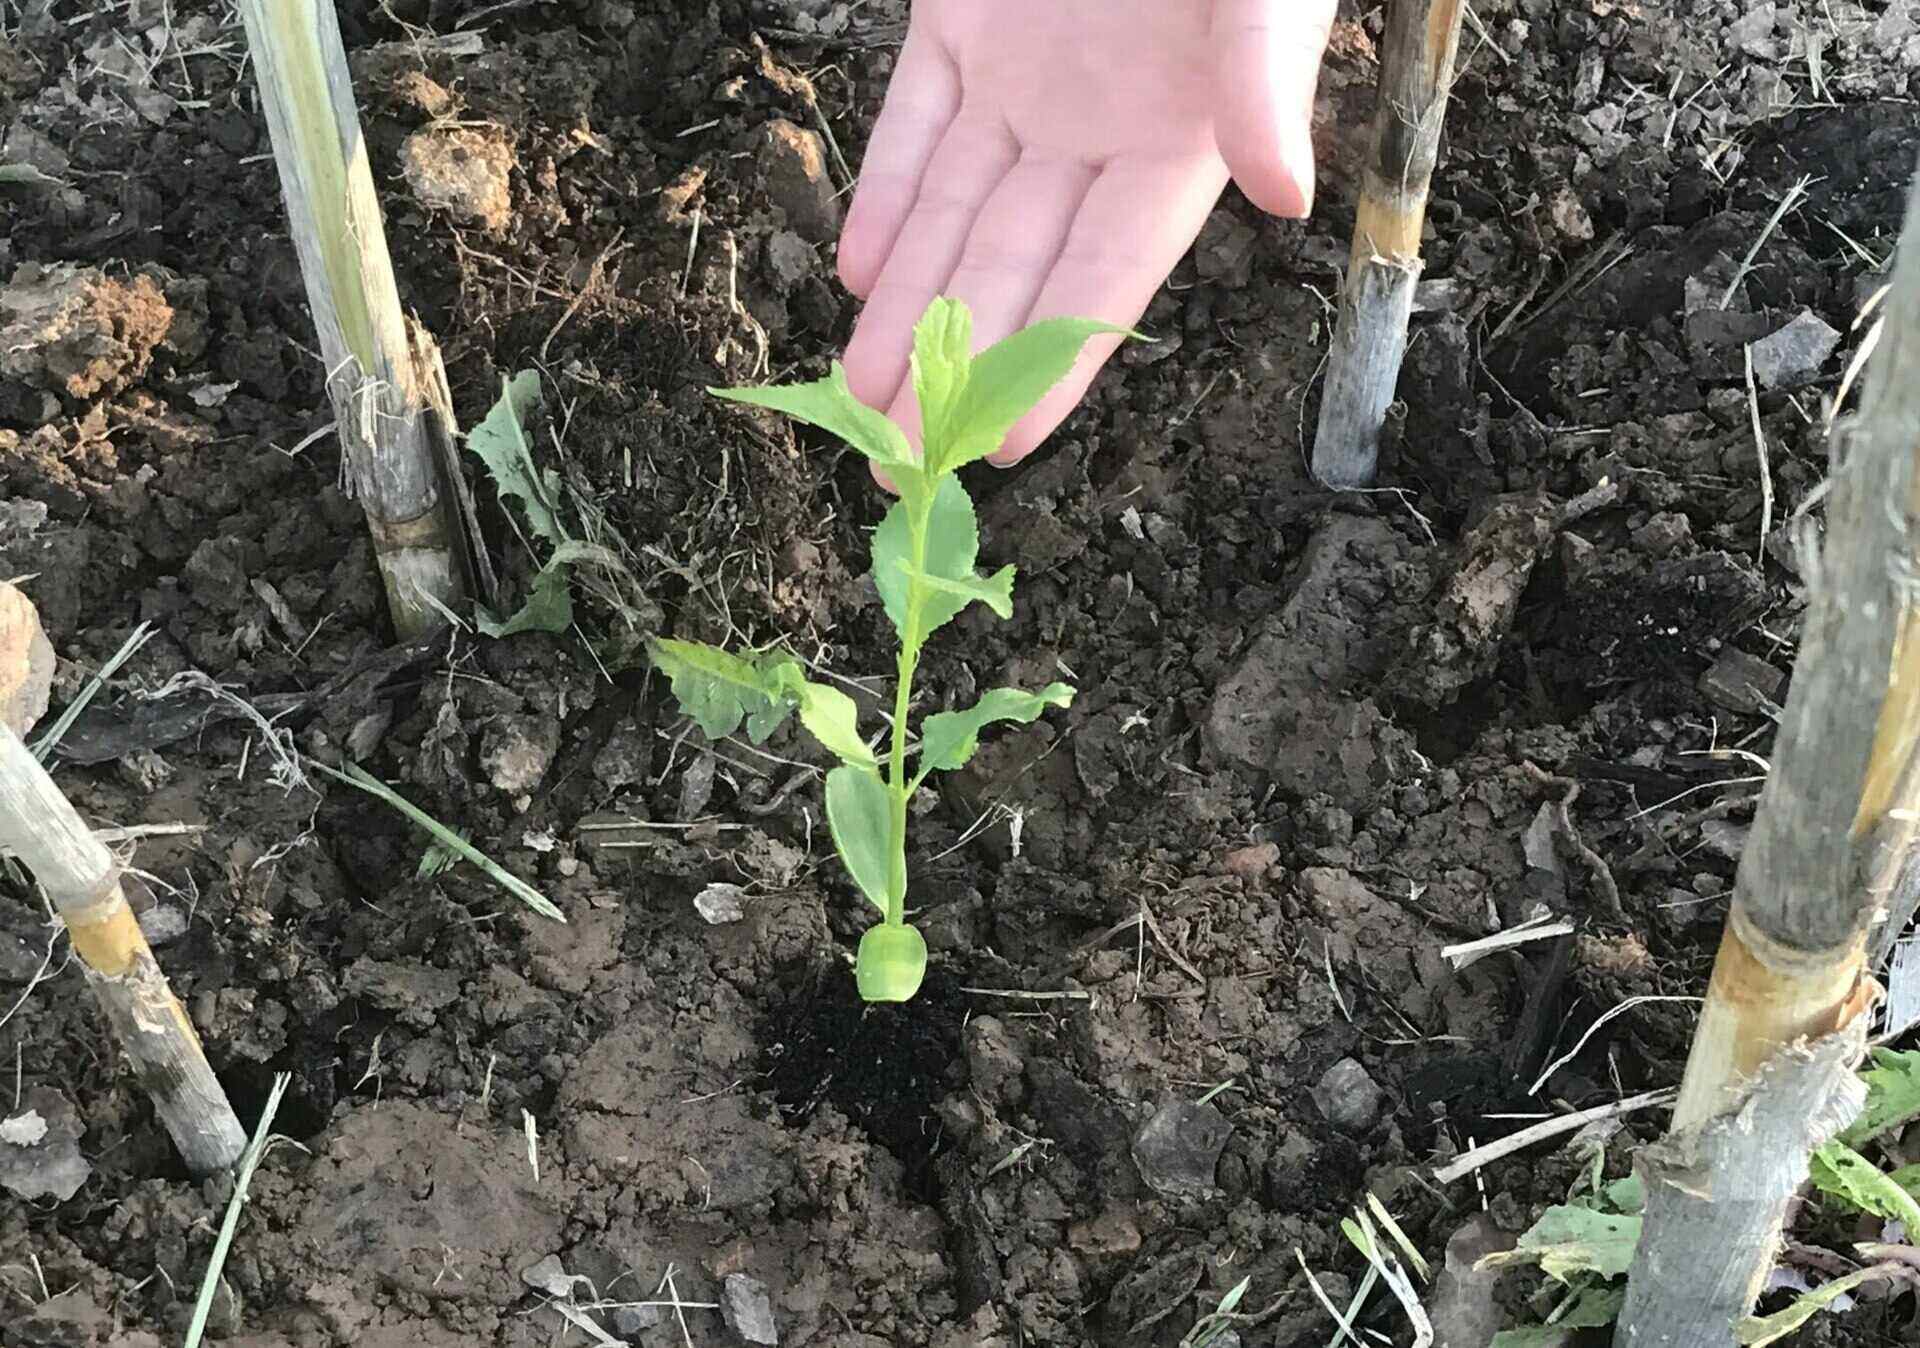
Now that the seeds are planted, it’s time to be patient and wait for them to sprout. Germination can take anywhere from 3 to 6 weeks, so make sure to provide adequate care and attention during this time. Once the seedlings have grown a few inches tall, you can move on to the next step: providing proper care.
After removing the seeds from the hog plum, soak them in water for 24 hours to soften the outer shell. Plant the seeds in well-draining soil and keep them consistently moist. Place the pot in a warm, sunny location and be patient, as hog plum seeds can take several weeks to germinate.
Step 4: Providing Proper Care
As your hog plum seedlings start to emerge, it’s important to provide them with proper care to ensure healthy growth. Follow these tips to promote strong and robust seedlings:
- Light requirements: Place the seedlings in a location where they receive at least 8-10 hours of sunlight each day. If natural light is not sufficient, you can supplement with grow lights placed a few inches above the plants.
- Watering: Keep the soil consistently moist but not overly saturated. Water the seedlings when the top inch of soil feels dry to the touch. Be careful not to overwater, as it can lead to root rot.
- Fertilizing: After the seedlings have grown their first set of true leaves, start feeding them with a balanced fertilizer. Dilute the fertilizer according to the instructions on the package and apply it every two weeks.
- Pruning: As the seedlings grow, they may develop multiple stems. To encourage a strong central trunk, choose the healthiest and most robust stem and prune away the others. This will promote upward growth and a well-structured tree.
- Providing support: As the seedlings grow taller, they may require support to prevent them from bending or breaking. Use stakes or small trellises to provide support and train the seedlings to grow upright.
- Pest and disease control: Keep a close eye on your hog plum seedlings for any signs of pests or diseases, such as aphids or fungal infections. Treat any issues promptly with organic pest control methods or consult a local garden center for appropriate remedies.
By following these care instructions, you will give your hog plum seedlings the best possible start in life and ensure their healthy development. After a few months, your seedlings will be ready for transplantation into their permanent home. Let’s move on to the next step: transplanting the seedlings.
Read more: How To Grow Plum Seeds
Step 5: Transplanting the Seedlings
Once your hog plum seedlings have grown to a size of 6-8 inches and have developed a strong root system, it’s time to transplant them into their permanent location. Here’s how to do it:
- Choose the right location: Select a sunny spot in your garden with well-draining soil. Hog plum trees thrive in tropical or subtropical climates and require full sun to produce abundant fruit.
- Prepare the planting hole: Dig a hole that is twice as wide and deep as the root ball of the seedling. This will provide enough space for the roots to establish and grow.
- Remove the seedling from its pot: Carefully remove the seedling from its pot, being mindful not to damage the delicate roots. Gently loosen the roots if they are compacted or tangled.
- Place the seedling in the hole: Position the seedling in the center of the hole, making sure it is upright. Backfill the hole with soil, gently firming it around the roots to remove any air pockets.
- Water thoroughly: Give the newly transplanted seedling a thorough watering to help settle the soil and remove any remaining air pockets. Water regularly during the first few weeks to promote root establishment.
- Provide support if needed: If your hog plum tree is tall and may be susceptible to strong winds or heavy fruiting, provide support with stakes or a trellis. Secure the tree to the support with soft ties or twine.
- Mulch around the tree: Apply a layer of organic mulch around the base of the tree, leaving a small gap around the trunk to prevent moisture buildup. Mulch helps retain soil moisture and suppresses weed growth.
Transplanting your hog plum seedlings can be a delicate process, so be gentle and take your time to ensure the roots are properly handled. With the right care and attention, your hog plum tree will soon grow and bear delicious fruits. Now, let’s explore the final step: harvesting hog plums!
Step 6: Harvesting Hog Plums
After patiently nurturing your hog plum tree, the time will come when you can finally enjoy the fruits of your labor. Harvesting hog plums requires careful observation and timing. Here’s what you need to know:
- Observe the fruit: Monitor the progress of your hog plum tree as it starts to bear fruit. The fruit will change color from green to a yellowish-orange when it is ripe and ready for harvest.
- Test for ripeness: Gently squeeze a fruit in your hand to check for ripeness. A ripe hog plum will give slightly under gentle pressure and feel soft to the touch.
- Pick the fruits: Use a pair of gardening shears or a sharp knife to harvest the ripe hog plums. Cut the fruit from the tree, making sure to leave a short stem attached. Avoid pulling or twisting the fruit, as this can damage the branches.
- Handle with care: Place the harvested hog plums in a shallow container or basket to avoid bruising or squashing. Handle them gently to prevent any damage to the fruit.
- Store or consume: Hog plums are best enjoyed fresh when they are perfectly ripe. If you have harvested more than you can consume, store them in a cool, dry place for a few days. Alternatively, you can make delicious jams, chutneys, or desserts with excess fruit.
Remember, hog plums can continue to ripen off the tree, so it’s essential to monitor your tree closely and harvest the fruits at the peak of ripeness. Enjoy the unique flavor of hog plums and savor the rewards of your hard work and dedication.
As your hog plum tree matures, it will continue to produce fruits year after year. With each harvest, you will be reminded of the joy and satisfaction that comes from growing your own fruit.
Now that you have learned how to grow hog plum from seed and enjoyed the process from start to finish, it’s time to put your newfound knowledge into action and embark on your hog plum growing journey. Happy gardening!
Conclusion
Growing hog plum from seed is a rewarding and fulfilling experience for any gardener. From carefully preparing the seeds to nurturing the seedlings and finally harvesting the delicious fruits, the journey of growing hog plum allows you to connect with nature and witness the miracle of life unfolding.
By following the step-by-step guide provided in this article, you now have the knowledge and tools to successfully grow your own hog plum tree. Remember to gather all the necessary supplies, prepare the seeds, provide proper care, and transplant the seedlings into a suitable location. With patience and dedication, you’ll soon be able to enjoy the tangy and juicy fruits of your labor.
Whether you have a small backyard or a spacious garden, hog plum trees can bring a touch of the exotic to your outdoor space. Their lush foliage, fragrant blossoms, and delectable fruits make them a wonderful addition to any garden or orchard.
Throughout the process, don’t forget to observe and appreciate the growth of your hog plum tree. Take the time to nurture your tree, ensuring it receives adequate sunlight, water, and nutrients. By providing proper care and addressing any issues promptly, you can help your tree thrive and flourish for years to come.
Remember, gardening is not just about the end result; it is about the journey and the connection we form with the plants we grow. So, get your hands dirty, enjoy the process, and revel in the joys of witnessing your own hog plum tree blossom and bear fruit.
Wishing you a bountiful harvest and many delightful moments as you embark on your hog plum growing adventure!
Now that you're on your way to growing hog plum from seed, you might wonder about the next steps toward a thriving garden. Understanding how seeds sprout is crucial for any gardener. Ready to learn more about the time it takes for seeds to begin their journey? Our detailed guide on seed germination will shed light on this vital process, setting you up for success in your gardening adventures. Don't miss out on mastering this essential gardening skill!
Frequently Asked Questions about How To Grow Hog Plum From Seed
Was this page helpful?
At Storables.com, we guarantee accurate and reliable information. Our content, validated by Expert Board Contributors, is crafted following stringent Editorial Policies. We're committed to providing you with well-researched, expert-backed insights for all your informational needs.


0 thoughts on “How To Grow Hog Plum From Seed”