Home>Garden Essentials>How To Grow Plum From Seed
Garden Essentials
How To Grow Plum From Seed
Modified: August 20, 2024
Learn how to grow plum from seed in your garden with these simple and effective tips. Enjoy the satisfaction of watching your very own plum tree thrive and bear delicious fruits.
(Many of the links in this article redirect to a specific reviewed product. Your purchase of these products through affiliate links helps to generate commission for Storables.com, at no extra cost. Learn more)
Introduction
Growing plums from seeds can be a rewarding and cost-effective way to enjoy your own fresh and juicy plums right from your own garden. While growing plum trees from seeds requires patience and dedication, it is a fascinating process that allows you to witness the magic of nature unfold.
Plum trees are not only beautiful additions to any garden, but they also provide a bountiful harvest of succulent fruits. By selecting the right plum seed, preparing it properly, and providing the optimal growing conditions, you can successfully grow your own plum tree from seed and enjoy the fruits of your labor.
In this article, we will guide you through the step-by-step process of growing a plum tree from seed. From selecting the right seed to caring for the sapling and eventually harvesting plums, we will provide you with all the information you need to successfully grow your very own plum tree.
So, roll up your sleeves and get ready to embark on this exciting journey of growing plums from seed. Let’s dive in and explore the steps involved in growing a plum tree from a tiny seed.
Key Takeaways:
- Growing plums from seeds is a patient and rewarding process that allows you to witness nature’s magic. From selecting the right seed to caring for the tree, you can enjoy the journey of growing your own plum tree.
- By providing optimal conditions and care, you can grow a healthy plum tree from seed and eventually harvest delicious plums. It’s a transformative journey that connects you with nature and brings the joy of growing your own fruit trees.
Read more: How To Grow Hog Plum From Seed
Step 1: Selecting the right plum seed
The first and crucial step in growing a plum tree from seed is selecting the right plum seed. While it is possible to grow plums from seeds obtained from store-bought fruits, it is recommended to choose seeds from locally grown plums or from a reliable nursery. This ensures that the seeds are from a variety that is well-suited to the local climate and growing conditions.
When selecting a plum seed, look for fresh, healthy, and fully ripe plums. Avoid seeds from overripe or damaged fruits, as they may not germinate successfully. Keep in mind that plum trees grown from seeds may not produce fruits with the same characteristics as the parent tree. However, they can still yield delicious plums that are unique in flavor and appearance.
After obtaining the plums, extract the seeds carefully. Rinse them to remove any pulp or residue, and then pat them dry with a paper towel. It is important to work with clean and dry seeds to prevent the growth of mold or fungi during the germination process.
Once you have selected and prepared your plum seeds, it’s time to move on to the next step: preparing the seeds for planting.
Step 2: Preparing the seed for planting
Preparing the plum seed for planting is an essential step to ensure successful germination and healthy growth of the seedling. There are a few methods you can use to enhance the seed’s viability and promote optimal growth.
One effective method is stratification, which simulates the natural conditions that the seed would experience during the winter. To stratify the plum seed, place it in a sealed plastic bag with a moistened paper towel or damp peat moss. Store the bag in the refrigerator for about 8 to 12 weeks. This cold stratification process breaks the seed’s dormancy and prepares it for germination.
Alternatively, you can also scarify the plum seed to promote germination. Scarification involves gently scratching or nicking the seed coat to help water penetrate and initiate the germination process. Use a small file or sandpaper to lightly scar the seed coat, being careful not to damage the inner part of the seed.
After stratification or scarification, it is recommended to soak the plum seed in water overnight to rehydrate it. This will further enhance germination rates and prepare the seed for planting.
Now that the plum seed is prepared for planting, let’s move on to the next step: actually planting the seed and giving it the right conditions for growth.
Step 3: Planting the plum seed
Now that you have prepared the plum seed, it’s time to plant it and provide the right conditions for germination. Follow these steps to ensure successful planting:
1. Choose a suitable container: Select a container with good drainage to plant the plum seed. A small pot or seed tray will work well. Make sure the container is clean and sterilized to prevent any potential diseases or pests.
2. Fill the container with potting mix: Use a well-draining potting mix that is suitable for seed starting. Avoid using garden soil, as it may be too heavy and compact for the delicate roots of the plum seedling.
3. Plant the seed: Make a small hole in the potting mix, about 1 inch deep. Place the plum seed in the hole, with the scarified or stratified side facing down. Gently cover the seed with potting mix, ensuring it is snugly nestled in the soil.
4. Water the seed: After planting, water the seed thoroughly to ensure the potting mix is moist. Be careful not to overwater, as excessive moisture can lead to rotting. Maintain a consistently moist environment throughout the germination period.
5. Provide warmth and light: Place the container in a warm location with plenty of indirect sunlight. A temperature range of 70-80°F (21-27°C) is ideal for plum seed germination. You can also use a seedling heat mat or cover the container with a plastic dome to create a mini greenhouse effect that retains heat and moisture.
6. Germination period: Germination can take anywhere from a few weeks to a couple of months for plum seeds. Be patient and keep an eye on the container for any signs of sprouting.
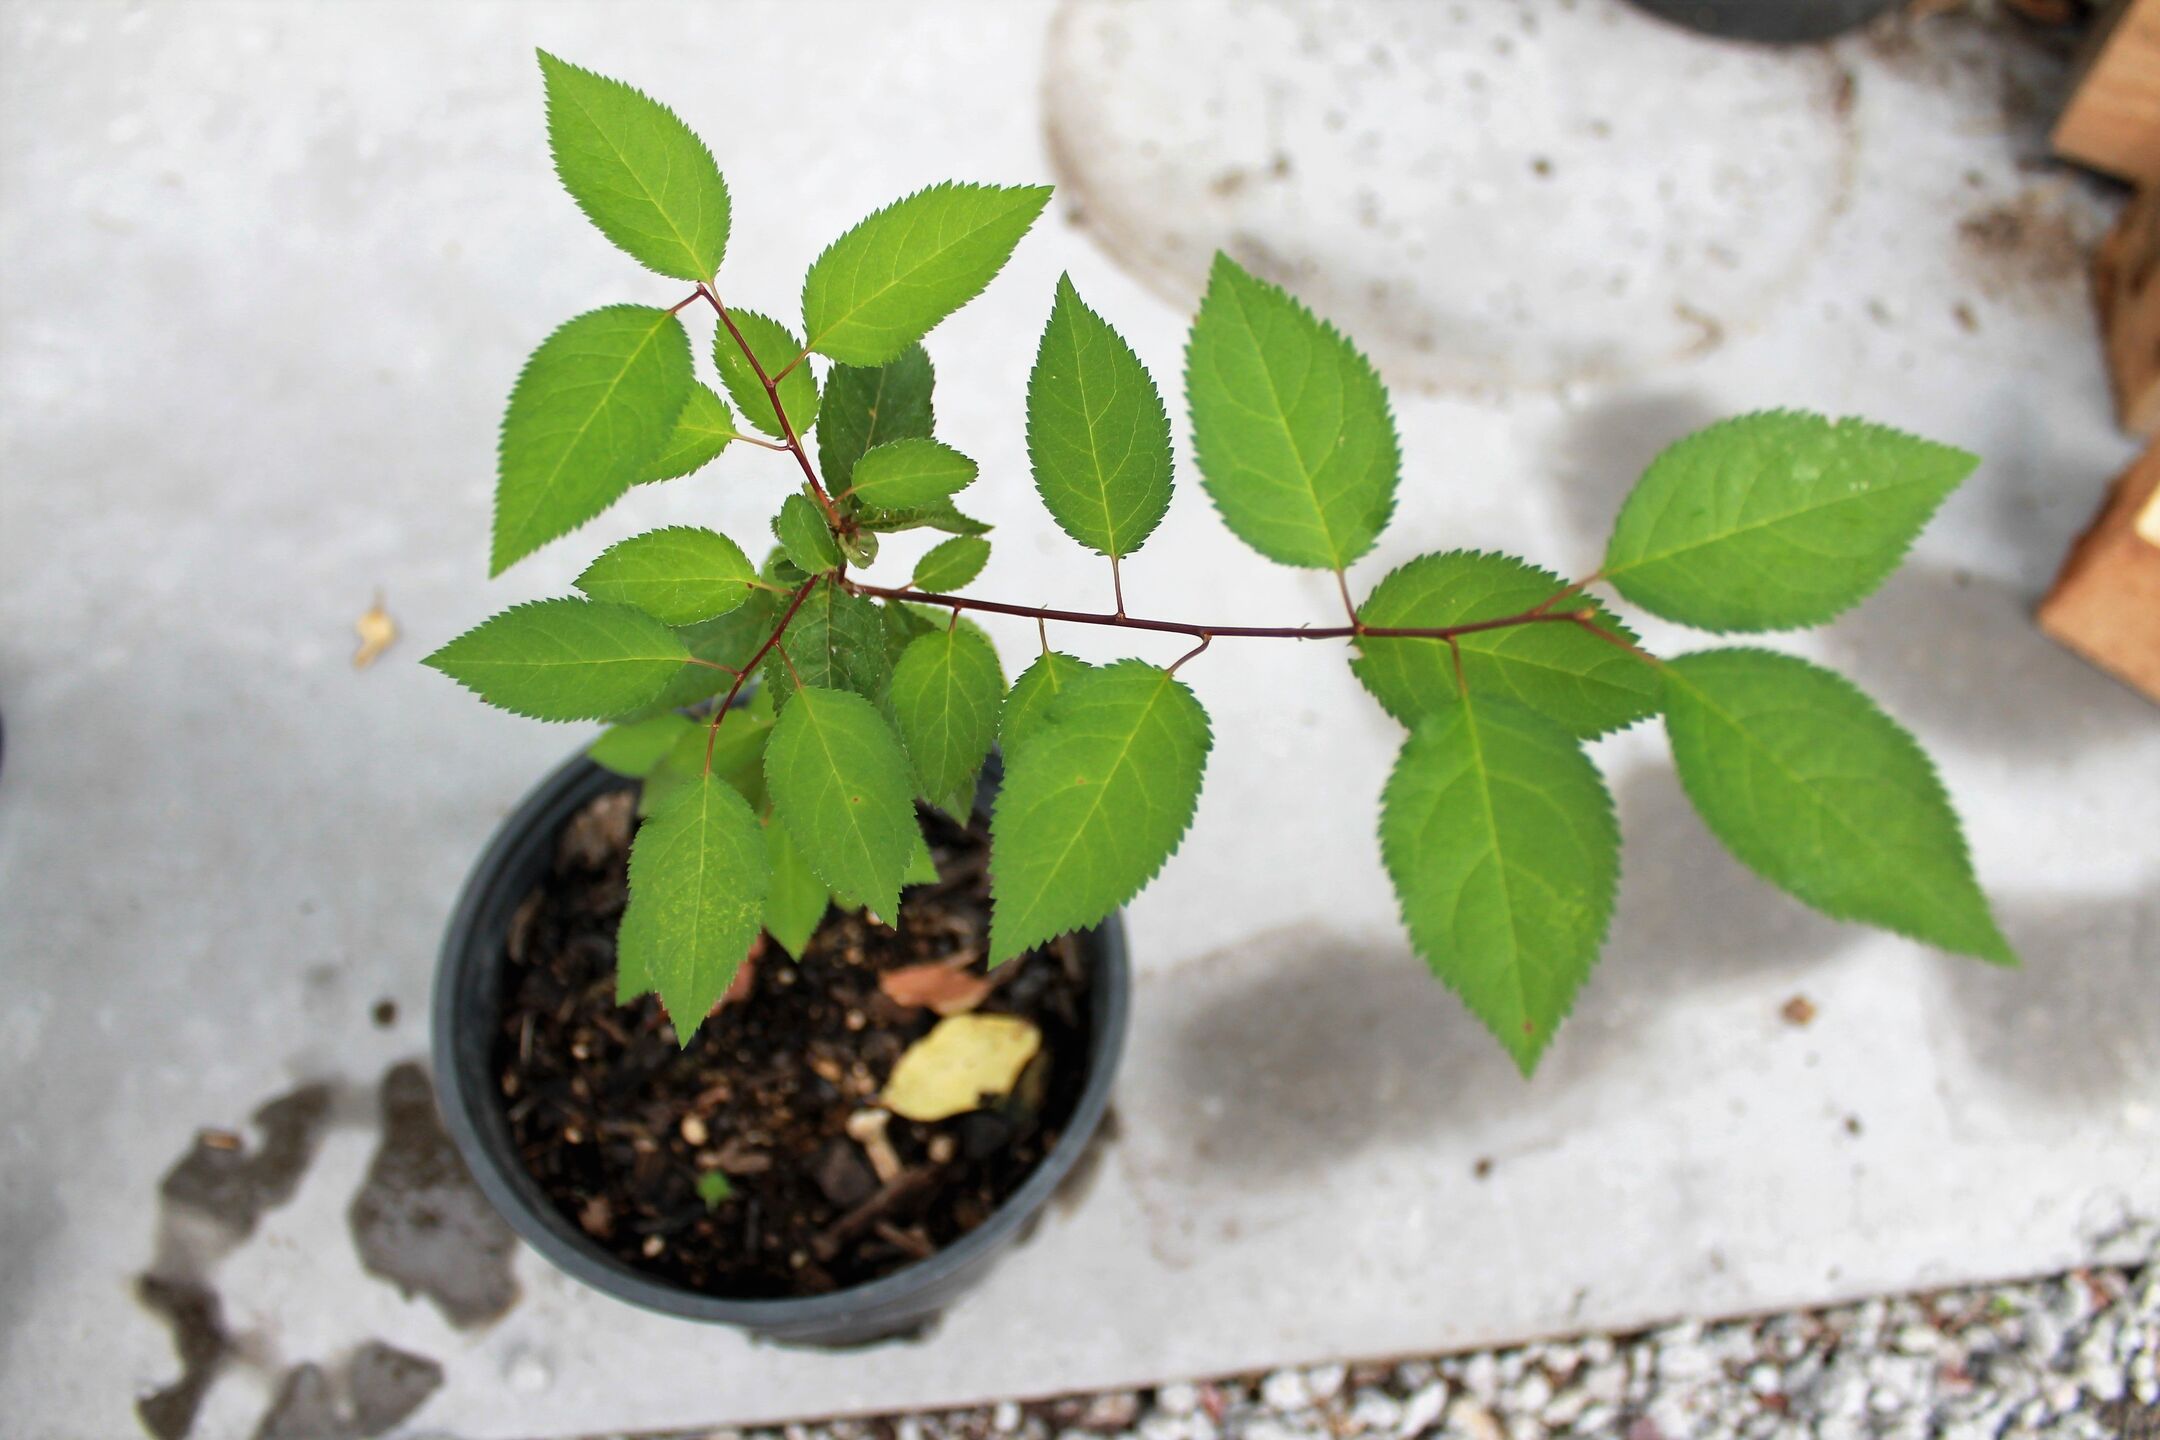
By following these steps and ensuring the right conditions, you are giving your plum seed the best chance of germinating and growing into a healthy seedling. Once the seedling emerges from the soil, it’s time to move on to the next step: providing optimal growing conditions for the plum tree.
Step 4: Providing optimal growing conditions
Once your plum seedling has emerged and started to grow, it’s crucial to provide it with the optimal growing conditions to ensure its healthy development. Follow these guidelines to foster the growth of your plum tree:
1. Sunlight: Place the pot or container in a sunny location where your plum tree can receive at least 6 to 8 hours of direct sunlight each day. Sunlight is essential for the tree’s photosynthesis process and overall growth.
2. Watering: Keep the soil consistently moist, but avoid overwatering. Water the plum tree when the top inch of soil feels dry to the touch. Ensure that the container has adequate drainage to prevent waterlogging, as overly wet soil can lead to root rot.
3. Fertilization: As the seedling grows, you can begin applying a balanced, slow-release fertilizer to provide essential nutrients. Follow the manufacturer’s instructions for the specific fertilizer you choose. Avoid over-fertilization, as it can cause nutrient burn and damage the tree.
4. Temperature and humidity: Plum trees thrive in moderate temperatures. Ideally, maintain a temperature range of 60-80°F (15-27°C) during the growing season. Additionally, plums prefer a humid environment. If the air in your area is dry, you can increase the humidity by misting the leaves or placing the container on a tray filled with water and pebbles.
5. Pruning: Once your plum tree has grown a few sets of leaves, you can start pruning to encourage a strong, well-shaped tree. Trim any damaged or overcrowded branches, and remove any suckers that grow at the base of the tree. Pruning helps promote proper airflow and prevents disease.
By providing your plum tree with these optimal growing conditions, you are giving it the best chance to thrive and bear fruit in the future. As your tree continues to grow, it will require ongoing care and attention. Let’s move on to Step 5, where we will discuss how to care for your growing plum seedling.
After removing the seed from the plum, dry it for a few days. Plant the seed in well-draining soil, keep it moist, and place it in a sunny spot. It may take a few years for the tree to produce fruit.
Read more: How To Grow Plum Seeds
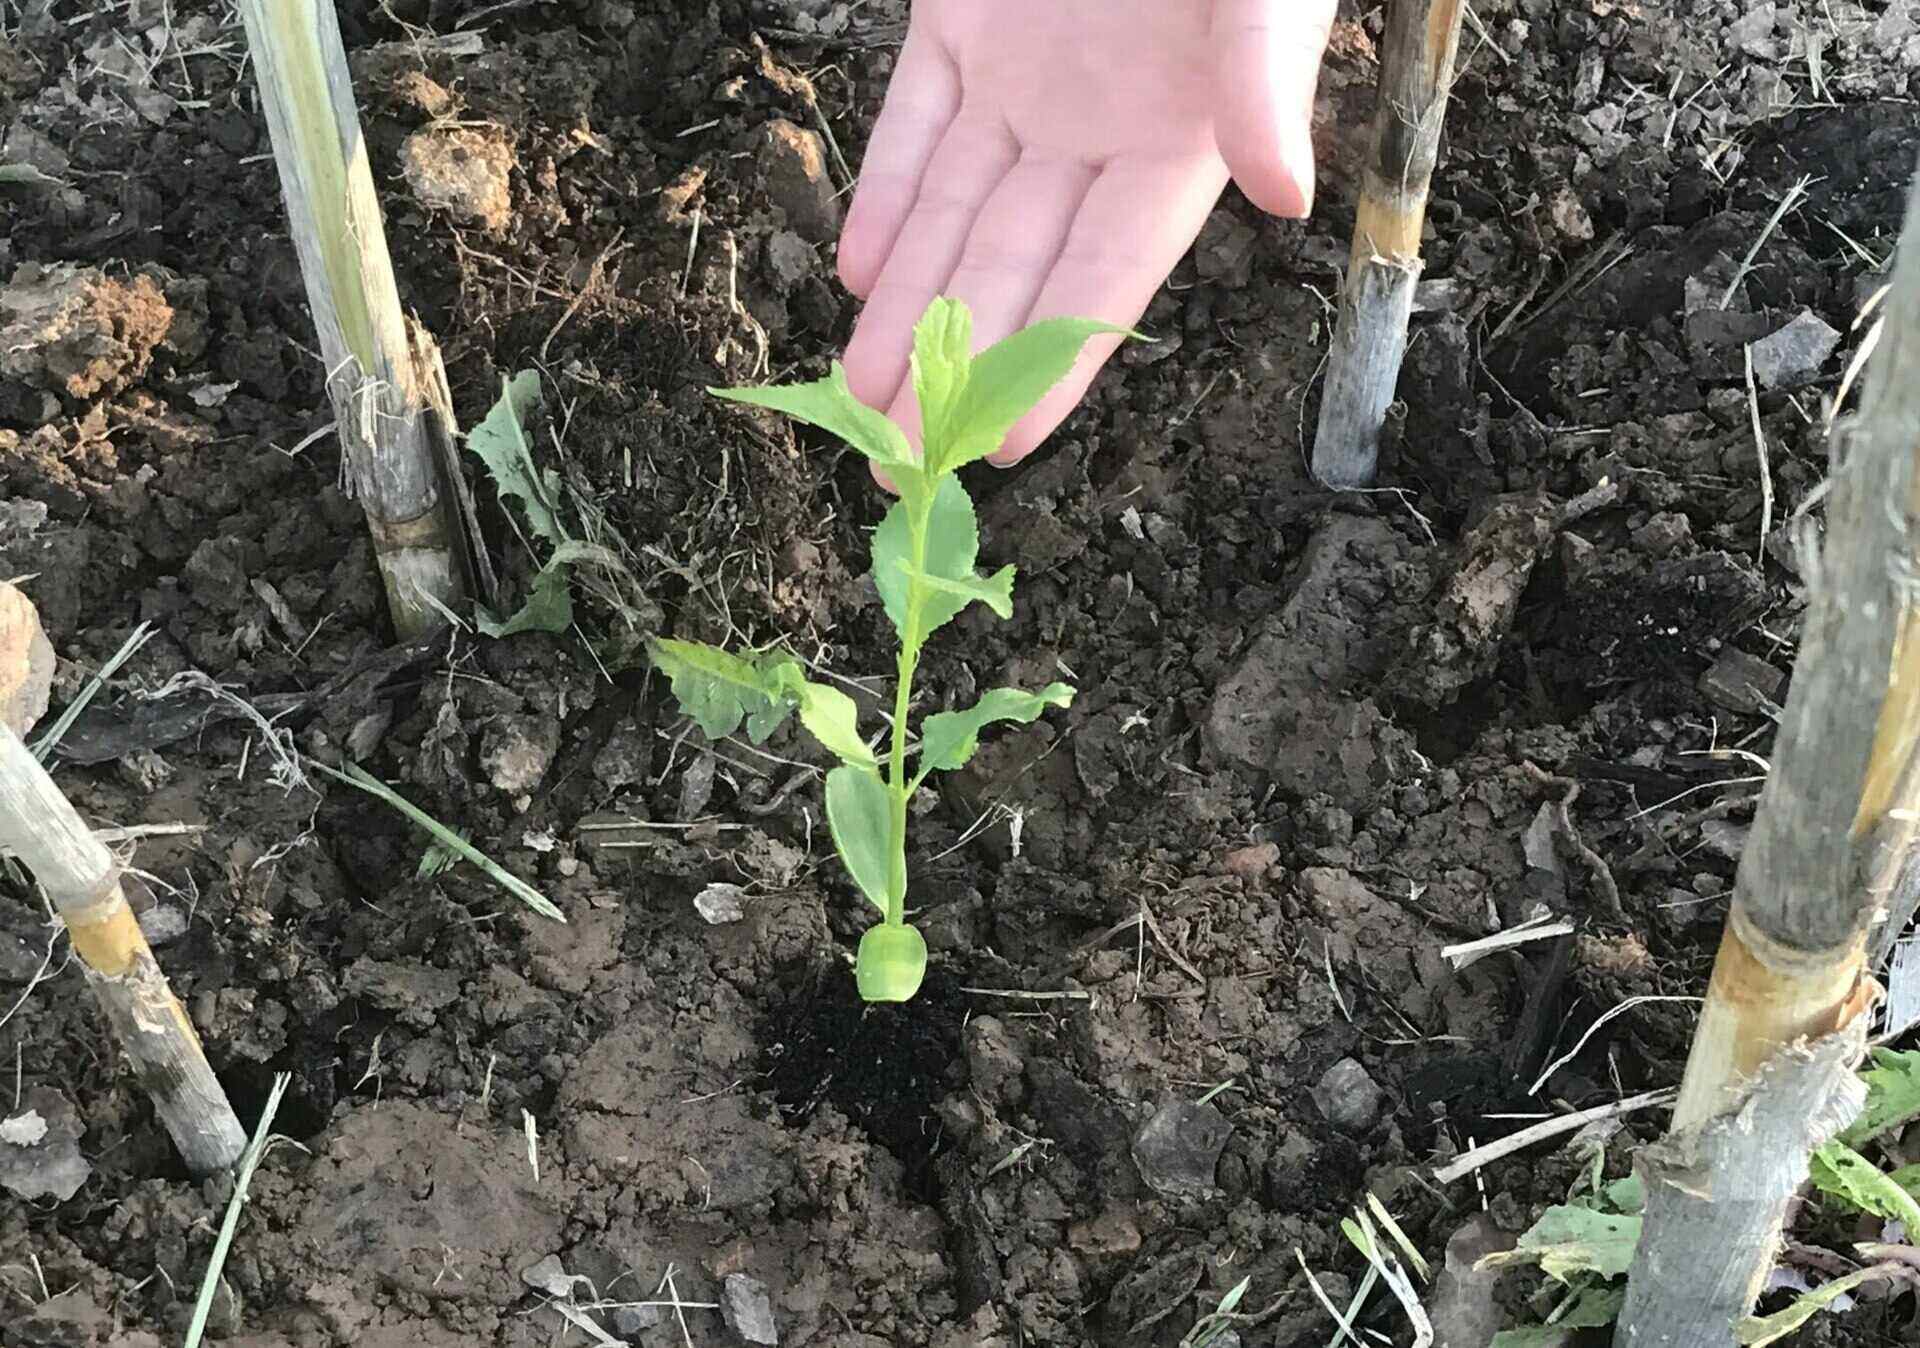
Step 5: Caring for the growing plum seedling
As your plum seedling continues to grow and develop into a young tree, it’s important to provide proper care to ensure its health and vigor. Follow these steps to care for your growing plum seedling:
1. Watering: Maintain consistent moisture levels by watering the plum seedling regularly. Water deeply, allowing the water to penetrate the soil and reach the roots. Aim to keep the soil moist but not waterlogged. Avoid drought stress by increasing watering during dry periods.
2. Mulching: Apply a layer of organic mulch around the base of the plum tree. This helps to conserve moisture, prevent weed growth, and regulate soil temperature. Leave a small gap between the mulch and the trunk to prevent rotting.
3. Supporting the trunk: If your plum seedling is tall and slender, it may benefit from staking for support. Use a sturdy stake and tie the trunk to it gently with a soft material, allowing the tree to grow upright and strong.
4. Pest and disease management: Regularly inspect your plum seedling for any signs of pests or diseases, such as aphids, fungal infections, or leaf spot. If detected, take appropriate measures to address the issue, such as using organic insecticides or fungicides, or employing cultural practices like pruning affected branches.
5. Training and shaping: As your plum tree grows, you may need to guide its growth by pruning and shaping. Remove any competing branches and encourage a balanced canopy structure. Prune in late winter or early spring when the tree is dormant to shape it according to your preferences.
6. Monitoring growth and development: Keep an eye on the overall growth and development of your plum tree. Look for the emergence of flowers, the formation of fruits, and signs of any nutrient deficiencies or stress. Adjust your care practices accordingly to support optimal growth and productivity.
By providing proper care and attention to your growing plum seedling, you are fostering its development into a strong, healthy tree that will eventually reward you with a bountiful harvest of delicious plums. Now that you’ve cared for the seedling, let’s discuss the next step: transplanting the plum seedling into its permanent location.
Step 6: Transplanting the plum seedling
Once your plum seedling has grown sufficiently and is ready to be moved to its permanent location, it’s time to transplant it. Transplanting the seedling properly will help ensure its successful establishment in the new spot. Here are the steps to transplant your plum seedling:
1. Choose the right time: The best time to transplant your plum seedling is in early spring or late fall when the tree is dormant. This allows the tree to adjust to its new surroundings without the added stress of actively growing or extreme temperatures.
2. Select the planting location: Choose a sunny location with well-draining soil for your plum tree. Ensure there is enough space for the tree to grow and spread its branches as it matures. Consider factors such as nearby structures or other plants that may shade the tree or compete for nutrients.
3. Dig the hole: Dig a hole in the new planting site that is wider and slightly deeper than the root ball of your plum seedling. Loosen the soil in the surrounding area to encourage root growth.
4. Remove the seedling from the container: Gently tap or squeeze the container to loosen the seedling’s root ball. Carefully slide the seedling out, taking care not to damage the roots. If the seedling is in a biodegradable container, you can plant it directly into the hole.
5. Place the seedling in the hole: Position the seedling in the center of the hole, making sure that the base of the trunk is level with or slightly above the surrounding soil. Backfill the hole with the loosened soil, gently firming it around the roots to remove air pockets. Avoid compacting the soil too firmly, as it can hinder root growth.
6. Water and mulch: After transplanting, give your plum seedling a deep watering to settle the soil and provide moisture for the roots. Apply a layer of organic mulch around the base of the tree, leaving a small gap around the trunk. Mulching helps retain soil moisture, suppress weeds, and protect the roots from extreme temperatures.
7. Provide post-transplant care: Monitor the newly transplanted plum seedling closely for the first few weeks. Water it regularly to keep the soil moist but not overly saturated. Protect the tree from extreme weather conditions, such as strong winds or frost, by providing temporary shelter if necessary.
By following these steps, you can ensure a successful transplant and give your plum seedling the best chance to thrive in its new location. Now, it’s time to move on to the final step: maintaining and eventually harvesting your plum tree.
Step 7: Maintaining and harvesting your plum tree
Once your plum tree is established and growing in its permanent location, it’s important to provide ongoing care and attention to ensure its health and productivity. Here are some key steps to maintain and eventually harvest your plum tree:
1. Watering: Continue to water your plum tree regularly, especially during dry spells. Deep, infrequent watering is generally better than frequent shallow watering. Monitor the soil moisture and adjust watering as needed, aiming to keep the soil consistently moist but not waterlogged.
2. Fertilization: Feed your plum tree with a balanced, slow-release fertilizer in early spring before the growing season begins. Follow the package instructions for application rates and timings. Additional fertilizer applications may be necessary if your soil is deficient in certain nutrients, as indicated by soil tests.
3. Pruning: Pruning is important for maintaining the shape, health, and productivity of your plum tree. Prune in late winter or early spring while the tree is dormant. Remove any dead or diseased branches, thin out overcrowded areas, and shape the tree to promote airflow and sunlight penetration. Pruning also helps stimulate the growth of new fruiting wood.
4. Pest and disease management: Regularly inspect your plum tree for signs of pests or diseases, such as aphids, plum curculio, brown rot, or powdery mildew. Take appropriate measures to manage these issues, such as using organic insecticides or fungicides when necessary. Encourage natural predators and beneficial insects to help control pest populations.
5. Harvesting: Plum trees typically bear fruit 3-5 years after planting, depending on the variety. Plums are ready for harvest when they are fully ripe and have reached their characteristic color and firmness. Gently twist or slightly lift the plums to determine if they detach easily from the tree. Harvest the plums carefully to avoid damaging the branches or the fruit.
6. Enjoying the harvest: Once you have harvested your plums, they can be consumed fresh, used in various culinary preparations, or preserved by canning, freezing, or making jams and jellies. Remember to thoroughly wash the plums before using them and store them in a cool, dry place if not consumed immediately.
By following these maintenance and harvesting steps, you can enjoy a plentiful harvest of delicious plums from your tree. Remember that each plum variety may have specific care requirements, so it’s essential to do research or consult local gardening resources for information specific to your plum tree’s variety.
Congratulations on successfully growing and caring for your plum tree! With patience, dedication, and proper maintenance, you can continue to enjoy the fruits of your labor for years to come.
Now that you have the knowledge and steps to grow and maintain a plum tree from seed, it’s time to roll up your sleeves and start your own plum-growing adventure. Happy gardening!
Conclusion
Growing plums from seeds is a rewarding and fulfilling experience that allows you to witness the marvels of nature firsthand. Throughout this article, we have explored the step-by-step process of growing a plum tree from seed, from selecting the right seed to caring for the tree and eventually harvesting its delicious fruits.
By choosing high-quality plum seeds, preparing them properly through stratification or scarification, and providing optimal growing conditions, you can set the stage for successful germination and growth. Watering, fertilizing, pruning, and managing pests and diseases are essential steps in maintaining the health and productivity of your plum tree.
Once your plum tree matures and starts bearing fruits, the joy of harvesting and enjoying the sweet, juicy plums will be incredibly rewarding. Whether you savor the plums fresh off the tree or explore various culinary uses, such as making jams, jellies, or pies, the possibilities are endless.
Remember to adjust your care practices based on the specific needs of your plum variety, as different varieties may have slightly different requirements. Engage with local gardening resources and consult experts for guidance and tips tailored to your specific growing region.
Growing plums from seeds requires patience and dedication, as it may take several years for your tree to mature and produce a significant harvest. But the journey itself is a transformative one, allowing you to connect with nature, learn about plant growth, and develop a deeper appreciation for the fruits of your labor.
So, whether you’re a seasoned gardener or a novice enthusiast, why not try growing plums from seeds? It’s a wonderful way to add beauty to your garden, enjoy fresh and delicious plums, and experience the joy and satisfaction of growing your own fruit trees. Get started on this exciting journey and watch your plum tree grow and flourish before your eyes!
Frequently Asked Questions about How To Grow Plum From Seed
Was this page helpful?
At Storables.com, we guarantee accurate and reliable information. Our content, validated by Expert Board Contributors, is crafted following stringent Editorial Policies. We're committed to providing you with well-researched, expert-backed insights for all your informational needs.


0 thoughts on “How To Grow Plum From Seed”