Home>Garden Essentials>How To Grow Luffa From Seed
Garden Essentials
How To Grow Luffa From Seed
Modified: March 16, 2024
Learn how to grow luffa from seed in your garden. Follow our step-by-step guide for a successful luffa harvest.
(Many of the links in this article redirect to a specific reviewed product. Your purchase of these products through affiliate links helps to generate commission for Storables.com, at no extra cost. Learn more)
Introduction
Welcome to the world of luffa! If you’re a gardening enthusiast looking to add something unique and interesting to your garden, growing luffa plants from seed might be just the project for you. Luffa, also known as sponge gourd or loofah, is a fascinating plant that not only provides a beautiful vine for your garden but also yields versatile and natural sponges. In this article, we will take you through the steps of growing luffa from seed, from choosing the right seeds to caring for the plants throughout the growing season.
Luffa plants belong to the Cucurbitaceae family and are native to Asia. They are warm-season annual vines that thrive in tropical and subtropical climates. While the mature gourds are commonly used as a scrubbing sponge, luffa plants also produce beautiful yellow flowers that add a touch of elegance to any garden. By following the right techniques, you can successfully grow luffa plants in your backyard and enjoy the process of watching them flourish.
Before you jump into the world of luffa gardening, it’s important to understand that these plants require specific conditions and care. They need a long growing season, ample sunlight, well-draining soil, and regular maintenance to thrive. With the right knowledge and a bit of patience, you can master the art of growing luffa and enjoy the rewards of a bountiful harvest.
In the upcoming sections, we will guide you through the complete process of growing luffa from seed. From choosing the right seeds to preparing the soil, from planting the seeds to providing the right growing conditions, we will cover all the important steps to ensure success in your luffa gardening journey. So, roll up your sleeves, grab your gardening tools, and let’s dive into the world of luffa cultivation!
Key Takeaways:
- Growing luffa from seed requires careful planning and attention to detail. From choosing the right seeds to providing optimal growing conditions, this guide equips you with the knowledge to nurture healthy luffa plants.
- Harvesting luffa at the right time is crucial for culinary or sponge use. With proper care, you can enjoy the rewards of homegrown luffa while embracing sustainable gardening practices.
Read more: How Long For Luffa To Germinate
Getting Started
Before you start growing luffa from seed, there are a few important things to consider and gather. Here’s a checklist to ensure you’re well-prepared:
- Seeds: Obtain high-quality luffa seeds from a reputable source. Look for seeds that are specifically meant for eating or sponges, depending on your desired purpose for growing luffa.
- Growing Space: Determine where you plan to grow your luffa plants. They require ample space to spread their vines, so choose an area with plenty of room for trellises or supports.
- Support Structures: Luffa vines are vigorous climbers and need a sturdy support structure to grow on. Install trellises, fences, or other supports before planting the seeds.
- Growing Season: Check your climate and determine the appropriate time to plant. Luffa plants require a long growing season of around 150-200 days, so make sure you have enough time before the arrival of frost or cold temperatures.
- Sunlight: Ensure your chosen growing space receives full sun for a minimum of 6-8 hours per day. Luffa plants thrive in warm and sunny conditions.
- Soil Preparation: Test your soil’s pH and fertility. Luffa plants prefer well-draining soil with a slightly acidic to neutral pH range of 5.5-7.5.
- Gardening Tools: Gather essential gardening tools like a spade, garden fork, rake, watering can, and pruners to assist in the planting and maintenance of luffa plants.
- Water Source: Ensure easy access to a water source for regular watering. Luffa plants require consistent moisture throughout the growing season.
Once you have all the necessary items and have considered the requirements, you’re ready to embark on your luffa growing adventure. The next step is to choose the right luffa seeds for your desired purpose, which we’ll explore in the following section.
Choosing the Right Seeds
When it comes to choosing luffa seeds, there are a few factors to consider. The first decision you’ll need to make is whether you want to grow luffa for eating or for sponges. Let’s explore the options:
Eating Luffa: If you’re interested in growing luffa for culinary purposes, look for varieties specifically bred for their delicious fruit. These edible luffa varieties have smaller, tender gourds with a mild flavor and crunchy texture. They can be used in various Asian stir-fry dishes, soups, or pickled for a unique twist.
Sponge Luffa: On the other hand, if you’re interested in growing luffa for its natural sponges, choose varieties that are specifically bred for this purpose. These varieties produce larger gourds with fibrous, thick skin that, when dried, can be used as eco-friendly and sustainable sponges for bathing and cleaning. The fibrous texture of the mature luffa gourd makes it an excellent natural exfoliating sponge.
Once you’ve decided the purpose of growing luffa, it’s time to select the specific variety. There are various luffa cultivars available, each with its own unique characteristics. Consider the following factors when choosing the right luffa seeds:
Climate Suitability: Check if the luffa variety you’re considering is suitable for your climate. Some varieties are better adapted to tropical or subtropical regions, while others can tolerate a wider range of climates.
Gourd Size: Different varieties produce luffa gourds of varying sizes. Consider the space available in your garden and your intended use for the luffa to determine whether you prefer smaller or larger gourds.
Growing Time: Take note of the estimated growing time for each variety. Some luffa cultivars have a shorter maturation period, which can be beneficial in regions with shorter growing seasons.
Reviews and Recommendations: Look for reviews and recommendations from other gardeners or reputable sources. Their experiences and insights can help you make an informed decision about which luffa variety to choose.
Once you’ve settled on the perfect luffa variety, you’re ready to move on to the next step: preparing the soil. In the following section, we’ll provide guidance on how to ensure the optimal soil conditions for your luffa plants.
Preparing the Soil
Before planting luffa seeds, it’s crucial to prepare the soil to provide the best growing conditions for your plants. Here are the steps to follow:
1. Clear the Area: Start by clearing the planting area of any weeds, rocks, or debris. Luffa plants need space to spread, so ensure there are no obstructions that could hinder their growth.
2. Loosen the Soil: Use a garden fork or a tiller to loosen the soil to a depth of about 12-18 inches. This will help improve drainage and create a loose, friable soil texture for the luffa roots to easily penetrate.
3. Amend the Soil: Mix organic matter such as compost or well-rotted manure into the soil. This will enrich the soil with nutrients and improve its structure. Aim for a ratio of about 2-3 inches of organic matter per square foot of planting area.
4. Test the Soil pH: Luffa plants prefer slightly acidic to neutral soil with a pH range of 5.5-7.5. Use a soil testing kit to determine the pH of your soil. If it’s outside the desired range, you can adjust it by adding amendments like sulfur to lower the pH or lime to raise it.
5. Provide Adequate Drainage: Ensure proper drainage by amending the soil with perlite, sand, or vermiculite if your soil tends to be heavy or clayey. This will prevent waterlogging and root rot, which can be detrimental to luffa plants.
6. Rake and Level the Soil: Rake the soil surface to level it and remove any large clumps or debris. This will create a smooth and even surface for sowing the luffa seeds.
By following these steps, you’ll create a nutrient-rich and well-drained soil environment that is ideal for luffa plant growth. Once the soil is prepared, it’s time to move on to the exciting part: planting the luffa seeds. In the next section, we’ll guide you through the process of sowing the seeds and getting your luffa plants off to a great start.
Planting the Seeds
Now that you’ve prepared the soil, it’s time to sow your luffa seeds. Follow these steps to ensure successful germination and healthy plant growth:
1. Determine the Planting Time: Luffa plants require warm soil temperatures to germinate and thrive. Wait until all danger of frost has passed and the soil has warmed up to at least 65°F (18°C) before planting. This is usually around the same time you would plant other warm-season crops like cucumbers or melons.
2. Spacing: Space your luffa plants adequately to allow room for their vigorous vines to spread. Plant them about 3 feet (90 cm) apart to ensure sufficient airflow and sunlight penetration between the plants.
3. Sow the Seeds: Make a small hole or trench in the soil about 1 inch (2.5 cm) deep. Place the luffa seeds in the hole, spacing them about 6-8 inches (15-20 cm) apart. Cover the seeds with soil and gently press it down to ensure good seed-to-soil contact.
4. Water the Seeds: After sowing the seeds, give them a gentle watering. This will help settle the soil and provide the initial moisture needed for germination. Be careful not to overwater, as excessively wet conditions can lead to seed rot.
5. Provide Protective Covering (Optional): If you live in a cooler climate or want to jumpstart the germination process, consider using row covers or plastic cloches to create a mini greenhouse effect. This will help trap heat and provide a warmer environment for the seeds to germinate.
6. Label and Maintain: Place plant labels or markers near each planting row to keep track of the luffa variety and planting date. Once your luffa plants start to emerge, maintain consistent moisture and observe regular watering practices.
Luffa seeds typically germinate within 7-10 days, depending on the ambient temperature. Once the seedlings emerge, it’s important to provide them with the right conditions to ensure their healthy development. In the following sections, we will guide you through the essential steps of providing the right growing conditions, watering, fertilizing, and protecting your luffa plants from pests and diseases.
Read more: How To Grow Okra From Seed
Providing the Right Conditions
Luffa plants thrive in warm and sunny conditions. Here’s how you can provide the optimal environment for their growth:
Sunlight: Locate your luffa plants in an area that receives full sun for at least 6-8 hours a day. The more sunlight they receive, the better their growth and fruit production.
Temperature: Luffa plants are heat-loving and require warm temperatures to thrive. Maintain an average temperature range of 70-90°F (21-32°C) throughout the growing season. Protect them from strong winds, as they can damage the vines.
Air Circulation: Good air circulation is essential for preventing diseases and promoting healthy plant growth. Avoid planting luffa too close together to allow for proper airflow. If necessary, use trellises or supports to keep the vines off the ground and enhance ventilation.
Soil Moisture: Luffa plants prefer consistently moist but not waterlogged soil. Monitor the soil moisture regularly and water deeply whenever the top inch (2.5 cm) of soil feels dry. Avoid overwatering, as it can lead to root rot and other issues. Mulching around the plants can help conserve moisture and regulate soil temperature.
Weed Control: Keep the area around your luffa plants free from weeds. Weeds can compete for nutrients and water, stunting the growth of your luffa plants. Regularly weed the area and use mulch to suppress weed growth.
Pruning and Training: As your luffa plants grow, they will produce long vines that need support and training. Regularly prune the side branches to redirect the plant’s energy towards fruit production. Train the main vines onto trellises or supports to keep them off the ground and prevent the gourds from rotting.
Pollination: Luffa plants require pollination for fruit set. Encourage pollinators such as bees and butterflies to visit your garden by planting flowers nearby. If you notice limited pollinator activity, you can gently hand-pollinate the flowers by transferring pollen using a small brush or cotton swab.
By providing these optimal conditions, you will set your luffa plants up for success, resulting in healthy growth and a bountiful harvest. However, in the gardening world, pests and diseases can pose challenges. In the next section, we will discuss how to manage common pests and diseases that may affect your luffa plants.
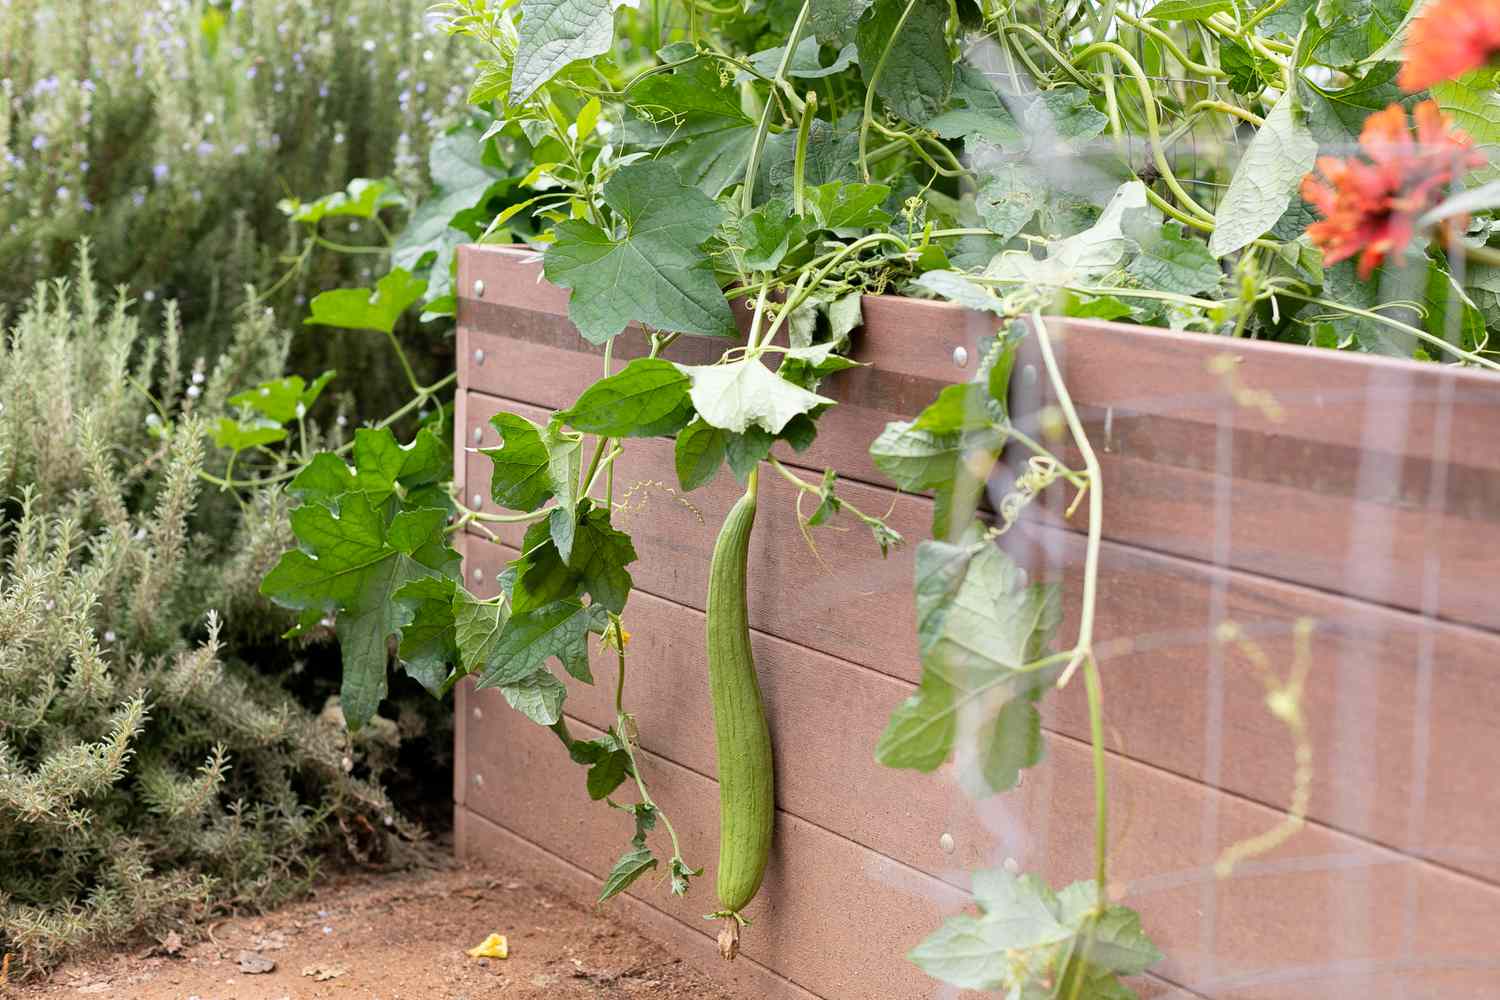
Plant luffa seeds in well-draining soil, keep them warm and moist, and provide a trellis for support as they grow. Luffa plants thrive in full sun and can be started indoors before transplanting outside.
Watering and Fertilizing
Proper watering and fertilization are essential for the healthy growth and productivity of luffa plants. Here’s what you need to know:
Watering:
Consistent moisture is vital for luffa plants, especially during periods of active growth. Follow these watering guidelines to ensure optimal hydration:
- Water deeply once a week, providing enough water to saturate the root zone. This encourages the roots to grow deeper and become more drought-tolerant.
- Avoid shallow and frequent watering, as it can lead to shallow root development.
- Monitor the soil moisture level regularly. Stick your finger about an inch (2.5 cm) into the soil. If it feels dry, it’s time to water.
- Mulch around the plants to conserve moisture and reduce evaporation. Organic mulches like straw or shredded leaves work well.
- Water in the morning to allow foliage to dry before nightfall, reducing the risk of fungal diseases.
Fertilizing:
Luffa plants benefit from regular fertilization to ensure they receive the necessary nutrients for healthy growth and abundant fruit production. Follow these fertilization tips:
- Before planting, incorporate well-rotted compost or aged manure into the soil to provide a nutrient-rich foundation.
- Apply a balanced organic fertilizer or slow-release granular fertilizer at planting time according to package instructions. This will provide a steady supply of nutrients throughout the growing season.
- Side-dress the plants with additional fertilizer once they start producing flowers. Use a nitrogen-rich fertilizer to promote vigorous vine growth and fruit development.
- Avoid excessive use of nitrogen, as it can result in excessive vine growth at the expense of fruit production.
- Regularly monitor the plants for signs of nutrient deficiencies, such as yellowing leaves or stunted growth. Adjust your fertilization practices accordingly.
Remember to always follow the instructions on the fertilizer packaging and avoid over-fertilizing, as it can harm the plants and cause environmental issues. With proper watering and fertilization, you’ll provide the nutrition needed for your luffa plants to thrive.
In the next section, we will discuss common pests and diseases that may pose a threat to your luffa plants and provide strategies for managing them.
Managing Pests and Diseases
Just like any other garden plants, luffa vines can be susceptible to certain pests and diseases. However, with proactive management strategies, you can keep these issues under control. Here are some common pests and diseases to watch out for and how to manage them:
Pests:
- Aphids: These tiny, soft-bodied insects can cluster on the undersides of leaves and feed on sap, causing stunted growth. Use insecticidal soap or horticultural oils to control aphids, or introduce beneficial insects like ladybugs to naturally control their population.
- Cucumber Beetles: These pests can transmit diseases and feed on both leaves and fruits. Use row covers or insect netting to protect young plants, and handpick or use organic insecticides labeled for cucumber beetles if an infestation occurs.
- Whiteflies: These small flying insects can cause leaf yellowing and transmit viruses. Encourage natural predators like lacewings or use yellow sticky traps to control whitefly populations.
- Caterpillars: Caterpillars, such as the pickleworm or corn earworm, can chew on leaves or bore into fruits. Regularly inspect plants and handpick any caterpillars or use organic insecticides targeted towards caterpillars.
Diseases:
- Powdery Mildew: Powdery mildew appears as a white, powdery coating on leaves and can hinder the plant’s growth. Ensure proper spacing and airflow, and avoid overhead watering. Apply fungicidal sprays or use organic treatments like neem oil to manage powdery mildew.
- Downy Mildew: Downy mildew manifests as yellow spots on the upper leaf surface and fuzzy growth on the undersides. Improve airflow and reduce leaf wetness by watering early in the day. Apply copper-based fungicides or use organic treatments containing Bacillus subtilis to control downy mildew.
- Root Rot: Excessive moisture or poorly drained soil can lead to root rot, causing wilting and stunted growth. Ensure proper drainage, avoid overwatering, and practice crop rotation to prevent root rot.
Regularly inspect your luffa plants for signs of pests or diseases, and take appropriate action at the first sign of trouble. Prevention is key, so maintain good cultural practices, such as proper spacing, regular pruning, and sanitizing garden tools. Additionally, selecting disease-resistant varieties can help mitigate risks.
By staying vigilant and implementing these pest and disease management strategies, you can keep your luffa plants healthy and thriving. Now that you’re armed with knowledge on managing potential challenges, let’s move on to the next section: training and supporting luffa vines.
Training and Supporting Luffa Vines
Luffa plants are vigorous climbers that require proper support and training to ensure they grow in a controlled and productive manner. Here are some tips for training and supporting your luffa vines:
Trellises:
Installing trellises or supports is essential for luffa vines to climb and sprawl without taking up excessive space in your garden. Follow these guidelines for trellis setup:
- Choose sturdy materials such as bamboo poles, wooden stakes, or metal trellises to provide support for the vines.
- Place the trellis in the ground before planting the luffa seeds or seedlings to avoid damaging the roots.
- Space the trellises 3-4 feet (90-120 cm) apart to allow the vines to spread and receive adequate sunlight and airflow.
- Ensure the trellis is at least 6-8 feet (180-240 cm) tall to accommodate the height of mature luffa plants.
- Secure the vines to the trellis using soft ties or plant clips, taking care not to constrict or damage the stems.
Training Techniques:
Luffa vines can be trained to grow in a vertical or horizontal direction, depending on the available space and your preference. Here are two common training methods:
- Vertical Training: When using vertical training, guide the main vine upwards along the trellis, securing it to the support structure as it grows. Prune the side branches regularly to redirect the plant’s energy towards fruit production and upward growth.
- Horizontal Training: If you have limited vertical space, you can train the luffa vines horizontally along a fence or other support. Allow the vines to spread out laterally, securing them at intervals along the support structure.
Regular Pruning:
Pruning is an important practice for maintaining the health and productivity of luffa plants. Follow these pruning guidelines:
- Regularly inspect the vines and prune off any damaged, diseased, or dead branches. This helps improve air circulation and reduces the risk of pest and disease problems.
- Pinch off excessive side shoots or suckers that divert energy away from fruit production.
- Remove any fruits that have deformed or are not developing properly to focus the plant’s resources on larger, healthy gourds.
Proper training and support for luffa vines help maximize space utilization, enhance airflow, and promote even ripening of the gourds. By implementing these techniques, you’ll be well on your way to a successful and organized luffa garden.
In the next section, we’ll discuss the exciting part: harvesting luffa!
Read more: How To Grow A Tree From A Seed
Harvesting Luffa
Harvesting luffa is an exciting and rewarding part of the gardening journey. Here’s everything you need to know about when and how to harvest your luffa gourds:
Timing:
The optimal time to harvest luffa depends on your intended purpose. If you’re growing luffa for culinary use, harvest the gourds when they reach a length of about 4-6 inches (10-15 cm). At this stage, the gourds are tender and have a mild flavor. For sponge luffa production, allow the gourds to mature on the vine until they turn yellow and the skin becomes dry and fibrous.
Appearance:
When harvesting luffa for sponges, look for gourds that are fully mature and have a yellow color. The skin should feel hard and rough to the touch. Avoid harvesting luffa that are still green or have a smooth texture, as they will not yield high-quality sponges.
Harvesting Technique:
Follow these steps to harvest luffa:
- Use a sharp knife or gardening shears to cut the luffa gourd from the vine, leaving a short stem attached.
- Handle the harvested luffa with care to avoid damaging the delicate skin.
- For culinary luffa, rinse the gourds thoroughly under running water to remove any dirt or debris.
- For sponge luffa, place the harvested gourds in a warm, well-ventilated area to dry. This process can take several weeks, and you’ll know the gourds are fully dry when the skin turns brown and becomes lightweight.
Storing Luffa:
Store culinary luffa in the refrigerator in a perforated plastic bag or a container lined with paper towels. They will stay fresh for about a week or two.
Once your sponge luffa gourds have dried completely, store them in a dry and cool place to prevent moisture buildup and mold.
Saving Seeds:
If you want to save luffa seeds for future planting, allow a few selected gourds to stay on the vine until they turn brown and dry. Once completely dry, break open the gourds and collect the seeds. Store the seeds in a cool, dry place in a labeled envelope or airtight container until you’re ready to plant them again.
By following these harvesting guidelines, you’ll enjoy the fruits of your labor and have luffa gourds ready for culinary delights or natural sponge usage.
In the final section, we’ll discuss the essential care practices to ensure the long-term health and productivity of your luffa plants.
Caring for Luffa Plants
Proper care is crucial to ensure the long-term health and productivity of your luffa plants. Here are some essential care practices to follow:
Regular Watering:
Consistent moisture is vital for luffa plants throughout the growing season. Water deeply once a week, providing enough water to saturate the root zone. Monitor soil moisture regularly and adjust watering frequency based on weather conditions.
Mulching:
Apply a layer of organic mulch, such as straw or shredded leaves, around your luffa plants. Mulching helps conserve moisture, regulate soil temperature, and suppress weed growth. It also adds organic matter to the soil as it breaks down.
Feeding:
Regularly feed your luffa plants with a balanced organic fertilizer according to package instructions. Side-dress the plants with additional nitrogen-rich fertilizer once they start producing flowers. Be cautious not to over-fertilize, as it can lead to excessive foliage growth at the expense of fruit production.
Pruning and Training:
Continue pruning your luffa plants throughout the growing season. Remove any damaged or diseased branches, as well as excessive side shoots or suckers. Regularly train the vines onto trellises or supports, redirecting their growth and maintaining airflow.
Monitoring Pests and Diseases:
Keep a watchful eye for any signs of pests or diseases on your luffa plants. Regularly inspect the foliage, stems, and fruits for any abnormalities. Act promptly if you notice any pests or signs of diseases, using organic interventions or natural methods to control them.
Support Maintenance:
Check the stability of trellises or supports regularly to ensure they can withstand the weight of the growing vines and developing fruits. Reinforce or repair them as needed to prevent any damage to the plants.
Crop Rotation:
Practice crop rotation to avoid soil-borne diseases and to maintain soil fertility. Avoid planting luffa or any other Cucurbitaceae family members in the same spot for consecutive years. Instead, rotate them with other crops like legumes or brassicas.
Harvesting and Seed Saving:
Harvest luffa fruits at the appropriate stage, whether for culinary use or sponge production. Properly store harvested luffa and save seeds for future planting, ensuring they are kept in a cool and dry place.
By following these care practices, you’ll provide the necessary attention and support for your luffa plants, resulting in healthy growth, high yields, and a successful gardening experience.
Congratulations! You now have a comprehensive understanding of how to grow luffa from seed. Whether you choose to cultivate luffa for its delicious gourds or eco-friendly sponges, enjoy the journey of nurturing these fascinating plants and reaping the rewards of your efforts.
Happy luffa gardening!
Conclusion
Congratulations on completing this guide to growing luffa from seed! By following the steps and tips outlined in this article, you’re well-equipped to embark on your luffa gardening journey. Whether your goal is to cultivate luffa for culinary purposes or to harvest natural sponges, the process of growing these unique plants can be both rewarding and enjoyable.
From choosing the right seeds to preparing the soil, planting the seeds, and providing the optimal growing conditions, you have learned the essential steps to ensure successful luffa cultivation. Additionally, you now have knowledge on how to effectively manage pests and diseases that may affect your luffa plants.
Caring for your luffa plants by watering adequately, providing nutrients, pruning, training vines, and monitoring for any issues will contribute to their overall health and productivity. And when the time comes, you’ll know exactly when and how to harvest your luffa gourds, whether for culinary delights or natural sponges.
Remember, gardening is an ongoing learning experience. Throughout your luffa growing journey, don’t hesitate to experiment, adapt to your specific climate and conditions, and seek additional resources to expand your knowledge. Join gardening communities, connect with fellow enthusiasts, and share your experiences and successes.
By growing luffa, you not only contribute to the beauty of your garden but also embrace sustainable practices. Luffa plants offer a renewable and eco-friendly alternative to synthetic sponges and bring a touch of nature’s bounty directly to your home.
Now, armed with your newfound knowledge, it’s time to get your hands dirty and start growing luffa from seed. Enjoy the process, watch your plants flourish, and relish the satisfaction of harvesting your own homegrown luffa. The journey awaits, filled with growth, discovery, and the joy of connecting with nature.
Happy luffa gardening!
Frequently Asked Questions about How To Grow Luffa From Seed
Was this page helpful?
At Storables.com, we guarantee accurate and reliable information. Our content, validated by Expert Board Contributors, is crafted following stringent Editorial Policies. We're committed to providing you with well-researched, expert-backed insights for all your informational needs.


0 thoughts on “How To Grow Luffa From Seed”