Home>Garden Essentials>How To Grow Maypop From Seed
Garden Essentials
How To Grow Maypop From Seed
Modified: March 15, 2024
Learn how to grow maypop in your garden from seed with these simple steps. Enjoy beautiful blooms and delicious fruits in your backyard.
(Many of the links in this article redirect to a specific reviewed product. Your purchase of these products through affiliate links helps to generate commission for Storables.com, at no extra cost. Learn more)
Introduction
Welcome to the wonderful world of gardening! There’s nothing quite like the joy of growing your own plants, especially when it comes to edible varieties. If you’re looking to add some unique and vibrant plants to your garden, maypop is an excellent choice. Maypop, scientifically known as Passiflora incarnata, is a native North American plant with beautiful flowers and delicious edible fruits.
In this article, we will guide you through the process of growing maypop from seed. Whether you’re a beginner or an experienced gardener, you’ll find useful tips and step-by-step instructions to help you establish a thriving maypop garden.
Maypop seeds are easily obtainable, either through online seed suppliers or by collecting them from mature maypop fruits. With a little patience and care, you can successfully propagate these fascinating plants and enjoy their beauty and harvest their fruits in your own backyard.
So, let’s dive in and explore the exciting journey of growing maypop from seed!
Key Takeaways:
- Growing maypop from seed is a fun and rewarding journey that involves collecting, scarifying, and planting the seeds. With patience and care, you can enjoy the vibrant flowers and delicious fruits of maypop in your own garden.
- Providing the right growing conditions, such as sunlight, soil, and water, is essential for nurturing healthy maypop plants. Troubleshooting common issues like poor germination and pest infestation can help ensure a thriving garden.
Read more: How To Grow Okra From Seed
Step 1: Collecting Maypop seeds
The first step in growing maypop from seed is collecting the seeds themselves. Maypop fruits are small, round, and green when unripe, turning yellow or orange when ripe. They are typically ready for harvest in late summer or early fall.
When the fruits are fully ripe, they will be slightly soft to the touch and may even start to wrinkle. Gently twist or pull the fruits off the vine, being careful not to damage them. Ensure that you collect fruits from healthy and disease-free plants for the best chance of successful germination.
Once you have harvested the maypop fruits, it’s time to extract the seeds. Cut open the fruits using a sharp knife or scissors, and you will find several small, black seeds inside. These seeds are usually surrounded by a gel-like substance, which can be sticky. To separate the seeds from the gel, place them in a bowl of water and gently rub them between your fingers. Rinse the seeds thoroughly to ensure they are clean and free from any remaining fruit residue.
Make sure you collect more seeds than you plan to plant as not all maypop seeds will germinate. This will give you a higher chance of success. It’s also a good idea to keep the seeds labeled and stored in a cool, dry place until you’re ready to plant them.
Now that you have a collection of maypop seeds, let’s move on to the next step: preparing the planting container.
Step 2: Preparing the planting container
Once you have collected your maypop seeds, it’s time to prepare the planting container. Choosing the right container is crucial for the successful growth of your maypop plants.
Start by selecting a container that has good drainage. This could be a seed tray, a pot, or even a recycled container with drainage holes. The container should be at least 4-6 inches deep to allow for proper root development. Using a container with drainage holes will prevent waterlogging and ensure that excess water can easily drain away.
Next, fill the container with a well-draining potting mixture. You can use a pre-mixed potting soil or make your own by combining equal parts of peat moss, perlite, and vermiculite. This mixture will provide the right balance of moisture retention and aeration for the seeds to germinate and the seedlings to thrive.
Before adding the potting mixture, moisten it slightly with water, but be careful not to make it too soggy. This will create a moist environment for the seeds without being overly wet, which could lead to rotting.
Once the container is filled with the moist potting mixture, it’s time to move on to the next step: scarifying the maypop seeds.
Step 3: Scarifying the Maypop seeds
In order to improve the germination rate of maypop seeds, scarification is necessary. Scarification is the process of breaking or weakening the hard seed coat to allow moisture to penetrate and promote germination.
To scarify maypop seeds, you have a few options. One method is to gently rub the seeds with sandpaper or a nail file to create small abrasions on the seed coat. Another method is to soak the seeds in warm water overnight. The water will soften the seed coat and aid in the germination process. Alternatively, you can also use a sharp knife or clippers to make tiny cuts on the seed coat, being careful not to damage the embryo inside.
After scarifying the maypop seeds, they are ready for the next step: soaking.
Please note that not all seeds may require scarification. Some maypop seeds have a thinner seed coat that allows for easier germination without scarification. However, scarifying the seeds can still increase the overall germination rate and speed up the process.
Now that the maypop seeds have been scarified, let’s move on to the next step: soaking the seeds.
Step 4: Soaking the Maypop seeds
Soaking the scarified maypop seeds is an important step to help kickstart the germination process. This process involves immersing the seeds in water for a specific period of time to provide them with the necessary moisture they need to break dormancy.
To soak the maypop seeds, you will need a container or a glass filled with room temperature water. Place the scarified seeds into the water and make sure they are fully submerged. Allow the seeds to soak for about 24 to 48 hours.
During the soaking period, keep an eye on the seeds and change the water if it becomes cloudy or stagnant. Fresh water will help maintain the optimal conditions for germination.
Soaking the seeds allows them to absorb the necessary moisture and can help speed up the germination process. It also softens the seed coat, making it easier for the emerging seedling to push through.
After the soaking period, you’re ready to move on to the next step: planting the maypop seeds.
Remember, patience is key when growing seeds. While some maypop seeds may sprout quickly after soaking, others may take several weeks or even months. Be prepared for varying germination times and continue to provide the necessary care and attention.
Read more: How To Grow A Tree From A Seed
Step 5: Planting the Maypop seeds
With your scarified and soaked maypop seeds ready, it’s time to plant them and give them a cozy home to germinate and grow. Follow these steps to ensure a successful planting process:
- Fill small individual pots or seed trays with moist potting soil. Make a small indentation in the soil, about ¼ inch deep.
- Place one maypop seed in each indentation. Gently cover the seed with a thin layer of soil, ensuring it is not buried too deeply.
- Label each pot or tray with the date of planting and the seed variety to keep track of your plants.
- Water the pots or trays gently to provide moisture. Avoid overwatering, as it can lead to rotting. Maintain a consistently moist but not waterlogged environment.
- Place the pots or trays in a warm location with indirect sunlight. Ideal temperatures for germination range between 70-85°F (21-29°C).
- Consider using a plastic cover or placing the pots in a plastic bag to create a humid environment, which can enhance germination rates.
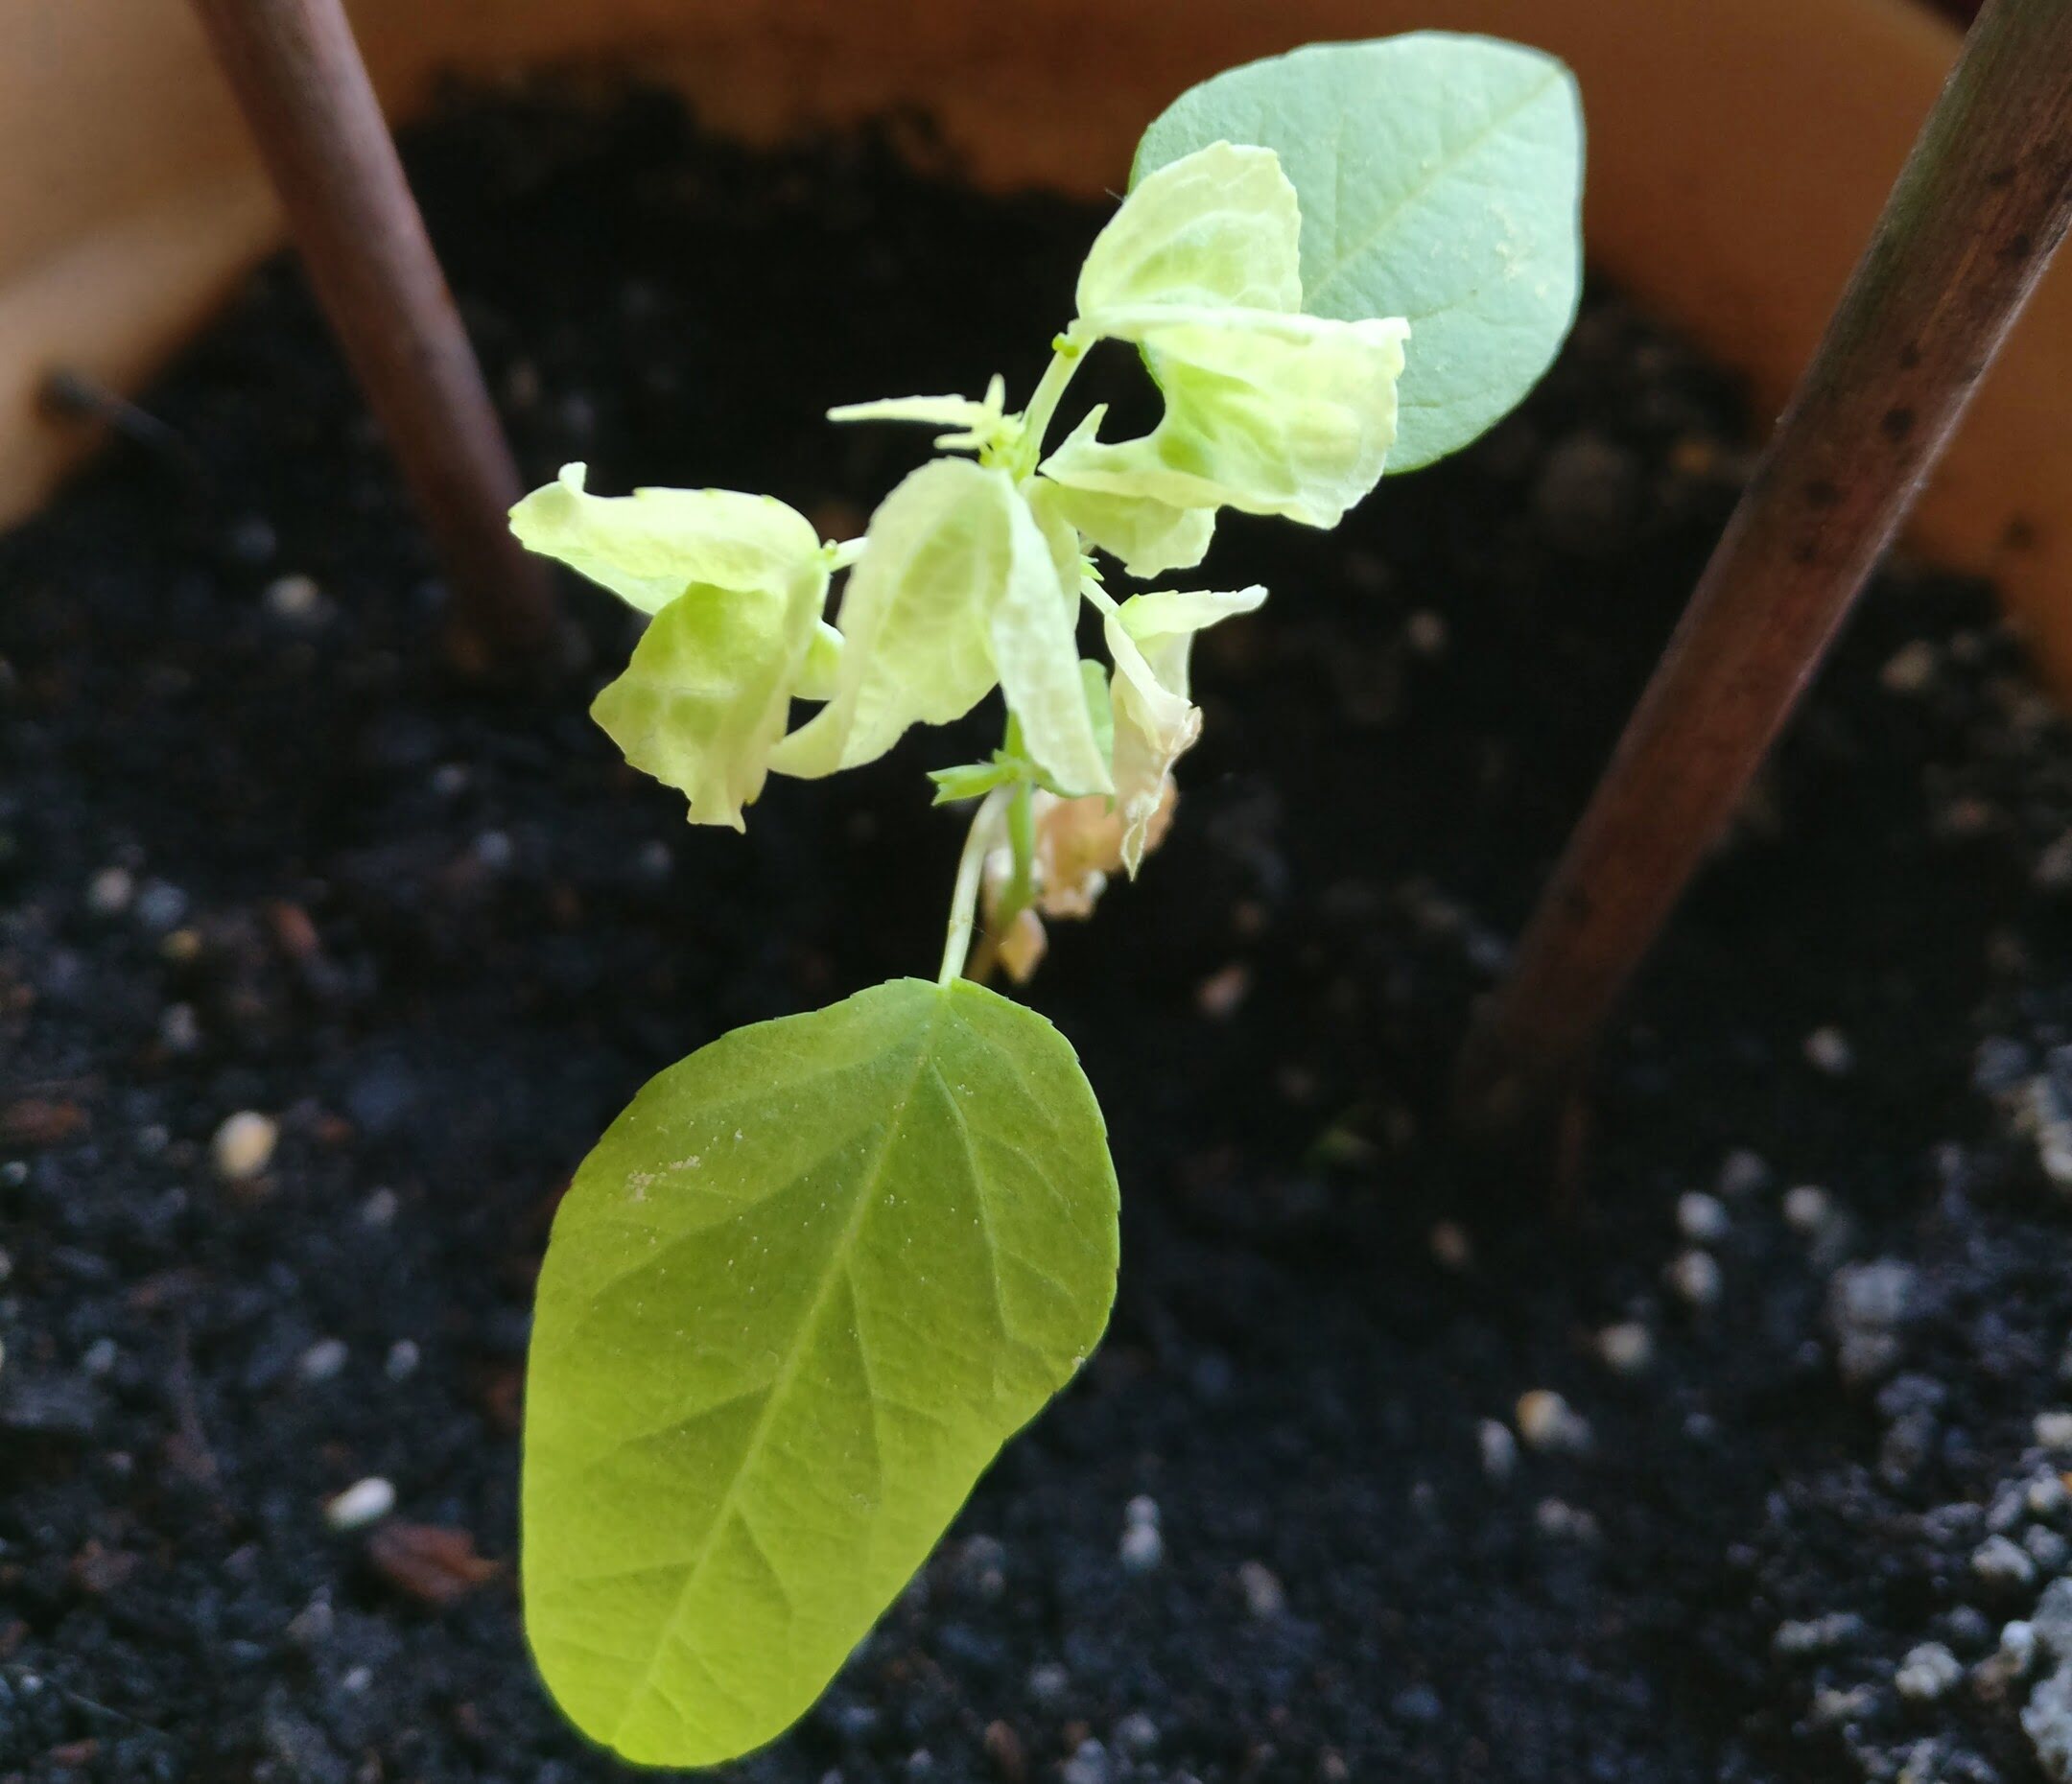
Be patient and monitor the pots or trays regularly for any signs of germination. It can take anywhere from several weeks to a few months for the maypop seeds to sprout, so do not be discouraged if you don’t see immediate results.
Once the maypop seedlings have emerged and grown to a suitable size, it’s time to transition them to their permanent growing location. This brings us to the next step: transplanting the maypop seedlings.
After collecting maypop seeds, soak them in warm water for 24 hours to soften the seed coat. Then, plant them in well-draining soil and keep them consistently moist until they germinate.
Step 6: Providing the right growing conditions
Once your maypop seedlings have reached a suitable size, it’s important to provide them with the right growing conditions to ensure their long-term health and vigor. Here are some tips to help you create an optimal environment:
- Sunlight: Maypops thrive in full sun to partial shade. Place them in a location where they will receive at least 6-8 hours of direct sunlight each day.
- Soil: Maypops prefer well-draining soil with a slightly acidic to neutral pH level of 6.0-7.0. If your garden soil is heavy clay, consider amending it with organic matter or planting in raised beds to improve drainage.
- Watering: While maypops are relatively drought-tolerant, they do appreciate regular watering, especially during dry spells. Aim to keep the soil evenly moist, but be cautious of overwatering, as it can lead to root rot.
- Mulching: Apply a layer of organic mulch, such as straw or wood chips, around the base of the plants. Mulching helps retain moisture, suppresses weed growth, and regulates soil temperature.
- Support: Maypop vines can grow quite long and may require support as they begin to climb. Consider providing a trellis, fence, or other sturdy structure for them to cling to.
- Fertilization: Maypops do not require heavy fertilization. Applying a balanced, slow-release fertilizer in the spring can provide them with the necessary nutrients. Avoid over-fertilizing, as it can lead to excessive leaf growth at the expense of fruit production.
By providing the right growing conditions, your maypop plants will thrive and produce abundant flowers and fruits. Additionally, monitoring the plants for any signs of pests or diseases and taking necessary action promptly will help maintain their overall health.
Now that you have set the stage for successful growth, it’s time to move on to the next step: caring for the maypop plants.
Step 7: Transplanting the Maypop seedlings
Once your maypop seedlings have grown to a size where they can handle transplanting, it’s time to move them to their permanent growing location. In this step, we will guide you through the process of safely transplanting your maypop seedlings:
- Choose an area in your garden that offers full sun to partial shade and has well-draining soil.
- Prepare the planting hole by digging a hole slightly larger than the rootball of your seedling.
- Carefully remove the seedlings from their pots, being cautious not to damage the delicate roots.
- Place the seedling into the planting hole, ensuring that the top of the rootball is level with the surrounding soil surface.
- Backfill the hole with soil, gently pressing it down to secure the seedling in place.
- Water the transplanted seedling thoroughly to help settle the soil and provide hydration to the roots.
- Apply a layer of mulch around the base of the plant to help retain moisture and suppress weed growth.
- Continue to monitor the transplanted seedlings closely, providing regular water and ensuring they receive adequate sunlight.
Transplant shock is common when moving seedlings, so it’s important to take extra care during this process. Avoid transplanting during the hottest part of the day, as the heat can stress the plants further. Instead, choose a cooler time of day, such as early morning or late afternoon.
It’s normal for transplanted seedlings to undergo an adjustment period, during which they may show signs of wilting or slower growth. With proper care and attention, they will bounce back and continue to grow and thrive.
Now that your maypop seedlings are in their new home, let’s move on to the next step: caring for the maypop plants.
Step 8: Caring for the Maypop plants
Now that you have successfully transplanted your maypop plants, it’s important to provide them with the proper care to ensure their health and productivity. Here are some key elements to include in your care routine:
- Watering: Maypops benefit from regular watering, especially during dry periods. Water deeply, ensuring the soil is evenly moist but not waterlogged. Aim to provide about 1 inch of water per week.
- Fertilizing: Apply a balanced, slow-release organic fertilizer in the spring, following the package instructions. This will provide the necessary nutrients for healthy growth and fruit production.
- Pruning: Prune your maypop plants in early spring, before new growth emerges. Remove any dead or damaged branches and thin out crowded areas to promote better airflow and light penetration.
- Support: As the maypop vines grow, they may require support to prevent them from sprawling on the ground. Install a trellis, arbor, or other support structure for the vines to climb and keep them off the ground.
- Pest and disease control: Regularly inspect your maypop plants for any signs of pests, such as aphids or spider mites, and promptly take necessary measures to control their population. Likewise, watch for symptoms of diseases like fungal leaf spots and treat accordingly.
- Harvesting: Maypops are ready for harvest when the fruit turns yellow or orange and starts to wrinkle. Gently twist or pull the fruit from the vine when it is fully ripe. The fruit is delicious and can be eaten raw or used in various culinary preparations.
By providing consistent care and attention, your maypop plants will flourish and reward you with an abundance of beautiful flowers and delicious fruits. Remember to monitor them regularly, address any issues promptly, and adjust your care routine as needed based on the specific needs of your plants.
Now that you’re equipped with the knowledge to care for your maypop plants, let’s move on to the next step: harvesting the Maypop fruits.
Read more: How To Grow Zinnias From Seed
Step 9: Harvesting the Maypop fruits
After months of care and patience, your maypop plants are finally ready to reward you with their delicious fruits. Harvesting the maypop fruits at the right time ensures optimal flavor and sweetness. Here’s what you need to know:
- Observe the color and texture: Maypop fruits are typically ready to harvest when they turn from green to yellow or orange. The fruit should feel slightly soft to the touch and may even start to wrinkle.
- Gently twist or pull: To harvest the maypop fruit, grasp it gently and give it a slight twist or pull. The fruit should detach easily from the vine. Avoid pulling too forcefully, as this may cause damage to the plant.
- Handle with care: Maypop fruits have a delicate skin, so handle them gently to prevent bruising or puncturing.
- Enjoy the fruits: Maypop fruits have a unique and tangy flavor with a hint of sweetness. They can be eaten fresh, added to fruit salads, used in desserts, or even made into refreshing juices and jams.
- Store or consume promptly: Maypop fruits are best enjoyed when fresh. However, if you have a surplus, they can be stored in the refrigerator for up to a week. To prolong their freshness, store the fruits in a perforated plastic bag to allow for air circulation.
Remember, maypop fruits are not only delicious but also a rich source of nutrients. They are high in vitamin C and contain antioxidants, making them a healthy addition to your diet.
Now that you know how to harvest your maypop fruits, let’s move on to the final step: troubleshooting common issues that may arise while growing maypop.
Step 10: Troubleshooting common issues
While growing maypop can be a rewarding experience, it’s not uncommon to encounter some challenges along the way. Here are some common issues that may arise and how to troubleshoot them:
- Poor germination: If you’re experiencing low germination rates, ensure that the seeds have been properly scarified and soaked. Also, check for adequate moisture, temperature, and light conditions during the germination period. Consider using fresh seeds or trying different scarification methods to improve germination.
- Slow growth: Maypop plants can take time to establish and start growing. If growth seems slow, ensure they are receiving enough sunlight, water, and nutrients. Consider adjusting the growing conditions or using organic fertilizers to promote healthy growth.
- Pest infestation: Maypops can be susceptible to pests like aphids, spider mites, and caterpillars. Regularly inspect your plants and take action at the first sign of infestation. Use organic pest control methods such as insecticidal soap or neem oil to manage the pests effectively.
- Disease issues: Maypops can be prone to fungal diseases such as leaf spots and root rot. To prevent these issues, avoid overwatering, provide good air circulation, and avoid overcrowding the plants. Removing and disposing of diseased leaves can help mitigate the spread of fungal diseases.
- Failure to flower or fruit: If your maypop plants are not producing flowers or fruits, it could be due to insufficient sunlight, inadequate pollination, or nutritional deficiencies. Ensure they are receiving 6-8 hours of direct sunlight, encourage pollinators in your garden, and fertilize appropriately to provide the necessary nutrients.
Remember, gardening is a continuous learning process, and not every challenge can be avoided. With patience, observation, and proactive maintenance, you can overcome most issues and enjoy a thriving maypop garden.
Congratulations on completing all the steps to grow maypop from seed! By following these guidelines and troubleshooting tips, you will have a beautiful and fruitful garden filled with maypop plants. Enjoy the journey of growing and harvesting these unique and delightful fruits!
Conclusion
Congratulations! You have now completed all the steps to grow maypop from seed and have acquired the knowledge to successfully cultivate these fascinating plants in your own garden. From collecting the seeds to caring for the plants and harvesting their delicious fruits, you have embarked on a rewarding journey of gardening.
Maypop, with its vibrant flowers and delectable fruits, adds beauty and flavor to any garden. By following the step-by-step instructions provided in this article, you have learned how to collect seeds, prepare the planting container, scarify and soak the seeds, plant and transplant the seedlings, and care for the plants throughout their growth cycle.
Remember to provide the right growing conditions, such as adequate sunlight, well-draining soil, and proper watering. Regularly monitor your plants for any signs of pests or diseases and take prompt action to mitigate them. Harvest the ripe fruits and enjoy their unique taste and nutritional benefits.
While challenges may arise along the way, such as poor germination or slow growth, the troubleshooting tips provided will help you navigate these issues and continue to nurture your maypop garden. Gardening is a constant learning experience, and every challenge is an opportunity to grow and improve your skills.
So, let your green thumb thrive and enjoy the beauty and bounty of your maypop plants. Whether you’re using them as ornamental vines, attracting pollinators to your garden or delighting in the delicious fruits they bear, maypop is sure to bring joy and satisfaction to your gardening endeavors.
Thank you for joining us on this journey of growing maypop from seed. Happy gardening!
Frequently Asked Questions about How To Grow Maypop From Seed
Was this page helpful?
At Storables.com, we guarantee accurate and reliable information. Our content, validated by Expert Board Contributors, is crafted following stringent Editorial Policies. We're committed to providing you with well-researched, expert-backed insights for all your informational needs.


0 thoughts on “How To Grow Maypop From Seed”