Home>Garden Essentials>How To Grow Olive Tree From Seed

Garden Essentials
How To Grow Olive Tree From Seed
Modified: April 28, 2024
Learn how to grow an olive tree from seed in your garden. Follow our step-by-step guide for successful olive tree propagation.
(Many of the links in this article redirect to a specific reviewed product. Your purchase of these products through affiliate links helps to generate commission for Storables.com, at no extra cost. Learn more)
Introduction
Welcome to the world of gardening, where nature and creativity come together to cultivate beautiful landscapes. If you have a passion for both gardening and cooking, then growing your own olive tree from seed is a rewarding endeavor that combines the best of both worlds. Not only will you have a stunning addition to your garden, but you will also be able to enjoy the fruits of your labor by harvesting your very own olives.
Olive trees (Olea europaea) have been revered for centuries for their beauty, resilience, and the delicious fruit they produce. Originating from the Mediterranean region, these hardy trees have adapted to a variety of climates and can thrive in both tropical and subtropical regions. By following a few simple steps, you can successfully grow your own olive tree from seed and enjoy the satisfaction of nurturing a plant from its humble beginnings.
Before we delve into the specifics of growing an olive tree from seed, it’s important to note that this process requires patience, as it may take several years for your tree to reach maturity and produce fruit. However, the journey itself is incredibly fulfilling, and the lush foliage and unique form of the olive tree will provide beauty and character to your outdoor space.
So, grab your potting soil, gardening tools, and enthusiasm, and let’s dive into the fascinating world of growing olive trees from seed!
Key Takeaways:
- Growing olive trees from seed is a patient and rewarding journey, combining gardening and cooking passions. It requires scarifying, soaking, and stratifying the seeds before planting in well-draining soil with ample sunlight.
- Providing proper care, including watering, fertilizing, and protecting from frost, is essential for young olive trees to thrive. Harvesting olives is a rewarding experience, offering the taste of homegrown olives after years of nurturing.
Collecting Olive Seeds
The first step in growing an olive tree from seed is to collect the ripe seeds from an existing olive fruit. This can be done by harvesting olives from a mature tree or by purchasing them from a local market or nursery.
When selecting olives for seed collection, look for fruit that is fully ripe and has a rich, dark color. Avoid using underdeveloped or damaged olives, as they may not contain viable seeds.
To extract the seeds from the olives, begin by thoroughly rinsing the fruit under cool, running water. This will remove any dirt or residue that may be present. Next, use a sharp knife to carefully cut around the circumference of the olive, being careful not to cut too deeply into the seed inside. Gently pry open the olive and remove the flat, oval-shaped seed inside.
Once you have collected the seeds, it’s important to remove any flesh or pulp that may be clinging to them. This can be accomplished by soaking the seeds in a bowl of water for 24 to 48 hours. During this time, the remaining pulp will soften and can be easily removed by gently rubbing the seeds with your fingers. Rinse the seeds again to ensure they are clean and free from any debris.
After preparing the seeds, you can choose to plant them immediately or store them for later use. If you opt for storage, place the seeds in a breathable bag or container and store them in a cool, dark location. Remember to label the container with the date to ensure you use the seeds within a reasonable timeframe.
Now that you have successfully collected olive seeds, it’s time to prepare them for planting and give them the best possible start for germination and growth.
Preparing the Olive Seeds for Planting
Before you plant the olive seeds, it is important to prepare them to increase their chances of successful germination. The following steps will guide you through the process:
- Scarification: Olive seeds have a hard outer shell that can inhibit water absorption and prevent germination. To overcome this barrier, you can scarify the seeds by carefully nicking the outer coating with a small file or sandpaper. This will create small openings for moisture to enter and stimulate germination.
- Soaking: After scarification, soak the olive seeds in warm water for 24 to 48 hours. This step helps to further soften the seed coat and encourage germination.
- Stratification: Olive seeds require a period of cold stratification to break dormancy and promote germination. To achieve this, place the soaked seeds in a plastic bag filled with moist vermiculite or sand. Seal the bag and refrigerate it for approximately 2 to 3 months. This mimics the natural winter conditions that olive seeds experience in their native habitat.
- Monitoring: While the seeds are undergoing stratification, it’s important to periodically check their progress. Inspect the seeds for signs of mold or rot, and remove any damaged or unhealthy seeds. Regularly moisten the vermiculite or sand to ensure the seeds remain hydrated.
- Preparation of Planting Containers: As the stratification period nears its end, prepare your planting containers. Choose pots with drainage holes to ensure proper drainage. Fill the containers with a well-draining potting mix, such as a mixture of peat moss, perlite, and vermiculite.
Once you have completed these steps, your olive seeds are now primed and ready for planting. In the next section, we will explore how to effectively plant the seeds and provide them with the optimal growing conditions to thrive.
Planting the Olive Seeds
Now that you have properly prepared your olive seeds, it’s time to plant them and watch them sprout into young olive trees. Follow these steps to ensure successful planting:
- Selecting the Container: Choose a container large enough to accommodate the growth of the olive tree. It should have drainage holes to prevent waterlogging, which can hinder root development.
- Preparing the Soil: Use a well-draining soil mix that is suitable for container gardening. A blend of potting soil, perlite, and compost works well for olive trees. Fill the container about three-quarters full with the soil mixture.
- Planting the Seed: Make a small indentation in the center of the soil, approximately 1 inch deep. Place a single olive seed in the hole and cover it with soil, gently firming it to ensure good soil-to-seed contact.
- Watering: Give the newly planted seed a thorough watering, ensuring that the soil is evenly moist. Avoid overwatering, as excessive moisture can lead to root rot. From this point forward, maintain the soil moisture level by watering when the top inch of soil feels dry.
- Providing Warmth and Light: Place the container in a warm spot with ample sunlight. Olive seeds require temperatures between 70°F and 80°F (21°C to 27°C) to germinate. Consider using a heat mat under the container to provide consistent warmth if necessary.
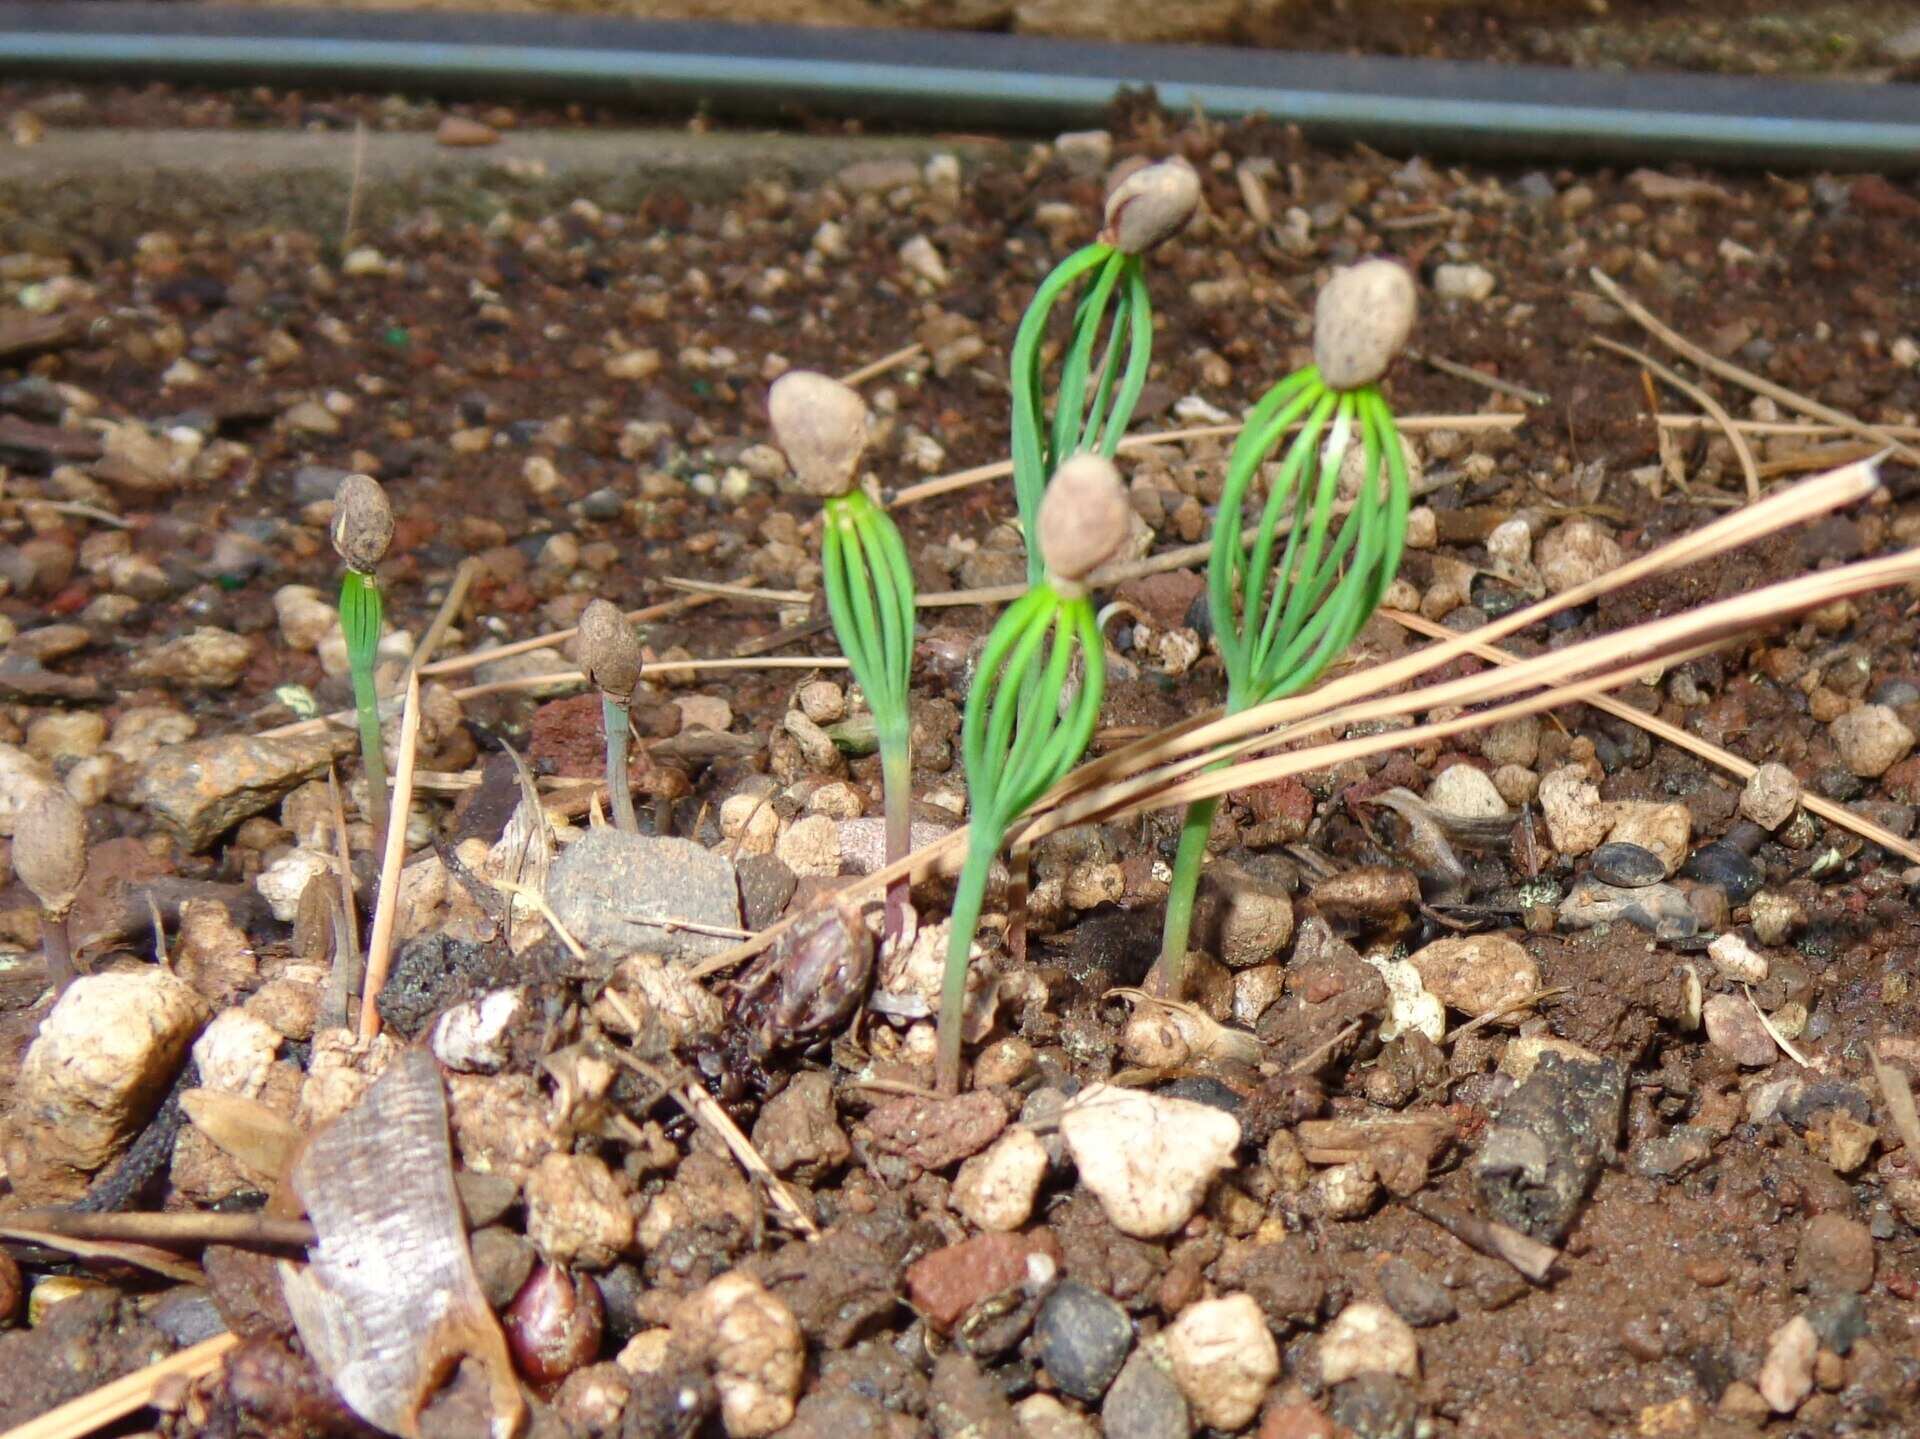
- Germination: Be patient, as germination can take anywhere from a few weeks to a few months. Monitor the container regularly and be on the lookout for the emergence of tiny olive seedlings.
- Thinning and Transplanting: Once the seedlings have grown to be a few inches tall, thin them out by carefully removing the weaker seedlings, leaving only one or two of the strongest ones. This will give the remaining seedlings ample space to grow. If you prefer, you can transplant the strongest seedling(s) to individual pots.
By following these steps, you are well on your way to successfully growing your own olive tree. In the next sections, we will explore how to optimize growth conditions and provide the necessary care for your young olive trees.
Optimizing Growth Conditions
Creating the ideal growing conditions for your young olive trees is crucial to their healthy development and long-term success. Olive trees thrive in specific environmental conditions, and by optimizing these factors, you can ensure optimal growth and fruiting. Here are some key factors to consider:
- Sunlight: Olive trees love sun! They require at least 6-8 hours of direct sunlight each day to thrive. Choose a location in your garden where the trees will receive ample sunlight throughout the day.
- Temperature: Olive trees are adaptable and can tolerate a wide range of temperatures, but they prefer a Mediterranean-like climate. Ideally, temperatures between 60°F and 85°F (15°C to 29°C) are optimal for their growth. Protect young olive trees from freezing temperatures until they are more established.
- Soil Conditions: Olive trees prefer well-draining soil with a pH level between 6 and 8. Amend heavy clay or sandy soil with organic matter, such as compost, to improve its structure and drainage. Conduct a soil test to determine any specific nutrient deficiencies and adjust as necessary.
- Watering: While mature olive trees are drought-tolerant, young trees require regular watering to establish their root system. Water deeply and thoroughly, allowing the top few inches of soil to dry out before watering again. Avoid overwatering, as this can lead to root rot.
- Fertilization: Olive trees benefit from regular fertilization to support their growth and fruit production. Apply a balanced, slow-release fertilizer formulated for fruit trees in early spring and again in early summer. Follow the manufacturer’s instructions for application rates.
- Pruning: Pruning young olive trees is essential to shape their growth and encourage proper branching. Remove any dead, damaged, or crossing branches. Maintain an open center shape by training the branches to grow outward. Regular pruning will help the tree develop a strong structure and promote fruiting.
- Pests and Diseases: Olive trees are relatively resistant to pests and diseases but can be susceptible to certain issues, such as olive fruit fly, scale insects, and fungal diseases. Monitor your trees regularly and take necessary steps to control pests or diseases should they occur.
By optimizing these growth conditions, you are providing your olive trees with the best possible environment for healthy development. In the next section, we will delve into the care that your young olive trees require to thrive.
To grow an olive tree from seed, soak the seed in water for 24 hours, then plant it in well-draining soil. Keep the soil consistently moist and place the pot in a warm, sunny spot. It may take several weeks for the seed to germinate.
Read more: How To Grow Olives From Seeds
Caring for Your Young Olive Trees
Providing proper care for your young olive trees is essential to their overall health and development. By following these care guidelines, you can ensure that your trees grow strong and eventually bear delicious olives:
- Watering: Young olive trees have shallow root systems, so consistent and adequate watering is crucial during the first few years. Water deeply once or twice a week, allowing the soil to dry out slightly between waterings. Adjust the frequency of watering based on the weather conditions and the moisture level of the soil.
- Mulching: Apply a layer of organic mulch around the base of the tree to conserve moisture and suppress weeds. Mulch also helps regulate soil temperature and provides essential nutrients as it breaks down. Keep the mulch a few inches away from the trunk to prevent moisture-related issues.
- Fertilization: Feed your young olive trees with a balanced, slow-release fertilizer specifically formulated for fruit trees. Apply the fertilizer in early spring and again in early summer, following the manufacturer’s instructions for application rates. Avoid over-fertilizing, as this can lead to excessive vegetative growth instead of fruit production.
- Weeding: Regularly remove weeds around the base of your olive trees to prevent competition for nutrients and water. Be careful when weeding to avoid damaging the shallow root system of the young trees.
- Protection from Frost: If you live in a region with frosty winters, take precautions to protect your young olive trees. Cover them with frost blankets or bring them indoors during extreme cold spells. Remember to remove the covers during the day to allow airflow.
- Support: Provide support, such as staking, for your young olive trees to keep them upright and stable. This is especially important in areas with strong winds or in the early stages of growth when the trees are more susceptible to bending or breaking.
- Monitoring for Pests and Diseases: Regularly inspect your olive trees for any signs of pests or diseases. Common pests include olive fruit flies, scale insects, and aphids. If necessary, take appropriate measures to control these pests, such as applying organic insecticides or using sticky traps. Also, keep an eye out for any diseases like fungal infections or leaf spots, and treat them promptly.
- Pruning: Prune your young olive trees during the dormant season to shape their growth and promote air circulation. Remove any dead, damaged, or crowded branches. Encourage a balanced structure by maintaining an open center shape. Pruning also helps to stimulate fruit production in the future.
By providing proper care and attention to your young olive trees, you are setting them up for healthy growth and fruitful maturity. In the next section, we will explore the process of transplanting your olive trees into their permanent outdoor location.
Transplanting the Olive Trees
Transplanting your young olive trees from their temporary containers to their permanent outdoor location is an important step in their growth journey. Follow these steps to ensure a successful transplant:
- Timing: The best time to transplant olive trees is in the early spring or fall when the temperatures are mild, and the tree is in a dormant state. Avoid transplanting during the hot summer months when the stress of the move can be detrimental to the tree’s health.
- Site Selection: Choose a sunny location in your garden with well-draining soil. Olive trees prefer soil with a pH level between 6 and 8. Ensure that the area has enough space to accommodate the mature size of the trees and provides good air circulation.
- Preparing the Hole: Dig a hole in the planting site that is slightly larger and deeper than the root ball of the olive tree. Loosen the soil in the hole to promote proper root development and drainage.
- Removing the Tree from the Container: Carefully remove the olive tree from its temporary container, gently loosening the soil around the root ball. Avoid pulling the tree by its trunk, as this can damage the delicate roots. If the roots are tightly bound, gently tease them apart to encourage outward growth.
- Placing the Tree: Position the olive tree in the center of the prepared hole, ensuring that the top of the root ball is level with the surrounding soil surface or slightly above. This will help prevent the tree from becoming too deeply planted, which can lead to rotting.
- Backfilling and Watering: Fill the hole with the amended soil, gently firming it around the roots to eliminate any air pockets. Water the tree thoroughly to settle the soil and ensure good root-to-soil contact.
- Staking: If your tree is tall or is in an area prone to strong winds, consider staking it to provide additional support. Use sturdy stakes and secure the tree with soft ties, being careful not to damage the trunk. Check the stakes periodically and adjust them as needed.
- Mulching: Apply a layer of mulch around the base of the tree, leaving a gap around the trunk to prevent moisture-related issues. Mulch helps conserve moisture, regulate soil temperature, and suppress weed growth.
- Post-Transplant Care: After transplanting, monitor your olive trees closely and provide them with regular care. Water the trees regularly, especially during the first year, keeping the soil moist but not soggy. Avoid over-fertilizing in the first year, as the tree needs time to establish its roots.
Transplanting can be stressful for olive trees, but by following these steps and providing proper care, you can ensure a smooth transition and encourage healthy growth in their new home. In the next section, we will explore the process of harvesting olives from your olive trees.
Harvesting Olives from Your Trees
After years of nurturing and tending to your olive trees, the time will come when you can finally enjoy the fruits of your labor. Harvesting olives is an exciting and rewarding process that allows you to experience the taste of fresh, homegrown olives. Here’s how to harvest olives from your trees:
- Timing: The optimal time to harvest olives depends on the desired ripeness and their intended use. Green olives are typically harvested earlier in the season when they are still firm and green in color. Ripe olives are harvested later when they have turned darker in color.
- Inspecting the Olives: Before harvesting, inspect the olives on the tree to ensure they are in good condition and free from signs of disease or pest damage. Choose olives that are plump and have a consistent color.
- Using Harvesting Tools: To harvest olives, you can use traditional methods such as handpicking or using a small rake or comb. Another method is laying out nets or tarps beneath the tree and gently shaking the branches to loosen the ripe olives, allowing them to fall onto the nets for easy collection.
- Collecting the Olives: Once the olives have been harvested, gather them into buckets or baskets. Remove any leaves or debris that may have fallen with the olives.
- Sorting and Cleaning: After collecting the olives, sort through them to remove any damaged or shriveled ones. Rinse the olives with water to remove soil and debris, then allow them to dry briefly before moving on to the next step.
- Processing Options: There are various methods for processing olives, depending on your desired end product. You can cure them in brine, dry them, or press them to extract olive oil. Research the specific process you would like to follow and gather the necessary materials and equipment.
- Curing: If you choose to cure your olives in brine, make a saltwater solution using coarse salt and water. Submerge the olives in the brine and let them sit for several weeks, changing the brine periodically. This process helps remove the bitterness from the olives and enhances their flavor.
- Drying: For drying olives, spread them out on a tray or mesh screen in a well-ventilated area. Turn them regularly to ensure even drying. It may take several weeks for the olives to dry completely.
- Enjoying Your Olives: Once the olives have been processed, they are ready to be enjoyed! Rinse cured olives before eating or using them in recipes. Dried olives can be stored in airtight containers and rehydrated when needed.
Harvesting olives from your trees is a rewarding experience that allows you to savor the flavors of your own homegrown olives. Enjoy the fruits of your labor and share them with family and friends. In the next section, we will conclude our journey and reflect on the joys of growing olive trees from seed.
Conclusion
Growing olive trees from seed is a fulfilling journey that allows you to connect with nature and experience the joys of nurturing a plant from its humble beginnings. From collecting the seeds to harvesting the olives, every step of the process is filled with anticipation and rewards. As you’ve learned, it takes patience, care, and a bit of knowledge to successfully grow olive trees from seed, but the end result is well worth it.
Throughout this guide, we covered various aspects of growing olive trees from seed, including collecting and preparing the seeds, planting them, optimizing growth conditions, and caring for the young trees. We explored the importance of sunlight, temperature, soil conditions, watering, fertilization, pruning, and pest control in ensuring the health and vitality of your olive trees.
Transplanting the young trees into their permanent outdoor location is a significant milestone in their growth journey. It’s crucial to choose the right timing, select an appropriate site, and provide proper post-transplant care. Finally, the joy of harvesting your own olives and enjoying their fresh, homegrown flavor is a rewarding experience that truly completes the cycle of growing olive trees from seed.
As you continue your gardening adventure with olive trees, remember that each tree is unique and will require individual attention. No matter how small or grand your gardening space is, growing olive trees from seed allows you to connect with nature, cultivate beauty, and appreciate the wonders of the natural world.
So, grab your gardening tools, prepare your soil, and embark on this rewarding journey of growing your own olive trees. Patience, perseverance, and a love for gardening will guide you along the way. Enjoy the beauty, the aroma, and the taste of your very own olive trees, and let them bring a touch of the Mediterranean into your garden and your life.
Frequently Asked Questions about How To Grow Olive Tree From Seed
Was this page helpful?
At Storables.com, we guarantee accurate and reliable information. Our content, validated by Expert Board Contributors, is crafted following stringent Editorial Policies. We're committed to providing you with well-researched, expert-backed insights for all your informational needs.


0 thoughts on “How To Grow Olive Tree From Seed”