Home>Garden Essentials>How To Grow A Maple Tree From Seed
Garden Essentials
How To Grow A Maple Tree From Seed
Modified: March 15, 2024
Learn how to grow a beautiful maple tree from seed in your garden. Tips and techniques for successful germination and cultivation included.
(Many of the links in this article redirect to a specific reviewed product. Your purchase of these products through affiliate links helps to generate commission for Storables.com, at no extra cost. Learn more)
Introduction
Welcome to the world of gardening, where you can create your own little paradise right in your backyard. If you’re a nature lover and want to add a touch of beauty to your landscape, growing a maple tree from seed can be a rewarding and fulfilling experience. Maple trees not only provide shade and stunning autumn foliage, but they also attract birds and other wildlife, making them a valuable addition to any garden.
In this comprehensive guide, we will walk you through the step-by-step process of growing a maple tree from seed. From collecting the seeds to caring for the seedlings and eventually transplanting them, we will cover everything you need to know to ensure success in growing your very own maple tree.
Before we delve into the details, it’s important to note that maple trees come in a variety of species, each with its unique characteristics and requirements. The most common maple trees include the Norway maple, Japanese maple, silver maple, and sugar maple. Make sure to choose a species that is suitable for your climate and meets your aesthetic preferences.
Now, let’s dive into the fascinating journey of growing a maple tree from seed and uncover the secrets to cultivating a thriving and majestic maple tree that will bring joy and beauty to your garden for years to come.
Key Takeaways:
- Growing a maple tree from seed is a fascinating journey that requires collecting, preparing, planting, and caring for the seedlings. It’s a rewarding process that adds natural beauty to your garden.
- Providing the right growing conditions, ongoing care, and seeking professional advice when needed are essential for the successful growth and longevity of your mature maple tree. Happy gardening!
Read more: How To Grow Japanese Maple From Seed
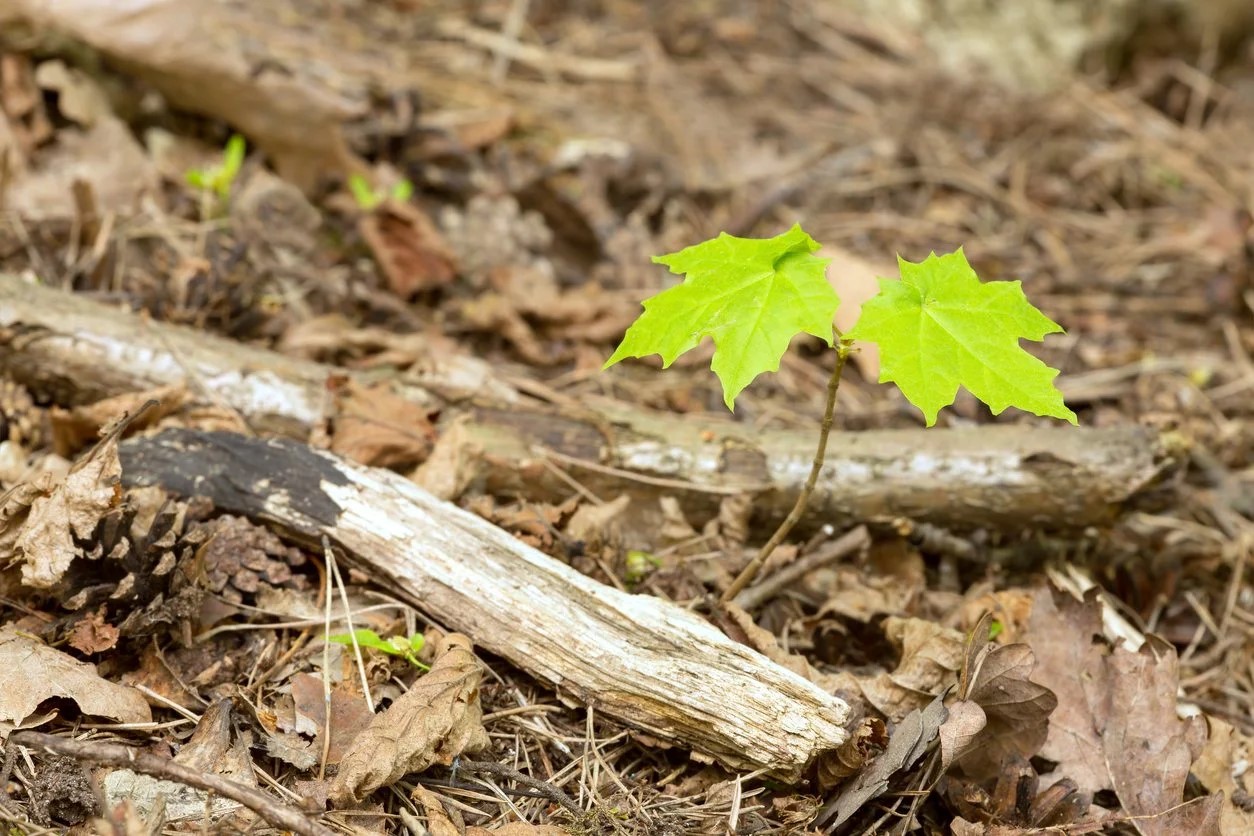
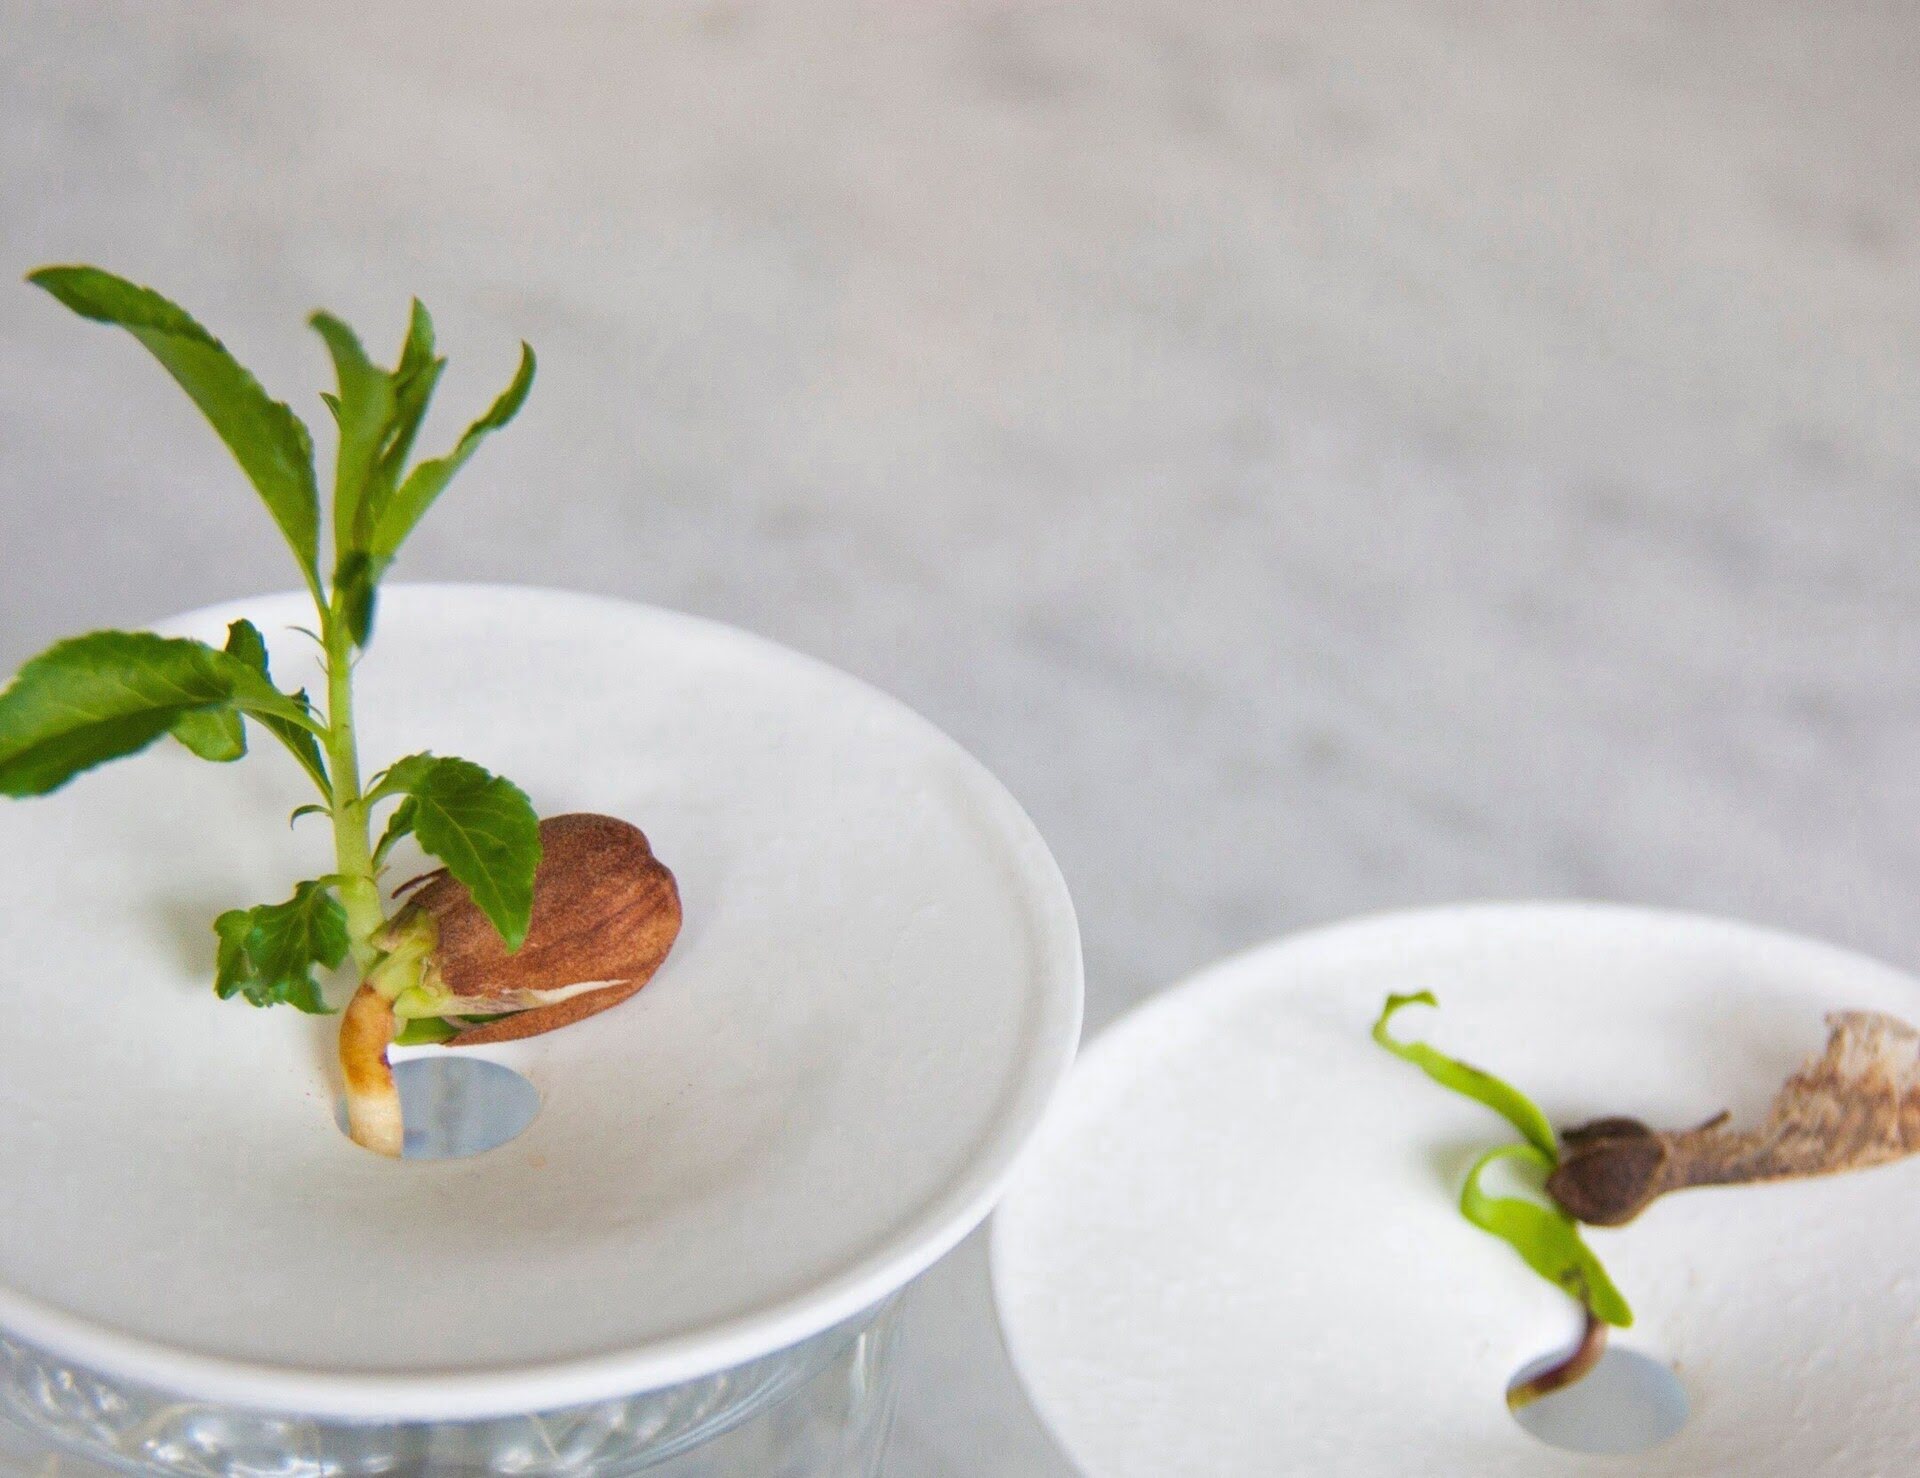
Step 1: Collecting Maple Seeds
The first step in growing a maple tree from seed is to collect the maple seeds, also known as samaras or “helicopter seeds.” Maple trees produce these distinctive seeds in abundance during the autumn season.
You can start by observing the maple trees in your area and identifying the ones that have matured and are producing seeds. Look for maple trees with drooping clusters of green or brownish seeds. These seeds are often found hanging from the tree branches or scattered on the ground.
When collecting maple seeds, it’s essential to choose healthy and undamaged ones. Avoid seeds that show signs of mold, rot, or insect infestation. The best time to collect maple seeds is when they are fully mature and begin to detach easily from the tree.
To collect the maple seeds, gently twist or pull them off the tree branches. It’s advisable to wear gloves to protect your hands from any potential irritation caused by the seeds’ sharp edges. Place the collected seeds in a paper bag or a bucket, and be careful not to overcrowd them as it may cause damage to the seeds.
Once you have gathered the desired amount of maple seeds, it’s time to move on to the next step of preparing them for planting.
Step 2: Preparing the Seeds for Planting
Now that you have collected a batch of maple seeds, it’s important to properly prepare them before planting. This step will help improve the germination rate and increase the chances of successful seedling growth.
Start by cleaning the maple seeds to remove any dirt or debris. Gently rinse them under running water, taking care not to damage the delicate seed coat. After rinsing, place the seeds on a clean towel or paper towel and allow them to dry completely. This will prevent mold or fungal growth during the planting process.
Once the seeds are dry, it’s time to scarify them. Scarification is a process that helps break the hard outer coating of the seeds, making it easier for moisture to penetrate and initiate germination. You can scarify the maple seeds using a nail file, sandpaper, or by lightly nicking the seed coat with a small knife. Be careful not to damage the embryo inside the seed.
After scarification, you can choose to stratify the maple seeds. Stratification is a cold treatment that simulates the natural winter dormancy period and promotes germination. Place the scarified seeds in a plastic bag with slightly moistened peat moss or vermiculite. Seal the bag and refrigerate it for 60-90 days. This process will help break the seed’s dormancy and enhance germination.
Alternatively, you can sow the scarified maple seeds directly without stratification, but keep in mind that the germination rate might be lower compared to stratified seeds.
With the seeds properly cleaned, scarified, and optionally stratified, you are now ready to move on to the next step of planting the maple seeds.
Step 3: Planting the Maple Seeds
Now that you have prepared the maple seeds, it’s time to plant them and kickstart the germination process. Maple seeds can be planted either in pots or directly in the ground, depending on your preference and the available space.
If you choose to plant the seeds in pots, fill the pots with a high-quality potting mix. Make sure the pots have drainage holes to prevent waterlogging. Place one or two maple seeds about an inch deep into the soil, and gently cover them with a thin layer of soil. Water the pots thoroughly to ensure the soil is moist but not waterlogged.
If you prefer to plant the seeds directly in the ground, find a suitable location with well-draining soil and receive partial to full sunlight. Clear away any grass, weeds, or debris from the planting area. Dig a small hole, about an inch or two deep, and place one or two maple seeds in the hole. Cover the seeds with soil and gently pat it down. Water the area generously to settle the soil and provide moisture for germination.
It’s important to note that maple seeds have a higher germination rate when they are planted in the autumn or early spring. This allows them to naturally go through the cold stratification period and take advantage of the spring’s optimal growing conditions. However, you can still try planting them at any time of the year with the proper care and conditions.
After planting the maple seeds, it’s crucial to maintain consistent moisture levels. Keep the soil moist, but not soggy, throughout the germination period. Depending on the weather conditions, it may take several weeks for the seeds to sprout. Be patient and continue to provide the necessary care.
Once the maple seeds sprout and develop into seedlings, you can move on to the next step of providing the right growing conditions to ensure their healthy growth.
Step 4: Providing the Right Growing Conditions
As your maple seedlings begin to emerge, it’s essential to create the ideal growing conditions to support their healthy development. Here are some key factors to consider:
1. Sunlight: Maple trees thrive in areas that receive partial to full sunlight. Ensure that your seedlings are exposed to at least 4-6 hours of direct sunlight daily. If you’re growing them indoors, place them near a south-facing window or provide fluorescent grow lights.
2. Watering: Proper watering is crucial for the growth of your maple seedlings. Keep the soil consistently moist, but be careful not to overwater, as excessive moisture can lead to root rot. Allow the top inch of soil to dry out before watering again, and make sure the water reaches the roots.
3. Soil: Maples trees prefer well-draining soil that is rich in organic matter. If planting in pots, use a high-quality potting mix that provides good drainage. In the ground, amend heavy clay soil with compost to improve drainage and fertility.
4. Fertilization: Young maple seedlings don’t need regular fertilization initially, as they can draw nutrients from the soil. However, after the first year, you can begin fertilizing with a balanced slow-release fertilizer in early spring. Follow the package instructions for the proper application rate.
5. Mulching: Applying a layer of organic mulch around the base of your maple seedlings can provide numerous benefits. Mulch helps retain moisture, suppresses weed growth, and regulates soil temperature. Use a 2-3 inch layer of wood chips, straw, or leaves, ensuring the mulch is kept away from the trunk to prevent rotting.
6. Protection: Protect your young maple seedlings from harsh weather conditions, such as strong winds or extreme temperatures. Provide temporary shelters or barriers if needed, until the seedlings become more established.
By providing the right growing conditions, you’ll give your maple seedlings the best chance to thrive and grow into healthy and robust trees. Next, let’s move on to step 5, where we’ll discuss essential care tips for your maple seedlings.
To grow a maple tree from seed, collect seeds in the fall, store them in a cool, dry place, then plant them in a pot with well-draining soil in the spring. Keep the soil moist and provide plenty of sunlight for healthy growth.
Read more: How To Grow A Tree From A Seed
Step 5: Caring for the Maple Seedlings
As your maple seedlings continue to grow, it’s important to provide ongoing care to ensure their healthy development. Here are some essential care tips:
1. Regular watering: Consistent and adequate watering is crucial for the growth and health of your maple seedlings. Water deeply, ensuring the soil is evenly moist, but avoid overwatering. Adjust the frequency of watering based on weather conditions.
2. Pruning: Regular pruning helps shape your maple tree and encourages proper branch structure. As the seedlings grow, remove any dead, damaged, or crossed branches. Prune sparingly to maintain a natural and balanced shape.
3. Weed control: Keep the area around your maple seedlings free from weeds. Weeds compete for water, nutrients, and sunlight, which can hinder the growth of your seedlings. Regularly remove any weeds and apply mulch to suppress weed growth.
4. Pest and disease management: Monitor your maple seedlings for any signs of pests or diseases, such as aphids, scale insects, or fungal infections. Address any issues promptly by using organic pest control methods or contacting a professional arborist for assistance.
5. Stake support: If your maple seedlings are tall and thin or if you live in an area with strong winds, consider staking them for additional support. Use soft ties to secure the trunk to the stake, avoiding damaging the bark.
6. Regular inspections: Take the time to regularly inspect your maple seedlings for any issues. Look for signs of stress, such as wilting leaves or discoloration, and address them accordingly. Early detection and intervention can prevent potential problems from escalating.
7. Winter protection: Before the onset of winter, prepare your maple seedlings for the colder months. Apply a layer of mulch around the base to insulate the roots and protect them from extreme temperature fluctuations. Remove the mulch in the spring to allow for new growth.
By providing proper care and attention, your maple seedlings have the best chance of growing into healthy and resilient trees. Let’s move on to step 6, where we’ll discuss the process of transplanting your maple seedlings as they mature.
Step 6: Transplanting the Maple Seedlings
As your maple seedlings mature and outgrow their pots or their original planting location, it’s time to transplant them into a permanent spot in your garden. Transplanting allows the seedlings to establish deeper root systems and continue their growth journey. Here’s how to transplant your maple seedlings:
1. Choose the right time: The best time to transplant maple seedlings is during the dormant season, either in late winter or early spring before the tree starts to bud. This reduces stress on the seedlings and gives them ample time to establish their roots before the arrival of warmer weather.
2. Select a suitable location: Choose a spot in your garden that offers the right growing conditions for your maple tree, including sufficient sunlight, well-draining soil, and enough space for the tree to mature. Consider its mature size and ensure it has enough room to spread its branches without interference.
3. Prepare the planting hole: Dig a hole that is at least twice as wide and slightly deeper than the root ball of the maple seedling. Loosen the soil and remove any weeds or debris. Add compost or organic matter to enrich the soil if needed.
4. Gently remove the seedling: Carefully remove the maple seedling from its current container by gently tapping the sides of the pot or squeezing it from the bottom. Avoid pulling on the stem or damaging the roots. If the seedling is growing directly in the ground, dig around it to carefully lift it out.
5. Place the seedling in the hole: Set the seedling in the center of the planting hole, ensuring the top of the root ball is level with or slightly above the soil surface. This will prevent the seedling from sinking too deeply into the ground once it is watered.
6. Backfill and water: Fill in the hole with the excavated soil, gently pressing it around the roots to eliminate any air pockets. Water the newly transplanted seedling thoroughly to settle the soil and provide moisture. Apply a layer of mulch around the base, avoiding contact with the trunk.
7. Provide post-transplant care: After transplanting, continue to provide regular watering, monitoring for pests or diseases, and maintaining weed control. Give the maple tree time to adjust to its new surroundings, and be patient as it establishes its roots and begins to thrive.
Remember, transplanting can be stressful for plants, so it’s crucial to handle the seedlings with care and create a smooth transition to their new home. With proper care and nurturing, your maple seedlings will grow into magnificent trees that will bring beauty and shade to your garden for years to come.
We’re almost at the end of our journey. In the next step, step 7, we’ll explore the continued care required for mature maple trees.
Step 7: Continued Care for Mature Maple Trees
Congratulations! Your maple tree has successfully grown from a tiny seedling to a mature and majestic addition to your garden. However, the care and attention shouldn’t stop there. To ensure the ongoing health and beauty of your maple tree, here are some important steps to follow:
1. Regular pruning: As your maple tree matures, regular pruning is necessary to remove any dead, damaged, or crossing branches. Prune during the dormant season to minimize stress on the tree and promote healthy growth.
2. Watering: While mature maple trees are generally more tolerant of dry conditions, they still benefit from regular watering during prolonged periods of drought. Provide deep, thorough watering to reach the tree’s extensive root system.
3. Mulching: Maintain a layer of mulch around the base of the tree, extending out to the drip line. This helps conserve moisture, suppress weeds, regulate soil temperature, and promote a healthy root environment.
4. Fertilization: Mature maple trees typically don’t require regular fertilization if planted in well-nourished soil. However, if your tree is showing signs of nutrient deficiencies, consult with a professional arborist to determine the appropriate fertilizer and application method.
5. Monitor for pests and diseases: Regularly inspect your maple tree for any signs of pests or diseases, such as aphids, caterpillars, or fungal infections. Early detection and appropriate treatment can help prevent the spread of damage and ensure the long-term health of your tree.
6. Storm protection: If you live in an area prone to strong winds or storms, take precautions to protect your maple tree. Consider staking taller branches, pruning for better wind resistance, or installing tree protection devices to reduce the risk of damage.
7. Consult an arborist: If you have any concerns about the health or care of your mature maple tree, don’t hesitate to seek professional advice. An arborist can assess the tree’s condition, provide specialized care recommendations, and address any issues that may arise.
By following these steps and providing continued care for your mature maple tree, you can ensure its longevity and beauty for many years to come. Appreciate the shade, stunning foliage, and the ecosystem your maple tree supports, and enjoy the rewards of your gardening journey.
With step 7 completed, you’ve now learned how to care for your mature maple tree. We hope this comprehensive guide has helped you successfully grow and nurture your very own maple tree, adding a touch of natural beauty to your garden.
Happy gardening!
Conclusion
Growing a maple tree from seed is a rewarding and fulfilling process that allows you to witness the transformation of a tiny seed into a magnificent tree. From collecting the maple seeds to providing the right growing conditions, caring for the seedlings, and eventually transplanting them, each step is crucial for their success.
By following the steps outlined in this comprehensive guide, you can navigate the journey of growing your own maple tree with confidence and expertise. Remember to choose the right species for your climate, collect healthy seeds, and properly prepare them for planting.
As your maple seedlings grow, provide them with consistent care, including proper watering, pruning, and protection from pests and diseases. Transplant the seedlings to a permanent location once they have outgrown their pots or initial planting spot.
For mature maple trees, continued care is essential. Regular pruning, watering, mulching, and monitoring for pests and diseases will ensure their ongoing health and beauty. Seek professional guidance when needed, and appreciate the shade, stunning foliage, and ecological benefits that your maple tree provides.
Remember, gardening is a journey that requires patience and dedication. Enjoy the process, the connection with nature, and the satisfaction of watching your maple tree thrive and enhance the beauty of your garden.
So go ahead, embrace your green thumb, and start growing your own maple tree from seed. It’s a wonderful way to create a lasting impact and contribute to the natural beauty of the world around us.
Happy gardening!
Frequently Asked Questions about How To Grow A Maple Tree From Seed
Was this page helpful?
At Storables.com, we guarantee accurate and reliable information. Our content, validated by Expert Board Contributors, is crafted following stringent Editorial Policies. We're committed to providing you with well-researched, expert-backed insights for all your informational needs.


0 thoughts on “How To Grow A Maple Tree From Seed”