Home>Garden Essentials>How To Make A Greenery Wreath Centerpiece Using Chicken Wire

Garden Essentials
How To Make A Greenery Wreath Centerpiece Using Chicken Wire
Modified: April 23, 2024
Create a stunning greenery wreath centerpiece for your garden using chicken wire. Learn the step-by-step process and add a touch of nature to your home decor.
(Many of the links in this article redirect to a specific reviewed product. Your purchase of these products through affiliate links helps to generate commission for Storables.com, at no extra cost. Learn more)
Introduction
Welcome to the world of gardening! If you’re like me, you probably find joy in creating beautiful and natural arrangements that add a touch of green to your living space. One of the most versatile and visually appealing ways to incorporate greenery into your home decor is by making a wreath centerpiece.
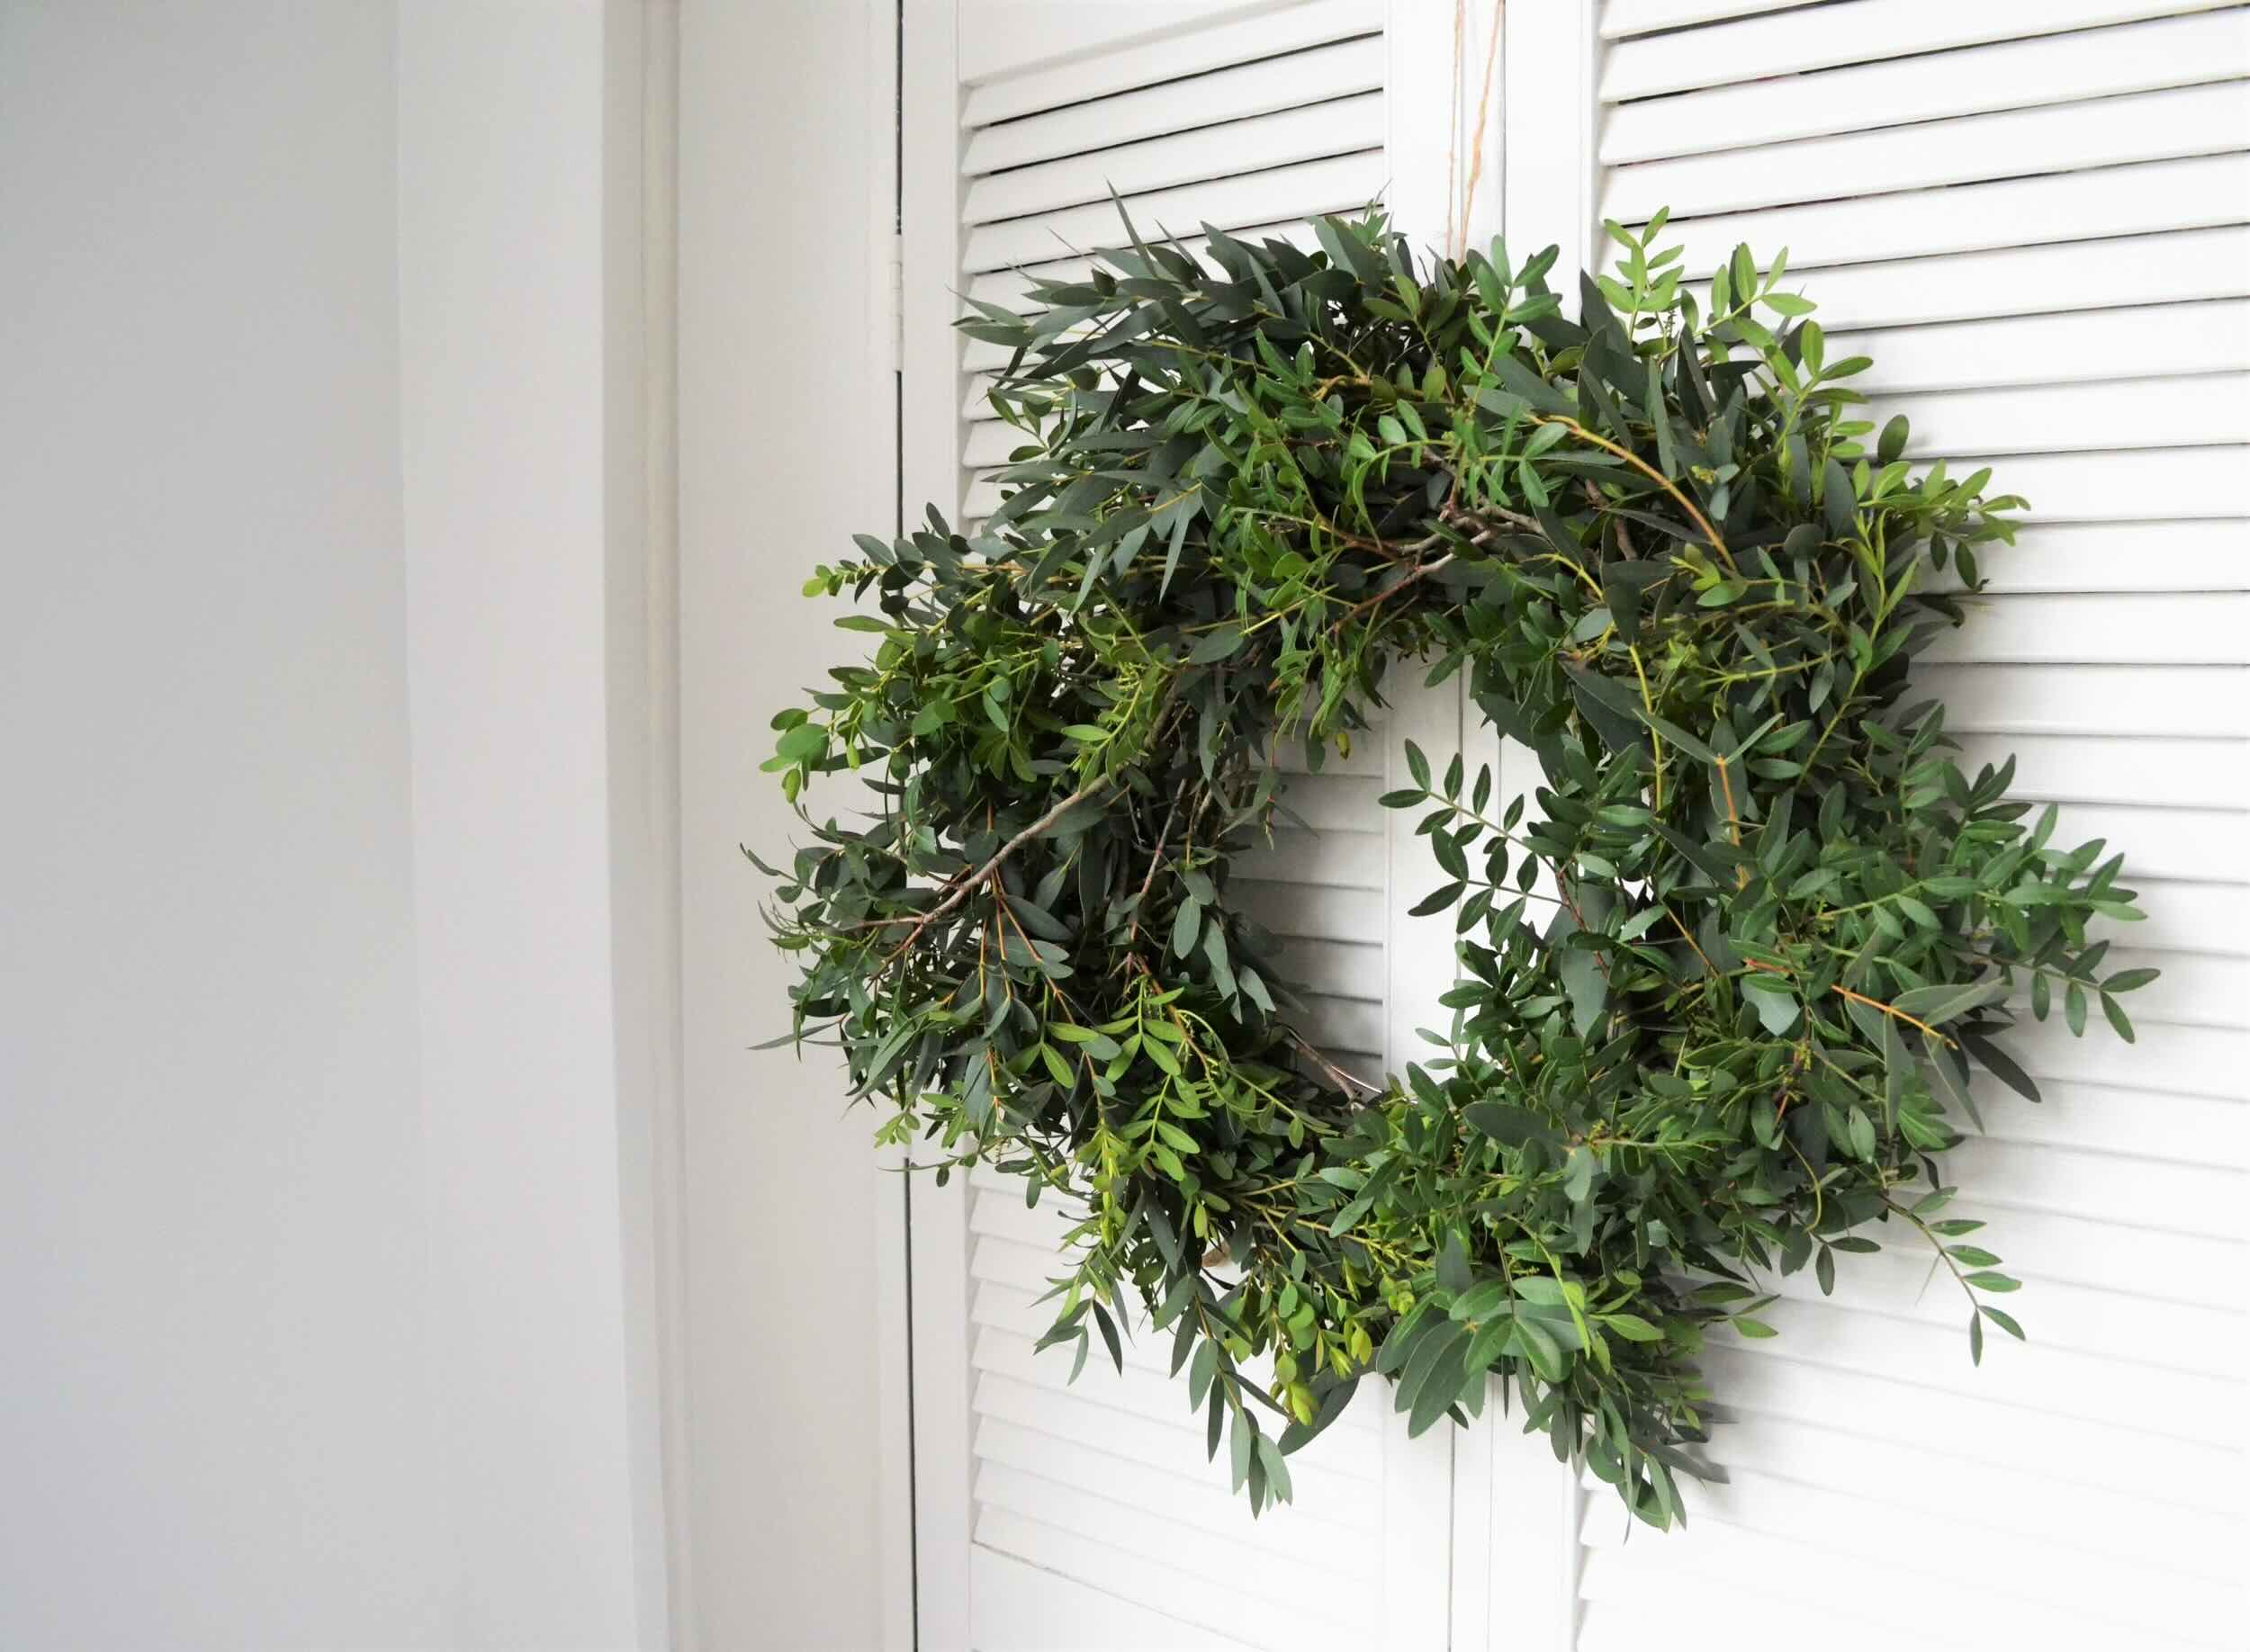
A greenery wreath centerpiece not only adds a fresh and vibrant element to any space, but it also creates a warm and inviting atmosphere. Whether you’re hosting a dinner party or simply want to brighten up your dining table, this DIY project is perfect for garden enthusiasts and craft lovers alike.
In this article, I will guide you through the process of making a stunning greenery wreath centerpiece using chicken wire. With just a few materials and some basic gardening skills, you can create a centerpiece that will make a statement and leave your guests in awe.
So, let’s roll up our sleeves, gather our supplies, and get started on this fun and creative project!
Key Takeaways:
- Embrace your creativity and gardening skills by crafting a stunning greenery wreath centerpiece using chicken wire and a variety of foliage. It’s a fun and rewarding DIY project that adds natural elegance to your home decor.
- Personalize your greenery wreath centerpiece with a mix of fresh or artificial greenery, and optional decorative accents. Showcase your unique style and bring the beauty of nature indoors with this versatile and visually appealing DIY project.
Read more: How To Make A Greenery Wreath
Materials Needed
Before you venture into creating your greenery wreath centerpiece, let’s gather all the necessary materials. These items will ensure you have everything on hand to complete the project with ease:
- Chicken wire: This will serve as the base for your wreath. Make sure to choose a size that suits your desired wreath circumference.
- Wire cutters: You’ll need these to cut the chicken wire into the desired shape.
- Gloves: Protect your hands from sharp edges while working with the chicken wire.
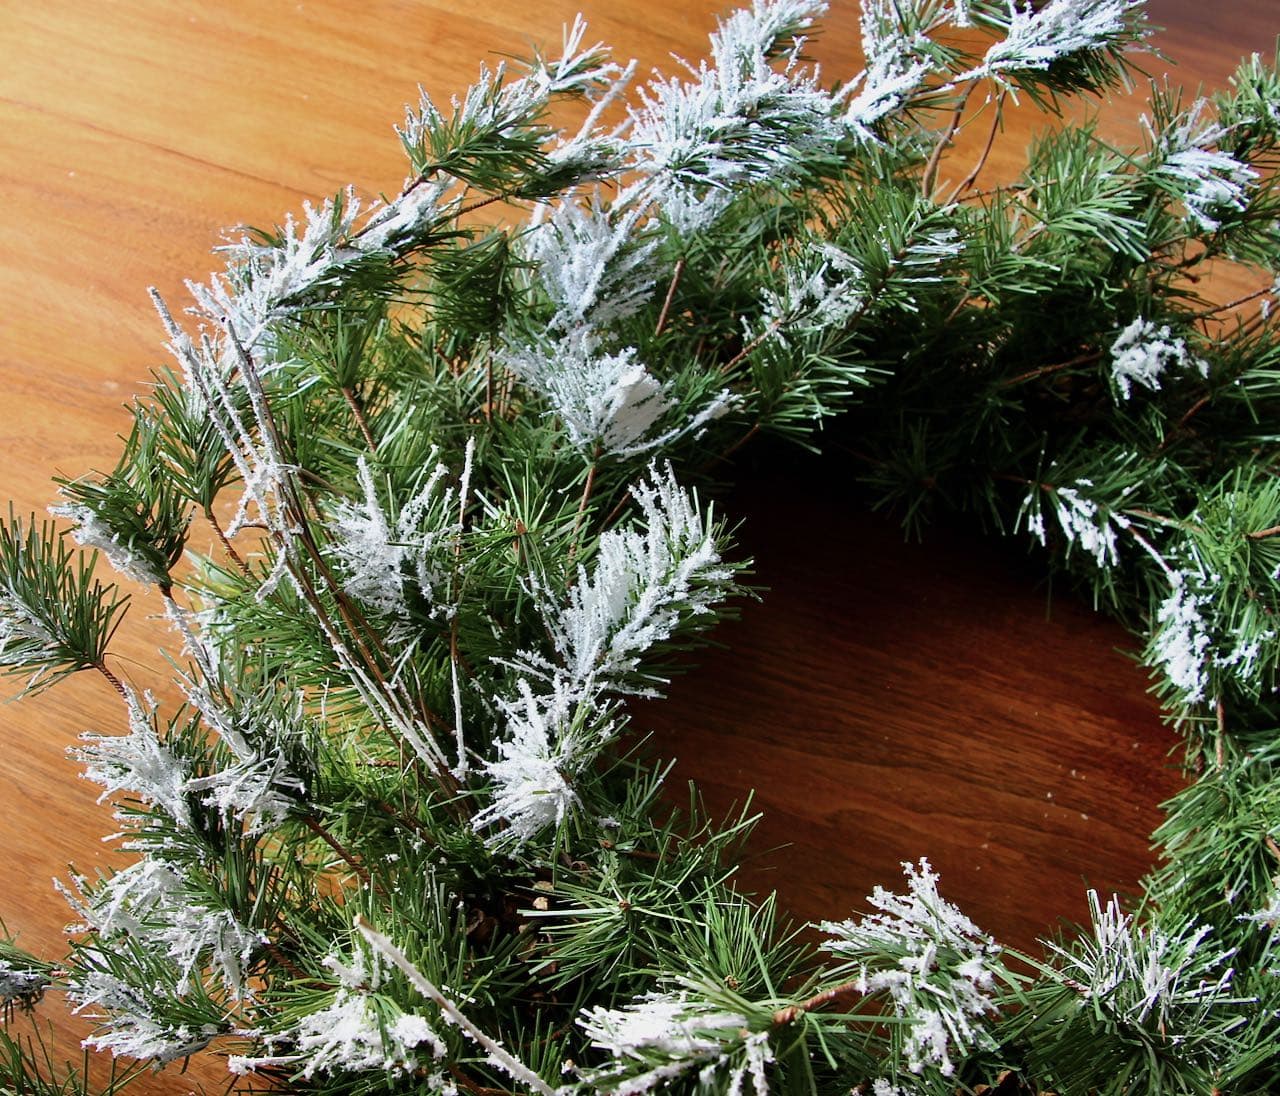
- Greenery: Select a variety of fresh or artificial greenery, such as eucalyptus, ferns, ivy, or any other foliage that appeals to you.
- Floral wire: This wire will be used to secure the greenery onto the chicken wire wreath.
- Decorative accents (optional): If you want to add a personal touch to your centerpiece, consider including decorative elements such as berries, pinecones, or flowers.
- Scissors: These will come in handy for trimming and shaping the greenery.
- Ribbon or twine: Use this to hang the wreath or create a bow for added charm.
Once you have gathered these materials, you’re ready to move on to the next steps in creating your greenery wreath centerpiece. It’s always a good idea to lay out all the supplies before starting to ensure you have everything you need within easy reach.
Step 1: Gather Greenery
The first step in creating your greenery wreath centerpiece is to gather the greenery you’ll be using. This is where you can get creative and choose a combination of foliage that suits your taste and style.
If you have access to a garden with an abundance of leaves and branches, consider harvesting your own greenery. Look for a variety of textures, shapes, and colors to add depth and visual interest to your wreath. Popular choices include eucalyptus, ferns, ivy, boxwood, or even seasonal favorites like pine branches or holly.
If you don’t have access to fresh greenery, don’t worry! You can easily find a wide selection of artificial greens at your local craft store. These options are fantastic because they’re long-lasting and give you the flexibility to experiment with different types of foliage that may not be widely available in your area.
When gathering or purchasing your greenery, it’s a good idea to gather more than you think you’ll need. This will give you options during the design process and ensure you have enough foliage to cover the entire wreath.
Once you have your greenery, lay it out and remove any damaged or brown leaves. Give the foliage a gentle shake to remove any dirt or insects. Now, your greenery is ready to be transformed into a beautiful wreath centerpiece!
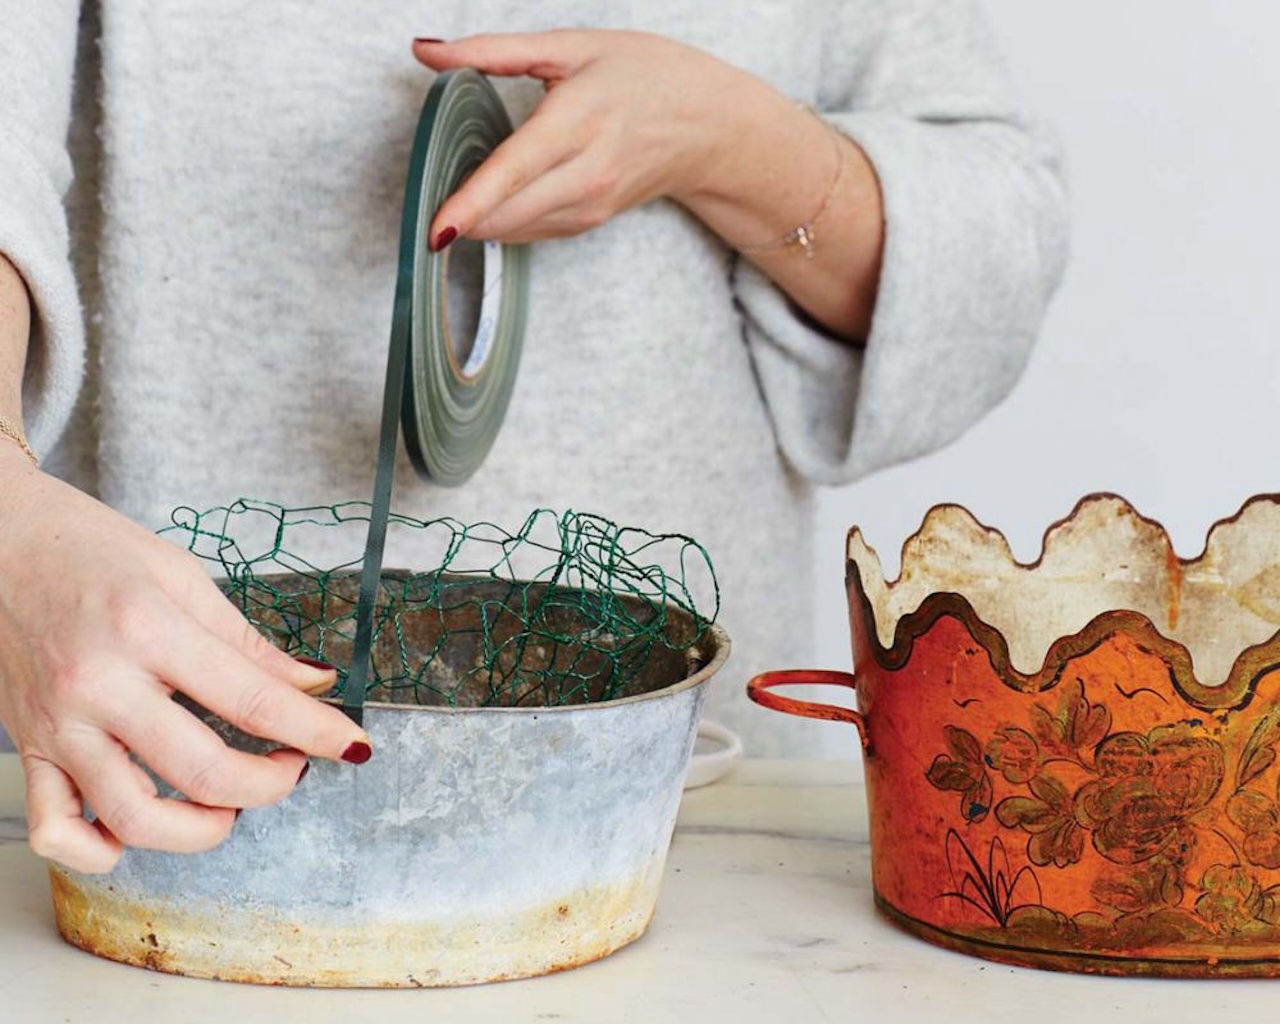
Step 2: Prepare the Chicken Wire
Now that you have gathered your greenery, it’s time to prepare the chicken wire, which will serve as the base for your wreath centerpiece. Follow these steps to get the chicken wire ready:
- Measure and cut the chicken wire: Start by measuring the desired size of your wreath. Use wire cutters to cut a piece of chicken wire that is slightly larger than the circumference you want. For example, if you want a wreath with a 12-inch diameter, cut a piece of chicken wire that is about 14 inches long.
- Shape the chicken wire: After cutting the chicken wire, begin shaping it into a circular or oval shape. This will be the foundation of your wreath. It’s okay if the edges of the chicken wire don’t perfectly align. The goal is to create a loose circular shape that can be easily manipulated.
- Twist the ends to secure the shape: Once you have shaped the chicken wire, use your fingers or wire cutters to twist the loose ends together. This will secure the circular shape and prevent the wire from unraveling.
Preparing the chicken wire is an essential step in creating a sturdy and reliable wreath base. Take your time to ensure the wire is shaped correctly and the ends are securely twisted together. This will provide stability for the greenery and help your wreath centerpiece last longer.
Now that your chicken wire is ready, it’s time to move on to the next step: placing the greenery onto the wreath.
Step 3: Shape the Chicken Wire into a Wreath
With the chicken wire prepared, it’s time to give it a more defined wreath shape. Follow these steps to shape the chicken wire:
- Gently mold the chicken wire: Take the circular or oval-shaped chicken wire and gently mold it with your hands. Start by pressing on the edges and gradually work your way towards the center.
- Create a curved surface: As you mold the chicken wire, focus on creating a curved surface that mimics the natural shape of a wreath. It’s okay if it’s not perfectly round or symmetrical, as this will add to the organic and rustic charm of the centerpiece.
- Tweak the shape as needed: If you’re not satisfied with the initial shape, don’t hesitate to make adjustments. You can reshape the wire by bending and twisting it to achieve the desired look.
Remember to wear gloves during this process to protect your hands from any sharp edges. Take your time to shape the chicken wire into a wreath shape that you’re happy with. Don’t be afraid to experiment and let your creativity guide you!
Once you’re satisfied with the shape, proceed to the next step: placing the greenery onto the wreath.
When working with chicken wire for a greenery wreath centerpiece, wear gloves to protect your hands from sharp edges and use wire cutters to trim the wire to the desired size.
Read more: How To Make A Wreath With Fresh Greenery
Step 4: Place the Greenery onto the Wreath
Now that you have shaped the chicken wire into a wreath, it’s time to start adding the greenery. Follow these steps to properly place the foliage onto the wreath:
- Start with a focal point: Choose a larger piece of greenery that will serve as the focal point of your wreath. This could be a branch of eucalyptus or a bundle of ferns, for example.
- Secure the greenery: Hold the chosen piece of greenery against the chicken wire wreath and use floral wire to secure it in place. Wrap the wire around the stem of the greenery and twist it tightly around the chicken wire. Repeat this process in multiple spots to ensure the foliage is secure.
- Add more greenery: Continue adding different types of greenery around the wreath, layering them on top of each other to create dimension and depth. Alternate between colors, textures, and shapes to create an aesthetically pleasing arrangement.
- Overlap the stems: As you add more greenery, make sure to overlap the stems to hide the chicken wire and create a seamless look. This will give your wreath a more polished appearance.
- Fill in any gaps: Step back and assess your wreath to see if there are any empty spots or gaps. If needed, add additional pieces of greenery to fill in those areas and create a fuller look.
As you place the greenery onto the wreath, take your time to arrange it in a way that pleases you. Experiment with different placements and angles to find the perfect balance of foliage. Remember, there is no right or wrong way to do it – let your creativity guide you!
Once you’re satisfied with the placement of the greenery, move on to the next step: securing it with floral wire.
Step 5: Secure the Greenery with Floral Wire
Now that the greenery is in place on your wreath, it’s important to secure it properly to ensure it stays in position. Here’s how to use floral wire to secure the greenery:
- Prepare the floral wire: Cut several small pieces of floral wire, each about 4-6 inches in length. This will make it easier to work with and allows you to secure different sections of the greenery.
- Locate the stem of the greenery: Identify the stem of a piece of greenery that you want to secure. Ideally, choose a spot where the stem is relatively thicker and easier to wrap the floral wire around.
- Wrap the floral wire around the stem: Take one of the pieces of floral wire and wrap it tightly around the stem of the greenery, securing it to the chicken wire wreath. Twist the wire firmly but gently to ensure a secure hold.
- Trim any excess wire: Use wire cutters to snip off any excess floral wire, leaving a neat finish. Be careful not to cut too close to the wreath or leave any sharp edges exposed.
- Repeat the process: Continue attaching the greenery to the wreath using floral wire. Work your way around the wreath, securing each piece of foliage to the chicken wire. Make sure to vary the angles and directions of the greenery to create a natural and balanced look.
Take your time with this step and be mindful of the placement and positioning of the greenery. By using floral wire, you can ensure that the foliage stays in place and maintains its fresh appearance over time.
Once all the greenery is securely attached, you’re ready to move on to step 6: adding additional greenery or accents to enhance the centerpiece.
Step 6: Add Additional Greenery or Accents
With the main greenery secured onto the wreath, step 6 allows you to personalize your centerpiece further by adding additional foliage or accents. Here’s how you can enhance your wreath:
- Assess the overall look: Take a step back and assess your wreath to identify any areas that may need some extra greenery or accents. Look for places where the wreath looks sparse or where you want to add a pop of color.
- Add more greenery: If you find any gaps or areas that need additional foliage, select smaller pieces of greenery and insert them into the wreath. Secure them in place using floral wire, ensuring a seamless integration with the existing greenery.
- Consider decorative accents: To add visual interest and a unique touch to your wreath centerpiece, consider incorporating decorative accents. This can include berries, pinecones, dried flowers, or small ornaments. Attach these accents using floral wire or hot glue, depending on the material and your preference.
- Avoid overcrowding: While it’s tempting to keep adding more elements, be cautious not to overcrowd the wreath. Maintain a balanced and harmonious arrangement, allowing the greenery and accents to shine without overwhelming the overall design.
Remember to step back periodically and assess your wreath as you work on this step. It’s essential to keep a cohesive and visually pleasing balance between the greenery and any additional accents you choose to incorporate.
Once you are satisfied with the appearance of your wreath and have added any desired additional elements, it’s time to move on to the final step: hanging or displaying your greenery wreath centerpiece.
Step 7: Hang or Display the Greenery Wreath Centerpiece
Congratulations! You’ve reached the final step of creating your greenery wreath centerpiece. It’s time to showcase your beautiful creation by hanging or displaying it in your desired location. Follow these steps to properly hang or display your wreath:
- Choose the perfect spot: Decide where you want to showcase your wreath centerpiece. It can be hung on a door, above a mantel, on a wall, or used as a charming centerpiece on a table. Consider the space, lighting, and overall aesthetics of the area.
- Prepare for hanging: If you plan to hang the wreath on a door or wall, attach a length of ribbon or twine to the back of the wreath. Secure it by twisting the ends of the ribbon or twine around the chicken wire. If displaying on a table, ensure the wreath sits flat and stable.
- Hang the wreath: If you’ve chosen to hang the wreath, use a hook or adhesive hook specifically designed for hanging wreaths. Place the hook on the door or wall, then gently hang your wreath on the hook using the attached ribbon or twine.
- Display as a centerpiece: If you’ve chosen to use the wreath as a centerpiece, place it on a table or surface of your choice. You may opt to place it on a decorative plate or candle holder to elevate the arrangement.
- Make adjustments: Step back and assess the placement of your wreath. Ensure it is centered, level, and properly positioned. Make any necessary adjustments to achieve the desired look.
Once your wreath centerpiece is hung or displayed, take a moment to admire your handiwork. It’s a testament to your creativity and gardening skills! Your greenery wreath centerpiece will add a touch of nature and beauty to your living space, creating an inviting and cozy atmosphere.
Remember to occasionally check the wreath and make any necessary adjustments as the greenery may dry and slightly shift over time. With proper care, your wreath centerpiece will remain intact and continue to bring joy for weeks to come.
Enjoy the fruits of your labor and bask in the compliments you’ll receive on your stunning greenery wreath centerpiece!
Read more: How To Make A Greenery Centerpiece
Conclusion
Congratulations on completing your greenery wreath centerpiece! You have taken a step into the world of gardening and crafting, creating a beautiful and natural arrangement that adds a touch of green to your living space. By following the steps outlined in this guide, you have transformed simple materials like chicken wire and greenery into a stunning centerpiece that will surely impress your guests.
Creating a greenery wreath centerpiece allows you to unleash your creativity and bring a sense of nature indoors. The combination of different types of greenery and optional accents brings depth, texture, and visual interest to your arrangement. The flexibility of this project allows you to personalize it to your taste and style, ensuring a unique centerpiece that reflects your personality.
Remember to consider the placement of your wreath, whether it’s hanging on a door, adorning a wall, or proudly displayed on a table. The right placement will enhance its visual impact and make it a focal point in any room.
Make sure to care for your wreath by occasionally spritzing it with water if you’re using fresh greenery or dusting it gently if you’re using artificial foliage. This will help maintain its freshness and longevity. Additionally, keep an eye on the placement of your wreath and make adjustments as needed to keep it looking its best.
Creating a greenery wreath centerpiece is not only a fulfilling and enjoyable activity, but it also brings the beauty of nature into your home. It adds a touch of freshness and greenery to any space and creates an inviting atmosphere. It’s also a wonderful way to showcase your gardening skills and create a one-of-a-kind piece of art!
So, go ahead and embrace your creativity. Gather your materials, shape the chicken wire, adorn it with beautiful greenery, and proudly display your greenery wreath centerpiece. It will serve as a stunning reminder of your love for gardening and your ability to create something truly captivating.
Enjoy the beauty of your handmade centerpiece and let it infuse your home with a touch of natural elegance and charm!
Frequently Asked Questions about How To Make A Greenery Wreath Centerpiece Using Chicken Wire
Was this page helpful?
At Storables.com, we guarantee accurate and reliable information. Our content, validated by Expert Board Contributors, is crafted following stringent Editorial Policies. We're committed to providing you with well-researched, expert-backed insights for all your informational needs.


0 thoughts on “How To Make A Greenery Wreath Centerpiece Using Chicken Wire”