Home>Garden Essentials>How To Plant Poppy Seeds Outside
Garden Essentials
How To Plant Poppy Seeds Outside
Modified: March 16, 2024
Learn how to plant poppy seeds in your garden and create a beautiful outdoor space with our step-by-step guide.
(Many of the links in this article redirect to a specific reviewed product. Your purchase of these products through affiliate links helps to generate commission for Storables.com, at no extra cost. Learn more)
Introduction
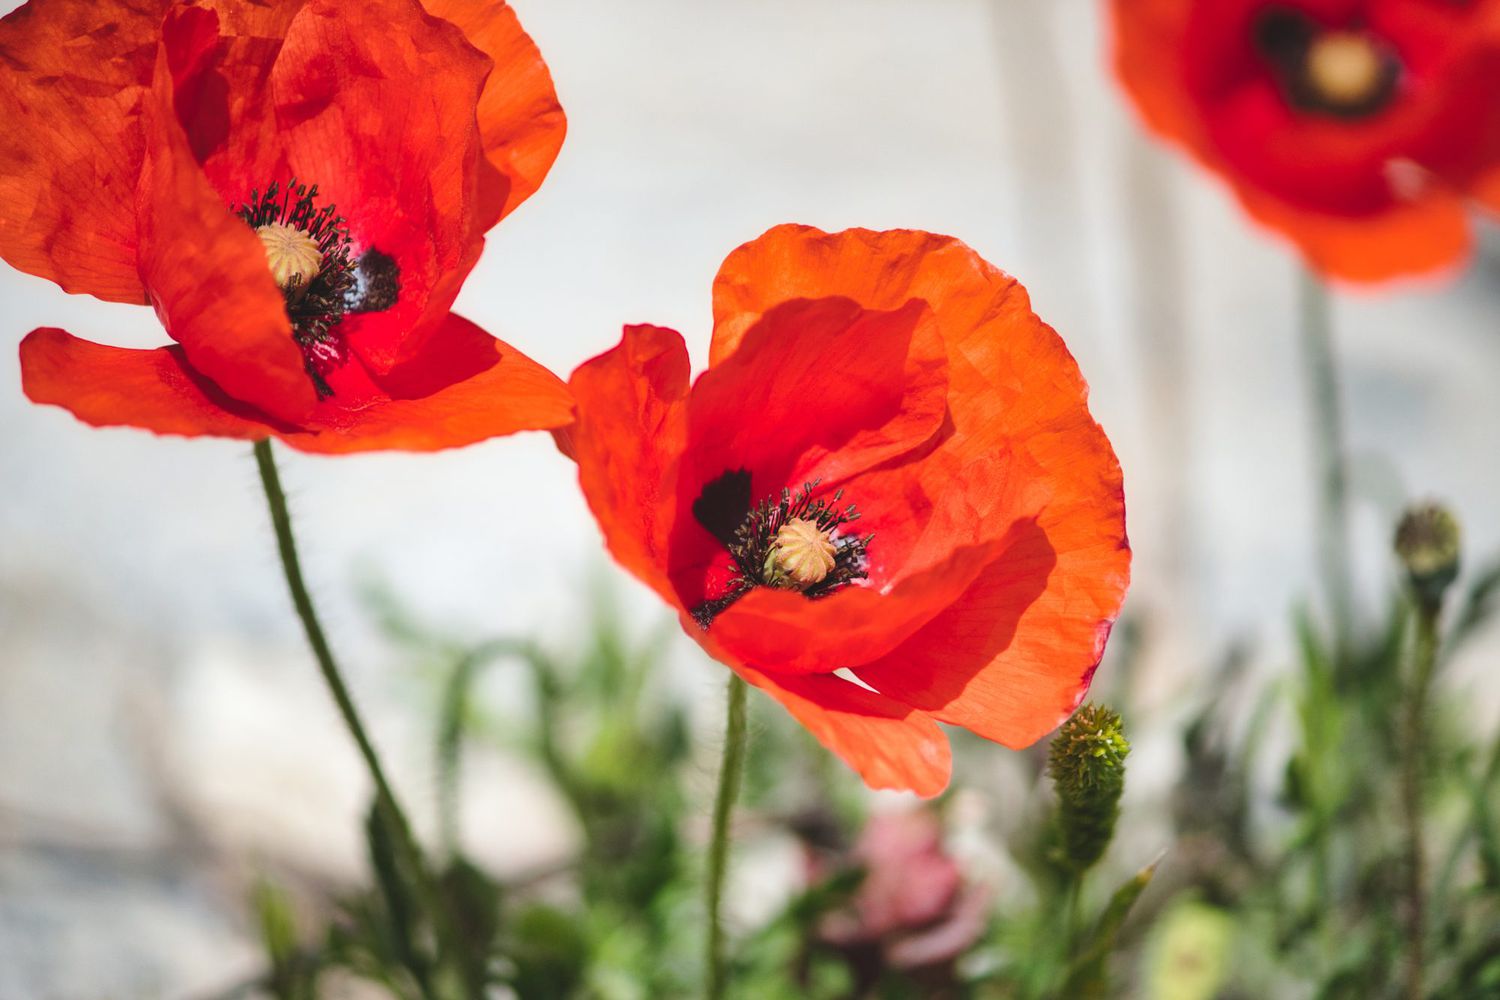
Welcome to the world of gardening! If you’re looking to add a splash of color and beauty to your outdoor space, planting poppy seeds is a wonderful choice. Poppies are not only visually stunning but also relatively easy to grow, making them an ideal choice for both beginner and experienced gardeners.
Poppy plants belong to the Papaveraceae family and are known for their delicate, vibrant flowers in various shades of red, orange, pink, yellow, and white. These stunning flowers are not only a treat for the eyes but also attract pollinators, adding life and vitality to your garden.
In this article, we will guide you through the process of planting poppy seeds outside. We’ll provide valuable information on climate and growing conditions, choosing the right poppy seeds, preparing the soil, planting the seeds, watering and fertilizing, mulching, protecting the seeds, maintaining and pruning, and harvesting and seed saving. By the end, you’ll be equipped with the knowledge you need to successfully cultivate your own poppy garden.
Note: Before proceeding, it’s essential to check your local regulations regarding the cultivation of poppies, as some varieties may be considered invasive in certain regions.
So, grab your gardening tools and let’s get started on this exciting journey of growing poppy seeds outside!
Key Takeaways:
- Choose the right poppy seeds for your garden by considering varieties, seed quality, germination rate, viability, and color mix. High-quality seeds increase the chances of a successful and vibrant poppy garden.
- Create an optimal soil environment for poppy seeds by removing weeds, loosening the soil, amending it with organic matter, testing the pH, and smoothing the surface. This sets the stage for healthy poppy growth and blooming.
Read more: How To Plant California Poppy Seeds
Climate and Growing Conditions
Before you start planting poppy seeds, it’s crucial to understand the climate and growing conditions that are suitable for these beautiful flowers. Poppies thrive in moderate to cool climates and are often grown as annuals or biennials.
When it comes to temperature, poppies prefer cool weather. They thrive in regions with average temperatures ranging from 60°F to 70°F (15°C to 21°C) during the day and cooler temperatures at night. However, they can tolerate slightly higher temperatures as long as they receive sufficient moisture and protection from intense sunlight.
Regarding sunlight, poppies appreciate full sun exposure. They require at least 6 to 8 hours of direct sunlight each day to grow and flower properly. If your garden doesn’t receive ample sunlight, consider choosing a spot that gets the maximum sunlight or using artificial lighting to supplement their light requirements.
When it comes to soil, poppies prefer well-draining, loamy soil. They don’t tolerate soggy or waterlogged conditions, which can lead to rot and other diseases. Ensure that the soil has good drainage to prevent water accumulation.
Soil pH is also important for the healthy growth of poppy plants. They prefer slightly acidic to neutral soil, with a pH level ranging between 6 and 7. If your soil is too acidic, you can amend it by adding agricultural lime. If it’s too alkaline, you can lower the pH by incorporating organic matter like compost or peat moss.
Lastly, while poppies can tolerate various climates, it’s important to note that extreme cold or heat may affect their growth and flowering. If you live in an area with harsh winters or scorching summers, it’s advisable to choose poppy varieties that are more suited to your specific climate.
By providing the right climate and growing conditions, you’ll create an optimal environment for your poppy seeds to flourish. In the next section, we’ll explore how to choose the right poppy seeds for your garden.
Choosing the Right Poppy Seeds
When it comes to choosing the right poppy seeds for your garden, there are a few factors to consider. From the variety of poppies to the seed quality, selecting the right seeds will set the foundation for a successful and vibrant poppy garden.
Poppy varieties: There are numerous varieties of poppies available, each with its own unique characteristics. Some popular options include the California Poppy (Eschscholzia californica), Oriental Poppy (Papaver orientale), Iceland Poppy (Papaver nudicaule), and Shirley Poppy (Papaver rhoeas). Research different varieties and choose the ones that best suit your personal preference and growing conditions.
Seed quality: It’s crucial to source high-quality poppy seeds for optimal germination and growth. Look for reputable seed suppliers or nurseries that specialize in flower seeds. Ensure that the seeds are fresh and haven’t been exposed to excessive heat or moisture, which can damage their viability.
Germination rate: Pay attention to the germination rate mentioned on the seed packets or product descriptions. This rate indicates the percentage of seeds that are likely to sprout and grow into healthy plants. Higher germination rates are preferable, as they increase the chances of successful seedling establishment.
Seed viability: Poppy seeds have a relatively short shelf life, so it’s essential to check the viability of the seeds you are purchasing. Older seeds may have a lower chance of germination. One way to assess seed viability is to perform a simple germination test by placing a few seeds on a damp paper towel and observing if they sprout within a specified time period.
Color and variety mix: If you want to create a diverse and visually appealing poppy garden, consider purchasing a mix of different colors and varieties. This mix will add depth and vibrancy, creating a stunning display of poppy blooms in your garden.
Ultimately, selecting the right poppy seeds is a personal choice. Consider your gardening goals, desired aesthetics, and the growing conditions in your area. By choosing high-quality seeds with good viability, you’ll increase the chances of a successful and beautiful poppy garden.
Now that you have chosen the perfect poppy seeds, it’s time to prepare the soil. In the next section, we will guide you through the process of preparing the soil to create an optimal growing environment for your poppies.
Preparing the Soil
Preparing the soil is a crucial step in the process of growing poppy seeds. By creating a healthy and fertile soil environment, you provide the necessary nutrients and structure for the poppy plants to thrive. Follow these steps to prepare the soil for your poppy garden:
- Remove weeds: Before you begin preparing the soil, remove any existing weeds or grass from the planting area. Weeds can compete with poppy seedlings for nutrients and moisture, hindering their growth. Use a garden hoe or hand tools to carefully remove the weeds, ensuring you remove the entire root system.
- Loosen the soil: Poppy seeds prefer loose and well-draining soil, so it’s important to loosen the soil to create a favorable growing environment. Use a garden fork or a tiller to loosen the soil to a depth of about 6 to 8 inches (15 to 20 centimeters). This helps improve the soil’s structure, allowing for better root penetration and water drainage.
- Amend the soil: Depending on the quality of your soil, you may need to amend it with organic matter to provide nutrients and improve its fertility. Incorporate well-decomposed compost, aged manure, or organic fertilizers into the soil. This helps enhance the soil’s nutrient content and overall health. Aim to incorporate about 2 to 3 inches (5 to 7 centimeters) of organic matter into the top layer of soil.
- Test the soil pH: It’s a good idea to test the soil’s pH level to ensure it falls within the ideal range for poppy growth (slightly acidic to neutral, pH 6 to 7). You can use a soil testing kit or send a soil sample to a local agricultural extension service for analysis. If the soil pH is too high or too low, you can adjust it by adding appropriate amendments like agricultural lime to raise pH or elemental sulfur to lower pH.
- Smooth and level the soil: Once you have amended the soil and adjusted the pH, use a rake or garden tool to smooth and level the soil surface. This allows for even seed distribution and helps create an aesthetically pleasing garden bed.
By following these steps, you have created a nutrient-rich and well-draining soil environment that is conducive to the growth of poppy seeds. In the next section, we will guide you through the process of planting the poppy seeds in your prepared soil.
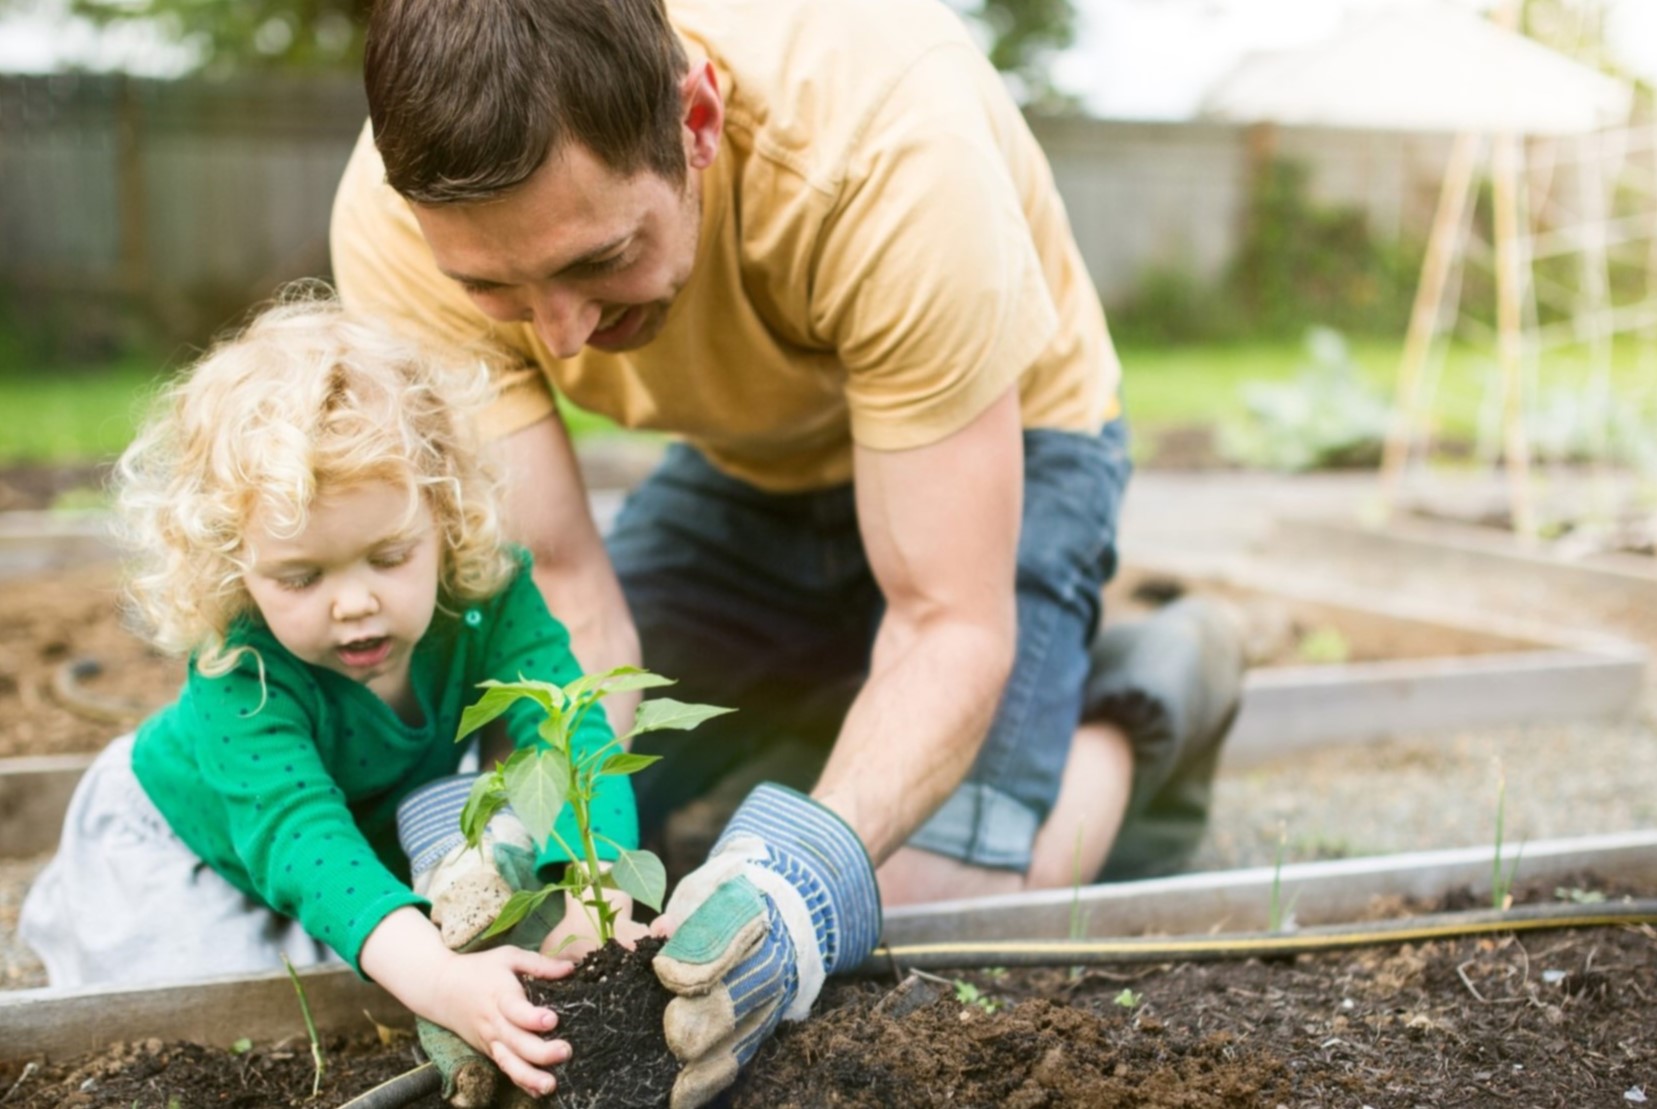
Planting Poppy Seeds
Now that you have prepared the soil, it’s time to plant your poppy seeds. Here’s a step-by-step guide to help you successfully sow and establish your poppy garden:
- Timing: Poppy seeds are best planted in early spring or late fall, depending on your climate. The cooler temperatures and moisture during these seasons create favorable conditions for germination and seedling establishment.
- Seed spacing: Scatter the poppy seeds evenly over the prepared soil. Aim for a spacing of about 6 to 12 inches (15 to 30 centimeters) between each seed. This allows enough space for the plants to grow and prevents overcrowding.
- Planting depth: Poppy seeds are tiny and require light for germination. It’s essential to plant them at the correct depth. Gently press the seeds into the soil with your fingers or a light rake, ensuring they are no deeper than 1/8 to 1/4 inch (3 to 6 millimeters) deep. This shallow planting depth allows sunlight to reach the seeds, stimulating germination.
- Watering: After sowing the poppy seeds, water the soil gently. Ensure that the soil remains slightly moist but not waterlogged. Overwatering can lead to rot and other diseases, so it’s important to maintain a balance in watering.
- Labeling: To keep track of your poppy varieties and planting locations, it’s helpful to label each area where you have sown seeds. You can use small plant markers or sticks with the variety name written on them.
- Protective measures: Poppies are attractive to birds, so it’s important to protect the seeds from being eaten. You can cover the seeded areas with a thin layer of fine mesh or bird netting. This will prevent birds from accessing the seeds while still allowing sunlight and water to reach them.
Remember to keep the soil adequately moist during the germination period, which can take around 10 to 14 days. Avoid overhead watering, as it can dislodge the seeds or cause fungal issues. Instead, use a gentle mist setting or a watering can with a fine spout to water the seeded areas.
As the poppy seeds germinate and grow into seedlings, thin them out to achieve the desired spacing. Remove any weak or overcrowded seedlings, allowing the stronger ones to develop into healthy plants.
Now that you know how to plant poppy seeds, let’s move on to the next stage: watering and fertilizing your poppy plants for optimal growth.
Read more: How To Plant Poppies From Seed
Watering and Fertilizing
Proper watering and fertilizing are essential for the healthy growth and blooming of your poppy plants. Here are some guidelines to ensure your poppies receive the right amount of water and nutrients:
Watering:
- Establishment phase: During the initial stages of growth, it’s important to keep the soil consistently moist. Water the poppy plants regularly, especially during dry spells or when there is a lack of rainfall. Aim to provide 1 inch (2.5 centimeters) of water per week, either through rainfall or supplemental irrigation.
- Deep watering: When you water, make sure to provide a deep soak rather than light, frequent watering. This encourages the poppy plants to develop deep, strong root systems, making them more resilient and drought-tolerant. Watering deeply also helps prevent shallow rooting, which can make the plants susceptible to drying out.
- Avoid overwatering: While it’s important to keep the soil consistently moist, be cautious not to overwater. Poppies prefer well-draining soil, and excessive moisture can lead to root rot and other fungal diseases. Monitor the soil moisture level by sticking your finger about an inch into the soil. If it feels moist, hold off on watering until the top inch of soil feels slightly dry.
Fertilizing:
- Organic matter: Prior to planting your poppy seeds, incorporating well-decomposed compost or aged manure into the soil helps provide a nutrient-rich foundation. This organic matter slowly releases essential nutrients to the plants as they grow.
- Light feeding: Poppies generally don’t require heavy fertilization. In most cases, the nutrients from the initial soil preparation and organic matter are sufficient for their growth. However, if you notice slow growth or pale foliage, you can apply a balanced, slow-release fertilizer following the manufacturer’s instructions. Avoid excessive nitrogen fertilizers, as they can result in lush foliage at the expense of flower production.
- Timing of fertilization: Apply fertilizer when the plants are actively growing, usually in the early spring or after the first set of true leaves appears. Split the application into two or three doses throughout the growing season, allowing ample time between each application.
Remember that each garden and its soil may have specific nutrient requirements. It’s advisable to perform a soil test to determine any deficiencies or imbalances and adjust your fertilization practices accordingly.
By providing proper watering and appropriate fertilization, you’ll ensure that your poppy plants have the necessary resources for healthy growth and abundant blooming. In the next section, we’ll discuss the importance of mulching and how it can benefit your poppy garden.
Choose a sunny spot with well-drained soil. Scatter poppy seeds on the soil surface and lightly press them in. Water gently and keep soil moist until seeds sprout. Thin seedlings to 6-8 inches apart for best growth.
Mulching
Mulching is a valuable practice that can benefit your poppy garden in several ways. By adding a layer of mulch to the soil surface, you can help conserve moisture, suppress weeds, regulate soil temperature, and improve overall soil health. Here’s why mulching is important and how to incorporate it into your poppy garden:
Moisture conservation: Mulch acts as a protective barrier between the soil and the environment. It helps slow down evaporation and reduce water loss from the soil surface. By retaining moisture, mulch ensures that your poppy plants have a consistent and adequate water supply, especially during dry periods. Apply a layer of mulch around 2 to 3 inches (5 to 7 centimeters) thick, making sure to leave a small space around the base of the plants to prevent rot.
Weed suppression: Mulch helps suppress the growth of weeds by preventing sunlight from reaching weed seeds. This reduces competition for nutrients and resources, allowing your poppy plants to thrive without having to compete with unwanted vegetation. Before mulching, make sure to remove any existing weeds or grass from the planting area to minimize their growth.
Soil temperature regulation: Mulch acts as an insulating layer, helping to regulate soil temperature. It provides insulation from temperature extremes, keeping the soil cooler in hot weather and warmer in cold weather. This creates a more favorable environment for the poppy plants, as they prefer moderate to cool temperatures.
Soil health improvement: As mulch breaks down over time, it adds organic matter to the soil. This organic matter enriches the soil, improving its structure, fertility, and moisture-holding capacity. It also encourages beneficial soil microorganisms and earthworm activity, which contribute to overall soil health and nutrient cycling.
When selecting mulch for your poppy garden, consider using organic options such as straw, shredded leaves, wood chips, or compost. These materials provide additional nutrients to the soil as they break down and are environmentally friendly choices.
Apply mulch in the spring once the soil has warmed up and the poppy seedlings have emerged. Make sure to keep the mulch a few inches away from the base of the plants to avoid moisture-related issues and allow air circulation around the stems.
Mulching is an excellent practice to improve the overall health and productivity of your poppy garden. It conserves moisture, suppresses weeds, regulates soil temperature, and enhances soil fertility. With proper mulching, your poppy plants will have the ideal growing environment to flourish and dazzle you with their vibrant blooms.
Now that you understand the benefits of mulching, let’s move on to the next section where we’ll discuss how to protect your poppy seeds from potential threats.
Protecting the Seeds
Protecting your poppy seeds is crucial to ensure successful germination and establishment of your poppy garden. There are a few key factors to consider when it comes to safeguarding your seeds from potential threats. Here’s what you need to know:
Protecting from birds and animals:
- Birds are notorious seed lovers, and poppy seeds are no exception. To prevent birds from feasting on your freshly sown seeds, it’s important to take protective measures. Cover the seeded areas with a thin layer of fine mesh or bird netting. This allows sunlight and water to reach the seeds while keeping birds at bay.
- Other animals like squirrels or rodents may also be attracted to poppy seeds. If you notice signs of their presence, you can place chicken wire or mesh cages over the seeded areas until the seedlings have established.
Protecting from excessive moisture:
- While poppies require adequate moisture to germinate and grow, excessive moisture can lead to damping off, root rot, and other fungal diseases. To prevent these issues, avoid overwatering and ensure proper drainage in the planting area. Use a gentle watering technique to keep the soil slightly moist, but not waterlogged.
- Avoid overhead watering, as it can dislodge or damage the seeds. Instead, use a watering can with a fine spout or a gentle mist setting on a hose to water the seeded areas.
Protecting from extreme weather conditions:
- Poppies are generally tolerant to a wide range of weather conditions, but extreme heat or cold may affect their growth and blooming. If you anticipate extreme temperatures, consider providing some protection to your poppy plants.
- During hot summer months, provide shade or partial shade to protect the plants from intense sunlight. You can use shade cloth or plant taller companion plants to create some shade for your poppies.
- In regions with frost or freezing temperatures, cover the plants with frost blankets, row covers, or even old bedsheets to protect them from cold damage.
By taking proactive measures to protect your poppy seeds, you increase their chances of successful germination and growth. Remember to monitor the planting area regularly, keeping an eye out for signs of bird activity, excess moisture, or extreme weather conditions.
Now that you are equipped with knowledge on protecting your poppy seeds, let’s move on to the next section: maintaining and pruning your poppy plants to ensure healthy growth and abundant flowering.
Maintaining and Pruning
Maintaining and pruning your poppy plants is essential for their overall health, appearance, and longevity. While poppies are relatively low-maintenance, they still benefit from some regular care and attention. Here are some important maintenance tasks and pruning techniques for your poppy garden:
Regular watering: Once your poppy plants are established, it’s important to maintain a regular watering schedule. Water deeply and evenly, ensuring that the soil remains consistently moist, particularly during dry spells. However, be cautious not to overwater, as this can lead to root rot and other moisture-related issues. Monitor the soil moisture level and adjust your watering accordingly.
Weeding: Regular weeding is important to prevent competition for nutrients and resources. Remove any weeds that may sprout near your poppy plants by hand, taking care not to disturb the delicate poppy roots. Applying a layer of mulch around your poppies can help suppress weed growth and reduce the need for frequent weeding.
Deadheading: Deadheading is the process of removing spent flowers from the plant. For poppies, deadheading helps redirect the plant’s energy from seed production to continuous blooming. After a poppy flower has withered and the petals have fallen off, gently pluck the flower stem from the plant using your fingers or pruners. This encourages the plant to produce more blossoms, extending the flowering season.
Pruning: While poppies don’t require extensive pruning, there are a few instances when pruning can be beneficial. If you notice any damaged or diseased leaves or stems, promptly remove them to stop the spread of disease and maintain the plant’s overall health. Additionally, if your poppy plants become overcrowded, you can thin them out by removing some of the weaker or overcrowded seedlings. This allows more space for the remaining plants to grow and thrive.
Monitoring pest and disease issues: Poppy plants are generally resistant to pests and diseases. However, it’s still important to monitor your plants for any signs of pest infestation or disease. Keep an eye out for common garden pests like aphids or snails, and take appropriate measures to control them if necessary. If you encounter any disease symptoms, such as powdery mildew or fungal infections, promptly address them using organic disease control methods or seek advice from your local gardening expert.
By maintaining and pruning your poppy plants, you can ensure that they remain healthy, vigorous, and beautiful throughout the growing season. Regular care and attention will reward you with a stunning display of vibrant poppy blooms in your garden.
Now that you know how to care for your poppy plants, let’s move on to the next section: harvesting and seed saving.
Read more: When To Plant California Poppy Seeds
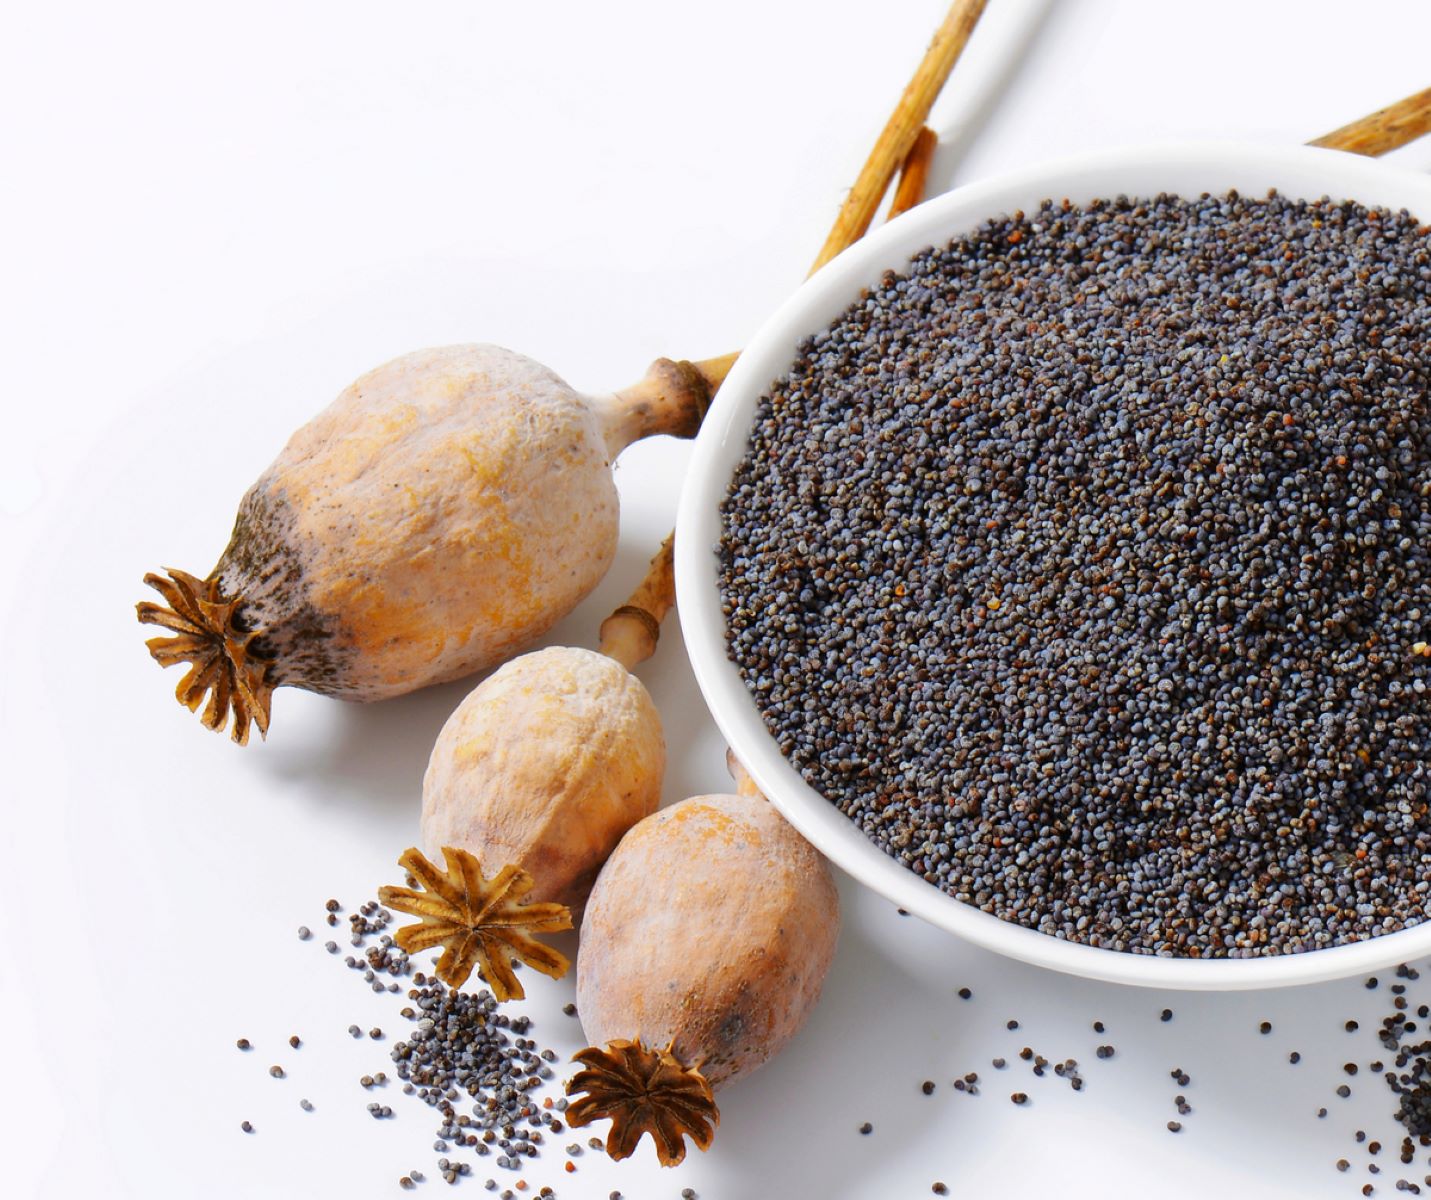
Harvesting and Seed Saving
Harvesting and seed saving allows you to continue the cycle of growth and beauty in your poppy garden. Here’s a guide to help you harvest poppy seeds and save them for future planting:
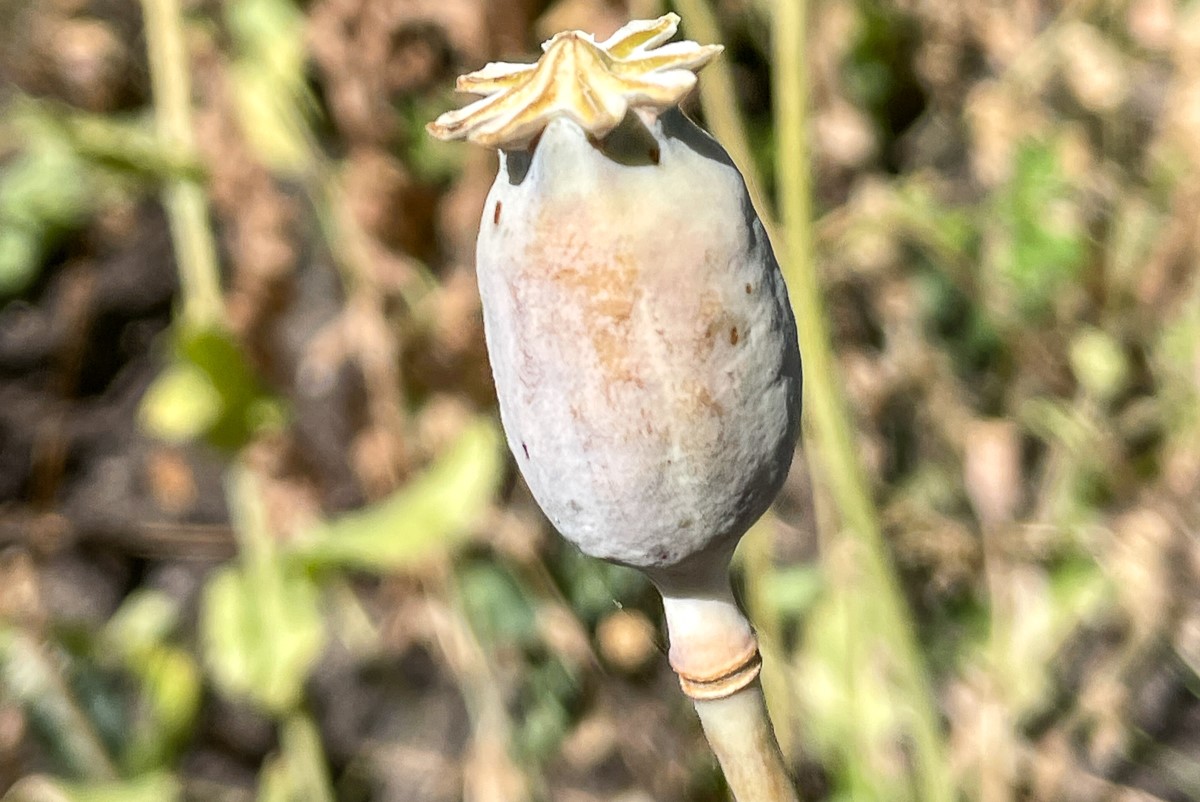
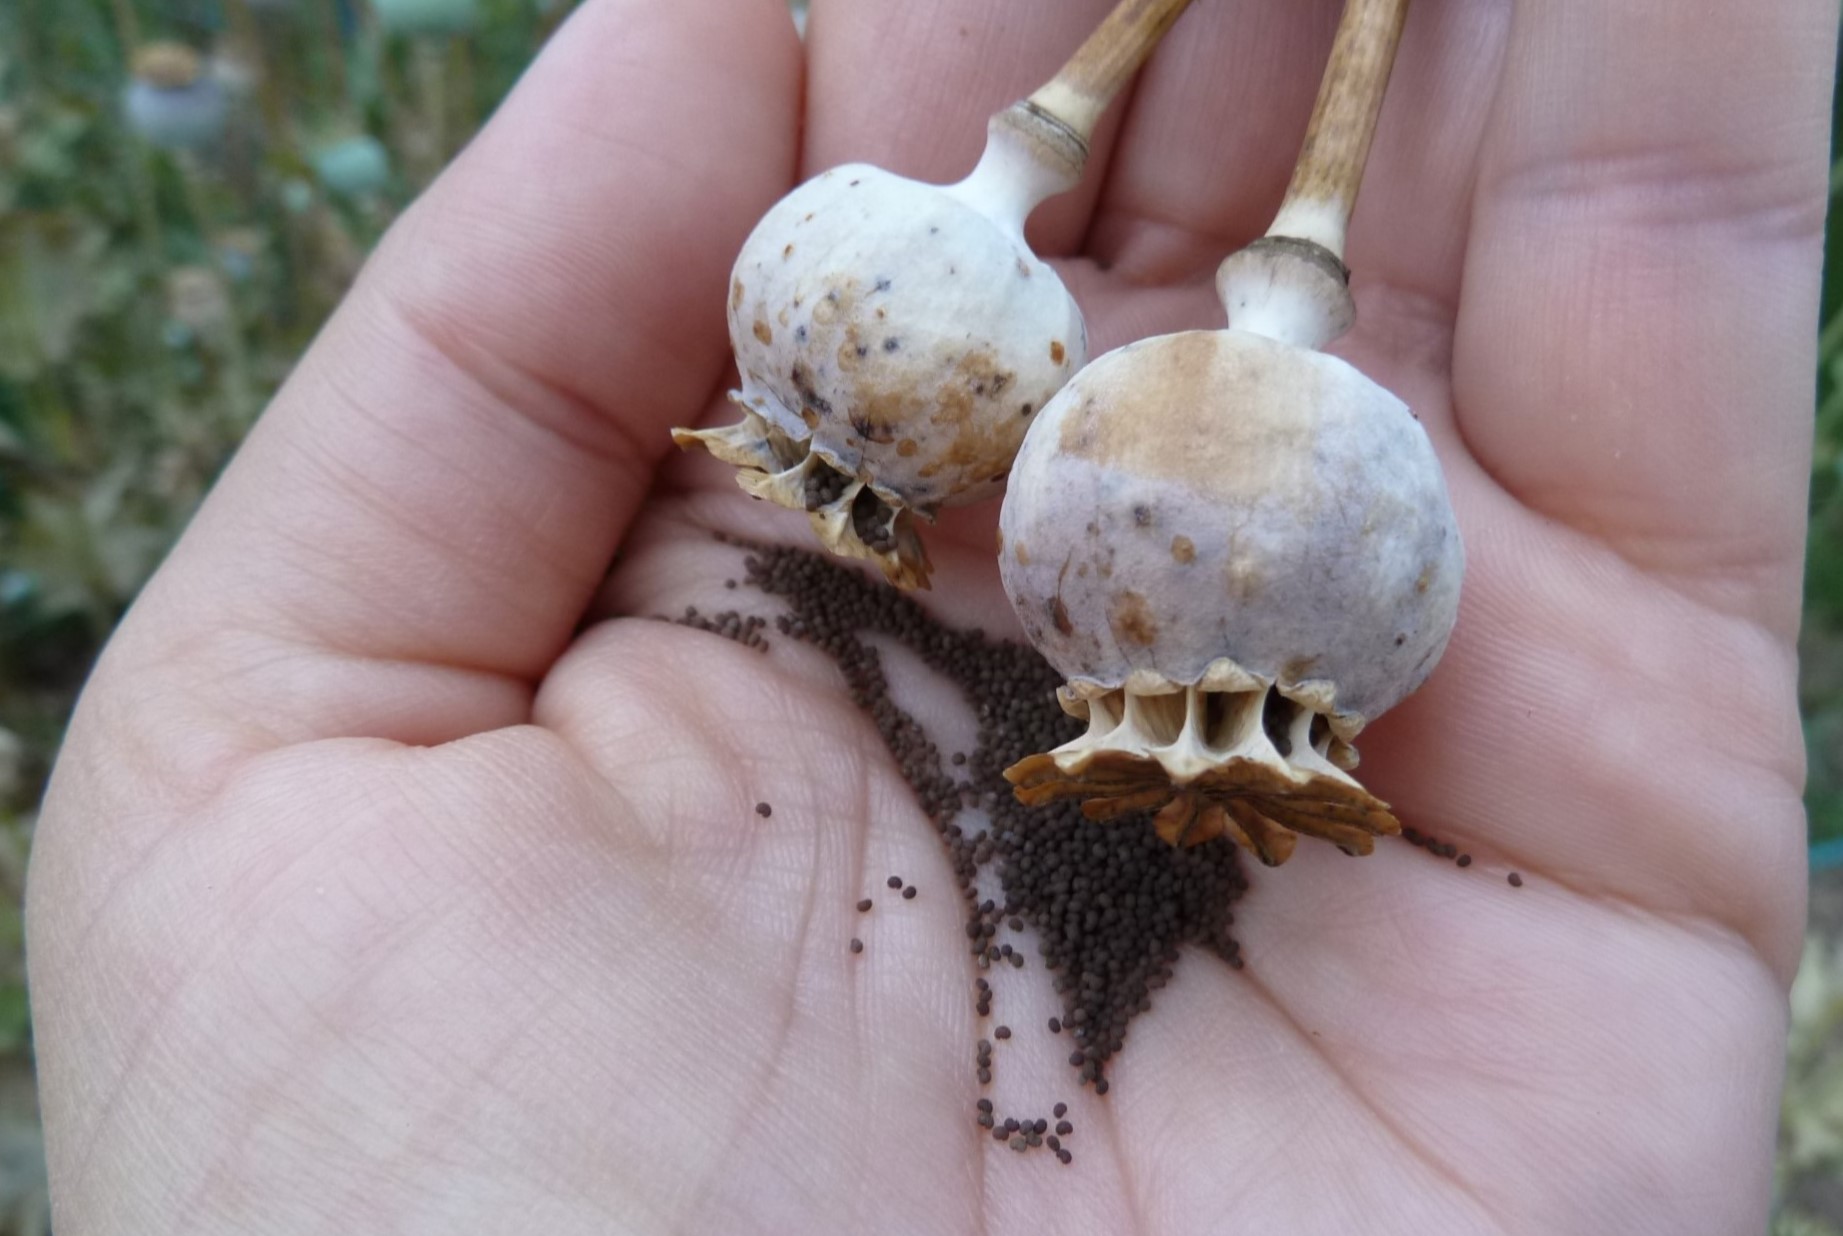
Timing: Wait for the poppy flowers to fade and their seed pods to dry out before harvesting. The seed pods, also known as capsules, will turn brown and become dry and papery in texture. This usually occurs several weeks after the flowers have bloomed.
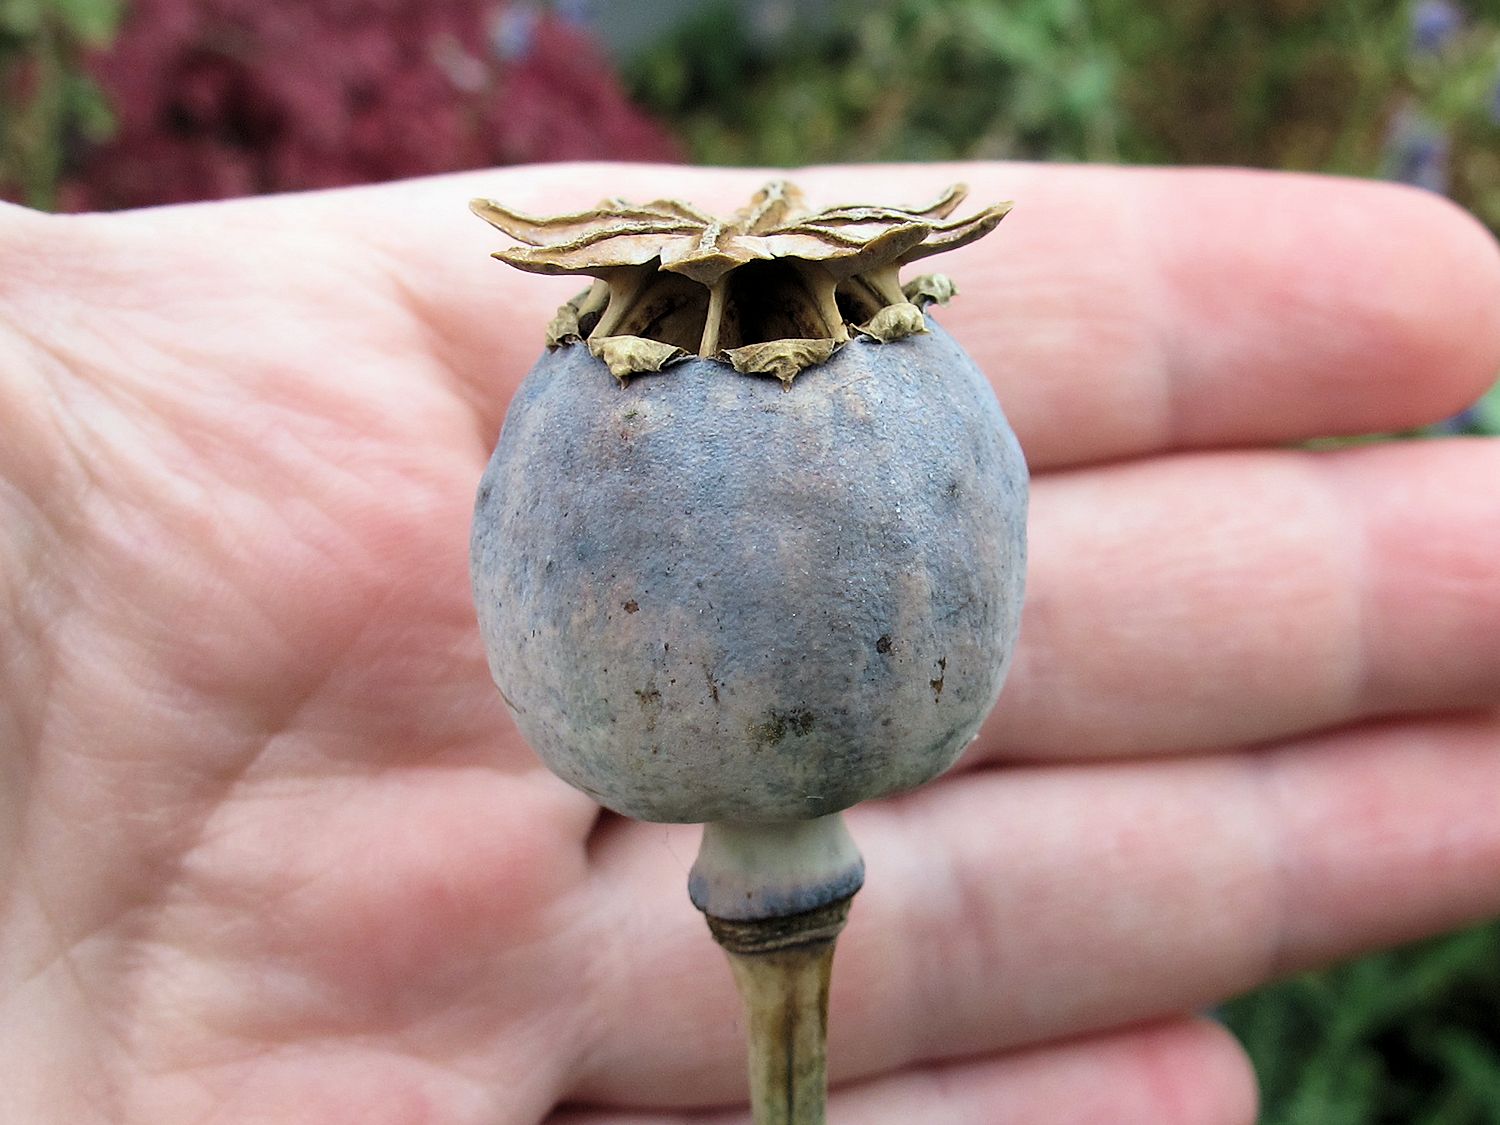
Harvesting the seeds: To harvest the poppy seeds, gently grasp the dried seed pod near its base and carefully twist and pull it from the stem. Place the seed pods in a clean, dry container. As you handle the seed pods, you may notice a small hole at the top where the seeds are released. Be cautious not to jostle or shake the pods excessively, as this can cause premature seed dispersal.
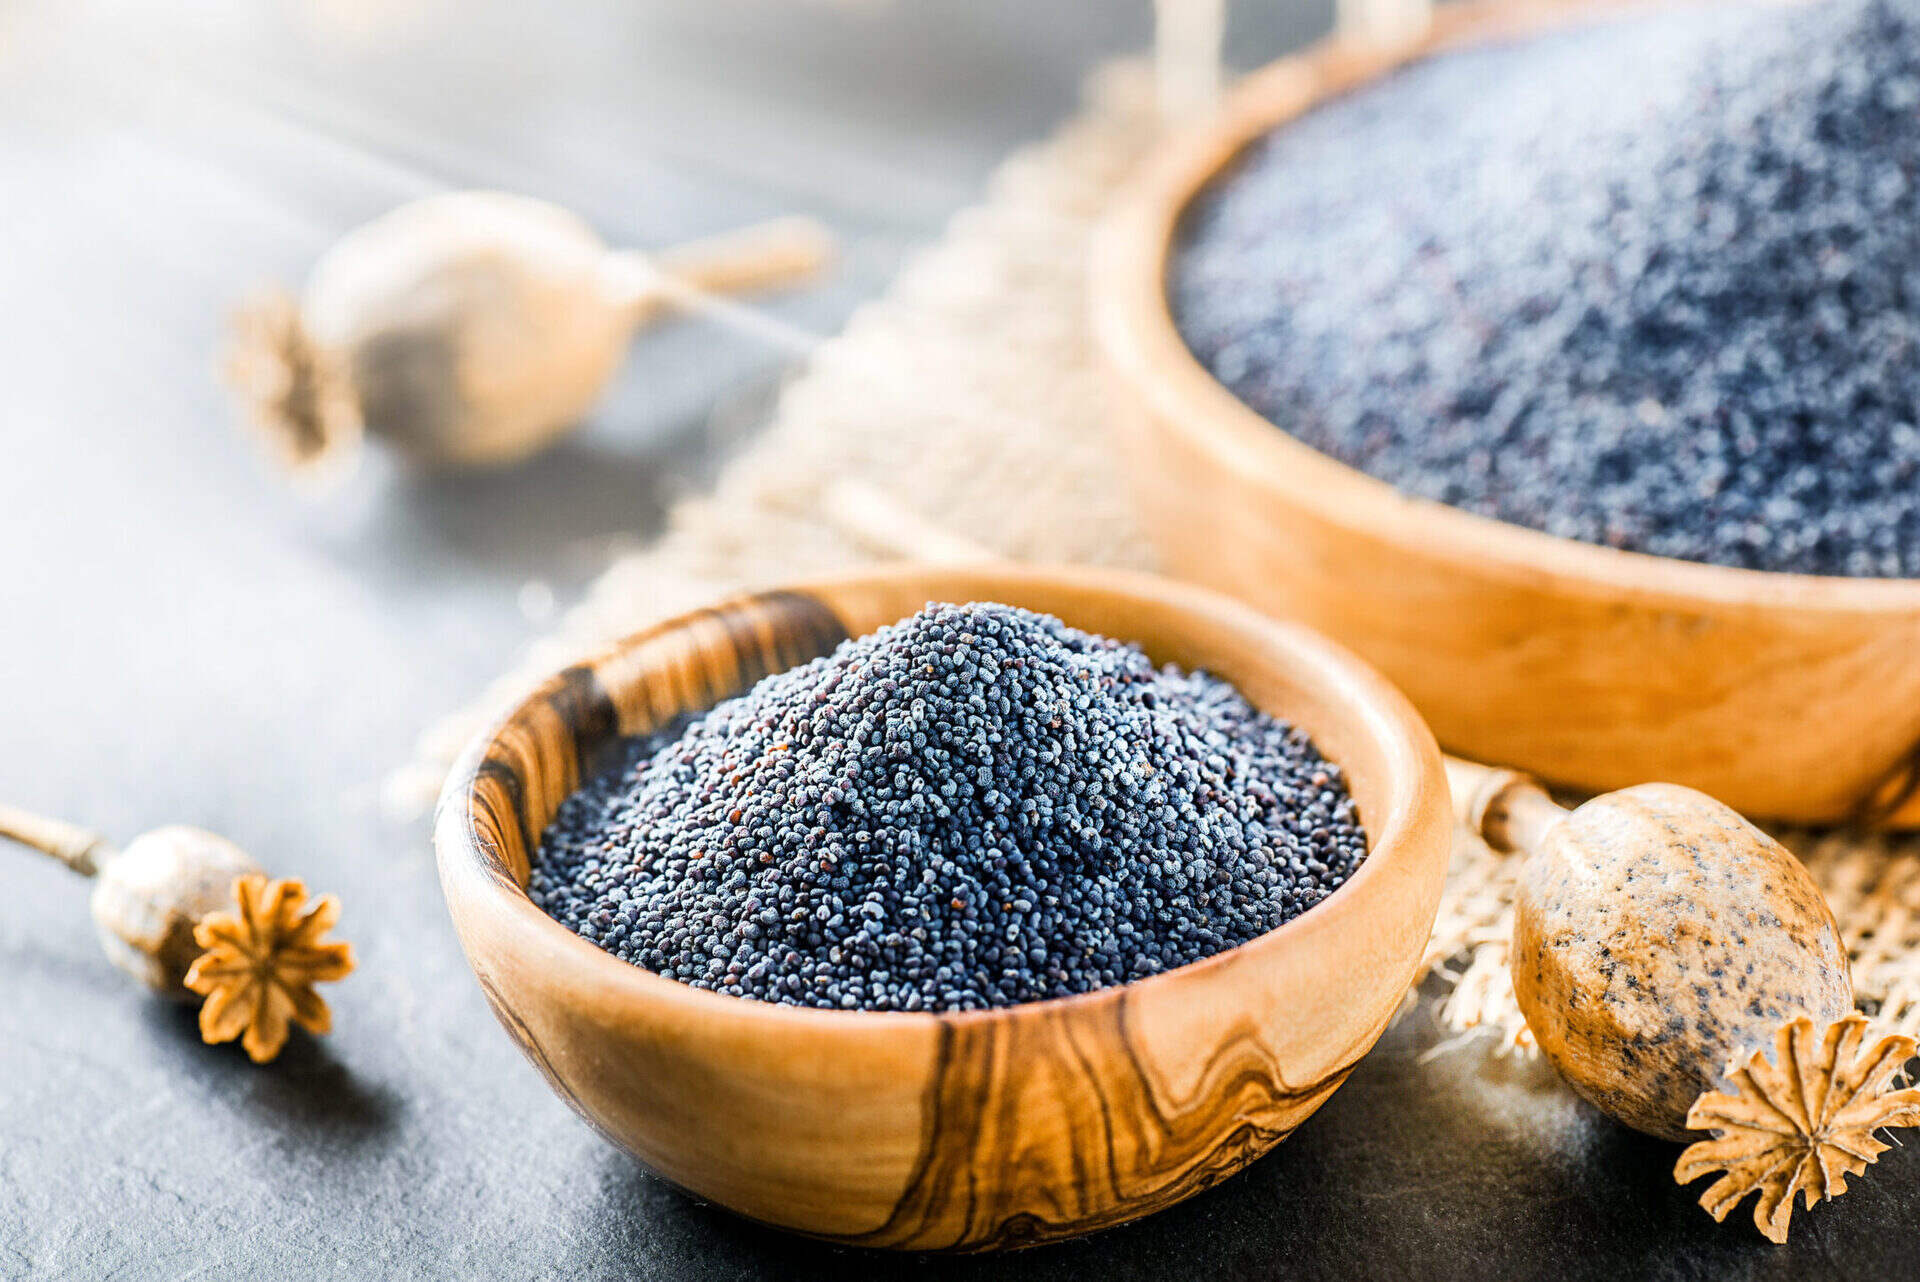
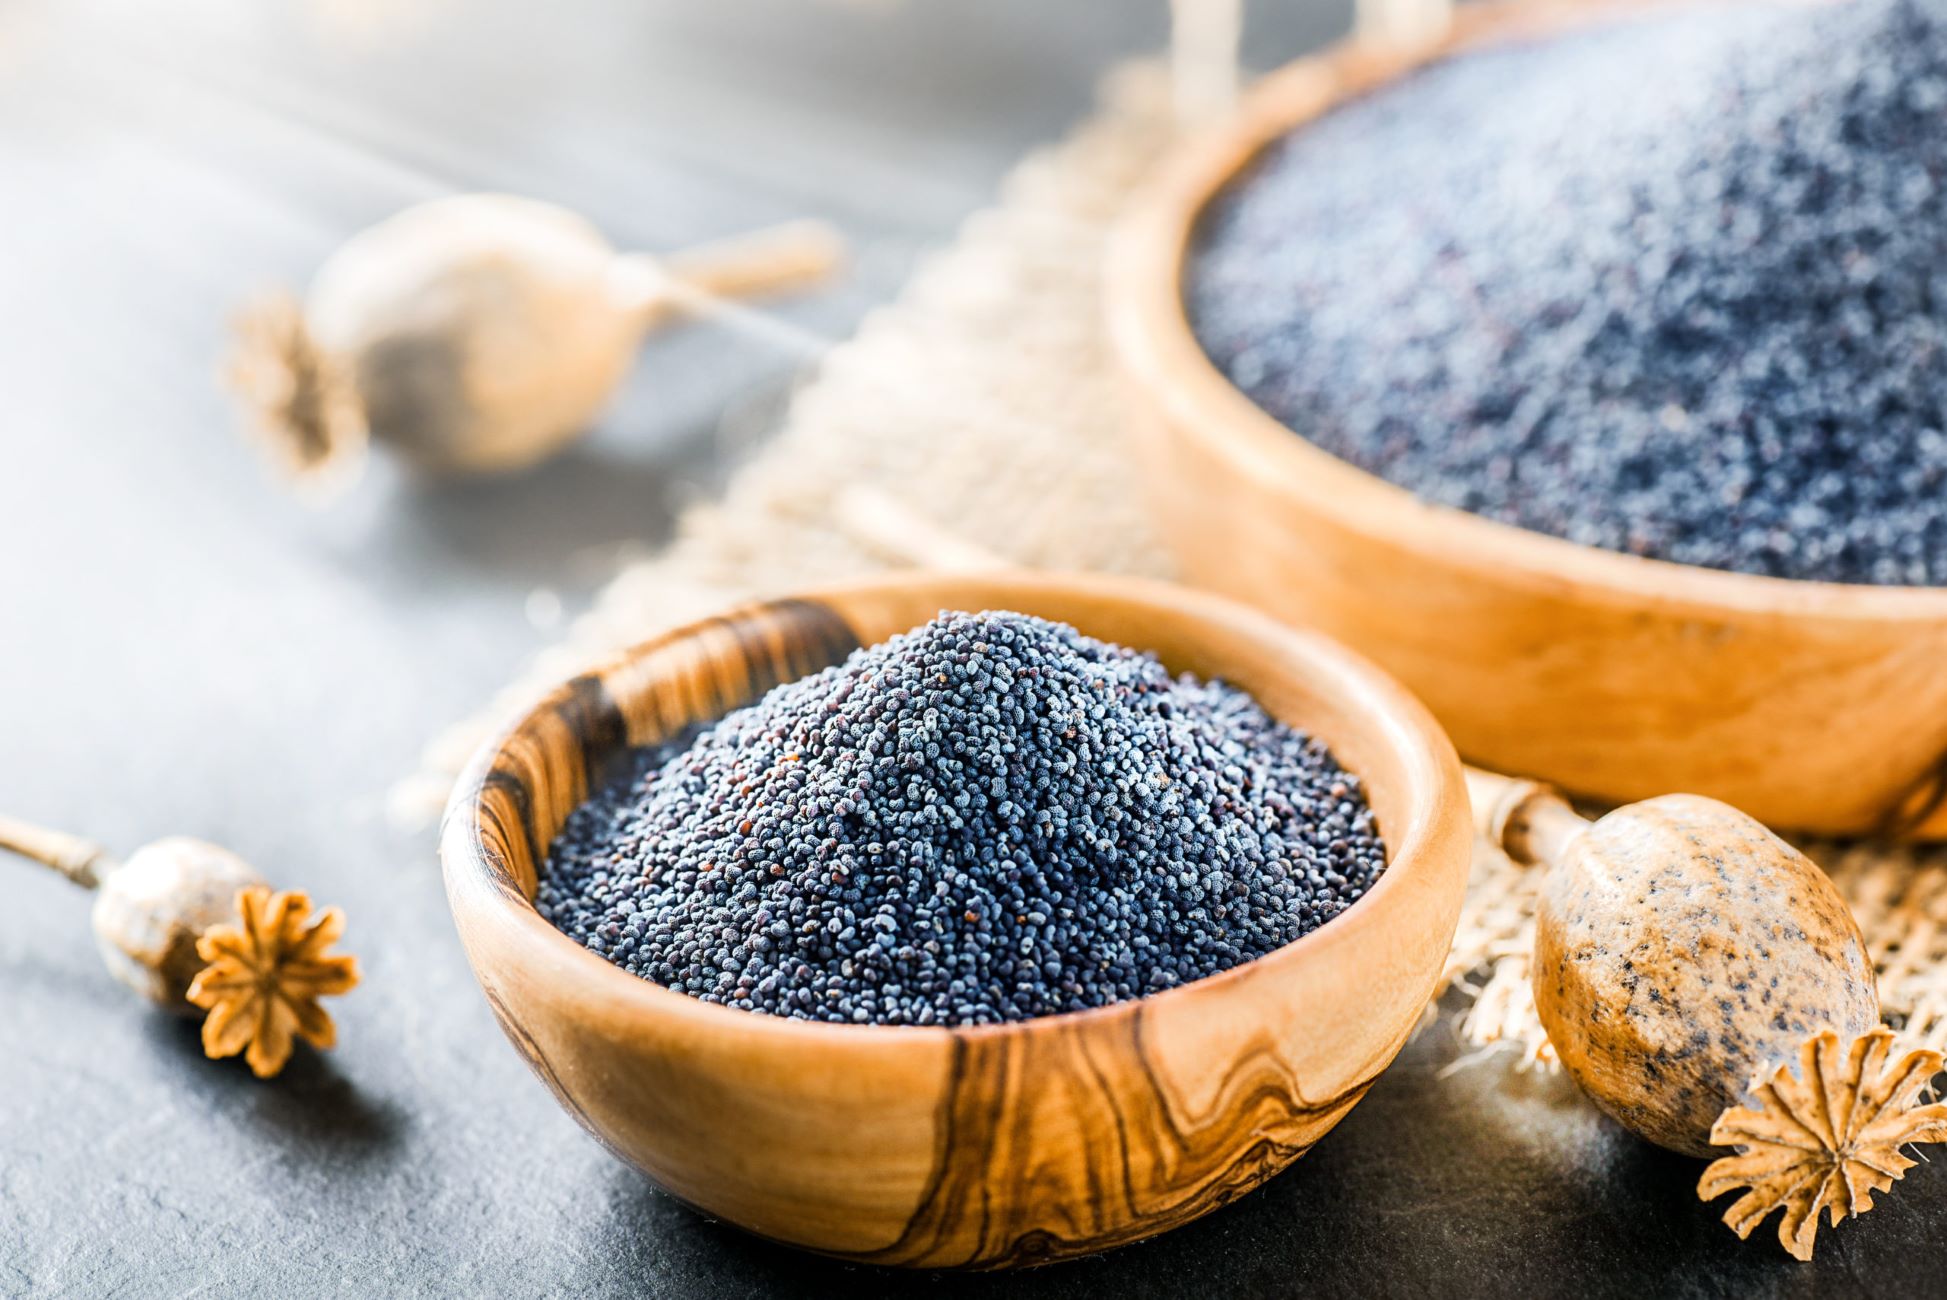
Drying the seeds: Once you have harvested the seed pods, it’s important to dry them thoroughly before storing the seeds. Place the seed pods in a well-ventilated area, away from direct sunlight and moisture. Allow them to dry for about 1 to 2 weeks until the pods are completely dry and brittle. This ensures that the seeds are fully mature and will have a higher germination rate.
Extracting the seeds: Once the seed pods are dry, gently crush or rub them between your fingers to release the small poppy seeds. Be careful not to crush the seeds while doing this. To separate the seeds from any remaining pod debris, you can use a fine-mesh sieve or a seed cleaning screen. Gently shake the seeds through the sieve to remove any remaining plant material.
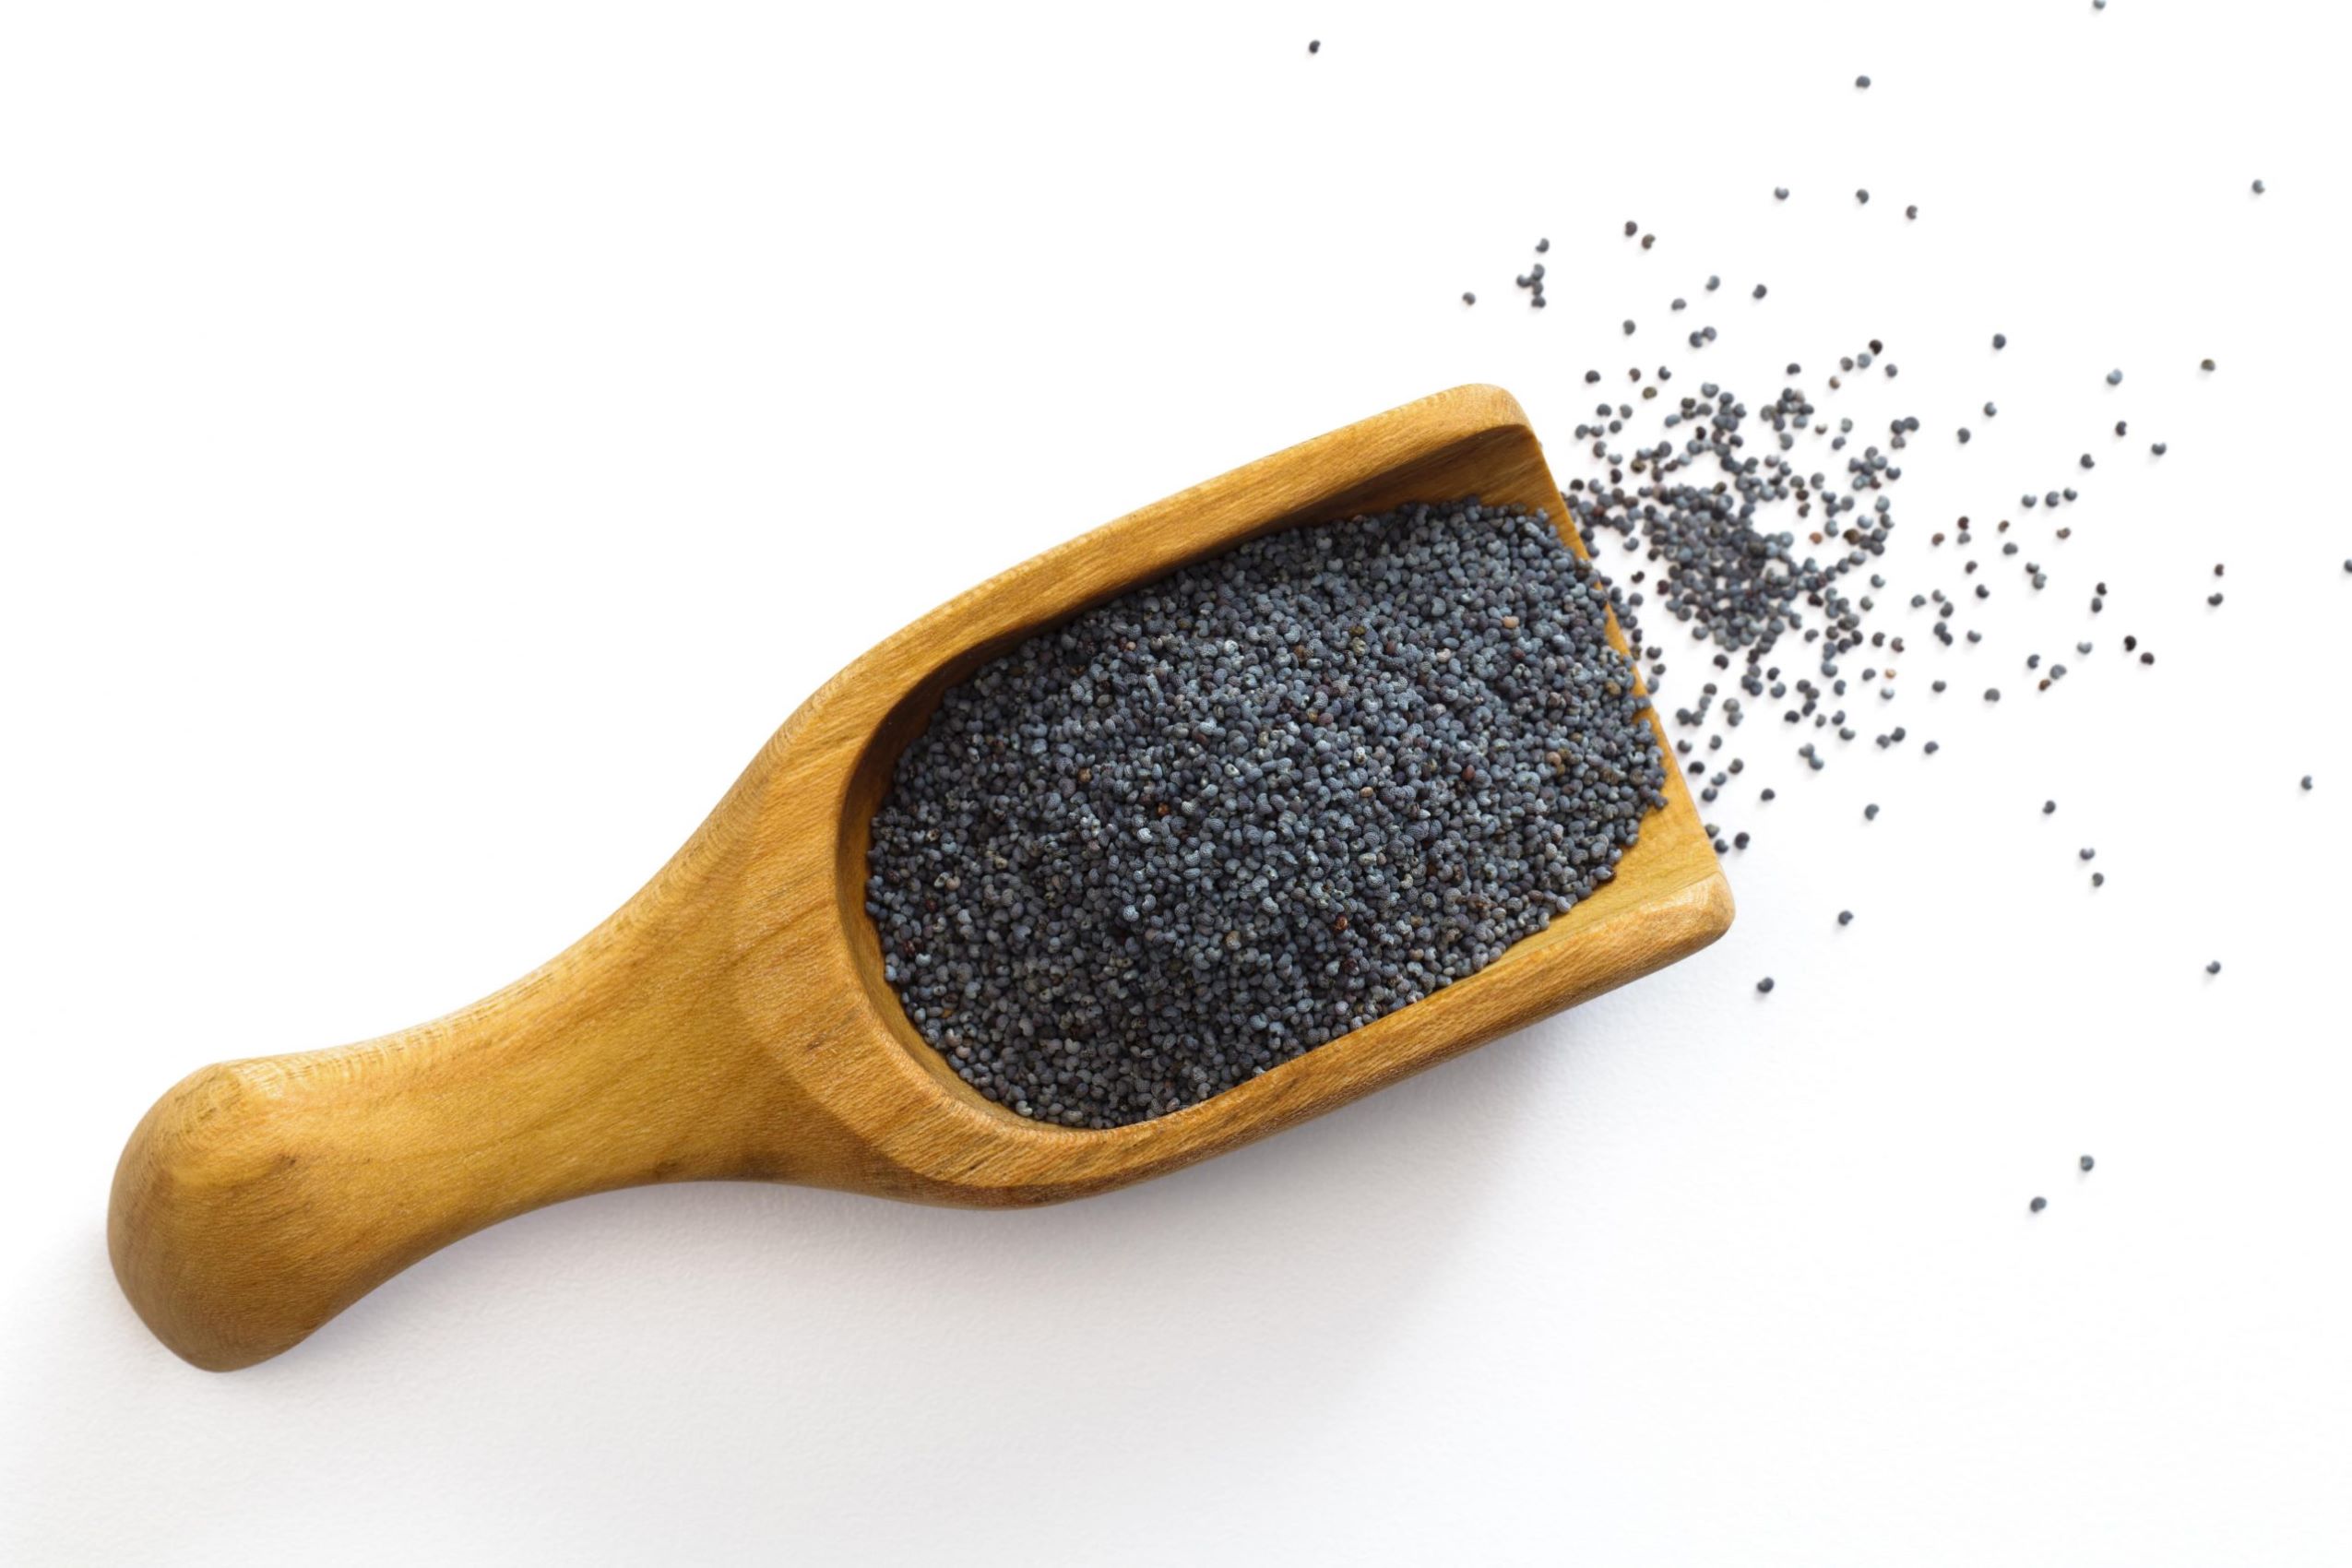
Storing the seeds: After you have extracted the poppy seeds, store them in a cool, dry place in airtight containers. You can use small envelopes, glass jars, or seed storage containers. Label each container with the poppy variety and the date of harvest. Store the containers in a dark and cool location, such as a pantry or refrigerator. This helps maintain the viability of the seeds for future planting.
Note: Poppy seeds have a relatively short shelf life, so it’s best to use them within 1 to 2 years for optimal germination. If you want to extend their viability, you can place the sealed containers in the refrigerator, which provides a cool and stable environment.
By harvesting and saving your own poppy seeds, you can continue to grow these beautiful flowers year after year. Remember to only collect seeds from open-pollinated varieties to ensure that the seeds will produce true-to-type plants. Enjoy the process of seed saving and the satisfaction of having a perpetual source of poppy seeds for your garden.
Congratulations! You now have all the knowledge you need to successfully plant, care for, and harvest poppy seeds in your garden. These vibrant and stunning flowers will add a pop of color and elegance to your outdoor space, attracting pollinators and bringing you joy season after season.
Happy gardening!
Conclusion
Congratulations on embarking on your journey to plant and grow poppy seeds in your garden! With their vibrant colors and delicate blooms, poppies are a delightful addition to any outdoor space. By following the steps outlined in this article, you now have the knowledge to successfully cultivate your own poppy garden.
From understanding the climate and growing conditions that are favorable for poppy plants to choosing the right seeds and preparing the soil, you have learned the crucial elements for successful poppy cultivation. Remember to create an optimal soil environment with proper drainage and a slightly acidic to neutral pH level. Ensure that your poppy seeds receive adequate sunlight and water to help them germinate and thrive.
Thanks to your newfound knowledge on maintaining and pruning, you can provide your poppy plants with the care they need for healthy growth and abundant flowering. Regular watering, weeding, and deadheading will help your poppies flourish throughout the growing season. It’s also crucial to protect your poppy seeds from threats like birds, excessive moisture, and extreme weather conditions.
By harvesting and saving poppy seeds, you can continue the cycle of growth and beauty in your garden. Remember to wait for the seed pods to dry out before harvesting, and ensure that the seeds are fully mature and dry before storage. With proper seed storage, you’ll have a plentiful supply of seeds for future planting and the ability to share the joy and beauty of poppies with others.
As you embark on this gardening journey, don’t forget to enjoy the process and take moments to appreciate the beauty of nature. Gardening is a rewarding experience that connects us with the earth and allows us to cultivate and nurture life. Embrace the ups and downs, the successes and challenges, and remember that each step you take in the garden contributes to the growth and vitality of your poppy plants.
Now it’s time to put your knowledge into action. Get your gardening tools ready, select your favorite poppy seeds, and start planting. With patience, care, and dedication, you’ll soon be rewarded with the sight of vibrant poppy blooms dancing in your garden,
Happy gardening and enjoy the beauty and tranquility that poppy flowers bring to your outdoor oasis!
Frequently Asked Questions about How To Plant Poppy Seeds Outside
Was this page helpful?
At Storables.com, we guarantee accurate and reliable information. Our content, validated by Expert Board Contributors, is crafted following stringent Editorial Policies. We're committed to providing you with well-researched, expert-backed insights for all your informational needs.


0 thoughts on “How To Plant Poppy Seeds Outside”