Home>Garden Essentials>How To Plant Milkweed Seeds Outside
Garden Essentials
How To Plant Milkweed Seeds Outside
Modified: March 15, 2024
Learn how to plant milkweed seeds in your garden with this comprehensive guide. Transform your outdoor space into a haven for butterflies and support the monarch population.
(Many of the links in this article redirect to a specific reviewed product. Your purchase of these products through affiliate links helps to generate commission for Storables.com, at no extra cost. Learn more)
Introduction
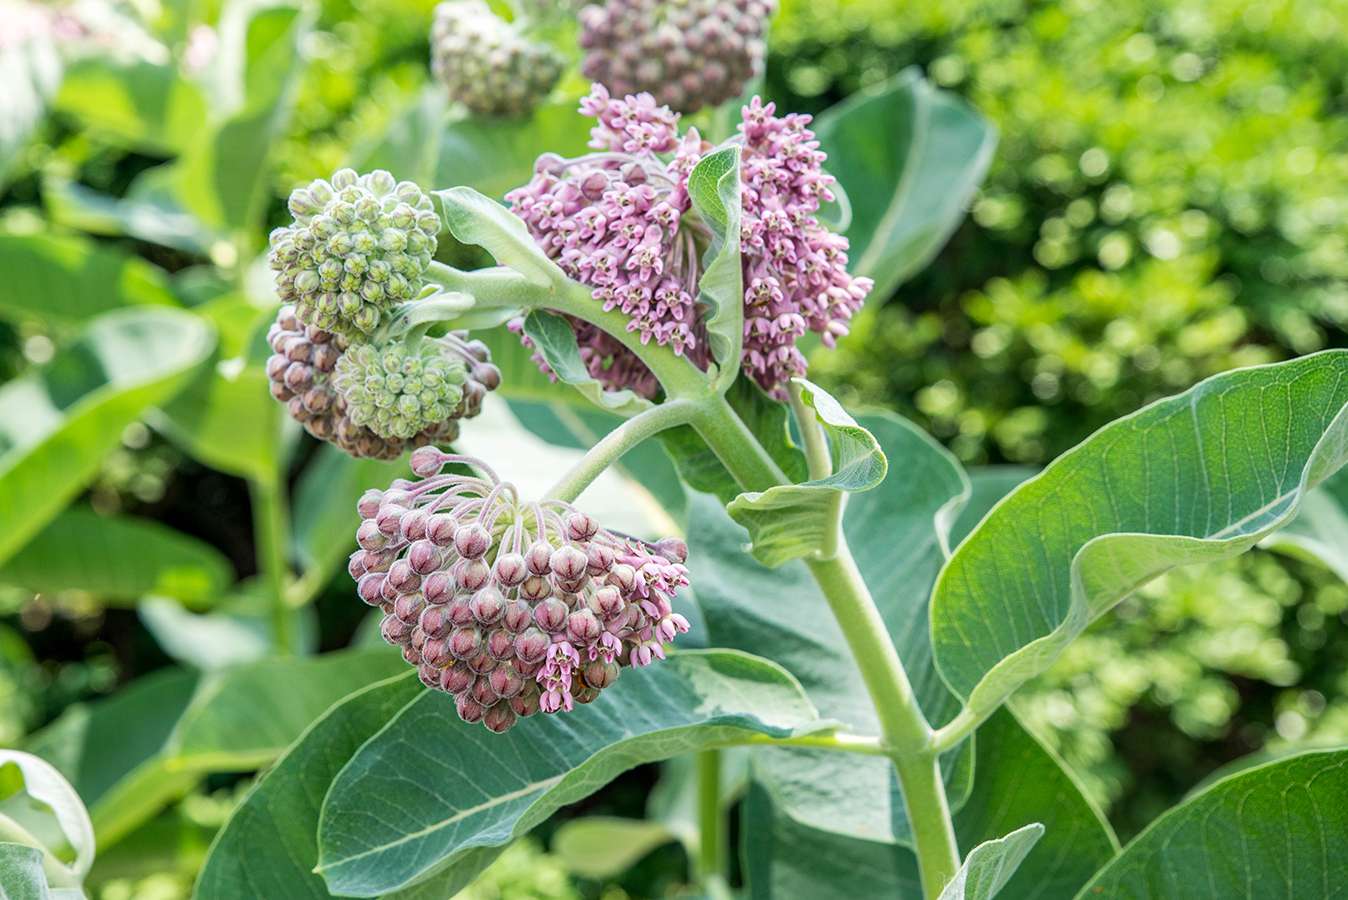
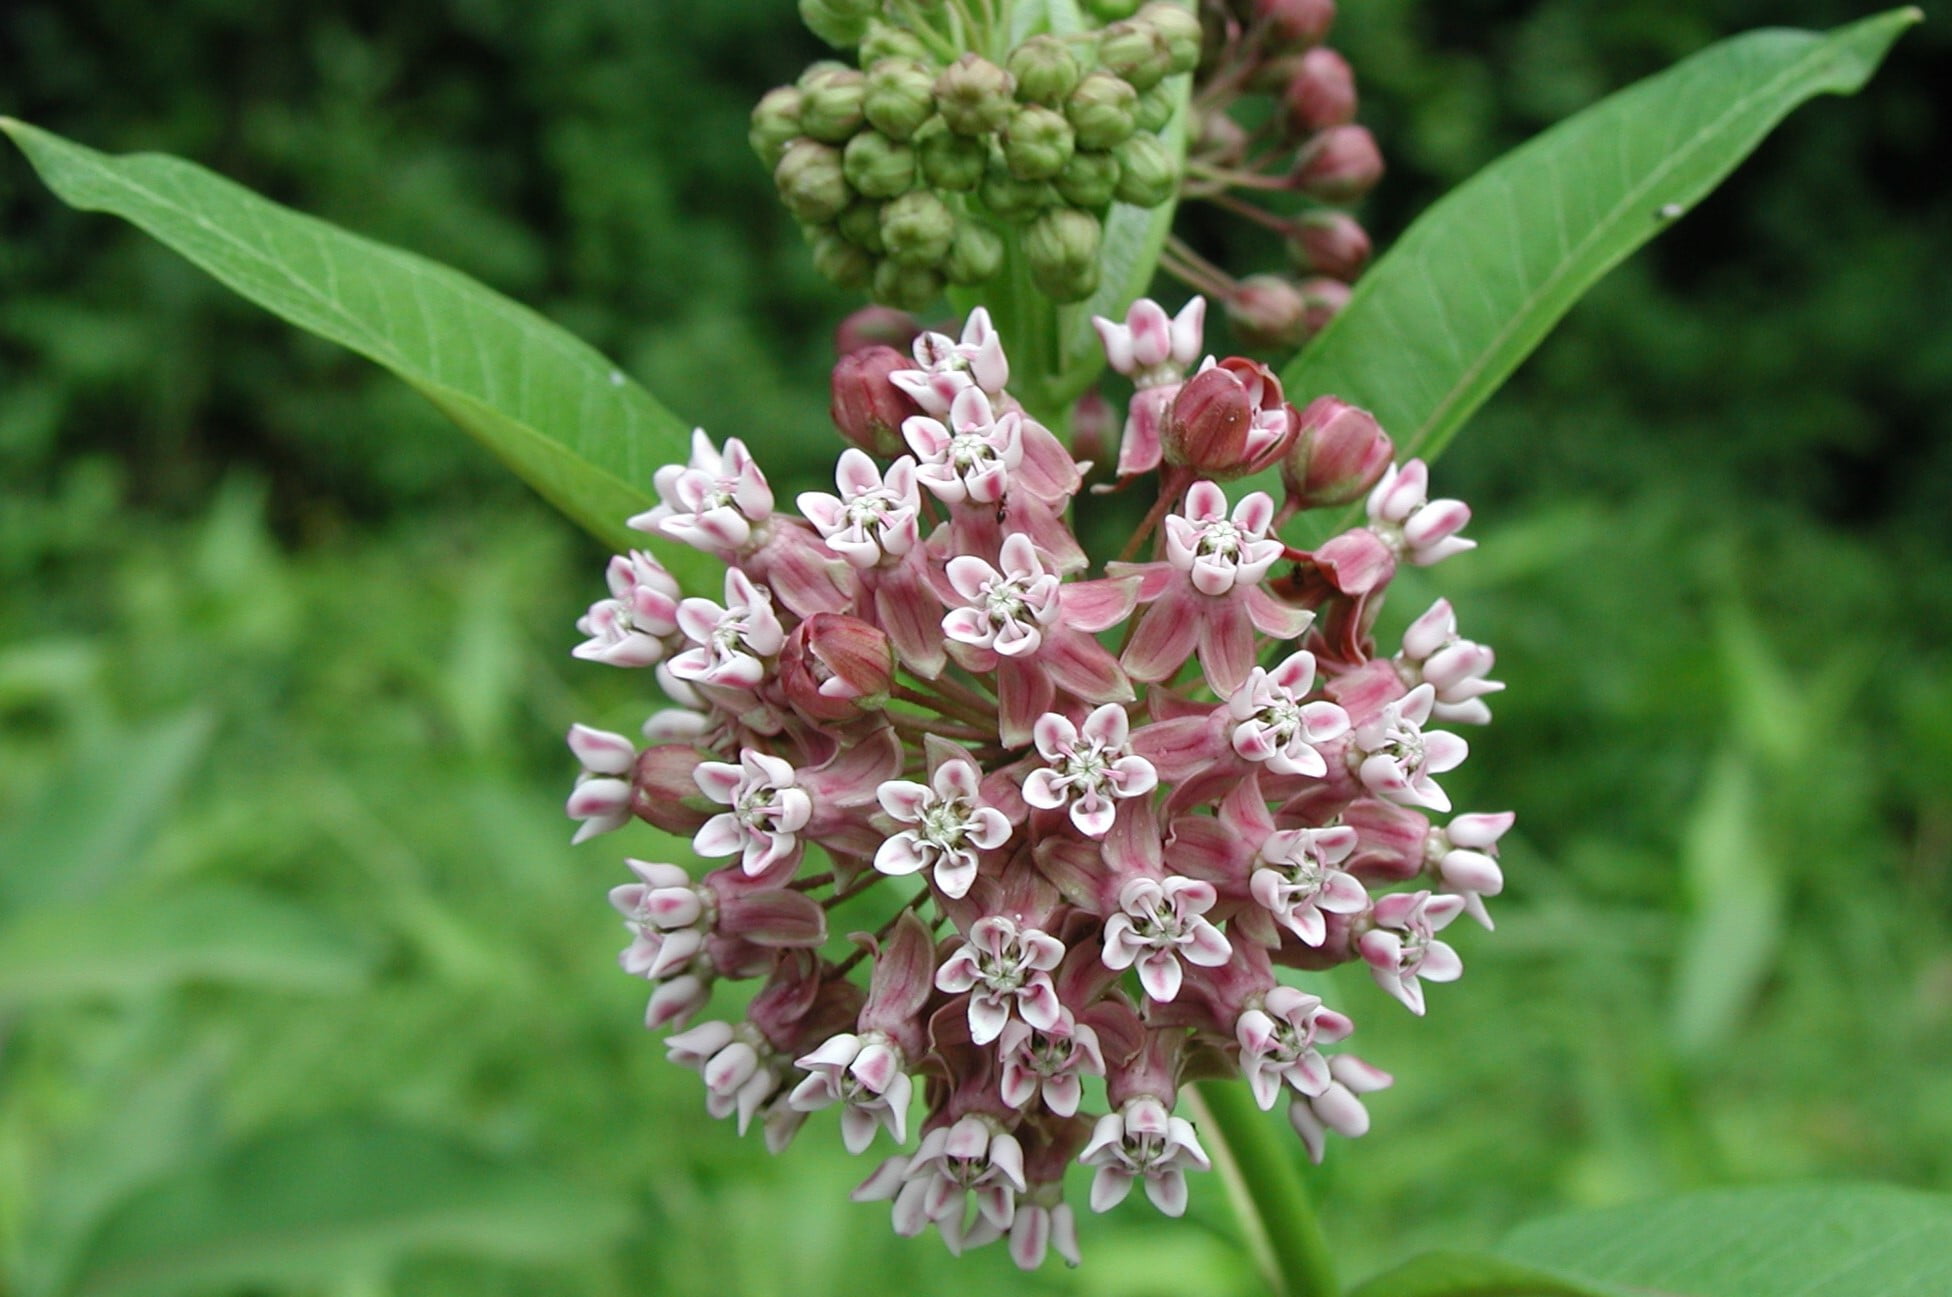
Welcome to this comprehensive guide on how to plant milkweed seeds outside. Milkweed is a beautiful and essential plant for attracting butterflies, particularly monarch butterflies, to your garden. By providing a habitat for these delicate creatures, you contribute to the conservation of their population and help support the ecosystem.
Planting milkweed seeds outside is a rewarding and relatively simple process that allows you to witness the magical lifecycle of butterflies firsthand. In this guide, we will walk you through the steps necessary to successfully plant milkweed seeds and ensure their growth and development.
Before we dive into the planting process, it’s important to understand why milkweed is crucial for butterflies. Monarch butterflies, in particular, rely on milkweed as their primary food source and habitat. Milkweed plants are the only plants that monarch caterpillars eat, and they provide essential nutrients for their growth. Without milkweed, the survival of monarch butterflies would be in jeopardy.
By planting milkweed seeds in your garden or outdoor space, you create a haven for butterflies, provide a food source for their caterpillars, and witness the incredible transformation from egg to caterpillar to butterfly. So let’s get started on transforming your outdoor space into a butterfly paradise!
Key Takeaways:
- Transform your outdoor space into a butterfly paradise by planting milkweed seeds. Support the survival of monarch butterflies and witness the magical lifecycle of butterflies firsthand.
- Create an ideal environment for milkweed seeds to germinate and establish strong root systems. Ensure the long-term success of your milkweed garden by providing proper care and monitoring growth.
Read more: How To Plant Milkweed Seeds
Step 1: Prepare the soil
The first step in successfully planting milkweed seeds outside is to prepare the soil. Milkweed plants prefer well-drained soil with a slightly acidic to neutral pH level. Here’s how you can prepare the soil for optimal seed germination:
- Remove weeds and debris: Clear the selected area of any weeds, grass, or debris that may hinder the growth of milkweed plants. This will create a clean and fertile space for your seeds.
- Loosen the soil: Use a garden fork or a tiller to loosen the soil to a depth of at least 6 inches. This allows the milkweed roots to penetrate the soil easily and promotes healthy growth and development.
- Amend the soil: Add organic matter such as compost or well-rotted manure to improve the soil’s fertility and drainage. Mix the organic matter thoroughly with the existing soil to enrich it and create a nutrient-rich environment for the seeds to thrive.
- Level the soil: Smooth out the soil surface using a rake or garden leveling tool. This ensures an even planting area and eliminates any lumps or bumps that may hinder the seed sowing process.
By taking the time to properly prepare the soil, you create an ideal environment for milkweed seeds to germinate and establish strong root systems. This sets the foundation for healthy plant growth and ensures the long-term success of your milkweed garden.
Step 2: Choose the right location
Choosing the right location for planting milkweed seeds is essential for their successful growth and development. Milkweed plants thrive in sunny areas that receive at least 6-8 hours of direct sunlight each day. Follow these guidelines to select the perfect spot:
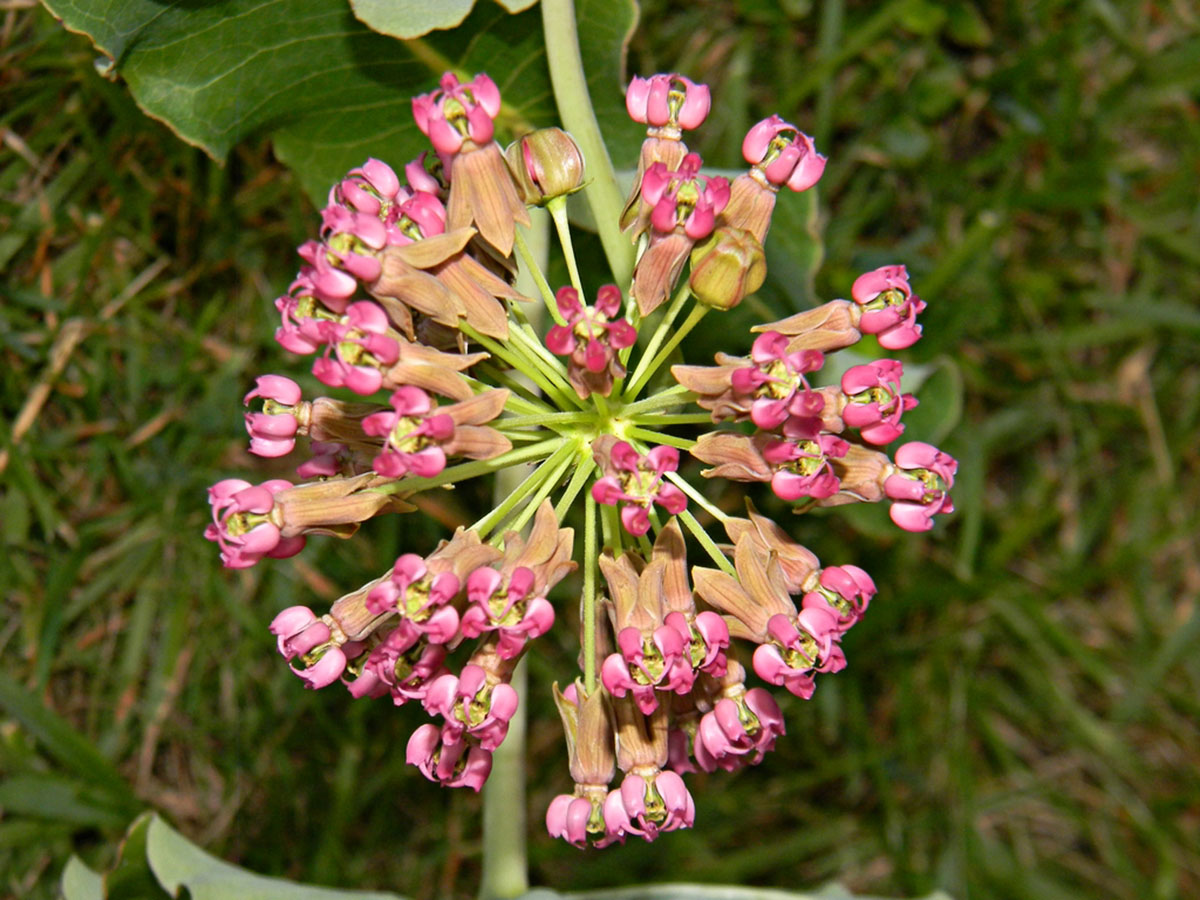
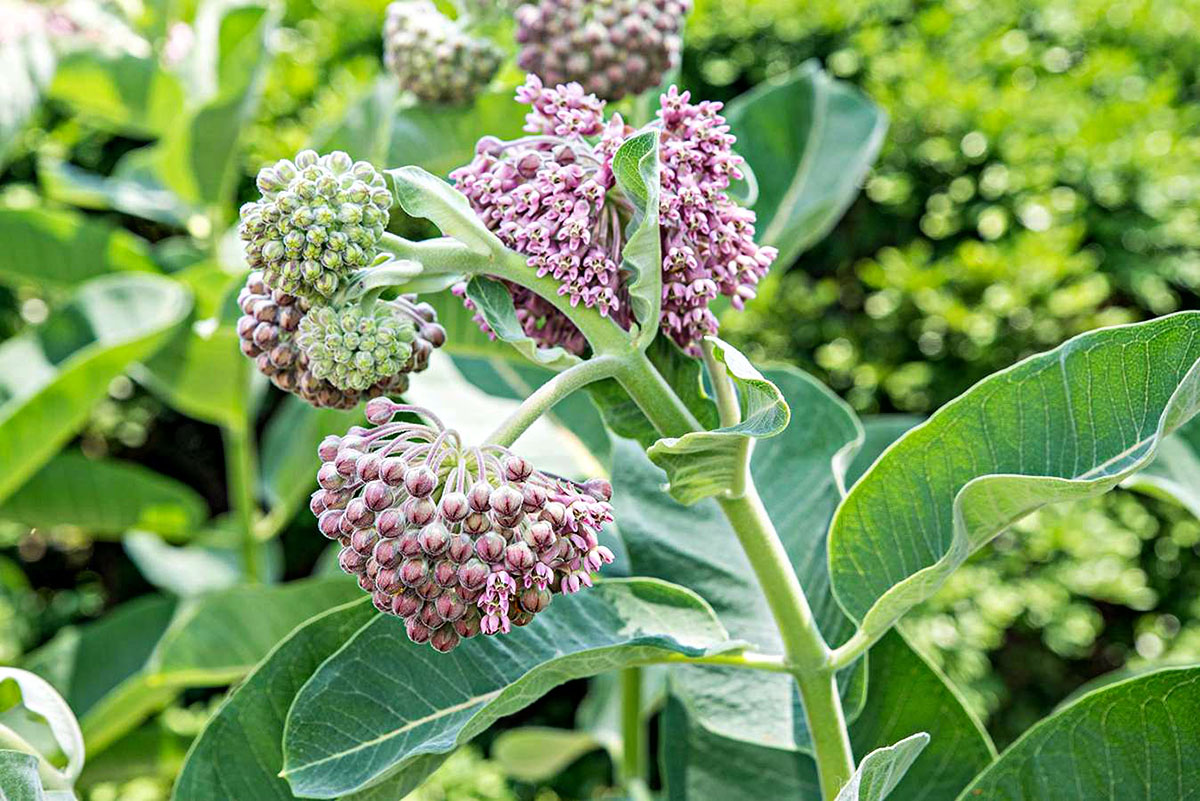
- Sunlight exposure: Look for an area in your garden or outdoor space that receives ample sunlight throughout the day. Milkweed plants require sunlight to thrive and produce vibrant flowers that attract butterflies.
- Protection from strong winds: While milkweed plants prefer sunny locations, it’s important to ensure they are sheltered from strong winds. Excessive wind can damage the delicate stems and leaves of the plants, so choose a location with some protection, such as a fence, hedge, or building.
- Ample space: Consider the space requirements of milkweed plants when choosing a location. Some varieties of milkweed can grow quite large, so ensure there is enough space for the plants to spread out without overcrowding other nearby plants.
- Accessibility to pollinators: To maximize the benefits of planting milkweed, select a location that is easily accessible to pollinators, especially butterflies. Planting the milkweed near other nectar-rich flowers will attract a variety of pollinators and enhance the overall biodiversity of your garden.
By choosing the right location for your milkweed seeds, you provide the optimal conditions for their growth and increase the chances of attracting butterflies to your garden. Remember to consider sunlight exposure, wind protection, space requirements, and accessibility to pollinators when selecting the perfect spot for your milkweed garden.
Step 3: Sow the milkweed seeds
Once you have prepared the soil and chosen the perfect location, it’s time to sow the milkweed seeds. Follow these steps to ensure proper planting:
- Timing: Plant milkweed seeds outdoors after the danger of frost has passed. Each region has its specific planting time, so check with your local gardening resources or extension office for the recommended planting dates.
- Seed spacing: Sow the milkweed seeds at a spacing of about 12-18 inches apart. This spacing allows the plants to have adequate room to grow and prevents overcrowding, which can lead to disease and competition for resources.
- Depth: Bury the milkweed seeds about ¼ inch deep in the soil. They do not need to be planted too deep as they require sunlight to germinate. Lightly cover the seeds with soil and pat it gently to ensure good seed-to-soil contact.
- Watering: After sowing the seeds, give them a thorough watering. This will help settle the soil and provide moisture for germination. Be careful not to overwater, as excessive moisture can lead to rotting of the seeds.
It’s important to note that milkweed seeds have a natural dormancy period, which means they may take a few weeks or even months to germinate. Be patient and provide the necessary conditions for germination, including adequate moisture, warmth, and sunlight.
Remember to mark the planted area with plant markers or labels to keep track of the seed location. This will help you avoid accidentally disturbing the seeds or mistaking them for weeds during the early stages of growth.
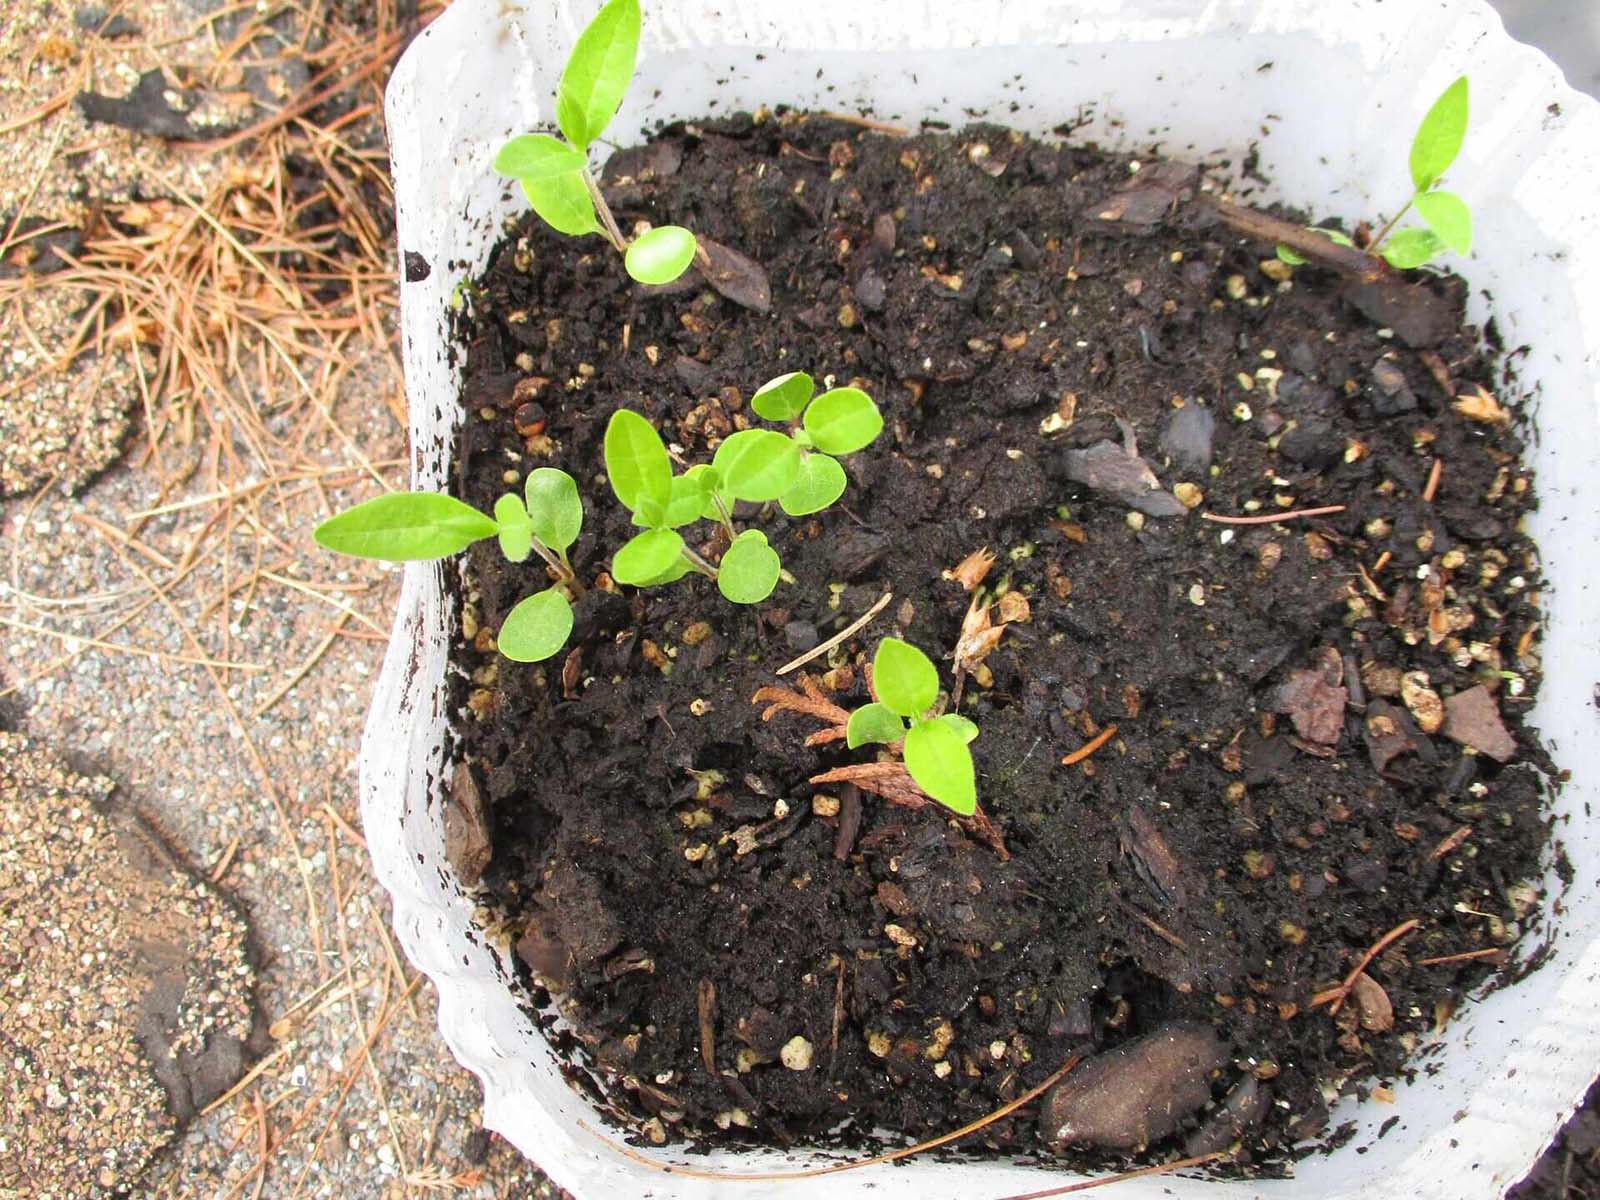
By sowing the milkweed seeds correctly, you give them the best chance for germination and establishment. With a little patience and care, you will soon see the first signs of green emerging from the soil, signaling the growth of your milkweed plants.
Step 4: Water the seeds
Proper watering is crucial for the germination and growth of milkweed seeds. Follow these guidelines to ensure your seeds receive adequate moisture:
- Initial watering: After sowing the milkweed seeds, give them a good initial watering. This helps to settle the soil and provides the necessary moisture for the seeds to begin the germination process.
- Consistent moisture: Keep the soil consistently moist but not waterlogged during the germination period. Avoid allowing the soil to dry out completely, as this can hinder seed germination. Use a gentle watering method, such as a misting spray or a watering can with a fine nozzle, to avoid disturbing the seeds or causing soil erosion.
- Watering frequency: Water the seeds as needed, typically once or twice a week, depending on the climate and weather conditions. Adjust the watering frequency based on the moisture levels in the soil. Aim to keep the soil evenly moist, but not overly saturated.
- Deep watering: As the milkweed plants begin to grow, switch to deep watering to encourage the development of deep, strong roots. Water deeply once a week, allowing the water to penetrate the soil to a depth of at least 6 inches. This promotes healthy root growth and helps the plants withstand dry periods.
It’s important to strike a balance with watering milkweed seeds. Too much or too little water can negatively impact their growth. Pay attention to the soil moisture levels and adjust your watering practices accordingly to provide the optimal conditions for the plants.
Once the milkweed plants are established and have developed a strong root system, they are more drought-tolerant and require less frequent watering. However, it’s still important to monitor the soil moisture levels and provide supplemental watering during prolonged dry spells or periods of extreme heat.
By providing the right amount of water at the appropriate times, you ensure the healthy growth and development of your milkweed plants, increasing their chances of attracting butterflies to your garden.
Choose a sunny spot with well-drained soil. Plant seeds in the fall or early spring, about 1/4 inch deep. Water regularly until established.
Read more: How To Grow Milkweed Plants From Seed
Step 5: Provide necessary care and maintenance
While milkweed plants are generally low-maintenance, providing some care and maintenance will help ensure their optimal growth and attractiveness to butterflies. Follow these guidelines to provide the necessary care for your milkweed plants:
- Mulching: Apply a layer of organic mulch around the base of the milkweed plants to conserve moisture, suppress weed growth, and regulate soil temperature. Keep the mulch a few inches away from the stems to prevent moisture buildup and potential rotting.
- Weeding: Regularly remove any weeds that may compete with milkweed plants for nutrients and resources. Be careful not to disturb the milkweed roots while weeding, especially during the early stages of growth.
- Supportive structures: Some varieties of milkweed can benefit from the support of a stake or cage, especially when they start to grow tall or if they tend to flop over. Use these structures to provide support and maintain an upright growth habit.
- Deadheading: Deadhead the milkweed plants by removing spent flowers regularly. This encourages continuous blooming and prevents the plants from going to seed too quickly. Deadheading also helps redirect the plant’s energy towards foliage and flower production.
- Fertilization: In most cases, milkweed plants do not require regular fertilization. However, if you notice signs of nutrient deficiency, such as yellowing leaves or stunted growth, you can apply a balanced slow-release fertilizer according to the manufacturer’s instructions. Avoid over-fertilization, as excessive nutrients can lead to lush vegetative growth with fewer flowers.
Regularly inspect your milkweed plants for signs of pests, like aphids or milkweed bugs. If an infestation occurs, monitor the severity and consider using organic pest control methods if necessary, such as spraying with a gentle soap and water solution or releasing beneficial insects like ladybugs or lacewings.
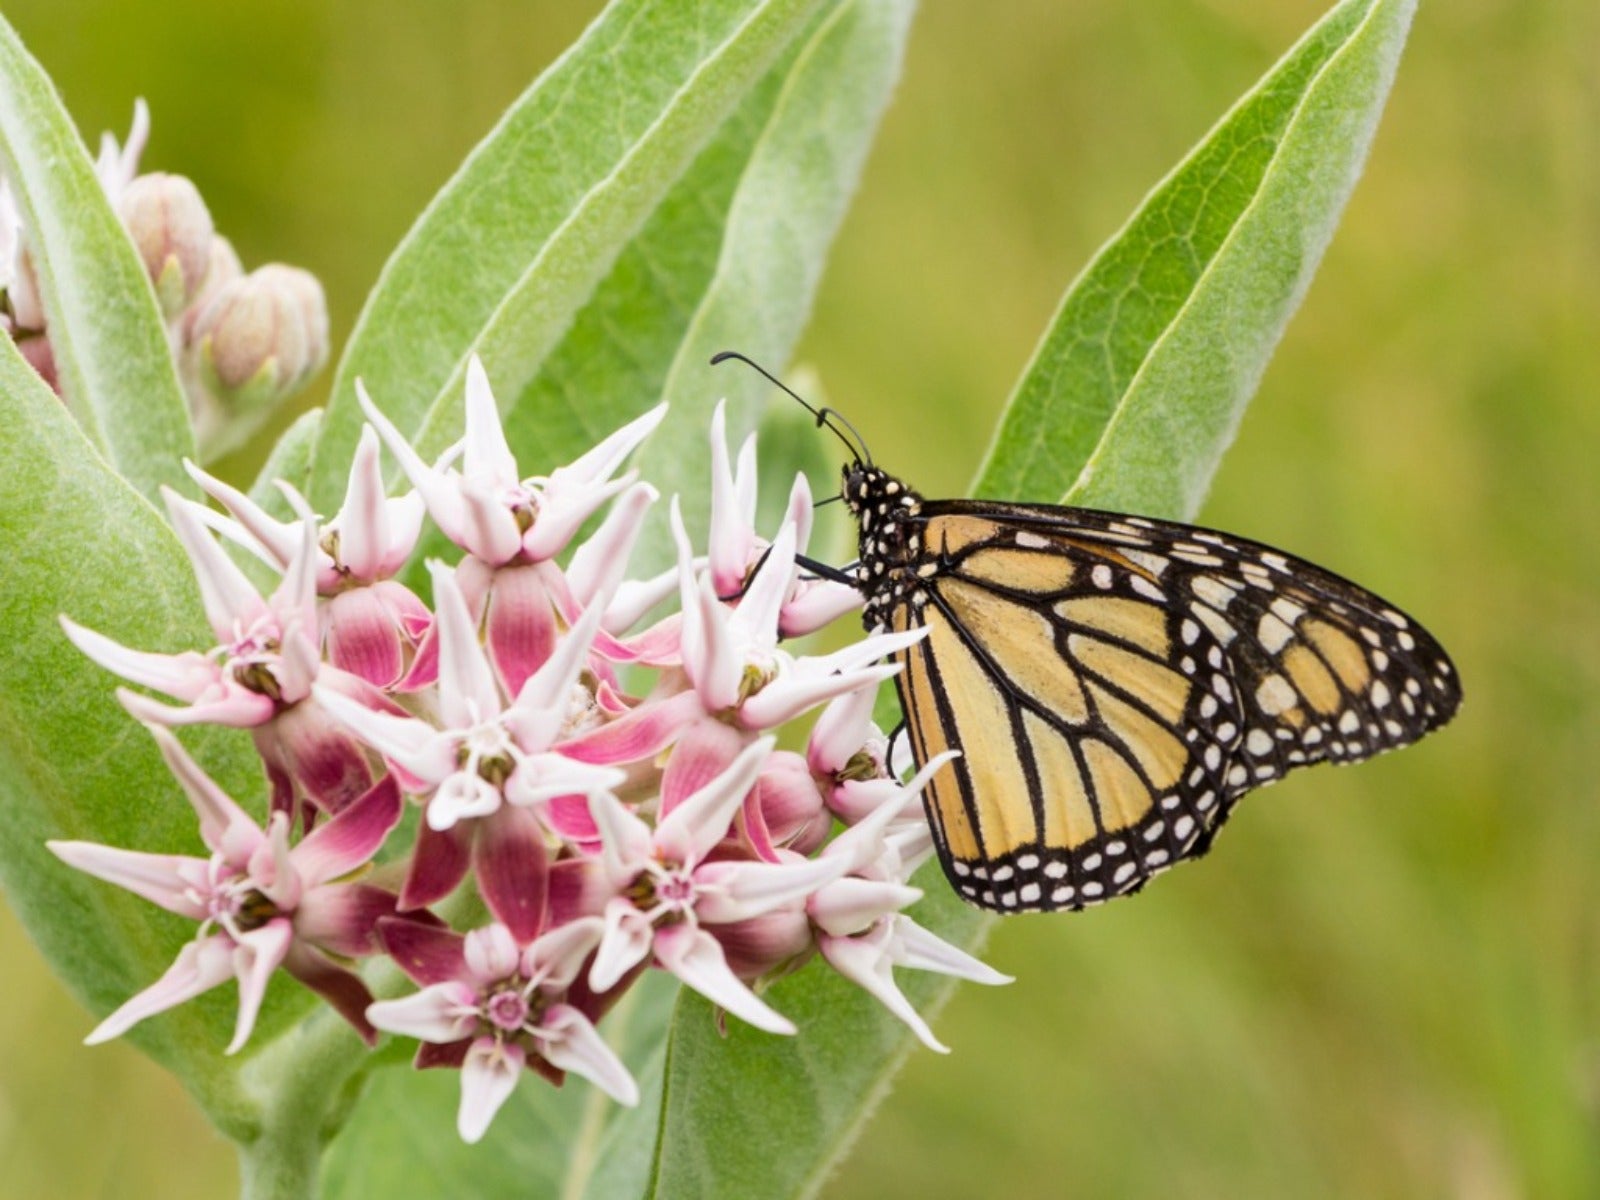
Lastly, remember to observe and enjoy the butterflies that visit your milkweed garden. These beautiful creatures play a vital role in pollination and contribute to the biodiversity of your outdoor space.
By providing the necessary care and maintenance, you ensure the health and vitality of your milkweed plants, creating an inviting environment for butterflies to thrive.
Step 6: Protect the seeds from pests
Protecting your milkweed seeds from pests is crucial to ensure the successful germination and growth of your plants. From birds to insects, several pests can pose a threat to your seeds. Follow these steps to safeguard your seeds:
- Physical barriers: One effective method to prevent pests from accessing your seeds is to use physical barriers. You can cover the seeded area with a fine mesh or netting to deter birds and other small animals from reaching the seeds.
- Chemical-free pest control: Consider using organic and environmentally friendly pest control options to protect your seeds. For example, companion planting certain herbs and flowers, such as marigolds and lavender, can repel pests that might damage the milkweed seeds.
- Companion planting: Planting insect-repellent flowers and herbs near your milkweed seeds can help deter pests. For example, planting garlic or chives nearby can deter aphids, which are common pests for milkweed plants.
- Monitoring: Regularly inspect the seeded area for any signs of pests and damage. Look for pests like birds, slugs, or snails that may be attracted to the seeds. Vigilant monitoring allows you to take action promptly and prevent potential damage to the seeds.
- Natural predators: Encourage natural predators, such as birds, ladybugs, or praying mantises, in your garden to help control pest populations. Creating a diverse and balanced ecosystem in your outdoor space can help keep pests in check without the need for harmful chemicals.
By implementing these pest protection strategies, you minimize the risk of seed damage and increase the chances of successful seed germination. This allows your milkweed garden to thrive, attracting butterflies and contributing to a healthy ecosystem.
Step 7: Monitor growth and development
Monitoring the growth and development of your milkweed plants is essential in ensuring their health and providing timely care. By observing their progress, you can identify potential issues and take appropriate actions. Follow these steps to effectively monitor the growth and development of your milkweed plants:
- Regular observation: Take the time to regularly observe your milkweed plants. Pay attention to the growth of new leaves, stems, and buds. This allows you to track their progress and spot any abnormalities or signs of distress.
- Inspect for pests: Keep an eye out for any signs of pests or diseases on your milkweed plants. Look for chewed leaves, yellowing foliage, or visible insects. Early detection of pests or diseases enables you to address the issue promptly and prevent it from escalating.
- Check for nutrient deficiencies: Monitor the foliage of your milkweed plants for any signs of nutrient deficiencies. Yellowing leaves or stunted growth can be indications of inadequate nutrients. If necessary, conduct a soil test to determine any nutrient imbalances and adjust your fertilization accordingly.
- Observe butterfly activity: Watch for butterfly activity around your milkweed plants. Take note of the number of butterflies visiting your garden and their behavior. This not only contributes to your knowledge of their habits but also indicates the success of your milkweed plants in attracting these beautiful pollinators.
- Record observations: Keep a garden journal or make notes of your observations. Document the growth milestones, flowering times, and any notable observations you make. This will not only serve as a valuable reference for future gardening endeavors but also help you identify patterns and trends in your milkweed plants’ growth cycle.
Regular monitoring and observation allow you to be proactive in addressing any issues that arise. By taking swift action and providing necessary care, you can ensure the continued health and vitality of your milkweed plants, creating an ideal environment for butterflies and enhancing the beauty of your garden.
Conclusion
Congratulations! You have now learned how to successfully plant milkweed seeds outside and create a thriving habitat for butterflies in your garden. By following the steps outlined in this guide, you have taken important strides in supporting the population of these magnificent creatures and contributing to the conservation of the ecosystem.
From preparing the soil and choosing the right location to sowing the seeds and providing ongoing care, each step plays a crucial role in the growth and development of your milkweed plants. By nurturing them with proper watering, protecting them from pests, and monitoring their progress, you ensure optimal conditions for these plants to flourish.
As your milkweed garden takes shape, you can look forward to the joy of witnessing the transformation of caterpillars into beautiful butterflies. The vibrant flowers of the milkweed plants will serve as a haven for these winged creatures, providing them with nectar and a place to lay their eggs.
Remember to continue observing and maintaining your milkweed garden throughout the season. By keeping an eye on the growth, addressing any potential issues promptly, and recording your observations, you can refine your gardening techniques and ensure the long-term success of your milkweed plants.
Additionally, consider educating others about the importance of milkweed and butterfly conservation. Share your knowledge and experiences with friends, family, and fellow gardeners to inspire them to create their own butterfly-friendly spaces.
By planting milkweed seeds, you are not only nurturing a beautiful garden but also making a meaningful contribution to the preservation of these delicate and essential creatures. Enjoy the mesmerizing dance of butterflies in your outdoor space and the knowledge that you are making a positive impact on the natural world.
Frequently Asked Questions about How To Plant Milkweed Seeds Outside
Was this page helpful?
At Storables.com, we guarantee accurate and reliable information. Our content, validated by Expert Board Contributors, is crafted following stringent Editorial Policies. We're committed to providing you with well-researched, expert-backed insights for all your informational needs.


0 thoughts on “How To Plant Milkweed Seeds Outside”