Home>Garden Essentials>How To Prepare Seed Potatoes
Garden Essentials
How To Prepare Seed Potatoes
Modified: March 24, 2024
Learn how to prepare seed potatoes for your garden with our step-by-step guide. Start growing healthy and delicious potatoes today.
(Many of the links in this article redirect to a specific reviewed product. Your purchase of these products through affiliate links helps to generate commission for Storables.com, at no extra cost. Learn more)
Introduction
Welcome to the wonderful world of gardening! Whether you’re a seasoned gardener or a beginner looking to try your hand at growing your own food, planting seed potatoes is a great way to start. Potatoes are a versatile and delicious crop that can be enjoyed in a variety of dishes, from mashed potatoes to crispy fries.
In this article, we will guide you through the process of preparing seed potatoes and getting them off to a healthy start. From selecting the right variety to caring for them throughout the growing season, we’ll cover everything you need to know to ensure a successful harvest.
So let’s get started with step one – selecting the right potato variety.
Key Takeaways:
- Selecting the right potato variety is crucial for a successful harvest. Consider your culinary preferences and local climate when choosing a variety, and opt for disease-resistant options for a healthier crop.
- Proper care, including watering, fertilizing, and pest control, is essential for healthy potato plants. Harvest carefully, store in a cool, dark place, and enjoy the fruits of your labor in delicious dishes!
Read more: How To Prepare Jackfruit Seeds
Selecting the Right Potato Variety
When it comes to selecting the right potato variety for your garden, there are several factors to consider. The choice of potato variety will depend on your personal preferences, as well as the growing conditions in your region.
Firstly, consider the intended use of the potatoes. Are you looking for a variety that is best for baking, boiling, or frying? Different potato varieties have different textures and flavors, so it’s important to choose one that suits your culinary preferences.
Secondly, consider the climate and growing conditions in your region. Some potato varieties thrive in cooler climates, while others are better suited for warmer regions. If you live in an area with a short growing season, you may want to choose an early maturing variety that will reach harvest in a shorter period of time.
Additionally, some potato varieties are more resistant to common diseases and pests, making them a better choice for organic gardeners or for those who prefer to minimize the use of pesticides. Research the disease resistance and pest tolerance of different potato varieties to make an informed decision.
Popular potato varieties that are versatile and well-suited for many gardeners include Yukon Gold, Russet Burbank, and Red Pontiac. These varieties are known for their delicious flavor, versatility in the kitchen, and relatively easy cultivation.
Once you have chosen the right potato variety for your garden, it’s time to move on to the next step – choosing healthy seed potatoes.
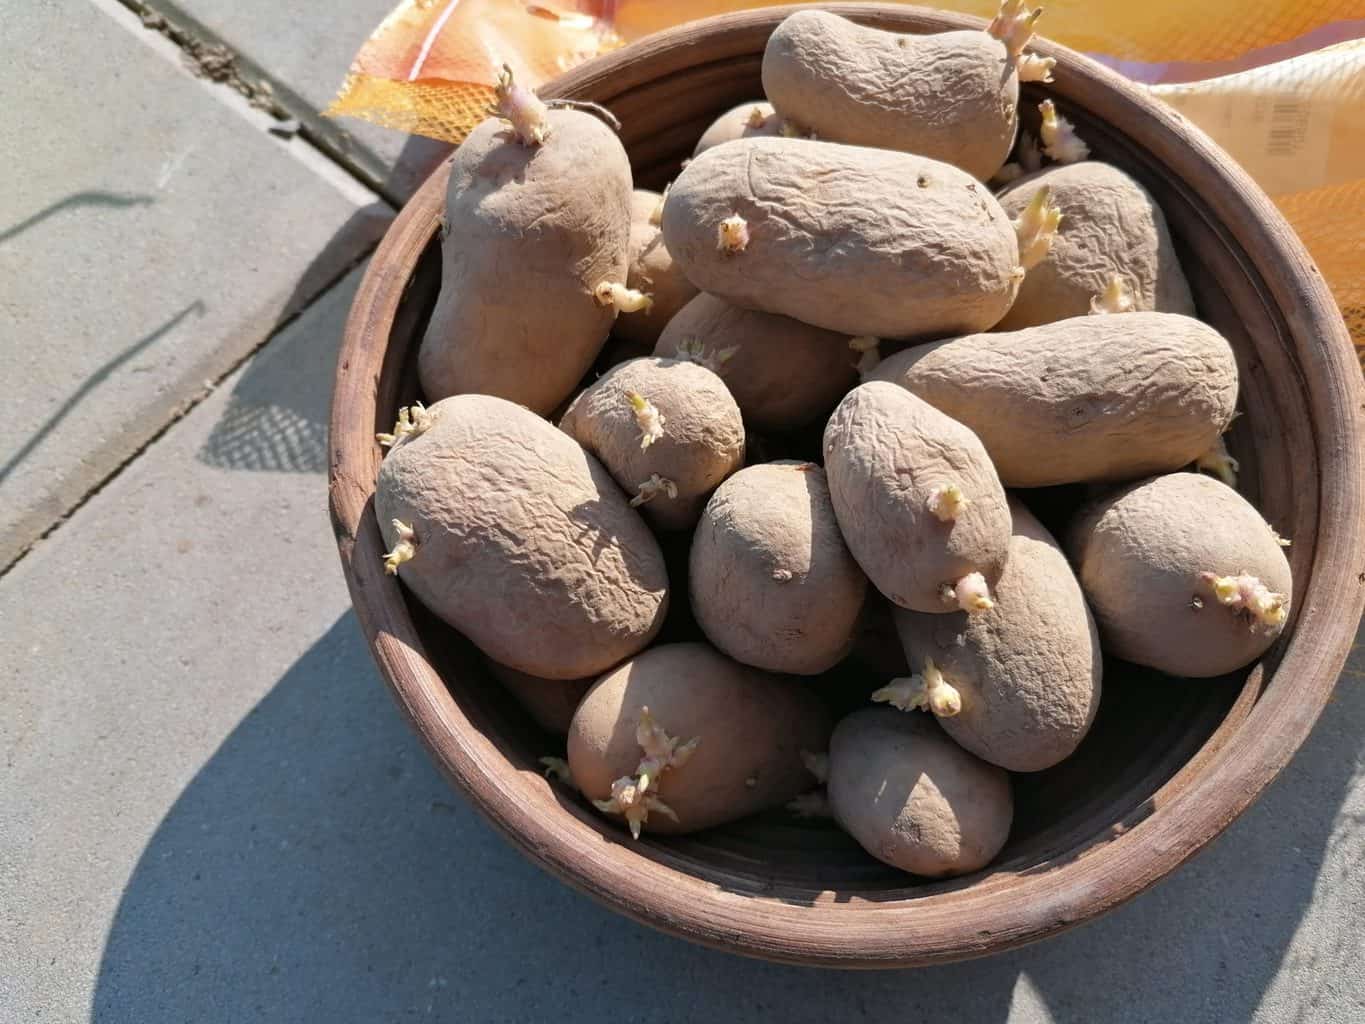
Choosing Healthy Seed Potatoes
Choosing healthy seed potatoes is crucial for a successful potato harvest. Seed potatoes are essentially the tubers that you use to start growing your potato plants. It’s important to select seed potatoes that are disease-free, firm, and free from any signs of rot or damage.
When purchasing seed potatoes, look for certified disease-free varieties. These potatoes have undergone testing and certification to ensure that they are free from common potato diseases such as late blight or scab.
Inspect the seed potatoes carefully before purchasing. Look for firm, smooth-skinned potatoes that are free from any soft spots or sprouting eyes. Avoid seed potatoes with green patches or a shriveled appearance, as these are signs of improper storage or exposure to light.
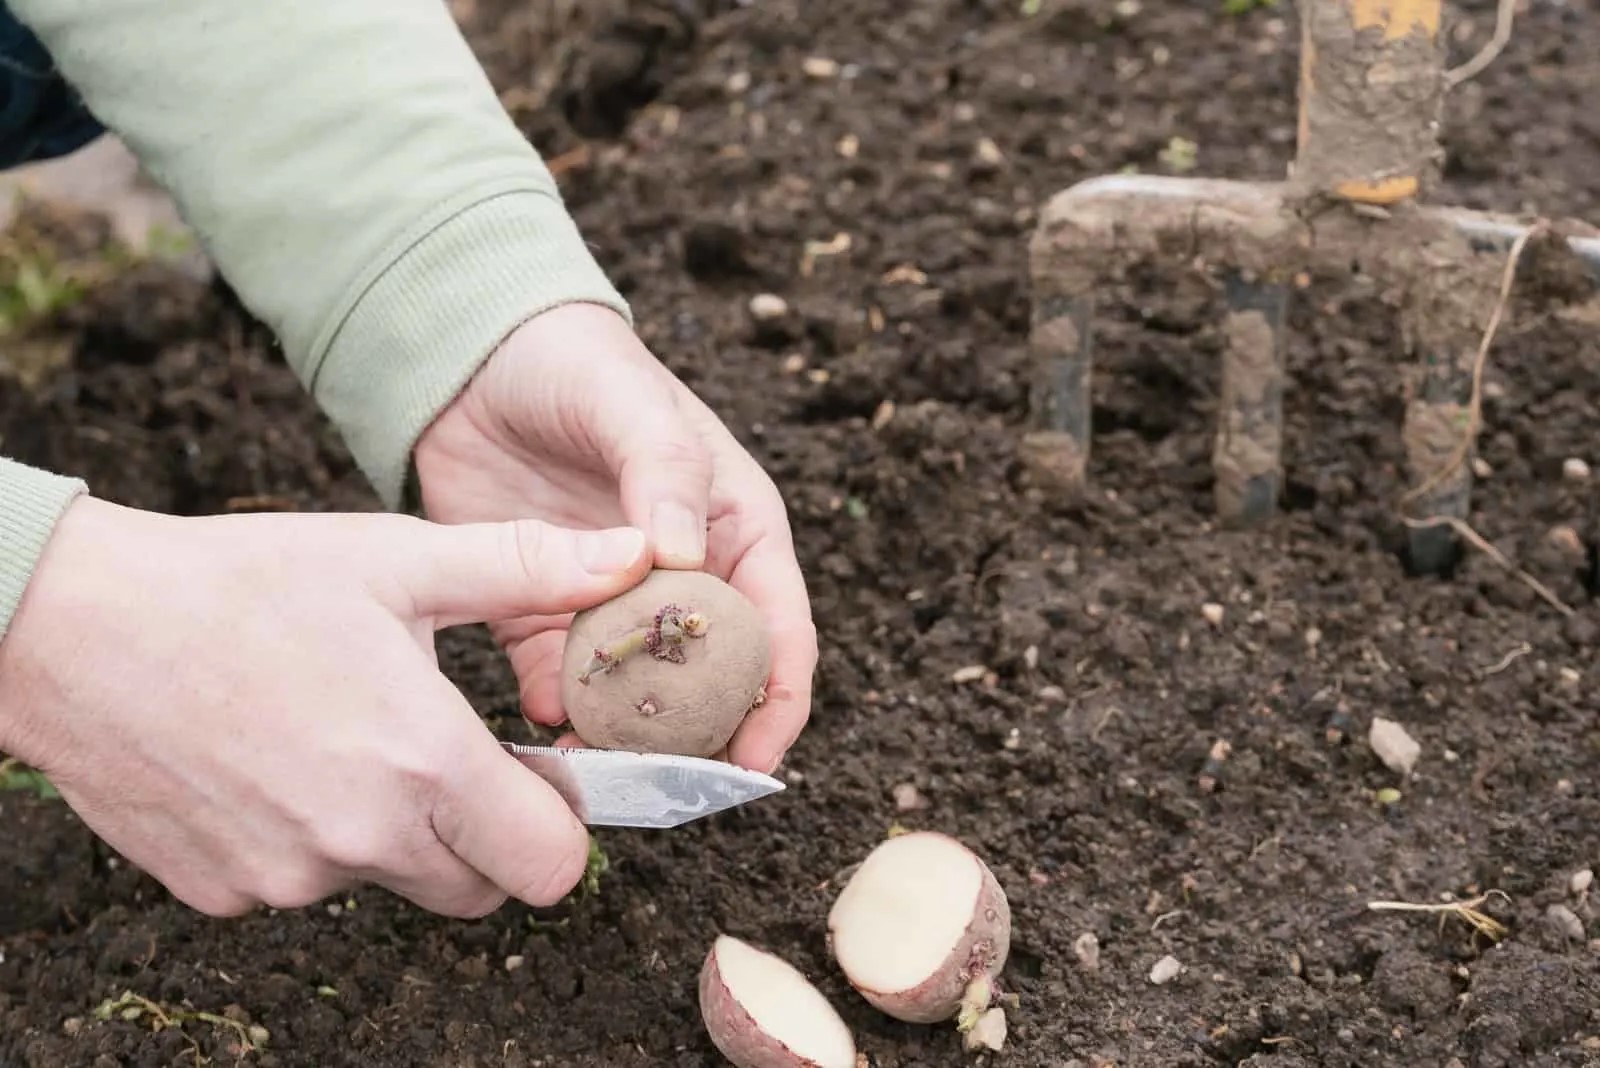
It’s also a good idea to choose seed potatoes that are of a similar size. This will help ensure consistent growth and maturity of your potato plants. Small seed potatoes can be planted whole, while larger ones can be cut into smaller pieces, ensuring that each piece has at least one or two eyes.
Prior to planting, you can further reduce the risk of disease by treating your seed potatoes with a fungicide. This will help protect the potatoes from soil-borne diseases and help increase the chances of a healthy harvest.
Remember, healthy seed potatoes are the foundation for a successful potato crop. Take the time to select high-quality seed potatoes, and you’ll be rewarded with strong and productive plants.
With your healthy seed potatoes in hand, it’s time to move on to the next step in preparing your potatoes for planting – chitting.
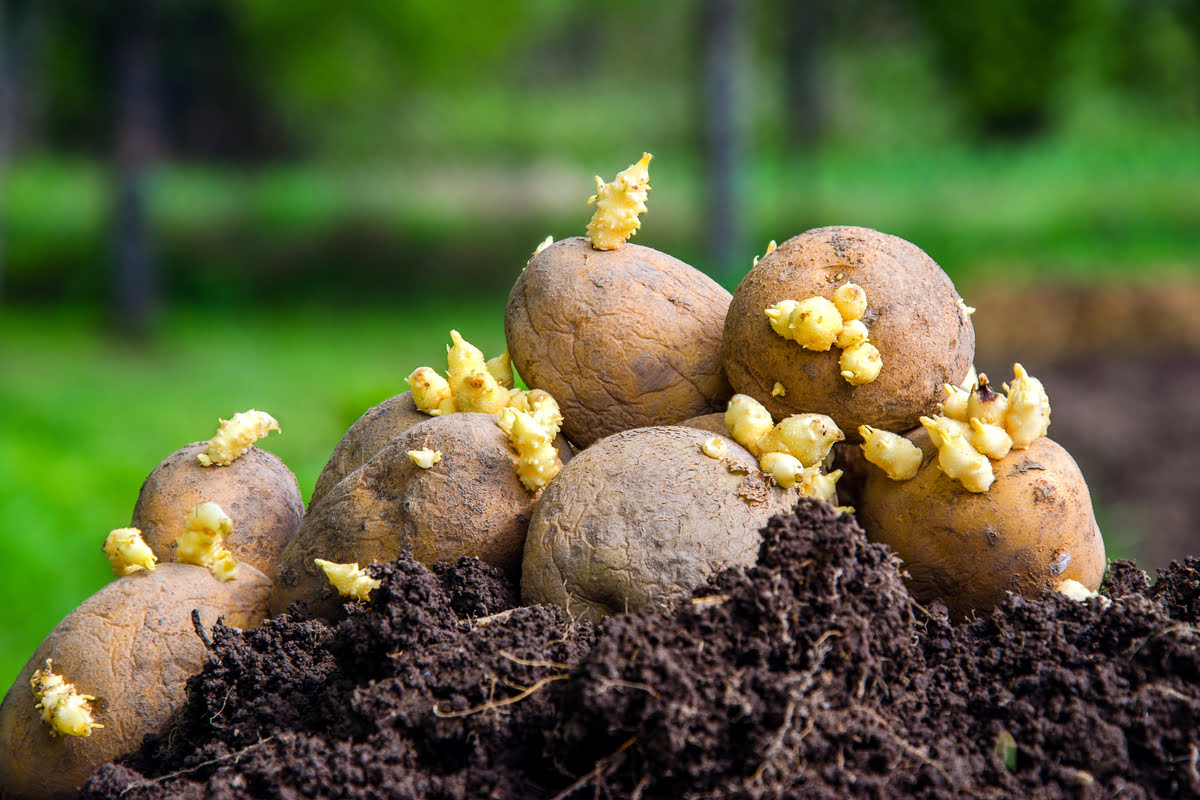
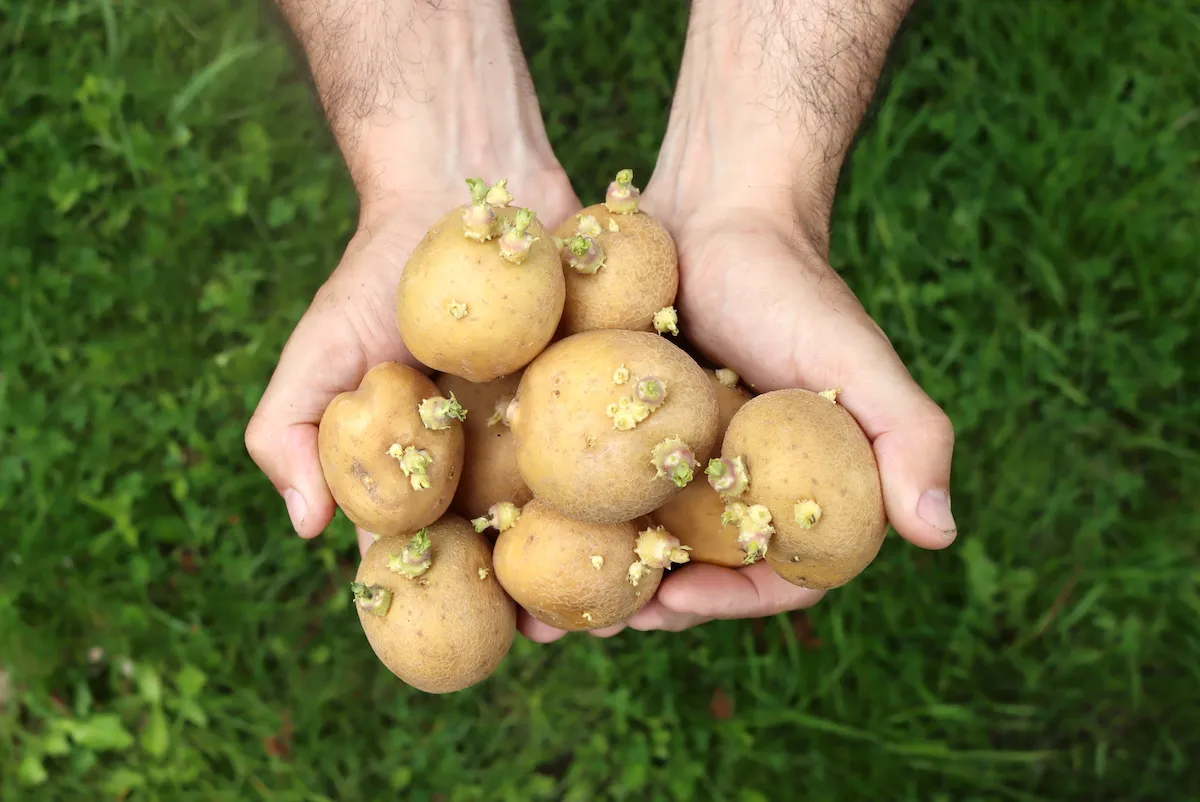
Chitting Seed Potatoes
Chitting, also known as pre-sprouting, is the process of encouraging seed potatoes to produce short, sturdy sprouts before planting them in the ground. This technique jumpstarts the growth of the potatoes and helps them establish more quickly once planted.
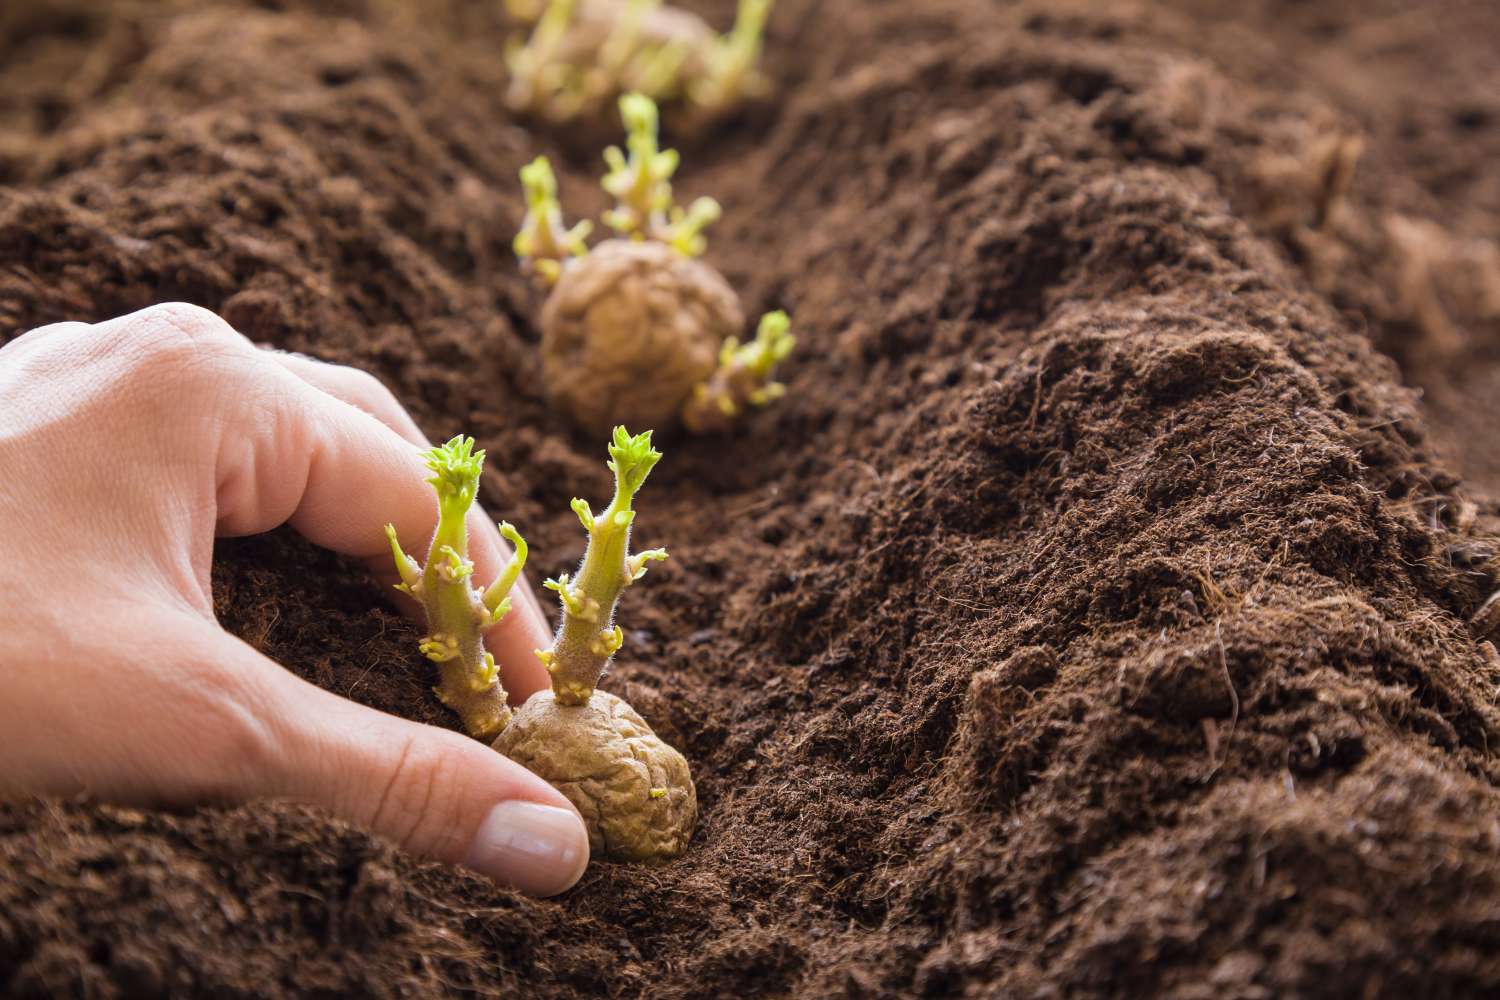
To begin chitting, start by placing your seed potatoes in a cool, well-lit area. Avoid direct sunlight, as this can cause the potatoes to turn green. You can use an egg carton or a tray lined with newspaper to hold the potatoes in an upright position.
Position the seed potatoes with the “eye” side up – this is where the sprouts will emerge from. The eyes are small indentations or dimples on the surface of the potato. If your seed potatoes are larger, you can cut them into smaller pieces, ensuring that each piece has one or two eyes.
Allow the seed potatoes to chit for about four to six weeks before planting. During this time, the potatoes will develop short, sturdy sprouts. These sprouts are more resistant to damage and will promote healthy growth once planted.
Regularly check on your chitting potatoes to ensure they are not becoming too dry or moldy. If they are starting to shrivel, lightly mist them with water to keep them hydrated. If you notice any mold growth, remove the affected potatoes to prevent the spread of disease.
Chitting is not always necessary, especially if you have a long growing season or are planting early-maturing varieties. However, it can be a helpful technique for gardeners in colder climates or regions with shorter growing seasons, as it gives the potatoes a head start.
Once your seed potatoes have developed sturdy sprouts through chitting, it’s time to move on to the next step – preparing the soil for planting.
Preparing the Soil
Preparing the soil is a crucial step in growing healthy and productive potato plants. Potatoes thrive in loose, well-draining soil that is rich in organic matter. Follow these steps to ensure your soil is ideal for planting:
- Clear the area: Start by clearing the planting area of any weeds, rocks, or debris. It’s important to have a clean and clutter-free space to ensure healthy growth and easy access for harvesting later on.
- Loosen the soil: Use a garden fork or a tiller to loosen the soil to a depth of about 10-12 inches (25-30 cm). This will help improve drainage, allow for root penetration, and create a loose, friable texture that promotes healthy root development.
- Amend the soil: Potatoes thrive in soil that is rich in organic matter. Incorporate compost, well-rotted manure, or other organic amendments into the soil to improve its fertility and nutrient content. This will provide a steady supply of nutrients for the growing plants.
- Test the soil pH: Potatoes prefer slightly acidic soil, with a pH range of 5.0 to 6.0. Use a soil testing kit to determine the pH level of your soil. If necessary, adjust the pH by adding lime to raise it or sulfur to lower it. Aim for a pH level that is optimal for potato growth.
- Create planting mounds or rows: Potatoes are typically grown in mounds or rows. If you choose to plant in mounds, create small hills of soil about 8-10 inches (20-25 cm) high and 2-3 feet (60-90 cm) apart. If you prefer rows, make furrows that are about 4-6 inches (10-15 cm) deep and 2-3 feet (60-90 cm) apart.
- Water the soil: Before planting your seed potatoes, water the soil thoroughly. This will ensure that the soil is moist and ready to receive the seeds. Avoid over-watering, as excessive moisture can lead to rot or disease.
By following these steps and preparing the soil properly, you will create an optimal environment for your potato plants to grow and thrive. The next step is to plant your seed potatoes.
When preparing seed potatoes, make sure to choose healthy, disease-free potatoes. Cut them into pieces with at least 2 eyes per piece and let them dry for a day before planting. This will help prevent rot and promote healthy growth.
Read more: How Many Potatoes Per Seed Potato
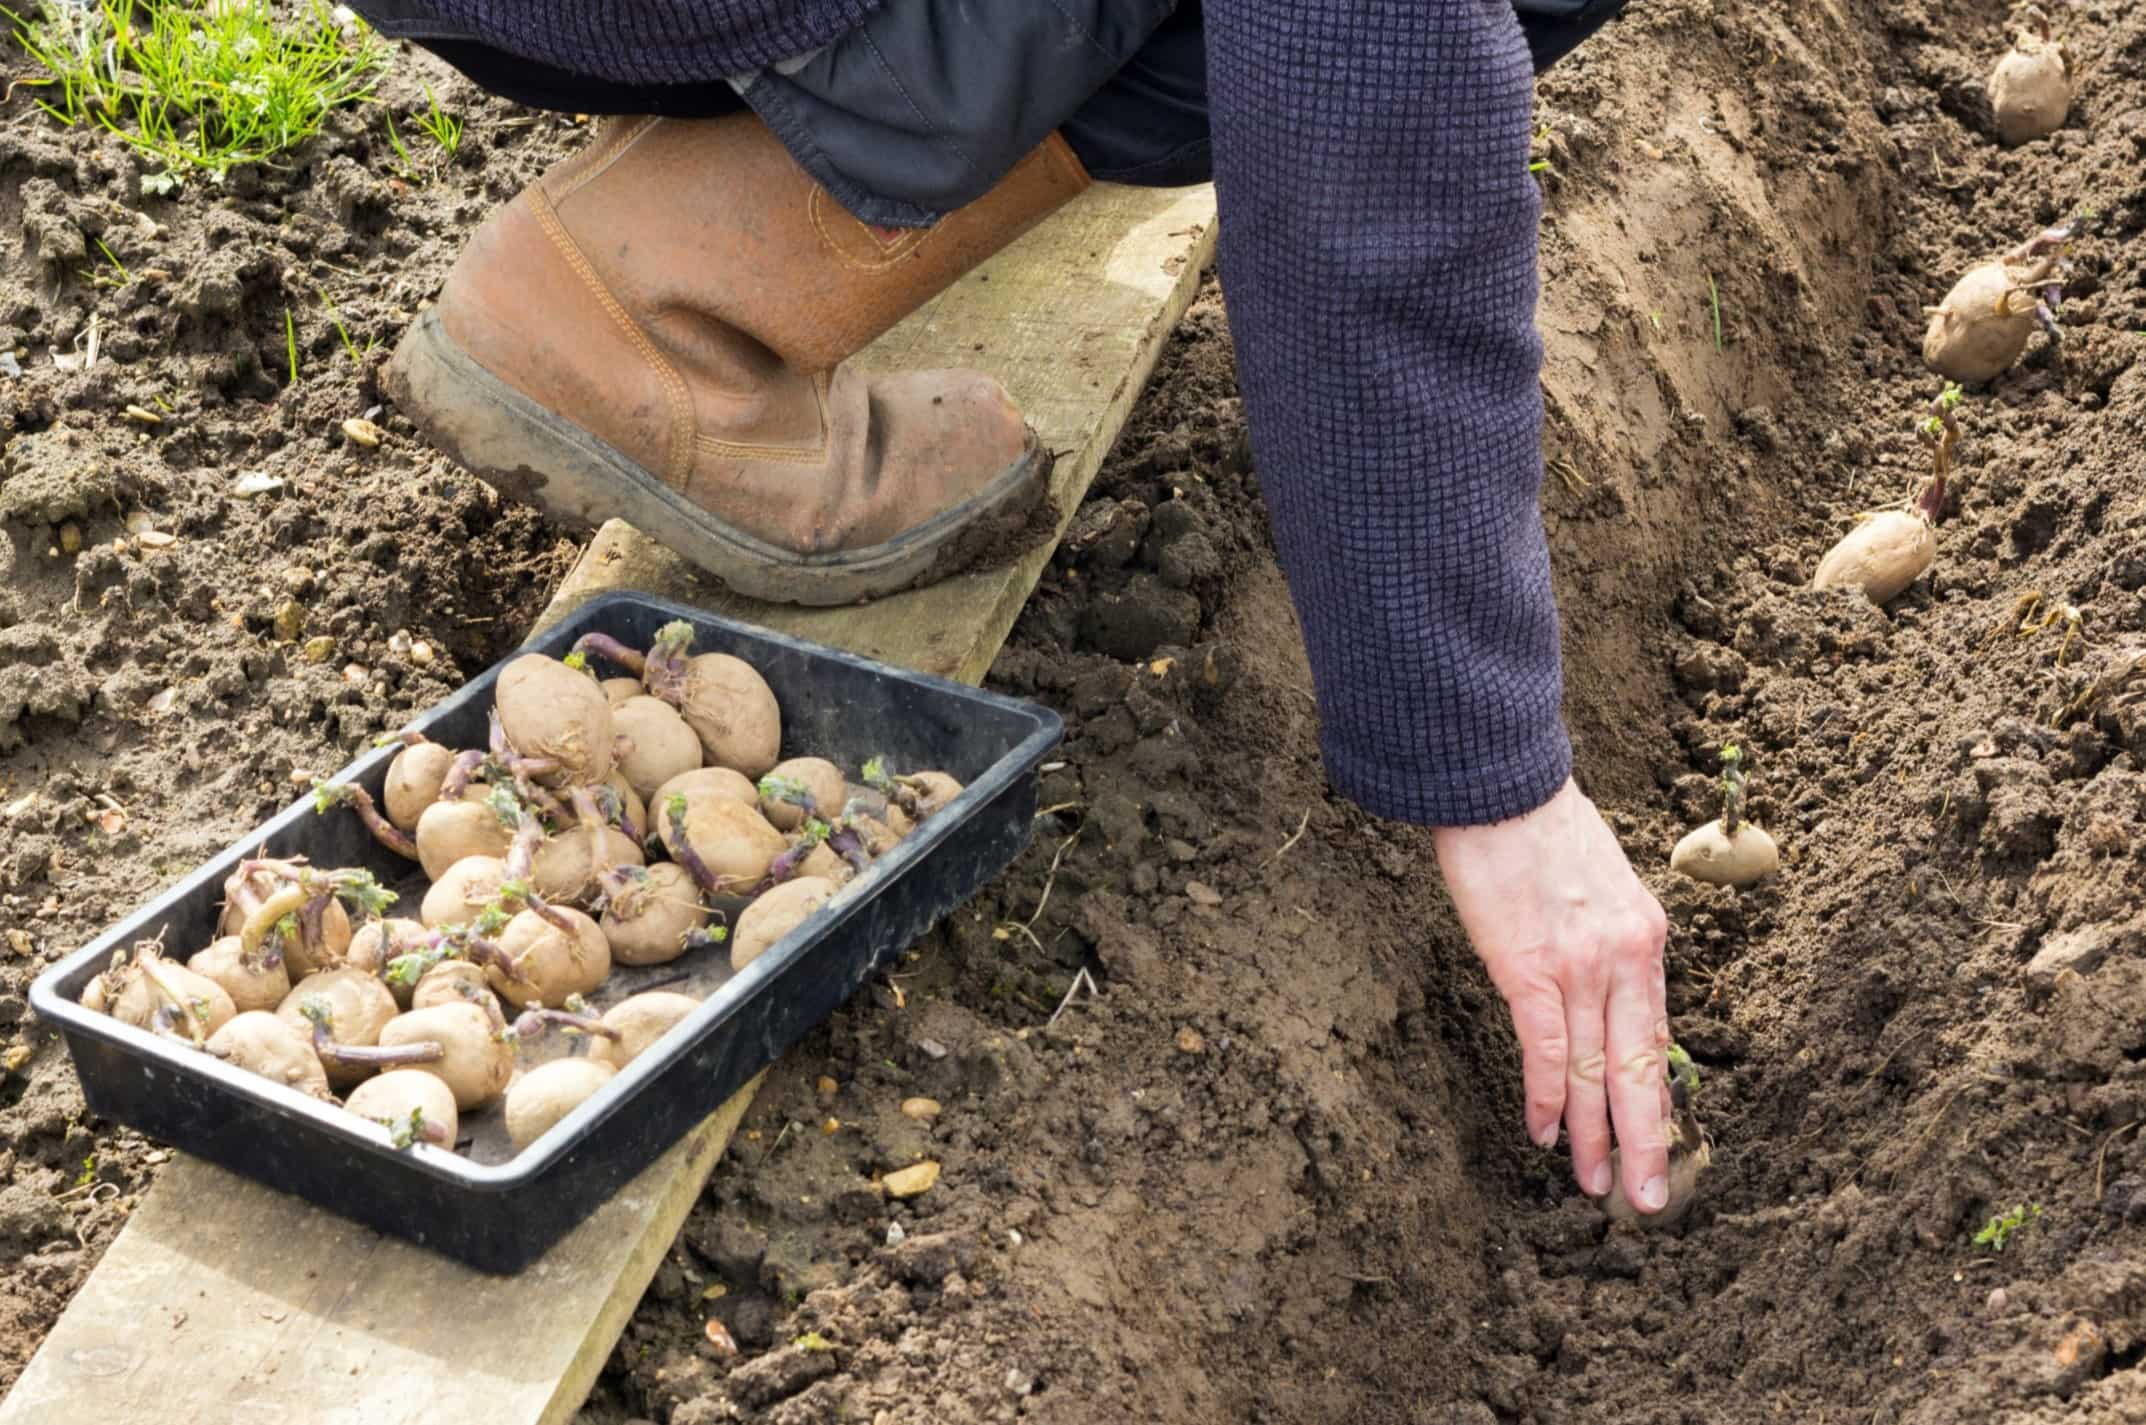
Planting Seed Potatoes
Now that you have selected your potato variety, chitted the seed potatoes, and prepared the soil, it’s time to start planting! Follow these steps to ensure successful planting of your seed potatoes:
- Space the seed potatoes: If you are planting in mounds, space the seed potatoes evenly across the top of each mound, leaving about 12 inches (30 cm) between each potato. If you are planting in rows, space the seed potatoes about 12 inches (30 cm) apart within the furrows.
- Planting depth: Gently push each seed potato into the soil, ensuring that it is planted with the eye side up. Plant the seed potatoes about 4-6 inches (10-15 cm) deep in the mounds or furrows. Cover the potatoes with soil, gently firming it down.
- Hilling: If you planted in mounds, once the seed potatoes have sprouted and grown to a height of about 6 inches (15 cm), it’s time to hill them. Use a hoe or shovel to scoop soil from between the rows and mound it up around the base of the plants. This helps to protect the developing tubers and encourages additional root growth.
- Watering: After planting, give the newly planted seed potatoes a good watering. This will help settle the soil around the tubers and provide them with the moisture they need to establish themselves properly.
- Mulching: Consider applying a layer of organic mulch, such as straw or wood chips, around the potato plants. Mulching helps to conserve soil moisture, suppress weed growth, and regulate soil temperature.
- Provide support: If you are growing tall or vining potato varieties, consider providing support once the plants start to grow. This can be done by installing stakes or trellises to prevent the plants from sprawling on the ground and to maximize space in the garden.
Remember to monitor the moisture levels in the soil throughout the growing season. Potatoes require consistent moisture, but avoid over-watering, as this can lead to rot or disease. Also, keep an eye out for any signs of pests or diseases and take appropriate action if necessary.
With your seed potatoes planted and cared for, it’s time to move on to the next step in the potato growing journey – caring for the plants.
Caring for Seed Potatoes
Proper care is essential for the health and productivity of your seed potatoes. By following these tips, you can ensure that your potato plants thrive and produce a bountiful harvest:
- Watering: Ensure that your potato plants receive consistent moisture throughout the growing season. Keep the soil evenly moist, but avoid over-watering, as it can lead to rot or disease. Water deeply, providing enough moisture to reach the roots.
- Fertilizing: Potatoes are heavy feeders and benefit from regular fertilization. Apply a balanced fertilizer, such as a 10-10-10 or 14-14-14 formula, when the plants are about 6 inches (15 cm) tall. Follow the package instructions for application rates and timings.
- Hilling: As your potato plants grow, periodically hill up soil around the base of the plants to protect the developing tubers and encourage additional root growth. Hilling not only helps prevent greening of the tubers but also provides loose soil for the plants to expand and produce more potatoes.
- Weeding: Regularly remove weeds from around your potato plants. Weeds compete with the potatoes for nutrients, water, and sunlight. Take care when weeding to avoid damaging the roots of the potato plants.
- Pest and disease control: Monitor your potato plants for signs of common pests such as potato beetles or aphids. If you notice any infestations, consider using organic pest control methods or seek advice from your local garden center. Additionally, stay vigilant for any signs of disease, such as blight or scab, and take appropriate measures to prevent its spread.
- Supporting vining potatoes: If you are growing vining or tall potato varieties, provide support to prevent the plants from sprawling on the ground. Use stakes or trellises to keep the plants upright and ensure good air circulation around the foliage.
Regularly observe your potato plants throughout the growing season and address any issues promptly. By providing proper care, you can optimize the health and productivity of your seed potatoes and increase your chances of a successful harvest.
Now that you’ve learned how to care for your seed potatoes, it’s time to move on to the next stage – harvesting!
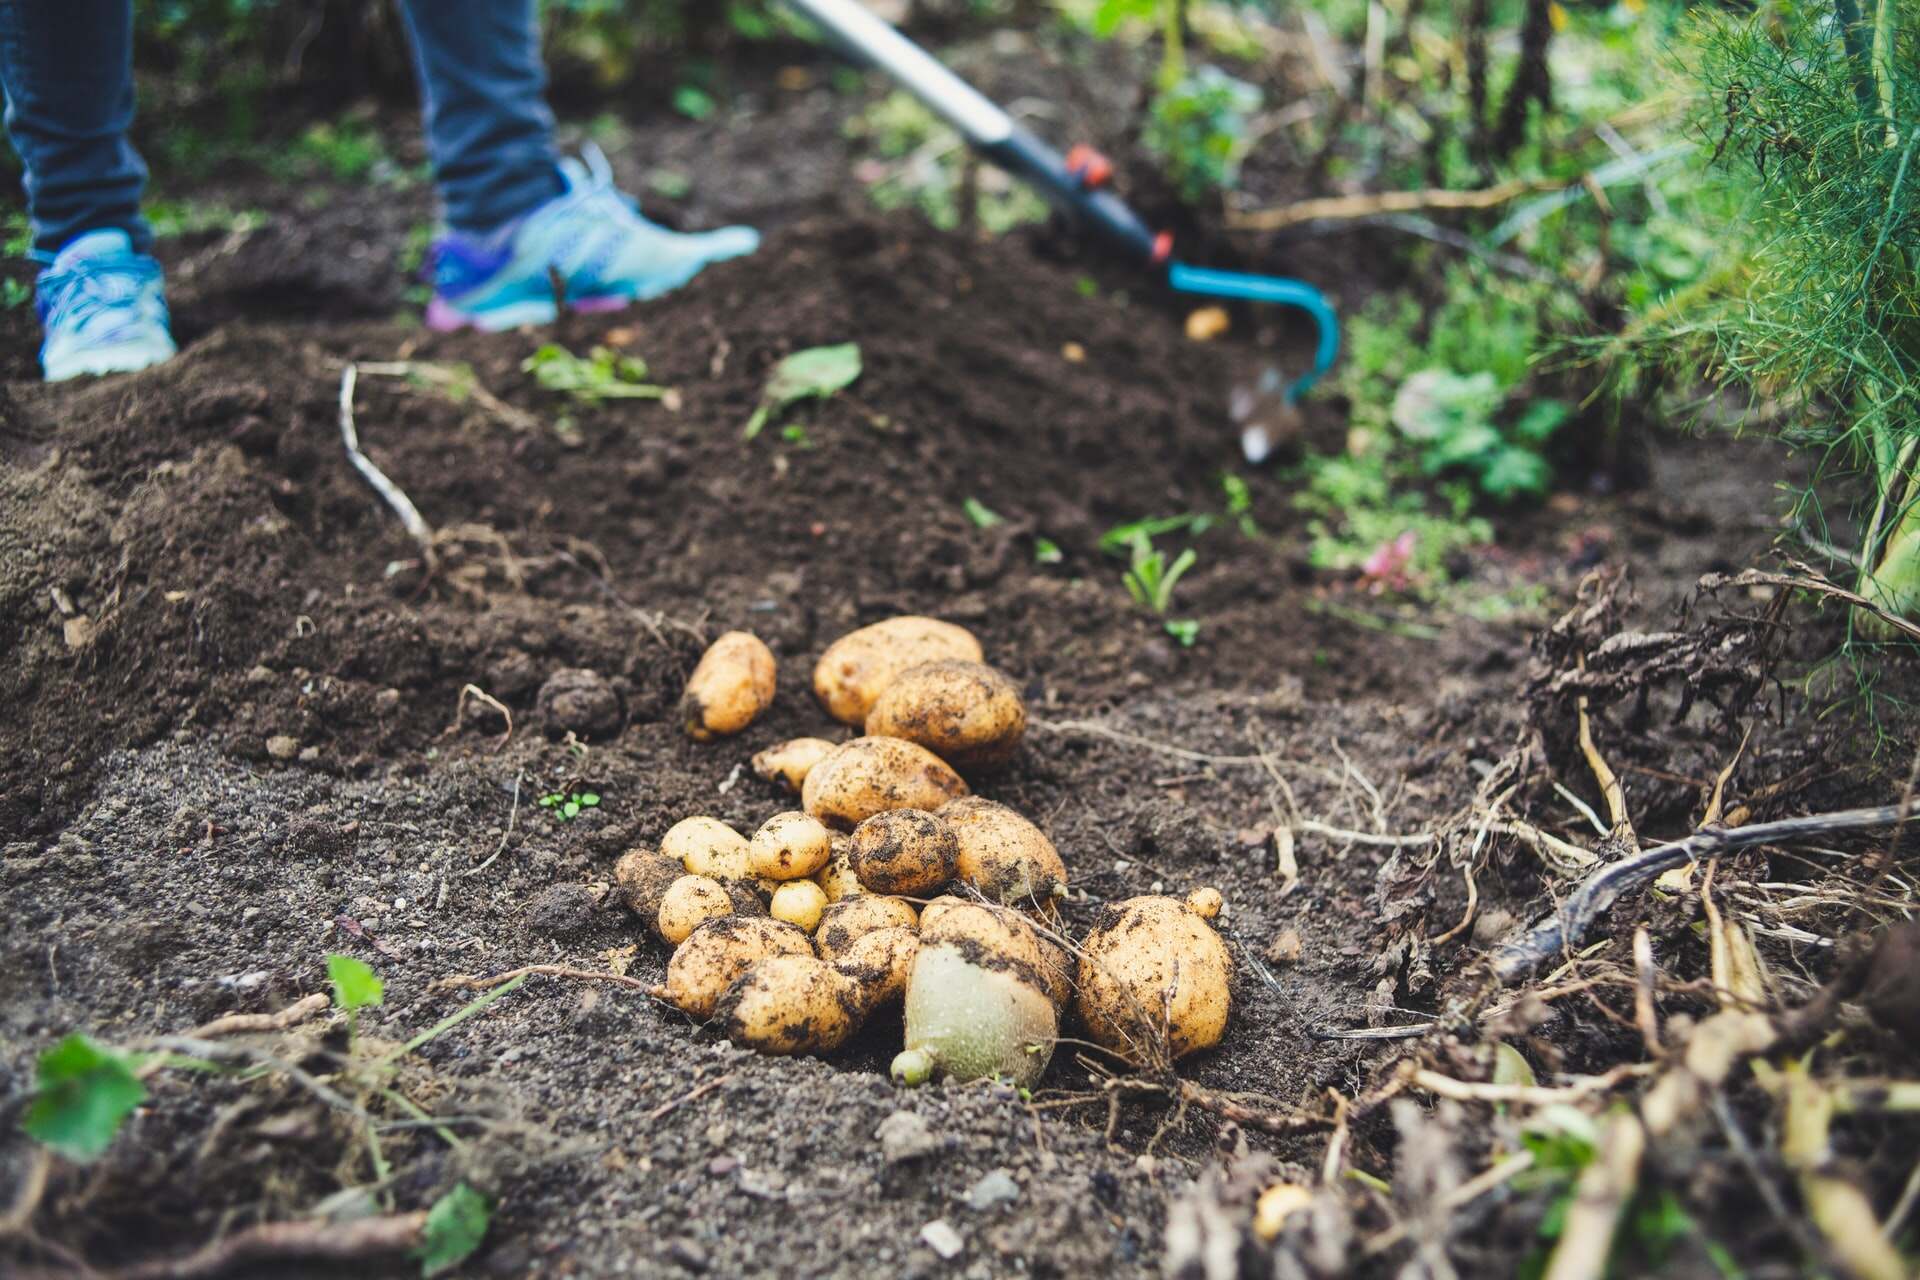
Harvesting Seed Potatoes
Harvesting seed potatoes is an exciting time, as it marks the culmination of your efforts and the opportunity to enjoy the fruits (or in this case, tubers) of your labor. Follow these steps to ensure a successful potato harvest:
- Monitor plant maturity: Keep an eye on the foliage of your potato plants. When the plants start to turn yellow and the leaves begin to die back, it’s a sign that the potatoes are nearing maturity.
- Wait for the right time: Though it can be tempting to dig up your potatoes as soon as the foliage dies back, it’s best to wait for about two weeks after the foliage has completely withered. This allows the skins of the potatoes to toughen, making them more resistant to damage during harvest.
- Prepare for harvest: Before harvesting, prepare your tools. You’ll need a garden fork or a sturdy shovel to gently loosen the soil around the potato plants without damaging the tubers.
- Begin harvesting: Carefully insert the garden fork or shovel into the soil about a foot away from the base of the plant and gently lift the tubers up from beneath. Take care not to pierce or cut the potatoes during this process.
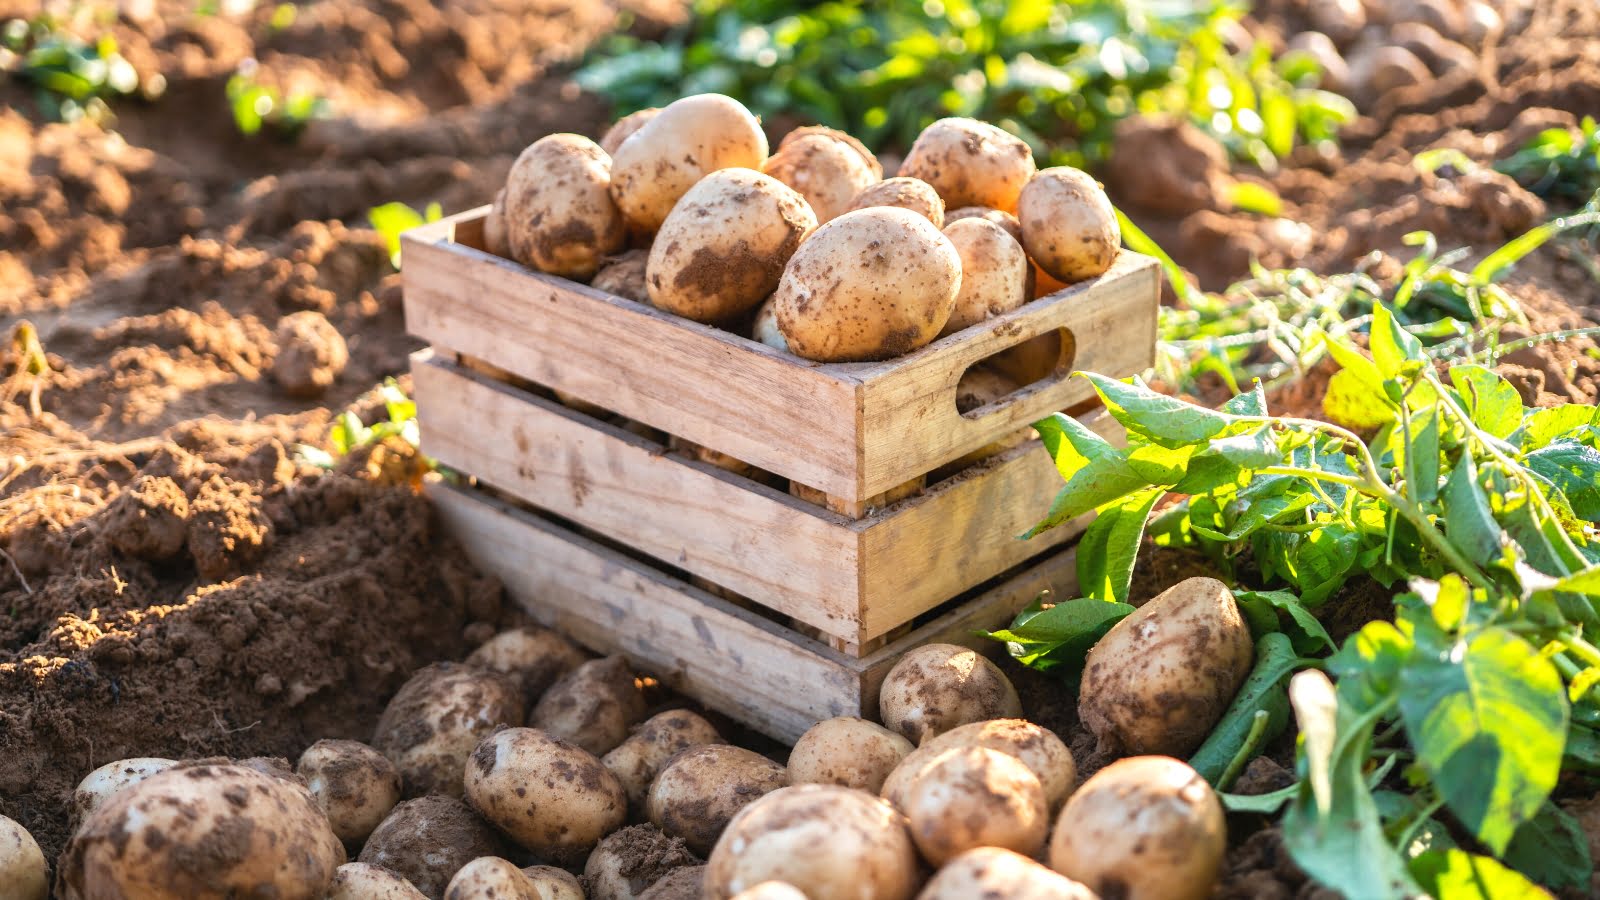
- Collect the potatoes: As you lift the tubers, collect them by hand. Inspect each potato for any damage or signs of disease. Place the undamaged and healthy potatoes into a bucket or crate, being careful not to drop or bruise them.
- Allow for drying: After harvest, it’s a good idea to allow the potatoes to dry for a few hours in a well-ventilated area. This helps to further toughen the skins and reduces the risk of rot during storage.
- Store or use immediately: Once the potatoes are dry, you can choose to store them for later use or enjoy them right away. Store potatoes in a cool, dark, and well-ventilated place to prevent sprouting and extend their shelf life.
Remember that harvested seed potatoes can also be used for culinary purposes, so don’t hesitate to enjoy the fruits of your labor in delicious potato dishes.
By following these steps, you can successfully harvest your seed potatoes and celebrate the rewards of your hard work and dedication. Now that you know how to harvest, let’s explore the next and final step – storing the seed potatoes for future plantings.
Storing Seed Potatoes
Proper storage of seed potatoes is crucial to maintain their quality and viability for future plantings. Follow these guidelines to ensure your seed potatoes are stored correctly:
- Cure the potatoes: Before storing, it’s important to cure the potatoes for about 1-2 weeks. Place them in a well-ventilated area with a temperature of around 50-60°F (10-15°C) and high humidity. This curing process allows the potato skins to further toughen and heal any minor cuts or bruises.
- Inspect and sort: After curing, carefully inspect each potato for any signs of rot, disease, or damage. Discard any potatoes that appear to be compromised. Sort the remaining potatoes according to size and any other preferences you may have.
- Choose the right storage location: The ideal storage location for seed potatoes is cool, dark, and well-ventilated. A temperature of around 40°F (4°C) is ideal to maintain their quality. Keep them away from direct light, as exposure to light can cause the potatoes to turn green and develop solanine, a toxic compound.
- Select appropriate containers: Use breathable containers such as burlap sacks, paper bags, or well-ventilated crates to store your seed potatoes. These containers allow for air circulation and prevent excessive moisture build-up, which can lead to rot.
- Avoid moisture: Potatoes are prone to rot if stored in a humid environment. Make sure the storage area is dry and moisture-free. Check the potatoes regularly to ensure they remain dry, and remove any that show signs of excessive moisture or decay.
- Monitor for sprouting: Seed potatoes have the tendency to sprout as they age. Check your stored potatoes periodically and promptly remove any sprouting potatoes. This ensures that the energy of the potato is preserved for future plantings.
- Keep pests away: Protect your stored seed potatoes from pests such as rodents and insects. Ensure the storage area is free from any infestations and consider using natural pest repellents or traps to prevent damage to your potatoes.
With proper storage, your seed potatoes can remain viable for several months until the next planting season. Make sure to label and keep track of the potato varieties stored, so you can easily identify and select the right ones for future plantings.
By following these storage guidelines, you can maintain the quality of your seed potatoes and ensure a successful growing season when it’s time to plant them again.
Congratulations! You have now completed the final step of the seed potato journey. By selecting the right potato variety, preparing the soil, caring for the plants, harvesting, and properly storing your seed potatoes, you have set yourself up for a bountiful and successful potato-growing experience.
Happy gardening!
Read more: How To Prepare Poppy Seeds For Baking
Conclusion
Congratulations on becoming a seed potato expert! Throughout this article, we have explored the various steps involved in preparing and growing seed potatoes. From selecting the right potato variety to harvesting and storing them, you now have the knowledge and skills to embark on a successful potato-growing journey.
Remember, selecting the right potato variety is essential, as it determines the flavor, texture, and adaptability to your local climate. Take the time to choose varieties that align with your culinary preferences and growing conditions.
When it comes to preparing seed potatoes, chitting can give them a head start by encouraging sturdy sprout development. Preparing the soil properly, with loose and fertile conditions, ensures healthy root growth and optimal nutrient absorption.
Caring for your seed potatoes involves consistent watering, proper fertilization, and vigilant pest and disease control. Regular maintenance tasks such as hilling and weeding support the growth and productivity of your plants.
Once your seed potatoes are ready for harvest, make sure to handle them with care to prevent damage. After curing, sort and store the potatoes in a cool, dark, and well-ventilated environment to preserve their quality for future plantings.
This journey of growing seed potatoes not only yields delicious and versatile tubers but also provides a rewarding experience. The satisfaction of enjoying your own homegrown potatoes, whether in a comforting meal or shared with others, is truly priceless.
So, gather your tools, get your hands dirty, and let the joy of growing seed potatoes begin. With the knowledge and techniques you’ve acquired, success is within reach.
Happy potato growing!
Frequently Asked Questions about How To Prepare Seed Potatoes
Was this page helpful?
At Storables.com, we guarantee accurate and reliable information. Our content, validated by Expert Board Contributors, is crafted following stringent Editorial Policies. We're committed to providing you with well-researched, expert-backed insights for all your informational needs.


0 thoughts on “How To Prepare Seed Potatoes”