Home>Garden Essentials>How To Save Potatoes For Seed
Garden Essentials
How To Save Potatoes For Seed
Modified: March 16, 2024
Learn how to save potatoes for seed in your garden with our simple and effective techniques. Maximize your potato yield and enjoy a plentiful harvest!
(Many of the links in this article redirect to a specific reviewed product. Your purchase of these products through affiliate links helps to generate commission for Storables.com, at no extra cost. Learn more)
Introduction
Welcome to the wonderful world of gardening! If you’ve ever grown potatoes in your garden, you know how rewarding it can be to harvest a bountiful crop. But have you ever wondered how to save potatoes for seed? Growing your own potatoes from seed can be a fulfilling and cost-effective way to continue your potato-growing adventures year after year.
In this article, we will guide you through the process of selecting the right potatoes for seed, harvesting and storing them, preparing them for planting, caring for them during the growing season, and finally, how to harvest and save potato seeds for future planting.
Before we dive into the details, let’s talk a little bit about the benefits of saving and using potato seeds. By saving your own potato seeds, you have control over the quality and characteristics of the plants. You can select the best performers from your previous harvest and save their seeds to ensure a crop that suits your preferences. Additionally, saving potato seeds can also save you money in the long run, as you won’t have to rely on purchasing new seed potatoes each year.
Now that you understand the importance and benefits of saving potatoes for seed, let’s get started!
Key Takeaways:
- Save high-quality, disease-free potatoes for seed to ensure a successful and bountiful harvest. Consider buying certified seed potatoes or saving your own from previous healthy crops.
- Properly prepare, plant, and care for your seed potatoes to nurture robust and productive potato plants. Enjoy the journey of saving and growing your own potato seeds for a truly homegrown harvest.
Read more: How To Save Seed
Selecting the Right Potatoes for Seed
When it comes to selecting potatoes for seed, it’s important to choose healthy, disease-free, and high-quality tubers. The quality of the seed potatoes you choose will directly affect the success and productivity of your future potato crop.
Here are some tips to help you select the right potatoes for seed:
- Buy certified seed potatoes: Certified seed potatoes are guaranteed to be disease-free and have undergone testing to ensure their quality. Look for reputable suppliers or visit your local garden center to purchase certified seed potatoes.
- Choose healthy tubers: Examine the seed potatoes carefully before buying them. Avoid any potatoes that show signs of rot, damage, or sprouting. Look for firm and smooth tubers that are free from blemishes.
- Select the right variety: Consider the growing conditions in your area and choose potato varieties that are well-suited to your climate and soil type. Take into account factors such as maturity rate, disease resistance, and desired flavor or texture.
- Save your own seed potatoes: If you have previously grown potatoes and have had a successful harvest, you can save some of your own tubers as seed potatoes for the next planting season. Just make sure the potatoes are disease-free and have been stored properly.
It’s also a good idea to keep track of the characteristics and performance of different potato varieties in your garden. This way, you can make informed decisions and choose the best potatoes for seed based on your own observations and preferences.
Remember, selecting the right potatoes for seed is an essential step towards a successful potato harvest. By investing in high-quality seed potatoes, you are setting yourself up for a productive and satisfying growing season.
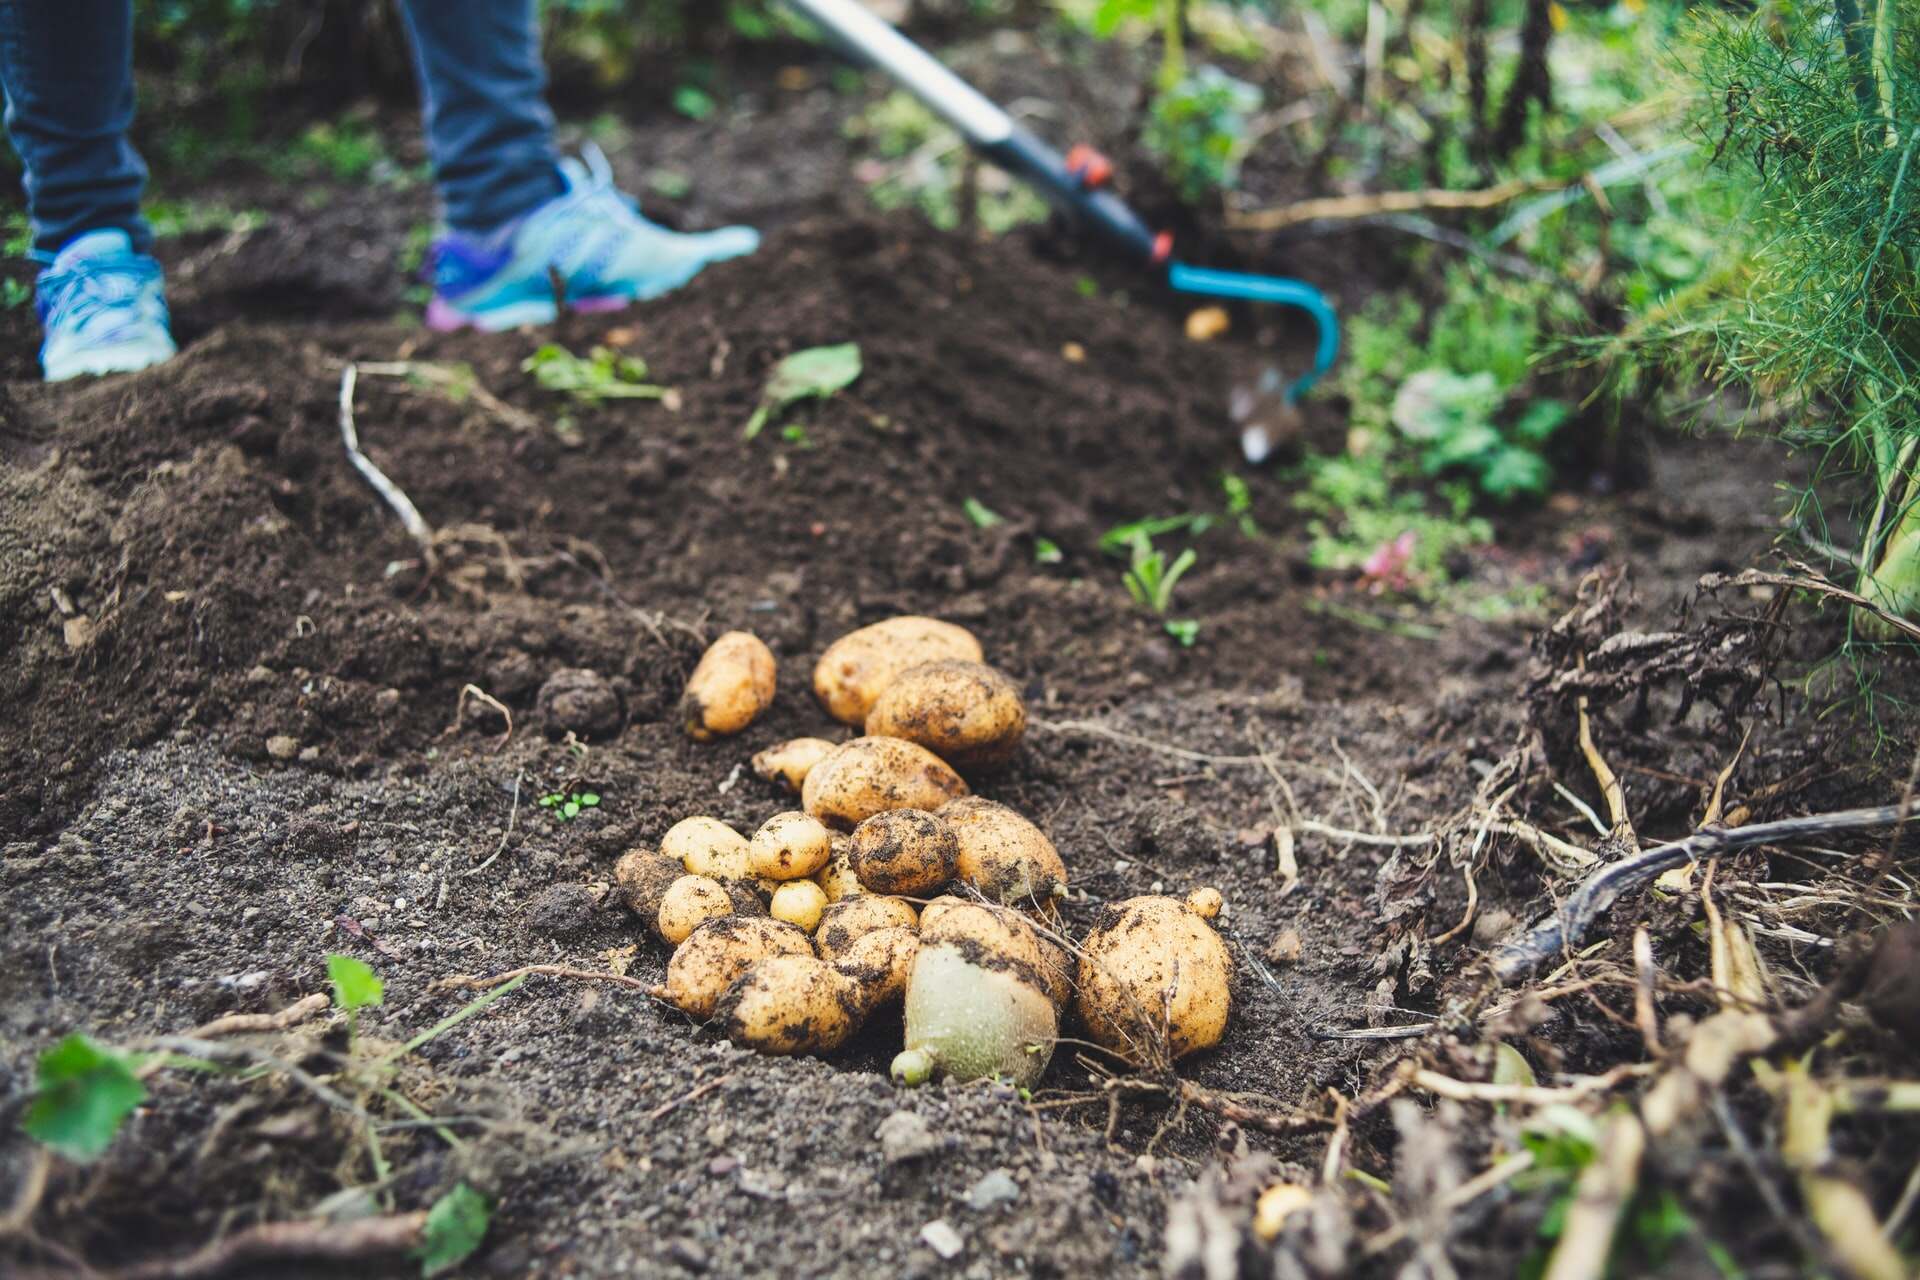
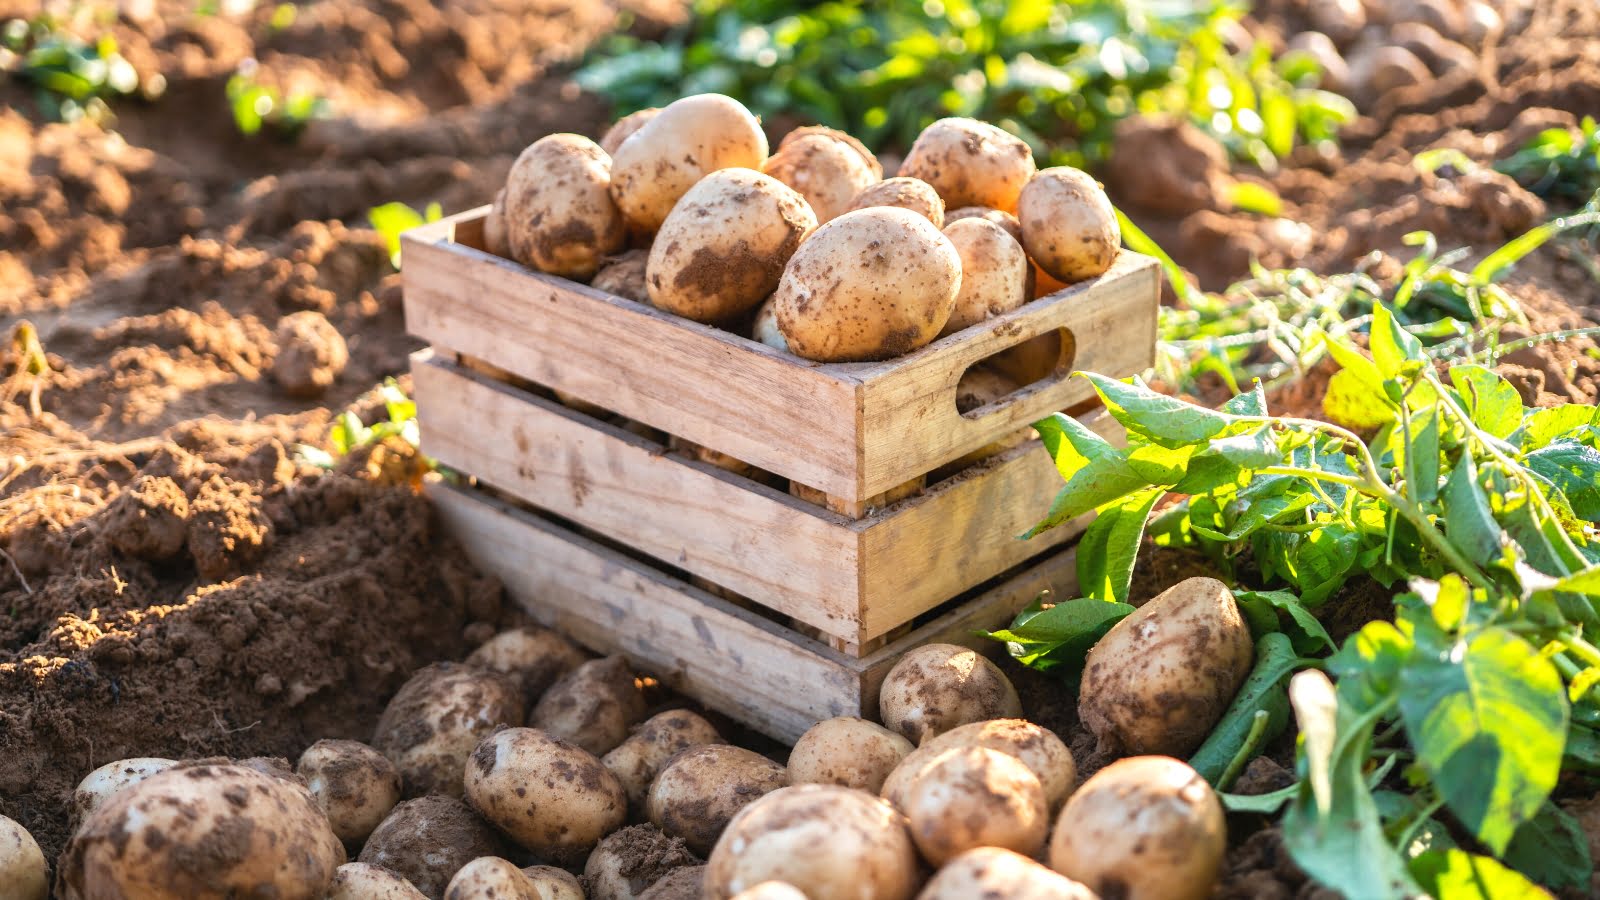
Harvesting Potatoes for Seed
Harvesting potatoes for seed is slightly different than harvesting them for eating. To ensure healthy and viable seeds for future planting, it’s important to follow the proper harvesting techniques. Here’s a step-by-step guide to help you harvest your potatoes for seed:
- Timing: Harvesting potatoes for seed should be done when the plants have fully matured. This is typically when the foliage starts to yellow and die back. Avoid harvesting too early or too late, as it can affect the quality of the seeds.
- Prepare the soil: Before harvesting, gently loosen the soil around the potato plants with a garden fork or a shovel. This will make it easier to lift the potatoes without damaging them.
- Carefully lift the potatoes: Use a garden fork or shovel to carefully lift the plants from beneath the potatoes. Be gentle to avoid bruising or damaging the tubers.
- Inspect the potatoes: Once the potatoes are lifted, inspect them closely for any signs of damage, disease, or rot. Discard any potatoes that show these signs, as they can negatively impact the quality of the seeds.
- Cure the potatoes: After inspecting, allow the potatoes to cure for about ten days in a cool, dry, and well-ventilated space. This process helps the skins toughen up and any minor cuts or wounds to heal.
- Sort and store: Once the potatoes have cured, sort them according to their size and quality. Choose the best-looking and healthiest tubers for seed. Store the seed potatoes in a cool and dark place, such as a cellar or a basement, until you’re ready to plant them.
By following these harvesting guidelines, you can ensure that your harvested potatoes are in optimal condition for seed saving. Proper handling and care will help you maintain the quality and viability of the potato seeds for successful future plantings.
Curing and Storing Potatoes for Seed
After harvesting your potatoes for seed, it’s important to properly cure and store them to ensure their longevity and viability. Curing is the process of allowing the potatoes to dry out and toughen their skins, which helps protect them during storage. Here’s a guide to help you effectively cure and store your potato seeds:
- Curing: Place the harvested potatoes in a single layer on newspaper or a drying rack in a cool, dark, and well-ventilated area. The ideal temperature for curing potatoes is around 50-60°F (10-15°C) with humidity levels around 80-85%. Avoid direct exposure to sunlight as it can lead to greening of the tubers.
- Drying time: Allow the potatoes to cure for about 2-4 weeks. During this time, the potatoes will develop a thicker skin and any minor cuts or wounds will heal. It’s essential to maintain good air circulation around the potatoes to prevent the growth of mold or rot.
- Inspect for spoilage: Regularly check the potatoes during the curing period for any signs of spoilage or disease. Remove any potatoes that show signs of decay to prevent the spread of infection to healthy tubers.
- Choosing storage containers: Once the potatoes have cured, select suitable containers for storing your seed potatoes. Opt for breathable containers such as burlap sacks, paper bags, or wooden crates. These containers allow proper airflow and prevent moisture buildup, reducing the risk of rot.
- Storage conditions: Store the cured potatoes in a cool, dark, and well-ventilated area with temperatures around 35-40°F (1-4°C). It’s crucial to maintain consistent temperature and humidity levels to prevent sprouting or premature aging of the tubers. Check the storage area regularly for any signs of rot or pest infestation.
By properly curing and storing your potato seeds, you can extend their shelf life and preserve their quality for future planting. Remember to label your storage containers with the variety and date of harvest, so you can keep track of the age and attributes of your seed potatoes.
When it’s time for planting, be sure to select the best-looking and healthiest seed potatoes from your storage, as they will have the highest chance of producing vigorous and productive potato plants.
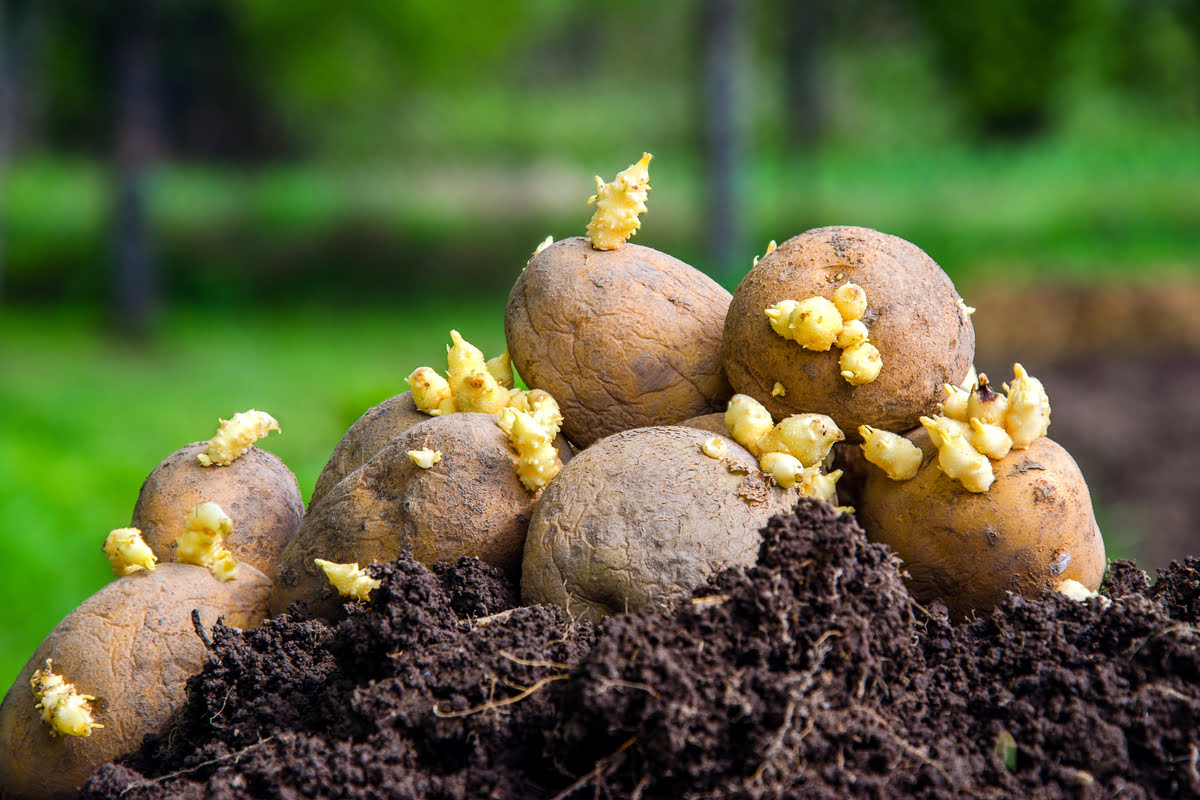
Preparing Potatoes for Planting
Preparing potatoes for planting is a crucial step in ensuring successful germination and growth. Proper preparation helps create an optimal environment for the seed potatoes to develop strong roots and produce healthy plants. Here are the steps to prepare your potatoes for planting:
- Inspect the seed potatoes: Before planting, carefully examine the seed potatoes for any signs of disease, rot, or damage. Discard any potatoes that are not in good condition to prevent the spread of infection to your garden.
- Cut or leave whole: Depending on the size of your seed potatoes, you may choose to leave them whole or cut them into smaller pieces. If the potatoes are small, leave them whole. For larger potatoes, you can cut them into pieces, making sure each piece has at least one or two “eyes” or buds.
- Allow the cut surfaces to dry: If you decide to cut your seed potatoes, it’s important to let the cut surfaces dry for a day or two before planting. This helps prevent moisture from entering the cut areas, reducing the risk of rotting. Place the cut potatoes in a cool and dry location with good air circulation during this drying period.
- Consider pre-sprouting: Pre-sprouting, also known as chitting, is an optional step that can help jumpstart the growth of your potato plants. To pre-sprout, place the seed potatoes in a well-lit location with a temperature of around 50-60°F (10-15°C). Allow the potatoes to develop small sprouts before planting, typically 1 to 1.5 inches in length.
- Prepare the planting area: Before planting, prepare the soil by loosening it with a garden fork or a tiller. Remove any weeds or debris, and amend the soil with organic matter, such as compost, to improve its fertility and drainage.
- Planting depth and spacing: When planting, ensure that the seed potatoes are placed at the proper depth. Plant them about 4-6 inches deep, with the sprouts facing upward. Space the seed potatoes about 12-15 inches apart, allowing enough room for the plants to grow and develop.
- Water and mulch: After planting, water the soil thoroughly to provide moisture for germination. Apply a layer of organic mulch, such as straw or wood chips, to help conserve moisture, suppress weeds, and regulate soil temperature.
Properly preparing your seed potatoes for planting sets the foundation for healthy and productive potato plants. Taking the time to inspect, cut (if necessary), and pre-sprout the potatoes, as well as providing optimal planting conditions, will increase the chances of a successful potato harvest.
Store potatoes for seed in a cool, dark place with good air circulation to prevent sprouting. Keep them separate from eating potatoes to avoid contamination. Check regularly for any signs of rot or disease.
Read more: How Many Potatoes Per Seed Potato
Planting Potatoes for Seed
Now that you have prepared your seed potatoes, it’s time to plant them and watch them grow into robust potato plants. Proper planting techniques ensure that the seeds have the best chance of germination and healthy growth. Here’s a step-by-step guide to planting potatoes for seed:
- Select the planting location: Choose a sunny spot in your garden with well-draining soil. Potatoes prefer loose, loamy soil with a pH level between 5.8 and 6.5. Avoid areas with heavy clay or compacted soil.
- Prepare the soil: Loosen the soil to a depth of about 8-10 inches using a garden fork or tiller. Remove any rocks, weeds, or debris from the planting area.
- Apply organic matter and fertilizer: Enhance the soil fertility by incorporating organic matter, such as compost, into the planting area. This improves the soil structure, adds nutrients, and promotes healthy root growth.
- Planting method: Dig shallow trenches or furrows in the prepared soil, spaced about 2 to 3 feet apart. Place the seed potatoes with the sprouts facing up, ensuring they are spaced 12-15 inches apart in the trench. Cover the potatoes with about 2 inches of soil.
- Hilling: As the potato plants grow, continue to add soil or organic matter around them to create hills. This helps prevent the tubers from being exposed to sunlight, which can cause greening and decrease their quality. Hilling also encourages the development of more tubers along the stems.
- Watering: After planting, water the soil thoroughly to provide moisture for the seeds to germinate. Throughout the growing season, keep the soil consistently moist, but avoid overwatering, as it can lead to rot or disease. Aim to provide around 1-2 inches of water per week, keeping the soil evenly moist.
- Monitor for pests and diseases: Regularly inspect your potato plants for any signs of pests or diseases. Common pests include potato beetles, aphids, and wireworms. Treat any infestations promptly to prevent damage to the plants and tubers.
- Protect from frost: In areas with late spring frosts, be prepared to protect your young potato plants from cold temperatures. Cover them with row covers or use garden fabric to prevent frost damage.
- Mulching: Apply a layer of organic mulch, such as straw or wood chips, around the base of the potato plants. Mulching helps suppress weeds, retain soil moisture, and regulate soil temperature.
Following these planting guidelines will give your seed potatoes the best start for a successful growing season. Be sure to provide proper care and maintenance throughout the season, including regular watering, controlling pests and diseases, and hilling the plants as they grow. With time and care, you’ll soon be harvesting a plentiful supply of delicious homegrown potatoes!
Caring for Potatoes During the Growing Season
Once you have planted your potato seeds, it’s important to provide them with the right care and attention throughout the growing season. Potatoes are relatively low-maintenance plants, but there are a few key steps you can take to ensure their optimal growth and productivity. Here are some tips for caring for your potatoes:
- Watering: Potatoes require consistent moisture to grow properly. Water the plants regularly, especially during dry periods, keeping the soil evenly moist. Aim to provide about 1-2 inches of water per week and adjust accordingly based on rainfall and soil conditions. Avoid overwatering, as it can lead to disease and rot.
- Fertilizing: Potatoes benefit from regular fertilization to ensure healthy growth and a good yield. About a month after planting, apply a balanced organic fertilizer or a potato-specific fertilizer according to the package instructions. This will help provide essential nutrients for the developing plants.
- Controlling weeds: Keep the potato planting area free from weeds, as they compete with the potato plants for nutrients and moisture. Regularly remove any weeds by hand or carefully use a hoe or cultivator, taking care not to damage the shallow roots of the potato plants.
- Hilling: As the potato plants grow, continue to hill the soil around the base of the plants. Hilling involves piling soil or mulch around the stems, leaving only the tops of the plants exposed. This promotes the development of more tubers and helps prevent greening of the tubers from exposure to sunlight.
- Pest and disease control: Regularly monitor your potato plants for signs of pests and diseases. Common pests include potato beetles, aphids, and slugs. Control measures can include handpicking pests, using organic insecticides, or applying natural repellents. Be sure to learn about common potato diseases in your area and take preventive measures to avoid or mitigate them.
- Support for sprawling varieties: Some potato varieties have sprawling growth habits and may benefit from additional support. Use stakes or trellises to provide support for the plants, preventing them from sprawling on the ground and reducing the risk of disease and damage.
- Mulching: Apply a layer of organic mulch, such as straw or wood chips, around the base of the potato plants. Mulching helps suppress weeds, retain soil moisture, and regulate soil temperature, creating an optimal growing environment for the potatoes.
- Monitoring maturity: It’s important to keep an eye on the maturity of your potato plants. Depending on the variety, they will be ready for harvest when the foliage starts to yellow and die back. This typically occurs about 2-3 months after planting. Check a few plants by carefully digging around the base to assess the size and readiness of the tubers.
- Harvesting: When the potatoes are ready for harvest, carefully dig them up using a garden fork or shovel. Take care not to damage the tubers during the harvesting process. Once harvested, gently brush off excess soil and allow the potatoes to cure before storing or using.
By following these care instructions, you can ensure the health and success of your potato plants throughout the growing season. Remember to provide adequate water, fertilizer, and protection against pests and diseases. With proper care, you will be rewarded with a bountiful harvest of nutritious and delicious homegrown potatoes.
Harvesting and Saving Potato Seeds for Future Planting
As the growing season comes to an end, it’s time to harvest your mature potato plants and save the seeds for future planting. Harvesting and saving potato seeds allows you to continue your potato-growing adventures year after year and maintain the qualities you desire in your potato crop. Here’s a guide to harvesting and saving potato seeds:
- Timing: Wait until the potato plants have reached full maturity before harvesting the seeds. This is typically indicated by the complete dieback of the foliage and the formation of a thick skin on the tubers.
- Harvesting: Use a garden fork or shovel to carefully unearth the potato plants, taking care not to damage the tubers. Gently remove the soil from around the plants to expose the potatoes. Remember to handle them with care to avoid bruising or scraping off the skin.
- Seed selection: Inspect the harvested potatoes closely, selecting the healthiest and highest-quality tubers for seed saving. Choose potatoes that are free from any signs of disease, rot, or damage. Selecting the best tubers ensures the production of strong and vigorous potato plants in future seasons.
- Curing: Place the selected seed potatoes in a dry and well-ventilated area for about two weeks to allow for curing. This curing process helps toughen the skin of the potatoes and heal any minor cuts or wounds. Avoid exposing the potatoes to direct sunlight during this period.
- Storage: Once the potatoes have cured, store them in a cool and dark location with a temperature range of 35-40°F (1-4°C). Choose a storage container that allows for air circulation, such as a burlap sack or a paper bag. Avoid storing potatoes near fruits or vegetables that produce ethylene gas, as it can speed up aging.
- Long-term storage: For long-term storage, periodically check the stored potatoes for any signs of decay or disease. Remove any potatoes showing signs of spoilage to prevent the spread of infection to the others. It’s also helpful to label the storage container with the variety and the date harvested for easy identification in the future.
- Preparing for planting: When you’re ready to plant the saved potato seeds, a couple of weeks before planting, take the stored potatoes out of storage and place them in a warm and well-lit area to encourage sprouting. This pre-sprouting period helps kick-start the growth of the seed potatoes.
- Planting: Plant the sprouted seed potatoes in the prepared soil, ensuring each piece has at least one or two sturdy sprouts. Follow the usual planting techniques, such as planting at the right depth and spacing, and providing adequate water and nutrients.
- Observation and selection: Throughout the growing season, observe the performance of the potato plants. Take note of their yield, disease resistance, and desirable qualities. Select the best-performing plants for seed saving, continuing the cycle of saving and planting seeds from the strongest and healthiest plants.
By harvesting and saving your own potato seeds, you have the opportunity to control the quality, traits, and flavors of your potato harvest. With each passing season, you can refine your selection and cultivate a potato crop that perfectly suits your preferences. Enjoy the journey of saving and growing potato seeds, and revel in the satisfaction of a truly homegrown harvest.
Conclusion
Congratulations! You now have the knowledge and tools to save and grow your own potato seeds. By implementing the proper techniques for selecting, harvesting, curing, storing, and preparing potatoes for planting, you can ensure a successful and bountiful potato crop year after year.
Remember, selecting high-quality seed potatoes is crucial to the success of your potato plants. Choose disease-free and healthy tubers, and consider buying certified seed potatoes or saving your own from previous successful harvests. Take the time to inspect, cure, and store the potatoes properly to maintain their viability for future planting.
When it comes to planting, prepare the soil, cut or leave the seed potatoes whole, and allow for proper drying or pre-sprouting if desired. Plant at the right depth and spacing, provide water, nutrients, and support as needed, and protect your plants from pests and diseases.
Don’t forget to monitor the maturity of your potato plants and harvest them when they are fully mature. Then, select the best tubers for seed saving, cure them, and store them in optimal conditions until you’re ready to plant them again next season.
Gardening is a journey of learning and experimentation, and saving potato seeds adds an exciting and rewarding dimension to the process. By saving and replanting your own seeds, you have the opportunity to develop and adapt your potato crop to your preferences, climate, and growing conditions.
So, roll up your sleeves, gather your gardening tools, and embark on the adventure of saving and growing your own potato seeds. Enjoy the beauty of watching the plants grow, the joy of harvesting your homegrown potatoes, and the satisfaction of self-sufficiency and sustainability in your garden.
Happy potato growing!
Frequently Asked Questions about How To Save Potatoes For Seed
Was this page helpful?
At Storables.com, we guarantee accurate and reliable information. Our content, validated by Expert Board Contributors, is crafted following stringent Editorial Policies. We're committed to providing you with well-researched, expert-backed insights for all your informational needs.


0 thoughts on “How To Save Potatoes For Seed”