Home>Garden Essentials>How To Grow Potatoes From Seeds
Garden Essentials
How To Grow Potatoes From Seeds
Modified: October 21, 2024
Looking to grow potatoes from seeds in your garden? Learn how to successfully grow potatoes and enjoy a bountiful harvest with our step-by-step guide.
(Many of the links in this article redirect to a specific reviewed product. Your purchase of these products through affiliate links helps to generate commission for Storables.com, at no extra cost. Learn more)
Introduction
Welcome to the wonderful world of gardening and the exciting journey of growing your own potatoes from seeds! Whether you’re a seasoned gardener looking to expand your crop selection or a beginner eager to try your hand at vegetable gardening, growing potatoes from seeds can be a rewarding and fulfilling experience.
Potatoes are a versatile and staple vegetable that can be enjoyed in a variety of dishes. From crispy fries to creamy mashed potatoes, and everything in between, having an abundant supply of fresh potatoes at your fingertips is a real treat. Plus, growing your own potatoes allows you to have control over the quality and sustainability of your food.
In this article, we will guide you through the process of choosing potato seeds, preparing the soil, planting the seeds, caring for the plants, managing pests and diseases, and eventually harvesting and storing your precious potato harvest.
So, let’s roll up our sleeves, put on our gardening gloves, and dive into the world of growing potatoes from seeds!
Key Takeaways:
- Choose certified seed potatoes and prepare loose, well-draining soil rich in organic matter to grow healthy and delicious potatoes. Proper watering, fertilizing, and pest management are essential for a bountiful harvest.
- Harvest mature potatoes carefully and store them in a cool, dark, and well-ventilated place to enjoy your homegrown produce for months. Growing potatoes from seeds is a rewarding and delightful experience!
Read more: How Many Potatoes Grow From One Seed Potato
Choosing Potato Seeds
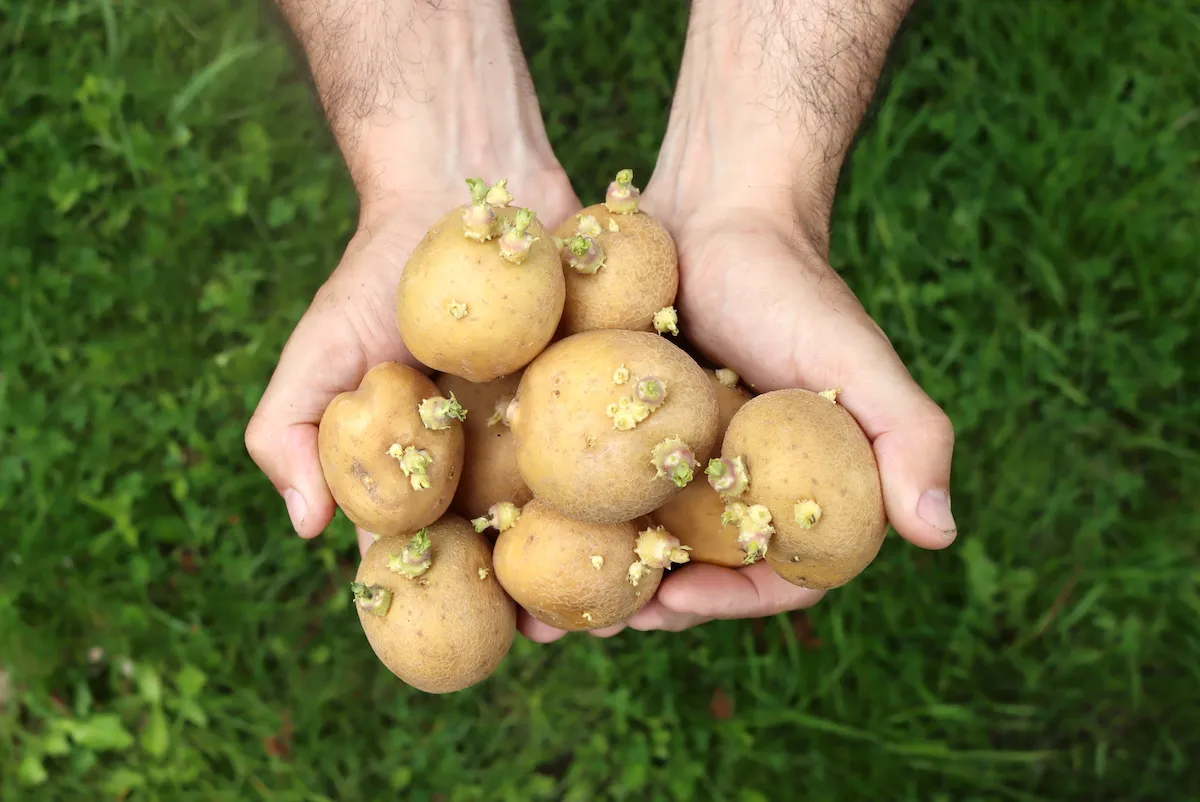
When it comes to choosing potato seeds, there are a few factors to consider. Firstly, decide on the variety of potatoes you want to grow. There are countless varieties available, each with its own unique characteristics in terms of flavor, texture, and suitability for specific growing conditions. Some popular varieties include Russet, Yukon Gold, Red Bliss, and Fingerling. Research the different varieties and select the ones that best suit your taste preferences and growing environment.
Next, it’s important to choose certified seed potatoes rather than ordinary store-bought potatoes. Certified seed potatoes are specially bred for disease resistance and optimal yields. They are also free from any diseases that can be carried over from the previous growing season. Look for reputable suppliers or local nurseries that offer certified seed potatoes and ensure they are healthy, firm, and free from any signs of decay or damage.
The size of the seed potatoes is also a crucial factor. Smaller seed potatoes, around the size of an egg or smaller, are ideal for planting. Avoid using large potatoes as they can result in uneven growth and a lower yield. If your seed potatoes are too large, you can cut them into smaller pieces, making sure each piece has at least one or two “eyes” from which the sprouts will emerge.
Lastly, keep in mind the specific growing conditions and climate of your region. Some potato varieties thrive better in cooler climates, while others are more suited to warmer regions. Consider the average temperature, rainfall, and length of the growing season in your area when selecting your potato seeds.
Remember, choosing the right potato seeds sets the foundation for a successful potato-growing experience. Take your time to research and select the best varieties that suit your taste preferences and growing conditions. With the right seeds, you’ll be well on your way to a bountiful potato harvest!
Preparing the Soil
The success of your potato plants largely depends on the quality of the soil they are planted in. Potatoes thrive in loose, well-draining soil that is rich in organic matter. Here are some steps to prepare your soil for optimal potato growth:
- Clear the area: Start by clearing any weeds, rocks, or debris from the area where you plan to grow your potatoes. It’s important to have a clean and weed-free space to prevent competition for nutrients and resources.
- Loosen the soil: Potatoes prefer loose and crumbly soil that allows for easy root penetration. Use a garden fork or a tiller to loosen the soil to a depth of around 8-10 inches. This will also help improve drainage and prevent waterlogging, which can cause rot.
- Add organic matter: Incorporate organic matter, such as compost or well-rotted manure, into the soil. This will provide essential nutrients for the potato plants and improve the soil structure. Spread a layer of organic matter over the loosened soil and mix it in thoroughly.
- Test the soil pH: Potatoes prefer slightly acidic soil with a pH ranging from 5.0 to 6.0. You can test the pH of your soil using a home testing kit or by sending a soil sample to a local agricultural extension office. If the pH is too high, you can lower it by adding elemental sulfur or acidic compost.
- Amend the soil: Based on the results of your soil test, you may need to amend the soil with additional nutrients to ensure a healthy potato crop. Common soil amendments for potatoes include bone meal for phosphorus, blood meal for nitrogen, and potassium sulfate for potassium.
- Level and rake the soil: Once you have incorporated organic matter and amendments into the soil, level the surface with a rake. This will provide a smooth planting bed and make it easier for your potato seeds to establish their roots.
By following these steps to prepare your soil, you will create the ideal conditions for your potato plants to thrive. Remember, healthy soil leads to healthy plants and a more abundant potato harvest.
Planting Potato Seeds
Now that you have prepared the soil, it’s time to plant your potato seeds. Follow these steps to ensure a successful planting process:
- Choose the planting method: There are two main methods for planting potatoes: trench planting and hill planting. Trench planting involves digging a trench and placing the seed potatoes at the bottom, while hill planting involves mounding soil into hills and planting the seed potatoes on top. Choose the method that best suits your preferences and the available space in your garden.
- Space and depth: Whether you choose trench or hill planting, space the seed potatoes about 12-15 inches apart. Ensure that each seed potato has enough space to grow and develop. Plant the seed potatoes with the “eyes” facing up and cover them with soil, leaving about 3-4 inches of soil above the seed potatoes.
- Potato containers: If you don’t have a large garden space or want to grow potatoes in containers, you can use large pots or grow bags. Fill the containers with a well-draining potting mix, leaving enough room for the seed potatoes to be planted about 4-6 inches deep. Remember to water the containers regularly to keep the soil moist.
- Watering: After planting the seed potatoes, water the soil thoroughly to ensure good soil-to-seed contact. This will help initiate germination and encourage root development. Keep the soil consistently moist throughout the growing season, but avoid overwatering, as this can lead to rotting of the potatoes.
- Provide support: As the potato plants grow, they may need support to prevent them from falling over. You can insert stakes or use cages around the plants to provide support and keep the foliage upright. This will also help with better air circulation and reduce the risk of diseases.
Remember to keep an eye on the weather conditions and adjust your planting schedule accordingly. Ideally, plant your potato seeds when the soil temperature is around 45-55°F (7-13°C) for optimal germination. With proper planting techniques, you’ll soon see the sprouts emerge from the soil, marking the start of an exciting potato-growing journey.
Watering and Fertilizing
Proper watering and fertilizing are crucial for the healthy growth and development of your potato plants. Here are some guidelines to follow:
Watering:
- Consistent moisture: Potatoes require consistent moisture throughout the growing season, especially during the tuber formation stage. Keep the soil evenly moist, but not waterlogged. Aim to provide around 1-2 inches of water per week, either through rainfall or irrigation.
- Avoid overwatering: Overwatering can lead to rotting of the tubers and the development of diseases. Monitor the soil moisture regularly and adjust your watering schedule accordingly to prevent excessive moisture.
- Mulching: Apply a layer of organic mulch, such as straw or shredded leaves, around the potato plants. Mulching helps conserve moisture in the soil, suppresses weeds, and regulates soil temperature.
Fertilizing:
- Soil test: Conduct a soil test before planting to determine the nutrient levels and pH of your soil. This will help you understand the specific fertilizer requirements for your potato plants.
- Pre-plant fertilizer: Before planting your potato seeds, incorporate a balanced organic fertilizer or compost into the soil. This will provide a slow-release source of nutrients for the plants.
- Side-dressing: As the potato plants grow, you can apply additional fertilizer around the base of the plants to provide a boost of nutrients. Use a balanced fertilizer high in potassium to promote tuber development.
- Avoid over-fertilization: While potatoes require nutrients for optimal growth, excessive fertilization can lead to excessive foliage growth at the expense of tuber development. Follow the recommended application rates and avoid applying fertilizer too close to the stems or tubers to prevent burn.
Remember to monitor the health and growth of your potato plants throughout the season. Adjust your watering and fertilizing practices as needed based on the specific needs of your plants. With proper care, your potato plants will reward you with a bountiful harvest of delicious spuds!
When growing potatoes from seeds, make sure to plant them in well-draining soil and keep them consistently moist. As the plants grow, mound soil around the stems to encourage more tuber growth.
Read more: Where Do Seed Potatoes Come From
Managing Pests and Diseases
Just like any other plants, potatoes are susceptible to various pests and diseases. Early detection and prompt management are key to ensuring a healthy potato crop. Here are some common pests and diseases that may affect your potato plants and how to manage them:
Pests:
- Colorado Potato Beetle: These beetles feed on the foliage of potato plants, causing damage to the leaves. Handpick and destroy the beetles, their eggs, and larvae. You can also use insecticidal sprays or introduce natural predators like ladybugs or parasitic wasps.
- Aphids: Aphids suck sap from the leaves and stems, causing stunted growth and transmitting viral diseases. Use a strong stream of water to dislodge aphids, or apply insecticidal soap or neem oil to control their population.
- Wireworms: These soil-dwelling pests feed on potato tubers, resulting in damaged and deformed potatoes. Use potato bait traps to attract and kill wireworms. Rotate crops and practice good garden hygiene to prevent their buildup.
- Slugs and Snails: These slimy creatures feed on the leaves and stems of potato plants, causing significant damage. Create barriers like copper tape or use organic slug baits to protect your plants.
Diseases:
- Late Blight: This fungal disease can quickly devastate potato plants, causing dark, irregular patches on leaves and tubers. Use disease-resistant potato varieties, practice crop rotation, and remove and destroy infected plant material promptly.
- Early Blight: Early blight manifests as brown spots on potato leaves, eventually leading to defoliation. Remove and destroy affected leaves, improve air circulation, and apply fungicides if necessary.
- Verticillium Wilt: This soil-borne fungus infects potato plants, causing wilting, yellowing, and stunted growth. Plant resistant varieties, practice crop rotation, and ensure proper soil drainage to minimize the risk of infection.
- Potato Virus Y (PVY): PVY is a viral disease that causes stunted growth, leaf curling, and reduced yields. Use certified disease-free seed potatoes, control aphids, and remove infected plants to prevent the spread of the virus.
Implementing good cultural practices, such as maintaining proper spacing between plants, providing adequate air circulation, and practicing crop rotation, can help prevent and minimize the occurrence of pests and diseases. Regularly inspect your potato plants for any signs of infestation or infection and take appropriate action to manage the problem. By protecting your potato plants from pests and diseases, you’ll ensure a healthier and more productive harvest.
Harvesting Potatoes
After all the hard work and anticipation, it’s time to harvest your potato crop! Proper timing and technique are essential to ensure that you harvest mature and healthy potatoes. Here’s what you need to know:
Timing:
The timing of your potato harvest will depend on the variety you planted and your desired potato size. Most potatoes are ready to be harvested when the plants have reached maturity and the foliage begins to yellow and die back. This usually occurs around 80 to 100 days after planting. However, if you prefer smaller “new potatoes,” you can harvest them earlier, when the plants are still green and the tubers are small.
Harvesting Technique:
- Prepare: Before harvesting, gently loosen the soil around the plants using a garden fork or spade. Be careful not to damage the tubers.
- Start Digging: Starting at the outer edge of the plant, insert the fork or spade into the soil and lift the plant from beneath to loosen the tubers. Lift the entire plant out of the ground, using your hands to gently brush off any excess soil.
- Collect the Potatoes: Carefully pick out the potatoes by hand, being mindful not to bruise or damage them. Remove any damaged or rotten potatoes, as they can spoil the rest of your harvest if stored together.
- Cure: After harvest, allow the potatoes to cure for a few hours in a cool, dry, and well-ventilated area. This will toughen the skin and improve their storage potential.
- Storage: For long-term storage, transfer the cured potatoes to a cool and dark location with temperatures between 38-40°F (3-4°C). Store them in breathable containers like burlap sacks or paper bags to maintain optimal humidity levels.
Enjoying the Harvest:
Now that you have successfully harvested your potatoes, it’s time to enjoy the fruits of your labor! Potatoes can be cooked and enjoyed in numerous ways, from roasting and mashing to boiling and frying. Store-bought potatoes can’t compare to the freshness and flavor of homegrown ones, so savor every delicious bite!
Remember, harvesting potatoes is an exciting milestone in your gardening journey. Take pride in your successful crop and enjoy the satisfaction of growing your own food.
Storing Potatoes
Proper storage is essential to preserve the freshness and quality of your harvested potatoes. When stored correctly, potatoes can last for several months, allowing you to enjoy your homegrown produce well into the winter months. Here are some guidelines for storing potatoes:
Preparing for Storage:
- Curing: After harvesting, allow the potatoes to cure for about two weeks in a cool and well-ventilated area with temperatures around 50-60°F (10-15°C). This process helps to toughen the skin and heal any minor cuts or bruises.
- Sorting: Remove any damaged, diseased, or rotten potatoes before storage. Damaged potatoes can spoil quickly and affect the quality of the rest of your stored crop.
- Drying: Before storing, gently brush off excess soil and allow the potatoes to air dry completely. This helps prevent the growth of mold and keeps the stored potatoes clean.
Storage Conditions:
- Cool Temperature: Potatoes should be stored in a cool location with temperatures between 38-40°F (3-4°C). Avoid storing them in areas where temperatures fluctuate greatly or reach freezing point, as this can lead to sprouting or spoilage.
- Darkness: Exposure to light can cause potatoes to turn green and develop a bitter taste. Store them in a dark place, free from direct sunlight, to prevent greening.
- Humidity: Potatoes prefer a humid environment with humidity levels around 85-90%. If the storage location is too dry, consider placing a tray of water near the stored potatoes to increase humidity.
- Air Circulation: Good air circulation is crucial to prevent the buildup of moisture and the growth of mold. Ensure that stored potatoes have some ventilation to keep them fresh and dry.
Storage Containers:
- Burlap sacks or Paper Bags: These breathable containers are ideal for storing potatoes. Avoid using plastic bags, as they can cause moisture buildup and promote rotting.
- Bins or Crates: If you have a larger quantity of potatoes, you can use wooden or plastic bins or crates with slatted sides. This allows for better airflow and organization of your stored crop.
Periodic Inspection:
Regularly check your stored potatoes for any signs of spoilage, disease, or sprouting. Remove any affected potatoes immediately to prevent further spread. It’s recommended to inspect your stored crop every few weeks to ensure the quality and freshness of your potatoes.
By following these storage guidelines, your harvested potatoes can last for several months, providing you with a homegrown supply of this versatile vegetable. Enjoy your stored potatoes in various dishes, from comforting stews to crispy roasted delights, and savor the taste of your successful harvest throughout the year!
Conclusion
Congratulations on embarking on your potato-growing journey! Growing potatoes from seeds allows you to experience the joys of nurturing plants, witnessing their growth, and harvesting the fruits of your labor. Throughout this article, we’ve covered the essential steps involved in successfully growing potatoes from seeds.
Starting with the selection of the right potato seeds for your preferences and growing environment, you learned the importance of choosing certified seed potatoes and the ideal size for planting. We then explored the process of preparing the soil, ensuring it is loose, well-draining, and rich in organic matter to promote optimal growth and development of your potato plants.
Planting the potato seeds and providing them with proper watering and fertilization are crucial for healthy plant growth. By striking the right balance of consistent moisture and well-timed fertilization, you can ensure robust potato plants and a desirable potato harvest.
Managing pests and diseases is an inevitable part of potato gardening. By being vigilant and employing organic pest control methods, you can minimize the impact of pests and effectively manage diseases, ensuring the longevity and productivity of your potato plants.
As your potato plants mature, the exciting time for harvesting arrives. With careful timing and proper technique, you can harvest mature, delicious potatoes that will grace your table in a variety of mouthwatering dishes.
Finally, we discussed the crucial aspect of storing your harvested potatoes. By following the appropriate storage conditions – cool temperature, darkness, humidity, and proper ventilation – you can extend the life of your potatoes and enjoy the rewards of your successful harvest for months to come.
Remember, growing your own potatoes from seeds is a rewarding and fulfilling experience. It connects you with the beauty of nature, the satisfaction of self-sufficiency, and the joy of relishing freshly harvested potatoes that you grew with your own hands. So, grab your garden tools, get your hands dirty, and enjoy the process of growing your own delightful potatoes!
Frequently Asked Questions about How To Grow Potatoes From Seeds
Was this page helpful?
At Storables.com, we guarantee accurate and reliable information. Our content, validated by Expert Board Contributors, is crafted following stringent Editorial Policies. We're committed to providing you with well-researched, expert-backed insights for all your informational needs.


0 thoughts on “How To Grow Potatoes From Seeds”