Home>Garden Essentials>How To Make Seed Potatoes Sprout

Garden Essentials
How To Make Seed Potatoes Sprout
Modified: September 1, 2024
Discover the secrets to making seed potatoes sprout in your garden. Follow our expert tips and techniques for a successful potato harvest.
(Many of the links in this article redirect to a specific reviewed product. Your purchase of these products through affiliate links helps to generate commission for Storables.com, at no extra cost. Learn more)
Introduction
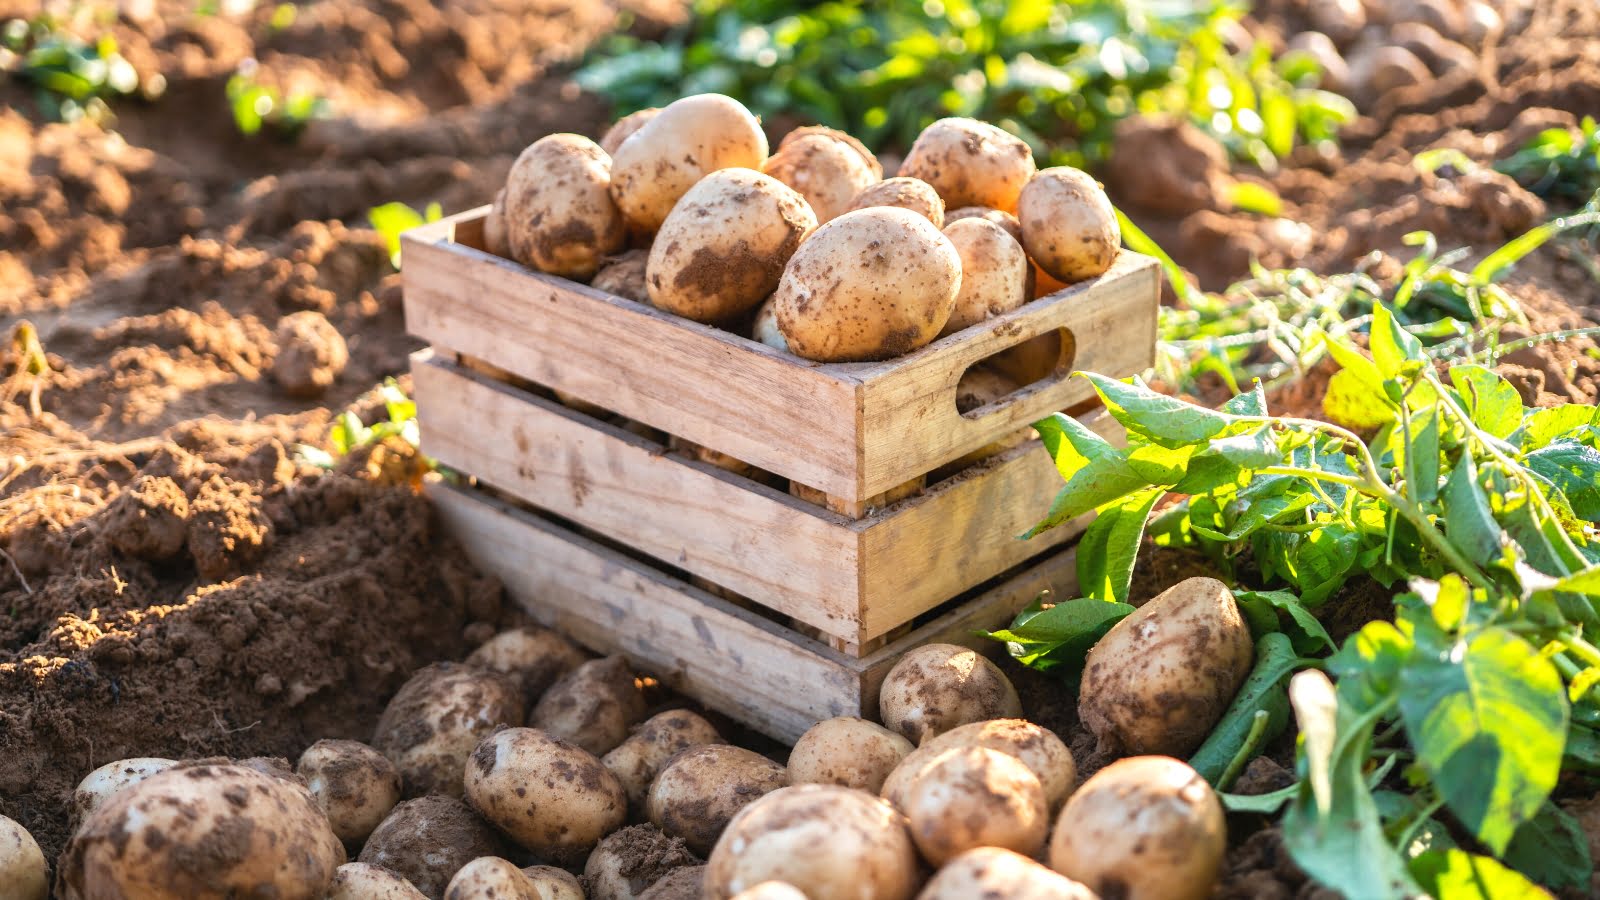
Welcome to the world of gardening, where every seed holds the promise of nature’s bounty. If you’re new to gardening or looking to expand your knowledge, you’ve come to the right place. In this article, we’ll dive deep into the fascinating process of sprouting seed potatoes.
Seed potatoes are the foundation of a successful potato crop. By sprouting them before planting, we can stimulate growth and ensure healthy plants. We’ll explore the reasons why seed potato sprouting is important, and guide you through the steps to get started.
Whether you have a small garden plot or a large backyard, growing your own potatoes can be a rewarding experience. There’s nothing quite like the satisfaction of digging up fresh, homegrown potatoes for your favorite dishes.
But before we get our hands dirty, let’s begin with the basics: choosing the right seed potatoes.
Key Takeaways:
- Sprouting seed potatoes before planting leads to healthier plants, increased yields, and early harvests. Choose certified, healthy seed potatoes and create optimal sprouting conditions for successful growth.
- Proper care, including watering, mulching, and fertilizing, is essential for thriving potato plants. Address common issues like pest infestation and fungal diseases to ensure a successful harvest.
Read more: How To Make A Seed Sprout
Why Sprouting Seed Potatoes Is Important
Sprouting seed potatoes is an essential step in potato cultivation for several reasons. Let’s explore why sprouting is important and how it benefits the growth and productivity of your potato plants.
1. Enhanced Plant Growth: Sprouting seed potatoes helps initiate the growth of new shoots. During the sprouting process, stored starches in the potato tubers are converted into essential nutrients that promote vigorous plant growth. This ultimately leads to healthier plants with stronger stems and increased resistance to diseases and pests.
2. Increased Yield: Sprouting seed potatoes can result in higher yields compared to planting unsprouted tubers. When the shoots are allowed to develop before planting, they have a head start in transferring energy to the main stem, producing more vigorous plants and, consequently, a larger crop at the end of the season.
3. Uniform Planting: Sprouting seed potatoes ensures that each planted tuber has a viable sprout. This reduces the risk of uneven growth and helps maintain uniformity in plant size and maturity. It also facilitates better spacing and allows for proper air circulation between plants, reducing the chances of fungal diseases.
4. Early Harvest: By sprouting seed potatoes indoors before planting, you can gain a few weeks of early growth. This is especially advantageous in cooler climates where the growing season may be shorter. Early sprouting gives your potato plants a head start, allowing them to reach maturity sooner and enabling an earlier harvest.
5. Disease Prevention: Sprouting seed potatoes provides an opportunity to inspect the tubers for any signs of disease. This allows you to remove and discard any infected or damaged potatoes, preventing the spread of diseases to the entire crop. Additionally, sprouting indoors can reduce the risk of soil-borne diseases, as the tubers aren’t exposed to potentially contaminated soil.
Now that we understand the importance of sprouting seed potatoes, let’s move on to choosing the right seed potatoes for sprouting.
Choosing the Right Seed Potatoes
When it comes to choosing seed potatoes for sprouting, there are a few key factors to consider. The quality and characteristics of the seed potatoes will directly impact the success of your potato crop. Here are some guidelines to help you make the right choice:
1. Certified Seed Potatoes: It’s important to select certified seed potatoes from reliable sources. Certified seed potatoes are guaranteed to be disease-free and have been carefully inspected to ensure their quality. Look for certified seed potatoes that are specifically labeled for sprouting.
2. Varietal Selection: Consider the specific potato variety that you want to grow. Different varieties have varying growth habits, maturity times, and flavor profiles. Research different potato varieties and choose one that suits your taste preferences and growing conditions.
3. Size and Condition: Look for seed potatoes that are firm and healthy, without any signs of rot, damage, or sprouting from multiple places. Choose potatoes that are medium-sized, as larger potatoes may produce multiple sprouts that can become crowded when planted.
4. Organic or Conventional: Decide whether you prefer to grow organic potatoes or are fine with conventional varieties. Organic seed potatoes are grown without the use of chemicals and synthetic fertilizers, making them a good option for those seeking a more natural approach to gardening.
5. Local Adaptation: Whenever possible, select seed potatoes that are locally adapted to your climate and growing conditions. Local varieties tend to perform better in their native environments and are more likely to withstand local pests and diseases.
6. Storage Conditions: Ensure that the seed potatoes have been stored properly. Look for potatoes stored in cool, dark conditions to prevent sprouting before you’re ready to start the process yourself.
By taking the time to choose the right seed potatoes, you lay the foundation for a successful sprouting and planting process. Once you have your seed potatoes sorted, it’s time to prepare them for sprouting.
Preparing the Seed Potatoes
Now that you have your chosen seed potatoes, it’s important to properly prepare them before sprouting. Preparing the seed potatoes optimizes their condition for sprouting and ensures the best chances of successful growth. Let’s explore the steps involved in preparing the seed potatoes:
1. Cleaning: Start by gently brushing off any soil or debris from the seed potatoes. Use a soft brush or cloth to avoid damaging the delicate skin. Cleaning the potatoes helps remove any potential sources of disease or contamination.
2. Cutting and Chitting: Depending on the size of the seed potatoes, you may need to cut them into smaller pieces. Each piece should have at least one healthy eye or sprout. Cutting the potatoes also allows you to maximize the number of plants you can grow from a single potato. After cutting, place the seed potatoes in a cool, dry place to allow them to “chit” or sprout.
3. Drying: After cutting, leave the seed potato pieces to air dry for a few days. This helps prevent moisture-related issues during the sprouting process. Place them in a well-ventilated area, away from direct sunlight.
4. Seed Treatment (Optional): Some gardeners choose to treat their seed potatoes with a fungicide or a protective substance like sulfur powder. This can help prevent fungal diseases during the sprouting and growing stages. Follow the instructions provided with the treatment product, if you opt to use it.
5. Sub-Eye Removal (Optional): If you notice any sub-eyes (small buds) on the potato pieces, you can carefully remove them with a clean, sharp knife. Sub-eyes can divert energy from the main sprout if left intact, so removing them allows the main sprout to grow stronger.
6. Labeling: It’s a good practice to label your seed potatoes with the variety name and the date of preparation. This helps you keep track of different varieties and ensures you can monitor the success of each batch of sprouted potatoes.
By following these steps, you’ll be ready to create the ideal sprouting conditions that will encourage strong and healthy growth in your seed potatoes. Let’s move on to the next section to learn about creating those optimal sprouting conditions.
Creating the Ideal Sprouting Conditions
Once your seed potatoes are prepared, it’s time to create the ideal sprouting conditions that will promote healthy and vigorous growth. Providing the right environment for sprouting is crucial for the development of strong shoots. Let’s explore the key factors involved in creating optimal sprouting conditions:
1. Temperature: The temperature plays a significant role in the sprouting process. Aim for a temperature range of 60-70°F (15-21°C). This mild temperature encourages the development of sturdy and well-formed sprouts. Avoid extreme temperature fluctuations and direct sunlight, as these can negatively impact sprouting.
2. Lighting: While seed potatoes do not require direct sunlight during the sprouting stage, they do need some light. Indirect light from a bright room or a fluorescent grow light is sufficient. Too much direct light can cause the sprouts to appear pale, weak, and elongated.
3. Humidity: Maintaining a moderate humidity level is important for successful sprouting. Aim for a relative humidity of around 85%. Misting the potatoes occasionally or placing them on a tray with moistened paper towels can help maintain the desired humidity. Avoid excessive moisture, as it can lead to rot or fungal diseases.
4. Air Circulation: Good air circulation is essential to prevent the development of mold or rot. Ensure there is proper ventilation in the area where you’re sprouting the seed potatoes. A fan can be used to promote air movement but avoid direct airflow on the potatoes, as it can dry them out.
5. Sprouting Containers: Choose shallow containers, such as seed trays or egg cartons, to sprout your seed potatoes. These containers provide adequate space for the seed potatoes to develop sprouts without crowding. Ensure the containers have drainage holes to prevent excess water accumulation.
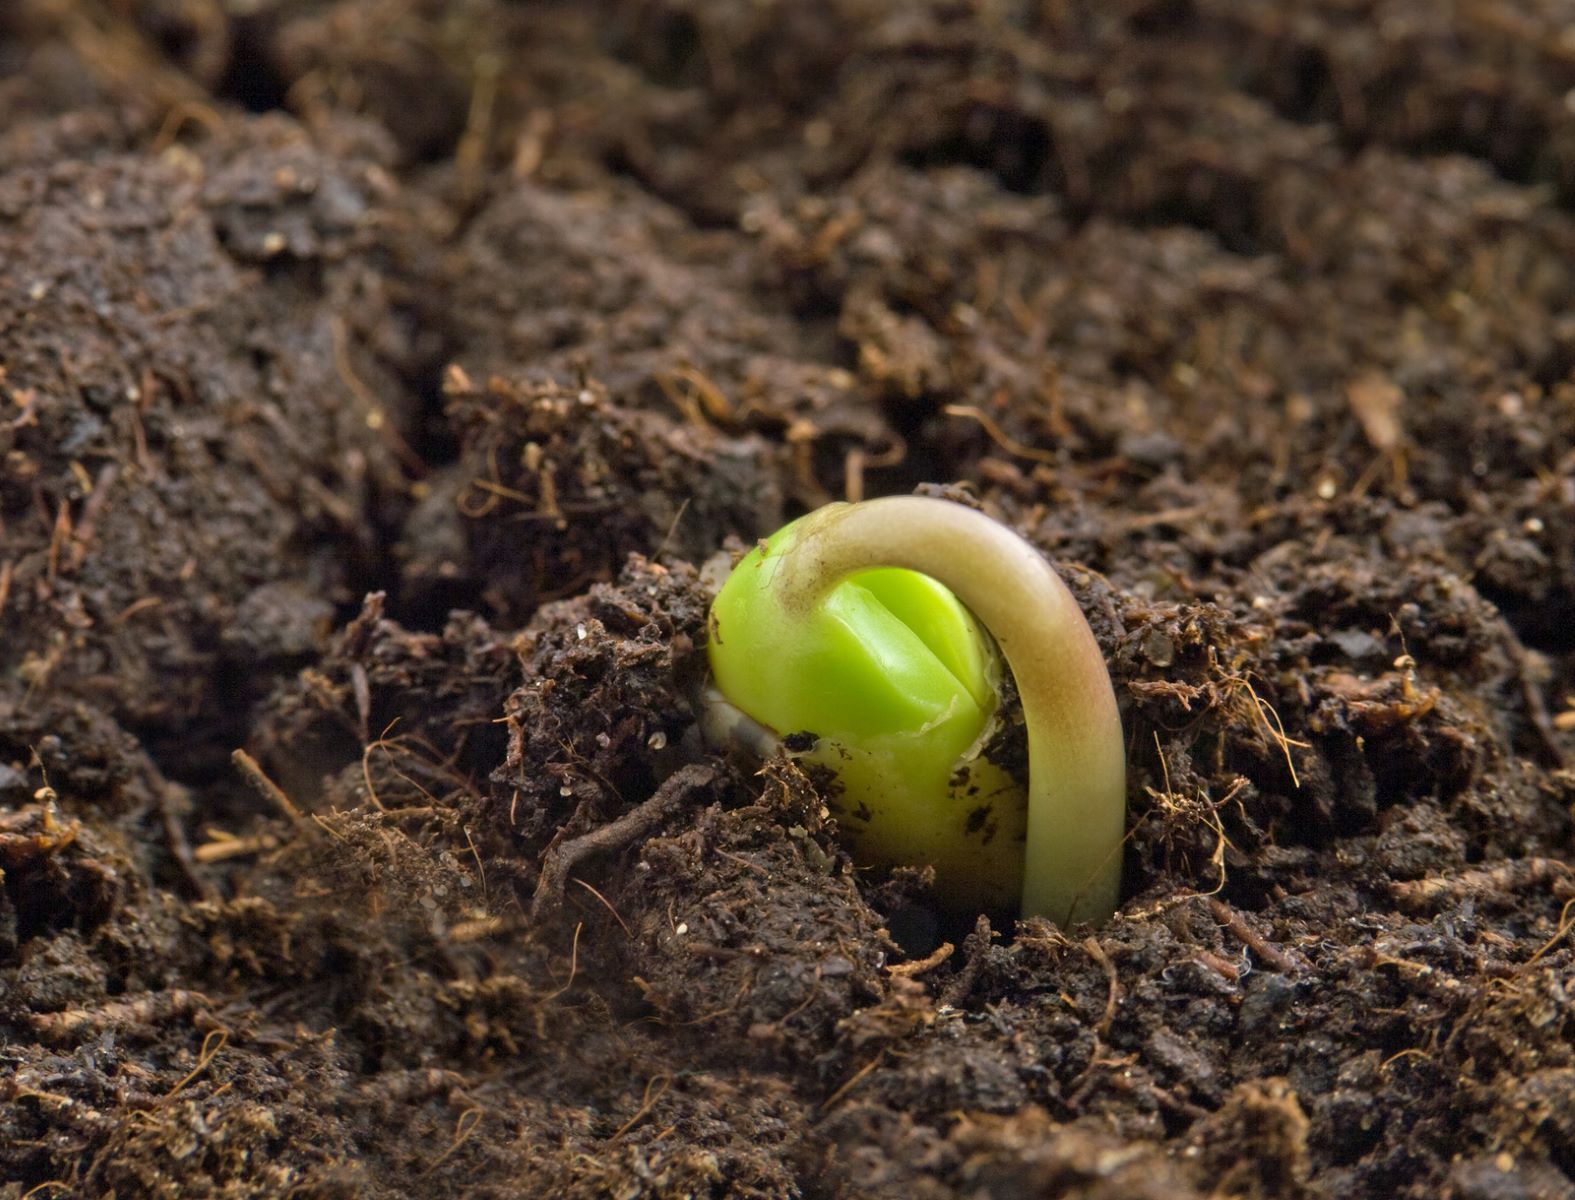
6. Sprouting Duration: The sprouting period varies depending on the potato variety and environmental conditions, but it generally takes around 2-4 weeks. Monitor the sprouts regularly, and once they reach a length of 1-2 inches (2.5-5 cm), they are ready for planting.
By creating the ideal sprouting conditions, you will encourage robust sprout development in your seed potatoes. Once the sprouts have reached the appropriate length, it’s time to move on to the next phase – planting the sprouted seed potatoes.
To make seed potatoes sprout, place them in a warm, well-lit area for a few weeks before planting. This will encourage the development of sprouts, which will help the potatoes grow faster once planted.
Read more: How To Store Sprouted Potatoes For Planting
Planting the Sprouted Seed Potatoes
Now that your seed potatoes have sprouted and are ready for planting, it’s time to move them to their permanent home in the soil. Follow these steps to ensure successful planting of your sprouted seed potatoes:
1. Prepare the Soil: Choose a sunny location in your garden with well-draining soil. Remove any weeds or debris and loosen the soil to a depth of about 8-12 inches (20-30 cm) to provide a loose and fertile bed for the potatoes to grow.
2. Dig Trenches or Hills: Depending on your preference and space availability, you can either dig trenches or create hills for planting. Trenches are suitable for larger garden plots, while hills work well in smaller spaces. Trenches should be about 4-6 inches (10-15 cm) deep and spaced 2-3 feet (60-90 cm) apart. Hills should be mounds of soil about 6-8 inches (15-20 cm) high and spaced 2-3 feet (60-90 cm) apart.
3. Planting the Potatoes: Place the sprouted seed potatoes, with the sprouts facing upwards, into the trenches or on top of the hills. Space the potato pieces about 12-15 inches (30-38 cm) apart, with the sprouts facing upwards. Cover the potatoes with a layer of soil, ensuring that they are completely buried but not too deep – about 3-4 inches (7-10 cm) of soil cover is sufficient.
4. Watering: After planting, water the soil thoroughly to ensure good moisture penetration. Moist but not waterlogged soil is ideal for potato growth. Monitor the moisture levels and water as needed throughout the growing season, especially during dry periods.
5. Mulching: Applying a layer of organic mulch, such as straw or grass clippings, around the planted potatoes can help conserve moisture, suppress weeds, and maintain a more stable soil temperature. Apply a layer of about 2-3 inches (5-7 cm) of mulch, ensuring that it doesn’t cover the sprouts.
6. Fertilizing: Potatoes are heavy feeders that benefit from regular fertilization. Before planting, incorporate organic compost or well-balanced fertilizer into the soil to provide the necessary nutrients. You can also side-dress the growing plants with additional compost or fertilizer after they have reached a height of 6-8 inches (15-20 cm).
By following these steps, you’ll ensure that your sprouted seed potatoes are planted in an optimal manner. Now it’s time to care for your growing potato plants and help them reach their full potential.
Caring for Sprouted Potatoes
Once your sprouted seed potatoes are planted, it’s crucial to provide them with proper care to ensure healthy growth and a bountiful harvest. Here are some important care tips for your sprouted potatoes:
1. Watering: Potatoes require consistent moisture throughout their growing season. Keep the soil evenly moist, but avoid overwatering, as excessively wet soil can lead to rot. Water deeply, ensuring that the moisture reaches the root zone. Monitor soil moisture regularly and adjust watering as needed, especially during dry spells.
2. Mulching: Maintain a layer of mulch around the potato plants to help conserve moisture, suppress weeds, and regulate soil temperature. Regularly check the mulch layer and replenish it as needed to maintain a thickness of about 2-3 inches (5-7 cm).
3. Hilling: As the potato plants grow, you can practice the technique of hilling. When the plants reach a height of about 6-8 inches (15-20 cm), mound soil around the base of the plants, covering the lower leaves. This encourages the formation of additional tubers, protects them from sunlight, and prevents greening.
4. Fertilizing: Regular fertilization is important for potato plants. Apply a balanced fertilizer or compost every 3-4 weeks during the growing season. Avoid using high-nitrogen fertilizers, as they can promote excessive foliage growth at the expense of tuber development.
5. Disease and Pest Management: Monitor your potato plants regularly for signs of common diseases such as blight, scab, or rot. Remove any affected plants or parts immediately to prevent the spread of disease. Implement pest control measures as needed, such as handpicking pests like Colorado potato beetles or applying organic pest control methods.
6. Supporting the Plants: As the potato plants grow taller and develop heavy foliage, they may benefit from staking or support to prevent them from falling over and getting damaged. Place stakes or cages around the plants and gently tie the stems as needed to provide stability.
7. Monitoring Tubers: As the growing season progresses, keep an eye on the developing tubers. Avoid excessive handling or disturbing the soil around the plants, as this can damage the growing potatoes. However, gently check the progress by carefully digging around the base of a plant to gauge the size and maturity of the tubers.
By providing proper care, you’ll give your sprouted potatoes the best chance to thrive and produce a successful harvest. Now, let’s address some common issues that may arise during the growing process and how to troubleshoot them effectively.
Troubleshooting Common Issues
While growing potatoes can be a rewarding experience, it’s not without its challenges. Here are some common issues that may arise during the potato growing process and ways to address them:
1. Pest Infestation: Potatoes can be susceptible to pests like Colorado potato beetles, aphids, or wireworms. Monitor your plants regularly and take action at the first sign of infestation. Handpick larvae and adult beetles, use insecticidal soaps or organic pest control methods, and practice crop rotation to reduce pest pressure.
2. Fungal Diseases: Diseases like late blight, early blight, or scab can affect potato plants. Proper plant spacing, good air circulation, and regular removal of infected plant parts can help prevent the spread of fungal diseases. Consider using organic fungicides labeled for potato diseases if problems persist.
3. Nutrient Deficiencies: Potatoes require specific nutrients to grow and produce healthy tubers. Nutrient deficiencies can cause stunted growth, yellowing leaves, or poor tuber development. Conduct a soil test to identify any nutrient deficiencies and amend the soil with appropriate fertilizers or amendments to address the specific deficiencies.
4. Watering Issues: Overwatering or inadequate watering can lead to problems. Overwatering can cause root rot or fungal diseases, while underwatering can result in stunted growth and reduced yields. Ensure proper moisture levels in the soil by regularly checking the soil’s moisture content and adjusting watering as needed.
5. Crowded Tubers: If the potato plants are spaced too closely or not properly hilled, the tubers may become crowded and fail to develop to their full potential. To avoid this, practice proper plant spacing and hill the soil around the plants to encourage tuber formation and prevent overcrowding.
6. Sunburn or Greening: Exposure to sunlight can cause potatoes to develop green patches or become sunburned. Greening occurs when tubers are exposed to light and produce chlorophyll, which is mildly toxic. Prevent exposure to sunlight by adequately hilling the soil around the base of the plants, ensuring that the tubers are well-covered.
7. Early Harvest: Harvesting potatoes too early can result in small tubers. Allow the potatoes to mature fully before harvest. Check the maturity by gently digging around the base of a plant and examining the size and firmness of the tubers. Harvest when the foliage begins to die back, typically 2-3 weeks after it has completely died back.
By being aware of these common issues and taking appropriate measures, you can tackle challenges that may arise during the potato growing process. Now, let’s move on to the final step – harvesting your potatoes and reaping the delicious rewards of your efforts!
Harvesting the Potatoes
The moment of truth has arrived – it’s time to harvest your potatoes! Harvesting is an exciting and rewarding stage of the potato growing process. Here are the steps to ensure a successful and satisfying potato harvest:
1. Timing: Harvesting potatoes at the right time is crucial. Wait for the plants to reach maturity and the foliage to die back completely. This typically occurs around 2-3 weeks after the foliage has wilted and turned brown. Harvesting too early can result in underdeveloped tubers, while delaying the harvest may lead to tubers that are prone to decay or damage.
2. Digging: Use a garden fork or spade to carefully dig around the base of the potato plants. Dig deep enough to loosen the soil and gently lift the plants, being careful not to damage the tubers. Alternatively, you can cut the foliage a few inches above the ground and wait for the remaining plant material to decompose before manually digging for the potatoes.
3. Handling: Handle the harvested potatoes with care to avoid bruising or damaging them. Gently remove any excess soil clinging to the tubers. Avoid exposing the potatoes to direct sunlight during the harvesting process, as it can cause them to green or develop bitter flavors.
4. Curing: After harvesting, allow the potatoes to cure or dry for a period of 1-2 weeks. Place them in a cool, well-ventilated area, away from direct sunlight. This curing process helps thicken the skin and enhances their flavor and storage life.
5. Sorting and Storing: Once the potatoes are cured, sort them and separate any damaged or diseased tubers from the healthy ones. Store the healthy potatoes in a cool, dark, and well-ventilated location. Ideal storage temperatures are around 40-50°F (4-10°C) with a humidity level of 85-95%. Use ventilated containers, burlap sacks, or mesh bags to store the potatoes, allowing for air circulation.
6. Enjoying the Fruits of Your Labor: Now that you have harvested and stored your potatoes, it’s time to enjoy them! Whether you’re roasting them, mashing them, or making a delicious potato salad, savor the taste of your homegrown potatoes and revel in the satisfaction of your gardening efforts.
Remember, the journey doesn’t end with harvesting. Take the time to reflect on your potato growing experience, learn from any challenges, and start planning for your next garden adventure. Happy harvesting!
—
HTML Validation Check:
<!DOCTYPE html>
<html lang="en">
<head>
<meta charset="UTF-8">
<meta name="viewport" content="width=device-width, initial-scale=1.0">
<title>Harvesting the Potatoes</title>
</head>
<body>
<h2>Harvesting the Potatoes</h2>
<p>The moment of truth has arrived - it's time to harvest your potatoes! Harvesting is an exciting and rewarding stage of the potato growing process. Here are the steps to ensure a successful and satisfying potato harvest:</p>
[...]
</body>
</html>
Read more: How To Store Potatoes Without Sprouting
Conclusion
Congratulations on your journey through the world of sprouting seed potatoes and bringing them to a successful harvest! Growing potatoes can be a fulfilling and enjoyable experience, allowing you to connect with nature and reap the rewards of your hard work. Let’s recap what we’ve covered in this article:
We started by understanding the importance of sprouting seed potatoes. By initiating the growth process before planting, we promote stronger plants, increased yields, and uniform planting. We explored the factors to consider when choosing the right seed potatoes, such as certified varieties, size, and local adaptation.
We then moved on to preparing the seed potatoes, ensuring they were clean, cut, and properly dried before sprouting. Creating ideal sprouting conditions, including temperature, lighting, humidity, and airflow, was crucial for fostering healthy sprouts.
Once the seed potatoes sprouted, we learned how to plant them properly, considering factors such as depth, spacing, and watering. Caring for the growing potatoes involved regular watering, mulching, fertilizing, and monitoring for pests and diseases.
In the event of common issues, we addressed troubleshooting techniques to combat pest infestation, fungal diseases, nutrient deficiencies, watering problems, crowded tubers, sunburn, and early harvests. By being proactive and attentive, you can mitigate these challenges and ensure the success of your potato crop.
Finally, we delved into the exciting stage of harvesting the potatoes. Timing the harvest, gently digging up the tubers, and properly curing and storing them were the key steps to ensure the longest possible shelf life and delicious homegrown potatoes.
As you reflect on your potato-growing experience, remember to celebrate your accomplishments and learn from any setbacks. Gardening is an ongoing learning process, and each season presents new opportunities for growth and improvement.
So, whether it’s a crispy batch of fries or a comforting plate of mashed potatoes, take pride in the fact that you have nurtured and harvested your own potatoes from seed to table. Enjoy the incredible flavors and the fulfillment that comes from growing your own food. Happy gardening!
—
HTML Validation Check:
<!DOCTYPE html>
<html lang="en">
<head>
<meta charset="UTF-8">
<meta name="viewport" content="width=device-width, initial-scale=1.0">
<title>Conclusion</title>
</head>
<body>
<h2>Conclusion</h2>
<p>Congratulations on your journey through the world of sprouting seed potatoes and bringing them to a successful harvest![...]
</body>
</html>
Frequently Asked Questions about How To Make Seed Potatoes Sprout
Was this page helpful?
At Storables.com, we guarantee accurate and reliable information. Our content, validated by Expert Board Contributors, is crafted following stringent Editorial Policies. We're committed to providing you with well-researched, expert-backed insights for all your informational needs.

0 thoughts on “How To Make Seed Potatoes Sprout”