Home>Furniture>Outdoor Furniture>How To Build A Backyard Patio

Outdoor Furniture
How To Build A Backyard Patio
Modified: March 7, 2024
Learn how to build a beautiful backyard patio with outdoor furniture, creating the perfect space for entertaining and relaxation.
(Many of the links in this article redirect to a specific reviewed product. Your purchase of these products through affiliate links helps to generate commission for Storables.com, at no extra cost. Learn more)
Introduction
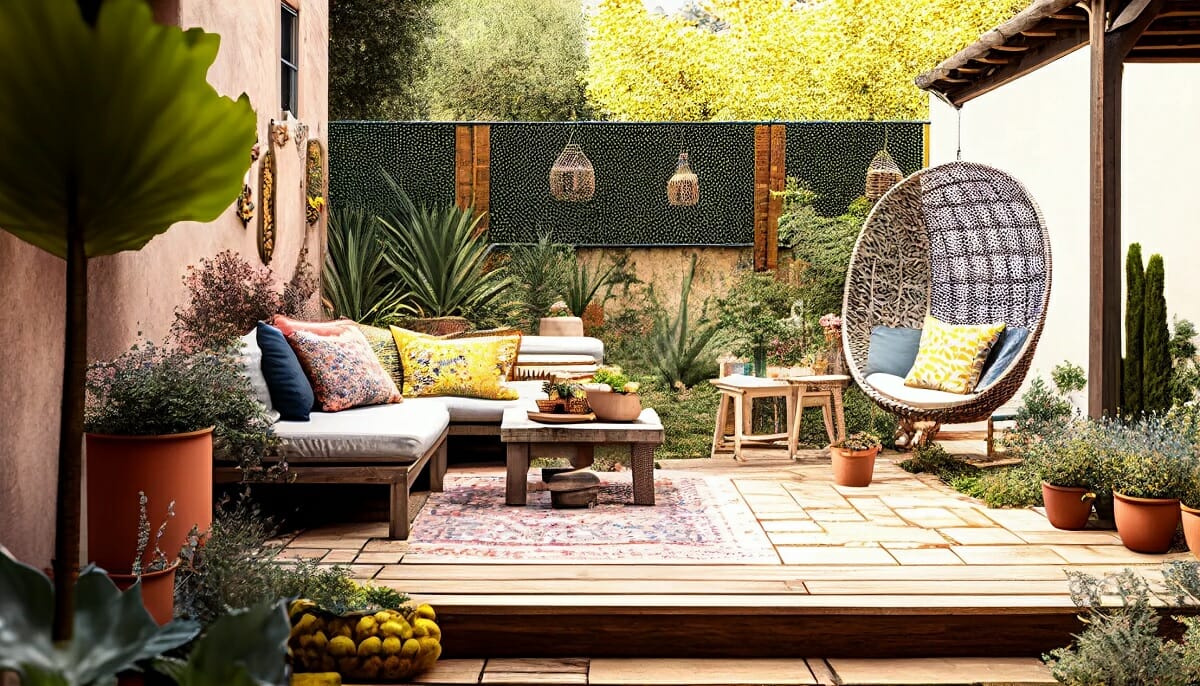
Welcome to the ultimate guide on how to build a backyard patio. A patio is a wonderful addition to any outdoor space, providing a versatile and inviting area for relaxation, entertaining, and enjoying the beauty of nature. Whether you’re a seasoned DIY enthusiast or a beginner, this step-by-step guide will help you create a stunning patio that perfectly suits your needs and style.
Building a backyard patio can seem like a daunting task, but with careful planning, proper materials, and a little elbow grease, you can transform your outdoor space into a haven of comfort and aesthetic appeal. Whether you envision a cozy retreat with comfortable seating and a fire pit, or an expansive entertaining space with a dining area and outdoor kitchen, the possibilities are endless.
Before we dive into the nitty-gritty details, let’s talk briefly about the benefits of having a backyard patio. Firstly, a patio extends your living space, allowing you to make the most of your outdoor area and enjoy fresh air and sunshine without leaving the comfort of your home. It serves as a versatile space for various activities, from hosting small gatherings and parties to simply relaxing with a good book or sipping on a cup of coffee.
Additionally, a beautifully designed patio can elevate the overall aesthetic appeal of your home and increase its value. In today’s real estate market, outdoor living spaces are becoming increasingly desirable among potential buyers, making a thoughtfully constructed patio a solid investment.
Now that you understand the benefits of having a backyard patio, it’s time to roll up your sleeves and get started. In the following steps, we will guide you through the process of planning, preparing, and building your own backyard oasis. So, grab your notepad and let’s begin the journey towards creating a stunning outdoor retreat that you’ll cherish for years to come.
Key Takeaways:
- Planning and designing your backyard patio is crucial for creating a space that meets your needs and reflects your style. Consider the purpose, layout, size, materials, and additional features to ensure a successful project.
- Proper site preparation, choosing the right materials and tools, and laying a solid foundation are essential for building a durable and beautiful backyard patio. Attention to detail and thoughtful finishing touches will create a space you’ll cherish for years to come.
Read more: Backyard Patio Transformation
Step 1: Planning and Designing your Patio
Before you start digging and laying down pavers, it’s crucial to take the time to plan and design your patio. This step will not only help you visualize the end result but also ensure that you create a patio that meets your functional and aesthetic preferences.
1.1 Identify the Purpose: Begin by determining the primary purpose of your patio. Do you want it to be a space for outdoor dining and entertaining, a tranquil reading nook, or a combination of different functions? Knowing how you intend to use your patio will help you choose the right size, layout, and features.
1.2 Consider the Layout: Evaluate the size and shape of your outdoor space to determine the best layout for your patio. Take into account any existing features such as trees, fences, or slopes that may impact the design. Consider the flow and accessibility of the patio, making sure it blends harmoniously with the rest of your backyard.
1.3 Determine the Size: Measure the area where you plan to build your patio and establish its dimensions. The size of your patio will depend on the available space and how you plan to utilize it. If you want a dining area, ensure it’s large enough to accommodate a table and chairs comfortably.
1.4 Select the Materials: Research different materials and select the ones that align with your style preferences and budget. Popular options for patio materials include concrete pavers, natural stone, brick, and composite decking. Consider factors such as durability, maintenance requirements, and how well the materials complement your existing landscape.
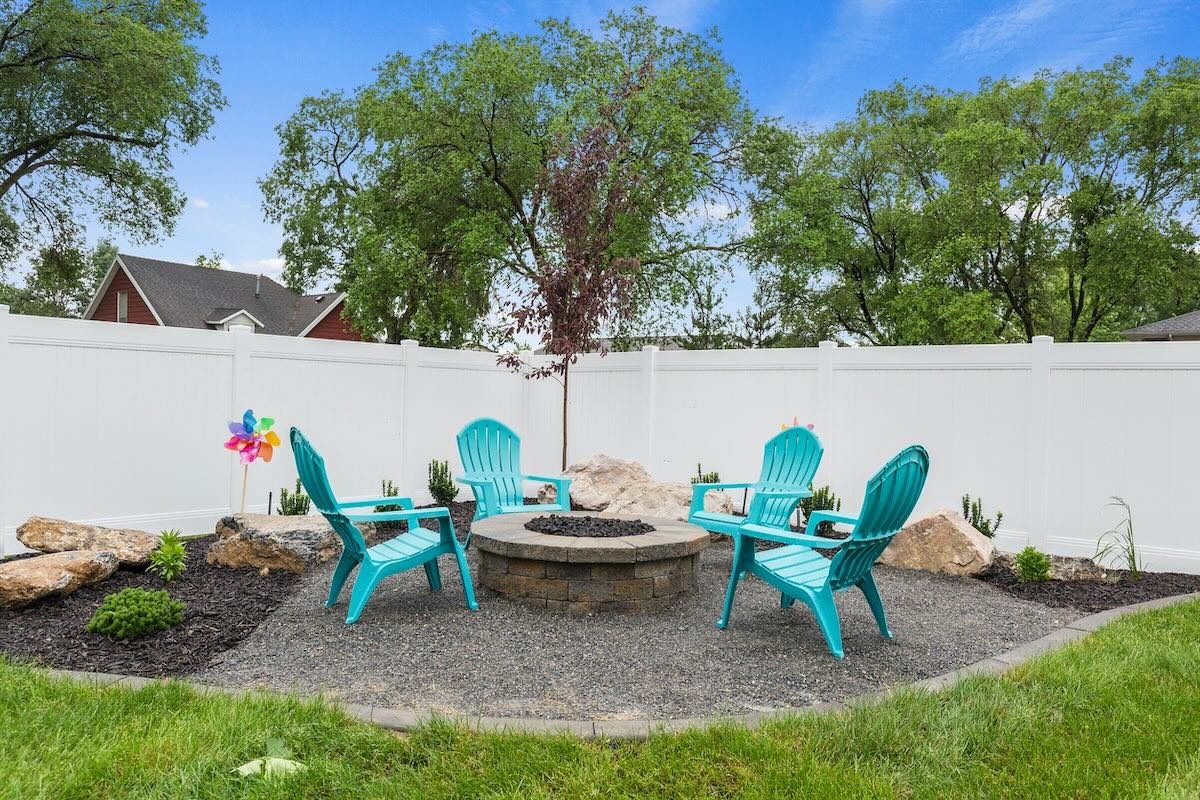
1.5 Add Functional Features: Think about any additional features you want to incorporate into your patio design. This could include a built-in grill, a fire pit, or even a water feature. These elements can enhance both the aesthetic appeal and functionality of your patio.
1.6 Seek Inspiration: Browse through magazines, websites, and social media platforms to gather inspiration for your patio design. Save images that resonate with your vision and create a mood board to help guide your decision-making process.
1.7 Sketch the Design: With all the information gathered, sketch out a preliminary design for your patio. Include the dimensions, layout, and key features. This will serve as a blueprint for the construction phase and help you communicate your vision to contractors or other professionals if needed.
By taking the time to plan and design your patio, you can ensure that you create a space that not only meets your needs but also reflects your personal style. This thoughtful approach will set the foundation for a successful patio-building project.
Step 2: Site Preparation
With the planning and design phase complete, it’s time to move on to the site preparation stage. Properly preparing the area where your patio will be built is crucial for a successful and long-lasting project.
2.1 Clear the Area: Begin by removing any existing vegetation, debris, or obstacles in the designated patio area. This includes grass, weeds, rocks, tree roots, and any other items that may interfere with the construction process.
2.2 Mark the Boundaries: Use stakes and string to mark the boundaries of your patio. This will help you visualize the exact area where you’ll be working and ensure that the dimensions align with your design plans.
2.3 Excavate the Soil: Use a shovel or a mechanical excavator to dig out the top layer of soil within the marked boundaries. The depth will depend on the type of patio you’re building and the required stability of the foundation. Typically, a depth of about 6-8 inches is sufficient.
2.4 Level the Surface: Use a rake or a leveling tool to ensure that the excavated area is level. A slight slope away from your home is advisable for proper drainage. Check the surface with a level and make any necessary adjustments before proceeding.
2.5 Install Edging: To prevent the patio pavers from shifting or spreading, install edging along the perimeter of the excavated area. This can be done using plastic or metal edging, which is readily available at most home improvement stores. Secure the edging in place using stakes or anchoring systems.
2.6 Compact the Soil: Use a plate compactor or a tamper to firmly compact the soil within the excavated area. This will provide a stable base for your patio and help prevent sinking or shifting over time. Pay special attention to the edges and corners, ensuring they are thoroughly compacted.
2.7 Install a Weed Barrier: Lay a weed barrier fabric over the compacted soil to prevent weeds from growing up through the pavers. This will help maintain the cleanliness and appearance of your patio. Cut the fabric to fit within the boundaries of the excavated area and secure it in place using landscape staples or nails.
With the site preparation complete, you’re now ready to move on to the next step: choosing the materials and tools for your backyard patio project. Taking the time to properly prepare the site will ensure a solid foundation for your patio, setting the stage for a successful construction process and a beautiful end result.
Step 3: Choosing the Materials and Tools
When it comes to building a backyard patio, selecting the right materials and tools is essential for achieving the desired aesthetic and ensuring the durability of your project. In this step, we will guide you through the process of choosing the materials and tools that best fit your style, budget, and the requirements of your patio design.
3.1 Patio Materials:
There are various materials available for building your patio. Here are a few popular options:
- Concrete Pavers: Concrete pavers are a versatile and cost-effective choice. They come in various shapes, sizes, and colors, allowing you to create unique patterns and designs.
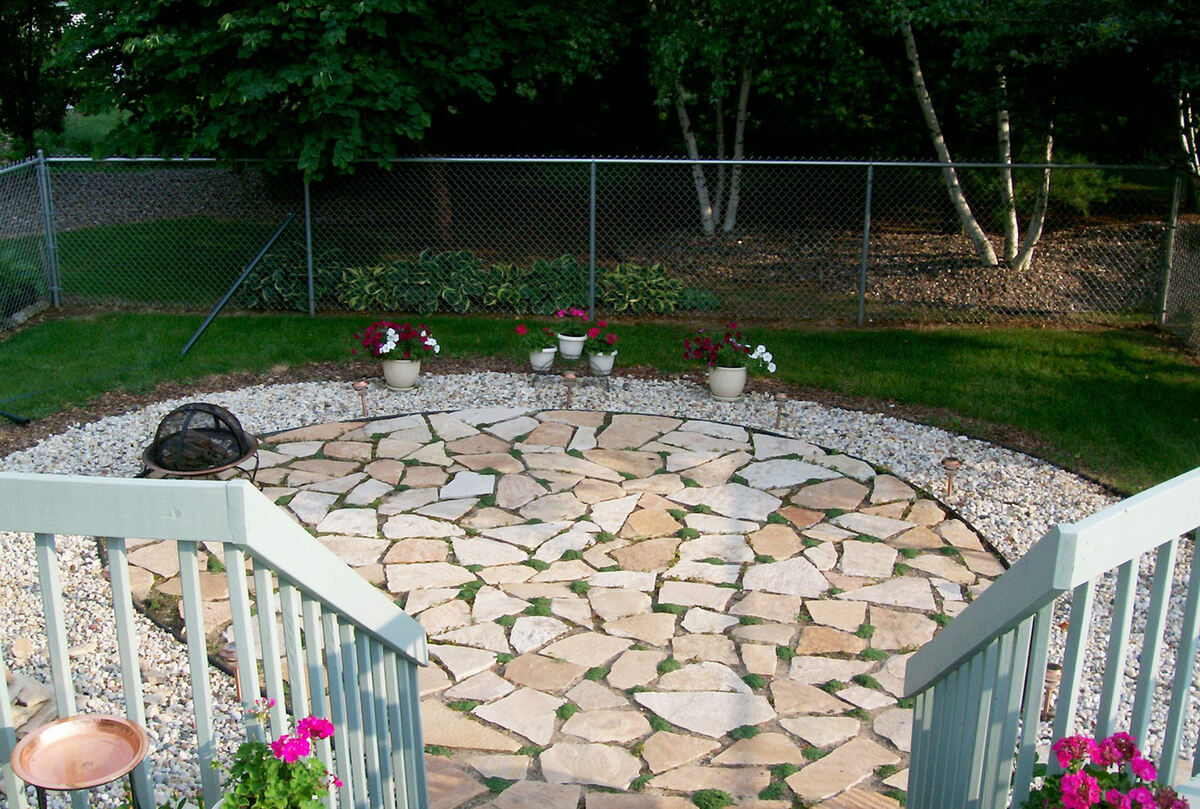
- Natural Stone: Natural stone, such as flagstone or slate, offers a timeless and elegant look. It can be more expensive than other materials but adds a touch of sophistication to any patio.
- Brick: Brick is a classic and durable option for patio construction. It comes in different colors and patterns, providing a traditional and charming aesthetic.
- Composite Decking: If you prefer a low-maintenance option, composite decking is worth considering. It is resistant to rot, insects, and fading, making it a durable and long-lasting choice.
Consider your personal style, budget, and the overall design of your patio when choosing the material. Research prices, product reviews, and maintenance requirements to make an informed decision.
3.2 Tools and Equipment:
Here are some essential tools and equipment you will need for building your patio:
- Shovel: A sturdy shovel is necessary for excavating the soil and moving materials.
- Rake: A rake will help you level the excavated area and distribute materials evenly.
- Plate Compactor: This heavy-duty machine is used to compact the soil and ensure a firm foundation.
- Saw or Paver Cutter: Depending on the material chosen, you may need a saw or paver cutter to make precise cuts.
- Mallet or Rubber Mallet: A mallet is useful for gently tapping pavers into place.
- Level: A level will help you ensure that your patio surface is even and properly sloped for drainage.
- Safety Equipment: Don’t forget to wear protective gear, including gloves, safety goggles, and ear protection.
Make sure to gather all the necessary tools and equipment before starting your patio construction to ensure a smooth workflow.
3.3 Additional Features:
Consider any additional features you want to incorporate into your patio design, such as outdoor lighting, seating, or a fire pit. Research the available options and choose features that align with your vision and functional requirements.
By carefully selecting the materials and tools for your patio, you can create a beautiful and functional outdoor space that matches your style and stands the test of time. With the materials in hand and the right tools at your disposal, you’re ready to move on to the next step: laying the foundation for your patio.
Consider using interlocking pavers for your backyard patio. They are durable, easy to install, and come in a variety of colors and patterns to suit your style.
Step 4: Laying the Foundation
Now that you’re equipped with the right materials and tools, it’s time to lay the foundation for your backyard patio. This step is crucial as it provides a stable base for the pavers and ensures the longevity of your patio. Follow these steps to create a solid foundation:
4.1 Base Material:
Start by adding a layer of base material, such as crushed gravel or crushed stone, to the excavated area. This layer serves as a stable base for the pavers and helps with drainage. Spread the base material evenly and use a rake to level it.
4.2 Compact the Base:
Using a plate compactor or a hand tamper, compact the base material. This step is essential to create a solid and level surface. Work in small sections, moving the compactor over the area multiple times until the base is firm and well-compacted.
4.3 Add a Layer of Sand:
Next, spread a layer of sand over the compacted base material. The sand layer helps create a smooth surface for laying the pavers and allows for slight adjustments during the installation process. Use a rake or a straight edge to level the sand layer.
4.4 Install Edge Restraints:
Place edge restraints, such as plastic or metal edging, along the perimeter of the patio. This will help keep the pavers in place and prevent shifting over time. Secure the edge restraints using spikes or stakes, making sure they are flush with the desired patio height.
4.5 Begin Paver Installation:
Start laying the pavers from one corner or edge of the patio. Follow your design plan, placing the pavers tightly together. Use a rubber mallet to tap the pavers gently into place, ensuring they are level and align with the edge restraints.
4.6 Check for Level and Slope:
Regularly use a level to check that the pavers are even and properly sloped away from your home for efficient drainage. Make any necessary adjustments by adding or removing sand beneath the pavers.
4.7 Fill in the Joints:
Once all the pavers are in place, spread additional sand over the surface of the patio and sweep it into the joints. This helps stabilize the pavers and prevents them from shifting. Use a broom or a vibrating plate compactor to ensure the sand fills the joints completely.
With the foundation of your patio successfully laid, it’s time to move on to the next step: installing the patio pavers. By following these steps carefully, you’re well on your way to creating a beautiful and durable outdoor space that you can enjoy for years to come.
Read more: How To Build A Backyard Pool
Step 5: Installing the Patio Pavers
Now that you have a solid foundation in place, it’s time to move on to the exciting part – installing the patio pavers! This step requires precision and attention to detail to ensure a professional-looking finish. Follow these steps to install the pavers:
5.1 Start from a Corner:
Begin laying the pavers from one corner of the patio. This will provide a reference point for the rest of the installation. Place the first paver flush against the edge restraint, ensuring it is level and aligned with your design plan.
5.2 Follow a Pattern:
Continue laying the pavers in a pattern that matches your design vision. Common patterns include running bond, herringbone, and basket weave. Follow your predetermined design plan to maintain consistency and achieve a visually pleasing result.
5.3 Maintain Uniform Gaps:
As you lay each paver, ensure there is a consistent gap between them. This gap allows for jointing material, such as sand or polymeric sand, to be added later. Use spacers or your preferred method to achieve uniform spacing.
5.4 Check for Level and Alignment:
Regularly use a level to ensure that the pavers are even and aligned. Adjust the height or position of any pavers that are not level or don’t align with the adjacent ones. This step is crucial for creating a visually pleasing and structurally sound patio.
5.5 Cut Pavers if Necessary:
If you encounter areas or edges where full-sized pavers won’t fit, use a saw or a paver cutter to make the necessary cuts. Measure carefully and wear appropriate safety gear while cutting. Place the cut pavers as needed to maintain the desired pattern.
5.6 Compact the Pavers:
Once all the pavers are in place, use a plate compactor or a rubber mallet to gently compact them. This helps ensure that they are securely set in the sand or jointing material and provides a sturdy surface for foot traffic.
5.7 Fill the Joints:
After compacting the pavers, it’s time to fill the joints with sand or polymeric sand. Spread the material evenly over the entire patio and use a broom to sweep it into the joints. This will stabilize the pavers and prevent weeds from growing between them.
5.8 Compact the Joints:
Once the joints are filled, use the plate compactor or a vibrating plate specifically designed for paver joints to further compact the sand or polymeric sand. This helps ensure that the joints are fully filled and provides a long-lasting and stable patio surface.
With the patio pavers successfully installed, it’s time to move on to the final step: adding the finishing touches that will bring your backyard patio to life.
Step 6: Adding the Finishing Touches
Congratulations on reaching the final step of building your backyard patio! Now it’s time to add the finishing touches that will enhance the beauty and functionality of your outdoor space. Follow these steps to complete your patio project:
6.1 Seal the Pavers:
Consider applying a sealer to the pavers to protect them from stains, fading, and the elements. Choose a sealer that is specifically designed for your type of pavers and follow the manufacturer’s instructions for application. Sealing the pavers will enhance their longevity and keep them looking vibrant for years to come.
6.2 Install Outdoor Lighting:
Outdoor lighting can create a warm and inviting ambiance while also providing safety and visibility during nighttime gatherings. Install landscape lighting around your patio to highlight key features and pathways. Choose from a variety of options, such as string lights, lanterns, or spotlights, to suit your style and lighting needs.
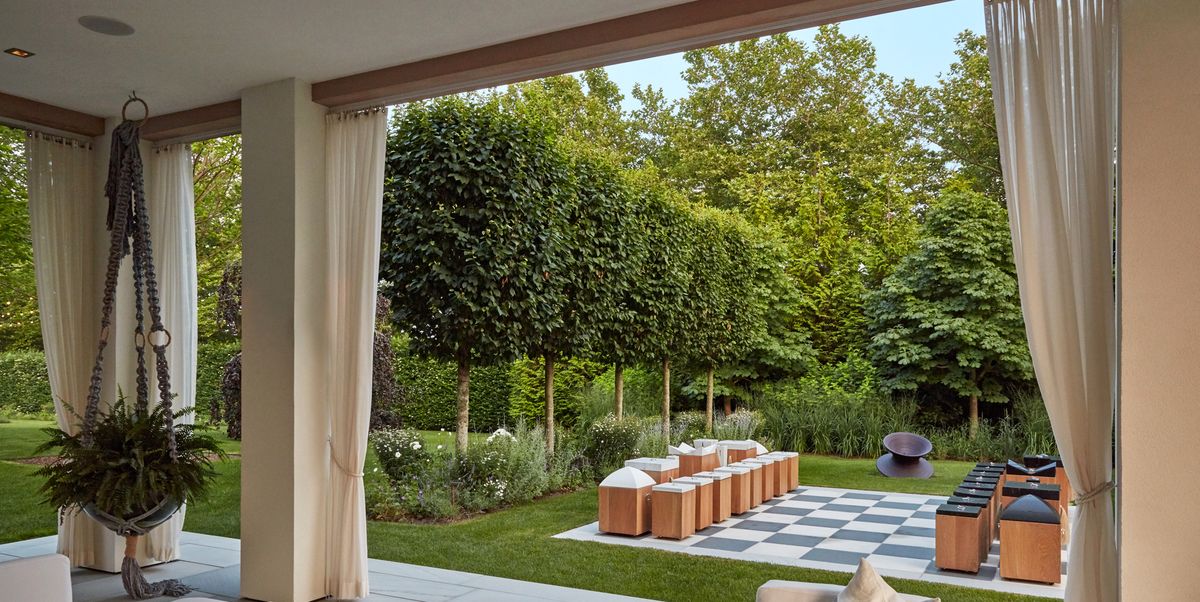
6.3 Add Furniture and Decor:
Choose patio furniture and decor that complements your design aesthetic and provides comfortable seating and dining options. Whether you prefer a cozy lounge area with plush cushions or a sleek dining set for hosting guests, select pieces that are weather-resistant and durable to withstand outdoor conditions.
6.4 Incorporate Greenery:
Add plants, flowers, and greenery to your patio to create a vibrant and inviting atmosphere. Choose low-maintenance plants that thrive in your climate and complement your outdoor space. Consider using pots, hanging baskets, or vertical gardens to maximize space and add a touch of natural beauty.
6.5 Install a Shade Structure:
If you want to create shade and protection from the sun, consider installing a pergola, canopy, or umbrella. These structures provide relief from direct sunlight, allowing you and your guests to enjoy the patio even on hot summer days. Choose a design that integrates seamlessly with your patio and aligns with your aesthetic preferences.
6.6 Personalize with Accessories:
Add your personal touch to the patio with accessories such as outdoor rugs, throw pillows, and decorative accents. Choose colors and patterns that reflect your style and create a cozy and inviting atmosphere. Don’t forget practical accessories like a grill, a fire pit, or storage solutions to enhance the functionality of your outdoor space.
6.7 Regular Maintenance:
To keep your patio looking its best, tend to regular maintenance tasks such as sweeping away debris, cleaning the pavers, and checking for any signs of damage. Follow specific care instructions for your selected materials and furniture to ensure they last for years to come.
With these finishing touches, your backyard patio is now complete! Take a moment to step back and admire your hard work. Your patio is ready to be enjoyed, whether it’s for relaxing with a book, hosting gatherings with friends and family, or simply immersing yourself in the beauty of your outdoor oasis.
Remember to continue caring for your patio, and feel free to update and personalize it as your tastes and needs evolve over time. Enjoy the fruits of your labor and create cherished memories in your beautiful backyard sanctuary!
ConclusionBuilding a backyard patio is a rewarding project that allows you to create a beautiful outdoor space where you can relax, entertain, and enjoy the beauty of nature. By following the steps outlined in this guide, you can successfully plan, prepare, and construct your own patio, transforming your outdoor area into a haven of comfort and style.
Throughout the process, it’s important to take the time to carefully plan and design your patio, considering factors such as its purpose, layout, size, materials, and additional features. This thoughtful approach ensures that your patio meets your functional needs and reflects your personal style.
The site preparation and foundation laying stages are vital for creating a solid and stable base for your patio. Clearing the area, excavating the soil, and properly compacting the base material are essential steps that contribute to the longevity and durability of your patio.
Choosing the right materials and tools is another key aspect of the patio-building process. Research different materials, consider their durability, aesthetics, and maintenance requirements, and select the ones that suit your style and budget. Having the necessary tools and equipment on hand will make the installation process smoother and more efficient.
With the foundation in place, you’re ready to install the patio pavers. Carefully follow your design plan, ensuring the pavers are level and aligned. Fill the joints with sand or polymeric sand, and compact them to create a stable surface.
Finally, add the finishing touches to your patio. Install outdoor lighting, select furniture and decor, incorporate greenery, and personalize the space with accessories. Regular maintenance will keep your patio in optimal condition and allow you to continue enjoying its beauty for years to come.
Building a backyard patio is a labor of love, and the end result is a space that enhances your lifestyle, increases the value of your property, and provides a tranquil retreat right in your own backyard. So, go ahead and embark on this exciting journey, and create a patio that becomes the centerpiece of your outdoor living experience.
Now, grab your tools and get ready to build your dream patio – a place where lasting memories will be made, laughter will be shared, and the beauty of the outdoors will be cherished.
Frequently Asked Questions about How To Build A Backyard Patio
Was this page helpful?
At Storables.com, we guarantee accurate and reliable information. Our content, validated by Expert Board Contributors, is crafted following stringent Editorial Policies. We're committed to providing you with well-researched, expert-backed insights for all your informational needs.


0 thoughts on “How To Build A Backyard Patio”