Home>Garden Essentials>Garden Storage>How To Build A DIY Cabana To Create A Shady Oasis For Your Backyard
Garden Storage
How To Build A DIY Cabana To Create A Shady Oasis For Your Backyard
Modified: October 20, 2024
Discover how to build your own DIY cabana for a stylish and functional storage solution in your backyard. Create a shady oasis and keep your outdoor space organized with this step-by-step guide.
(Many of the links in this article redirect to a specific reviewed product. Your purchase of these products through affiliate links helps to generate commission for Storables.com, at no extra cost. Learn more)
Introduction
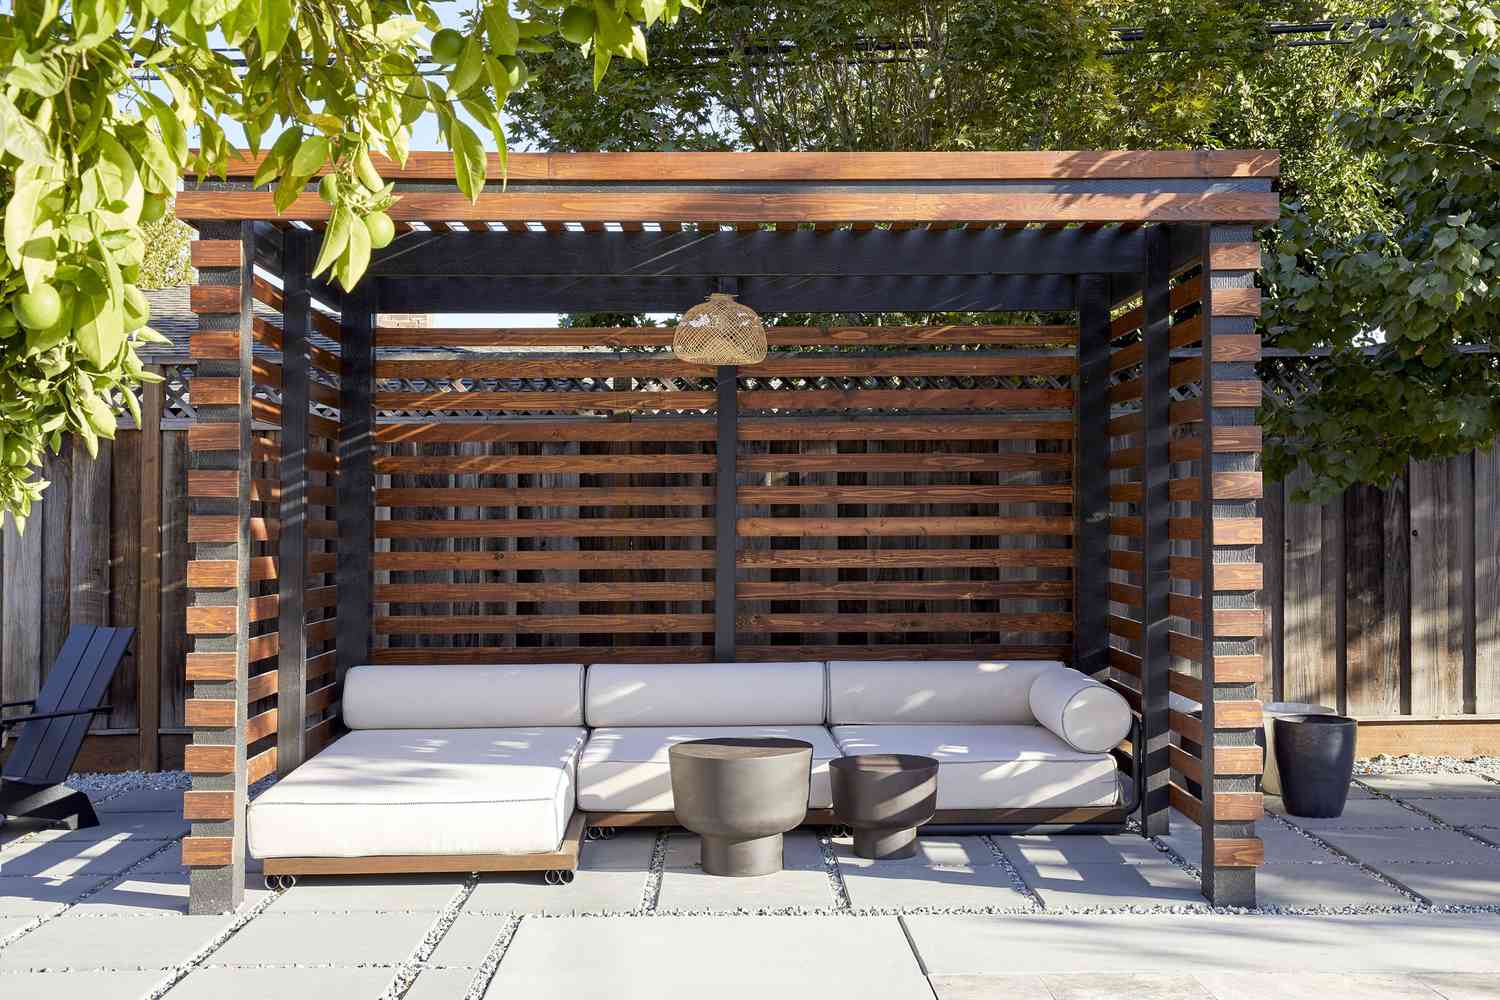
Welcome to the world of DIY cabanas! Are you looking to add a cozy and stylish retreat to your backyard? A DIY cabana might just be the perfect project for you. Not only will it provide a shady oasis on hot summer days, but it will also add a touch of elegance and charm to your outdoor space.
Building your own cabana may seem like a daunting task, but with the right materials, tools, and a bit of creativity, you can create a beautiful space that complements your backyard and meets your specific needs. Whether you want a private reading nook, a relaxing lounge area, or a place to entertain guests, a DIY cabana can be customized to suit your desires.
In this article, we will guide you through the process of building your own cabana step by step. From choosing the perfect location to adding the finishing touches, we’ll cover everything you need to know. So grab your tool belt and let’s get started!
To build your DIY cabana, you’ll need to gather a few essential materials. The main components you’ll require include:
- Wooden beams or posts
- Roofing materials such as shingles or thatch
- Wall panels or curtains
- Decorative elements such as paint, cushions, and curtains
- Tools including a saw, drill, hammer, and measuring tape
Once you have all the necessary materials, the first step is to choose the ideal location for your cabana.
Pro tip: Take into consideration factors such as sunlight exposure, privacy, and proximity to other outdoor amenities when selecting the location.
Key Takeaways:
- Building a DIY cabana involves careful planning, sturdy construction, and personalized design. From choosing the location to adding decorative elements, this guide provides step-by-step instructions for creating a stylish backyard retreat.
- Maintenance and care are essential for preserving the longevity of a DIY cabana. Regular cleaning, inspections, and repairs will ensure that the cabana remains a beautiful and functional oasis for years to come.
Materials Needed
Before diving into the exciting process of building your DIY cabana, it’s essential to gather all the necessary materials. Having everything you need on hand will help streamline the construction process and ensure a smoother workflow. Here’s a list of the essential materials you’ll need:
- Wooden beams or posts: These will form the main frame of your cabana. Choose sturdy, weather-resistant wood that can withstand outdoor conditions.
- Roofing materials: Depending on your preference and the overall design of your cabana, you can use various roofing materials such as shingles, thatch, or even canvas. Consider the climate in your area and choose a roofing material that is durable and can provide adequate protection from the elements.
- Wall panels or curtains: For added privacy or protection from the wind, you can install wall panels or use outdoor curtains. These can be made of materials like bamboo, wood, or fabric, depending on the desired aesthetic of your cabana.
- Decorative elements: To add your personal touch and enhance the ambiance of your cabana, consider incorporating decorative elements such as paint, cushions, and curtains. Select colors and patterns that complement your outdoor space and create a cozy atmosphere.
- Tools: To build your cabana, you’ll need a set of basic tools including a saw, drill, hammer, measuring tape, level, and a ladder. Make sure you have these tools in good condition and readily available before starting your project.
- Additional materials: Depending on your specific design, additional materials may be required. This could include hardware such as screws, nails, and brackets, as well as concrete or gravel for stability if your cabana will be freestanding.
It’s important to gather all the materials before beginning the construction process to avoid unnecessary delays and ensure a smooth workflow. Take the time to source high-quality materials that will withstand outdoor conditions and provide durability.
Now that you have your materials ready, it’s time to move on to the next step: choosing the ideal location for your DIY cabana.
Step 1: Choosing the Location
The first step in building your DIY cabana is choosing the perfect location. The location of your cabana will not only impact its functionality but also its overall aesthetic appeal. Here are some factors to consider when selecting the location:
- Sunlight exposure: Assess the amount of sunlight the area receives throughout the day. If you want a shady retreat, pick a spot that offers a good amount of shade, especially during the peak hours of the day.
- Privacy: Consider the level of privacy you desire for your cabana. If you prefer a secluded space, choose an area that is shielded from neighboring houses or high-traffic areas in your backyard.
- Proximity to other amenities: Determine whether you want your cabana to be close to other outdoor amenities such as a pool, patio, or barbecue area. This will help create a cohesive outdoor living space.
- Views: Take advantage of any beautiful views or focal points in your backyard. Position your cabana in a way that allows you to enjoy the scenery while relaxing inside.
- Ground stability: Ensure the chosen location has stable ground to support the weight of the cabana. Avoid areas with uneven terrain or areas prone to flooding.
Once you’ve considered these factors, assess your backyard and identify the best location based on your requirements. It could be against a fence or wall, under a tree for natural shade, or in an open area that provides a panoramic view.
Remember to check any local building codes or regulations that may affect the placement of your cabana. Some municipalities have restrictions on the distance between structures or setback requirements, so it’s important to familiarize yourself with these rules to avoid any issues later on.
Pro tip: Use stakes and string to mark the exact spot where your cabana will be placed. This will give you a clearer idea of the space it will occupy and allow you to make any necessary adjustments before starting construction.
With the perfect location chosen, you’re now ready to move on to the next step: gathering the tools you’ll need for the construction process.
Step 2: Gathering the Tools
Now that you have chosen the ideal location for your DIY cabana, it’s time to gather the necessary tools to bring your project to life. Having the right tools on hand will make the construction process much smoother and more efficient. Here are the essential tools you’ll need:
- Saw: A saw is necessary for cutting the wooden beams or posts to the desired lengths. Choose a saw that is suitable for the type of wood you’ll be working with.
- Drill: A drill will be used for making holes, attaching screws, and securing various parts of the cabana. Consider investing in a good quality drill with different drill bit sizes.
- Hammer: A hammer is essential for driving in nails and ensuring a secure connection between the wooden components. Opt for a hammer with a comfortable grip that suits your strength.
- Measuring tape: Accurate measurements are crucial for a well-built cabana. Make sure you have a measuring tape on hand to ensure precision throughout the construction process.
- Level: A level will help ensure that your cabana is square and straight. It’s important to have a level to achieve a professional and aesthetically pleasing end result.
- Ladder: Depending on the height and design of your cabana, you may need a ladder to reach certain areas during construction. Choose a stable ladder that provides safe access to all parts of the project.
- Additional tools: Depending on the specific design and features of your cabana, you may need additional tools such as a carpenter’s square, a chisel, a miter saw, or a paintbrush. Review your design plans to determine any additional tools required.
Before starting the construction process, ensure that your tools are in good working condition. Replace any worn-out or damaged tools and gather all the accessories, such as drill bits and screws, that you’ll need for the project.
Pro tip: Creating a designated workspace where you can organize your tools and materials will help streamline the construction process and keep everything easily accessible.
With your tools gathered and ready, it’s time to move on to the next step: planning the design of your DIY cabana.
Step 3: Planning the Design
Now that you have your location set and tools gathered, it’s time to delve into the exciting step of planning the design for your DIY cabana. Creating a well-thought-out design will ensure that your cabana not only meets your functional needs but also enhances the overall aesthetic of your outdoor space. Here are some key considerations when planning the design:
- Size and shape: Determine the size and shape of your cabana based on the available space and your specific requirements. Consider factors such as the number of people it will accommodate and the activities you plan to do inside.
- Roofing style: Choose the roofing style that best suits your taste and complements the overall design of your backyard. Options include a classic pitched roof, a rustic thatched roof, or a sleek flat roof. Take into account the weather conditions in your area and choose a roofing material that offers the necessary protection.
- Wall panels or curtains: Decide whether you want solid wall panels for more privacy, or if you prefer a more open concept with curtains that can be tied back. Consider the level of airflow and natural light you desire when making this decision.
- Decorative elements: Think about how you want to style and personalize your cabana. Choose colors, patterns, and textures that complement your outdoor space and create a welcoming atmosphere. Consider adding decorative elements such as cushions, curtains, and potted plants to enhance the overall aesthetic.
- Functionality: Identify the primary purpose of your cabana and design the interior layout accordingly. If you plan to use it as a lounge area, consider comfortable seating options. If it will be a reading nook, incorporate a cozy chair and a small side table for books and beverages.
Sketch out your design ideas on paper or use a design software to visualize the final result. Consider the proportions of the space, the flow of movement, and how the cabana will fit into the surrounding landscape. Allow room for any additional features or accessories you want to include.
Pro tip: Take inspiration from magazines, design websites, and even nearby vacation rentals to gather ideas and inspiration for your cabana design.
Once you have a clear vision of the design, it’s time to move on to the next step: building the frame of your DIY cabana.
Step 4: Building the Frame
With the design plans in hand, it’s time to roll up your sleeves and start building the frame of your DIY cabana. The frame serves as the foundation and structural support for the entire structure. Follow these steps to build a sturdy and secure frame:
- Measure and mark: Use your measuring tape and a pencil to mark the dimensions of the cabana on the ground. This will serve as a reference as you begin construction. Ensure that the corners are square and the lines are straight.
- Install the posts: Dig holes at each corner of the marked area to install the wooden posts. The depth of the holes will depend on the height of your cabana. Place the posts in the holes and use a level to ensure they are plumb. Fill the holes with concrete to secure the posts in place. Allow the concrete to dry according to the manufacturer’s instructions.
- Attach the cross beams: Cut the wooden beams to the desired length and attach them horizontally between the posts, creating the top and bottom frame of the cabana. Use screws or brackets to secure the beams to the posts. Ensure that the beams are level and securely fastened.
- Add support beams: Depending on the size and design of your cabana, you may need to add support beams in the middle of the frame for additional stability. Measure and cut the beams to fit and attach them perpendicularly to the cross beams.
- Create the roof trusses: If you have chosen a pitched roof design, it’s time to create the roof trusses. Measure and cut the wooden beams according to the pitch and angle of your roof design. Attach the trusses to the top frame of the cabana, ensuring they are evenly spaced. Use brackets or screws to secure them in place.
- Secure the roof framework: Once the trusses are in place, cut and install the roof beams, which will run horizontally across the trusses. Secure them tightly using screws or brackets. This framework will provide the structure for attaching the roofing material.
Throughout the construction process, continuously check for levelness and squareness to ensure your frame is strong and stable. It’s essential to use proper safety equipment, such as work gloves and safety glasses, when handling tools and constructing the frame.
Pro tip: Consider adding decorative touches, such as ornamental brackets or carvings, to the wooden beams. This will enhance the visual appeal of your cabana.
With the frame built, it’s time to move on to the exciting step of installing the roof. Stay tuned for the next step: Step 5 – Installing the Roof.
When building a DIY cabana, make sure to choose durable and weather-resistant materials to ensure longevity and protection from the elements.
Step 5: Installing the Roof
Now that the frame of your DIY cabana is complete, it’s time to move on to Step 5: installing the roof. The roof is not only a functional component but also a key element that adds character and protects you from the elements. Follow these steps to ensure a secure and weather-resistant roof for your cabana:
- Choose your roofing material: Depending on your design and personal preference, select the roofing material that suits your cabana. Options include shingles, thatch, canvas, or even polycarbonate panels. Consider factors such as durability, aesthetics, and weather resistance when making your decision.
- Prepare the roof: If you have chosen shingles or thatch, you’ll need to prepare the roof surface. Install a layer of roofing felt or a waterproofing membrane to create a barrier between the roof and the roof material. This will help prevent water damage and improve the longevity of your roof.
- Install the roofing material: Follow the manufacturer’s instructions to install the chosen roofing material. Whether it’s laying shingles or thatching a roof, ensure that each piece is securely attached and overlapped correctly to provide proper water drainage. If using canvas or polycarbonate panels, secure them tightly to prevent movement during windy conditions.
- Seal any gaps: Inspect the roof for any gaps or areas that might allow water to penetrate. Use roofing sealant or caulk to seal these areas and create a watertight seal. Pay special attention to the edges, corners, and seams to ensure maximum protection.
- Check for stability: Once the roofing material is installed, check that it is secure and stable. Ensure that it can withstand wind and other weather conditions without causing damage to the cabana or compromising its structural integrity.
Throughout the installation process, prioritize safety. Use a stable ladder or scaffolding system if needed, and consider enlisting the help of a friend or family member to assist with handling and securing the roofing material.
Pro tip: Consider adding gutters to your cabana roof to collect rainwater and redirect it away from the structure. This can help prevent water damage to the cabana and surrounding areas.
With the roof installed, your DIY cabana is starting to take shape. In the next step, we’ll explore how to add walls to your cabana. Stay tuned for Step 6: Adding the Walls.
Step 6: Adding the Walls
With the roof in place, it’s time to move on to Step 6: adding the walls to your DIY cabana. The walls not only provide privacy and protection from the elements but also define the space and create a cozy atmosphere. Follow these steps to effectively add walls to your cabana:
- Select your wall material: Choose the type of wall material that suits your design and functional requirements. Options include wooden panels, bamboo screening, fabric curtains, or even a combination of materials. Consider factors such as privacy, airflow, and aesthetic appeal when selecting your wall material.
- Measure and cut the wall panels: Measure the dimensions of the open spaces between the frame posts to determine the size of the wall panels. Using a saw or another appropriate cutting tool, cut the panels to the correct size. If using curtains, measure and cut the fabric accordingly.
- Install the wall panels: Secure the wall panels to the frame posts using screws or brackets. Make sure they are evenly spaced and level. If you prefer a more flexible option, attach curtain rods or hooks to the frame and hang your curtains, ensuring they are properly secured and hang evenly.
- Create entryways: Determine where you want the entryways to be in your cabana. If desired, leave an open space between the wall panels to create a doorway. Alternatively, install a separate door frame or use fabric curtains that can be tied back to create an open entrance.
- Add finishing touches: Consider adding decorative elements such as trim, paint, or stencil designs to the walls to enhance the overall appearance of your cabana. Personalize the space with artwork, mirrors, or hanging plants for a cozy and inviting ambiance.
Throughout the process, ensure that the walls are properly secured to the frame and provide sufficient stability. Double-check that the walls align correctly with the frame and that there are no gaps or spaces where wind, rain, or insects could enter.
Pro tip: Add screens or netting to your cabana if you want to keep insects at bay while enjoying the fresh air.
With the walls in place, your cabana is almost complete! In the next step, we’ll explore how to bring your cabana to life by adding some decorations and furnishings. Stay tuned for Step 7: Decorating and Furnishing.
Step 7: Decorating and Furnishing
With the walls securely in place, it’s time to move on to Step 7: decorating and furnishing your DIY cabana. This step allows you to truly personalize your space and create a cozy, inviting atmosphere. Here are some key considerations for decorating and furnishing your cabana:
- Choose a color scheme: Select a color palette that complements your outdoor space and evokes the atmosphere you desire. Consider using light, airy colors to create a sense of relaxation, or bold, vibrant hues to add a pop of energy.
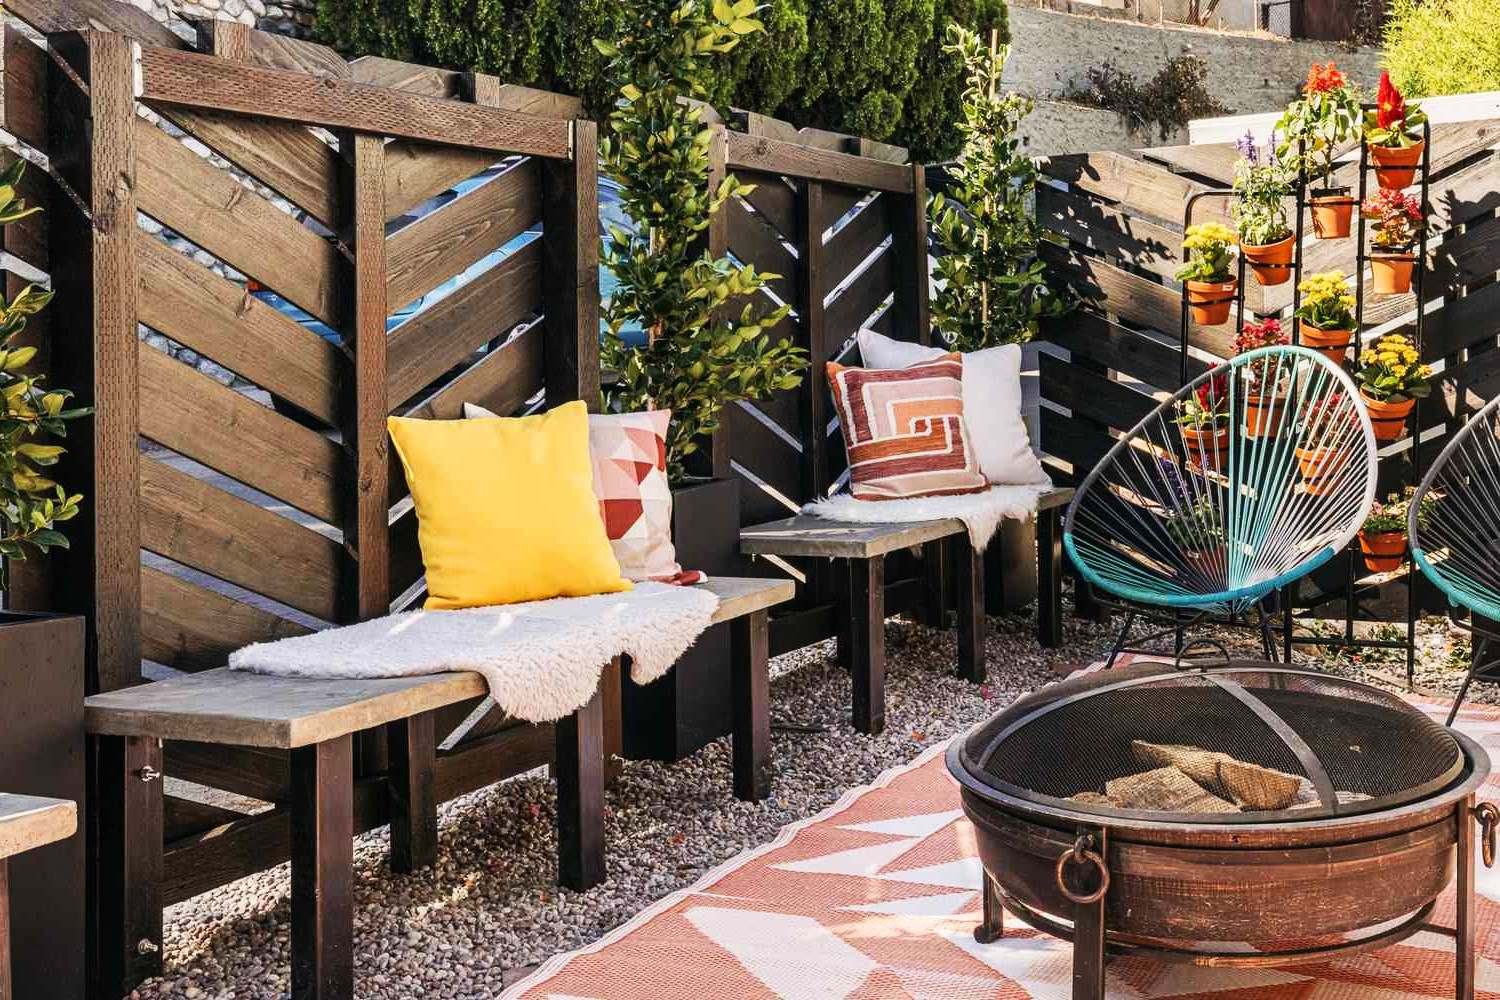
- Add textiles and cushions: Soft textiles, such as curtains, cushions, and rugs, can instantly transform your cabana into a cozy retreat. Choose fabrics that are suitable for outdoor use and can withstand sun exposure and moisture. Incorporate patterns and textures that coordinate with the color scheme.
- Include seating and tables: Depending on the size of your cabana and your intended use, incorporate appropriate seating options such as chairs, benches, or even a small sofa. Choose comfortable and weather-resistant materials. Include a side table or coffee table for drinks, snacks, and other essentials.
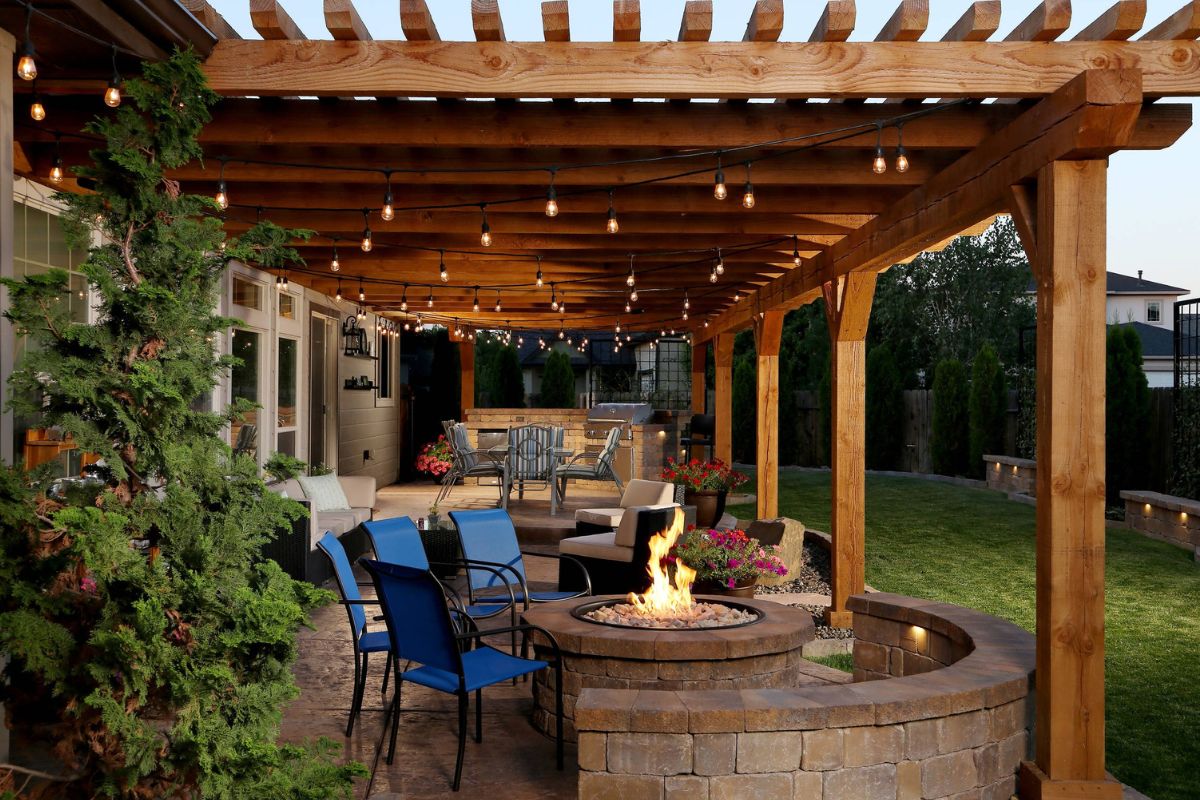
- Add lighting: Consider installing outdoor lighting to illuminate your cabana during the evening hours. Opt for options such as string lights, lanterns, or even solar-powered fixtures. Soft and warm lighting will create a cozy and welcoming ambiance.
- Accessorize: Enhance the visual appeal of your cabana by adding decorative accessories. Hang artwork or mirrors on the walls, place potted plants or floral arrangements to bring a touch of nature indoors, and include decorative elements such as candles or lanterns for a cozy glow.
- Don’t forget about functionality: While focusing on aesthetics, also consider the functionality of your cabana. Create storage solutions for items like towels, cushions, and small outdoor games. Incorporate hooks or hanging racks to keep things tidy and organized.
Take time to explore different furniture and decor options to find the ones that best suit your style and needs. Consider repurposing or upcycling items to add a unique and personalized touch to your cabana.
Pro tip: Consider adding a small outdoor bar or beverage station to your cabana. This can be a convenient and stylish feature for entertaining guests.
With your cabana now beautifully decorated and furnished, it’s time for the final step: Step 8 – Maintenance and Care. Let’s ensure that your cabana remains in great condition for years to come!
Step 8: Maintenance and Care
Congratulations on completing your DIY cabana! The final step is to ensure its longevity and maintain its pristine condition. Step 8 focuses on the necessary maintenance and care to keep your cabana looking beautiful and functioning well. Here are some important aspects to consider:
- Clean regularly: Regular cleaning is essential to prevent the buildup of dirt, debris, and mold. Sweep or vacuum the floors, wipe down surfaces, and remove any stains or spills promptly. Follow the manufacturer’s instructions for cleaning specific materials used in your cabana.
- Inspect for damage: Regularly inspect the cabana for any signs of damage, such as loose screws, cracks in the wood, or tears in the fabric. Repair or replace damaged components immediately to maintain the integrity of the structure.
- Protect from the elements: Take precautions to protect your cabana from harsh weather conditions. During heavy rain or snowfall, ensure that the roof and walls are well-sealed to prevent water damage. Cover furniture and cushions when not in use or during inclement weather.
- Maintain the roof: Check the condition of the roofing material periodically. Repair any loose shingles or thatch and replace damaged sections as needed. Trim any overhanging tree branches that may pose a risk to the roof.
- Prevent pest infestations: Keep your cabana pest-free by regularly inspecting for signs of unwanted visitors, such as insects or rodents. Use appropriate pest control methods to protect both the cabana structure and its occupants.
- Refinish or repaint as necessary: Over time, the exterior surfaces of your cabana may require refinishing or repainting to maintain their appearance and protect against weathering. Follow the appropriate steps and use suitable products for the type of material used.
- Store cushions and fabrics: To prolong the lifespan of your cushions and fabrics, store them indoors during the off-season or when not in use. This will help prevent fading, mold, and deterioration.
- Regularly inspect and maintain furniture: Periodically check the condition of your cabana furniture. Tighten any loose screws or connections, clean the furniture, and lubricate moving parts if necessary. Replace worn-out or damaged furniture as needed.
By following these maintenance practices, your cabana will remain a beautiful and enjoyable space for years to come. Regular care and attention will help you address any issues promptly and preserve the longevity of your DIY creation.
Pro tip: Keep a maintenance schedule or checklist to ensure that you stay on top of necessary tasks and keep your cabana in top shape.
With Step 8 completed, take a moment to appreciate your hard work and enjoy the fruits of your labor. Your DIY cabana is now a welcoming retreat that you can proudly showcase in your backyard.
Conclusion
Congratulations! You’ve successfully completed the journey of building your own DIY cabana. Through careful planning, design, and hard work, you’ve created a beautiful retreat right in your backyard. Your new cabana provides a shady oasis where you can relax, entertain guests, or simply enjoy a peaceful moment alone.
Throughout the process, you learned how to choose the perfect location for your cabana, gather the necessary tools and materials, plan the design, build the frame, install the roof, add the walls, and finally, decorate and furnish the space. Each step was carefully executed to ensure a functional and aesthetically pleasing outcome.
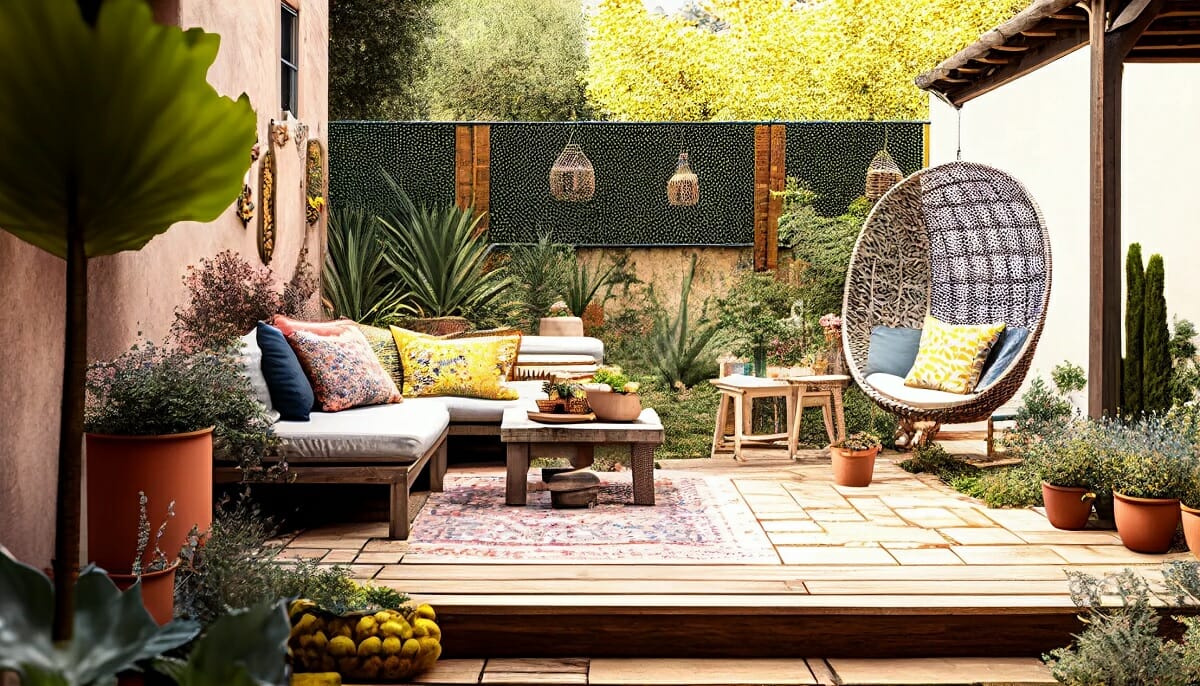
Now, it’s time to sit back and enjoy the fruits of your labor. Imagine spending sunny afternoons lounging on comfortable chairs, surrounded by beautiful curtains gently swaying in the breeze. Picture cozy evenings underneath the warm glow of string lights, sipping a refreshing drink and savoring the tranquility of your cabana.
Remember, proper maintenance and care are vital to keeping your cabana in top shape. Regular cleaning, inspections, and repairs will ensure its longevity and continued enjoyment. By staying proactive and addressing any issues that arise, you can protect your investment and maintain the pristine condition of your DIY creation.
As you embark on this new chapter with your DIY cabana, don’t forget to celebrate your accomplishment. Share the joy of your backyard oasis with friends and family, and take pride in the fact that you created a space that reflects your personal style and meets your specific needs.
Thank you for joining us on this exciting journey of building a DIY cabana. We hope this comprehensive guide has provided you with the knowledge and inspiration to bring your vision to life. Now, go ahead and enjoy your newfound retreat!
Frequently Asked Questions about How To Build A DIY Cabana To Create A Shady Oasis For Your Backyard
Was this page helpful?
At Storables.com, we guarantee accurate and reliable information. Our content, validated by Expert Board Contributors, is crafted following stringent Editorial Policies. We're committed to providing you with well-researched, expert-backed insights for all your informational needs.

0 thoughts on “How To Build A DIY Cabana To Create A Shady Oasis For Your Backyard”