Home>Garden Essentials>Garden Storage>How To Build A Greenhouse In Your Backyard Using A Kit

Garden Storage
How To Build A Greenhouse In Your Backyard Using A Kit
Modified: August 17, 2024
Learn how to build a storage greenhouse in your backyard using a kit. Transform your outdoor space into a functional and eco-friendly storage solution.
(Many of the links in this article redirect to a specific reviewed product. Your purchase of these products through affiliate links helps to generate commission for Storables.com, at no extra cost. Learn more)
Introduction
Welcome to the world of greenhouse gardening! If you’ve ever dreamed of having your own little oasis in your backyard where you can grow a variety of plants and extend your growing season, building a greenhouse is the perfect solution for you. And the best part is, you don’t have to be a construction expert to make it happen.
A greenhouse is a controlled environment that allows you to create optimal growing conditions for your plants. With the help of a greenhouse kit, you can easily set up a greenhouse in your backyard without the need for complex building plans or specialized tools. Whether you’re a beginner gardener or a seasoned pro, a greenhouse can provide a wealth of benefits for your plants and your gardening experience.
In this article, we will guide you through the process of building a greenhouse in your backyard using a kit. We’ll cover everything from choosing the right greenhouse kit to setting up the necessary infrastructure and ensuring optimal conditions for your plants.
By the end of this article, you’ll have all the knowledge you need to confidently embark on your greenhouse-building journey. So let’s get started and turn your backyard into a flourishing haven of greenery!
Key Takeaways:
- Building a greenhouse in your backyard using a kit provides an exciting opportunity to extend your growing season, experiment with diverse plant varieties, and create a thriving ecosystem for bountiful harvests and vibrant blooms.
- Proper maintenance and care for your greenhouse, including regular cleaning, ventilation, pest control, and plant care, are essential for ensuring healthy plant growth and the longevity of your greenhouse structure.
Read more: Backyard Greenhouse Ideas
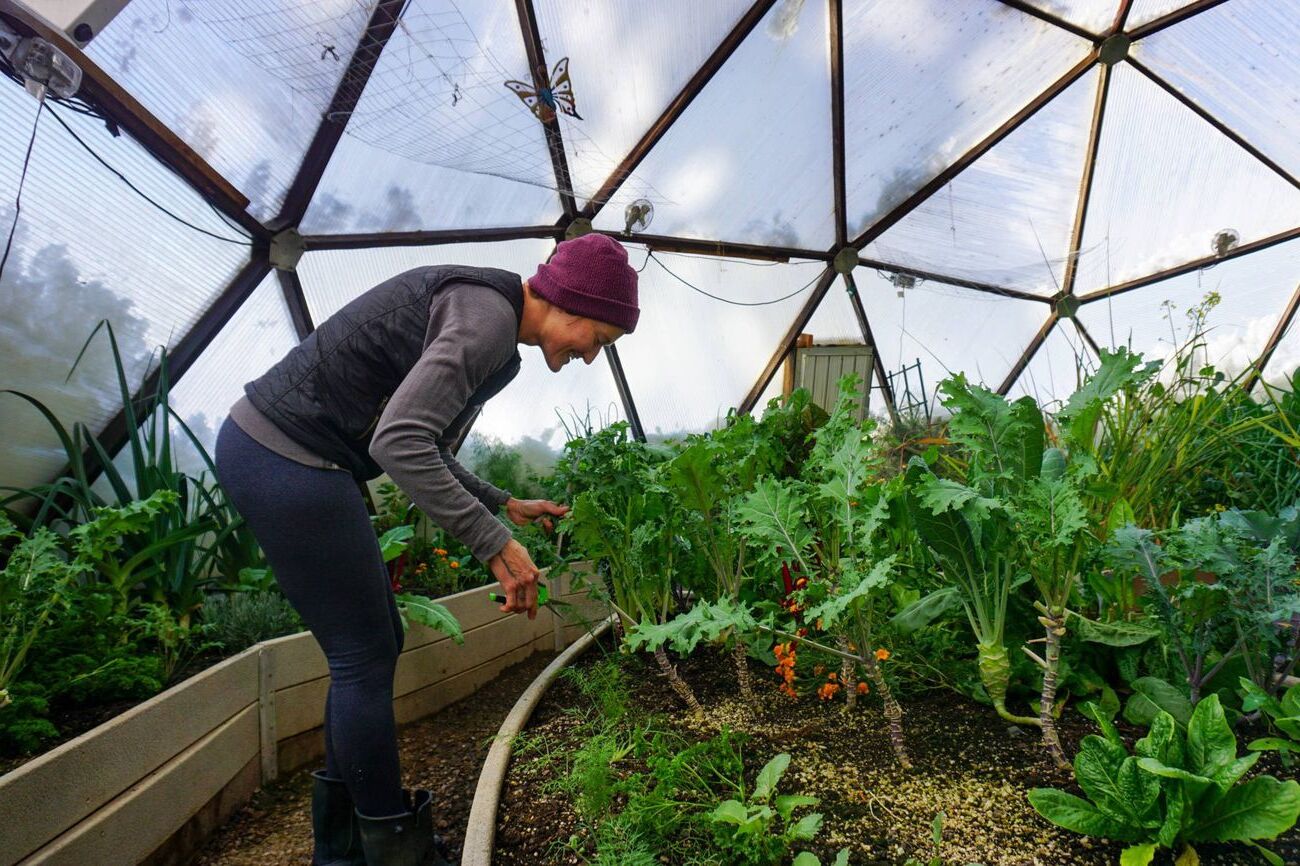
Benefits of Building a Greenhouse
Building a greenhouse in your backyard offers a wide range of benefits that can greatly enhance your gardening experience. Here are some of the key advantages of having your own greenhouse:
- Extended Growing Season: One of the biggest advantages of a greenhouse is the ability to extend your growing season. By creating a controlled environment, you can start planting earlier in the spring and continue growing well into the fall. This means you can enjoy fresh produce and vibrant flowers for a longer period of time.
- Protection from Extreme Weather: A greenhouse provides a sheltered space that protects your plants from harsh weather conditions such as frost, heavy rain, and strong winds. This is especially beneficial if you live in an area with unpredictable weather patterns. Your plants will be shielded from the elements, reducing the risk of damage or loss.
- Customizable Growing Conditions: With a greenhouse, you have the ability to create and control the ideal growing conditions for your plants. You can adjust the temperature, humidity, and light levels to suit the specific needs of different plant varieties. This level of control allows for more successful and productive gardening.
- Protection from Pests and Diseases: Greenhouses act as a barrier against common garden pests, including insects, rodents, and birds. By keeping your plants enclosed, you significantly reduce the risk of infestation or disease transmission. This means less time and effort spent on pest control, and healthier plants overall.
- Year-Round Gardening: In a greenhouse, you have the opportunity to engage in year-round gardening. You can grow delicate plants, herbs, and vegetables throughout the winter season, providing you with a continuous supply of fresh and nutritious produce. This is particularly beneficial for those who have a passion for gardening and want to indulge in their hobby all year long.
- Increased Plant Variety: With a greenhouse, you have the freedom to experiment and grow a wider range of plant varieties. You can cultivate exotic plants, tender perennials, and tropical species that may not survive in your local climate otherwise. This opens up a whole new world of possibilities and allows you to diversify your garden.
As you can see, building a greenhouse offers numerous benefits that can enhance your gardening experience and yield fantastic results. Whether you’re a beginner or an experienced gardener, a greenhouse can provide an exciting and rewarding way to nurture your plants and indulge in your passion for gardening.
Choosing the Right Greenhouse Kit
When it comes to choosing a greenhouse kit, there are several factors to consider to ensure that you make the right choice for your needs and preferences. Here are some key points to keep in mind:
- Size: Determine how much space you have available in your backyard and how many plants you plan to grow. This will help you decide on the appropriate size of the greenhouse kit. Consider both the floor space and height of the greenhouse to accommodate your plants and allow for comfortable movement inside.
- Material: Greenhouse kits are typically made from either polycarbonate or glass panels. Polycarbonate panels are lightweight, shatter-resistant, and provide excellent insulation. Glass panels offer better visibility and longevity but may be more prone to breakage. Consider your climate, budget, and personal preference when choosing the material.
- Frame: The frame of the greenhouse kit should be sturdy and durable to withstand various weather conditions. Common frame materials include aluminum and galvanized steel. Aluminum frames are lightweight and resistant to rust, while steel frames are stronger and more long-lasting. Assess the frame’s strength and quality to ensure it will withstand the test of time.
- Ventilation: Adequate ventilation is crucial for maintaining optimal air circulation and preventing overheating in the greenhouse. Look for kits that come with windows, vents, or adjustable roof panels that can be opened or closed as needed. This will allow you to regulate the temperature and humidity levels inside the greenhouse.
- Assembly: Consider your level of DIY skills and the time you are willing to invest in assembling the greenhouse kit. Some kits may require more complex assembly, while others come with a straightforward design and detailed instructions. Choose a kit that suits your abilities and schedule to ensure a smooth and successful installation process.
- Budget: Determine your budget for the greenhouse kit, taking into account not only the initial cost but also any additional expenses such as foundation materials or accessories. It’s important to find a balance between quality and affordability, ensuring that you invest in a kit that meets your requirements without breaking the bank.
By considering these factors, you can narrow down your options and find the perfect greenhouse kit that aligns with your needs, preferences, and budget. Remember to research different brands, read customer reviews, and consult with experts if needed. Choosing the right greenhouse kit is an important step towards creating a successful and enjoyable gardening space in your backyard.
Checking Your Backyard Space and Conditions
Before you start building your greenhouse, it’s essential to assess your backyard space and conditions to ensure that it is suitable for housing a greenhouse. Here are some key factors to consider:
- Available Space: Measure the area where you plan to install the greenhouse. Take into account not only the footprint of the greenhouse itself but also additional space for pathways, working areas, and possible expansion in the future. Make sure there are no obstructions such as trees, buildings, or utility lines that could interfere with the placement of the greenhouse.
- Sunlight Exposure: Assess the sunlight exposure in your backyard. Greenhouse plants thrive in full sun, so it’s important to choose a location that receives at least 6 to 8 hours of direct sunlight per day. Observe your yard throughout the day to determine the areas with the best sunlight exposure, as this will impact the growth and productivity of your plants.
- Drainage: Ensure that your backyard has proper drainage to prevent water from accumulating around the greenhouse. Standing water can lead to root rot and other plant diseases. If your yard has poor drainage, consider implementing a drainage system or raising the greenhouse slightly above ground level to avoid waterlogging.
- Wind Exposure: Assess the prevailing wind direction in your area. Strong winds can damage or even blow away a greenhouse if it is not properly anchored. Consider placing the greenhouse in a location that is shielded from strong winds, such as behind a fence or near a building. If necessary, you can install windbreaks or add extra reinforcement to the greenhouse structure.
- Accessibility: Ensure that the location of your greenhouse is easily accessible. You’ll need to transport materials, tools, and plants to and from the greenhouse, so it’s important to have a convenient pathway. Consider the proximity to a water source for irrigation purposes and ease of access for maintenance and harvesting.
- Microclimates: Take note of any microclimates in your backyard, which are small variations in temperature and humidity caused by factors like shading, proximity to walls or buildings, or differences in elevation. These microclimates can affect plant growth, so it’s important to choose a location that provides a relatively consistent climate for your greenhouse.
By assessing your backyard space and conditions, you can determine the best location for your greenhouse. Remember that choosing the right spot is crucial for the success of your plants. Take your time to carefully evaluate these factors and make any necessary adjustments before proceeding with the installation process.
Preparing the Ground for the Greenhouse
Once you have chosen the location for your greenhouse, the next step is to prepare the ground to ensure a stable and suitable foundation. Proper ground preparation is essential for the longevity and functionality of your greenhouse. Follow these steps to get your ground ready:
- Clear the Area: Remove any existing vegetation, rocks, and debris from the area where the greenhouse will be installed. Clearing away obstacles will make it easier to level the ground and create a clean space for your greenhouse.
- Level the Ground: Use a leveling tool, such as a long wooden board or a laser level, to check the ground for any unevenness. Ensure that the area is level and free from any bumps or depressions. A level foundation will provide stability for the greenhouse and prevent any water pooling.
- Consider Drainage: Adequate drainage is crucial to prevent water from accumulating around the greenhouse. If your yard has poor natural drainage, you can improve it by adding drainage pipes or French drains. Alternatively, you can create a slightly sloped ground away from the greenhouse to allow water to flow away naturally.
- Add a Weed Barrier: To prevent weed growth inside the greenhouse, it’s recommended to install a weed barrier before laying the foundation. You can use landscaping fabric or plastic sheeting to create a barrier that will help keep unwanted weeds at bay.
- Create a Foundation: Depending on the type of greenhouse kit you have, you may need to create a foundation. This can be done using materials such as concrete, gravel, or pressure-treated wood. Follow the instructions provided with your greenhouse kit to determine the appropriate foundation type and size.
- Secure the Foundation: Once the foundation is in place, ensure that it is securely anchored to the ground. This will help withstand strong winds and provide stability to the greenhouse structure. Use anchor bolts or stakes to secure the foundation to the ground, following the manufacturer’s recommendations.
- Inspect the Electrical and Water Connections: If your greenhouse requires electrical or water connections, ensure that they are in place and accessible. Consult with a licensed electrician or plumber to ensure that the connections are done safely and according to local building codes.
By properly preparing the ground for your greenhouse, you set a solid foundation for the structure and create an optimal environment for your plants. Take the time to complete these steps with care and attention to detail, as they form the basis for a successful greenhouse installation and gardening experience.
Read more: How To Build A Greenhouse With Glass
Assembling the Greenhouse Kit
Now that the ground is prepared, it’s time to assemble your greenhouse kit. Follow these steps to ensure a smooth and successful installation process:
- Read the Instructions: Thoroughly read the manufacturer’s instructions that come with your greenhouse kit. Familiarize yourself with the components, steps, and any specific requirements or recommendations.
- Organize the Materials: Lay out all the materials and components of the greenhouse kit in an organized manner. This will make it easier to locate each part and prevent any confusion during the assembly process.
- Start with the Base: Begin by assembling the base frame of the greenhouse. Follow the manufacturer’s instructions to connect the base beams or panels securely. Ensure that the base is level and properly aligned.
- Erect the Frame: Once the base is in place, start erecting the frame of the greenhouse. Connect the frame pieces according to the instructions, making sure that everything is secure and level. Use the recommended tools, such as screws or bolts, to secure the frame elements together.
- Install the Panels and Windows: Once the frame is assembled, it’s time to attach the panels or windows. Carefully align each panel or window with the corresponding frame section and secure them in place. Make sure that they fit tightly and provide a proper seal.
- Ventilation and Door Installation: Install any ventilation windows or vents according to the manufacturer’s instructions. These components are important for regulating temperature and airflow in the greenhouse. Also, install the greenhouse door, ensuring it opens and closes smoothly.
- Secure the Structure: Once the greenhouse frame, panels, windows, and doors are in place, double-check all connections to ensure they are secure. Strengthen any weak points or make necessary adjustments to provide additional stability.
- Inspect for Any Gaps or Leaks: Conduct a thorough inspection of the greenhouse structure to identify any gaps or potential leaks. Seal any openings or cracks to prevent drafts, water infiltration, or pest entry.
- Test the Functionality: Before proceeding further, test the functionality of the greenhouse. Open and close windows and vents, check the operation of the door, and ensure that all components are working as intended.
By carefully following the manufacturer’s instructions and taking the time to assemble the greenhouse kit with precision, you will ensure a sturdy and functional structure for your plants. Always refer back to the instructions whenever you have doubts or need clarification on any step of the assembly process.
Installing the Foundation and Base Frame
The foundation and base frame are essential components of your greenhouse, providing stability and support to the entire structure. Follow these steps to properly install the foundation and base frame for your greenhouse:
- Prepare the Area: Clear the ground where you plan to install the foundation. Remove any vegetation, rocks, or debris that may interfere with the installation process. Ensure that the area is level and well-drained.
- Choose the Foundation Type: Select the appropriate foundation type based on your greenhouse kit and local building codes. Common options include concrete slabs, gravel beds, or pressure-treated wood frames. Consider factors such as budget, climate, and personal preference when deciding on the ideal foundation type.
- Mark the Foundation Dimensions: Use stakes and strings to mark the desired dimensions of the foundation. Ensure that the dimensions align with the greenhouse kit’s specifications and allow for sufficient space around the structure for pathways and working areas.
- Excavate the Area: Begin excavating the foundation area, following the marked dimensions. Remove the topsoil and dig to the appropriate depth, considering factors such as local building codes and the recommended depth for your foundation type.
- Level the Excavated Area: Use a level to ensure that the excavated area is level and even. Make any necessary adjustments by adding or removing soil as needed. A level foundation is crucial for the stability of your greenhouse.
- Create a Bed of Gravel: If you’re opting for a gravel bed foundation, spread a layer of crushed gravel evenly across the excavated area. The gravel will aid in drainage and provide a solid base for the greenhouse frame.
- Pour Concrete or Assemble the Base Frame: If you’re choosing a concrete foundation or a pressure-treated wood frame, follow the specific instructions for that foundation type. Pour concrete into the excavated area or construct the base frame according to your kit’s instructions. Ensure that the foundation is level and secure.
- Attach the Base Frame to the Foundation: If you’ve created a separate base frame, secure it to the foundation using anchor bolts or screws. Ensure that the base frame is securely fastened to the foundation, providing a solid connection between the foundation and the greenhouse structure.
- Check for Levelness: Use a level to verify that the base frame is level in all directions. Make any necessary adjustments by shimming or adjusting the base frame legs. A level base frame is crucial for the proper alignment and stability of the greenhouse.
- Inspect Connections and Reinforce if Needed: Double-check all connections between the foundation, base frame, and greenhouse kit. Reinforce any weak points or make necessary adjustments to provide additional stability.
- Ensure Proper Drainage: Verify that the foundation and base frame allow for proper water drainage. Ensure there are no areas where water can collect and potentially cause damage to the foundation or the greenhouse structure.
By following these steps, you will ensure a solid foundation and base frame for your greenhouse. A sturdy foundation will provide stability and support, allowing you to build the rest of the greenhouse structure with confidence.
Erecting the Greenhouse Frame
The greenhouse frame forms the structural skeleton of your greenhouse, providing support for the walls, roof, and other components. Follow these steps to properly erect the greenhouse frame:
- Gather the Materials: Ensure that you have all the necessary materials and components for the greenhouse frame assembly. Refer to the manufacturer’s instructions to verify that you have everything you need.
- Identify the Parts: Familiarize yourself with the different parts of the greenhouse frame. Sort and organize them accordingly to make the assembly process more efficient.
- Start with the Base: Begin assembling the greenhouse frame by attaching the frame elements to the base or foundation. Follow the manufacturer’s instructions, ensuring that each component is securely fastened to the base.
- Connect the Frame Pieces: Connect the frame pieces as directed in the instructions. This may involve using screws, bolts, or other fasteners provided with the kit. Ensure that each connection is tight and secure to maintain the stability of the frame.
- Follow the Sequence: Assemble the greenhouse frame in the sequence specified by the manufacturer. This will ensure that each piece fits correctly and that the frame is properly aligned for the subsequent steps.
- Check for Squareness: Use a tape measure or carpenter’s square to check the frame for squareness during the assembly process. This will help ensure that the greenhouse is properly aligned and prevents any distortions or alignment issues later on.
- Use Braces or Reinforcements: Depending on the design and size of the greenhouse, you may need to add braces or reinforcements to certain areas of the frame. Follow the manufacturer’s instructions to determine where additional support is required and install these components as necessary.
- Secure the Frame: Once the greenhouse frame is fully assembled, double-check that all connections are tight and secure. Make any necessary adjustments or tighten any loose components to ensure the stability and durability of the frame.
- Inspect for Safety: Perform a safety inspection of the erected frame to ensure that there are no sharp edges or protruding elements that may pose a risk of injury. Smooth out any rough edges or cover them with protective caps as needed.
- Consider Wind and Snow Loads: If you live in an area prone to high winds or heavy snowfall, consider reinforcing the greenhouse frame to withstand these loads. Additional bracing or anchoring may be necessary to ensure the stability of the structure.
- Consult the Instructions: Always refer to the manufacturer’s instructions throughout the process. These instructions are specific to your particular greenhouse kit and will provide guidance on proper frame assembly and any additional considerations.
By following these steps and carefully following the manufacturer’s instructions, you will successfully erect the greenhouse frame. A sturdy frame is crucial for the structural integrity of your greenhouse, providing the necessary support for the subsequent steps of the installation process.
When building a greenhouse using a kit, make sure to carefully read and follow the instructions provided. Take your time during the assembly process to ensure a sturdy and functional structure.
Attaching the Panels and Windows
Attaching the panels and windows to your greenhouse frame is an important step in completing the structure and creating a secure enclosure for your plants. Follow these steps to properly attach the panels and windows:
- Prepare the Panels: Prior to attaching the panels, ensure that they are clean and free from any dust or debris. Wipe them down with a soft cloth or clean them according to the manufacturer’s instructions to ensure optimal clarity and transparency.
- Identify the Panel Types: Different greenhouse kits may include various types of panels, such as polycarbonate, glass, or plastic. Identify the correct panel types and make sure you have the appropriate hardware or edging strips for attaching them securely.
- Start with the Roof Panels: Begin by attaching the roof panels to the greenhouse frame. Follow the manufacturer’s instructions for the specific method of attachment. This may involve using clips, screws, or other fasteners provided with the kit.
- Work from the Top Down: As you attach the panels, work your way down from the roof to the walls. Ensure that each panel is properly aligned and fits securely within the designated frame section. Make any necessary adjustments to achieve a tight fit.
- Seal the Edges: Once the panels are in place, seal the edges to prevent water infiltration and ensure insulation. Apply an appropriate sealant or use edging strips recommended in the instructions to create a watertight seal.
- Attach Windows and Ventilation Panels: Install any windows or ventilation panels according to the manufacturer’s instructions. These components are important for regulating temperature and airflow within the greenhouse. Ensure they fit securely and are easily operable.
- Consider Security: Depending on your location and security concerns, you may want to consider adding additional measures to secure the panels and windows. Options include using locking devices or installing security films on glass panels to deter unauthorized access.
- Inspect for Air Leaks: After attaching the panels and windows, inspect the greenhouse for any gaps or air leaks. These can compromise temperature and humidity control. Seal any openings with appropriate weatherstripping or sealants to ensure a tight seal.
- Clear and Clean: Remove any adhesive or sealant residues from the panels or windows, following the manufacturer’s instructions. Clean the surfaces as needed, ensuring proper visibility and minimizing the risk of water staining or mold growth.
- Test the Functionality: Once all the panels and windows are attached, test their functionality. Open and close windows, check that ventilation panels operate smoothly, and ensure that the panels provide sufficient light transmission for optimal plant growth.
By following these steps and carefully adhering to the manufacturer’s instructions, you will properly attach the panels and windows to your greenhouse. This will create a secure and well-insulated environment for your plants, allowing them to thrive in the controlled conditions you provide.
Read more: How To Build A Foundation For A Greenhouse
Ventilation and Temperature Control
Proper ventilation and temperature control are crucial for maintaining a healthy and productive greenhouse environment. Here are some important considerations to ensure optimal ventilation and temperature regulation:
- Natural Ventilation: Utilize natural ventilation by incorporating windows, vents, or louvers into your greenhouse design. These openings allow for the circulation of fresh air and the release of excess heat, helping to regulate the temperature inside the greenhouse.
- Strategic Placement of Vents: Position vents or windows at opposite ends of the greenhouse to encourage proper air movement. This creates a cross-ventilation effect, allowing fresh air to enter at one end and flow out the other, maintaining a consistent and well-ventilated environment.
- Automatic Vent Openers: Consider installing automatic vent openers that respond to changes in temperature. These devices use a heat-sensitive mechanism to automatically open and close vents based on temperature fluctuations, ensuring efficient ventilation without the need for manual intervention.
- Shade Cloth: Use shade cloth or shade systems to reduce excessive heat buildup on hot, sunny days. This helps prevent temperature spikes that can stress and damage plants. Choose a shade cloth with an appropriate level of shade percentage based on your climate and the type of plants you are growing.
- Circulation Fans: Install circulation fans to improve air circulation within the greenhouse. A gently moving air mass helps prevent stagnant air pockets and reduces the risk of fungal diseases. Position the fans strategically to ensure optimal airflow and minimize turbulence.
- Thermostatic Controls: Implement thermostatic controls to maintain the desired temperature range within your greenhouse. These devices automatically activate heating or cooling systems, such as heaters or evaporative coolers, to maintain the set temperature threshold, ensuring optimal growing conditions for your plants.
- Monitoring and Adjustment: Regularly monitor the temperature and humidity levels inside your greenhouse. Invest in a thermometer and hygrometer to accurately measure these parameters. Make necessary adjustments to the ventilation, shading, or heating systems based on the collected data to maintain optimal conditions for your plants.
- Proper Insulation: Insulate your greenhouse to reduce heat loss during colder months and prevent excessive heat gain in hotter months. This can be achieved by using double-layered polycarbonate panels, installing bubble wrap insulation, or adding insulation blankets in the colder seasons.
- Consideration of Plant Needs: Different plants have varying temperature requirements. Group plants with similar temperature preferences together within the greenhouse, allowing for more precise temperature control. Create microclimates by using thermal barriers or movable partitions to further meet the specific needs of different plant species.
- Emergency Backup Plan: Have a contingency plan for extreme temperature events, such as heatwaves or cold snaps. Utilize backup heating or cooling methods, such as portable heaters or evaporative cooling systems, to ensure the survival of your plants during such occasions.
By implementing these strategies, you can maintain optimal ventilation and temperature control in your greenhouse. This helps create a conducive environment for plant growth and allows you to adjust the conditions to meet the specific needs of your plants throughout the year.
Setting Up Irrigation and Watering Systems
Proper irrigation and watering systems are essential for providing your greenhouse plants with the right amount of water, ensuring their health and productivity. Here are some key considerations for setting up irrigation and watering systems:
- Determine Water Requirements: Understand the water requirements of the plants you are growing in your greenhouse. Different plants have different needs, so it’s important to research and determine the optimal watering schedule and quantity for each plant variety.
- Choose a Water Source: Identify a reliable water source for your greenhouse. This can be a dedicated water line, rainwater collection system, or well water. Ensure that the water source is easily accessible and can provide sufficient water for your plants’ needs.
- Irrigation Method: Select an appropriate irrigation method based on your greenhouse’s size, plant variety, and water requirements. Common options include drip irrigation, sprinkler systems, or soaker hoses. Each method has its advantages, so choose the one that best suits your needs and provides efficient water delivery.
- Install Drip Irrigation: Drip irrigation is a popular and efficient method for greenhouse watering. Lay out the drip lines along the plant beds or rows, positioning the emitters close to the plants’ root zones. Ensure that the lines are securely installed and provide uniform water distribution.
- Automate Irrigation: Consider automating your greenhouse irrigation system for ease and consistency. Use a timer or a programmable irrigation controller to regulate the watering schedule and duration. This ensures that your plants receive water at the right time and in the right amounts, even when you’re not present.
- Watering Frequency: Establish a watering schedule based on the water requirements of your plants, taking into account factors such as soil moisture levels, temperature, and humidity. Avoid overwatering or underwatering by monitoring the soil moisture regularly using a moisture meter or simply visually inspecting the soil.
- Consider Water Conservation: Incorporate water conservation practices in your greenhouse by utilizing techniques such as mulching, which helps retain moisture in the soil, reducing water evaporation. Additionally, consider collecting and utilizing rainwater or recycling runoff water for irrigation purposes.
- Monitor and Adjust: Regularly assess the effectiveness of your irrigation system and make any necessary adjustments. Ensure that all emitters, pipes, and connections are functioning properly and not clogged. Monitor plant health and adjust the watering schedule or duration if you observe signs of overwatering or underwatering.
- Hand Watering: In addition to automated irrigation, there may be instances where hand watering is necessary, such as when starting seedlings or providing supplementary watering to specific plants. Use a watering can or a handheld hose with a gentle spray nozzle to ensure precise and controlled water application.
- Maintain Watering Equipment: Regularly maintain and clean your watering equipment to prevent clogs and ensure optimal performance. Flush out irrigation lines, clean filters, replace worn-out parts, and periodically check for leaks to keep your system running smoothly.
By implementing a well-designed irrigation and watering system, you can provide your greenhouse plants with the water they need for healthy growth and optimal productivity. Proper and efficient watering practices can help minimize water waste and ensure that your plants thrive in a well-hydrated environment.
Adding Shelving and Benches
Adding shelving and benches to your greenhouse is a practical and efficient way to maximize the use of space and organize your plants and gardening tools. Here are some key considerations when adding shelving and benches to your greenhouse:
- Evaluate Your Needs: Consider the type of plants you will be growing and the equipment you will be using in your greenhouse. Assess your storage needs for pots, trays, gardening tools, and supplies. This will help you determine the quantity and size of shelving and benches required.
- Choose the Right Materials: Select materials that are suitable for the greenhouse environment. Opt for materials that are durable, resistant to moisture and humidity, and easy to clean. Common options include aluminum, galvanized steel, or plastic-coated wire shelving, as well as benches made from treated or naturally rot-resistant wood.
- Plan the Layout: Determine the optimal placement and layout of the shelving and benches. Consider factors such as available space, accessibility, and the specific requirements of your plants. Allow enough room for maneuvering and ensure that shelves or benches do not obstruct windows or obstruct airflow.
- Height and Spacing: Consider the heights and spacing between shelves or bench tiers. This will depend on the types of plants you will be growing and the amount of vertical space they require. Ensure that there is sufficient space between shelves or benches to accommodate plant growth and allow for effective light penetration.
- Stability and Weight Capacity: Ensure that the shelving units and benches are stable and can support the weight of your plants and gardening equipment. Secure shelves and benches to the greenhouse walls or frame if necessary. Avoid overloading shelves or benches to prevent them from tipping or collapsing.
- Adjustable Shelving: Consider using adjustable shelving units to accommodate plants of varying heights and allow for flexibility in organizing your greenhouse space. Adjustable shelves can be moved up or down as needed, providing a customized storage solution for your plants and gardening supplies.
- Multi-Level Benches: Utilize multi-level benches to maximize vertical space in your greenhouse. These benches typically have multiple tiers, allowing you to add more plants without taking up additional floor space. This is especially useful for smaller greenhouses or when working with limited square footage.
- Benches with Storage: Choose benches that come with built-in storage options, such as shelves or cabinets underneath. These additional storage spaces can be used to store gardening tools, plant labels, fertilizers, or other supplies, keeping them organized and easily accessible.
- Consider Work Surface and Potting Areas: Allocate space for a dedicated work surface or potting area within your greenhouse. This can be a separate bench specifically designed for potting plants or a flat work surface incorporated into your shelving system. This area will provide a convenient space for tasks such as repotting, seed starting, and plant maintenance.
- Maintenance and Cleaning: Regularly clean and sanitize your shelving and benches to prevent the buildup of dirt, dust, or plant debris. This will help maintain a clean and healthy environment for your plants. Consider materials that are easy to wipe or hose down, and remove any clutter or unused items to keep your greenhouse organized.
By carefully selecting and arranging shelving and benches in your greenhouse, you can optimize your space and create an organized and efficient working area. Investing in functional and sturdy storage solutions will help make your greenhouse a productive and enjoyable space for your gardening endeavors.
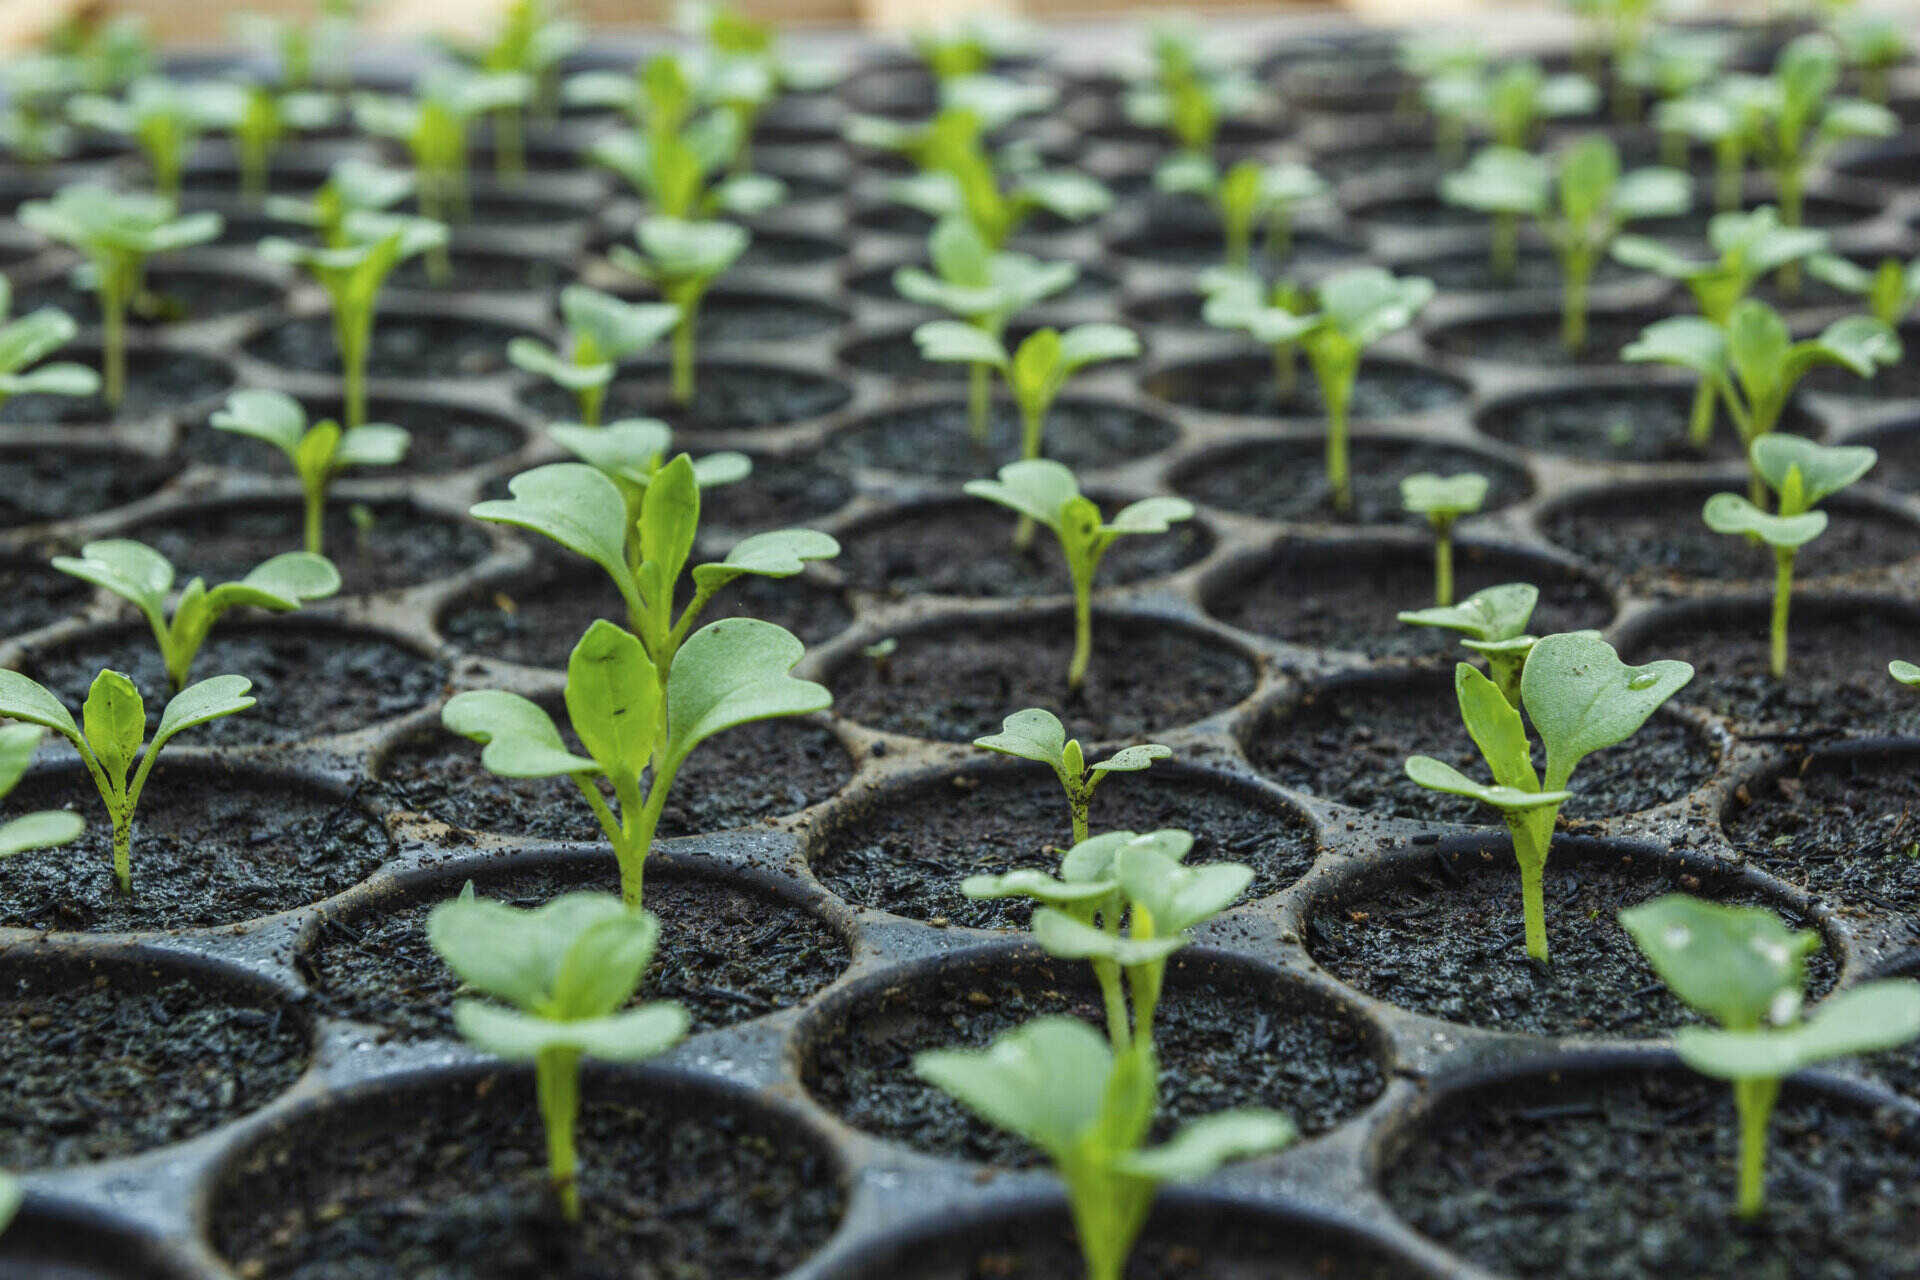
Choosing the Right Plants for Your Greenhouse
When it comes to selecting plants for your greenhouse, there are several factors to consider to ensure their success and maximize the potential of your space. Here are some key considerations when choosing plants for your greenhouse:
- Climate Compatibility: Consider the climate conditions in your area and choose plants that thrive in those conditions. Greenhouses offer more control over temperature and humidity, allowing you to create a microclimate, but it’s still important to select plants that are well-suited to your local climate.
- Plant Size and Growth Habit: Evaluate the size and growth habit of the plants you intend to grow. Consider both the height and spread of the mature plants to ensure they will have sufficient space in the greenhouse. Take into account factors such as vertical gardening options, trellises, or pruning techniques for plants that tend to grow tall or spread out.
- Light Requirements: Assess the amount of sunlight your greenhouse receives and match it with the light requirements of the plants you want to grow. Some plants thrive in full sun, while others prefer partial shade. Ensure that your greenhouse provides the necessary light intensity and duration for the plants you choose.
- Watering and Humidity Needs: Different plants have varying water requirements. Consider the watering and humidity needs of the plants you want to grow in your greenhouse. Ensure that your irrigation system or watering practices can meet their specific needs, whether they prefer consistently moist soil or prefer drier conditions.
- Growing Season and Harvest Time: Consider the duration of the growing season for the plants you select. Some plants have shorter growing seasons and can be harvested relatively quickly, while others require longer periods of time to reach maturity. Plan your planting schedule accordingly to optimize the use of your greenhouse throughout the year.
- Companion Planting: Explore the concept of companion planting by selecting plant species that work well together and benefit each other. Some plants have symbiotic relationships where they enhance growth, deter pests, or provide nutrient balance when grown together. Take advantage of companion planting to improve overall plant health and productivity.
- Edible vs. Ornamental: Determine whether you want to focus on growing edible plants, such as herbs, vegetables, or fruits, or if you prefer ornamental plants like flowers or tropical foliage plants. A combination of both can offer a visually appealing and productive greenhouse. Consider your personal preferences and the purpose of your greenhouse when making this decision.
- Plant Succession and Rotation: Plan for plant succession and rotation to maximize the use of your greenhouse space. This involves planting new crops as others are harvested, ensuring a continuous supply of fresh produce or vibrant flowers throughout the year. Rotate plant families to prevent the buildup of pests or diseases in the soil.
- Experiment and Diversity: Don’t be afraid to experiment and try new plant varieties in your greenhouse. Greenhouses provide an excellent opportunity to test out less commonly grown or exotic plants. Consider adding a variety of plants to create a diverse and vibrant ecosystem within your greenhouse.
- Ease of Care: Consider your level of gardening experience and the amount of time you can dedicate to greenhouse care. Choose plants that suit your skill level and available time for maintenance. Some plants may require more attention and specific care, while others are more forgiving and low-maintenance.
By considering these factors and making informed decisions, you can create a greenhouse filled with plants that will thrive and offer a bountiful harvest or a visually stunning display. Remember to regularly assess and adapt your plant selections based on their performance and your evolving gardening goals.
Maintaining and Caring for Your Greenhouse
Maintaining and caring for your greenhouse is crucial for ensuring the health and success of your plants. Regular upkeep helps create an optimal growing environment and maximizes the longevity of your greenhouse structure. Here are some essential maintenance tasks to keep in mind:
- Cleanliness: Regularly clean your greenhouse to remove dirt, dust, and debris. Sweep the floors, wash the windows, and disinfect surfaces to prevent the buildup of pests and diseases. A clean greenhouse promotes better plant growth and reduces the risk of contamination.
- Ventilation: Ensure proper ventilation by regularly checking and cleaning vents, windows, and fans. Remove any obstructions that may impede air circulation. Clean or replace filters in ventilation systems to maintain efficient airflow and prevent dust buildup.
- Irrigation System: Regularly inspect your irrigation system for leaks, clogs, or broken parts. Clean or replace clogged emitters or sprinkler heads. Adjust watering schedules based on seasonal changes, plant requirements, and weather conditions. Keep an eye on soil moisture levels to prevent overwatering or underwatering.
- Pest and Disease Control: Monitor your greenhouse for pests and diseases regularly. Implement integrated pest management strategies, such as using beneficial insects or biological controls, to manage pest populations. Inspect plants for signs of diseases and promptly remove infected plants to prevent the spread.
- Fertilization: Provide your plants with proper nutrition by regularly fertilizing them. Monitor nutrient levels in the soil and use organic or water-soluble fertilizers as appropriate. Follow manufacturer instructions for dosage and application. Be cautious not to over-fertilize, as this can lead to nutrient imbalances or damage to plants.
- Pruning and Training: Prune and train your plants as needed to maintain shape, promote growth, and improve air circulation. Remove dead or damaged foliage, pinch back growth tips to encourage branching, and provide support for vining or tall plants. Regular pruning helps prevent overcrowding and enhances the overall health of your plants.
- Weed Control: Stay vigilant against weeds in your greenhouse. Regularly remove weeds as they appear to prevent competition for nutrients and space. Consider using mulch or weed barriers to suppress weed growth and save yourself from continual weeding tasks.
- Monitor Environmental Conditions: Regularly monitor temperature, humidity levels, and light intensity within your greenhouse. Adjust climate controls as needed to provide optimal conditions for your plants. Install shade cloth during hot seasons to prevent heat stress, and use heaters or insulation during colder months to protect plants from cold damage.
- Equipment Maintenance: Regularly inspect and maintain your gardening equipment. Clean and sharpen tools such as pruners, shears, and shovels. Lubricate moving parts of mechanical equipment such as fans, motors, or hinges. Proper maintenance ensures that your tools perform optimally and last longer.
- Plant Inspection: Routinely inspect your plants for signs of stress, pests, or diseases. Look for yellowing leaves, wilting, unusual spots, or insects. Early detection allows for prompt intervention and prevents further damage. Remove and dispose of any infected or infested plants to protect the health of other plants.
By following a regular maintenance routine and attending to the specific needs of your greenhouse, you create an environment that fosters healthy plant growth and ensures the longevity of your structure. Dedicate time to caring for your greenhouse, and you’ll be rewarded with thriving plants and a successful gardening experience.
Conclusion
Building a greenhouse in your backyard using a kit is an exciting endeavor that brings a multitude of benefits to your gardening experience. Throughout this article, we have explored the various steps and considerations involved in creating a successful greenhouse space.
By carefully choosing the right greenhouse kit, assessing your backyard space and conditions, and preparing the ground for the greenhouse, you lay the foundation for a sturdy and functional structure. Assembling the greenhouse frame, attaching the panels and windows, and implementing proper ventilation and temperature control ensure an optimal growing environment for your plants.
Setting up irrigation and watering systems, adding shelving and benches, and choosing the right plants for your greenhouse contribute to the productivity and organization of the space. Maintaining and caring for your greenhouse through regular cleaning, proper ventilation, pest control, and plant care practices will ensure the health and longevity of both your plants and the greenhouse structure.
Remember to continuously monitor and make adjustments as needed, such as amending the irrigation schedule, implementing pest management strategies, or pruning and training your plants. By staying attentive and proactive, you can create a thriving ecosystem that yields bountiful harvests, vibrant blooms, and a space of tranquility and joy.
Whether you’re a novice gardener or an experienced plant enthusiast, building a greenhouse in your backyard opens up a world of possibilities. It offers the opportunity to grow a wider variety of plants, extend your growing season, and provide optimal growing conditions. Not only will you reap the rewards of your efforts through beautiful and abundant plants, but you’ll also find solace and relaxation in your greenhouse oasis.
So, start planning and building your greenhouse today. Let your imagination and green thumb run wild as you embark on this green and sustainable journey. Happy gardening!
Frequently Asked Questions about How To Build A Greenhouse In Your Backyard Using A Kit
Was this page helpful?
At Storables.com, we guarantee accurate and reliable information. Our content, validated by Expert Board Contributors, is crafted following stringent Editorial Policies. We're committed to providing you with well-researched, expert-backed insights for all your informational needs.


0 thoughts on “How To Build A Greenhouse In Your Backyard Using A Kit”