Home>Gardening & Outdoor>Landscaping Ideas>How To Remove Grass Cloth Wallpaper
Landscaping Ideas
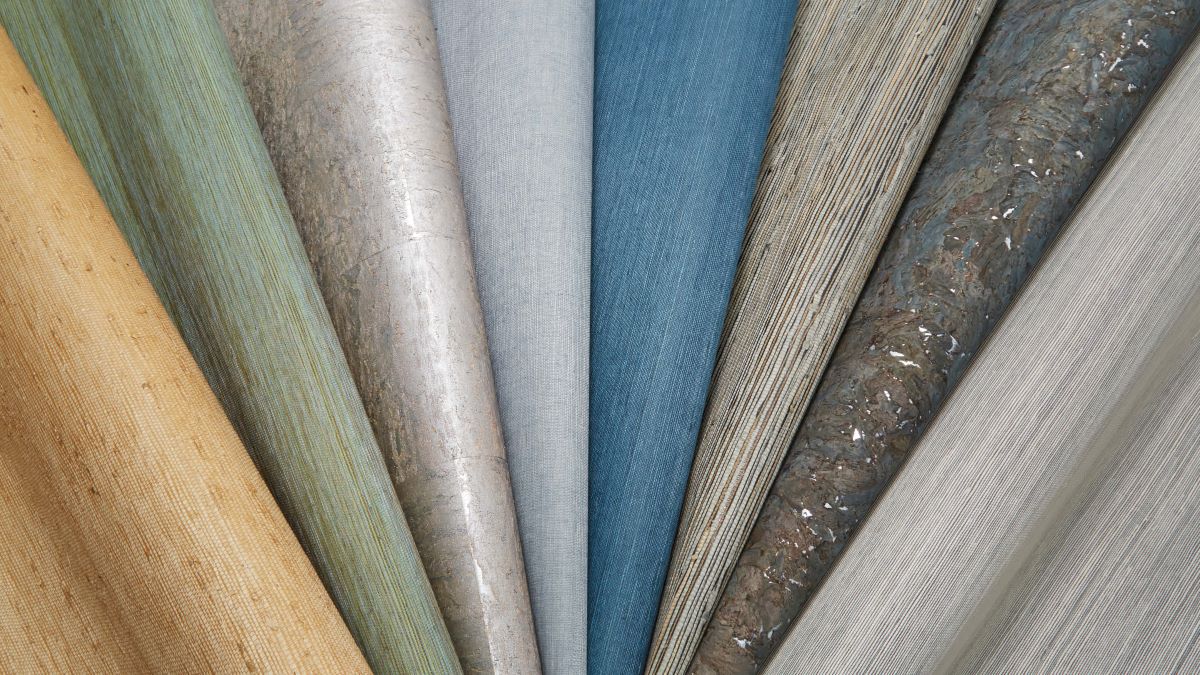
How To Remove Grass Cloth Wallpaper
Modified: August 27, 2024
Learn effective landscaping ideas and tips on how to remove grass cloth wallpaper. Explore step-by-step instructions for a smooth wallpaper removal process.
(Many of the links in this article redirect to a specific reviewed product. Your purchase of these products through affiliate links helps to generate commission for Storables.com, at no extra cost. Learn more)
Introduction
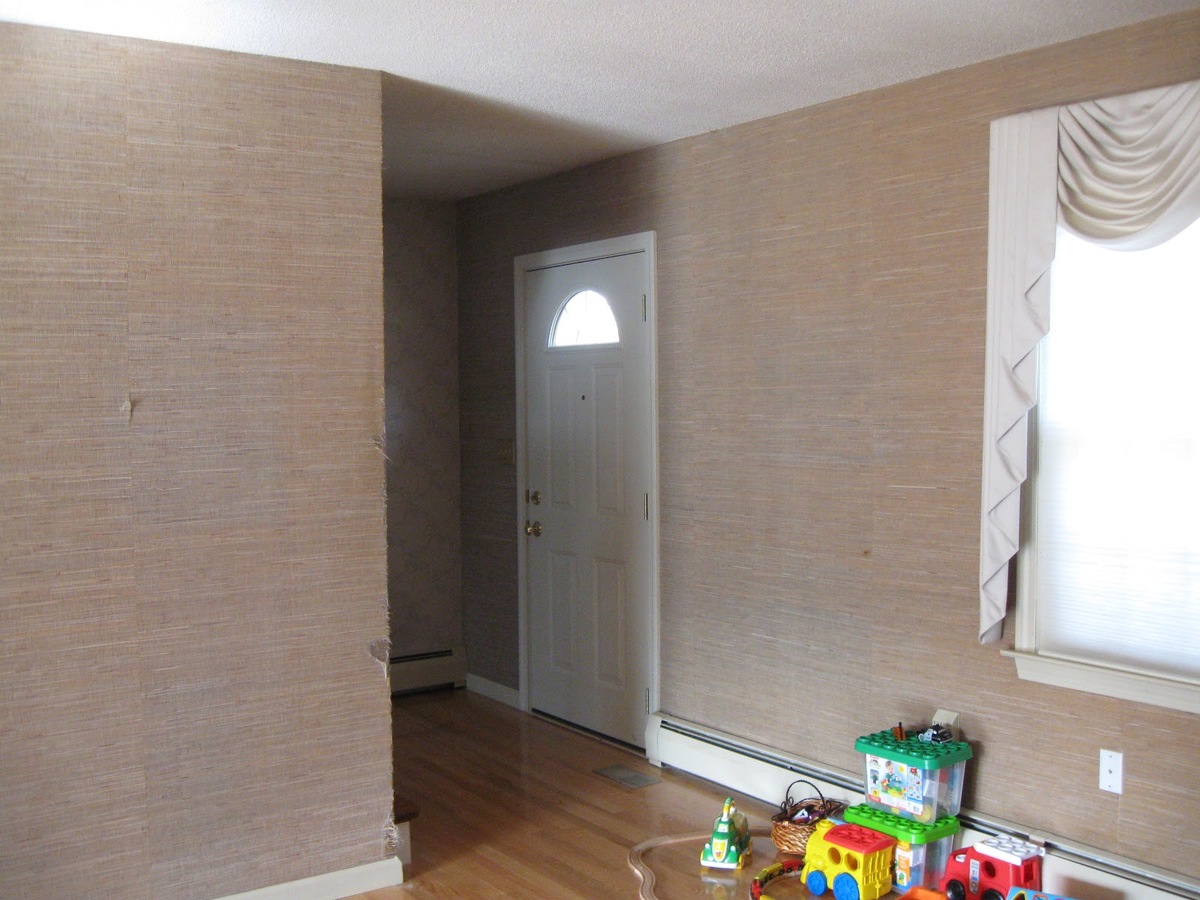
Removing grass cloth wallpaper can be a challenging yet rewarding home improvement project. Whether you're preparing to repaint your walls or simply want to update your home's aesthetic, taking the time to properly remove this type of wallpaper can make a significant difference in the overall appearance of your space. While the task may seem daunting at first, with the right tools, techniques, and a bit of patience, you can effectively remove grass cloth wallpaper without causing damage to the underlying walls.
In this comprehensive guide, we will walk you through the step-by-step process of removing grass cloth wallpaper, providing you with valuable tips and insights to ensure a successful outcome. By following these instructions and arming yourself with the necessary supplies, you can tackle this project with confidence and achieve professional-looking results. So, roll up your sleeves, gather your supplies, and let's get started on transforming your walls!
Key Takeaways:
- Removing grass cloth wallpaper requires patience, the right tools, and preparation. By testing a small area first, applying the stripping solution, and methodically scraping off the wallpaper, you can achieve a smooth, clean wall surface.
- After removing the wallpaper, thorough cleaning and wall preparation are essential. This final step ensures the walls are ready for new treatments, such as painting or applying new wallpaper, allowing for a refreshed and revitalized living space.
Read more: How To Remove Grass Stains From Clothes
Step 1: Gather Your Supplies
Before diving into the wallpaper removal process, it's essential to gather all the necessary supplies. Having the right tools at your disposal will not only streamline the project but also ensure that you can address any challenges that may arise along the way. Here's a list of items you'll need:
- Wallpaper Stripper: Invest in a high-quality wallpaper stripper solution or concentrate, as this will be the primary agent for loosening the adhesive and facilitating the wallpaper removal process.
- Scraper or Spatula: A wide, sturdy scraper or spatula will be indispensable for effectively peeling off the wallpaper once it has been saturated with the stripping solution.
- Spray Bottle or Garden Sprayer: You'll need a spray bottle or garden sprayer to apply the wallpaper stripper onto the wallpapered surface evenly.
- Drop Cloths or Plastic Sheeting: To protect your floors and furnishings from potential drips and spills, lay down drop cloths or plastic sheeting in the work area.
- Protective Gear: It's crucial to prioritize safety by wearing gloves and safety goggles to shield your skin and eyes from the stripping solution and debris.
- Step Ladder: Depending on the height of your walls, a step ladder may be necessary to reach higher sections of the wallpapered area safely.
- Sandpaper: After removing the wallpaper, sandpaper will be useful for smoothing any rough patches and preparing the walls for the next steps, such as painting or applying new wallpaper.
- Clean Rags or Sponges: Keep clean rags or sponges on hand to wipe away excess stripping solution and residue from the walls.
- Bucket: A bucket will come in handy for mixing the wallpaper stripping solution and for rinsing your tools throughout the process.
By ensuring that you have all the essential supplies within reach, you can approach the wallpaper removal task with confidence and efficiency. With these tools at your disposal, you'll be well-prepared to tackle each step of the removal process and achieve a smooth, clean wall surface.
Step 2: Prepare the Room
Before you begin the process of removing grass cloth wallpaper, it’s crucial to prepare the room to minimize potential mess and protect your furnishings. Proper preparation will not only make the task more manageable but also help safeguard your home from damage. Here are the essential steps to prepare the room for wallpaper removal:
- Clear the Space: Start by removing any furniture, wall decor, or other items from the walls and the surrounding area. Clearing the space will provide you with ample room to work and prevent any obstruction during the removal process.
- Protect the Floors: Lay down drop cloths or plastic sheeting to shield the floors from drips, spills, and debris. This will help maintain the cleanliness of your space and prevent any damage to the flooring.
- Turn Off Power: As a safety precaution, consider turning off the power to any electrical outlets and light switches in the room where you’ll be working. This will minimize the risk of accidents and ensure your safety throughout the project.
- Ventilate the Room: Ensure that the room is well-ventilated by opening windows and using fans to promote air circulation. Proper ventilation will help dissipate any fumes from the stripping solution and create a more comfortable working environment.
- Protect Fixtures and Trim: Use painter’s tape to cover and protect any light fixtures, electrical outlets, baseboards, and trim in the room. This will prevent the stripping solution from coming into contact with these surfaces and causing damage.
- Inspect the Walls: Take a close look at the wallpapered walls to identify any areas that may require special attention, such as seams, corners, or areas with multiple layers of wallpaper. Understanding the condition of the walls will help you strategize the removal process more effectively.
By taking the time to prepare the room thoroughly, you can create a conducive environment for removing the grass cloth wallpaper with minimal disruption and potential damage. This proactive approach will set the stage for a smoother and more successful wallpaper removal experience.
Step 3: Test a Small Area
Before diving into the full-scale wallpaper removal process, it’s crucial to test a small area of the grass cloth wallpaper to assess its responsiveness to the stripping solution. This initial test will help you determine the most effective approach for tackling the entire wallpapered surface. Here’s how to conduct a small area test:
1. Select a Test Area: Choose a discreet section of the wallpapered wall, preferably in a less conspicuous area, to perform the test. This can be behind furniture or in a corner where any potential damage will be less noticeable.
2. Apply Wallpaper Stripper: Using a spray bottle or garden sprayer, apply the wallpaper stripping solution to the selected test area. Ensure that the solution is applied evenly and thoroughly saturates the wallpaper.
3. Observe the Reaction: Allow the stripping solution to penetrate the wallpaper for the recommended amount of time, as specified by the product instructions. Observe how the wallpaper responds to the solution, noting any changes in texture, color, or adhesion.
4. Attempt Removal: After the designated dwell time, use a scraper or spatula to gently attempt to peel off the wallpaper in the test area. Take note of the ease of removal and the condition of the underlying wall surface.
5. Assess the Results: Evaluate the results of the test, paying attention to how the wallpaper reacts to the stripping solution. If the wallpaper comes off relatively easily and without causing damage to the wall, you can proceed with confidence in treating the entire surface using the same method.
By conducting a small area test, you can gain valuable insights into the responsiveness of the grass cloth wallpaper to the stripping solution. This strategic approach will empower you to tailor your wallpaper removal technique to achieve optimal results while minimizing the risk of damage to the underlying walls.
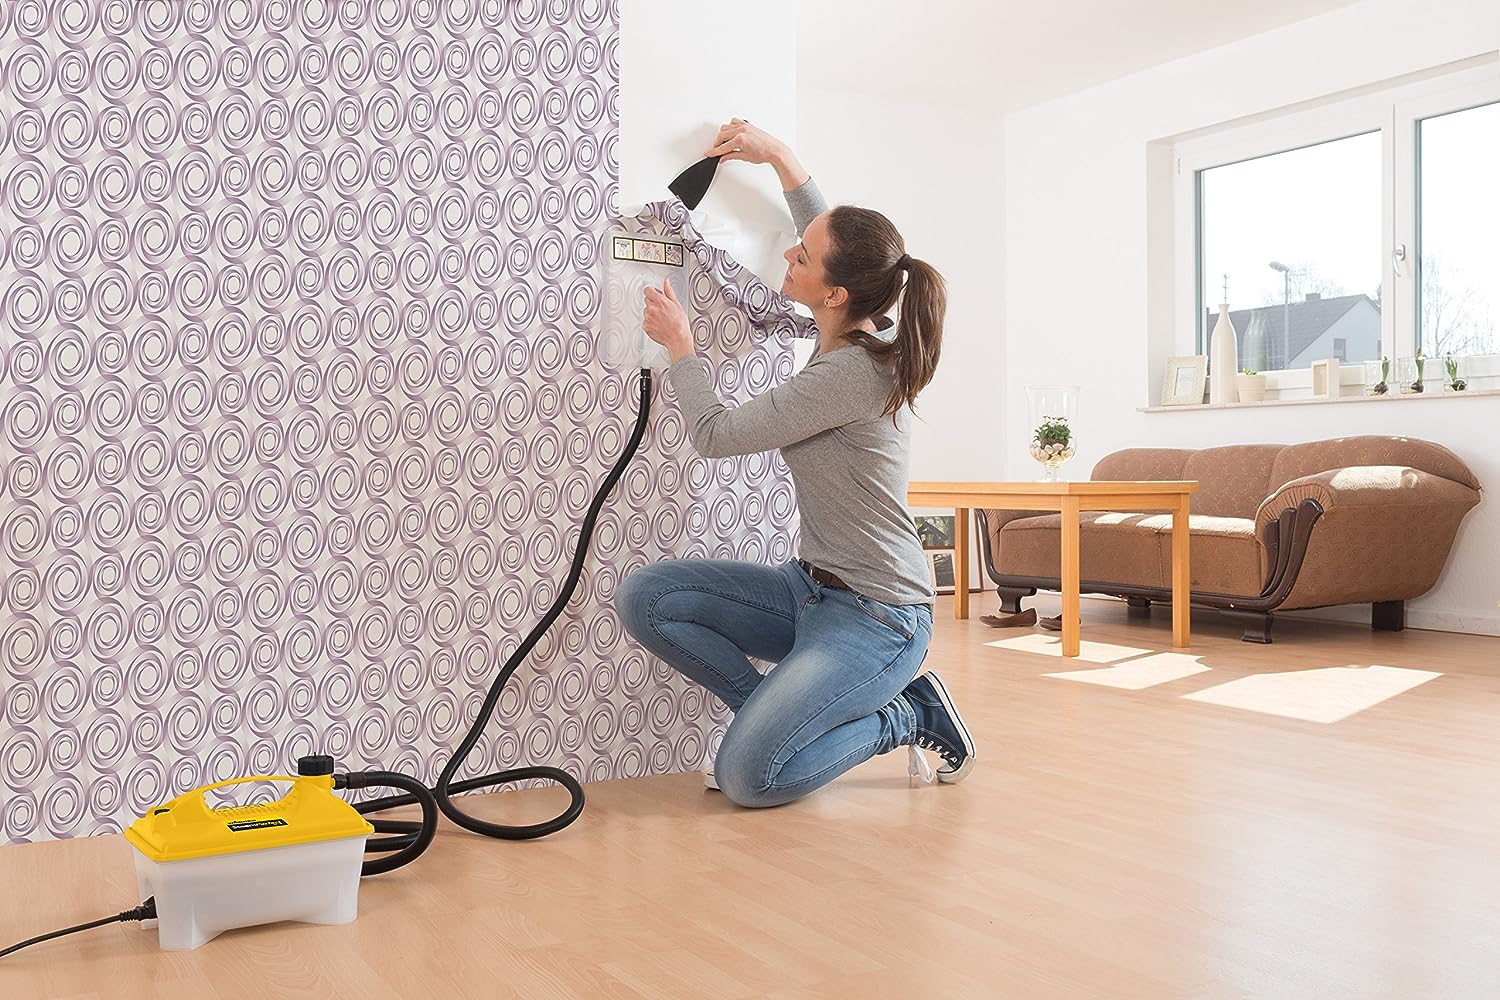
Use a wallpaper steamer to soften the adhesive, then gently peel off the grass cloth wallpaper. Be patient and work in small sections to avoid damaging the wall.
Step 4: Apply Wallpaper Stripper
Once you have tested a small area of the grass cloth wallpaper and determined the most effective approach for removal, it’s time to apply the wallpaper stripping solution to the entire wallpapered surface. This crucial step will help loosen the adhesive and prepare the wallpaper for seamless removal. Here’s how to apply the wallpaper stripper:
1. Mix the Solution: Follow the manufacturer’s instructions to prepare the wallpaper stripping solution. Whether it’s a concentrate that needs to be diluted or a ready-to-use formula, ensure that the solution is mixed according to the specified ratios for optimal effectiveness.
2. Fill the Sprayer: Pour the prepared stripping solution into a spray bottle or garden sprayer, ensuring that the container is equipped to dispense the solution evenly across the wallpapered surface.
3. Protective Gear: Prior to application, don protective gloves and safety goggles to safeguard your skin and eyes from the stripping solution and any potential debris.
4. Even Application: Starting from the top of the wall, spray the wallpaper stripping solution onto the grass cloth wallpaper in a consistent and thorough manner. Ensure that the entire surface is evenly saturated with the solution, allowing it to penetrate the wallpaper effectively.
5. Dwell Time: Allow the stripping solution to dwell on the wallpaper for the recommended duration, as specified by the product instructions. This dwell time is crucial for the solution to penetrate the wallpaper and loosen the adhesive, making the removal process more manageable.
6. Monitor the Progress: As the stripping solution works its magic, periodically check the wallpaper to observe any changes in texture, adhesion, or appearance. This will help you gauge the solution’s effectiveness in preparing the wallpaper for removal.
By applying the wallpaper stripping solution methodically and allowing it sufficient dwell time, you can effectively prime the grass cloth wallpaper for the subsequent removal process. This strategic approach sets the stage for a smoother and more efficient wallpaper removal experience, bringing you one step closer to revitalizing your walls.
Read more: How To Remove Wallpaper With Steamer
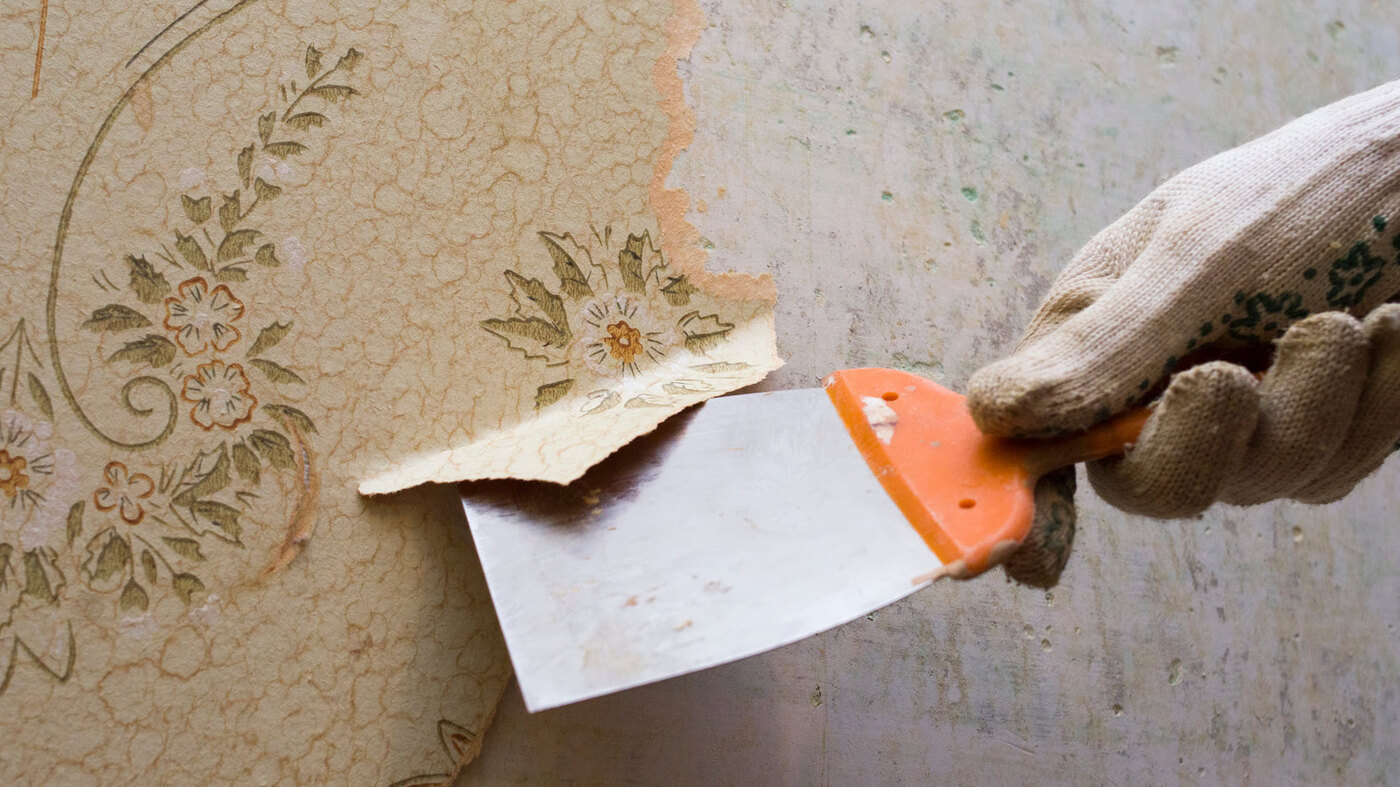
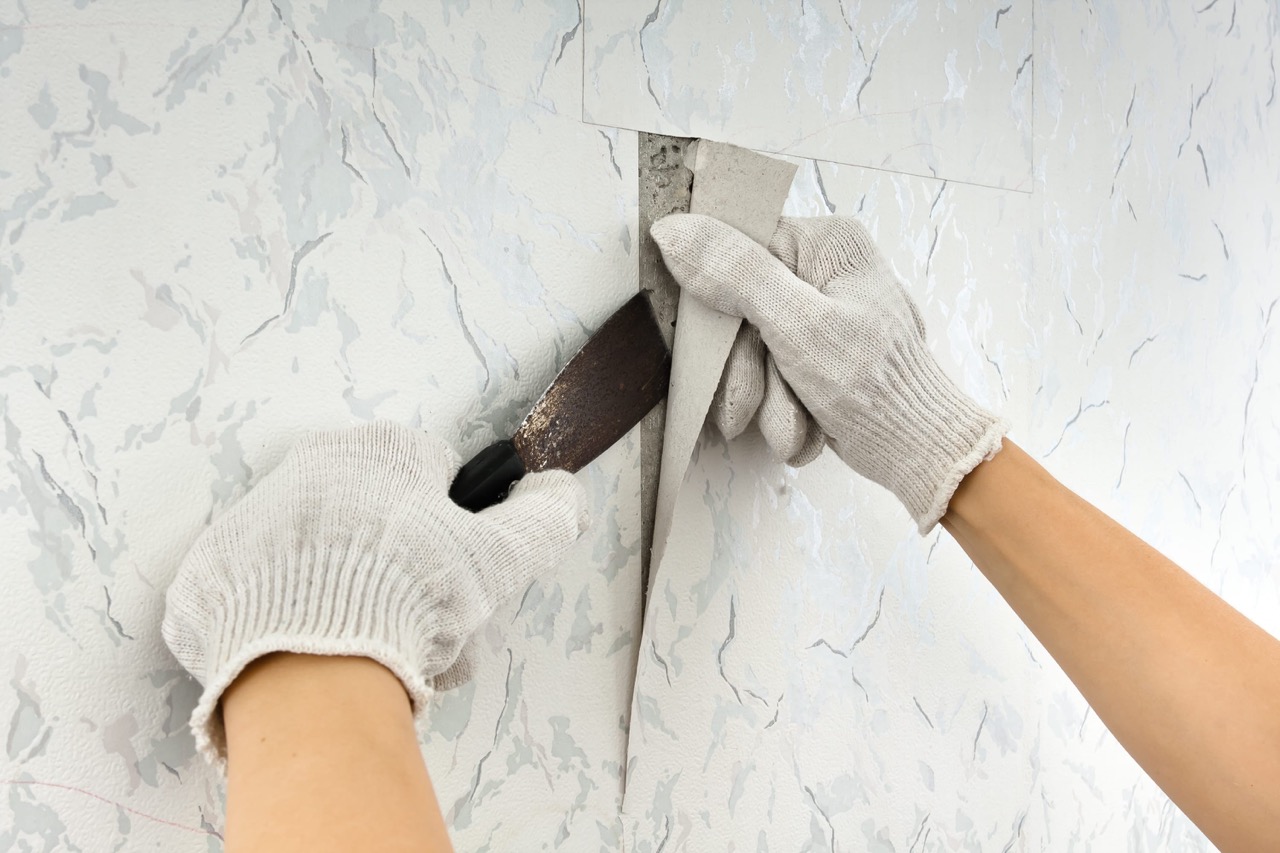
Step 5: Scrape Off the Wallpaper
After allowing the wallpaper stripping solution to work its magic and loosen the adhesive, it’s time to proceed with the physical removal of the grass cloth wallpaper. This step involves carefully scraping off the wallpaper to reveal the underlying wall surface. Here’s a detailed guide on how to effectively scrape off the wallpaper:
1. Begin at the Edges: Using a wide, sturdy scraper or spatula, start at a corner or an edge of the wallpaper. Gently lift the edge of the wallpaper to initiate the removal process, taking care not to damage the underlying wall surface.
2. Work Methodically: Once you have successfully lifted a section of the wallpaper, continue to peel it off in a methodical manner, working across the wall in manageable sections. Take your time and proceed with patience to avoid causing unnecessary damage to the walls.
3. Use a Steady Motion: Employ a steady, even motion as you scrape off the wallpaper, ensuring that you maintain consistent pressure to facilitate smooth removal. Adjust the angle of the scraper as needed to accommodate different areas of the wallpapered surface.
4. Address Stubborn Areas: In cases where certain sections of the wallpaper prove more resistant to removal, apply additional wallpaper stripping solution to these areas. Allow the solution to dwell for a few extra minutes before attempting to scrape off the stubborn wallpaper.
5. Minimize Damage: Exercise caution to minimize damage to the underlying walls as you remove the wallpaper. If you encounter resistance or stubborn adhesive, take a gentle approach to avoid gouging or scoring the wall surface.
6. Discard Removed Wallpaper: As you successfully peel off sections of the grass cloth wallpaper, discard the removed pieces into a trash bag or container to keep the work area tidy and organized.
By methodically scraping off the grass cloth wallpaper, you can gradually reveal the bare walls underneath, preparing them for the next phase of the wallpaper removal process. This careful and deliberate approach will help you achieve a clean, smooth wall surface, setting the stage for the final steps in revitalizing your walls.
Step 6: Clean the Walls
Once you have successfully removed the grass cloth wallpaper, it’s essential to thoroughly clean the walls to eliminate any residue, adhesive, or debris left behind. This final step will prepare the walls for any subsequent treatments, such as painting or applying new wallpaper. Here’s how to effectively clean the walls after wallpaper removal:
1. Remove Residual Wallpaper: Inspect the walls for any lingering bits of wallpaper or adhesive. Use a scraper, sandpaper, or a damp sponge to gently remove any remaining traces of wallpaper and adhesive from the wall surface.
2. Wash the Walls: Prepare a solution of warm water and mild dish soap or wallpaper remover. Use a clean sponge or cloth to wash the walls, focusing on areas where adhesive residue may be present. Thoroughly rinse the walls with clean water to remove any soapy residue.
3. Dry the Walls: After washing the walls, allow them to dry completely before proceeding with any additional treatments. Properly dried walls will ensure optimal adhesion for new wallpaper or paint application.
4. Inspect for Imperfections: Take the time to inspect the walls for any imperfections, such as gouges, dents, or uneven surfaces. Address any minor flaws by sanding the walls lightly and applying a suitable wall repair compound as needed.
5. Smooth the Surface: Once the walls are clean and dry, use fine-grit sandpaper to gently smooth the surface, ensuring that any remaining rough patches or imperfections are addressed. This step will promote a uniform and professional finish for subsequent wall treatments.
6. Prime the Walls (Optional): Depending on your future wall treatment plans, consider applying a primer to the walls to enhance adhesion and create a uniform surface. A primer can also help seal the walls and prevent any residual adhesive from affecting the new wall treatment.
By meticulously cleaning and preparing the walls after wallpaper removal, you can ensure that the surfaces are smooth, clean, and ready for the next phase of transformation. This final step sets the stage for applying new wallpaper, painting the walls, or simply enjoying the refreshed and revitalized appearance of your space.
Conclusion
Congratulations on successfully completing the process of removing grass cloth wallpaper from your walls! By following the comprehensive steps outlined in this guide, you have taken a significant step toward transforming your living space and preparing the walls for a fresh new look. As you reflect on the journey of wallpaper removal, it’s important to acknowledge the dedication and effort you’ve invested in revitalizing your home environment.
Throughout the removal process, you demonstrated patience, attention to detail, and a willingness to tackle challenges head-on. By carefully gathering the necessary supplies, preparing the room, and methodically executing each step, you have not only achieved the goal of removing the wallpaper but also gained valuable insights and skills in home improvement.
As you gaze upon the newly revealed walls, take pride in the accomplishment of restoring a clean and blank canvas for future enhancements. Whether you’re planning to apply a fresh coat of paint, adorn the walls with new wallpaper, or simply revel in the refreshed ambiance, the effort you’ve invested in removing the grass cloth wallpaper has set the stage for a renewed and rejuvenated living space.
Remember, the journey of home improvement is often as rewarding as the end result. Embrace the sense of accomplishment that comes with each completed step, and look forward to the exciting possibilities that await as you embark on the next phase of enhancing your home. Your dedication to creating a welcoming and aesthetically pleasing environment is a testament to your commitment to turning your house into a place you’re proud to call home.
As you move forward with your home improvement endeavors, may the knowledge and experience gained from this wallpaper removal project serve as a source of inspiration and empowerment. Your willingness to take on challenges and elevate your living space reflects a deep appreciation for the comfort and beauty of your home.
With the wallpaper removed and the walls primed for transformation, you stand poised to infuse your living space with your unique style and vision. Whether you opt for vibrant hues, elegant patterns, or a minimalist aesthetic, the clean canvas before you invites endless possibilities for personalizing and enhancing your home.
As you savor the sense of accomplishment and look ahead to future home improvement projects, remember that every step you take brings you closer to creating a space that truly reflects your personality and aspirations. Embrace the journey, celebrate your achievements, and revel in the boundless potential for transforming your living environment into a place of comfort, beauty, and inspiration.
Frequently Asked Questions about How To Remove Grass Cloth Wallpaper
Was this page helpful?
At Storables.com, we guarantee accurate and reliable information. Our content, validated by Expert Board Contributors, is crafted following stringent Editorial Policies. We're committed to providing you with well-researched, expert-backed insights for all your informational needs.
0 thoughts on “How To Remove Grass Cloth Wallpaper”