Home>Gardening & Outdoor>Outdoor Recreation & Activities>How To Fix A Trampoline Net
Outdoor Recreation & Activities
How To Fix A Trampoline Net
Modified: August 17, 2024
Learn how to fix a trampoline net and ensure safety for outdoor recreation and activities. Follow our step-by-step guide to keep your trampoline in top condition.
(Many of the links in this article redirect to a specific reviewed product. Your purchase of these products through affiliate links helps to generate commission for Storables.com, at no extra cost. Learn more)
Introduction
Trampolines are a fantastic way to enjoy the outdoors and get some exercise at the same time. Whether it's for the kids to play on or for your own fitness routine, a trampoline can provide hours of fun. However, wear and tear over time can lead to damage, and the trampoline net is one component that often needs attention. A damaged net not only compromises safety but also detracts from the overall look of the trampoline.
In this guide, we'll walk you through the process of fixing a trampoline net step by step. From assessing the damage to gathering materials, removing the old net, attaching the new net, and testing the trampoline, we've got you covered. By the end of this article, you'll feel confident in your ability to restore your trampoline to its former glory, ensuring that it remains a safe and enjoyable part of your outdoor recreation activities.
So, grab your tools and let's get started on reviving your trampoline net!
Key Takeaways:
- Assess the damage and gather materials before fixing a trampoline net to ensure safety and successful repair or replacement.
- Carefully remove the old net and attach the new one with precision, then conduct thorough testing to guarantee a safe and enjoyable trampoline experience.
Read more: How To Tie A Trampoline Net
Assessing the Damage
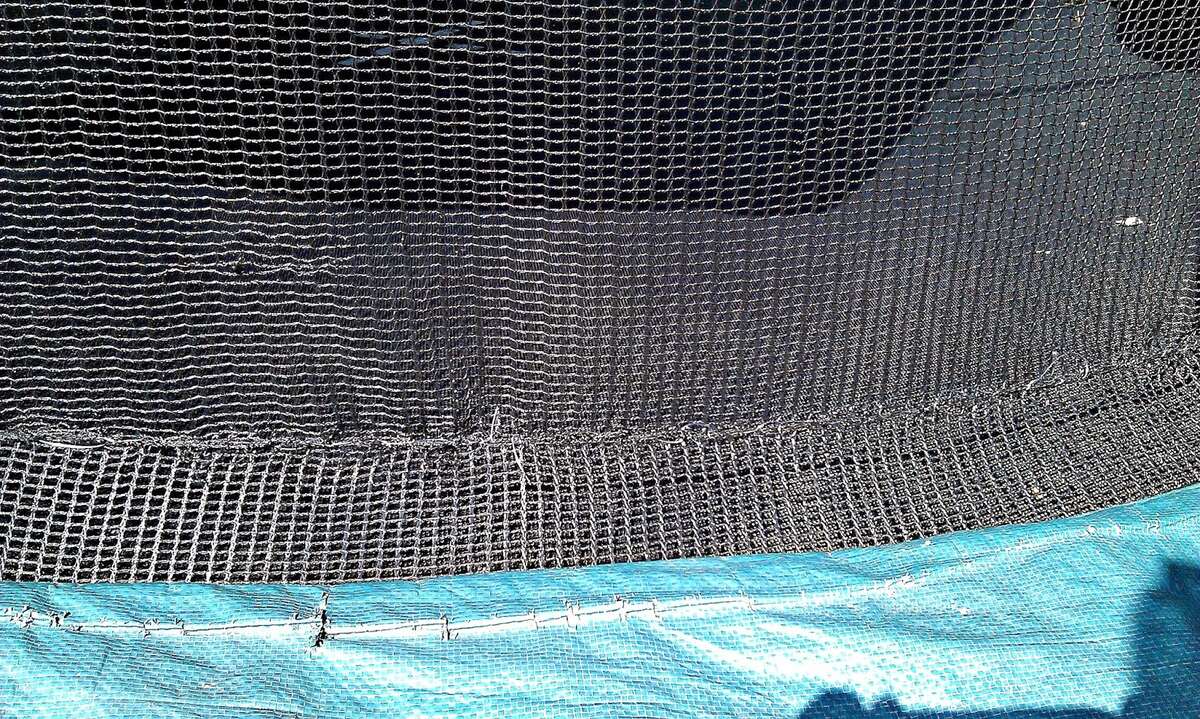
Before diving into the repair process, it’s crucial to thoroughly assess the extent of the damage to your trampoline net. Start by examining the net for any visible tears, holes, or frayed edges. Additionally, check the attachment points where the net connects to the trampoline frame or poles for signs of wear and tear.
Take note of the specific areas that require attention, and consider the overall condition of the net. Is it sagging or stretched out of shape? Are there multiple areas of damage, or is it a single tear that needs repair? Understanding the scope of the damage will help you determine whether a simple patch-up job will suffice or if a complete net replacement is necessary.
Furthermore, evaluate the condition of the trampoline frame and poles to ensure they are structurally sound and not contributing to the net’s deterioration. If any metal components are rusted or bent, they may need to be addressed before installing the new net.
Keep in mind that safety should be the top priority. Even minor damage to the net can compromise the trampoline’s safety features, so it’s essential to address any issues promptly. By thoroughly assessing the damage, you’ll be better equipped to proceed with the appropriate repair or replacement measures, ensuring that your trampoline is restored to a safe and secure condition for future use.
Gathering Materials
Before embarking on the trampoline net repair or replacement project, it’s essential to gather all the necessary materials and tools. Having everything on hand will streamline the process and prevent interruptions as you work through the steps. Here’s a list of materials and tools you’ll likely need:
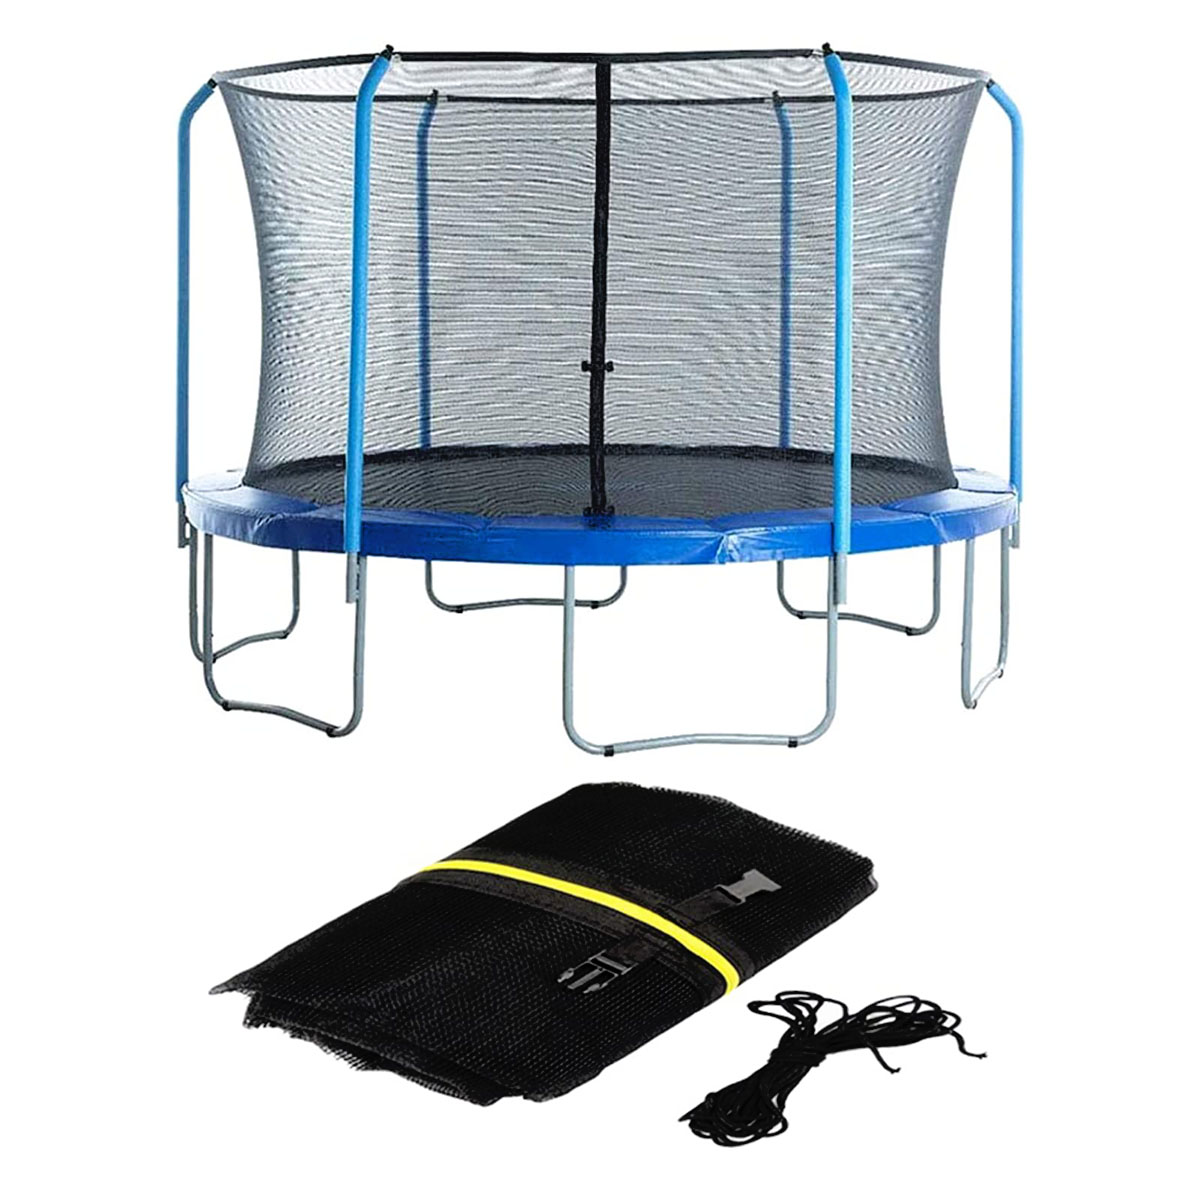
- New Trampoline Net: Ensure that the replacement net is compatible with the size and model of your trampoline. Double-check the dimensions and attachment mechanisms to guarantee a proper fit.
- Scissors or Utility Knife: These tools will be essential for cutting and trimming the net as needed during installation.
- Measuring Tape: Accurate measurements are crucial for ensuring the new net fits properly and securely.
- Zip Ties or Rope: Depending on the design of your trampoline, you may need zip ties or rope to secure the net to the frame or poles.
- Step Ladder: A sturdy step ladder will facilitate reaching the top of the trampoline for proper installation.
- Protective Gloves: Working with the net and metal components may require handling rough materials, making gloves essential for safety and comfort.
- Assistance: Enlist the help of a family member or friend to assist with holding the net in place and ensuring a smooth installation process.
By gathering these materials and tools in advance, you’ll be well-prepared to tackle the task of repairing or replacing your trampoline net. With everything at your disposal, you can proceed with confidence, knowing that you have what you need to complete the project efficiently and effectively.
Removing the Old Net
Now that you’ve assessed the damage and gathered the necessary materials, it’s time to begin the process of removing the old trampoline net. Follow these steps to ensure a safe and efficient removal:
- Clear the Area: Before starting, ensure that the area around the trampoline is clear of any obstructions. This will provide ample space for maneuvering and prevent potential accidents during the removal process.
- Detach the Net: Begin by detaching the old net from the trampoline frame or poles. Depending on the design of your trampoline, this may involve removing zip ties, unhooking clips, or releasing tension from any securing mechanisms.
- Cut and Remove: If the net is severely damaged or entangled, carefully cut it into manageable sections for easy removal. Use scissors or a utility knife to cut the net, taking care to avoid damaging the trampoline frame or other components.
- Inspect the Frame: While removing the old net, take the opportunity to inspect the trampoline frame and poles for any signs of damage or rust. Address any issues promptly to ensure that the new net installation is carried out on a sturdy and safe structure.
- Dispose of the Old Net: Once the old net is completely removed, dispose of it responsibly. If the net is still in usable condition despite minor damage, consider repurposing it for other DIY projects or recycling it if possible.
By following these steps, you’ll effectively remove the old trampoline net, clearing the way for the installation of the new net. Take your time during this process to ensure that the trampoline frame and surrounding area remain undamaged, setting the stage for a successful net replacement.
Inspect the net for any tears or holes. Use a repair kit to mend any damage. If the net is beyond repair, consider replacing it with a new one to ensure safety.
Attaching the New Net
With the old net successfully removed, it’s time to focus on attaching the new trampoline net. This step is critical for ensuring the safety and functionality of your trampoline. Follow these guidelines for a smooth and secure installation:
- Refer to the Instructions: If your replacement net comes with specific installation instructions, carefully review them before proceeding. Familiarizing yourself with the manufacturer’s guidelines can provide valuable insights for a successful installation.
- Position the Net: Begin by positioning the new net around the trampoline, ensuring that it aligns properly with the frame and poles. Enlist the help of a family member or friend to hold the net in place as you work through the attachment process.
- Secure Attachment Points: Depending on the design of your trampoline, secure the attachment points of the net to the frame or poles. This may involve using zip ties, ropes, or other fastening mechanisms to ensure a snug and stable fit.
- Adjust and Tension: As you attach the net, make any necessary adjustments to ensure that it is taut and free from sagging. Proper tension is crucial for maintaining the integrity of the net and enhancing safety during trampoline use.
- Trim Excess Material: Once the net is securely attached, carefully trim any excess material using scissors or a utility knife. This step will not only enhance the appearance of the trampoline but also prevent potential hazards caused by loose hanging netting.
- Double-Check the Fit: After attaching and trimming the net, double-check the overall fit and alignment. Ensure that the net is evenly tensioned and securely fastened, with no areas of concern that could compromise safety.
By following these steps, you’ll effectively attach the new trampoline net, restoring the safety and visual appeal of your trampoline. Attention to detail and proper alignment during installation will contribute to a successful outcome, allowing you to enjoy your trampoline with confidence.
Read more: How To Install A Net On A Trampoline
Testing the Trampoline
After successfully attaching the new trampoline net, it’s crucial to conduct a thorough testing process to ensure that the trampoline is safe and fully functional. Follow these steps to carry out a comprehensive assessment of the trampoline:
- Visual Inspection: Begin by visually inspecting the entire trampoline, paying close attention to the newly installed net, the frame, and the mat. Look for any signs of misalignment, loose components, or potential safety hazards.
- Physical Examination: Test the tension and stability of the net by gently pushing and pulling on various sections. Ensure that the net remains securely in place and that there are no areas of excessive sagging or looseness.
- Bounce Test: Carefully test the trampoline by performing a few gentle bounces to gauge its stability and the responsiveness of the net. Pay attention to any unusual sounds or movements that may indicate issues with the installation or the trampoline’s components.
- Weight Capacity Check: If applicable, verify that the trampoline is suitable for the intended users’ weight capacity. Ensure that the new net and the entire trampoline structure can safely support the anticipated users without compromise.
- Child Safety Assessment: If the trampoline is primarily used by children, assess the safety features and confirm that the net provides adequate protection against accidental falls or entanglement.
- Final Adjustments: Based on your observations during testing, make any necessary final adjustments to the net or the trampoline’s components. Addressing minor issues promptly will contribute to a safe and enjoyable trampoline experience.
By conducting a comprehensive testing process, you’ll have the confidence that your trampoline is in optimal condition for use. Prioritizing safety and functionality through thorough inspection and testing will ensure that your investment in the new net translates into countless hours of outdoor recreation and enjoyment.
Conclusion
Repairing or replacing a trampoline net is a rewarding endeavor that enhances both the safety and aesthetics of your outdoor recreational space. By following the steps outlined in this guide, you’ve taken proactive measures to revive your trampoline and ensure its continued enjoyment for family and friends. Here’s a recap of the key takeaways from this process:
- Assessment is Key: Thoroughly assess the damage to determine the extent of repair or replacement needed for the trampoline net.
- Prepare Adequately: Gather all the necessary materials and tools before embarking on the repair or replacement project.
- Methodical Removal: Carefully remove the old net, taking the opportunity to inspect the trampoline frame for any additional maintenance requirements.
- Precise Installation: Attaching the new net with attention to detail and proper tensioning is crucial for safety and functionality.
- Thorough Testing: Conduct a comprehensive testing process to ensure that the trampoline is safe, stable, and suitable for use.
By investing time and effort into this maintenance task, you’ve contributed to the longevity and safety of your trampoline, creating an inviting space for outdoor fun and physical activity. Whether it’s for recreational bouncing, fitness routines, or simply enjoying the fresh air, a well-maintained trampoline adds value to your outdoor lifestyle.
Remember, periodic inspections and maintenance are essential for preserving the integrity of your trampoline and ensuring a safe experience for all users. By staying proactive and addressing any signs of wear and tear promptly, you’ll continue to reap the benefits of this beloved outdoor recreational amenity for years to come.
Now, with your trampoline net expertly repaired or replaced, it’s time to get outside and enjoy the exhilarating bounce once again!
Frequently Asked Questions about How To Fix A Trampoline Net
Was this page helpful?
At Storables.com, we guarantee accurate and reliable information. Our content, validated by Expert Board Contributors, is crafted following stringent Editorial Policies. We're committed to providing you with well-researched, expert-backed insights for all your informational needs.


0 thoughts on “How To Fix A Trampoline Net”