Articles
How To Put Up Bird Netting On Balcony
Modified: May 6, 2024
Learn how to effectively put up bird netting on your balcony with our informative articles. Protect your space from unwanted visitors and enjoy your outdoor area in peace.
(Many of the links in this article redirect to a specific reviewed product. Your purchase of these products through affiliate links helps to generate commission for Storables.com, at no extra cost. Learn more)
Introduction
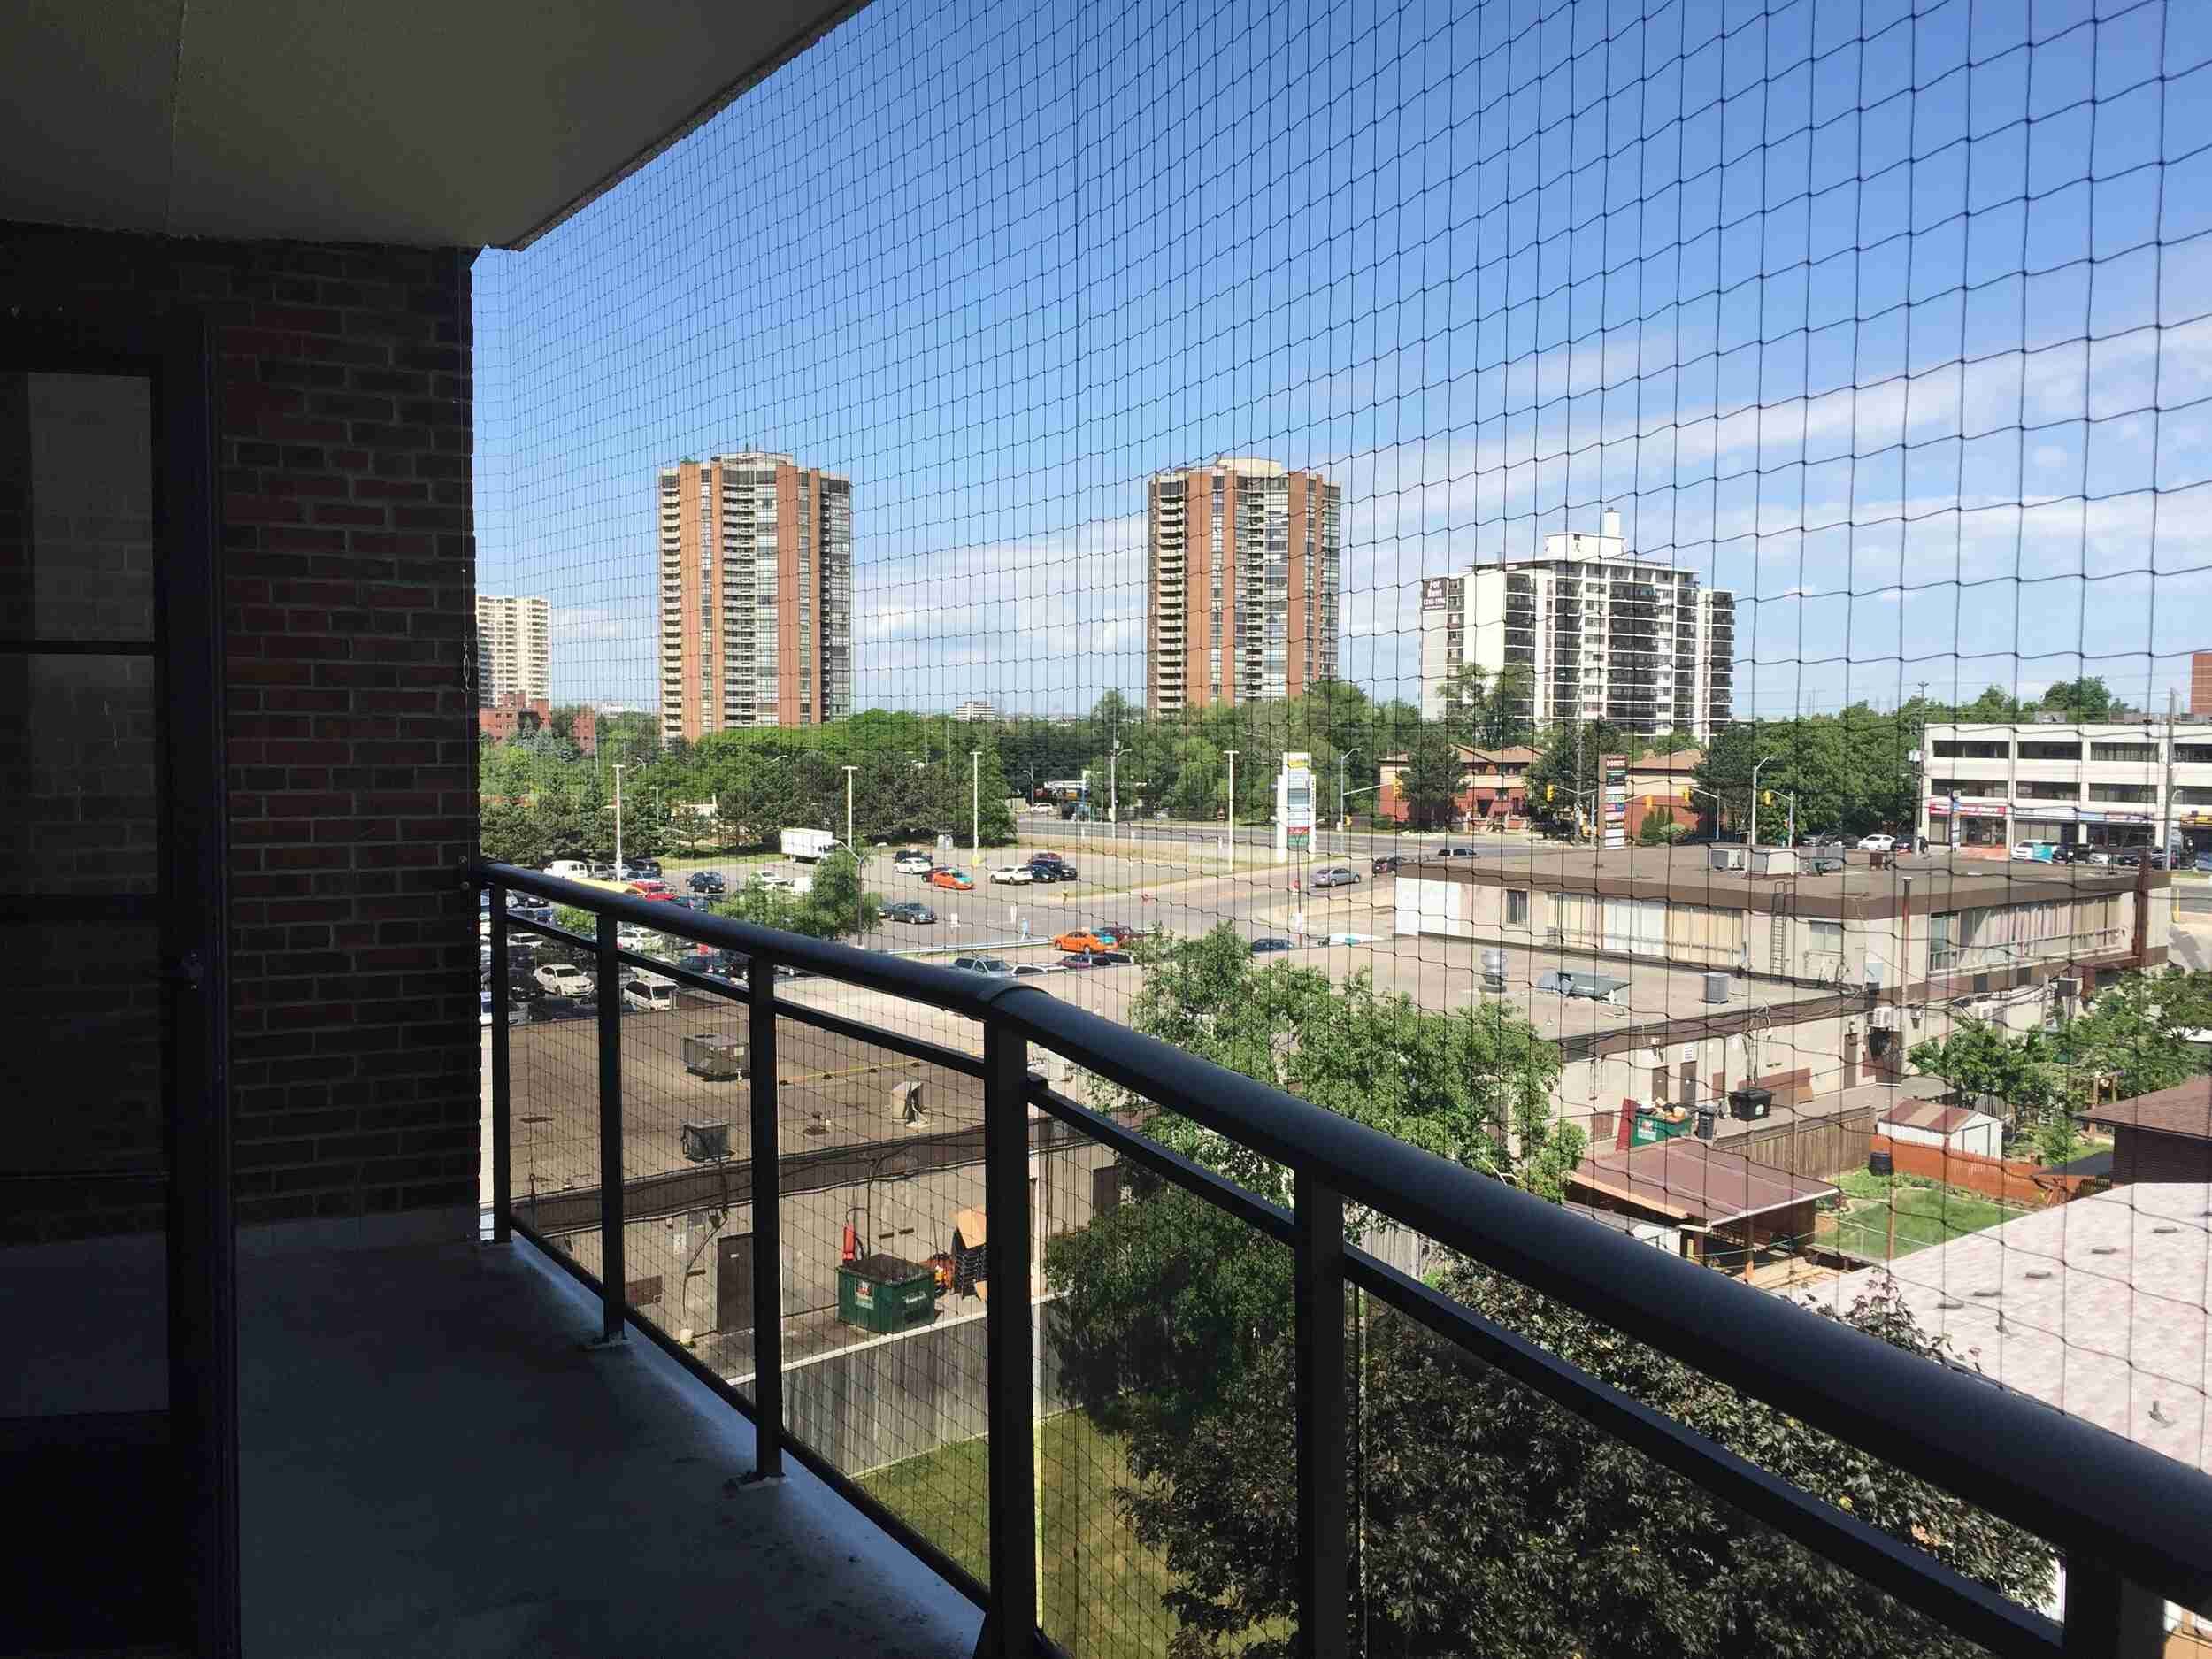
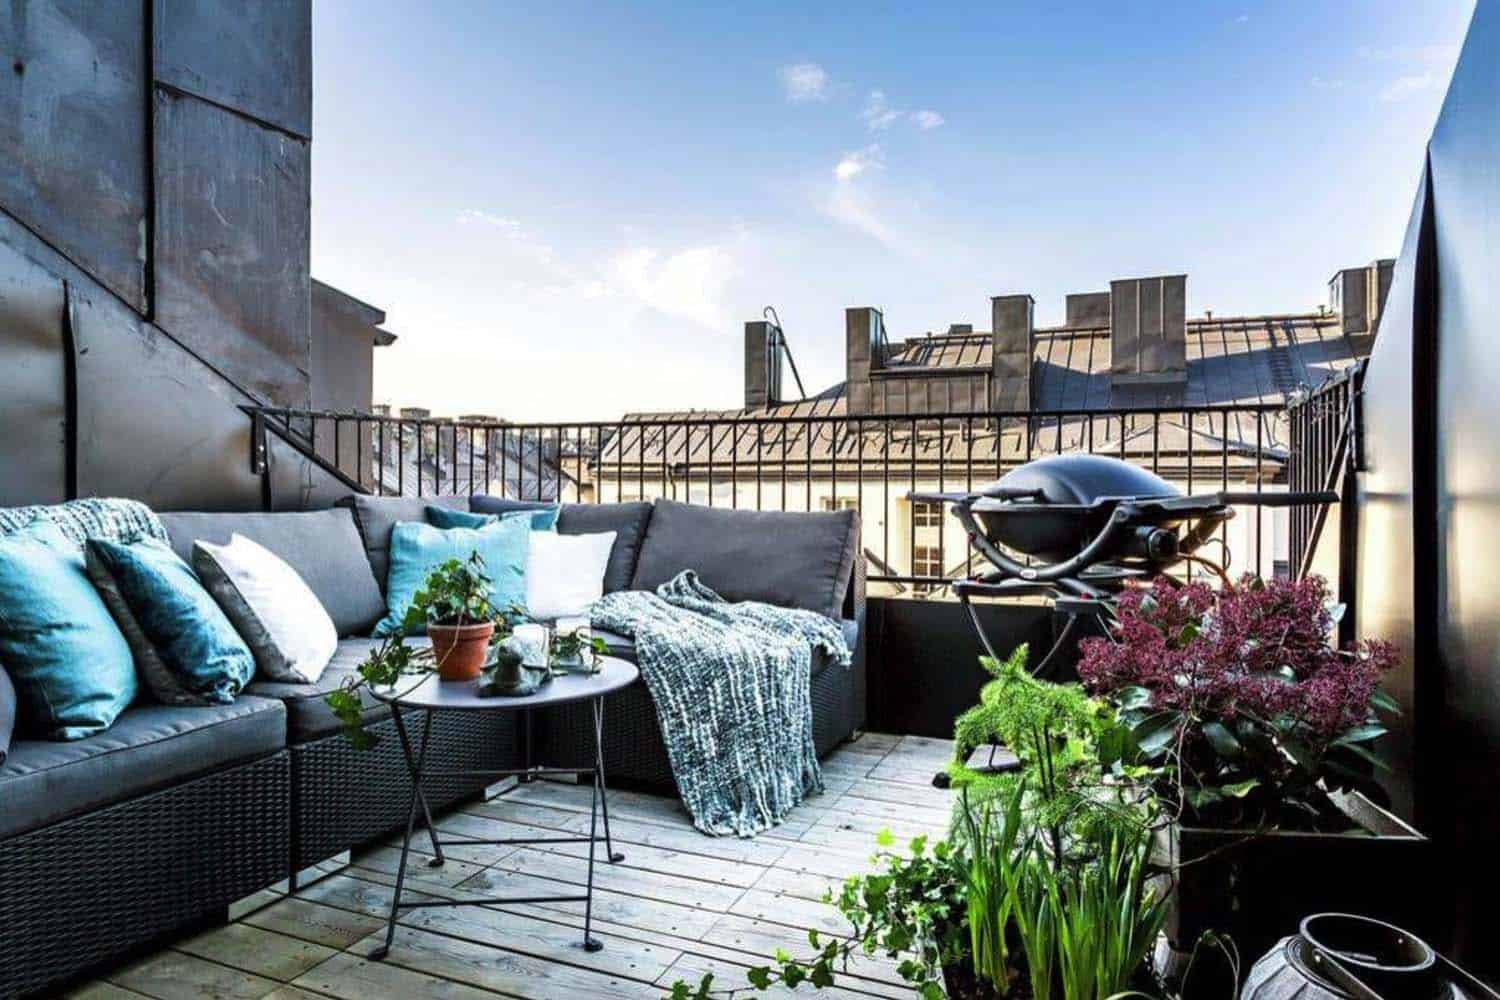
Birds are a beautiful addition to any outdoor space, but they can also be a nuisance, especially when they start nesting on your balcony. They leave behind droppings, create noise, and can damage your property. One effective way to prevent birds from setting up their homes on your balcony is by installing bird netting. Bird netting is a humane and environmentally-friendly solution that keeps birds away while allowing you to enjoy your balcony in peace.
In this article, we will walk you through the process of putting up bird netting on your balcony. We will cover everything from choosing the right bird netting to securing the edges of the netting. So, let’s get started!
Key Takeaways:
- Choosing the right bird netting, assessing your balcony, and gathering the necessary tools and materials are crucial steps in successfully installing bird netting on your balcony. Proper preparation ensures effective bird deterrence.
- After installing bird netting, securing the edges, making final adjustments, and implementing safety measures are essential for maintaining the effectiveness and longevity of the netting. Regular maintenance and mindful practices ensure a bird-free and safe balcony.
Read more: How To Put Up String Lights On Balcony
Choosing the Right Bird Netting
The first step in putting up bird netting on your balcony is to choose the right type of netting. There are different options available in the market, so it’s important to select one that suits your needs. Factors to consider include the size of the birds you are trying to deter, the size of your balcony, and your budget.
You can choose from mesh netting or solid netting. Mesh netting is ideal for smaller birds as it prevents them from getting through the gaps. Solid netting, on the other hand, is better for larger birds as it creates a physical barrier.
It’s also essential to ensure that the netting you choose is durable and made from high-quality materials. Look for UV-resistant netting that can withstand harsh weather conditions and won’t deteriorate over time.
Assessing Your Balcony
Before you start the installation process, take some time to assess your balcony. Look for any potential entry points or areas where birds might be nesting. Walk around and observe where the birds usually perch or gather. This will help you determine the best placement for the bird netting.
Additionally, identify any fragile items or plants that could be at risk during the installation process. Consider removing or placing them in a safe area to avoid any accidents or damage.
Gathering Necessary Tools and Materials
To successfully put up bird netting on your balcony, you will need a few tools and materials. Here’s a list of the items you should gather before you start:
– Bird netting (appropriate size and material)
– Scissors or utility knife
– Cable ties or zip ties
– Ladder or step stool (if needed)
– Hooks, eye screws, or other hardware for securing the netting to the balcony structure
– Optional: poles or stakes for additional support
Make sure you have everything you need readily available to streamline the installation process.
Next, we will cover the steps involved in preparing your balcony for bird netting.
Key Takeaways:
- Choosing the right bird netting, assessing your balcony, and gathering the necessary tools and materials are crucial steps in successfully installing bird netting on your balcony. Proper preparation ensures effective bird deterrence.
- After installing bird netting, securing the edges, making final adjustments, and implementing safety measures are essential for maintaining the effectiveness and longevity of the netting. Regular maintenance and mindful practices ensure a bird-free and safe balcony.
Read more: How To Put Up String Lights On Balcony
Choosing the Right Bird Netting
When it comes to choosing the right bird netting for your balcony, there are a few factors to consider. The size of the birds you are trying to deter, the size of your balcony, and your budget will all play a role in your decision-making process.
One important consideration is the type of netting material. Two common options are mesh netting and solid netting. Mesh netting is made up of small gaps or holes and is suitable for deterring smaller birds. The size of the mesh should be small enough to prevent birds from getting through while allowing air to flow freely through the balcony. Solid netting, on the other hand, creates a physical barrier that is more effective at keeping out larger birds.
Durability is another crucial factor. Look for bird netting that is made from high-quality materials, such as polyethylene or nylon, that are resistant to UV rays and can withstand exposure to different weather conditions. This will ensure that the netting remains effective for a long time without deteriorating or becoming damaged.
Consider the size of your balcony when selecting the right bird netting. Measure the dimensions of your balcony to determine the amount of netting you will need. It’s always better to have slightly more netting than necessary to ensure full coverage.
Budget is also an important consideration. Prices for bird netting can vary depending on the quality and size. It’s worth investing in a higher-quality netting that will last longer, especially if you have frequent bird activity on your balcony.
Additionally, consider the aesthetics of the netting. Some bird netting comes in different colors, allowing you to choose a tone that blends well with your balcony’s overall design. This can help make the netting less obtrusive and maintain the visual appeal of your outdoor space.
Lastly, it may be helpful to read reviews from other users or seek recommendations from professionals to ensure you choose a reputable brand or supplier. Their experiences and insights can provide valuable information in making an informed decision.
Remember, selecting the right bird netting for your balcony can make a significant difference in deterring birds and protecting your property. Take the time to evaluate your needs and consider the factors mentioned above before making your purchase.
Assessing Your Balcony
Before you start the process of putting up bird netting on your balcony, it’s essential to assess the space carefully. This step will help you determine the best placement for the netting and identify any potential areas where birds might be nesting.
Begin by observing the behavior of the birds around your balcony. Take note of the areas where they tend to perch or gather. Look for any signs of nesting, such as bird droppings or nesting materials. This will help you identify the key spots where you should focus your efforts.
Next, take a walk around your balcony to locate any potential entry points. Birds can squeeze through surprisingly small openings, so it’s crucial to be thorough in your inspection. Check for gaps in the structure, open vents, or areas where birds could potentially squeeze through.
While assessing your balcony, it’s also important to keep in mind any fragile items or plants that could be at risk during the installation process. Consider moving them temporarily or protecting them to prevent any damage or accidents.
Another factor to consider is the visibility of your balcony from neighboring birds’ nests or trees. If your balcony is easily visible, birds may be more attracted to it. In such cases, installing bird netting becomes even more critical in deterring them from nesting.
The size and layout of your balcony will also impact your bird netting placement. Measure the dimensions of your balcony to determine the amount of netting you will need. Consider if you will need to cover any specific areas or if you can create a full enclosure for maximum bird exclusion.
Finally, assess the overall aesthetic of your balcony. While bird netting is primarily functional, it’s worth considering how it will affect the visual appeal of your outdoor space. Look for netting that blends well with your balcony’s design or consider using transparent netting to minimize its visibility.
By carefully assessing your balcony before installing bird netting, you can determine the most effective placement strategy and ensure that no potential entry points are left unaddressed. This thorough evaluation will set you up for a successful installation process and long-term bird prevention.
Gathering Necessary Tools and Materials
Before you begin putting up bird netting on your balcony, it’s important to gather all the necessary tools and materials. Having everything prepared ahead of time will make the installation process smoother and more efficient. Here’s a list of the items you will need:
– Bird netting: Choose the appropriate size and material for your balcony. Measure the dimensions of your balcony to determine the amount of netting you will need. Ensure that the netting is durable and made from high-quality materials that are UV-resistant and can withstand different weather conditions.
– Scissors or utility knife: You will need these tools to cut the netting to the desired size and make any necessary adjustments during installation.
– Cable ties or zip ties: These will be used to secure the netting to the balcony structure. Opt for long and sturdy ties to ensure a secure attachment.
– Ladder or step stool (if needed): Depending on the height of your balcony, you may need a ladder or step stool to reach certain areas during the installation process. Make sure it is stable and safely positioned before climbing.
– Hooks, eye screws, or other hardware: These will be used to secure the netting to the balcony structure. Choose hardware that is appropriate for your balcony’s material and can provide a strong and reliable anchor for the netting.
– Optional: Poles or stakes for additional support: If you have a larger balcony or want to create a more enclosed space, you can use poles or stakes to provide additional support for the netting. These can be placed along the edges or corners of the balcony to ensure a taut and secure installation.
Once you have gathered all the necessary tools and materials, organize them in one place for easy access during the installation process. It’s helpful to have them within reach to avoid any unnecessary delays or interruptions.
Before you begin the installation, take a moment to familiarize yourself with the instructions and recommendations provided by the manufacturer. This will ensure that you have a clear understanding of the installation process and can proceed with confidence.
By gathering all the necessary tools and materials beforehand, you can streamline the installation process and complete it efficiently. Having everything prepared will also minimize the chances of delays or interruptions during the installation, allowing you to put up the bird netting smoothly and effectively.
Preparing Your Balcony for Bird Netting
Before you start installing bird netting on your balcony, there are a few important steps to take to ensure that the area is properly prepared. These preparation steps will help you achieve a successful and secure installation. Here’s what you need to do:
1. Clean the Balcony: Start by clearing any debris, dirt, or loose objects from your balcony. Sweep the floor and remove any items that may obstruct the installation process. This will provide a clean and clear surface for attaching the bird netting.
2. Remove Potential Nesting Materials: Look for any nesting materials or signs of bird activity on your balcony. Remove any twigs, leaves, or other materials that birds may use for nest building. By eliminating these attractants, you discourage birds from choosing your balcony as their nesting site.
3. Repair Any Structural Damage: Check for any damages or gaps in your balcony structure. Birds can squeeze through small openings, so it’s crucial to seal any potential entry points. Use caulking or sealant to fill cracks or gaps in walls, windows, or door frames. This will help prevent birds from accessing your balcony.
4. Protect Fragile Items: If you have delicate plants or fragile items on your balcony, it’s important to protect them during the installation process. Move them to a safe location or cover them with a drop cloth or plastic sheeting. This will prevent any accidental damage or contact with the bird netting.
5. Consider Lighting and Ventilation: Take into account the impact that the bird netting may have on your balcony’s lighting and ventilation. Ensure that the netting does not block any natural light sources or obstruct air circulation. Make necessary adjustments to accommodate these factors while still effectively deterring birds.
6. Secure Loose Objects: Take a look at any loose items on your balcony, such as light furniture or decorations. Ensure these are safely secured or removed before installing the bird netting. Secure any hanging plants or objects that may swing or interfere with the netting.
By following these preparation steps, you will create a suitable environment for installing bird netting on your balcony. Cleaning the area, removing potential nesting materials, repairing structural damage, and protecting fragile items will help streamline the installation process and ensure its effectiveness.
Remember, the key to effective bird netting is proper installation, so taking the time to prepare your balcony beforehand is crucial. With a well-prepared balcony, you’ll be ready to move on to the next step of installing the bird netting to deter birds from entering your space.
Installing the Bird Netting
Now that your balcony is prepared, it’s time to install the bird netting. Follow these steps to effectively install the netting and create a barrier to deter birds from accessing your balcony:
1. Measure and Cut the Netting: Lay out the bird netting on a flat surface and measure the required length and width based on your balcony’s dimensions. Use scissors or a utility knife to carefully cut the netting to the desired size. It’s important to cut the netting with clean, straight edges to ensure a neat and secure installation.
2. Start with the Corners: Begin by attaching the netting to the corners of your balcony. Secure one corner of the netting to a corner hook or eye screw using a cable tie or zip tie. Make sure the netting is pulled taut and evenly distributed.
3. Attach the Sides: Move along the sides of your balcony, alternating between attaching the netting to hooks, eye screws, or other hardware. Use cable ties or zip ties to secure the netting in place. Pull the netting tightly as you go to prevent any loose or sagging areas.
4. Create an Overlap: If your balcony is larger than the width of the netting, create an overlap by attaching multiple pieces of netting together. Overlap the edges by a few inches to ensure there are no gaps for birds to slip through. Use cable ties or zip ties to secure the overlapped edges firmly.
5. Ensure Full Coverage: As you progress with attaching the netting, double-check that the entire balcony area is adequately covered. Pay extra attention to areas where birds are likely to try and access, such as gaps or openings.
6. Make Adjustments: Once the netting is attached, step back to assess its coverage and appearance. Make any necessary adjustments to ensure the netting is taut, evenly distributed, and visually appealing. Trim any excess netting if needed.
7. Test the Installation: Before completing the process, walk around your balcony and carefully inspect all areas to ensure that the bird netting is securely attached and there are no loose points or gaps. Apply gentle pressure to the netting to make sure it can withstand some force without coming loose.
By following these steps, you will successfully install the bird netting on your balcony. Remember to take your time and ensure that the netting is firmly anchored and evenly distributed. A secure and properly installed bird netting will effectively deter birds from accessing your balcony and nesting in the area.
Securing the Edges of the Netting
After installing the bird netting on your balcony, it’s important to secure the edges to ensure a long-lasting and effective deterrent for birds. By properly securing the edges, you can prevent birds from finding entry points or causing the netting to come loose. Follow these steps to secure the edges of the netting:
1. Trim Excess Netting: Start by trimming any excess netting that extends beyond the edges of your balcony. Use scissors or a utility knife to carefully cut the netting to achieve a clean and neat finish. This will prevent the netting from being easily accessed or becoming a potential entanglement hazard.
2. Fold and Tuck: Fold the trimmed edge of the netting under itself, creating a clean and reinforced edge. Make sure the folded edge is tucked between the netting layers to prevent it from unraveling or becoming exposed over time. This folded edge will provide added strength and prevent any fraying or unraveling of the netting.
3. Secure with Cable Ties or Zip Ties: Use cable ties or zip ties to secure the folded edges of the netting. Place the ties at regular intervals along the edge, ensuring they are tight without over-tightening and damaging the netting. These ties will hold the netting together securely and prevent any potential gaps or openings for birds to enter.
4. Ensure a Taut Fit: As you secure the edges, ensure that the netting remains taut and evenly distributed. This will further reinforce its effectiveness in deterring birds. Adjust the tension as needed by tightening or loosening the cable ties or zip ties.
5. Check for Loose Points: Walk around your balcony and carefully inspect the edges of the netting. Pay attention to any areas where the netting may be loose or have slight gaps. If you find any loose points, readjust the cable ties or zip ties to secure them more tightly.
6. Reinforce with Additional Hardware: In some cases, using additional hardware can provide added security along the edges of the netting. Consider using hooks, eye screws, or other appropriate hardware to reinforce the netting’s attachment to the balcony structure. This can help distribute the tension and prevent the netting from shifting or coming loose over time.
By following these steps, you can effectively secure the edges of the bird netting on your balcony. This will ensure that the netting remains in place, prevent birds from finding entry points, and maintain the integrity of the installation. Regularly inspect the edges of the netting to check for any signs of wear or loosening and make any necessary adjustments to maintain its effectiveness.
Final Adjustments and Safety Measures
Once the bird netting is installed and the edges are secured, it’s time to make final adjustments and implement safety measures to ensure the effectiveness and longevity of the netting. These steps will help you fine-tune the installation and ensure safety for both birds and humans. Follow these guidelines:
1. Check for Gaps or Loose Areas: Take a walk around your balcony and carefully inspect the entire netting installation. Look for any gaps or loose areas that birds could potentially exploit. Pay attention to corners, edges, or areas where the netting may have shifted during installation. Make any necessary adjustments or tighten cable ties or zip ties to address these issues.
2. Trim Excess Cable Ties or Zip Ties: Trim off any excess ends of cable ties or zip ties once the netting is securely attached. This will prevent any snagging or injury risks while also maintaining a neat and tidy appearance.
3. Regularly Inspect and Maintain: Periodically inspect the bird netting to ensure it remains intact and in good condition. Check for any signs of damage, such as tears or fraying, and repair or replace the netting as needed. Regular maintenance will help prolong the netting’s lifespan and effectiveness in deterring birds.
4. Be Mindful of Wildlife: While bird netting is an effective way to keep birds away, it’s essential to be mindful of other wildlife that may be found in your area. Ensure that the bird netting does not unintentionally trap or harm other animals, such as bats or beneficial insects. Regularly check the netting to ensure there are no unintended captures and make any necessary adjustments to prevent harm to wildlife.
5. Safety Precautions: When installing bird netting, it’s important to prioritize safety. Use caution when working at heights and consider using a sturdy ladder or step stool if needed. Ensure proper balance and stability to avoid accidents or falls. If the installation requires working near power lines, exercise extreme caution and consider consulting with professionals to ensure safety.
6. Educate Others: If you live in a communal living space or apartment building, it’s helpful to inform your neighbors or building management about the installation of bird netting on your balcony. This will help prevent misunderstandings or concerns from arising and potentially encourage others to also take measures to deter birds on their balconies.
By making final adjustments and implementing safety measures, you can ensure the effectiveness and safety of your bird netting installation. Regular inspections, maintenance, and mindful practices will help maintain a bird-free and safe balcony, allowing you to enjoy your outdoor space without the nuisance of bird activity.
Conclusion
Putting up bird netting on your balcony is an effective and humane way to deter birds from nesting and causing disturbances. By following the steps outlined in this article, you can successfully install bird netting and enjoy a bird-free environment while still maintaining the beauty and functionality of your balcony.
Choosing the right bird netting, assessing your balcony, gathering the necessary tools and materials, and preparing the balcony are all crucial steps in the installation process. By taking the time to properly prepare and secure the netting, you can ensure its effectiveness in keeping birds away.
Remember to regularly inspect and maintain the netting to address any potential gaps or damages. This will help prolong its lifespan and ensure that it remains a reliable barrier against birds. Additionally, be mindful of other wildlife in the area and take appropriate measures to prevent unintentional harm.
Installing bird netting not only protects your property from bird damage but also creates a peaceful and enjoyable outdoor space. You can finally relax on your balcony without worrying about noise, droppings, or nests.
Lastly, remember to share the information and educate others about the benefits of bird netting. By spreading awareness and encouraging responsible bird deterrence, you can contribute to creating a harmonious coexistence between humans and birds.
So, why wait? Take the first step in reclaiming your balcony and create a peaceful sanctuary by installing bird netting. Embrace the beauty of nature without the hassle of bird-related nuisances. Enjoy your bird-free balcony and savor the serenity it brings!
Once you've mastered securing your balcony with bird netting, why not dive into more hands-on projects? Our next guide on DIY projects offers insightful tips and creative ideas to transform ordinary tasks into rewarding endeavors. Whether you're sprucing up your home or tackling new challenges, DIY projects provide a satisfying way to enhance your living space. Ready to roll up your sleeves and create something wonderful? Check out our detailed article on the perks of DIY undertakings.
Frequently Asked Questions about How To Put Up Bird Netting On Balcony
Was this page helpful?
At Storables.com, we guarantee accurate and reliable information. Our content, validated by Expert Board Contributors, is crafted following stringent Editorial Policies. We're committed to providing you with well-researched, expert-backed insights for all your informational needs.


0 thoughts on “How To Put Up Bird Netting On Balcony”