Home>Home Appliances>Home Automation Appliances>How To Replace A Thermostat Housing
Home Automation Appliances
How To Replace A Thermostat Housing
Modified: February 18, 2024
Learn how to replace a thermostat housing in your home automation appliances with our step-by-step guide. Keep your appliances running smoothly with this easy DIY fix.
(Many of the links in this article redirect to a specific reviewed product. Your purchase of these products through affiliate links helps to generate commission for Storables.com, at no extra cost. Learn more)
Introduction
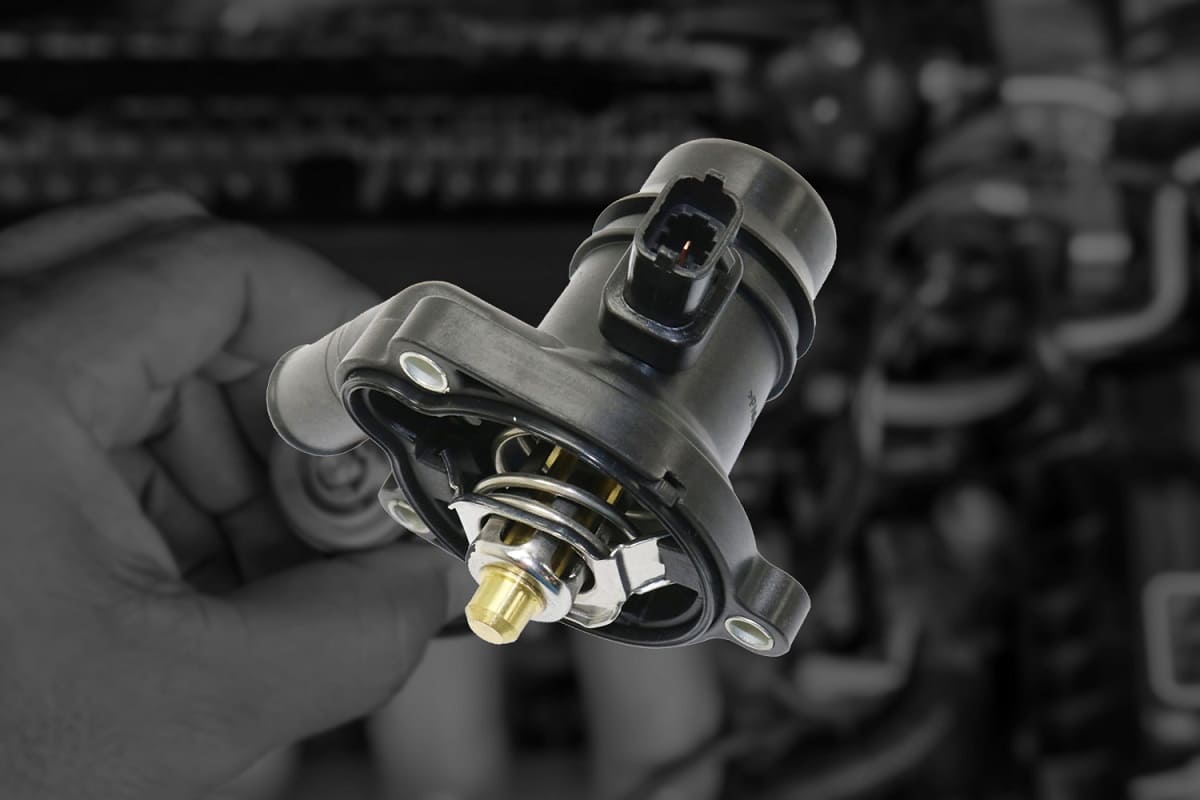
Welcome to the comprehensive guide on replacing a thermostat housing in your home! The thermostat housing is a crucial component of your heating and cooling system, responsible for regulating the engine's operating temperature. Over time, wear and tear can lead to leaks or cracks in the housing, compromising its functionality. Fortunately, with the right tools and a systematic approach, you can replace the thermostat housing and restore your system's efficiency.
In this guide, we will walk you through the step-by-step process of replacing a thermostat housing, empowering you to tackle this task with confidence. Whether you are a seasoned DIY enthusiast or a novice homeowner eager to learn new skills, this guide will equip you with the knowledge and insights needed to complete the replacement successfully.
Before we dive into the practical steps, it's essential to gather the necessary tools and materials. By being prepared and informed, you can streamline the process and ensure a seamless transition to the new thermostat housing. Let's embark on this home improvement journey together and take the first step towards a well-maintained and reliable heating and cooling system.
Key Takeaways:
- Replacing a thermostat housing requires draining coolant, removing the old housing, preparing and installing the new one, and refilling coolant. It’s a proactive task that ensures a well-maintained heating and cooling system.
- By following the step-by-step guide and using the right tools, you can confidently replace a thermostat housing, contributing to a comfortable and reliable home environment. It’s a proactive measure for home maintenance.
Read more: When To Replace A Thermostat
Tools and Materials Needed
Before beginning the thermostat housing replacement, it’s essential to gather the following tools and materials:
- Socket Set: A set of sockets and ratchets will be necessary for removing the bolts securing the old thermostat housing.
- New Thermostat Housing: Ensure that you have the correct replacement part for your specific make and model of the heating and cooling system.
- Gasket: Depending on the design of your thermostat housing, you may need a new gasket to ensure a proper seal.
- Coolant: Antifreeze or coolant will be required to refill the system after the replacement is complete.
- Scraper or Wire Brush: This will be useful for removing any residue or debris from the mounting surface.
- Container for Coolant: A suitable container for collecting and disposing of the old coolant is necessary to prevent spills and environmental contamination.
- Protective Gear: Safety goggles and gloves are essential for protecting yourself from potential splashes of coolant or debris.
- Rags or Towels: Having clean rags or towels on hand will help with cleaning and wiping surfaces during the replacement process.
- Owner’s Manual: It’s always helpful to have the owner’s manual for your heating and cooling system on standby for reference.
By ensuring that you have these tools and materials ready, you can approach the thermostat housing replacement with confidence and efficiency. Now that we have the necessary items in place, let’s move on to the step-by-step process of replacing the thermostat housing.
Step 1: Drain the Coolant
Before you begin the replacement process, it’s crucial to drain the coolant from the system to prevent spills and leaks. Follow these steps to safely drain the coolant:
- Ensure Safety: Put on protective gloves and safety goggles to shield yourself from any potential contact with coolant.
- Cool Down the Engine: If the engine has been running, allow it to cool down completely before proceeding with the draining process. Working on a cool engine reduces the risk of burns or injuries.
- Locate the Drain Valve or Plug: Refer to your owner’s manual to find the drain valve or plug on the radiator or engine block. Position a suitable container, such as a drain pan, beneath the valve or plug to collect the coolant.
- Open the Drain Valve: Carefully open the drain valve or remove the plug to initiate the flow of coolant. Allow the coolant to drain completely into the collection container.
- Dispose of the Coolant Properly: Once the coolant has been drained, transfer it to a sealed container for proper disposal. Coolant should be disposed of according to local regulations, as it can be harmful to the environment and wildlife.
By following these steps, you can safely and effectively drain the coolant from the system, preparing the environment for the next stages of the thermostat housing replacement. With the coolant drained, you are ready to move on to the next phase of the replacement process.
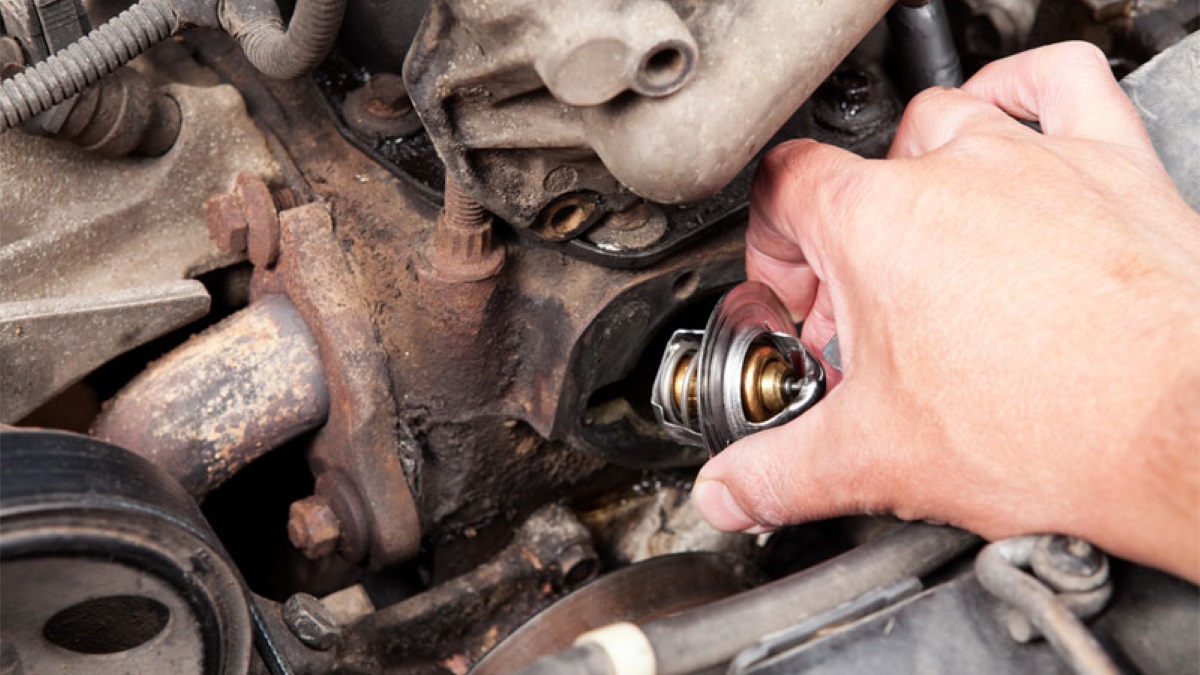
Step 2: Remove the Old Thermostat Housing
Now that the coolant has been drained, you can proceed to remove the old thermostat housing. Follow these steps to complete this phase of the replacement process:
- Access the Thermostat Housing: Locate the thermostat housing, which is typically connected to the engine and may be secured by bolts or fasteners.
- Disconnect Electrical Connections: If there are any electrical connections attached to the thermostat housing, carefully disconnect them to ensure a smooth removal process.
- Remove Mounting Bolts: Using a suitable socket and ratchet, loosen and remove the mounting bolts or fasteners securing the thermostat housing in place. Keep track of the removed hardware to facilitate the reassembly process later.
- Separate the Housing: Gently separate the old thermostat housing from its mounting location, taking care not to damage any surrounding components or gaskets.
- Clean the Mounting Surface: Once the old housing is removed, use a scraper or wire brush to clean the mounting surface, removing any residue or debris to ensure a smooth and secure fit for the new housing.
By following these steps, you can effectively remove the old thermostat housing, paving the way for the installation of the new housing. With the old housing out of the way and the mounting surface cleaned, you are ready to proceed to the next phase of the replacement process.
When replacing a thermostat housing, make sure to drain the coolant first to avoid a mess. Use a torque wrench to tighten the bolts to the manufacturer’s specifications.
Step 3: Prepare the New Thermostat Housing
With the old thermostat housing removed, it’s time to prepare the new housing for installation. Follow these steps to ensure that the new thermostat housing is ready for seamless integration into your heating and cooling system:
- Inspect the New Housing: Before installation, carefully inspect the new thermostat housing to ensure that it matches the specifications of your system and is free from any defects or damage.
- Check the Gasket: If your thermostat housing requires a gasket for sealing, verify that the new gasket is in good condition and compatible with the housing. Replace the gasket if necessary to prevent leaks.
- Clean the New Housing: Wipe down the new thermostat housing to remove any dust, debris, or residues that may have accumulated during storage or handling. A clean housing will promote a secure and effective seal once installed.
- Verify Fitment: Test-fit the new thermostat housing onto the mounting surface to ensure that it aligns correctly and that the mounting bolt holes align with the corresponding openings. This step helps prevent installation issues and ensures a proper fit.
- Prepare Fasteners: If the new housing requires specific mounting bolts or fasteners, gather them and ensure that they are clean and in good condition before proceeding with the installation.
By meticulously preparing the new thermostat housing and associated components, you can streamline the installation process and minimize the risk of complications or errors. With the new housing inspected, cleaned, and ready for installation, you are well-prepared to move on to the next crucial phase of the replacement process.
Read more: How To Replace An HVAC Thermostat
Step 4: Install the New Thermostat Housing
Now that the new thermostat housing is prepared, it’s time to proceed with the installation. Follow these steps to ensure a smooth and effective integration of the new housing into your heating and cooling system:
- Position the New Housing: Carefully position the new thermostat housing onto the cleaned mounting surface, ensuring that it aligns correctly with the corresponding openings and mating surfaces.
- Secure Mounting Bolts: Insert and tighten the mounting bolts or fasteners to secure the new housing in place. Use the appropriate torque specifications to ensure that the housing is firmly and securely attached to the engine or mounting location.
- Reconnect Electrical Connections: If any electrical connections were detached during the removal process, reconnect them to the new thermostat housing, ensuring a secure and proper fit.
- Verify Seal: Double-check that the gasket, if applicable, is properly seated and aligned to create a reliable seal between the new housing and the mounting surface. A well-sealed housing prevents coolant leaks and ensures optimal performance.
- Inspect Surrounding Components: Take a moment to inspect the area surrounding the new thermostat housing, ensuring that no tools or debris are left behind and that all components are securely in place.
By following these steps, you can successfully install the new thermostat housing, setting the stage for the final phase of the replacement process. With the new housing securely in position and all connections verified, you are ready to proceed to the next critical step.
Step 5: Refill the Coolant
With the new thermostat housing installed, it’s time to replenish the coolant in your system. Follow these steps to ensure a proper and effective refill process:
- Prepare the Coolant: If necessary, mix the coolant with water according to the manufacturer’s recommendations. Use a coolant mixture that is suitable for your specific climate and driving conditions.
- Locate the Coolant Reservoir: Refer to your owner’s manual to locate the coolant reservoir in your vehicle. The reservoir is typically transparent and marked with “MAX” and “MIN” indicators to guide the filling process.
- Slowly Add Coolant: Carefully pour the prepared coolant mixture into the reservoir, allowing it to displace any air pockets and fill the system gradually. Avoid overfilling the reservoir, as this can lead to pressure buildup and potential leaks.
- Bleed Air from the System: Some cooling systems may require air bleeding to remove trapped air pockets. Refer to your owner’s manual for specific instructions on bleeding the cooling system, if necessary.
- Monitor Coolant Level: After filling the reservoir, monitor the coolant level over the next few days and top it off as needed to maintain the proper level. Check for any signs of leaks or irregularities in the cooling system.
- Dispose of Excess Coolant Properly: If you have excess coolant after refilling the system, store it in a sealed container and dispose of it according to local regulations for proper environmental stewardship.
By following these steps, you can effectively refill the coolant in your system, ensuring that it operates at the optimal level and provides reliable temperature regulation. With the coolant replenished and the system checked for proper functionality, you have successfully completed the thermostat housing replacement process.
Congratulations on successfully replacing the thermostat housing in your home’s heating and cooling system! By following this comprehensive guide, you have taken a proactive step towards maintaining the efficiency and reliability of your system, contributing to a comfortable and well-functioning living environment.
Conclusion
Congratulations on successfully completing the replacement of your thermostat housing! By following the step-by-step process outlined in this guide, you have taken a proactive approach to maintaining the efficiency and integrity of your home’s heating and cooling system. The seamless integration of the new thermostat housing ensures that your system can effectively regulate temperatures, contributing to a comfortable and well-maintained living space.
Through the careful draining of coolant, removal of the old housing, preparation and installation of the new housing, and the proper refill of coolant, you have demonstrated a commitment to proactive home maintenance. By investing time and effort in this essential task, you have contributed to the longevity and reliability of your heating and cooling system, ultimately enhancing the comfort and well-being of your household.
It’s important to note that the successful replacement of the thermostat housing is a testament to your dedication to home improvement and maintenance. By equipping yourself with the necessary tools, materials, and knowledge, you have empowered yourself to tackle this task with confidence and precision.
As you reflect on the completion of this project, take pride in your ability to address essential home maintenance needs. The proactive replacement of the thermostat housing not only ensures the optimal performance of your heating and cooling system but also serves as a proactive measure to prevent potential issues in the future.
Thank you for embarking on this home improvement journey with us. Your commitment to maintaining a reliable and efficient living environment is commendable, and we hope that this guide has empowered you to take on future home maintenance tasks with confidence and expertise.
Remember, a well-maintained home is a haven of comfort and security, and your efforts in replacing the thermostat housing contribute to that ideal. Here’s to a home that continues to provide comfort and reliability for you and your loved ones!
Frequently Asked Questions about How To Replace A Thermostat Housing
Was this page helpful?
At Storables.com, we guarantee accurate and reliable information. Our content, validated by Expert Board Contributors, is crafted following stringent Editorial Policies. We're committed to providing you with well-researched, expert-backed insights for all your informational needs.


0 thoughts on “How To Replace A Thermostat Housing”